
Father’s Day is coming up fast – and if you’re looking for a card that’s sweet, personal, and guaranteed to make Dad smile, you’ve landed in exactly the right place.
This “Dad, You Rock!” handprint guitar card is one of those rare crafts that looks incredibly impressive but only takes about 20 minutes to pull together. Even better? It doubles as a keepsake. Because that little handprint won’t stay little forever.
Whether your kiddo is 2 or 12, this one works. And yes – we have a free printable to do most of the heavy lifting for you.
Let’s rock! 🤘
Why This Father’s Day Card Is So Special
Most store-bought cards are forgotten by the end of the week. This one? Dad’s going to hold onto it for years.
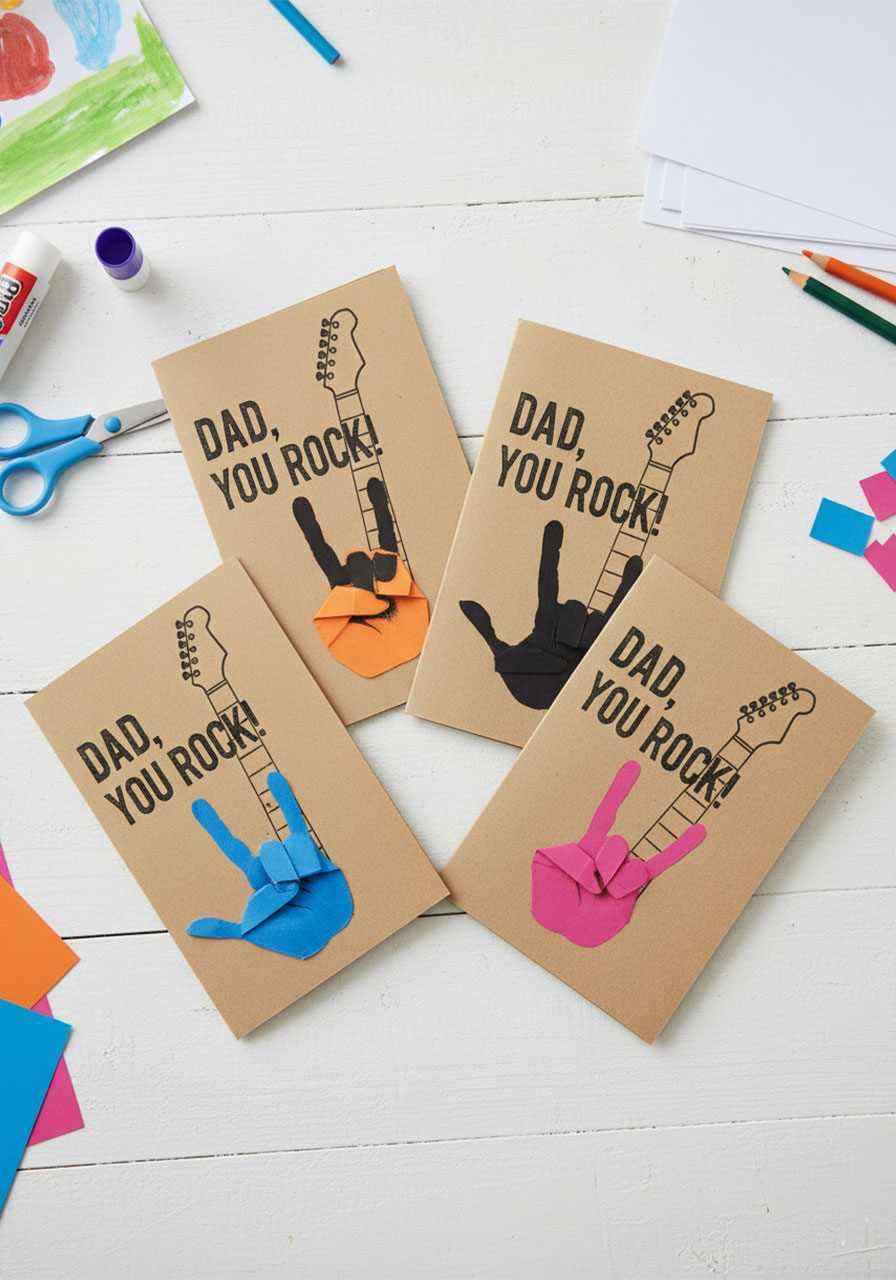
Here’s the magic: the printed card features a guitar neck and body outline – and your child’s actual handprint becomes the guitar body in the iconic “rock on” 🤘 sign. It’s clever, it’s personal, and it’s genuinely adorable.
The best part is how simple the whole thing is. You print, fold, trace, cut, and glue. That’s it. No special skills required. No craft store run needed beyond a few basics you likely already have at home.
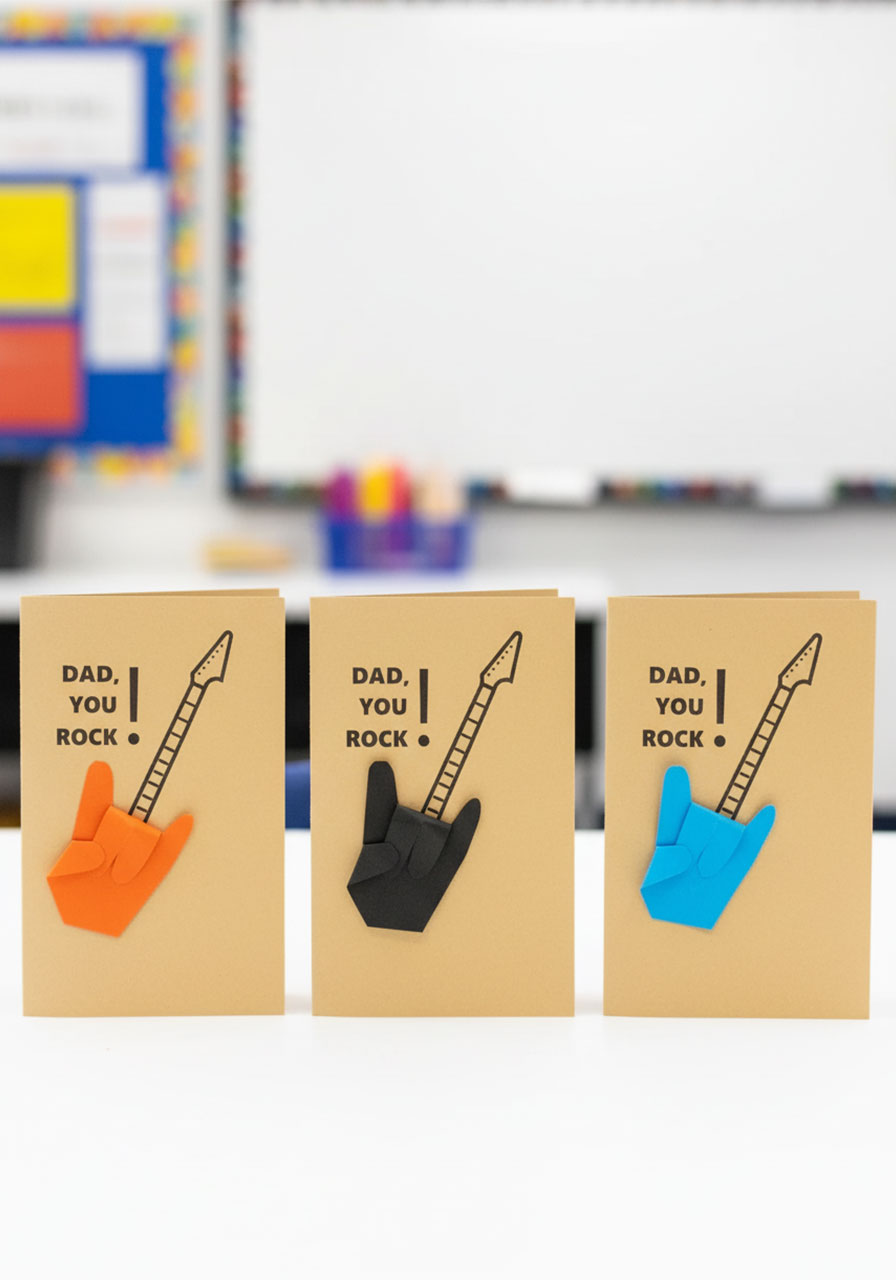
And with four bold color options – orange, blue, black, or pink – every card feels totally unique.


What You’ll Need
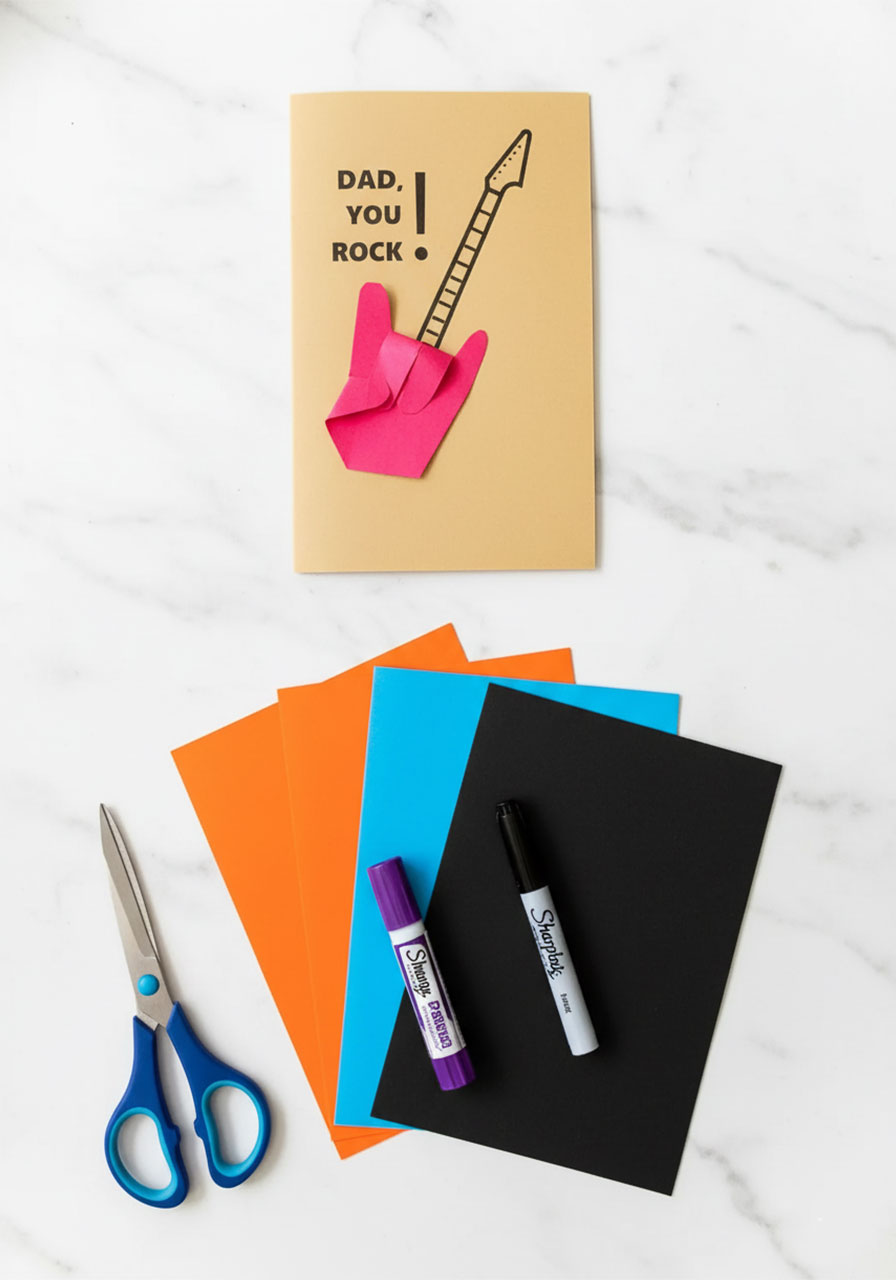
You Rock Card Printable
Tan or kraft-colored cardstock for printing the card
Colored cardstock for the handprint (your choice – orange, blue, black, pink, red, yellow all look great!)
Scissors
Glue stick
Black marker or Sharpie (for writing inside the card)
A printer
Time to Make: About 20 minutes total (5 min prep, 15 min active)
Difficulty: Easy – totally kid-friendly with a little adult help for the folding!
Best for: All ages. Toddlers will need help tracing and cutting, but even little ones can press their hand down and feel proud of the result.

Step-by-Step Instructions
Step 1: Print the Card
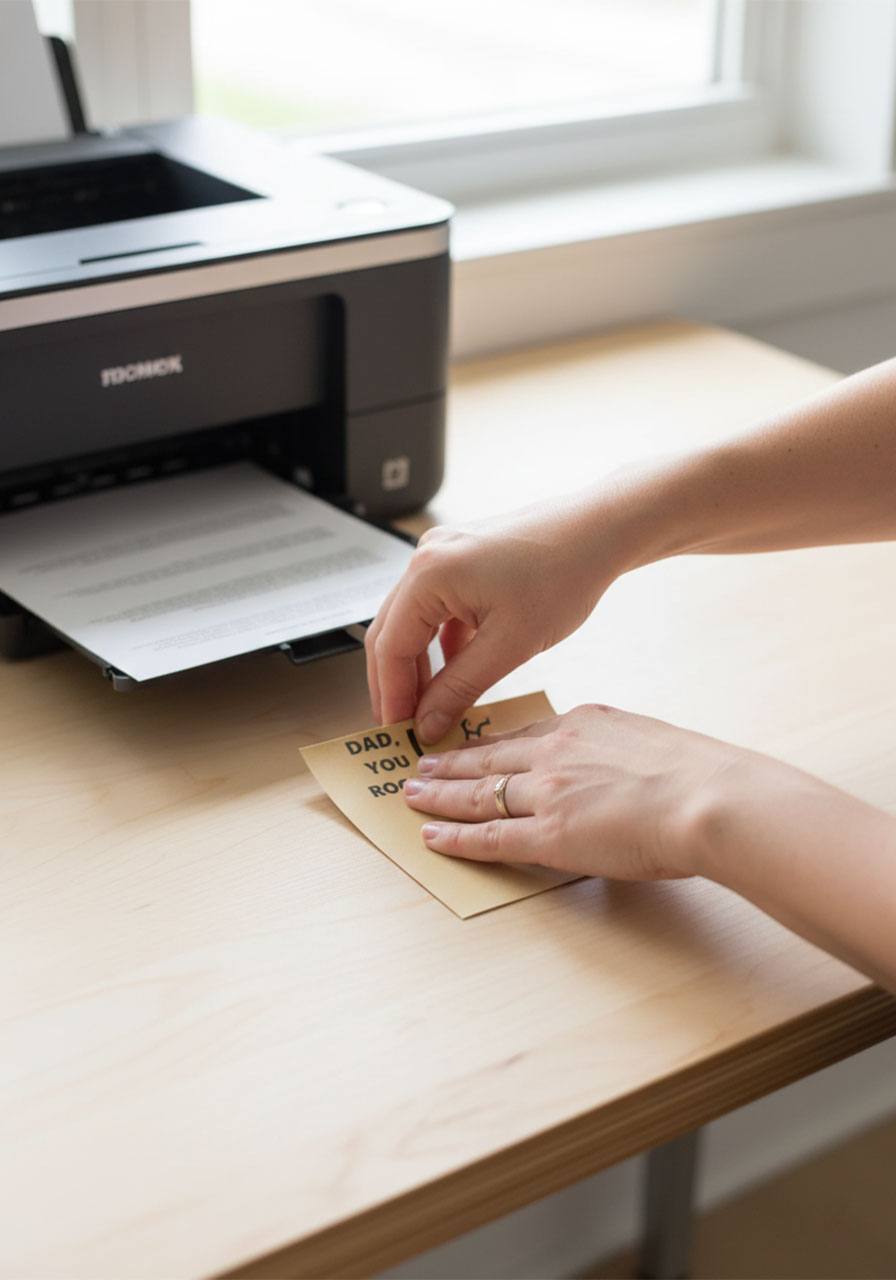
Download the free “You Rock!” card printable and print it onto your tan or kraft-colored cardstock. The printable already has the guitar neck, frets, and “Dad, You Rock!” text perfectly laid out – no design work needed on your end.
If you don’t have tan cardstock, white works too! The colored handprint will still pop beautifully.
Step 2: Fold the Card in Half
Once printed, fold the card in half so it opens like a greeting card. The guitar graphic should be on the front. Give it a good crease along the fold so it lays flat and looks crisp.
Step 3: Trace the Handprint
Grab your colored cardstock and have your child place their hand flat on it. Trace all the way around with a pencil – fingers spread naturally, nothing forced.
This is a great moment to make it a memory. Let little ones help hold the pencil, or trace their hand yourself while they giggle about the tickling.

Step 4: Cut Out the Handprint
Cut carefully along the pencil line. Older kids can do this themselves; younger ones will need a hand. Round the edges slightly as you go – it gives the finished handprint a cleaner, softer look.
Step 5: Fold Down the Middle and Ring Fingers
This is where the magic happens! Take the cut-out handprint and fold the middle finger and ring finger down toward the palm. You’re creating the classic “rock on” 🤘 hand sign – index finger up, pinky up, thumb out, middle two fingers tucked in.
Apply a dab of glue to the back of those two folded fingers and press them down to hold them in place. Let it dry for just a minute.

Step 6: Fold Down and Glue the Thumb (Optional, But Looks Amazing)
For the classic rock-on sign, fold the thumb slightly inward and glue it down, too. This creates a cleaner, more defined “rock on” shape that really pops on the card.
Don’t worry if it’s not perfect – every hand is different, and that’s what makes each card uniquely theirs.
Step 7: Glue the Handprint onto the Card
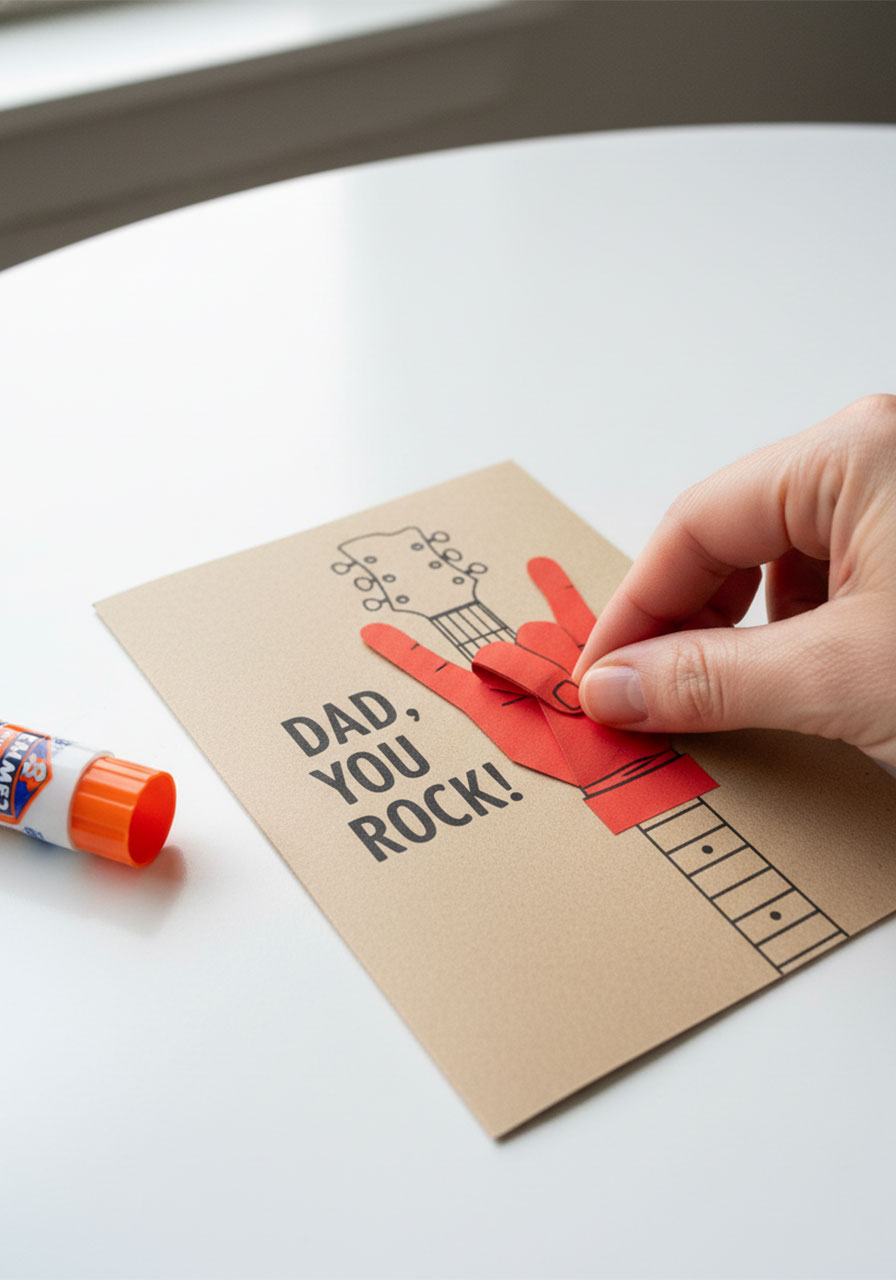
Apply glue to the back of the handprint and press it onto the front of the card, right at the base of the guitar neck. The wrist area should line up with where the guitar body would be, so the neck appears to extend right out of the hand.
Hold it down for 20–30 seconds to make sure it bonds well. Step back and admire your very cool guitar card. 🎸
Step 8: Write Your Message Inside
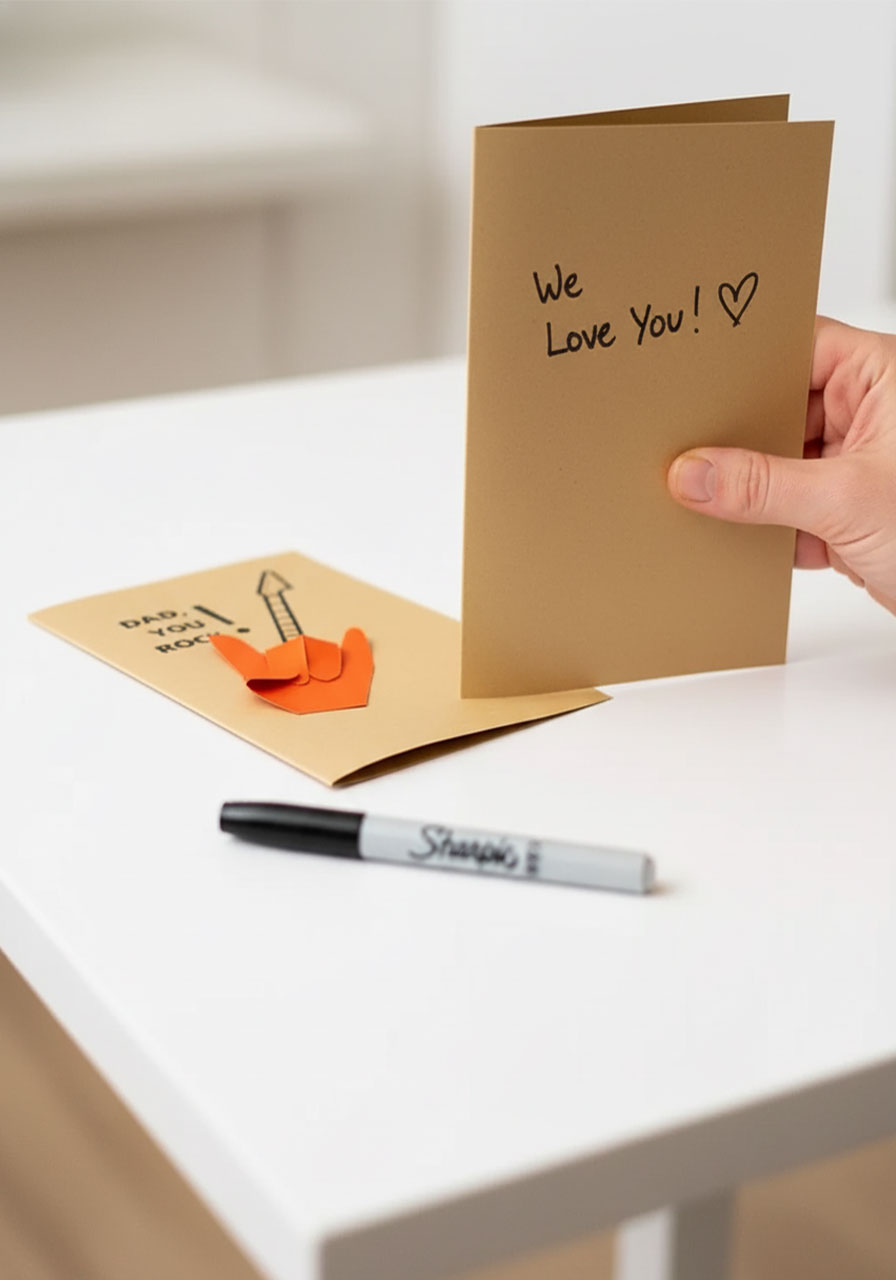
Open the card and grab your Sharpie. Write your Father’s Day message on the inside. Keep it heartfelt, silly, or both – “We love you, Dad!” or “Happy Father’s Day to the coolest dad ever!” are always winners.
Let the kids write their own names or draw a little picture, too. The messier and more genuine, the better.
Pro Tips for the Best Results
Choose a bold color for the handprint.
The more contrast between the handprint and the card background, the more striking the final result. Black on tan is dramatic and graphic. Orange or blue pops with energy. Red and pink feel warm and sweet.
Use a glue stick, not liquid glue.
Liquid glue can cause the cardstock to warp and wrinkle. A glue stick gives you a clean, flat bond every time.
Press the fingers firmly when folding.
Give each folded finger a solid crease before gluing. A crisp fold holds much better and gives the handprint that 3D look that makes this card so impressive.
Make one for yourself first.
If you’re doing this as a group activity (hello, classroom parties and daycare!), do a test run on scrap paper first so you can help the kids with the finger-folding step confidently.
Make multiples!
This card is fast enough to batch. If Dad has multiple kids, each child can make their own in a different color. Fan them out and present them all at once – the look on his face will be priceless.
Fun Variations to Try
Skip the finger folding.
Younger toddlers may not have the dexterity for the “rock on” fold yet – and that’s totally fine! Simply glue the full open handprint onto the card. It still looks adorable and the meaning is just as sweet.
Use your own handprint.
Mom, grandma, or older siblings can make their own version of this card. Mix and match sizes and colors for a full “band” of handprints on one card.
Add a personal touch inside.
Beyond the written message, try drawing a little guitar, star, or lightning bolt inside the card. Extra points for effort – and kids LOVE decorating the inside.
Turn it into a keepsake frame.
Once Father’s Day is over, suggest Dad pop the card into a small frame. A year from now, he’ll love looking at how small that hand was.
Frequently Asked Questions
What age is this craft best for?
This craft works for all ages! Babies and toddlers will need a grown-up to do most of the steps, but they can have their hand traced. Kids ages 4 and up can handle the cutting and gluing with some supervision. Older kids (6+) can do the whole thing mostly independently.
Do I need a special printer for the printable?
Nope! Any standard home printer works. Just make sure to load your cardstock before printing, and set your print settings to “fit to page” so the card prints at the right size.
What if I don’t have cardstock?
Regular printer paper works in a pinch, though the card will feel less sturdy. Construction paper is a great substitute for the handprint portion – it comes in bold colors and cuts easily.
Can I use foam sheets instead of cardstock for the handprint?
Yes! Foam sheets give the handprint a cool 3D puffiness that looks really fun. They’re a little trickier to fold for the “rock on” shape, but totally doable with a bit of patience.
How far in advance can I make this?
You can make this card up to a week ahead with no issues. Store it flat so the handprint doesn’t get bent, and hold off on writing the inside message until a day or two before you give it.
Ready to Make Dad Feel Like a Rock Star?
Download the free printable, grab your supplies, and get those handprints ready. This is one of those crafts that takes almost no time to make – but creates a memory that lasts way longer than Father’s Day.
Because the best gifts aren’t the most expensive ones. They’re the ones made with small hands, a little glue, and a whole lot of love.
Rock on, Dad. You’ve earned it. 🤘
Did you make this card? We’d love to see it! Tag us on Instagram and show off your little rockstar’s creation.
More Father’s Day Ideas to Keep the Fun Rolling:
How to Make a Magic Flip Card for Father’s Day (That Looks Way Harder Than It Is)
How to Make a DIY Tuxedo Father’s Day Card (Step-by-Step)
Super Dad Father’s Day Gift: The Sweetest Superhero Craft Kids Can Make in Minutes
“You Mean the World to Me”: How to Make the Cutest 3D Father’s Day Card for Dad or Grandpa
Going the Extra Mile: A Sweet DIY Handprint Semi-Truck Craft for Father’s Day
Unmask the Hero: DIY “Secret Superhero” Dress Shirt Card for Father’s Day
“Best Dad in the Universe”: The Cutest DIY Father’s Day Card Kids Can Make in an Afternoon
