
Not every doll is meant to be cute. Some are meant to make your neighbors question their life choices the second they step onto your porch.
If you’re a mom or teacher who loves a good hands-on project, you already know that the creepiest Halloween decorations aren’t the expensive ones. They’re the ones made from thrifted dolls, a little paint, and a lot of imagination.
Below are 27 creepy doll ideas anyone can pull off, whether you’ve got a weekend to spare or just an afternoon between school pickup and dinner. Each one includes exactly what you need and how to put it together, so there’s no guessing involved.
Let’s turn some innocent-looking dolls into your scariest décor yet.
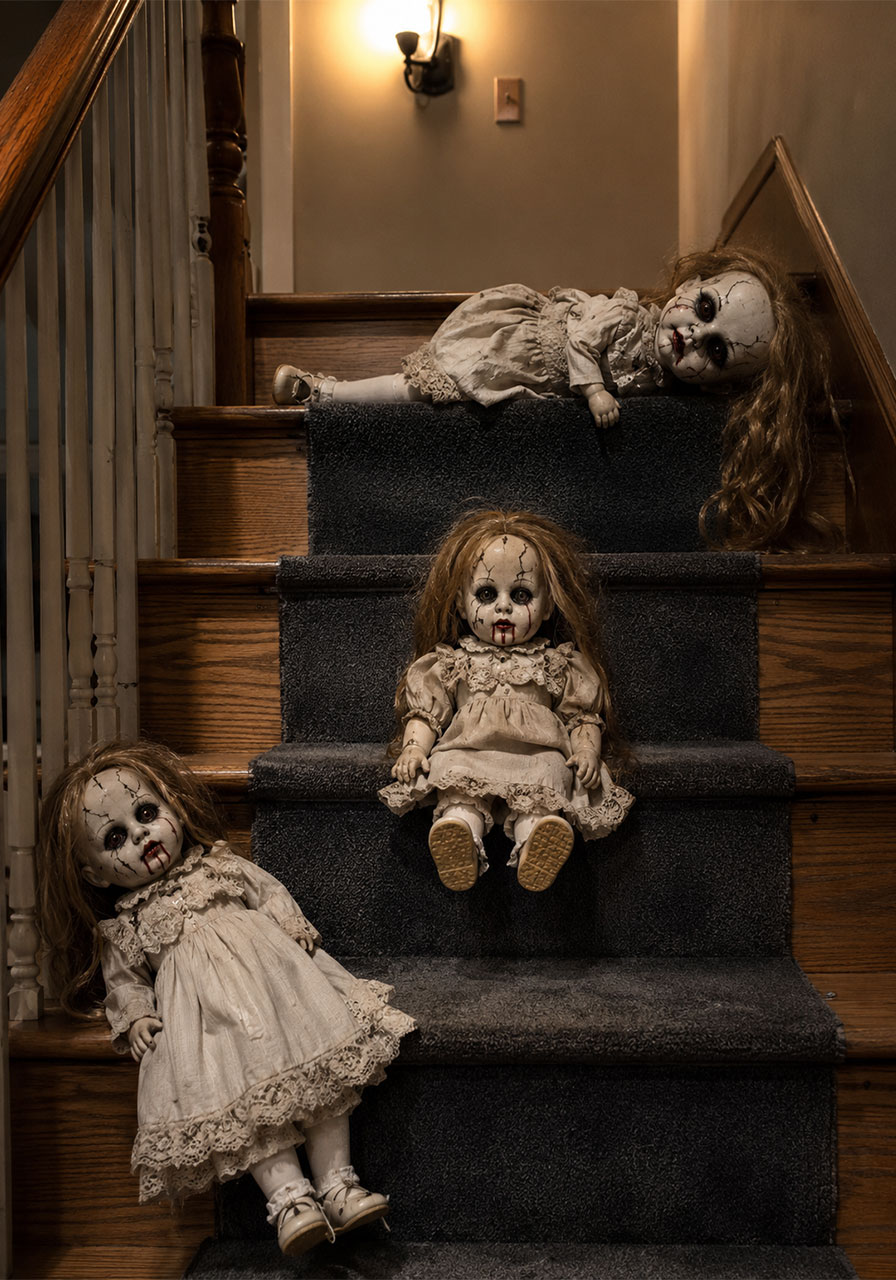
1. Creepy Dolls on the Staircase
A staircase is one of the first things guests see, which makes it prime real estate for a scare. Arrange a few battered, cracked-face dolls sitting or lying across the steps, and you’ve got instant unease before anyone even reaches your door.
Best for: Entryways, staircases
Prep Time: 15 minutes
Difficulty: Easy
What You’ll Need:
- 2-3 secondhand plastic dolls
- Black acrylic paint or a paint pen
- Fake blood or red paint
- Cotton balls or thread (for texture)
How to Make It:
1. Thrift a few plastic dolls of different sizes (thrift stores and garage sales are goldmines for this).
2. Use a paint pen to crack their faces, darken the eye sockets, and add a stitched mouth.
3. Dab on fake blood around the mouth or a limb for extra shock value.
4. Arrange them at different heights on the stairs, some sitting, some lying sideways.
Pro Tip: Angle at least one doll so its eyes seem to follow guests as they climb the stairs. It’s a small detail that makes a big difference.

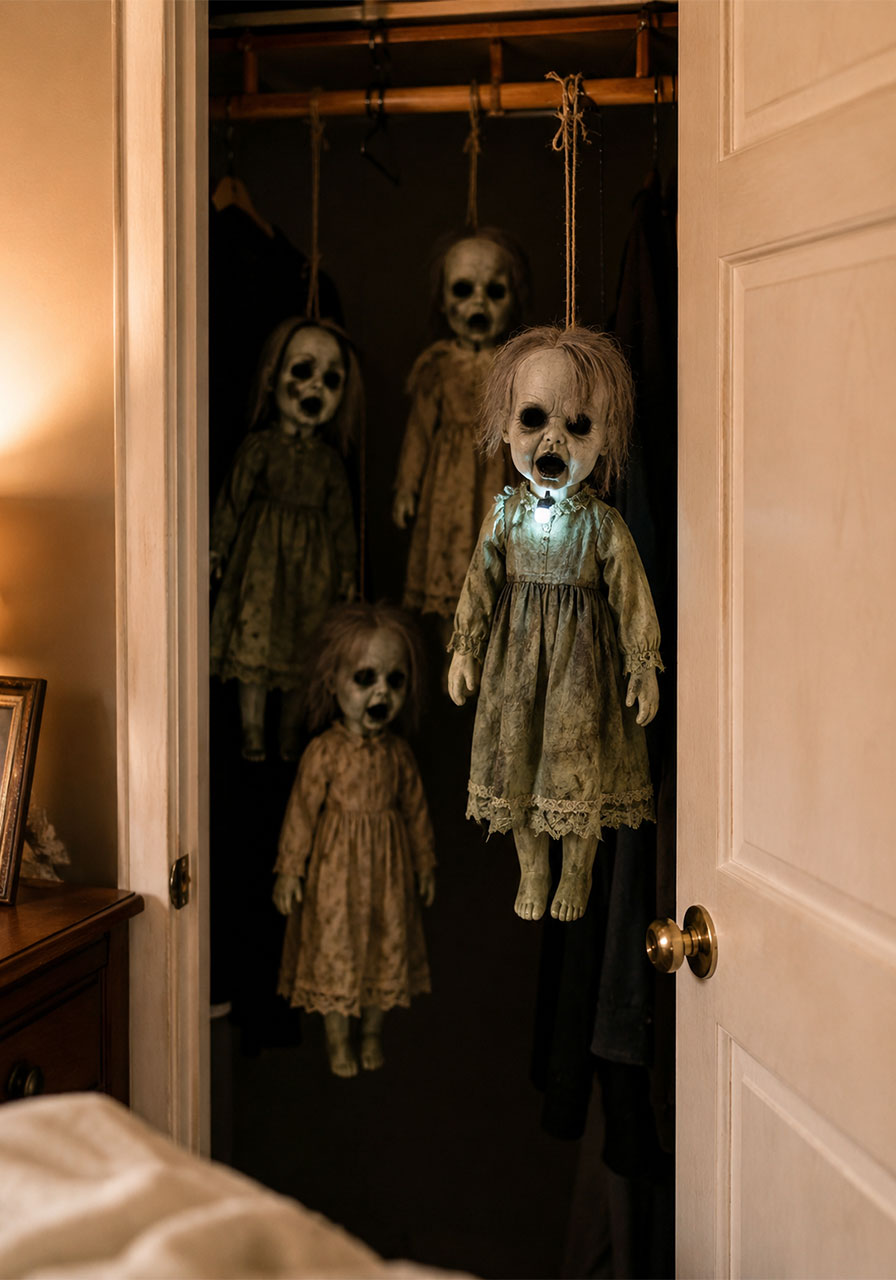
2. Zombie Dolls Hanging in the Closet
Anyone who peeks into a closet expecting coats and instead finds zombie dolls staring back is going to remember your party. This one works especially well if you’re hosting indoors.
Best for: Indoor parties, bedroom or closet doors left ajar
Prep Time: 20 minutes
Difficulty: Easy
What You’ll Need:
- 3-4 old dolls
- Fishing line or twine
- Grey and black paint
- A closet rod or hooks
How to Make It:
1. Paint the dolls’ skin a sickly grey and add dark shadowing around the eyes and mouth.
2. Tie fishing line securely around each doll’s torso or neck area.
3. Hang them from the closet rod at slightly different heights so they overlap.
4. Leave the closet door cracked open just enough to catch the eye.
Pro Tip: Add a small motion-sensor light inside the closet. It’ll click on the moment someone opens the door, which guarantees a jump.
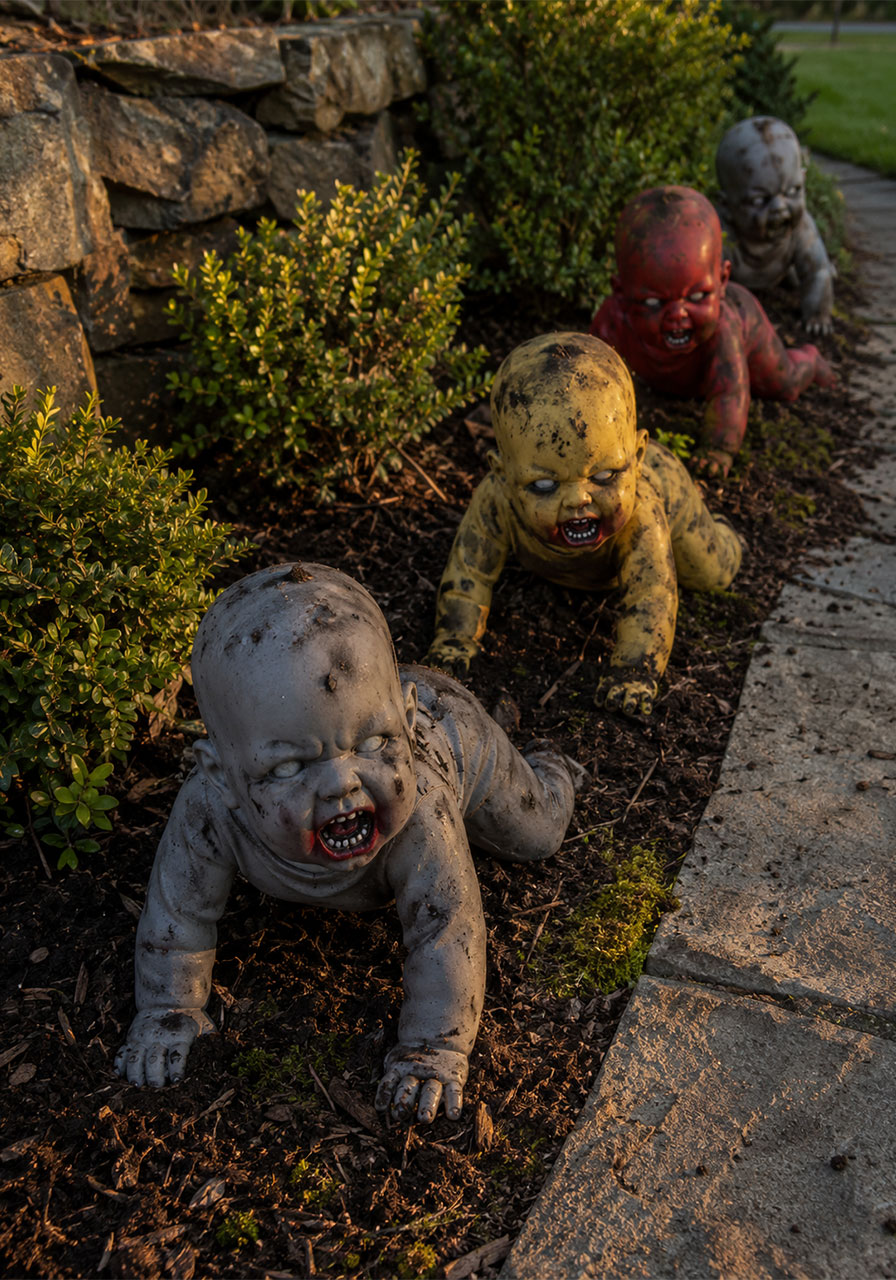
3. Zombie Baby Dolls for the Yard
Nothing rattles trick-or-treaters (or their parents) quite like zombie babies crawling across the lawn. This is one of the most effective yard displays because it plays on a very specific kind of unease.
Best for: Front yards, garden beds
Prep Time: 30 minutes
Difficulty: Medium
What You’ll Need:
- 3-5 baby dolls
- Grey, yellow, and red acrylic paint
- Small nails or tacks (optional, for texture)
- Dirt or moss for staging
How to Make It:
1. Paint the baby dolls’ skin in patches of grey, yellow, and sickly green.
2. Add red paint around the mouth and hands to suggest they’ve been “feeding.”
3. Rough up the hair and smudge dirt across the arms and legs.
4. Pose them crawling out from behind bushes, low walls, or garden edges.
Pro Tip: Position them near your front walkway rather than the middle of the lawn. Guests are more likely to notice something they nearly step on.
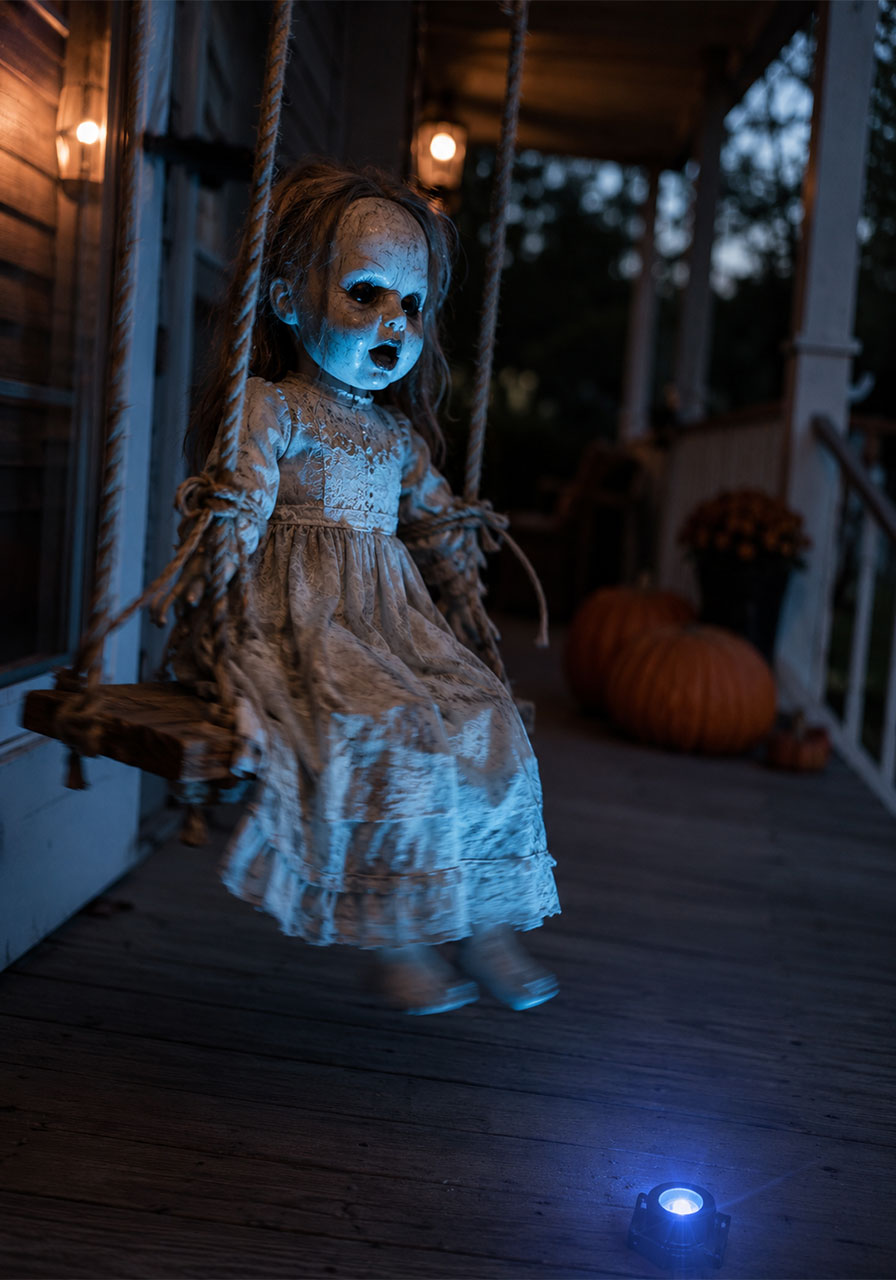
4. Swinging Porch Doll
A doll gently swinging on your porch, lit from below, is unsettling in a very cinematic way. This idea works especially well if you already have a porch swing or can rig a simple rope swing.
Best for: Front porches
Prep Time: 20 minutes
Difficulty: Medium
What You’ll Need:
- 1 large doll
- Rope or chain
- Battery-operated uplighting (blue or purple works well)
- A porch beam or swing frame
How to Make It:
1. Secure a rope swing to a sturdy porch beam.
2. Seat the doll on the swing and tie its hands loosely to the ropes so it doesn’t slide off.
3. Place uplighting below the doll, angled upward, to cast eerie shadows on its face.
4. Give the swing a gentle push before guests arrive so it’s still moving when they approach.
Pro Tip: A small desk fan aimed at the doll keeps it swaying on its own all night, so you don’t have to keep restarting it.
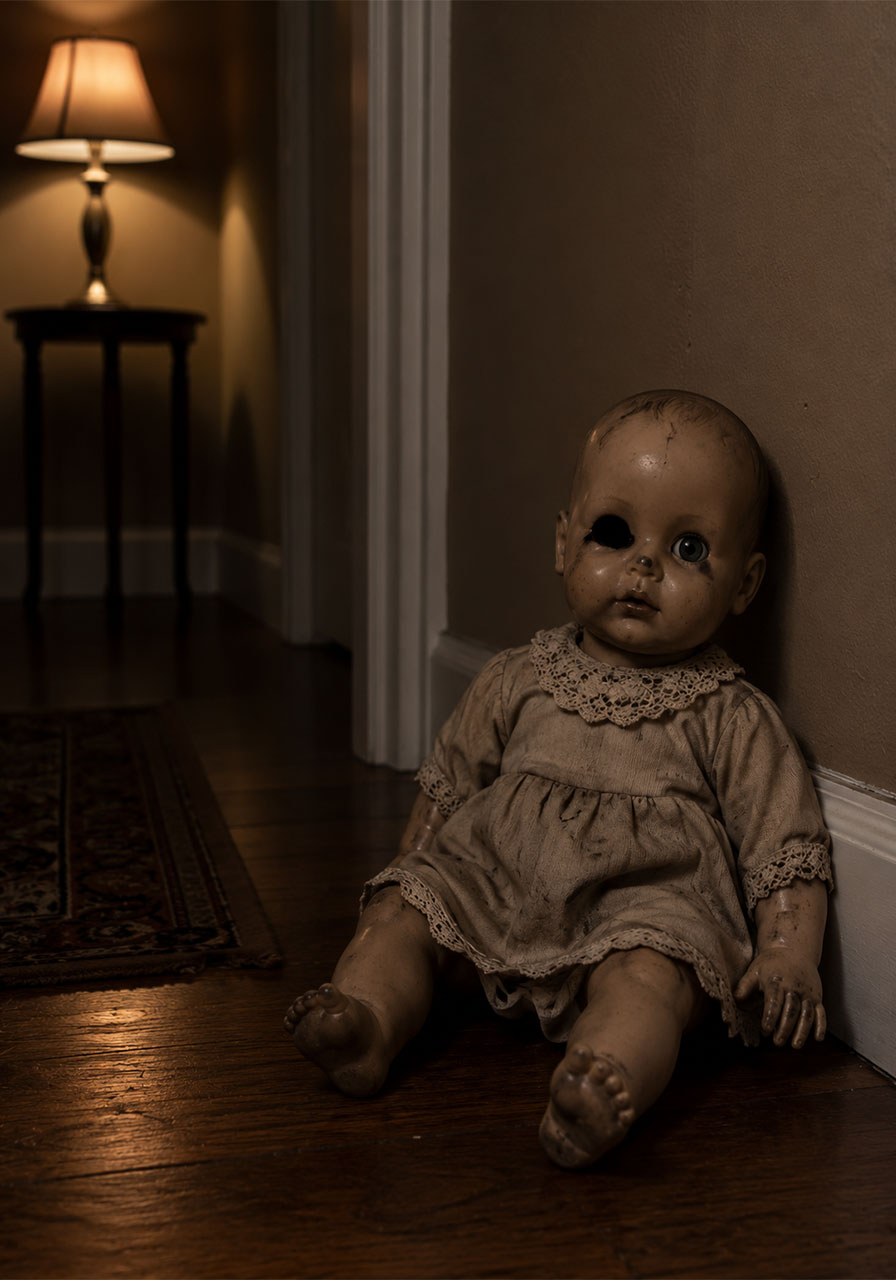
5. One-Eyed Doll in the Corner
Sometimes the simplest ideas are the most effective. A single doll, sitting quietly in a corner with one eye missing, plays on the fear of being watched.
Best for: Hallways, living room corners
Prep Time: 10 minutes
Difficulty: Easy
What You’ll Need:
- 1 doll
- Small craft tool or knife (for adults only, to remove one eye)
- Dark paint for the empty socket
How to Make It:
1. Carefully remove one glass eye from the doll (an adult should handle this step).
2. Paint the empty socket black or dark red to make it look hollow.
3. Seat the doll upright in a dim corner where guests will catch it out of the corner of their own eye.
Pro Tip: Skip the overhead lighting here. A single dim lamp does more to sell the creepiness than any bright light ever could.
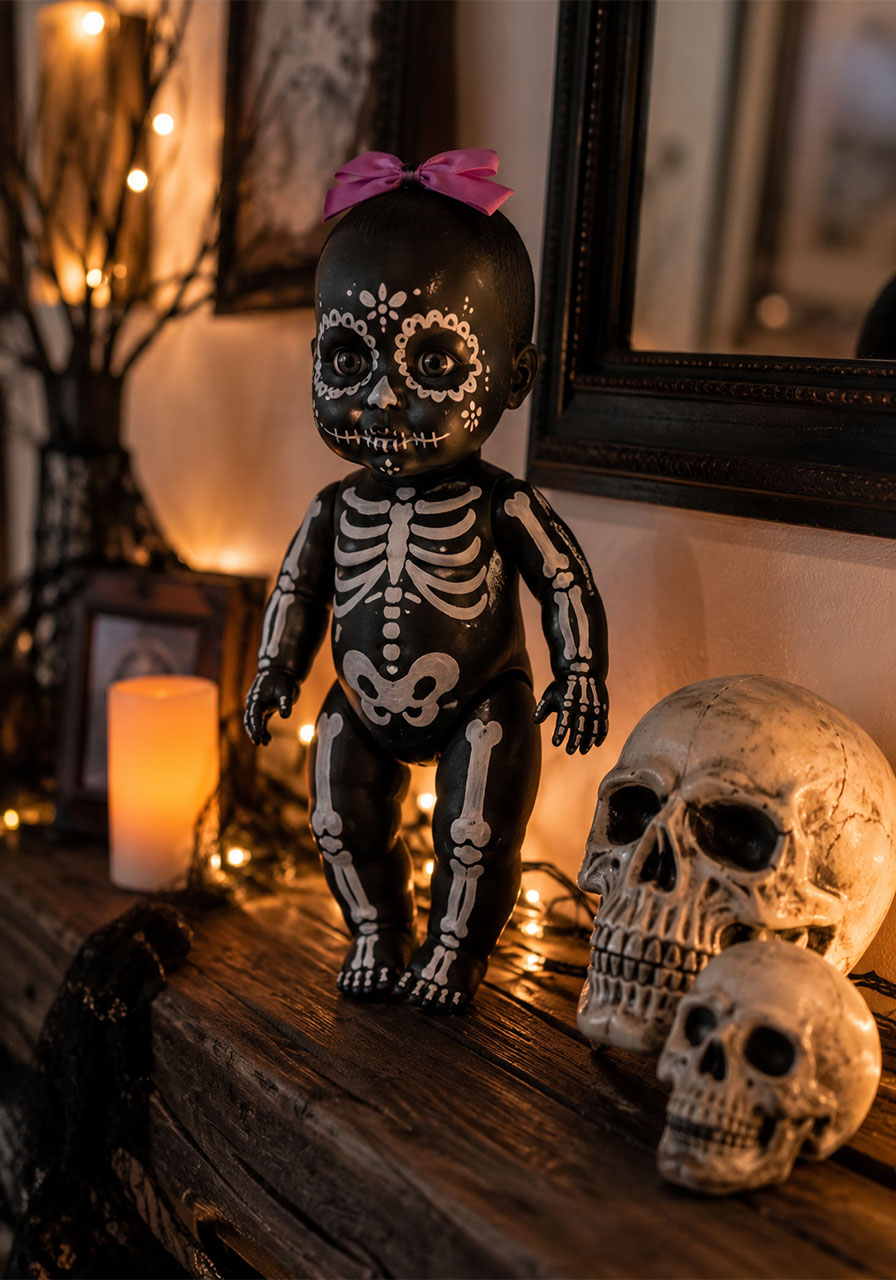
6. Skeleton Doll on the Shelf
A hand-painted skeleton doll adds a sugar-skull twist to your display and works beautifully if you’re leaning into a Day of the Dead theme alongside your Halloween decor.
Best for: Shelves, mantels
Prep Time: 45 minutes
Difficulty: Medium
What You’ll Need:
- 1 plastic doll
- Black and white acrylic paint
- Fine paintbrush
- Small bow or ribbon (optional)
How to Make It:
1. Paint the doll’s body black as a base coat.
2. Once dry, paint white bones directly on top: ribs, arms, legs, and skull details on the face.
3. Add fine detailing around the eyes with a small brush for a sugar-skull effect.
4. Display it alongside real or faux skulls for a cohesive shelf display.
Pro Tip: A tiny bow or flower crown makes the skeleton doll feel intentionally styled rather than just “broken,” which reads as more unsettling.
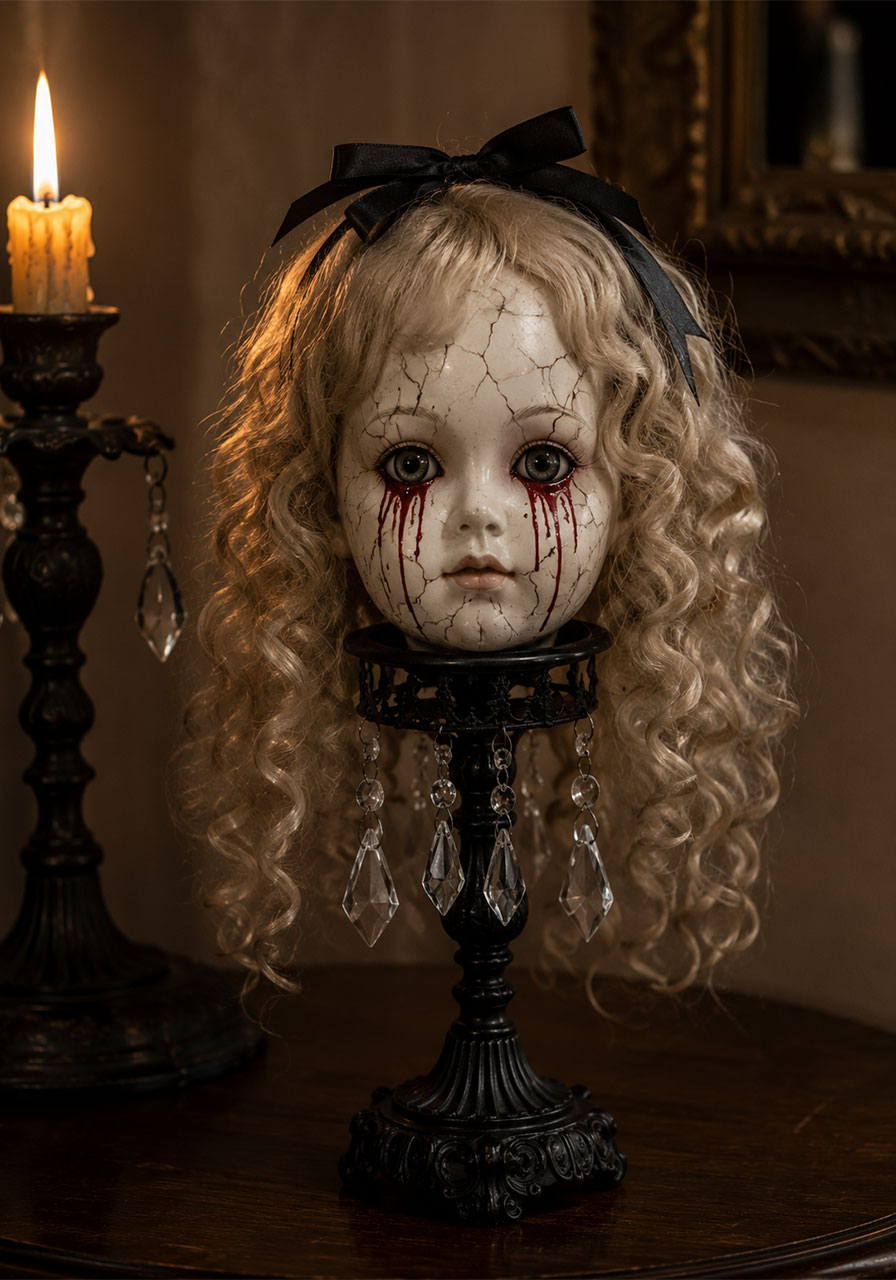
7. Gothic Doll Head
A single doll head, cracked and bloodied, displayed on a small stand instantly elevates any Halloween tablescape. It’s a small project with a big visual payoff.
Best for: End tables, mantels, buffet displays
Prep Time: 20 minutes
Difficulty: Easy
What You’ll Need:
- 1 doll head (or a full doll you don’t mind separating)
- Black and red paint
- A small stand or candlestick base
- Ribbon or lace for hair accents
How to Make It:
1. Paint cracks across the doll’s face using thin black lines.
2. Add red “tear” streaks running from the eyes down the cheeks.
3. Tie a black ribbon in the hair for a gothic touch.
4. Mount the head on a small stand so it sits at eye level on a table or shelf.
Pro Tip: Pair it with a small chandelier-style stand for an antique, unsettling doll shop feel.
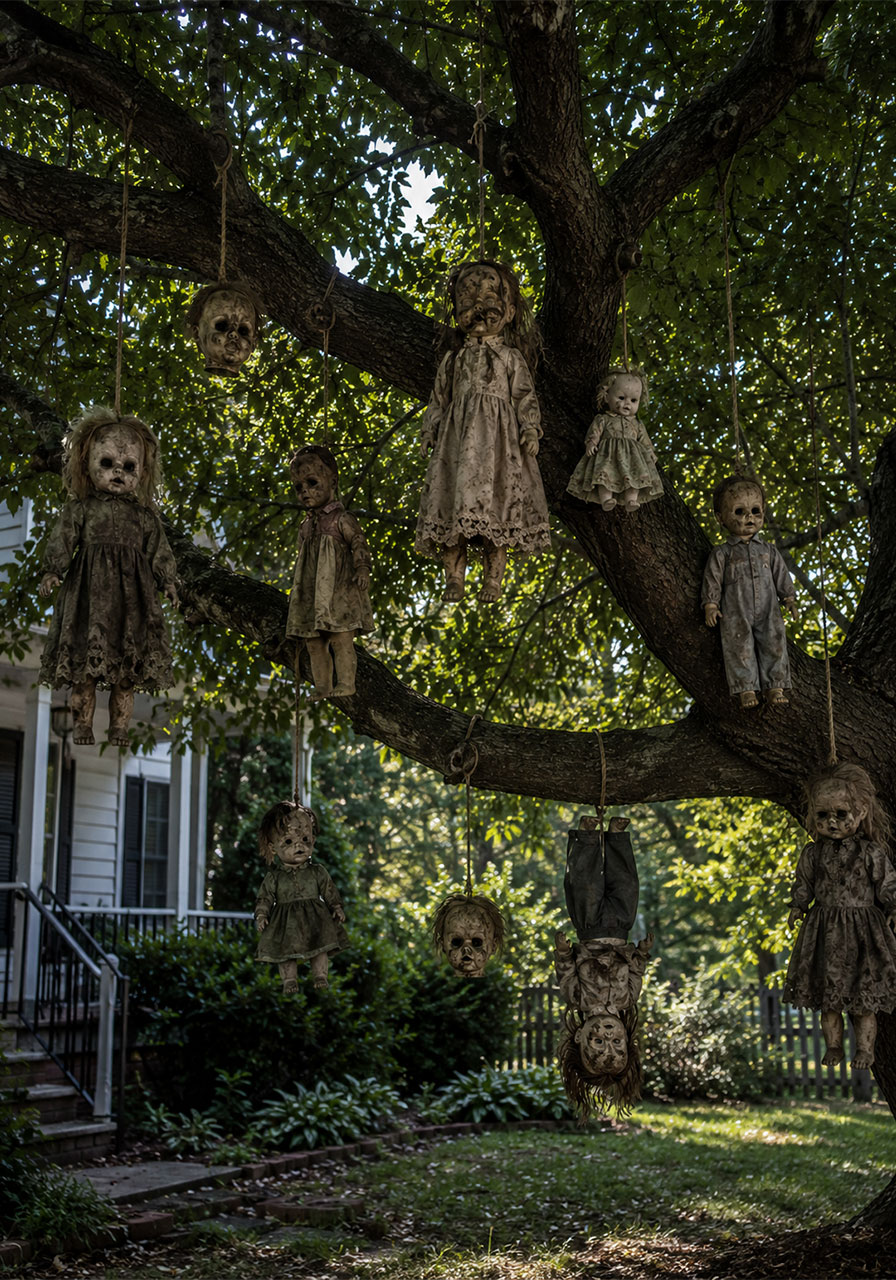
8. Dolls Hanging from Trees
Broken dolls hanging from tree branches is one of the most talked-about Halloween looks out there, largely inspired by Mexico’s famous Island of the Dolls. It’s dramatic, it’s eerie, and it’s shockingly simple to recreate.
Best for: Front yard trees
Prep Time: 30 minutes
Difficulty: Easy
What You’ll Need:
- 5-10 old or broken dolls
- Twine or rope
- Dirt, moss, or fake cobwebs for aging
How to Make It:
1. Collect dolls in rough shape, missing limbs or hair is even better here.
2. Rub dirt or moss onto their bodies to age them.
3. Tie twine around the neck, waist, or limbs of each doll.
4. Hang them from tree branches at varying heights, some upside down.
Pro Tip: Mix in a few bare doll heads without bodies scattered among the full dolls. It reads as far creepier than uniform dolls.
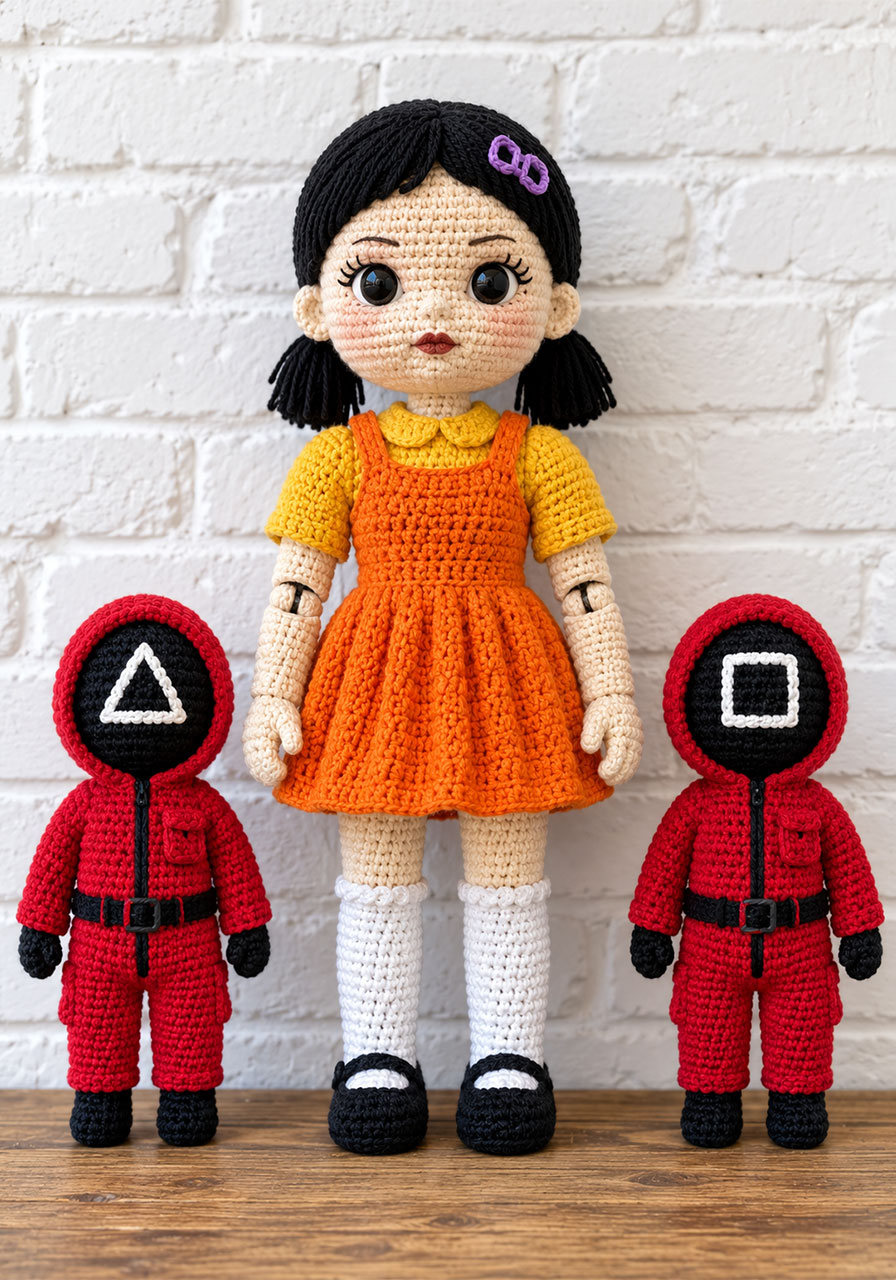
9. Squid Game Crochet Doll
If you’d rather make something yourself from scratch, this crochet Squid Game-inspired doll is a fun handmade project that still delivers plenty of unsettling energy, especially paired with the small red-suited figures.
Best for: Crafters, indoor displays
Prep Time: Several hours (over a few evenings)
Difficulty: Advanced (requires crochet skills)
What You’ll Need:
- Amigurumi crochet pattern (widely available on Etsy)
- Yarn in skin tone, orange, yellow, and red
- Stuffing
- Small safety eyes or embroidery thread for facial features
How to Make It:
1. Purchase or download the crochet pattern.
2. Crochet the main doll body first, followed by the smaller red-suited figures.
3. Stuff each piece firmly for a solid shape.
4. Embroider or attach the facial features last, keeping the eyes slightly uneven for an unsettling look.
Pro Tip: This one doubles as a fun weekend project with older kids if they enjoy crafting alongside you.
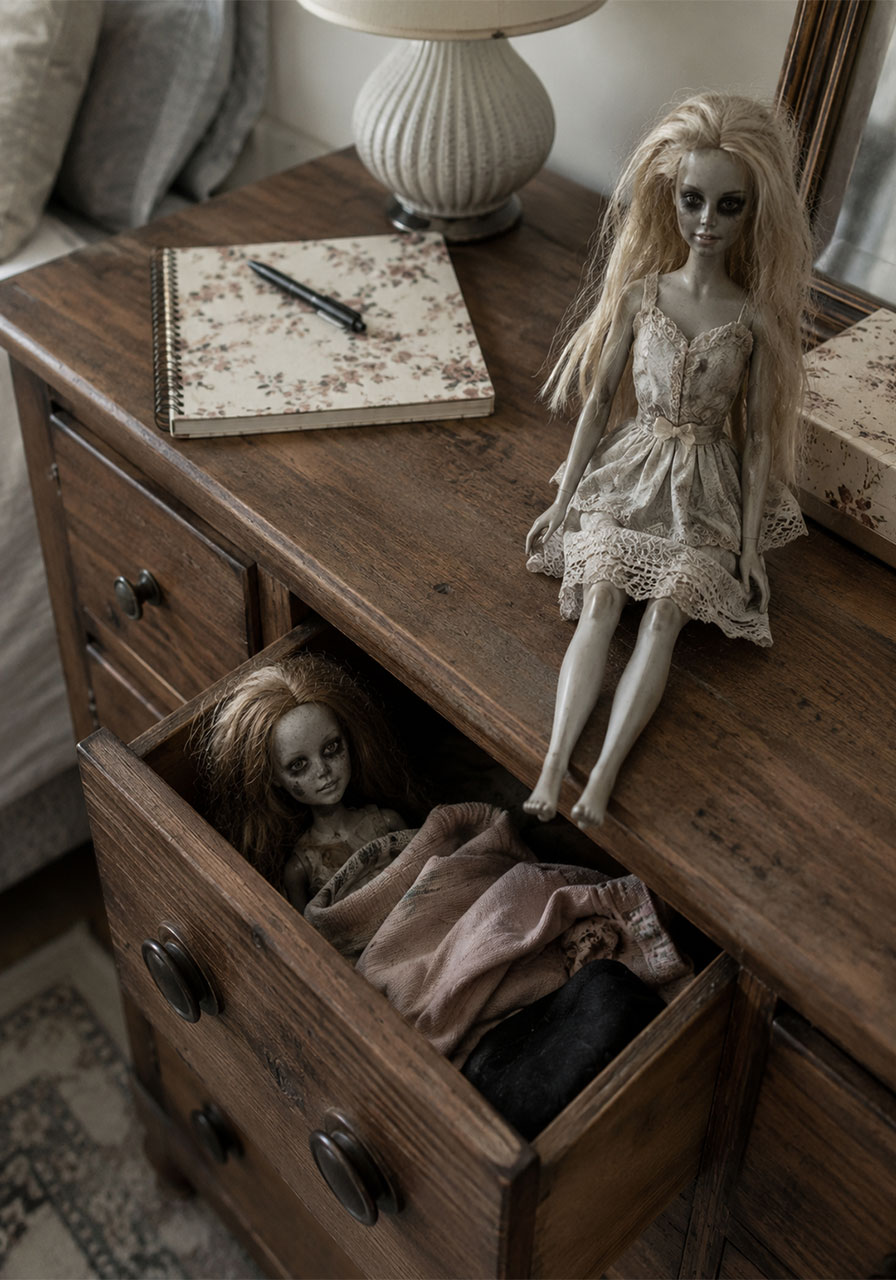
10. Eerie Dolls in Drawers or on the Desk
For a smaller, subtler scare, tuck a few unsettling dolls inside a dresser drawer or on a study desk. It’s a quieter kind of creepy that catches people off guard when they least expect it.
Best for: Bedrooms, home offices, kids’ rooms
Prep Time: 10 minutes
Difficulty: Easy
What You’ll Need:
- 2-3 dolls (Barbie-style works well here)
- Grey or pale paint
- Dark eyeliner or paint for eye shadowing
How to Make It:
1. Lightly grey out the doll’s skin tone with a thin wash of paint.
2. Add dark circles under the eyes and smudge the lips slightly.
3. Leave the drawer cracked open just enough for the doll to peek out, or seat it upright on the desk.
Pro Tip: Understated works better here than gory. A subtly “off” doll in an everyday spot is often creepier than an obviously monstrous one.
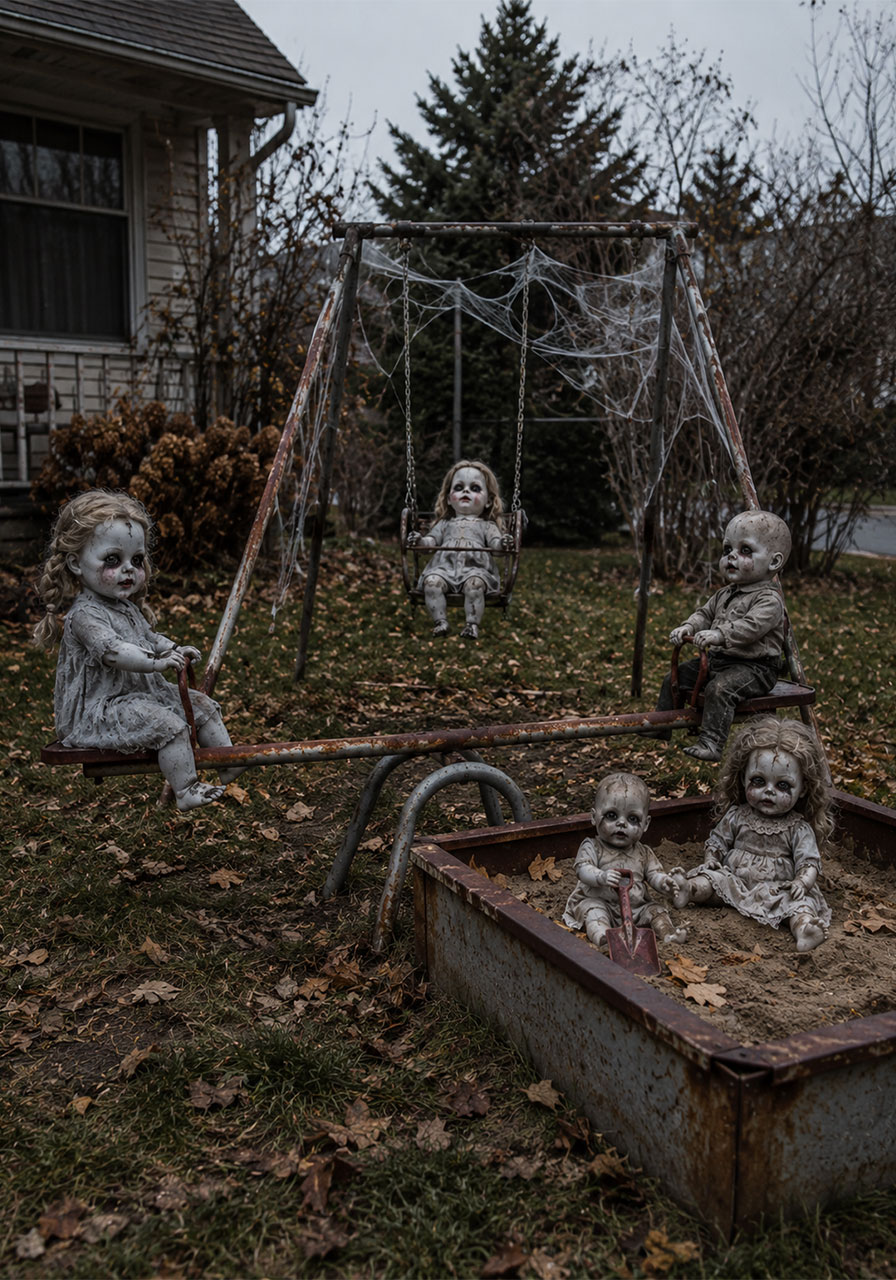
11. Seesaw Playground Dolls
An entire abandoned-looking playground scene, complete with dolls on a seesaw, swing set, or sandbox, is one of the most ambitious yard displays on this list, and one of the most memorable.
Best for: Large front yards, HOA-friendly neighborhoods that allow bigger displays
Prep Time: 1-2 hours
Difficulty: Advanced
What You’ll Need:
- A small seesaw, swing set, or sandbox (secondhand or rented)
- 4-6 dolls of varying sizes
- Grey and pale paint
- Fake spider webs for aging
How to Make It:
1. Set up the playground equipment in your yard.
2. Pale out the dolls’ skin and add dark shadowing to the eyes.
3. Pose them mid-play: one on the seesaw, one on the swing, one in the sandbox.
4. Drape fake webbing over the equipment for an abandoned feel.
Pro Tip: This works best viewed from the street, so step back and check the display from the sidewalk before finalizing doll placement.
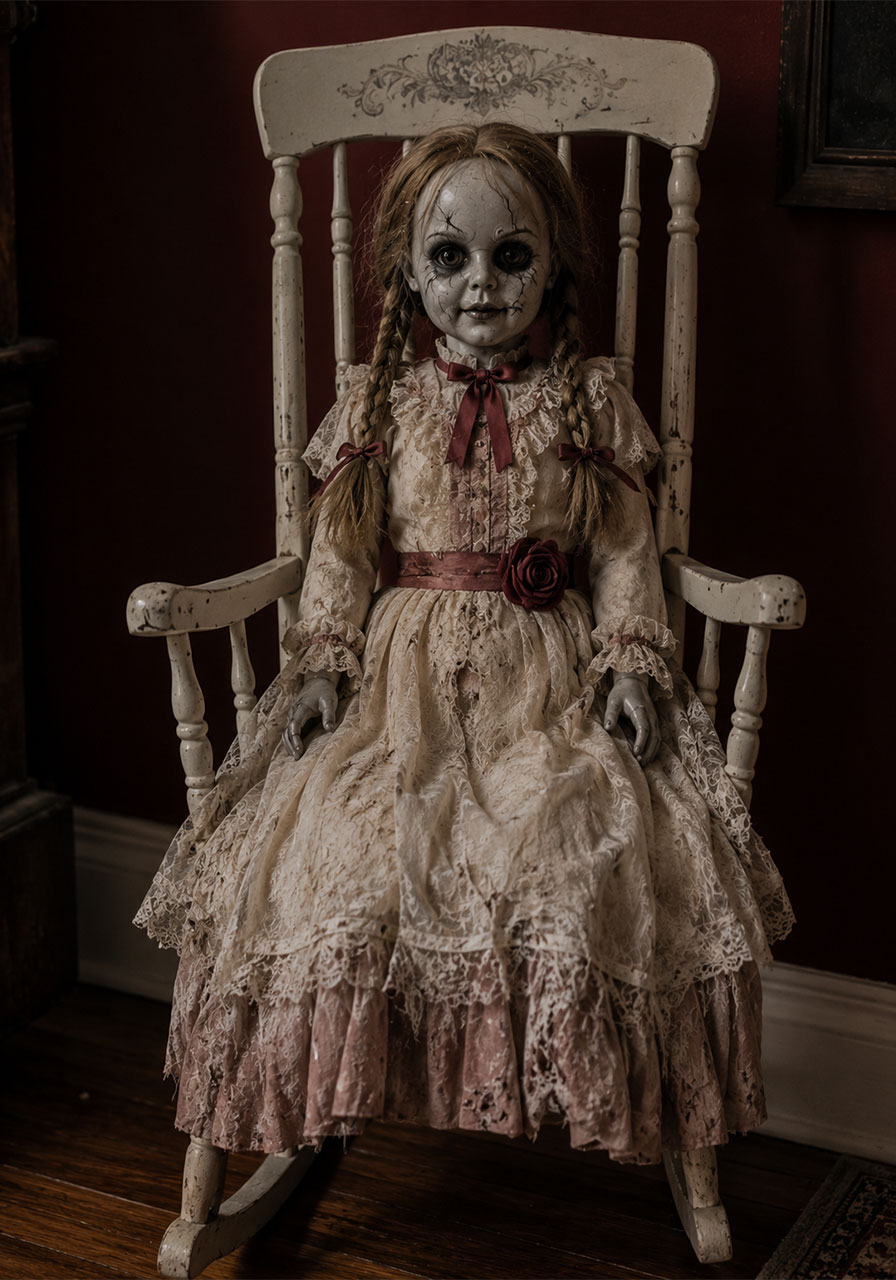
12. Annabelle-Inspired Doll
For horror movie fans, a doll modeled after the infamous Annabelle is an easy way to bring a recognizable scare to your porch or entryway without needing a licensed prop.
Best for: Front porches, rocking chairs
Prep Time: 30 minutes
Difficulty: Medium
What You’ll Need:
- 1 large doll with braided hair capability
- White or cream fabric dress
- Grey and black paint
- Red ribbon
How to Make It:
1. Dress the doll in a distressed white or cream dress.
2. Braid the hair into two pigtails.
3. Grey out the skin tone and add dark, cracked detailing around the eyes and mouth.
4. Tie a red ribbon at the waist or neck as a signature accent.
5. Seat the doll in a rocking chair for maximum effect.
Pro Tip: A slow, subtle rock (a small motor or a well-placed fan works) sells the illusion far better than a completely still doll.
13. Giant Inflatable Doll
If DIY painting projects aren’t your thing, a giant inflatable creepy doll is a no-fuss way to make a big statement on your lawn in minutes.
Best for: Front lawns, quick setup
Prep Time: 10 minutes
Difficulty: Easy
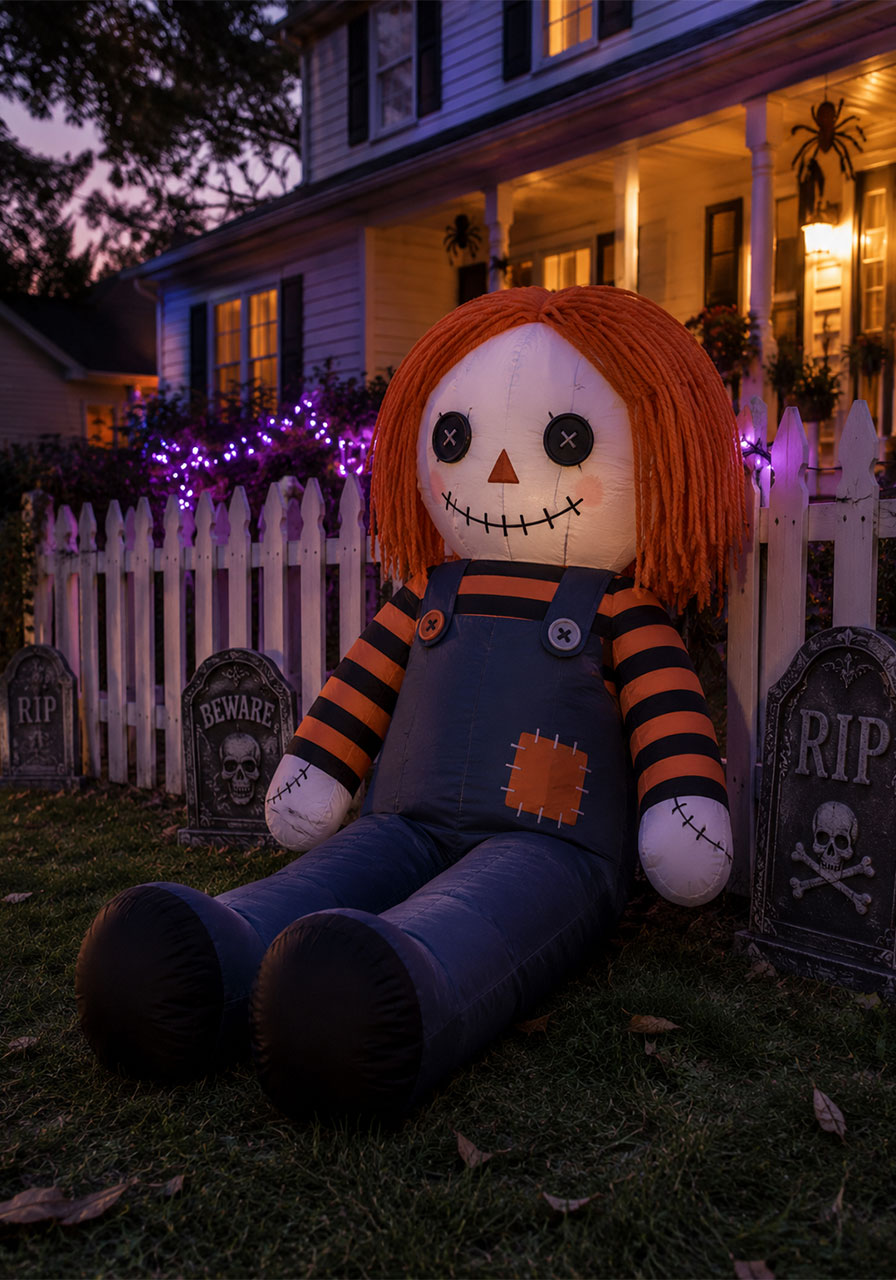
What You’ll Need:
- A pre-made inflatable Halloween doll (widely available online)
- An outdoor outlet or extension cord
- Stakes for securing it in wind
How to Make It:
1. Unpack and lay out the inflatable in your desired yard spot.
2. Stake down all corners securely, especially if you live somewhere windy.
3. Plug it in and let it inflate fully before adjusting its final position.
Pro Tip: Add small spotlights nearby so the inflatable is visible after dark, not just during the day.
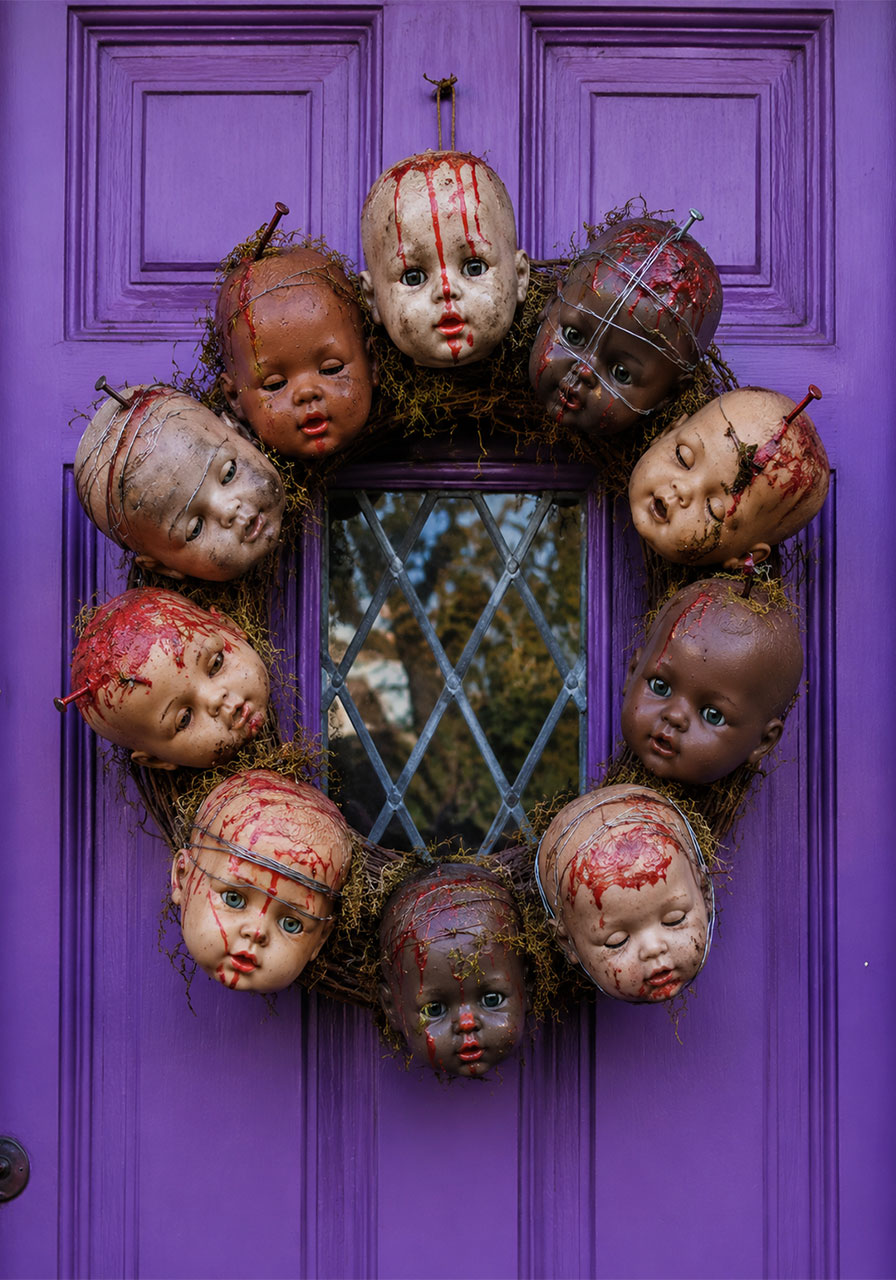
14. Doll Head Wreath
Swap your usual front door wreath for one made entirely of doll heads. It’s unexpected, it’s a conversation starter, and trick-or-treaters will absolutely hesitate before ringing your bell.
Best for: Front doors
Prep Time: 45 minutes
Difficulty: Medium
What You’ll Need:
- 8-10 doll heads (separated from bodies)
- A wreath form or wire ring
- Hot glue gun
- Red paint, small nails, or wire (for gory detailing)
How to Make It:
1. Remove the heads from old dolls (pliers make this easier).
2. Hot glue each head around the wreath form, facing outward.
3. Add gory details like red paint drips, small nails, or wrapped wire for extra shock.
4. Let everything dry fully before hanging on your front door.
Pro Tip: Vary the expressions and damage on each head. Uniform faces are far less unsettling than a mismatched, chaotic mix.
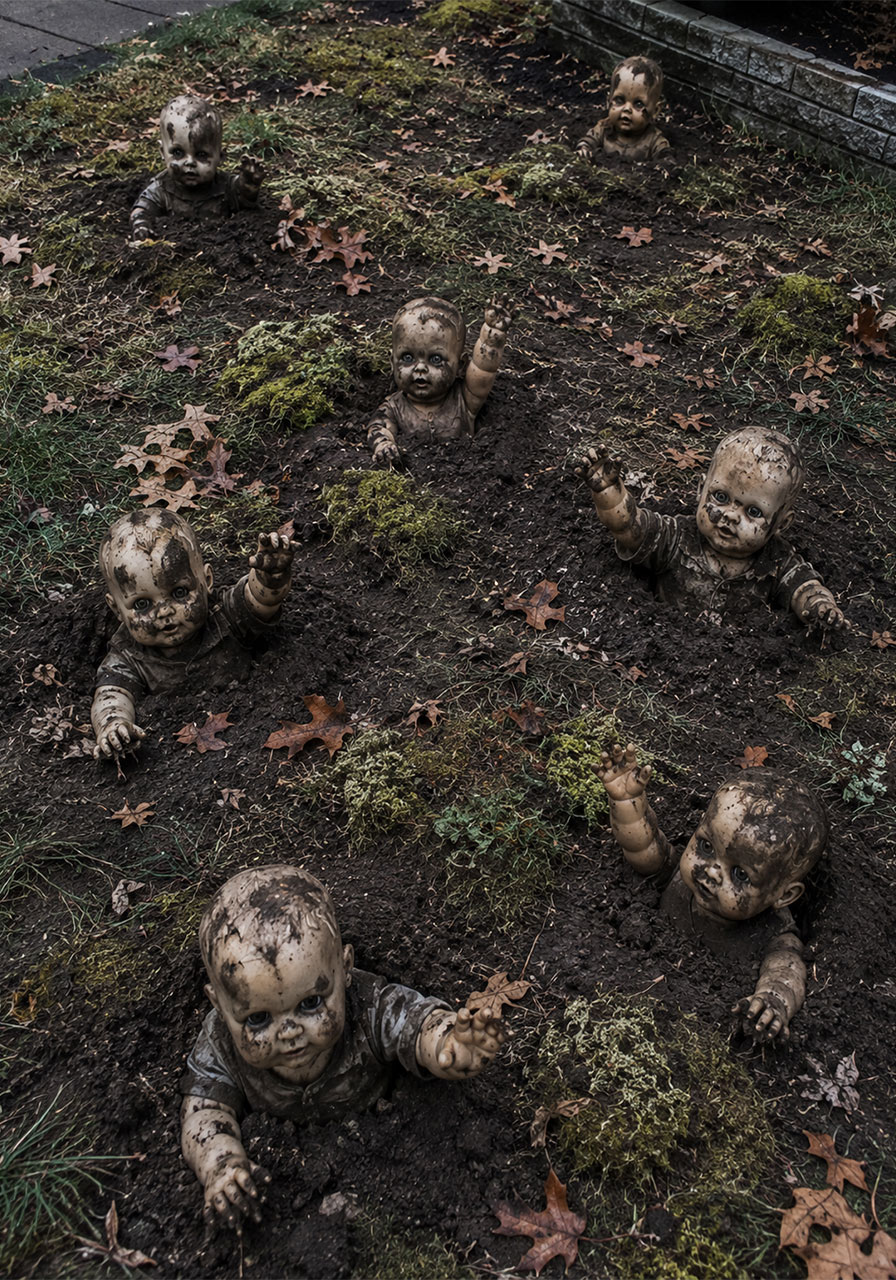
15. Doll Swamp on the Lawn
Turn a patch of your lawn into a swamp of half-buried, flesh-toned dolls reaching up from the ground. It’s a larger-scale project, but the payoff is a genuinely disturbing scene guests won’t forget.
Best for: Front lawns, garden beds
Prep Time: 1 hour
Difficulty: Medium
What You’ll Need:
- 6-8 dolls
- Brown and green paint
- Small shovel
- Fake moss or leaves
How to Make It:
1. Paint dolls with muddy brown and green tones to suggest decay.
2. Dig shallow holes across your lawn area.
3. Bury each doll partway, with an arm, hand, or head reaching upward.
4. Scatter moss and leaves around the “swamp” to tie the scene together.
Pro Tip: Water the ground lightly beforehand so it looks genuinely swampy rather than just dry dirt.
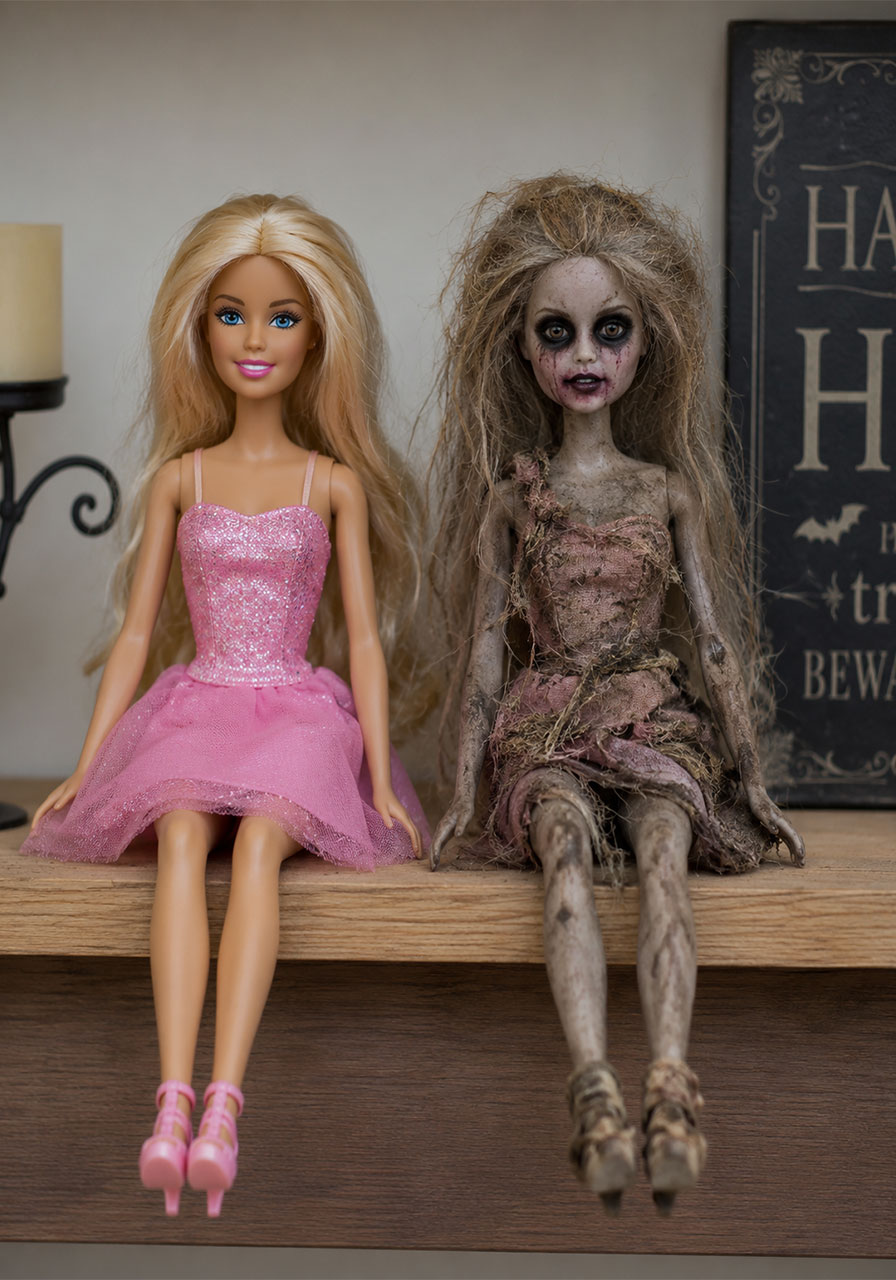
16. Creepy Barbie Makeover
Not every Barbie has to stay picture-perfect. A quick makeover turns a familiar, friendly face into something far more unsettling, which makes the transformation even more effective.
Best for: Shelves, tablescapes
Prep Time: 20 minutes
Difficulty: Easy
What You’ll Need:
- 1-2 Barbie-style dolls
- Grey and white paint
- Dark eyeliner or paint
- Distressed fabric scraps
How to Make It:
1. Tease and mess up the doll’s hair for a wild, unkempt look.
2. Grey out sections of the skin, leaving some natural tone for contrast.
3. Darken the eyes heavily and smudge the lips.
4. Dress in torn or muddied fabric instead of the original outfit.
Pro Tip: Keep one Barbie mostly untouched next to a fully transformed one. The contrast makes the “before and after” story instantly readable.
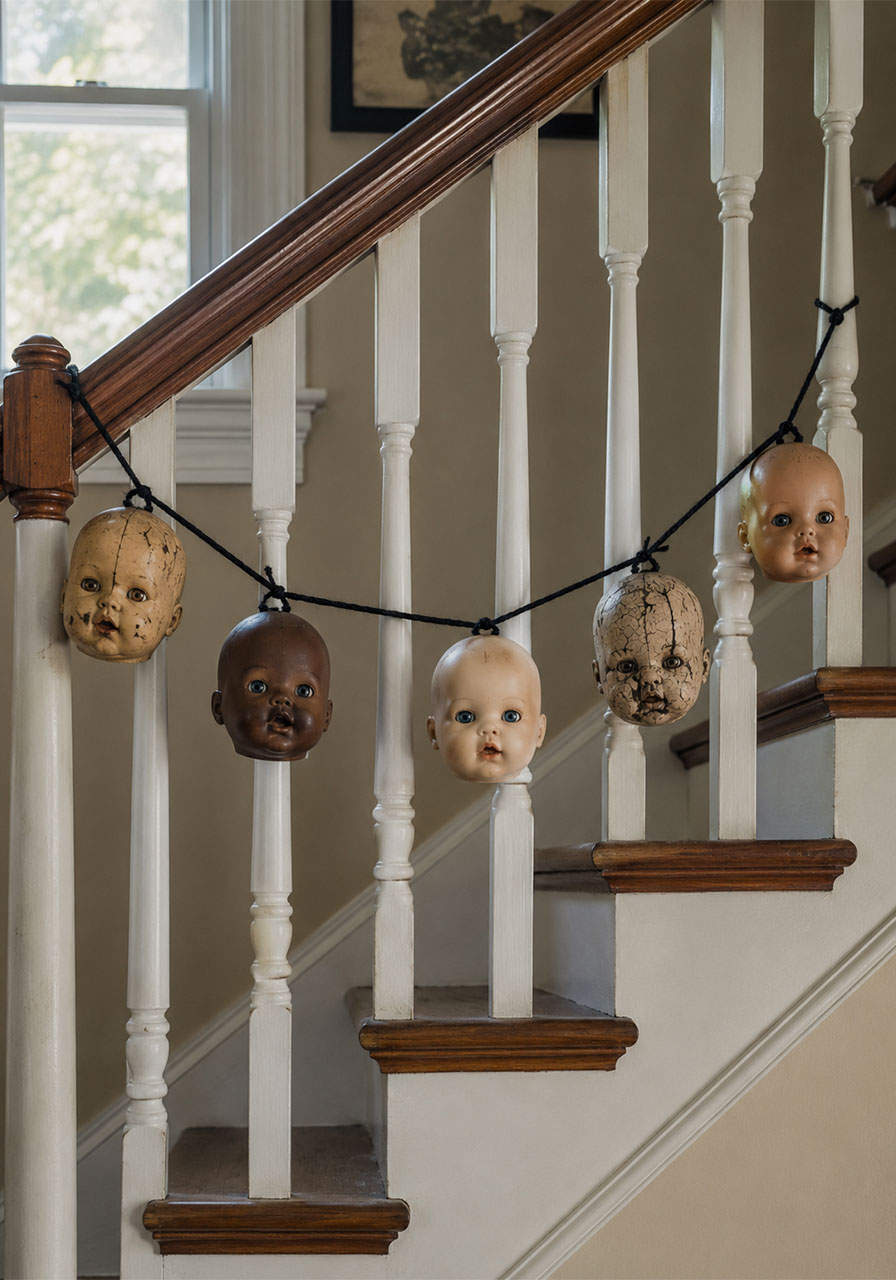
17. Doll Head Garland
A simple garland strung with doll faces adds a creepy accent to doorways, staircases, or mantels without requiring much setup time.
Best for: Doorways, staircase railings, mantels
Prep Time: 20 minutes
Difficulty: Easy
What You’ll Need:
- 5-6 doll heads or faces
- Twine or ribbon
- Hole punch or drill (adult use only)
How to Make It:
1. Carefully punch or drill a small hole at the top of each doll head.
2. Thread twine through each hole, spacing the heads evenly.
3. String the finished garland along a railing, doorway, or mantel.
Pro Tip: Mix in a few cracked or discolored heads with the more “normal” ones for a garland that looks unsettling rather than just decorative.
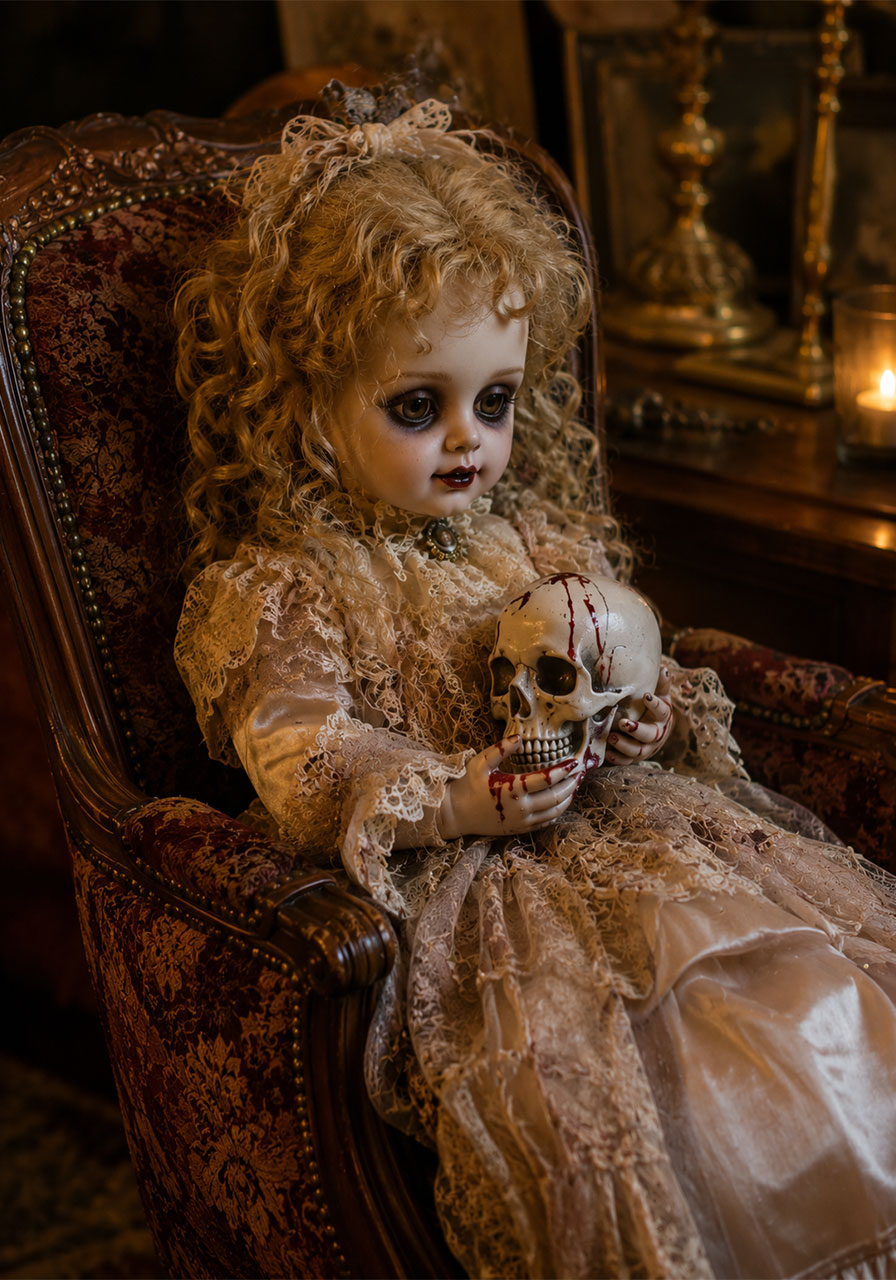
18. Doll Holding a Skull
A single doll clutching a faux skull is a simple, symbolic scare that works beautifully staged in a bed, chair, or shelf display.
Best for: Beds, chairs, shelves
Prep Time: 15 minutes
Difficulty: Easy
What You’ll Need:
- 1 doll
- 1 small faux skull (craft stores carry these seasonally)
- Fake blood paint (optional)
How to Make It:
1. Position the doll seated or reclining.
2. Place the faux skull in its hands, angled toward the viewer.
3. Add a few drops of fake blood on the skull or doll’s fingers for extra detail.
Pro Tip: Stage this one somewhere guests will discover it up close, like a nightstand or reading chair, rather than from across the room.
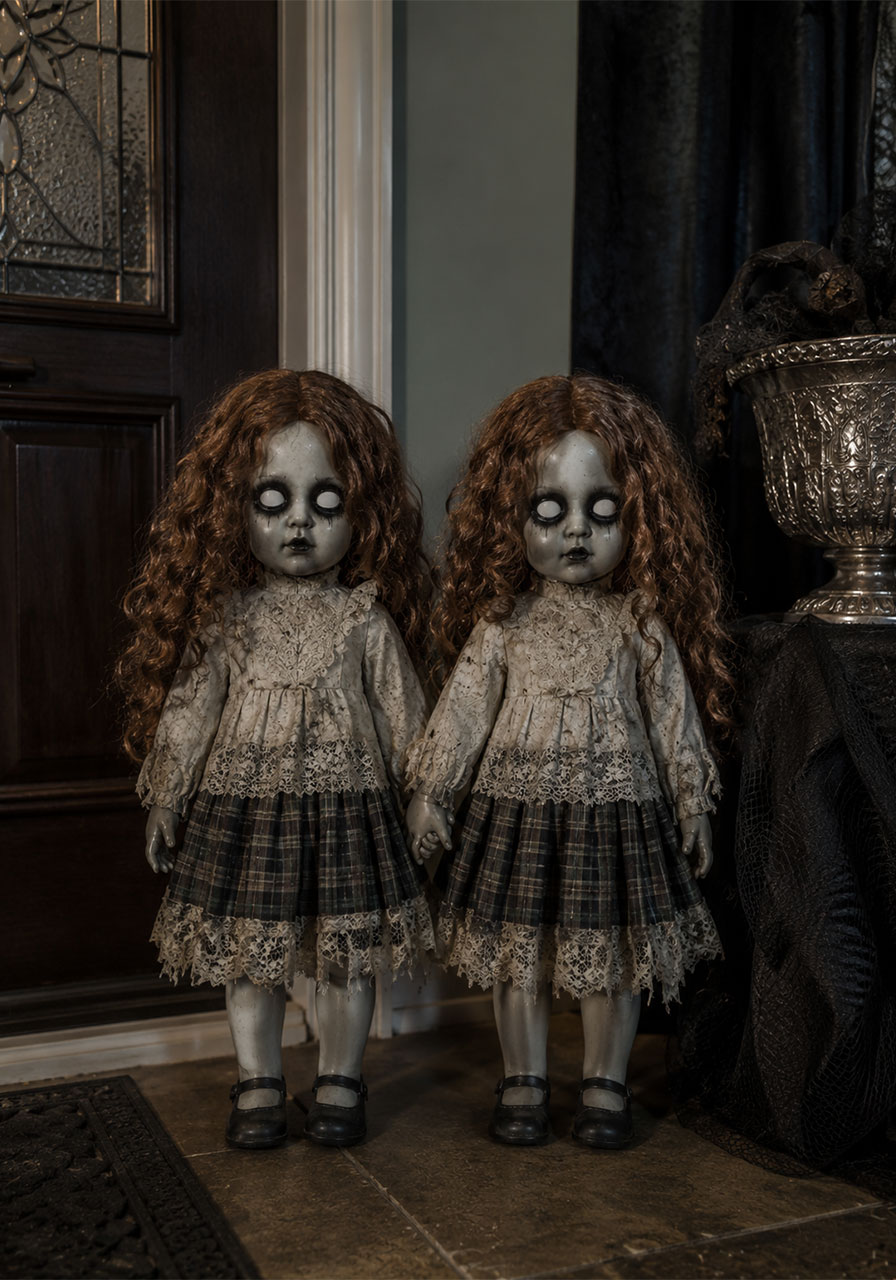
19. Twin Doll Sisters
Twins are a horror movie staple for a reason. Two identical (or nearly identical) dolls positioned together at your entry door taps into that unsettling “in sync” feeling.
Best for: Front entryways
Prep Time: 25 minutes
Difficulty: Medium
What You’ll Need:
- 2 matching or similar dolls
- White or pale fabric
- Grey and black paint
How to Make It:
1. Dress both dolls identically in white or pale, distressed fabric.
2. Grey out both faces evenly so they match one another.
3. Hollow out the eyes with dark paint on both dolls.
4. Hang or seat them side by side, holding hands if possible.
Pro Tip: Perfect symmetry is what makes twins unsettling, so take the extra few minutes to make sure both dolls truly match.
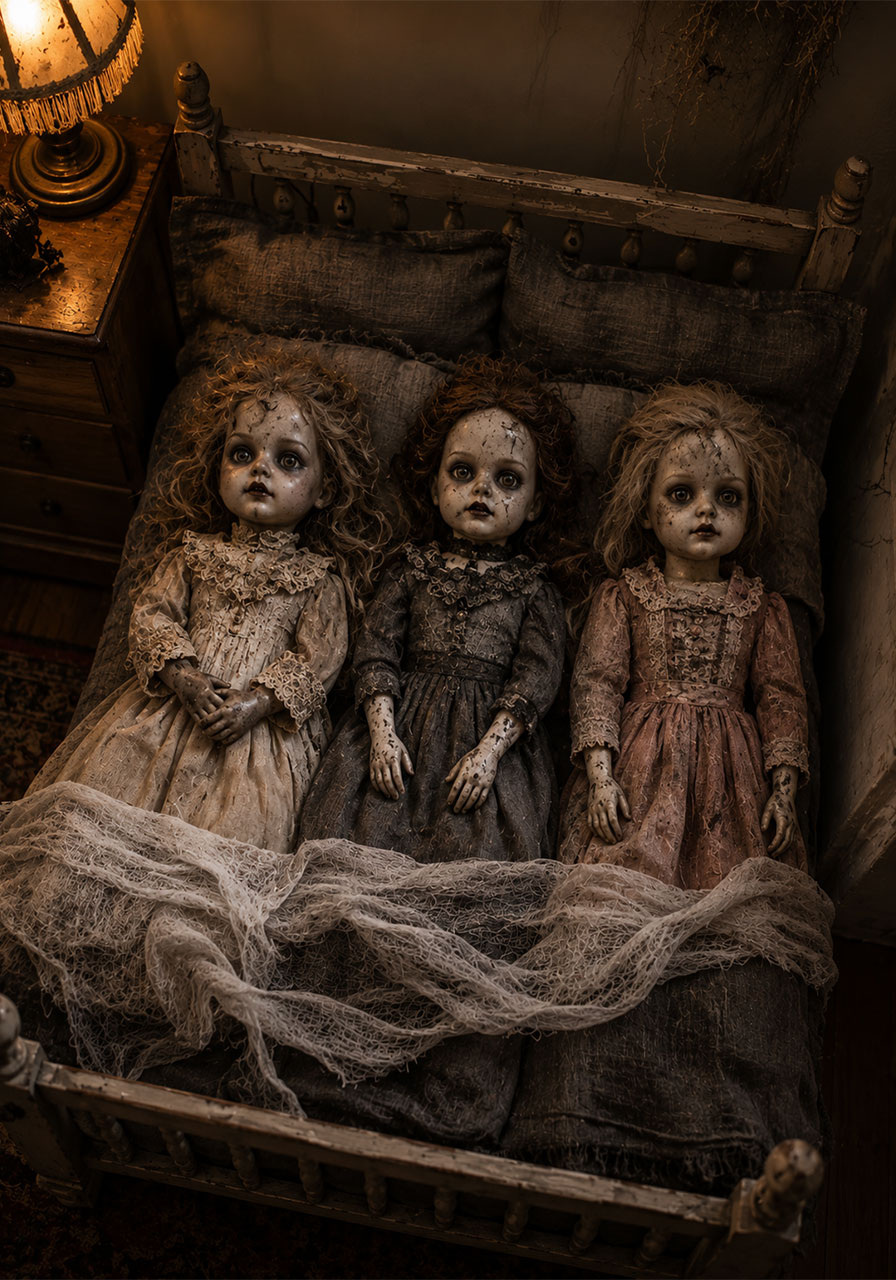
20. Creepy Doll Bed
A small bed or crib filled with dolls lying still is a quiet, eerie scene that works well tucked into a corner of a party room or entryway.
Best for: Corners, entryway tables
Prep Time: 15 minutes
Difficulty: Easy
What You’ll Need:
- A small doll bed or crib (or a shoebox lined with fabric)
- 2-3 dolls
- Grey paint
- Dark fabric or gauze
How to Make It:
1. Line the small bed with dark, distressed fabric.
2. Grey out the dolls’ faces and hands.
3. Lay the dolls in the bed, eyes open, staring straight up.
4. Drape a bit of gauze over the bed for an abandoned nursery feel.
Pro Tip: Keep the lighting dim and warm rather than bright. It reads more like a forgotten room than a Halloween prop.
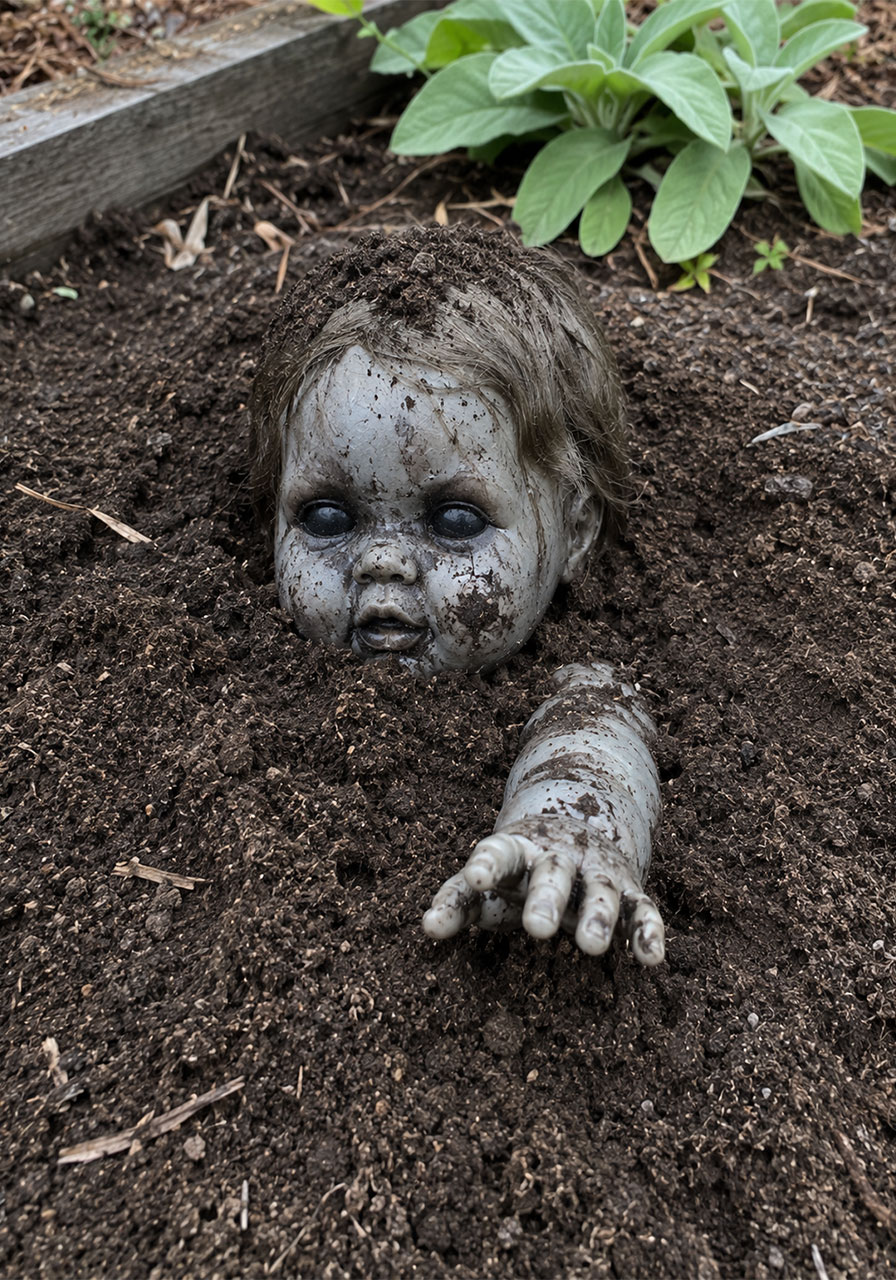
21. Half-Buried Backyard Doll
A single doll, half-buried in your yard with just a hand or head visible, is a small detail that can genuinely startle anyone who spots it while walking by.
Best for: Garden beds, backyard corners
Prep Time: 20 minutes
Difficulty: Easy
What You’ll Need:
- 1 doll
- Small shovel
- Brown and grey paint
How to Make It:
1. Grey out and dirty up the doll’s exposed skin.
2. Dig a shallow hole in a garden bed or lawn corner.
3. Bury the doll partway, leaving a hand, foot, or head visible above ground.
4. Pack the dirt loosely around it for a realistic, unsettled look.
Pro Tip: Place this one somewhere guests will stumble across it by accident rather than in an obvious display spot. Surprise is what makes it effective.
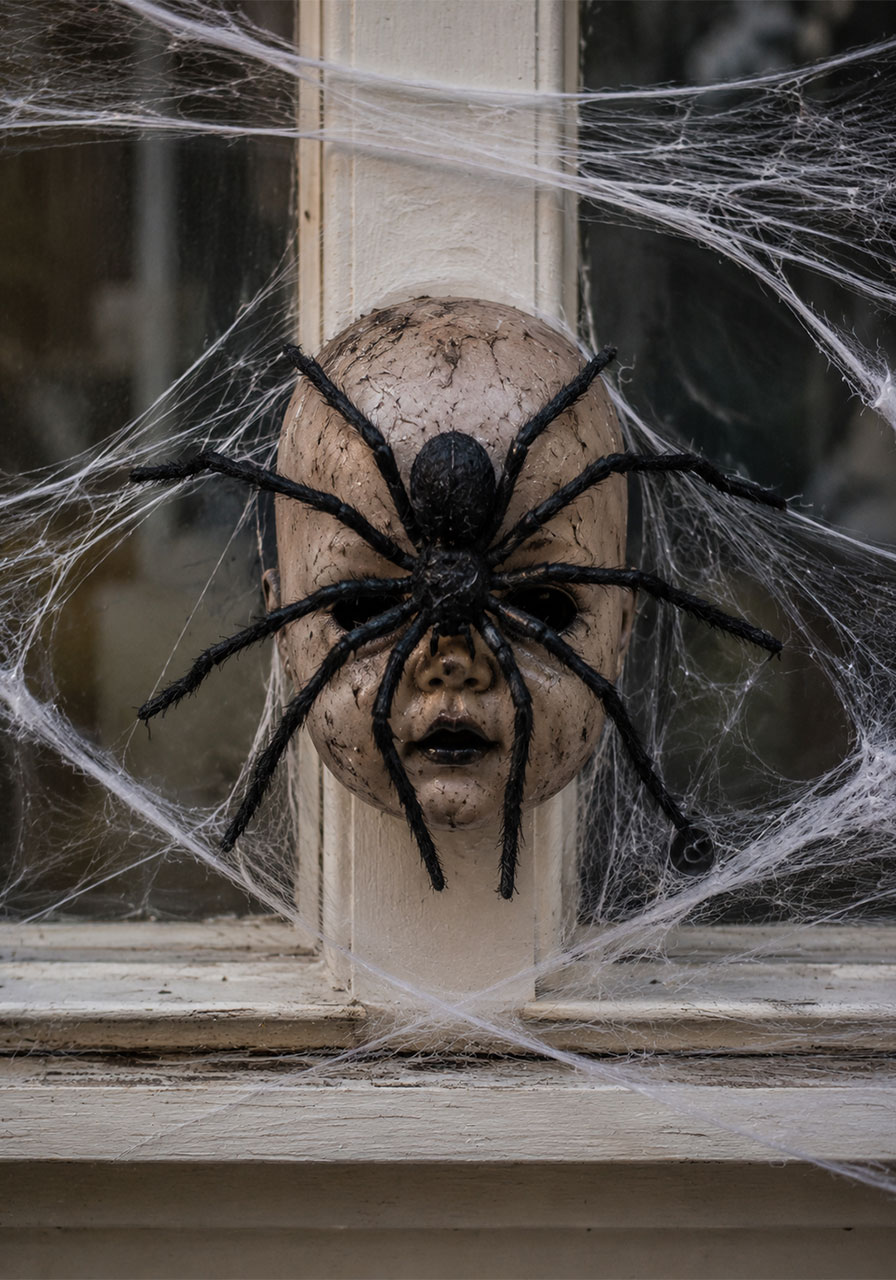
22. Spider and Doll Combo
Pairing a giant fake spider with a doll’s face creates layered scares in a single small display, perfect for a front door or window sill.
Best for: Front doors, window sills
Prep Time: 15 minutes
Difficulty: Easy
What You’ll Need:
- 1 doll face or head
- 1 large fake spider
- Fake cobwebs
- Hot glue
How to Make It:
1. Position the doll face at the center of your display space.
2. Glue or place the fake spider directly across the doll’s face.
3. Stretch fake cobwebs around both to tie the scene together.
Pro Tip: A slightly oversized spider relative to the doll’s face makes the scale feel more unsettling and more photo-worthy for guests.
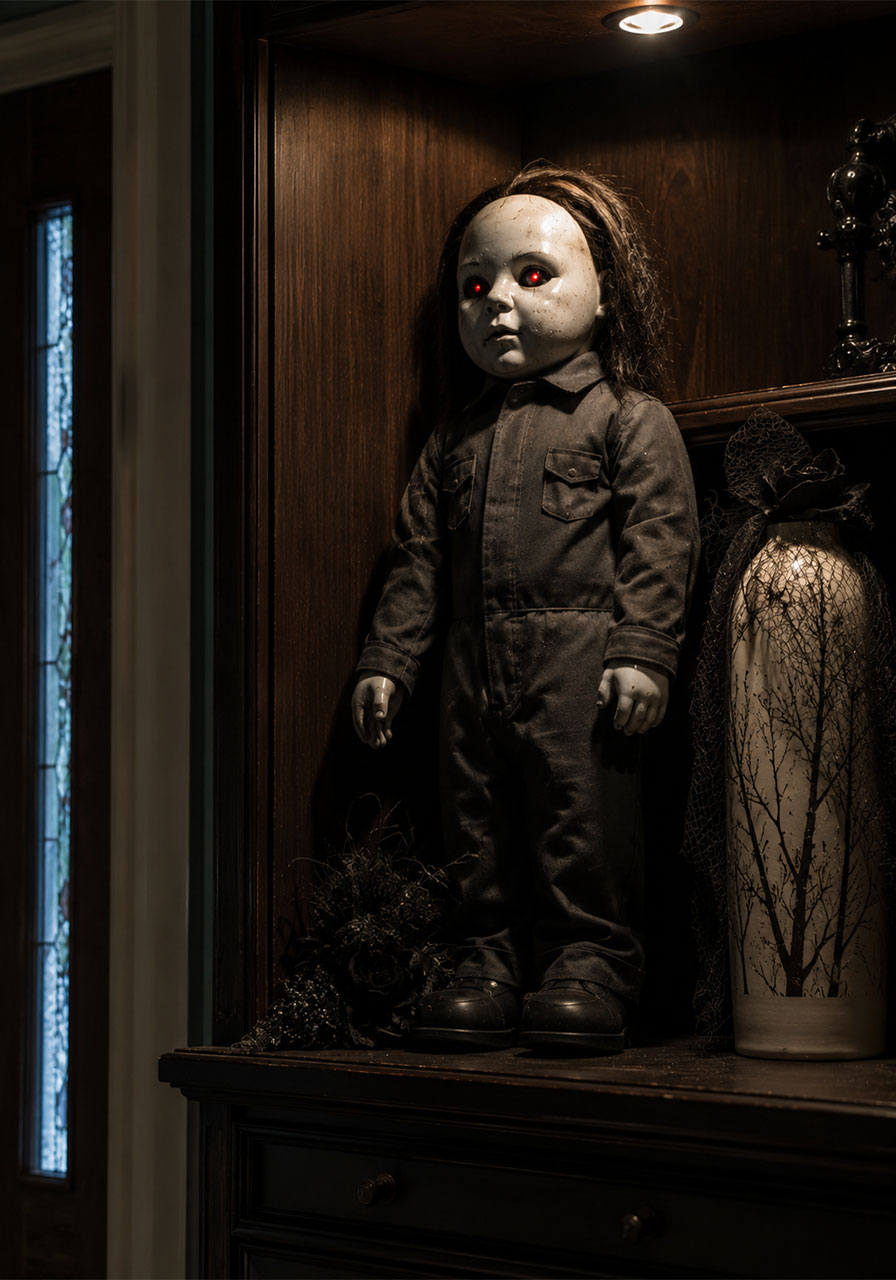
23. Michael Myers-Inspired Animatronic Doll
For horror fans wanting something with movement, an animatronic doll styled after a classic slasher villain adds motion and sound to your display, both of which dramatically increase the scare factor.
Best for: Shelves, entryway tables
Prep Time: 20 minutes (setup only, doll is pre-made)
Difficulty: Easy
What You’ll Need:
- A pre-made animatronic Halloween doll
- Batteries or power outlet
- A stable shelf or table
How to Make It:
1. Unbox and test the animatronic before your event to confirm movement and sound work properly.
2. Position it on a sturdy shelf at roughly eye level.
3. Trigger it to activate automatically via motion sensor, or turn it on right as guests arrive.
Pro Tip: Place it somewhere slightly out of direct sightline so guests discover it mid-conversation rather than the moment they walk in.
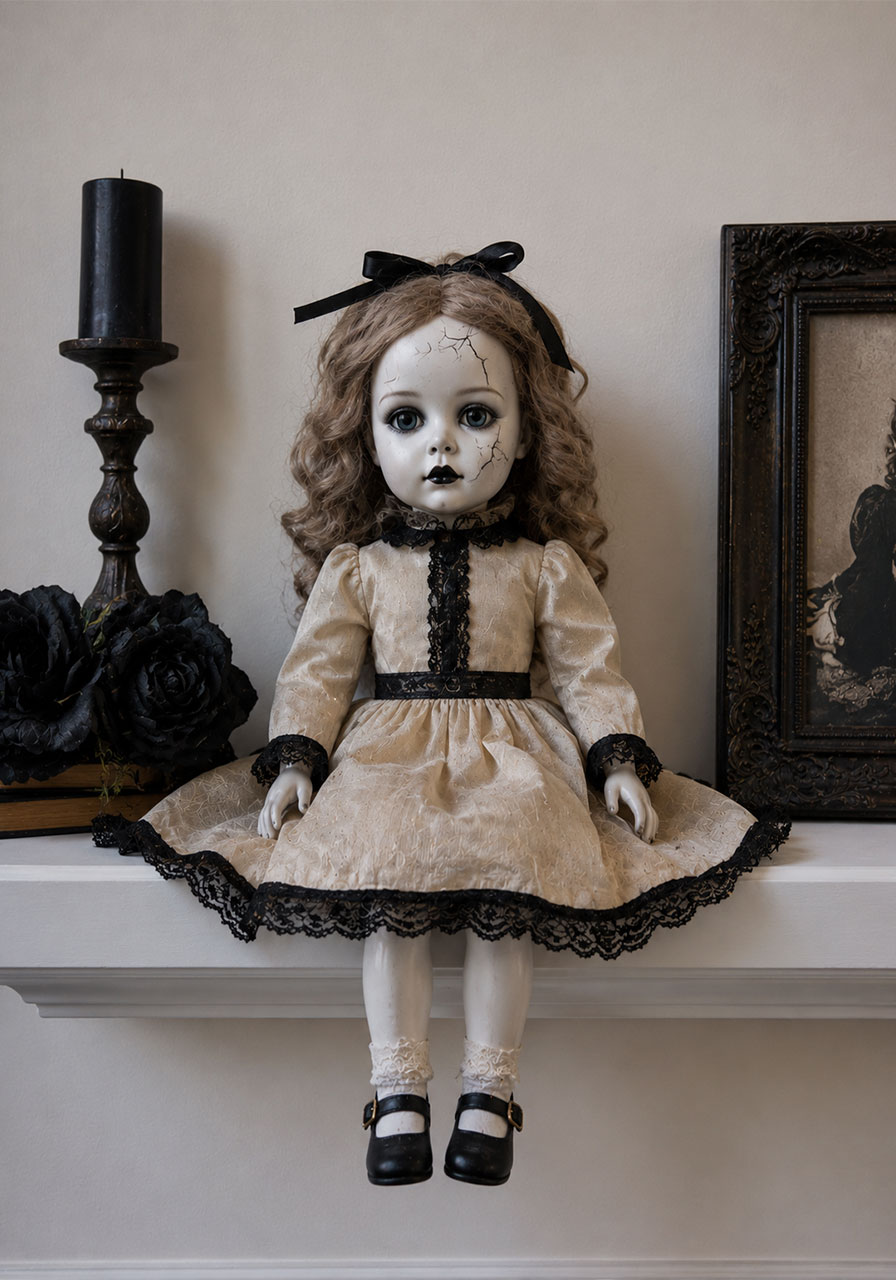
24. Cracked-Face Doll on a Floating Shelf
A single, carefully painted doll with a cracked porcelain-style face displayed on a floating shelf reads as elegant and eerie at the same time.
Best for: Living rooms, hallways
Prep Time: 30 minutes
Difficulty: Medium
What You’ll Need:
- 1 doll
- White or cream paint
- Fine black paint pen
- A floating shelf
How to Make It:
1. Paint the doll’s face in a matte, porcelain-white base coat.
2. Once dry, draw thin, spidery crack lines across the face with a fine paint pen.
3. Seat the doll upright on the floating shelf, positioned to face the room.
Pro Tip: Fewer, more deliberate cracks look far more convincing than covering the entire face. Restraint sells this one.
25. Evil Doll Next to a Kitchen Jar
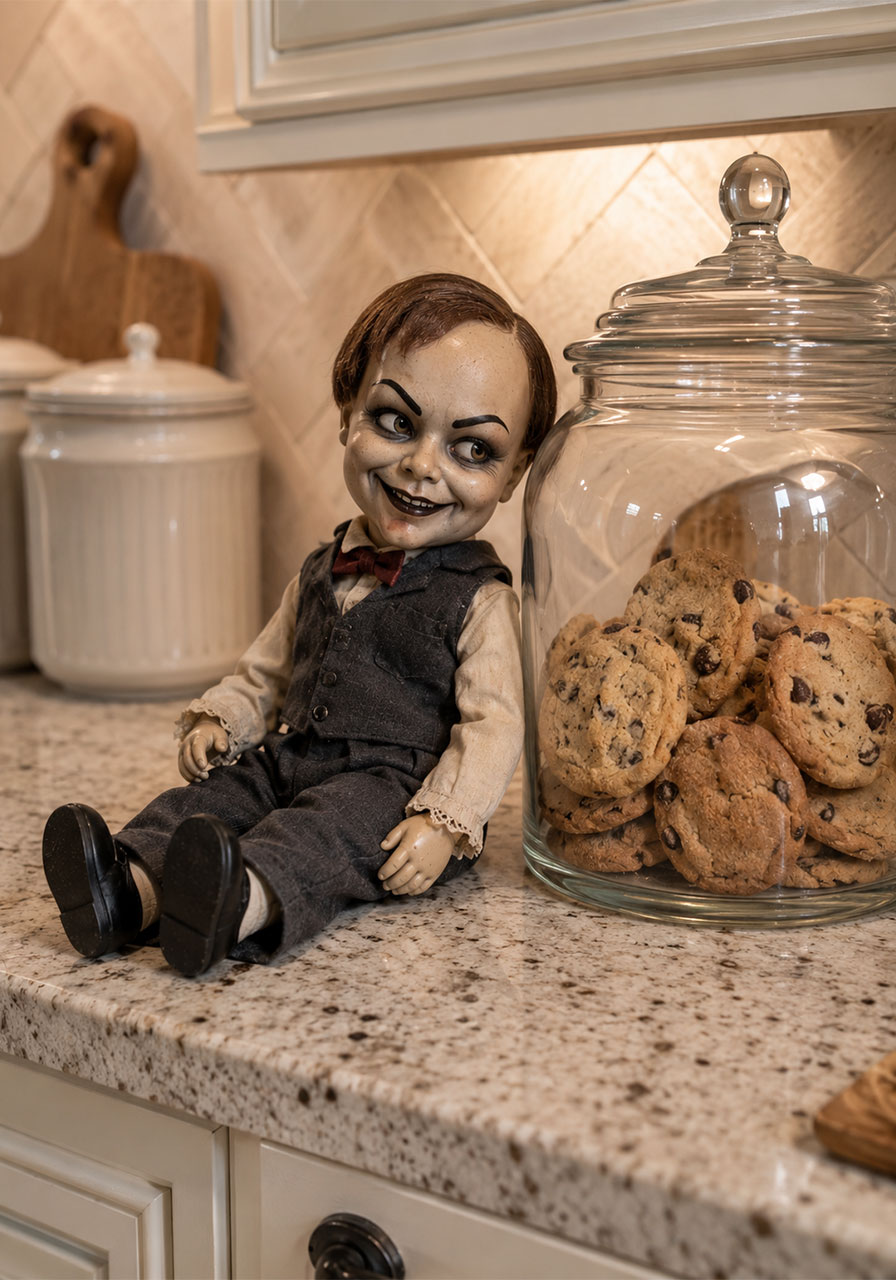
A small, wicked-looking doll perched beside your kitchen jars adds an unexpected, slightly funny scare to a room guests don’t usually expect Halloween decor in.
Best for: Kitchen counters
Prep Time: 15 minutes
Difficulty: Easy
What You’ll Need:
- 1 small doll
- Dark paint for facial detailing
- A kitchen jar or canister you already own
How to Make It:
1. Paint an exaggerated, mischievous expression on the doll’s face.
2. Darken the eyes and add a subtle smirk to the mouth.
3. Prop the doll casually beside a kitchen jar, as if it’s been there the whole time.
Pro Tip: This one works best when it feels almost too normal at first glance, then unsettling on a second look.
26. Ring-Around-the-Rosie Swing Dolls
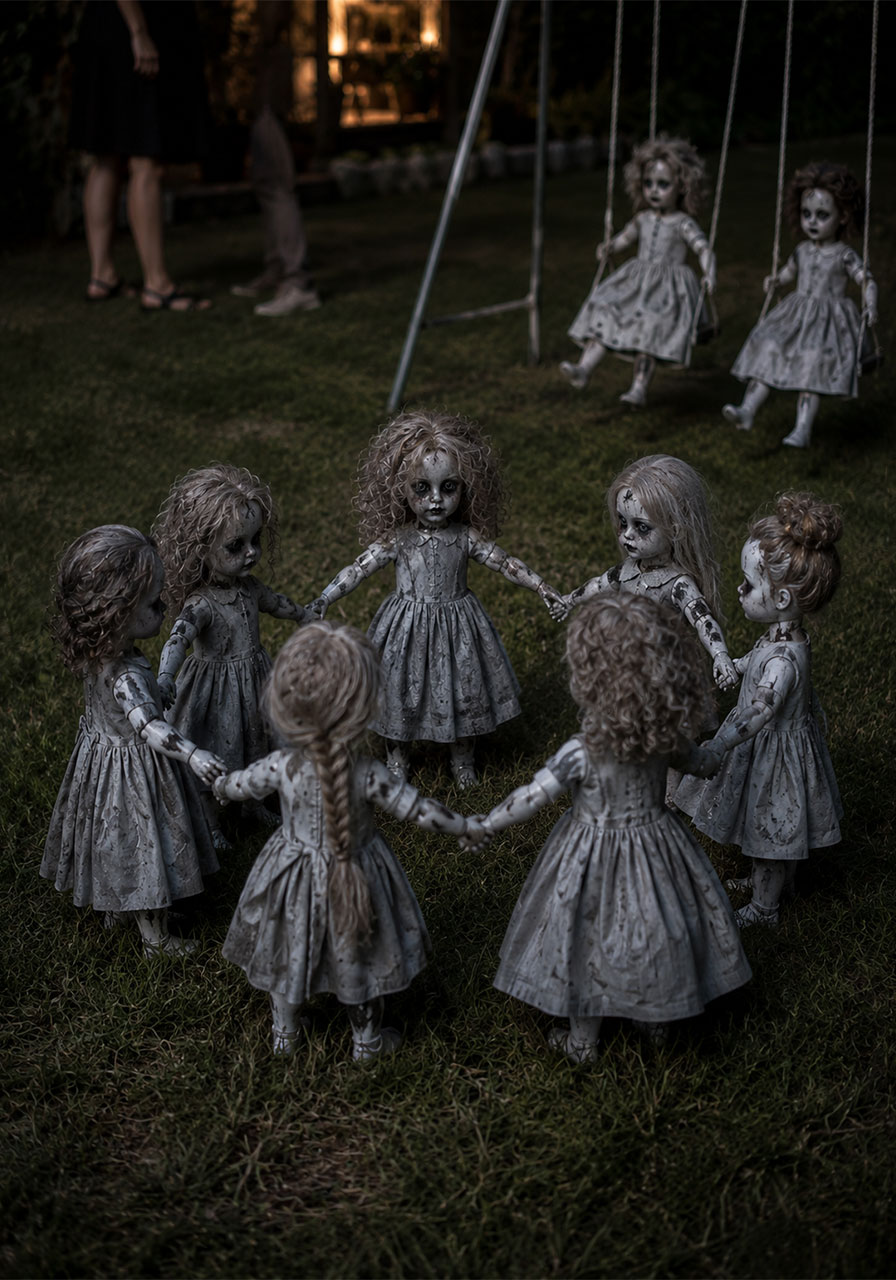
A group of dolls arranged as if mid-game, some on a swing, some holding hands in a circle, creates a scene that feels innocent at first and disturbing the longer you look at it.
Best for: Large yards, group displays
Prep Time: 45 minutes
Difficulty: Medium
What You’ll Need:
- 6-8 dolls
- A small swing (optional)
- Twine (to link hands)
- Pale or grey paint
How to Make It:
1. Pale out each doll’s skin tone slightly for a uniform, ghostly look.
2. Link several dolls hand to hand using small loops of twine.
3. Arrange them in a rough circle on the lawn, as if frozen mid-game.
4. Add one or two swinging separately nearby for extra motion.
Pro Tip: Slightly different heights and poses across the dolls make the “frozen in motion” effect much more convincing than a perfectly still, uniform group.
27. Playful Pumpkin-Shaped Dolls
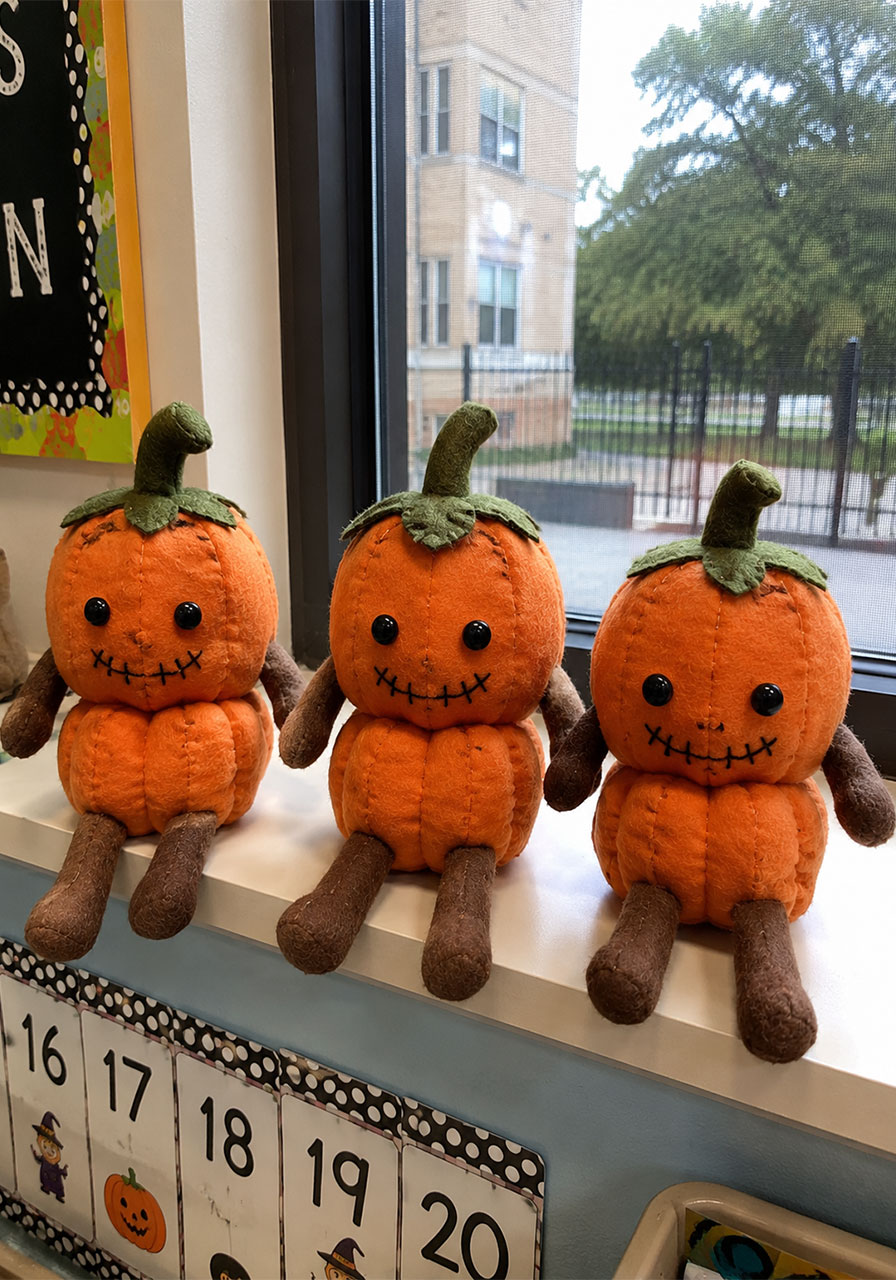
Not every doll on this list has to be terrifying. Pumpkin-shaped dolls add a lighter, more playful note to your Halloween decor, which is perfect if you’re also decorating spaces where younger kids will be spending time.
Best for: Kids’ rooms, classroom displays, playful corners
Prep Time: 15 minutes
Difficulty: Easy
What You’ll Need:
- Pumpkin-shaped dolls (store-bought or DIY felt/fabric versions)
- Orange and green fabric or felt (if making your own)
- Needle and thread or hot glue
How to Make It:
1. If making your own, cut a simple round pumpkin body shape from orange felt.
2. Sew or glue on small arms, legs, and a face.
3. Add a green felt stem on top.
4. Display on shelves, desks, or classroom windowsills.
Pro Tip: This is a great project to make together with kids, since there’s no gore or sharp tools involved, just fabric, glue, and imagination.
A Few More Ideas Worth Trying This Year
Once you’ve worked through the classics above, here are five fresh ideas worth adding to your list, all still doll-based, all still easy to pull off at home.
28. Doll Face Mason Jar Lanterns
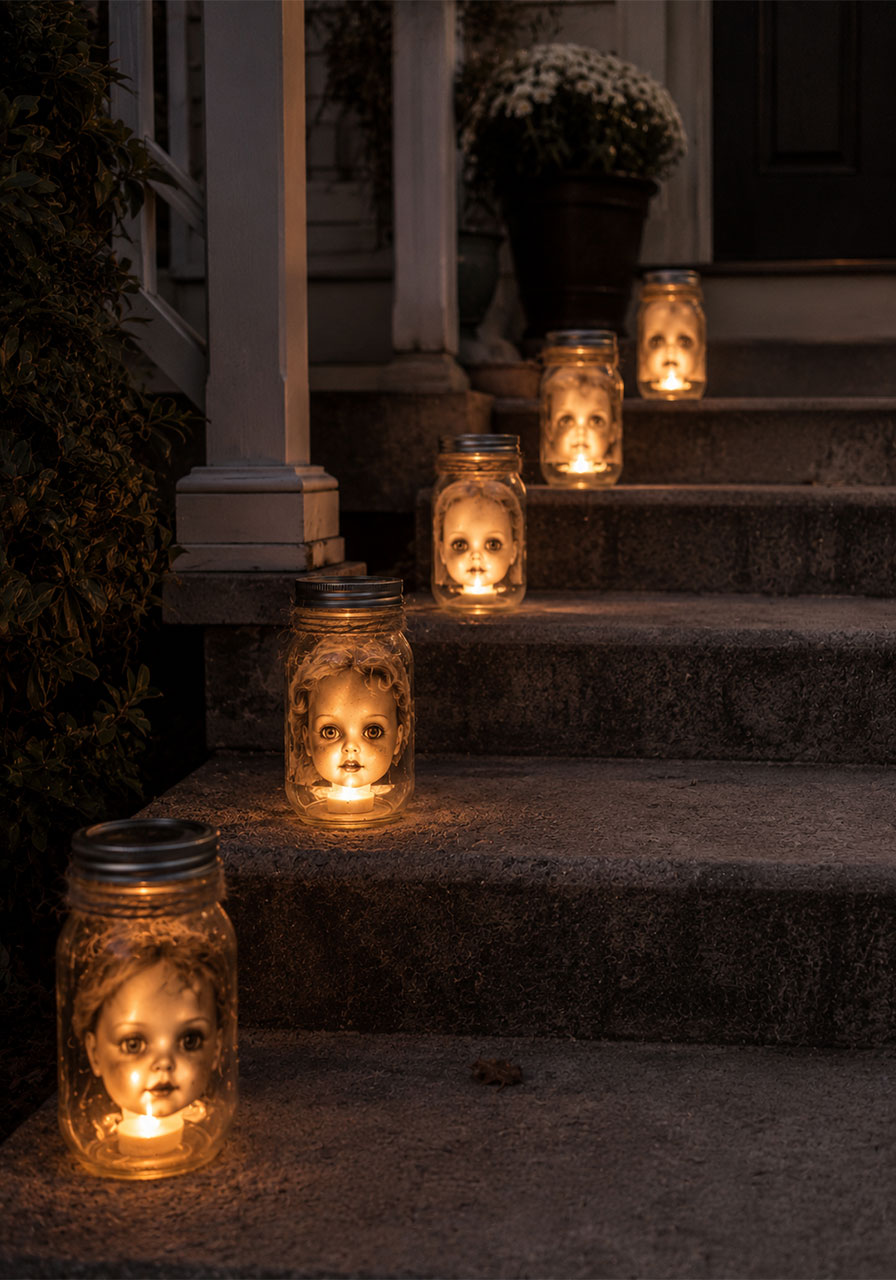
Turn ordinary mason jars into flickering doll-face lanterns for a warm, eerie glow along a walkway or porch railing.
Best for: Walkways, porch railings
Prep Time: 30 minutes
Difficulty: Easy
What You’ll Need:
- Mason jars
- Small doll faces or printed doll face cutouts
- Mod Podge or glue
- Battery tea lights
How to Make It:
1. Cut out doll face images and glue them to the inside or outside of each jar.
2. Seal with a thin layer of Mod Podge if the faces are on the outside.
3. Drop a battery tea light into each jar.
4. Line them along your walkway or porch steps for a soft, unsettling glow after dark.
Pro Tip: This is a wonderful one to make with kids since there’s no sharp tools involved, just cutting, gluing, and battery-powered lights.
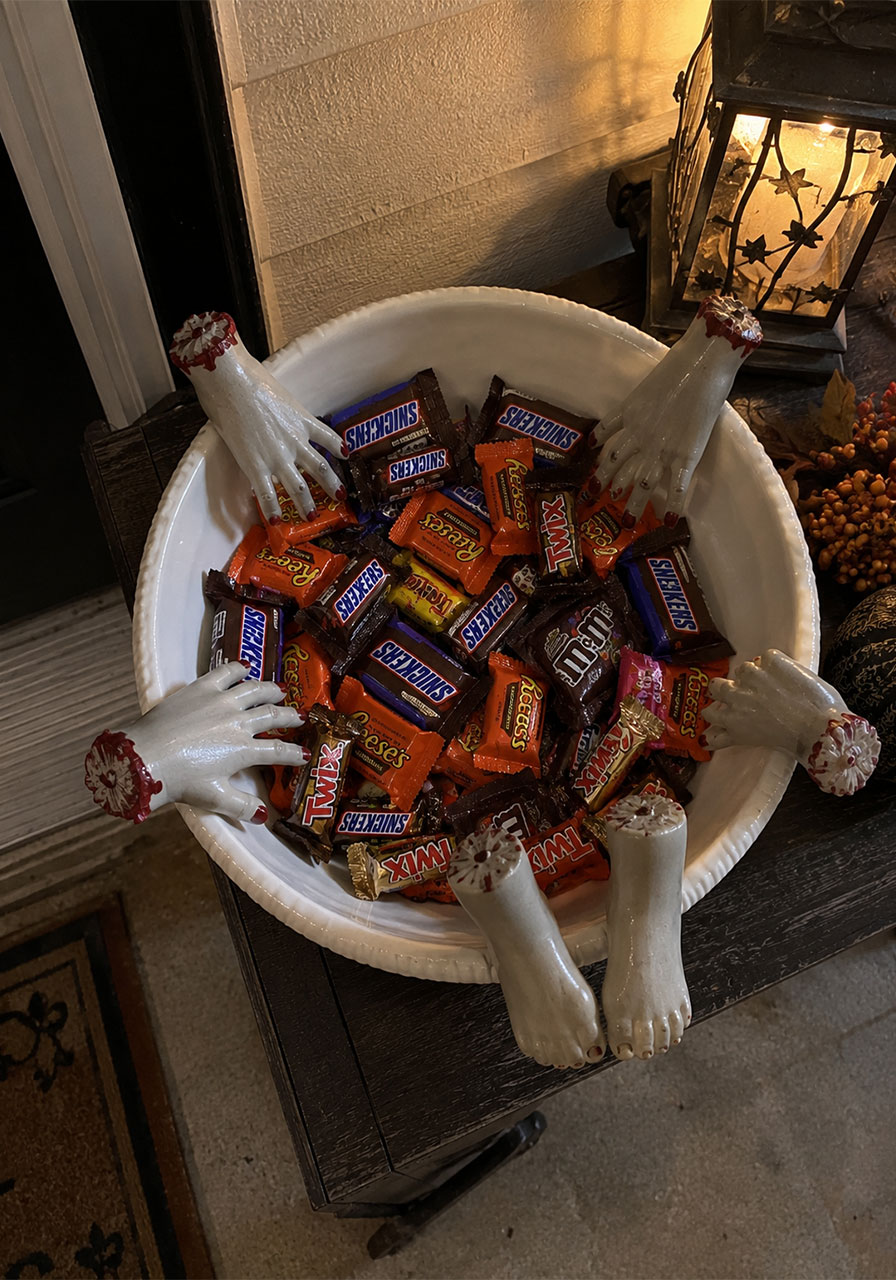
29. Doll Parts Candy Bowl
Instead of a plain candy bowl at the door, surround it with doll hands and feet reaching toward the treats. Trick-or-treaters will have to reach past them to grab their candy.
Best for: Front door candy stations
Prep Time: 20 minutes
Difficulty: Easy
What You’ll Need:
- A large bowl
- 4-6 doll hands and feet (separated from old dolls)
- Grey and red paint
How to Make It:
1. Paint the doll hands and feet a pale, greyish tone with red detailing at the joints.
2. Arrange them around the rim of the candy bowl, as if reaching in.
3. Fill the bowl with candy and set it out for trick-or-treaters.
Pro Tip: This one gets a laugh as often as it gets a scream, which makes it a great pick if you want your display to feel fun rather than purely frightening.
30. Doll Head String Lights
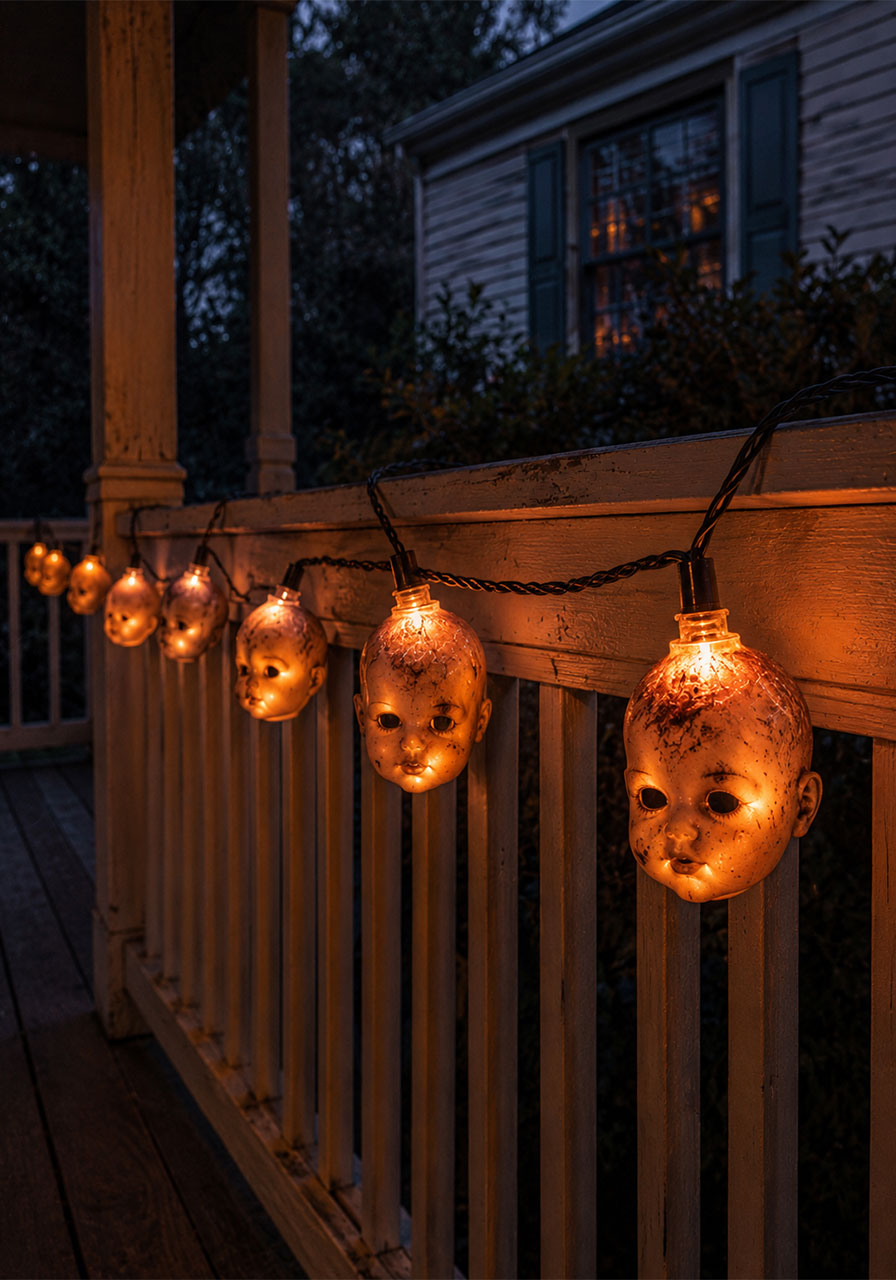
Replace plain string lights with small doll heads threaded along the wire for a glowing, unsettling light display along a porch or fence line.
Best for: Porches, fence lines
Prep Time: 40 minutes
Difficulty: Medium
What You’ll Need:
- A string of outdoor Halloween lights
- 6-8 small doll heads
- Craft knife or drill (adult use only)
How to Make It:
1. Carefully create a small hole in the back of each doll head, just large enough to fit around a light bulb.
2. Slide each doll head over an individual light along the string.
3. Hang the finished string along your porch or fence line.
Pro Tip: Warm white or orange lights make the doll faces glow from within, which looks far creepier than standard colored bulbs.
31. Doll Face Pumpkin Stencils
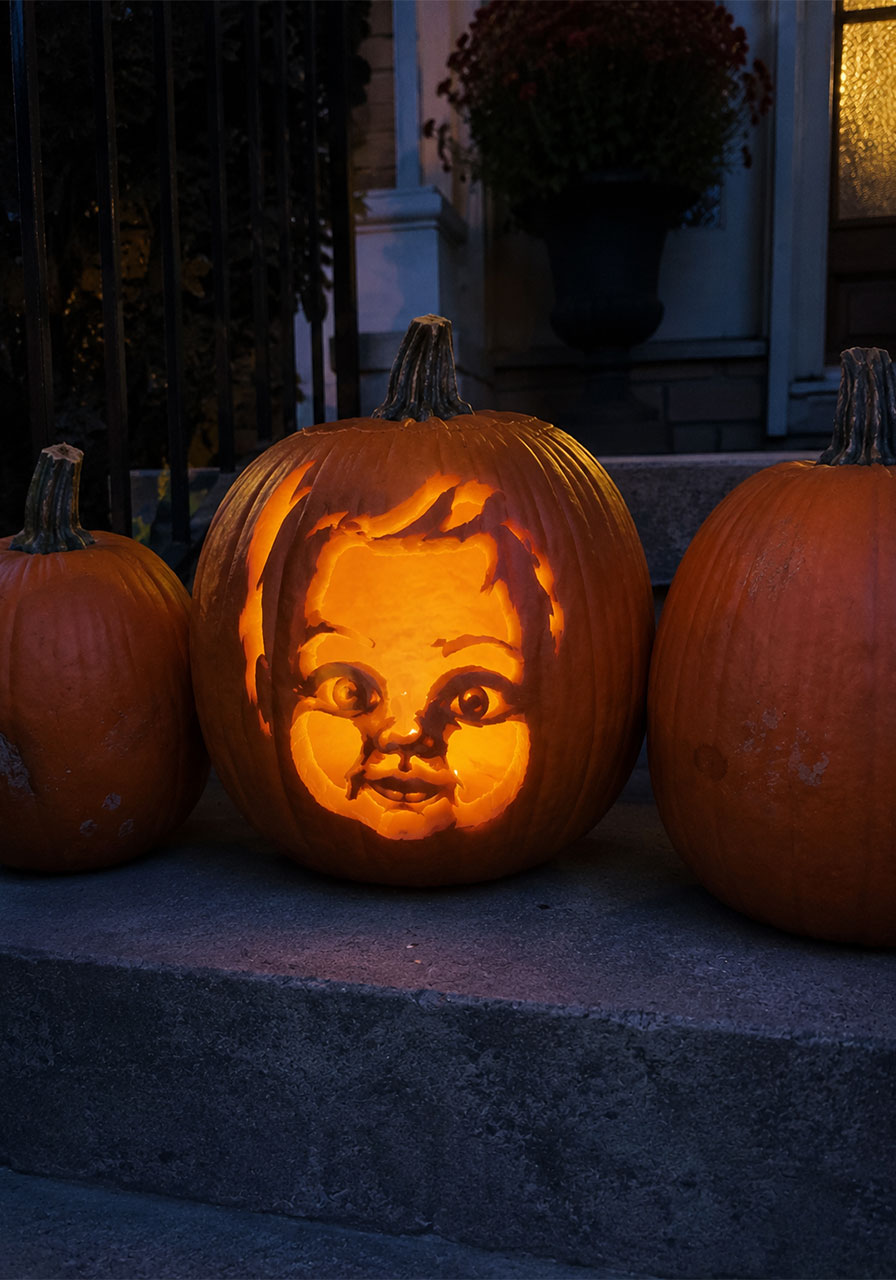
Skip the usual jack-o’-lantern face and carve a doll’s face into your pumpkin instead. It’s a simple twist on a classic that fits perfectly with a doll-themed display.
Best for: Front porches, alongside other pumpkins
Prep Time: 30 minutes
Difficulty: Easy
What You’ll Need:
- 1 pumpkin
- Pumpkin carving tools
- A printed doll face template (or freehand a simple design)
How to Make It:
1. Tape your doll face template onto the pumpkin, or sketch one freehand.
2. Carve along the outline using standard pumpkin carving tools.
3. Place a battery light inside for evening glow.
Pro Tip: Keep the eyes slightly asymmetrical when carving. It reads as far more unsettling than a perfectly even doll face.
32. Doll Silhouette Window Display
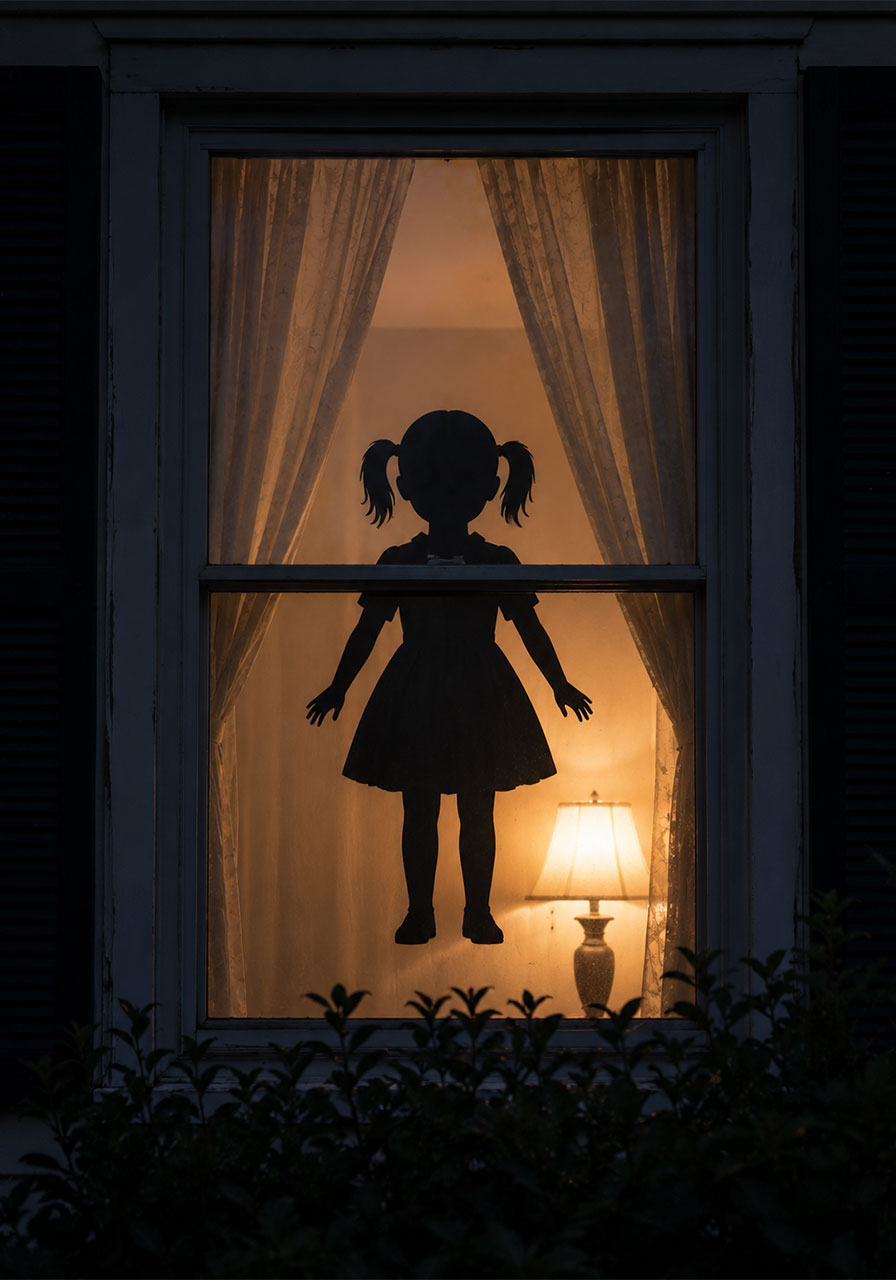
Create eerie doll silhouettes in your windows using nothing more than black paper and backlighting, visible from the street after dark.
Best for: Front-facing windows
Prep Time: 25 minutes
Difficulty: Easy
What You’ll Need:
- Black craft paper or cardstock
- Scissors or a craft knife
- Tape
- A lamp or light source behind the window
How to Make It:
1. Sketch or print a simple doll silhouette outline.
2. Cut the shape out of black paper.
3. Tape the silhouette to the inside of your window.
4. Place a lamp behind it so the silhouette is visible from outside after dark.
Pro Tip: This is one of the easiest projects on the list, and it’s a great one to involve classroom students in if you’re decorating for a school event.
With this many doll-based ideas to choose from, you’ve got everything you need to turn your porch, yard, or classroom into the most talked-about Halloween display around. Pick a few that fit your space and your comfort level with gore, and get creating. Because the best Halloween decorations are the ones people are still talking about the next morning.
