
Halloween sneaking up on you? You’re not alone. Between lesson plans, permission slips, and everyday parent life, “spooky porch decor” can slide way down the to-do list until suddenly it’s the afternoon of the 31st.
Good news: you don’t need a weekend, a big budget, or a trip to five different stores to make your entryway trick-or-treater-ready. These last-minute DIYs use simple supplies you can grab at a dollar store or craft store, and most come together in under an hour.
Even better news for the teachers and homeschool parents in the room: several of these projects double as sneaky, screen-free STEM lessons. You’ll see a “STEM Connection” note on the ideas where kids can learn a little chemistry, physics, or engineering while they help decorate. Nothing like disguising a science lesson as “let’s make the porch creepy.”
Let’s get your porch ready for the little ghosts and goblins.
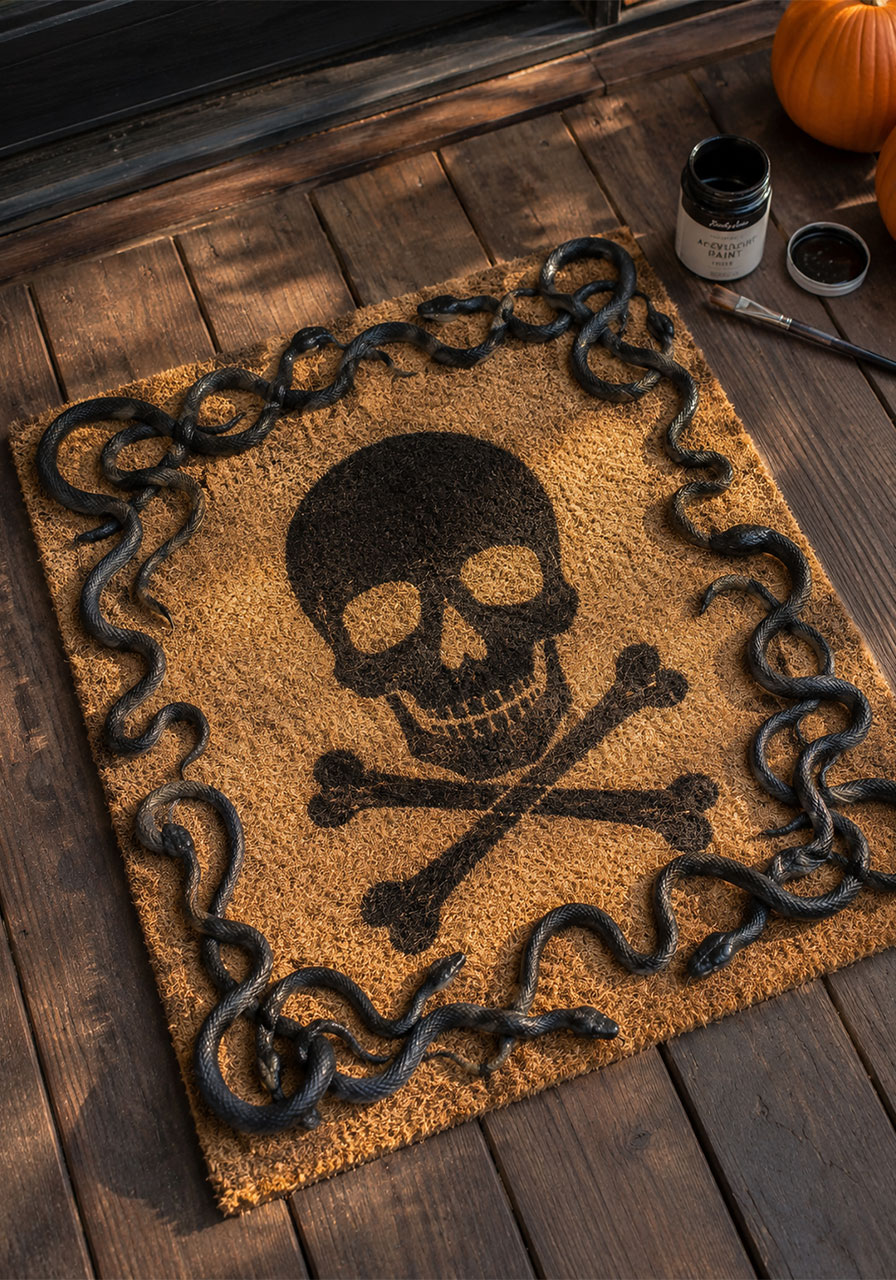
1. Skull and Snakes Doormat
This is the idea that makes guests pause before they even ring the doorbell. A plain doormat gets transformed with a bold painted skull design and a border of rubber snakes slithering around the edges. It looks like it came from a Halloween boutique, but it’s a stencil-and-paint job anyone can do.
Best for: Entryways, front porches, first impressions.
Prep time: 30-40 minutes, plus drying time.
Skill level: Easy.
What you’ll need:
- A plain natural fiber doormat
- A stencil (printable, vinyl-cut, or hand-cut from contact paper/vellum)
- Black acrylic paint
- A paintbrush or sponge
- A few rubber snakes
- Hot glue gun and glue sticks
How to make it:
1. Print or design your skull-and-crossbones (or any spooky) image, then cut it out of contact paper or vellum using a sharp craft knife. If you have access to a print shop or a vinyl cutter, even easier.
2. Lay the stencil flat on the doormat in the position you want.
3. Dab acrylic paint over the stencil with a sponge or brush, working it into the mat’s fibers for full coverage.
4. Let the paint dry completely, then carefully peel off the stencil to reveal your design.
5. Flip the mat over and hot glue the rubber snakes around the border on the underside edge, so they curl over onto the top of the mat.
Pro Tip: Because the snakes are hot glued (not sewn or painted on), you can peel them off after Halloween and use the plain painted mat year-round.

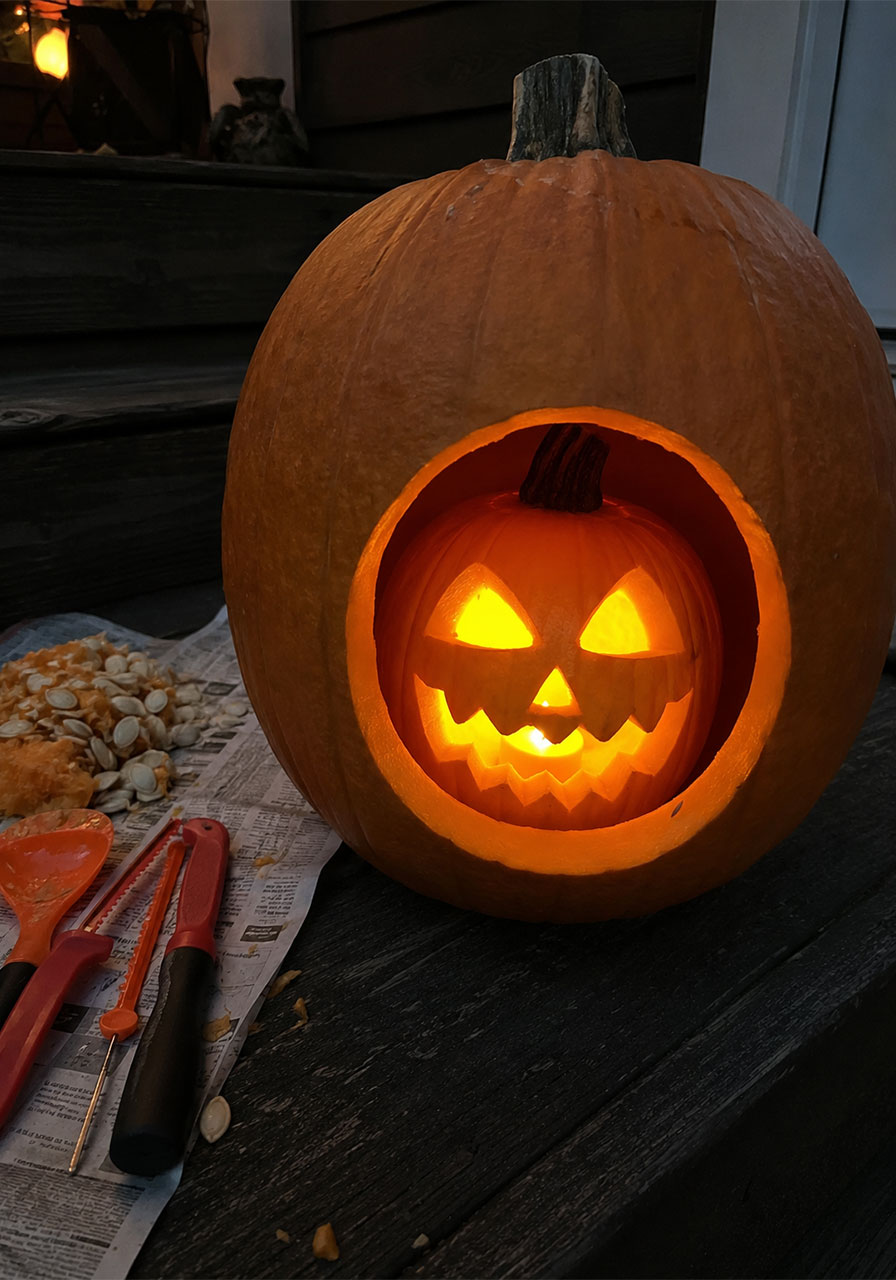
2. Skeleton-Inside-a-Pumpkin Carving
This is a fresh spin on the classic jack-o’-lantern: a pumpkin within a pumpkin. Instead of one carved face, you get a spooky “reveal” where a smaller skull-carved pumpkin peeks out from inside a larger one, like it’s being swallowed whole.
Best for: Pumpkin-carving parties, classroom carving stations, anyone bored of the same old jack-o’-lantern.
Prep time: 45-60 minutes.
Skill level: Intermediate (adult carving recommended).
What you’ll need:
- One large pumpkin
- One smaller pumpkin
- Pumpkin carving tools
How to make it:
1. Carve the smaller pumpkin first. A simple skull or skeleton face works best.
2. Cut an opening in the larger pumpkin sized to fit the smaller one snugly inside.
3. Finish carving your design into the outside of the larger pumpkin.
4. Nest the smaller carved pumpkin inside the larger one so the “skull” appears to be emerging.
Pro Tip: Add a small battery-operated candle inside the smaller pumpkin so the skull glows from within once it gets dark.
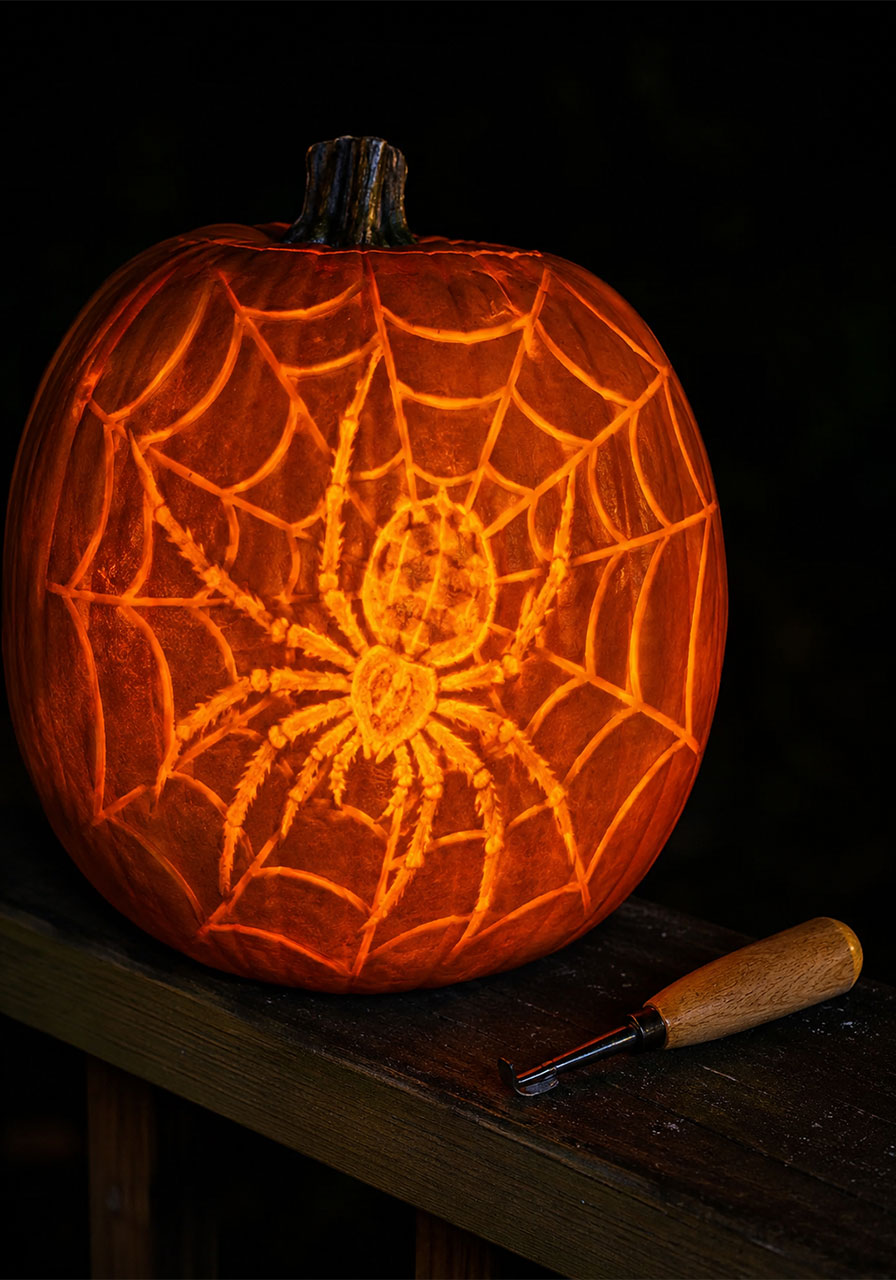
3. Glowing Carved Spider Pumpkin
This carving technique has been trending for good reason: instead of cutting all the way through the pumpkin, you shave away just the outer skin, leaving a thin layer that glows softly when lit from inside. The result is a detailed, almost lace-like spider design.
Best for: Anyone who wants a more detailed, artistic look than a standard jack-o’-lantern.
Prep time: 45-60 minutes.
Skill level: Intermediate.
What you’ll need:
- A pumpkin
- Carving tools
- A candle or LED light
How to make it:
1. Sketch or trace your spider design onto the pumpkin’s surface.
2. Instead of cutting all the way through, carefully shave away only the outer skin along your design lines, leaving the inner flesh intact so light can pass through it.
3. Once your design is complete, place a candle or LED light inside.
4. Light it up and watch the design glow like a lantern instead of showing as a solid cutout.
STEM Connection: This is a great, low-pressure way to talk with kids about how light travels through different thicknesses of material – thinner spots glow brighter, thicker spots stay dark. It’s basic physics, dressed up as pumpkin art.
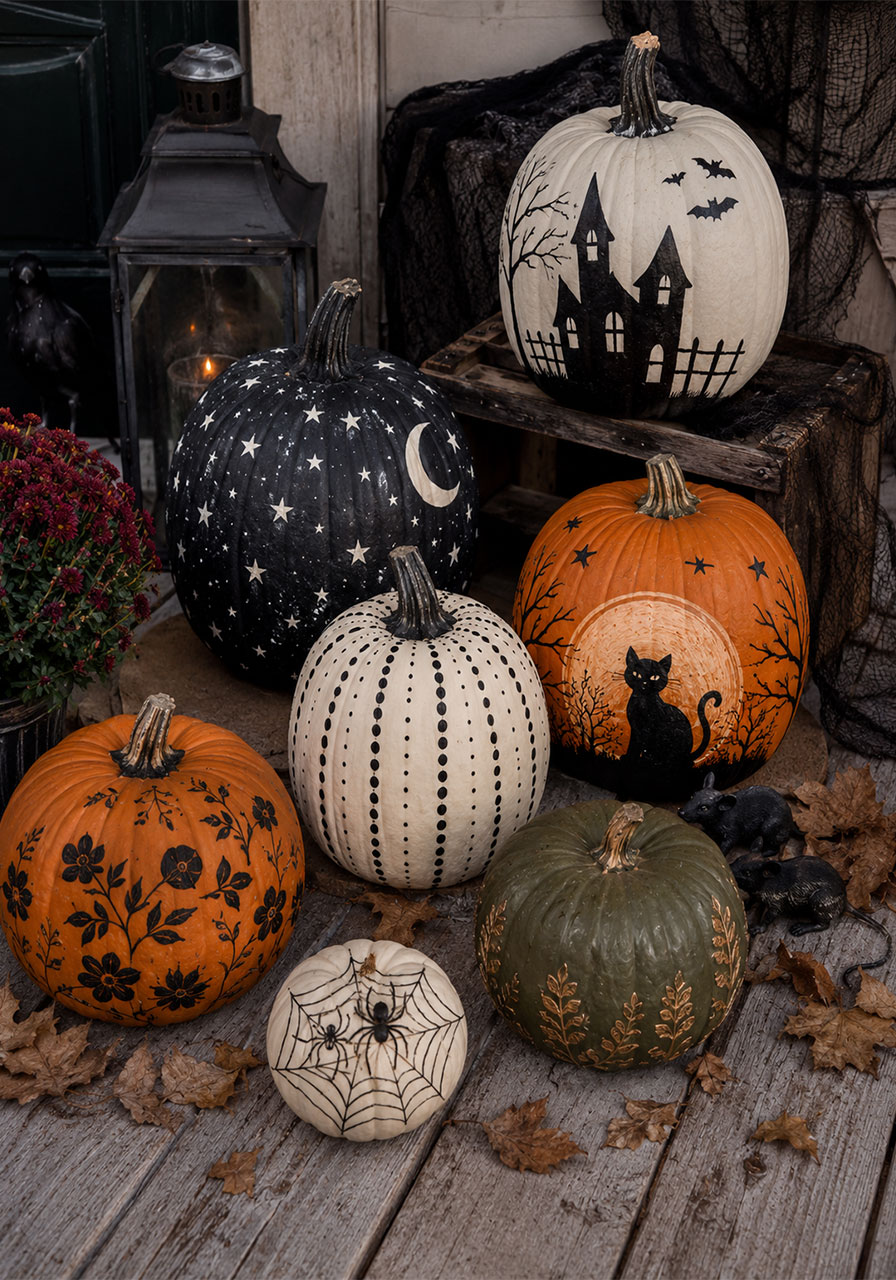
4. No-Carve Painted Spiderweb Pumpkin
Not everyone wants to deal with pumpkin guts, and that’s completely fair. This painted design skips the carving altogether but still delivers a striking, gallery-worthy spiderweb look.
Best for: Families with young kids, anyone short on time, no-mess decorating.
Prep time: 20-30 minutes, plus drying time.
Skill level: Easy – great for kids to help with.
What you’ll need:
- A pumpkin
- White and orange acrylic paint
- Painter’s tape
How to make it:
1. Paint the entire pumpkin white and let it dry fully.
2. Apply thin strips of painter’s tape in a spiderweb pattern over the white base.
3. Paint over the taped design with shades of orange, layering lighter and darker tones for depth.
4. Let the paint dry, then carefully peel away the tape to reveal the crisp white web underneath.
Pro Tip: Let kids help with the taping step – it’s a simple, mess-free way to include younger helpers in the project.
5. Zombie Hands Candy Bowl
If you’re leaving a candy bowl out for trick-or-treaters, this last-minute upgrade turns an ordinary bowl into something that will make kids do a double take before they reach in for their treat.
Best for: Self-serve candy stations, porches where you won’t be home all night.
Prep time: 15-20 minutes.
Skill level: Easy.

What you’ll need:
- A plastic bowl
- A few prop zombie/skeleton arms (often found at dollar stores)
- Hot glue gun and glue
How to make it:
1. Arrange the prop arms around the lip of the bowl first to check spacing and fit before gluing anything.
2. Apply hot glue to the base of one arm and attach it to the bottom of the bowl.
3. Repeat for each additional arm you’re using.
4. Curve the arms upward so they drape over the bowl’s rim, adding more glue as needed to hold the shape.
Pro Tip: Fill the bowl with candy before your final gluing pass so you can check that the arms don’t block easy access for little hands.
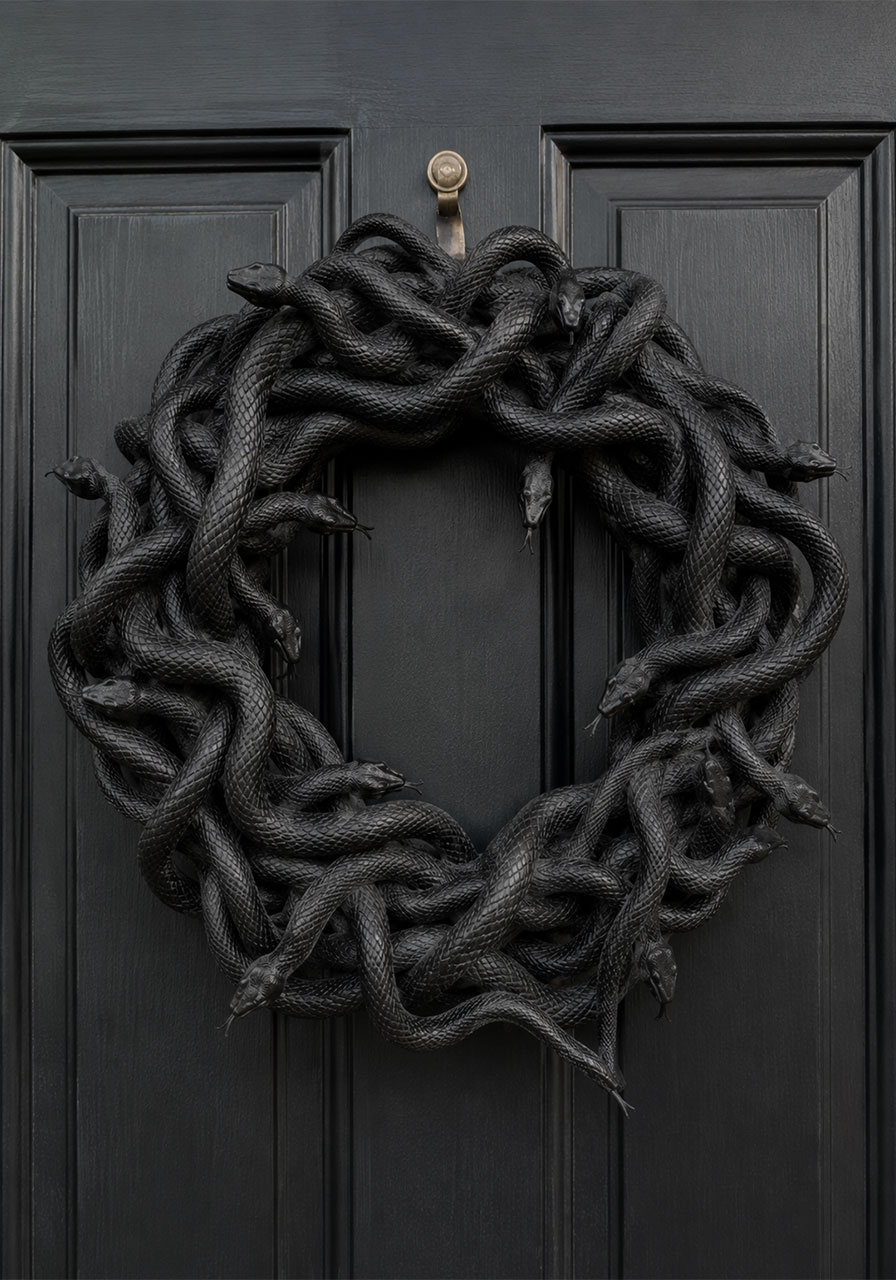
6. Snake-Covered Wreath
Swap the traditional autumn wreath for something with a little more bite. This design layers rubber snakes over a twig wreath, then unifies everything with a coat of black spray paint for a cohesive, almost sculptural look.
Best for: Front doors, statement decor pieces.
Prep time: 30-45 minutes, plus drying time.
Skill level: Easy.
What you’ll need:
- A twig wreath base
- Several rubber snakes
- Black spray paint
- Hot glue gun and glue
How to make it:
1. Hot glue the rubber snakes onto the wreath, crossing and overlapping them so they wrap around the entire ring.
2. Once the glue has set, spray paint the whole wreath – snakes included – in black.
3. Let it dry completely before hanging.
Pro Tip: Spray in light, even coats rather than one heavy coat. It dries faster and won’t pool in the crevices between the snakes.
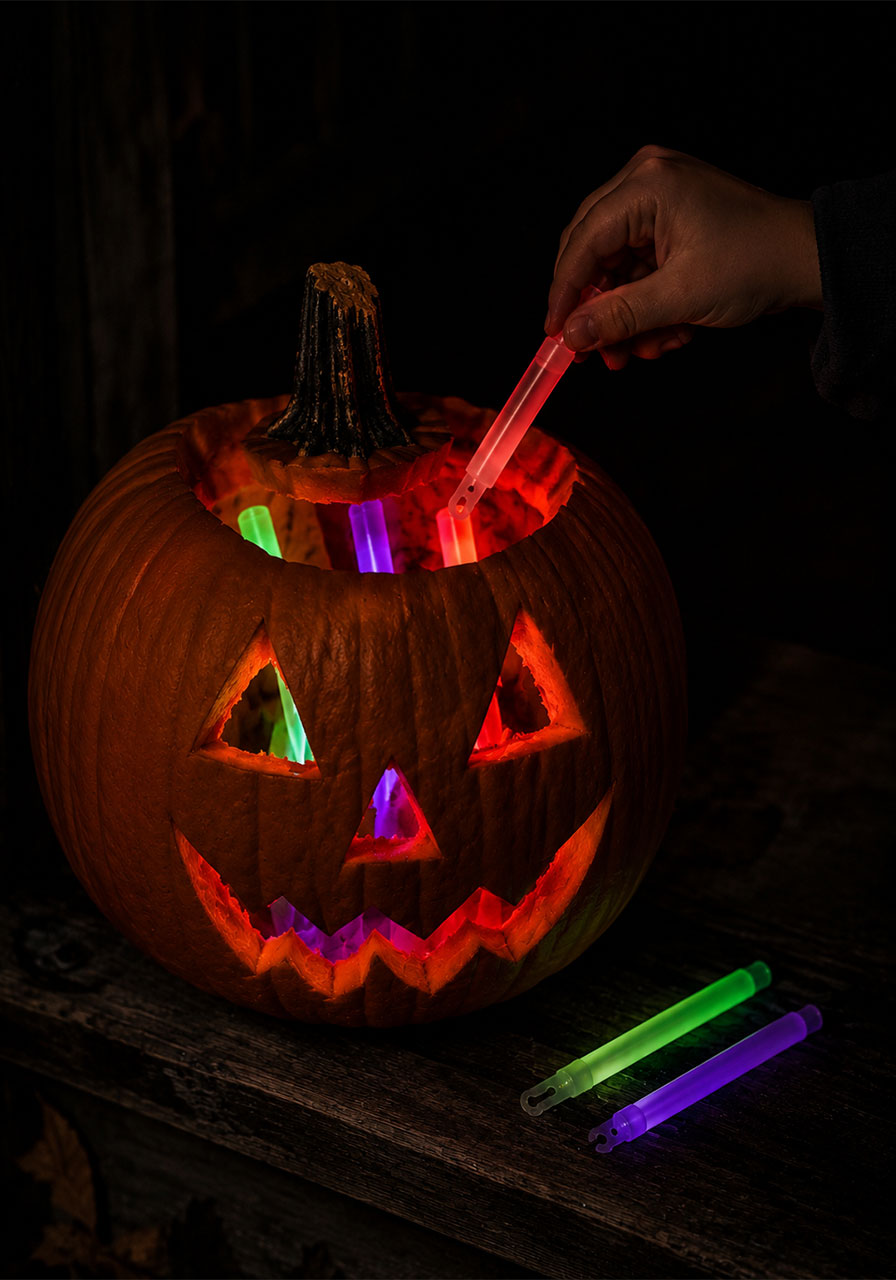
7. Glow-in-the-Dark Chemistry Pumpkins
Skip the candle and light your pumpkins with glow sticks instead – it’s a simple way to introduce the idea of chemiluminescence (light created by a chemical reaction, no heat or fire involved).
Best for: Households with young kids, classroom Halloween stations, fire-free lighting.
Prep time: 10-15 minutes.
Skill level: Easy.
What you’ll need:
- A carved or uncarved pumpkin
- Several glow sticks in assorted colors
How to make it:
1. Activate your glow sticks by bending and shaking them.
2. Drop them inside a carved pumpkin, or tape them around the inside rim of an uncarved one.
3. Let the glow shine through the pumpkin’s flesh or carved cutouts once it gets dark.
STEM Connection: Ask kids why the glow stick gets brighter when you shake it. The answer: shaking mixes two chemicals inside the tube faster, speeding up the reaction that produces light.
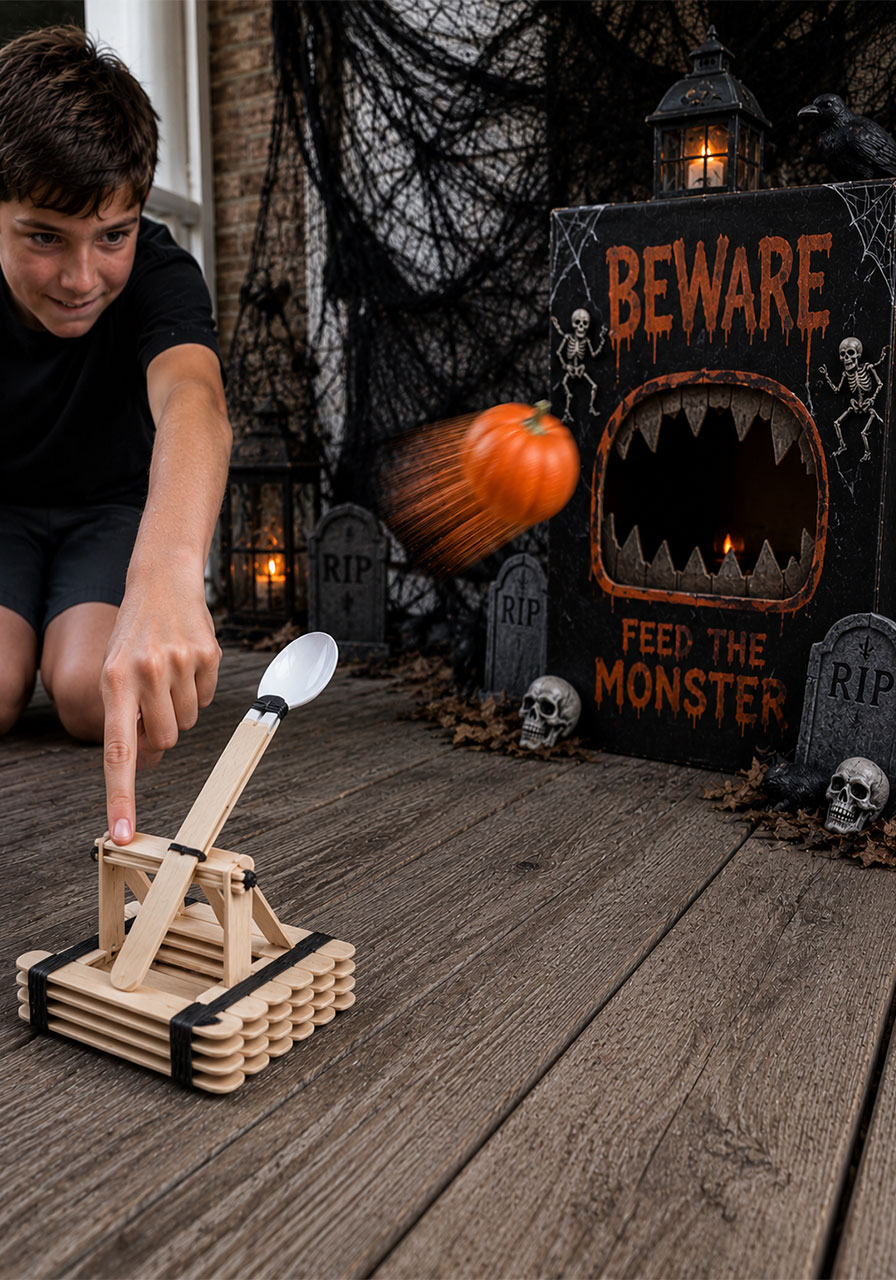
8. Balloon-Powered Pumpkin Catapult
This one is less “front porch decor” and more “front porch activity,” but it’s a hit with kids who want to actually build something for Halloween instead of just looking at it.
Best for: Backyard or porch STEM activity, classroom engineering unit, mini pumpkin “launches.”
Prep time: 20-30 minutes.
Skill level: Easy to intermediate.
What you’ll need:
- Popsicle sticks or wooden craft sticks
- Rubber bands
- A plastic spoon
- Mini pumpkins or pumpkin-shaped pom-poms as “ammo”
How to make it:
1. Stack several popsicle sticks together and secure both ends tightly with rubber bands to form the catapult’s base.
2. Wedge one additional stick between two of the stacked sticks near one end to create the launch arm.
3. Attach a plastic spoon to the top of the launch arm with a rubber band or hot glue.
4. Place a mini pumpkin in the spoon, press down, and release to launch.
STEM Connection: This is a hands-on intro to simple machines and stored energy. Talk through how pressing the arm down stores energy, and releasing it converts that stored energy into motion.
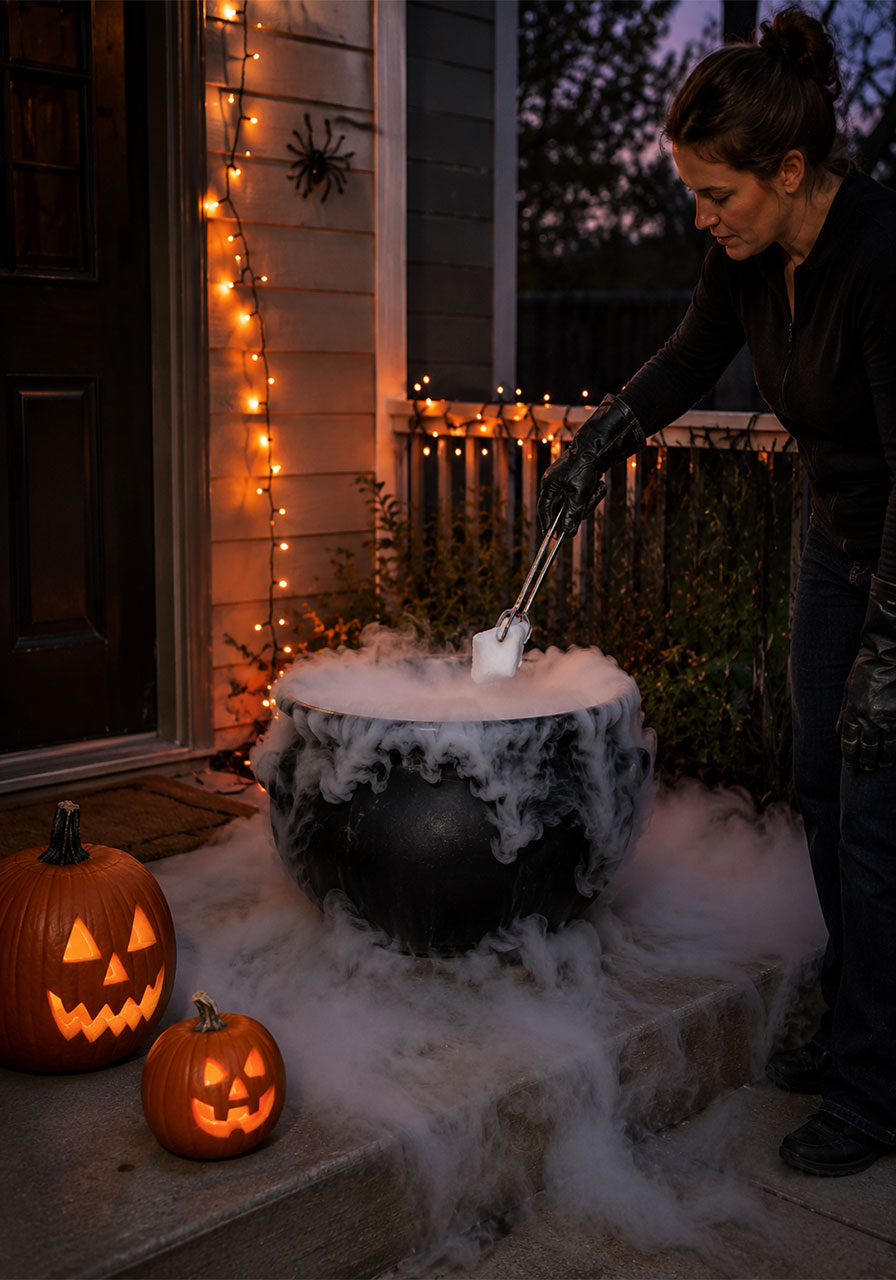
9. Bubbling Cauldron Fog Effect
For a genuinely spooky visual that also teaches a bit of chemistry, a dry ice “bubbling cauldron” is hard to beat. Thick fog rolling out of a cauldron or pot is one of those effects that makes trick-or-treaters stop in their tracks.
Best for: Porches with adult supervision, Halloween parties, dramatic entryway moments.
Prep time: 10 minutes to set up.
Skill level: Easy, but requires adult handling of dry ice.
What you’ll need:
- A plastic cauldron, pot, or wide bowl
- Dry ice (handle with gloves, never bare hands)
- Warm water
How to make it:
1. Fill your cauldron about halfway with warm water.
2. Using gloves or tongs, add a few chunks of dry ice to the water.
3. Watch as thick fog immediately begins rolling out and settling low around the cauldron.
4. Add more dry ice chunks as needed to keep the fog going throughout the evening.
STEM Connection: Dry ice is frozen carbon dioxide that skips the liquid stage entirely and turns straight into gas – a process called sublimation. The “fog” is actually water vapor condensing in the cold gas cloud. Always supervise kids closely and never let them touch dry ice directly, as it can cause skin burns.
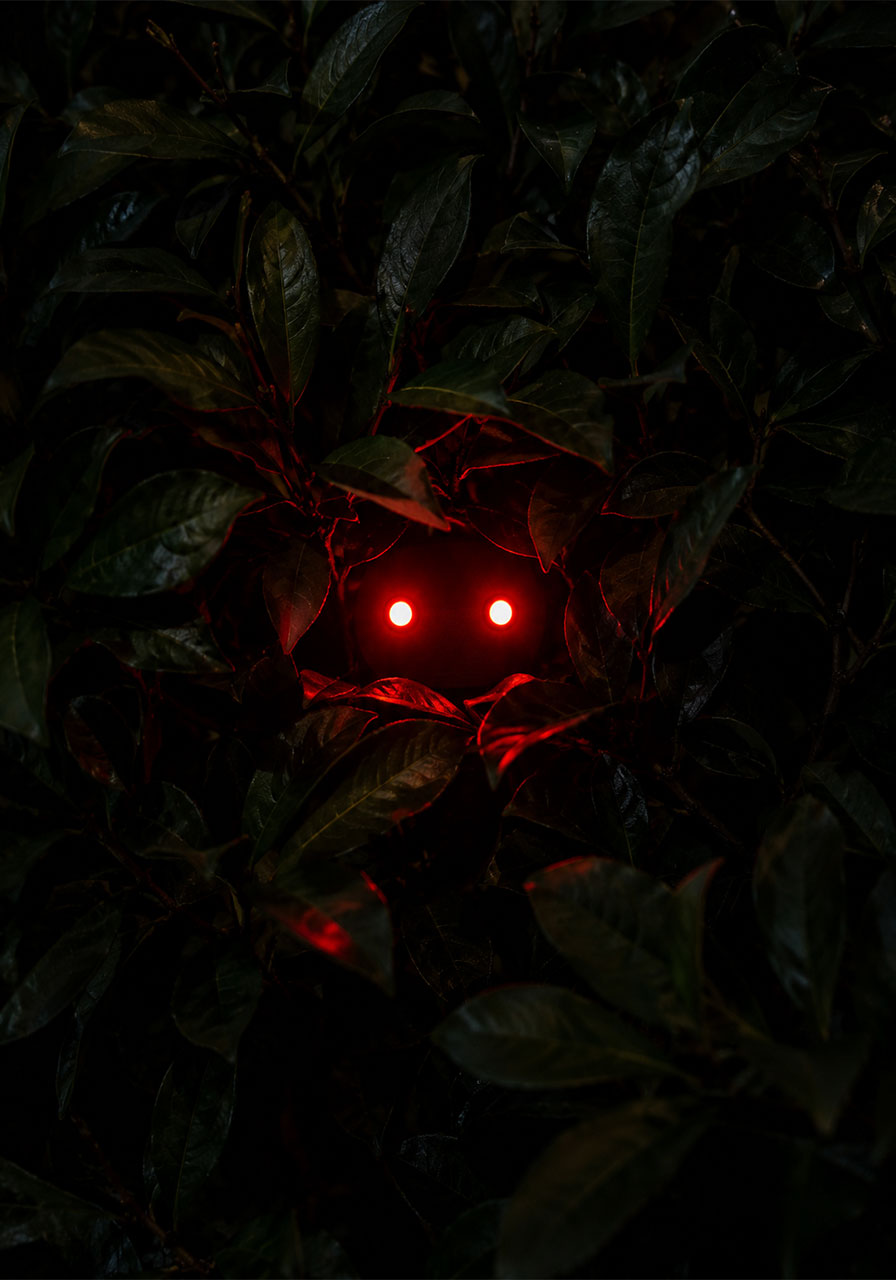
10. Simple Circuit Blinking Eyes
For families or classrooms wanting to go a step further into hands-on engineering, this project uses a basic circuit to make a pair of “eyes” blink from inside a bush, window, or dark porch corner.
Best for: STEM-focused families, upper elementary and middle school classrooms, older kids ready for a first circuit project.
Prep time: 20-30 minutes.
Skill level: Intermediate (best with an adult or older kid leading).
What you’ll need:
- Two small LED lights
- A coin cell battery
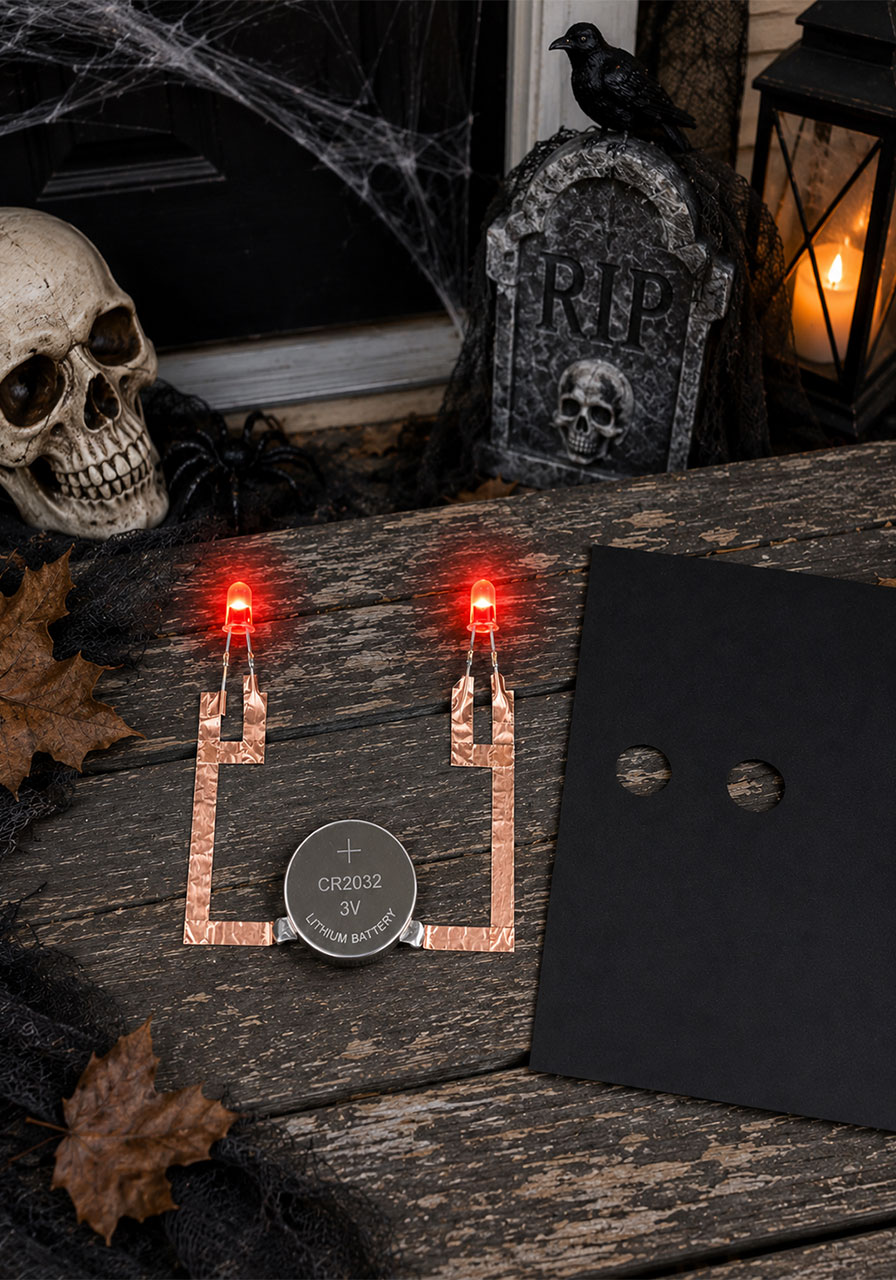
- Copper tape or wire
- Black cardstock or a black sock/glove to hide the wiring
How to make it:
1. Connect the positive and negative legs of each LED to the matching sides of the coin cell battery using copper tape, forming a simple closed loop circuit.
2. Test that both LEDs light up before hiding the wiring.
3. Tuck the circuit inside black cardstock, a dark sock, or a small enclosure with two small holes cut for the LEDs to peek through.
4. Place your glowing “eyes” in a bush, window, or dark corner of the porch after sunset.
STEM Connection: This is a genuinely great, low-cost introduction to how a basic circuit works: a power source, a path for electricity to flow, and a component (the LED) that uses that electricity to do something – in this case, glow.
11. Motion-Sensor Jump Scare Light
Give trick-or-treaters a fun little surprise with a motion-activated light that flickers on as they approach the porch, using an inexpensive motion sensor light kit.
Best for: Porches and front walkways, families who want a bigger “wow” moment without a full haunted house setup.
Prep time: 15-20 minutes.
Skill level: Easy.

What you’ll need:
- A battery-operated motion sensor light (widely available at hardware and craft stores)
- Zip ties or hooks for mounting
- Optional: red or orange gel lighting film for a spookier glow
How to make it:
1. Mount the motion sensor light near your front walkway or porch steps, following the product’s instructions.
2. Test the sensor’s range and sensitivity by walking toward it from a few different distances.
3. If desired, tape a piece of colored gel film over the light for an eerier orange or red glow.
4. Adjust the position so it triggers right as guests reach your porch steps.
STEM Connection: Motion sensor lights typically use infrared sensors to detect body heat and movement. It’s a simple, real-world example of how sensors “read” the environment and trigger an action – a foundational concept in basic robotics and engineering.
Ready to Spook Up Your Porch?
Whether you’ve got a full free afternoon or just thirty spare minutes before the doorbell starts ringing, there’s an idea here that fits. Pick two or three that match your time and supplies, and your porch will be ready to give trick-or-treaters (and maybe a curious student or two) something to remember.
Because the best Halloween porches are the ones that make people stop, look twice, and maybe learn something along the way.
#HalloweenDIY #FrontPorchDecor #STEMforKids #LastMinuteHalloween #SpookySeason
