
If you’ve ever needed a science activity that looks like pure magic but only takes five household items to build, stop scrolling. This DIY floating octopus in a bottle is about to become the most-requested activity in your classroom or your living room.
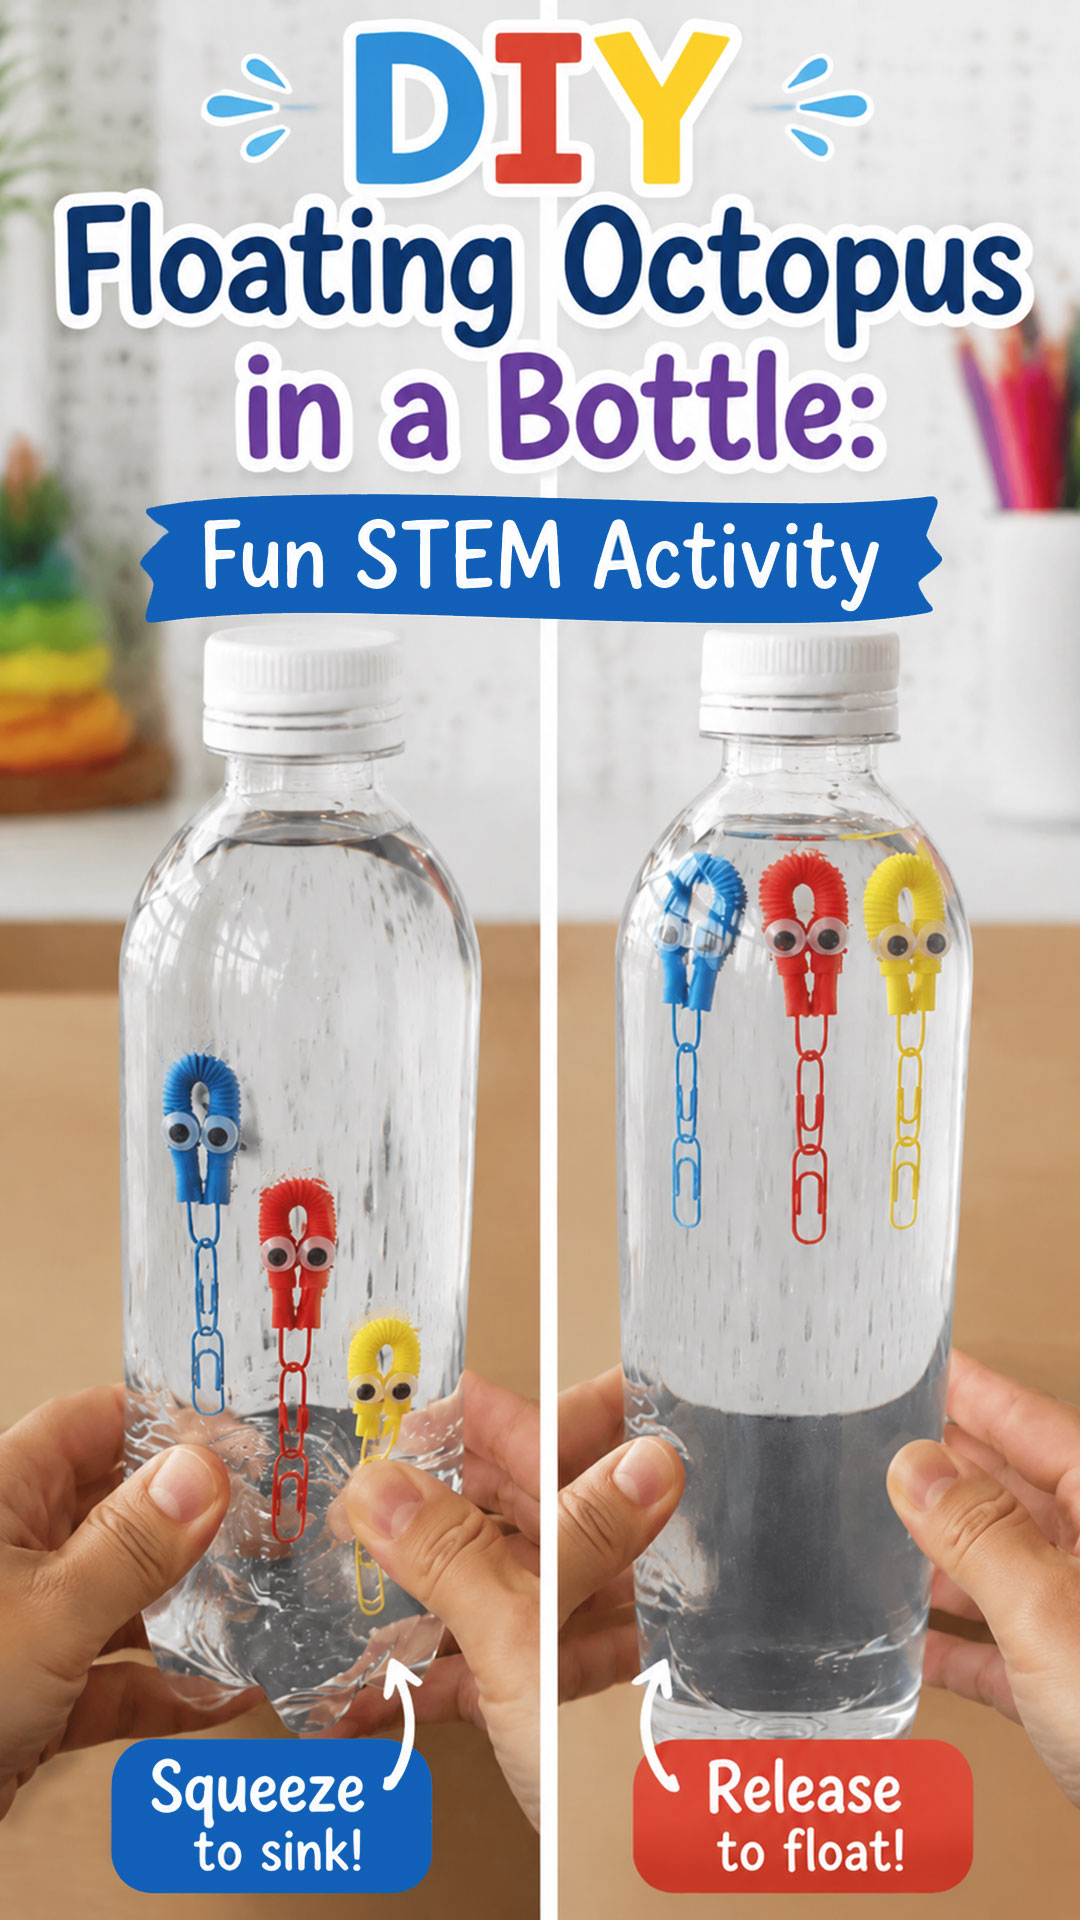
Squeeze the bottle, and the little octopus sinks straight to the bottom. Let go, and it floats right back up like it’s swimming on its own. No batteries. No apps. Just real science happening right in front of tiny, amazed faces.
We tested this one with paperclips, straws, and googly eyes (all things you probably already have in a junk drawer), and it worked every single time. That’s what we love most about this project: it’s foolproof, it’s fast, and it teaches real physics without ever feeling like a lecture.
Whether you’re a teacher filling out a STEM lesson plan or a parent trying to survive a rainy afternoon, this activity checks every box. Let’s build one.
Why This Activity Is a Teacher and Parent Favorite
This project is technically called a Cartesian diver, named after the philosopher René Descartes. But you don’t need to say that word once for kids to be completely hooked.
What makes it such a strong STEM activity is that the “trick” isn’t a trick at all. It’s a hands-on demonstration of buoyancy and density, two concepts that are notoriously hard to explain with just a textbook.
Kids get to test a hypothesis, watch a real reaction happen instantly, and then explain why it happened in their own words. That’s the entire scientific method, wrapped up in a five-minute activity.
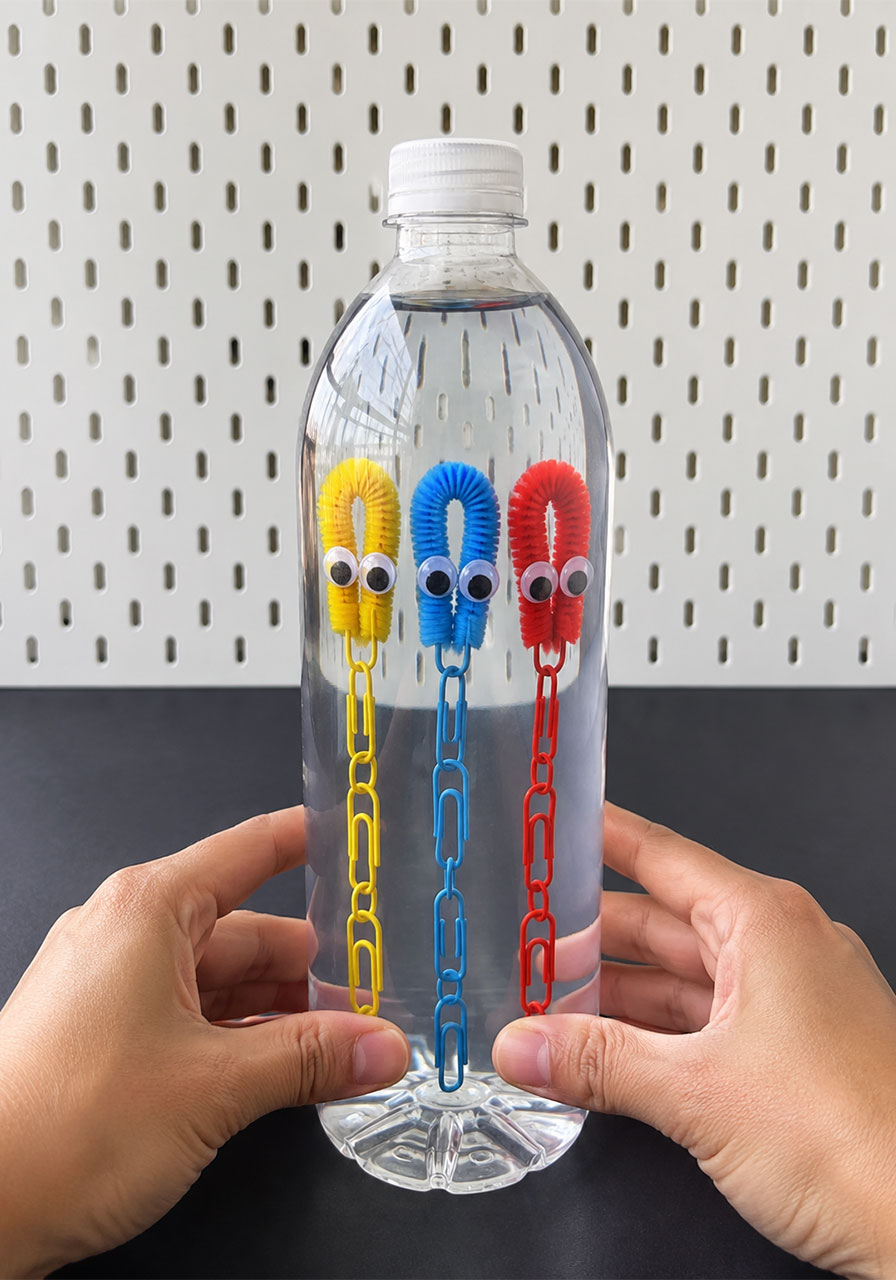
And because the octopus divers are so cute, you can turn this into a whole family of ocean creatures. Yellow, blue, and red divers all bobbing together in one bottle make the science feel like play, which is exactly the goal.

What You’ll Need
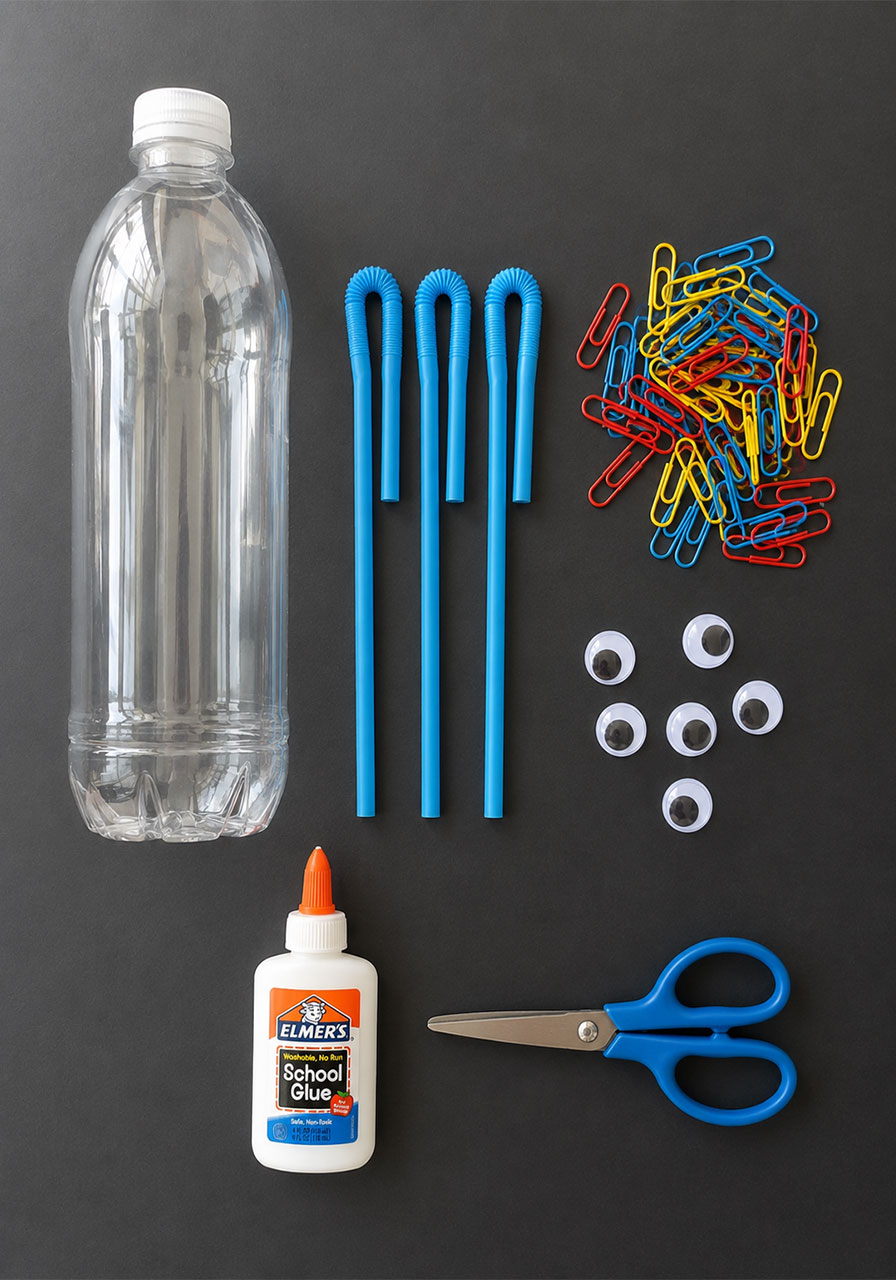
Bendy straws (the flexible, ridged kind, not straight straws)
Small paperclips, about 9 to 10 per octopus
Googly eyes (two per octopus)
Craft glue or a hot glue gun
Scissors
An empty clear plastic water bottle with a tight-sealing cap
Water
Optional swap: instead of paperclips, you can use tiny water balloons filled with a small amount of water. We’ll explain why that variation works even better a little further down.
How to Make Your Floating Octopus Diver
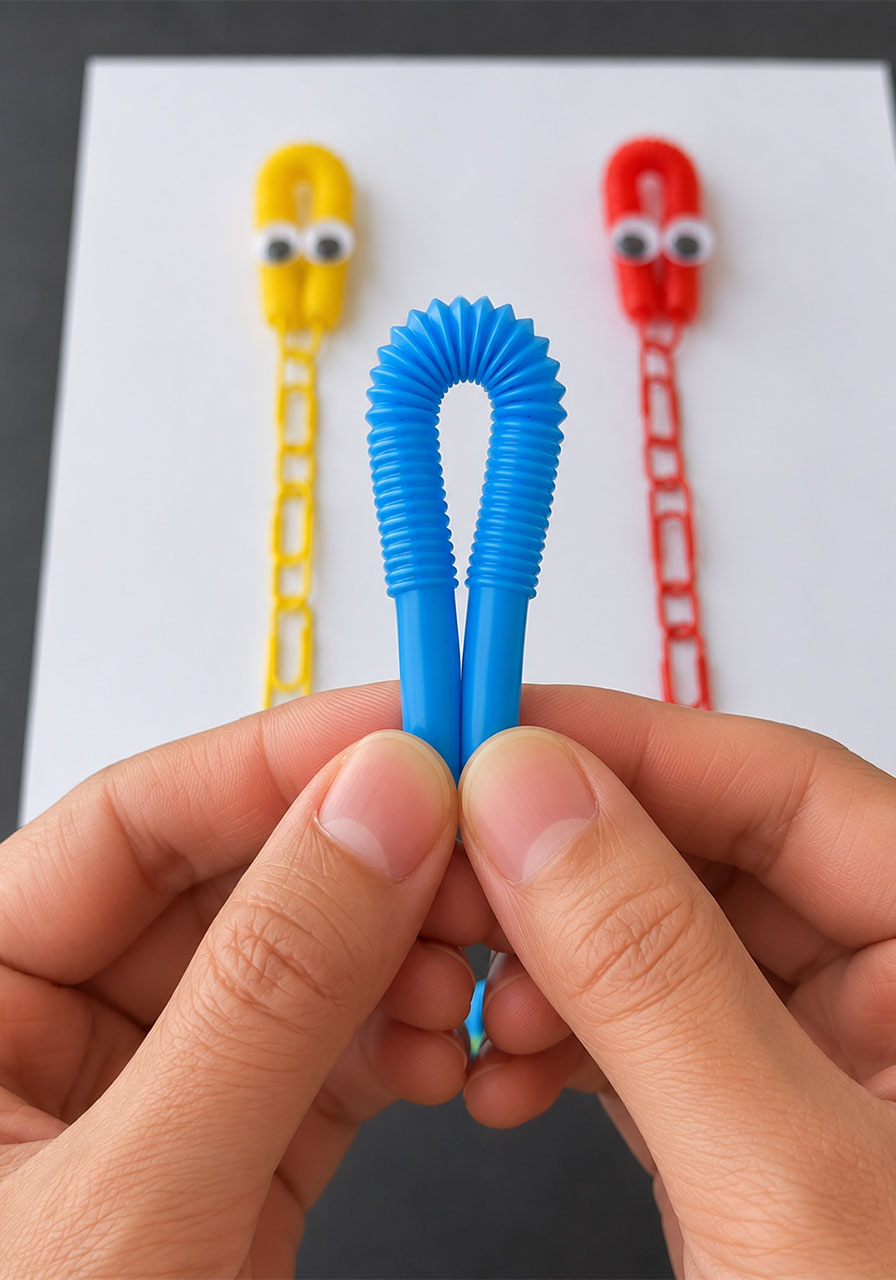
Step 1: Cut your bendy straw just below the ridged, accordion-style bend, so you’re left with the bendy section and about two inches of straw on either side.
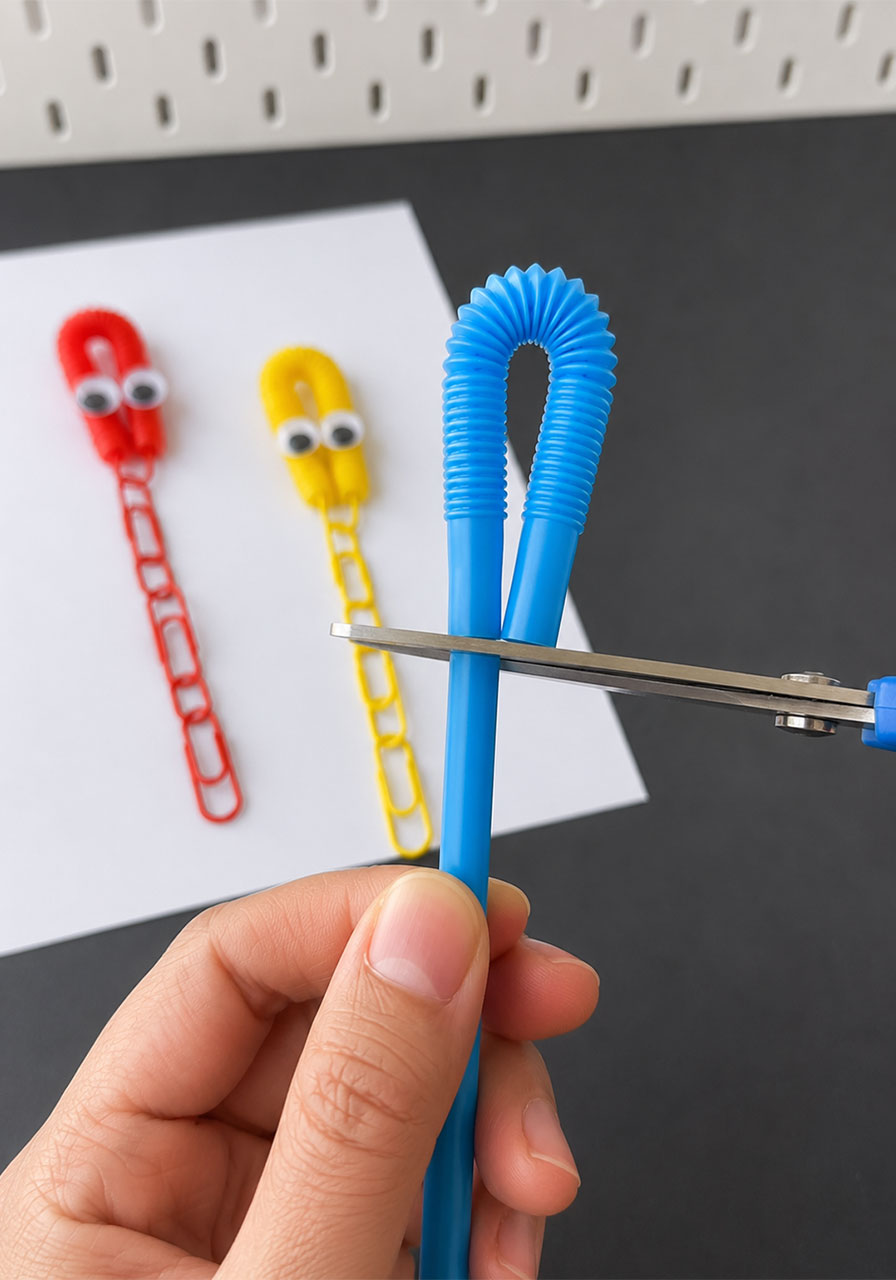
Step 2: Fold the two straw legs together so the ridged bend forms a rounded loop at the top. This loop is your octopus’s head, and the two straw legs hanging down are its tentacles.
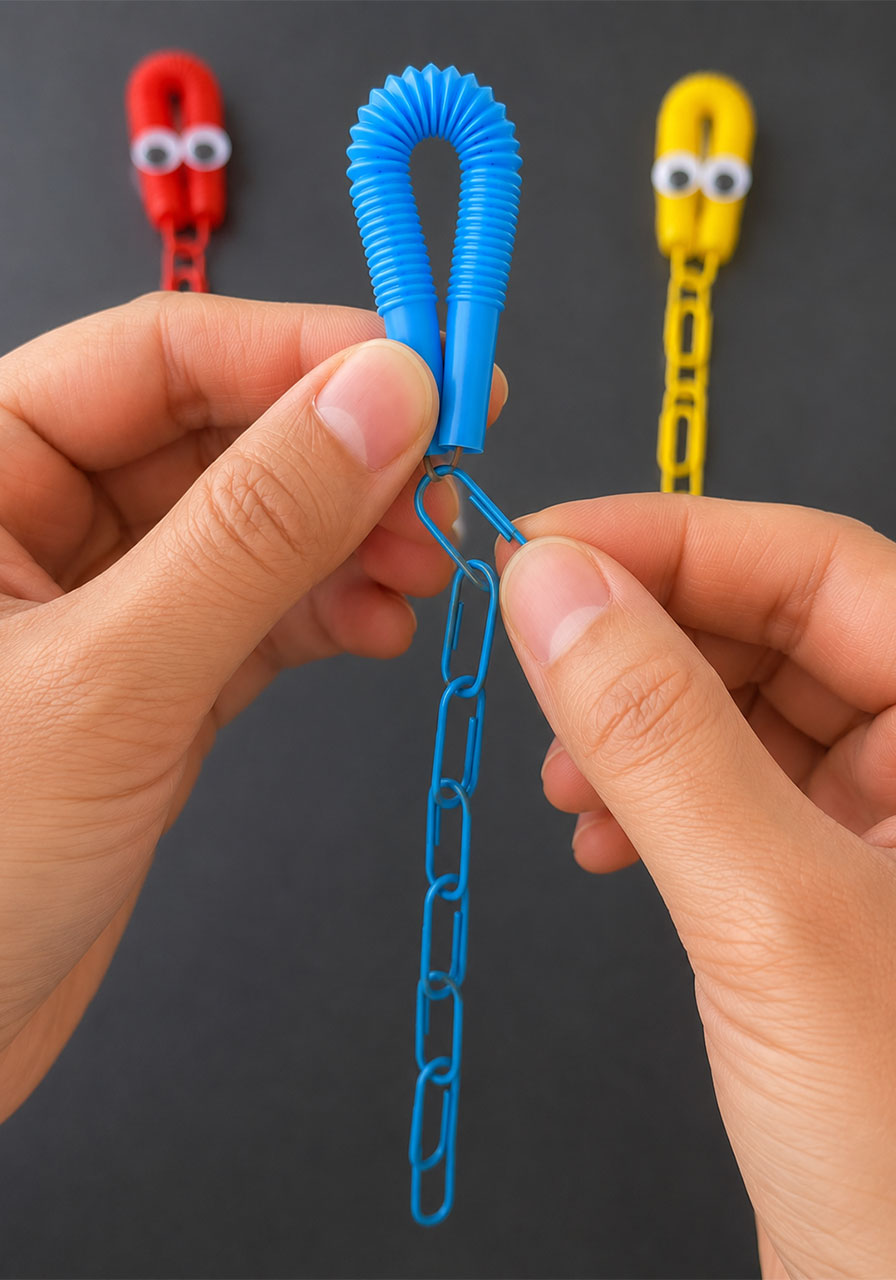
Step 3: Take one paperclip and hook it through the very bottom of the folded straw, right where the two legs meet. This is the anchor clip.
Step 4: Link about 8 to 9 more paperclips together into a chain, then attach that chain to the anchor clip. This chain is what controls how your octopus floats and sinks, so don’t skip it.
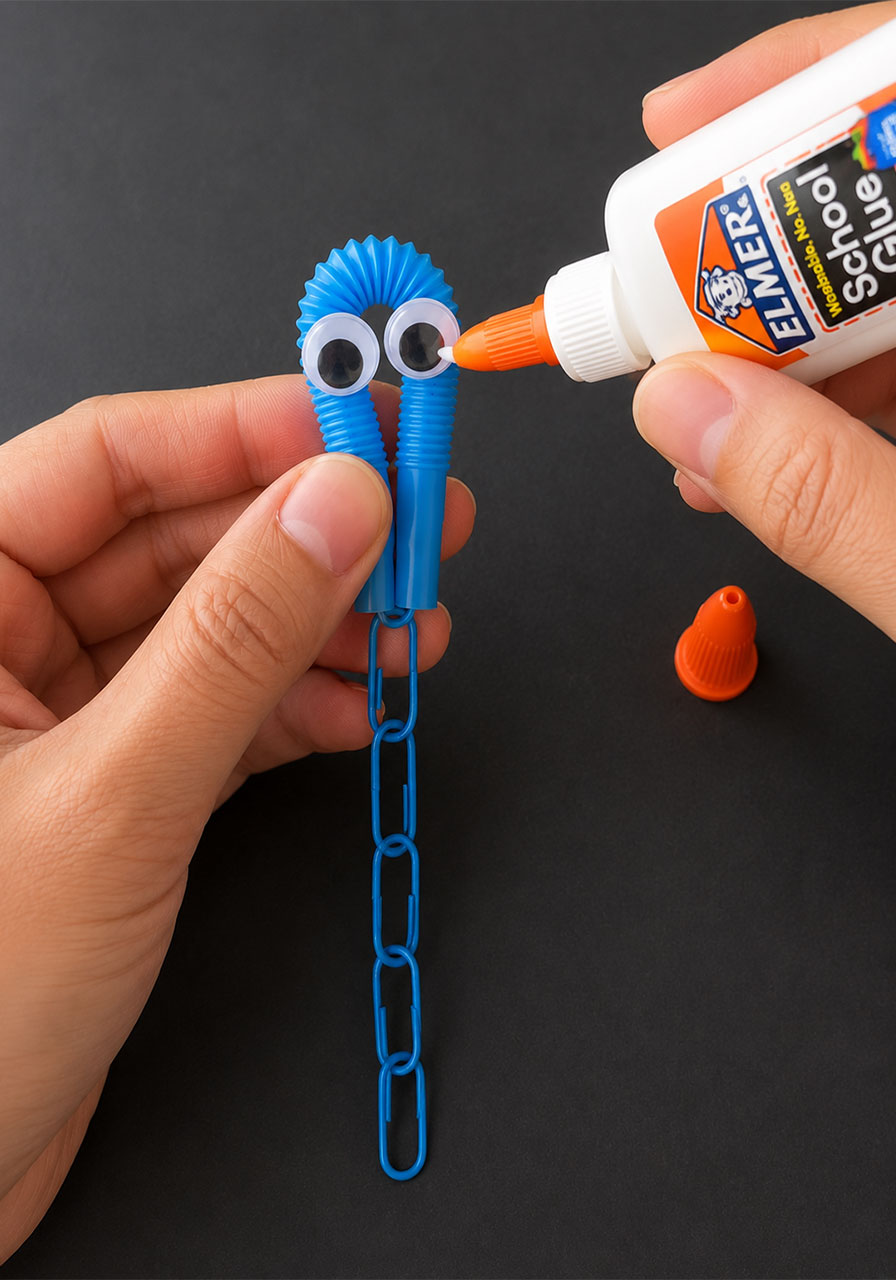
Step 5: Glue two googly eyes onto the rounded loop at the top. Instantly, your science experiment has a face, and instantly, your kids will care about it about ten times more.
Step 6: Repeat the process to make two or three more divers in different colors. A little squad of octopus friends makes the bottle way more fun to watch than just one.
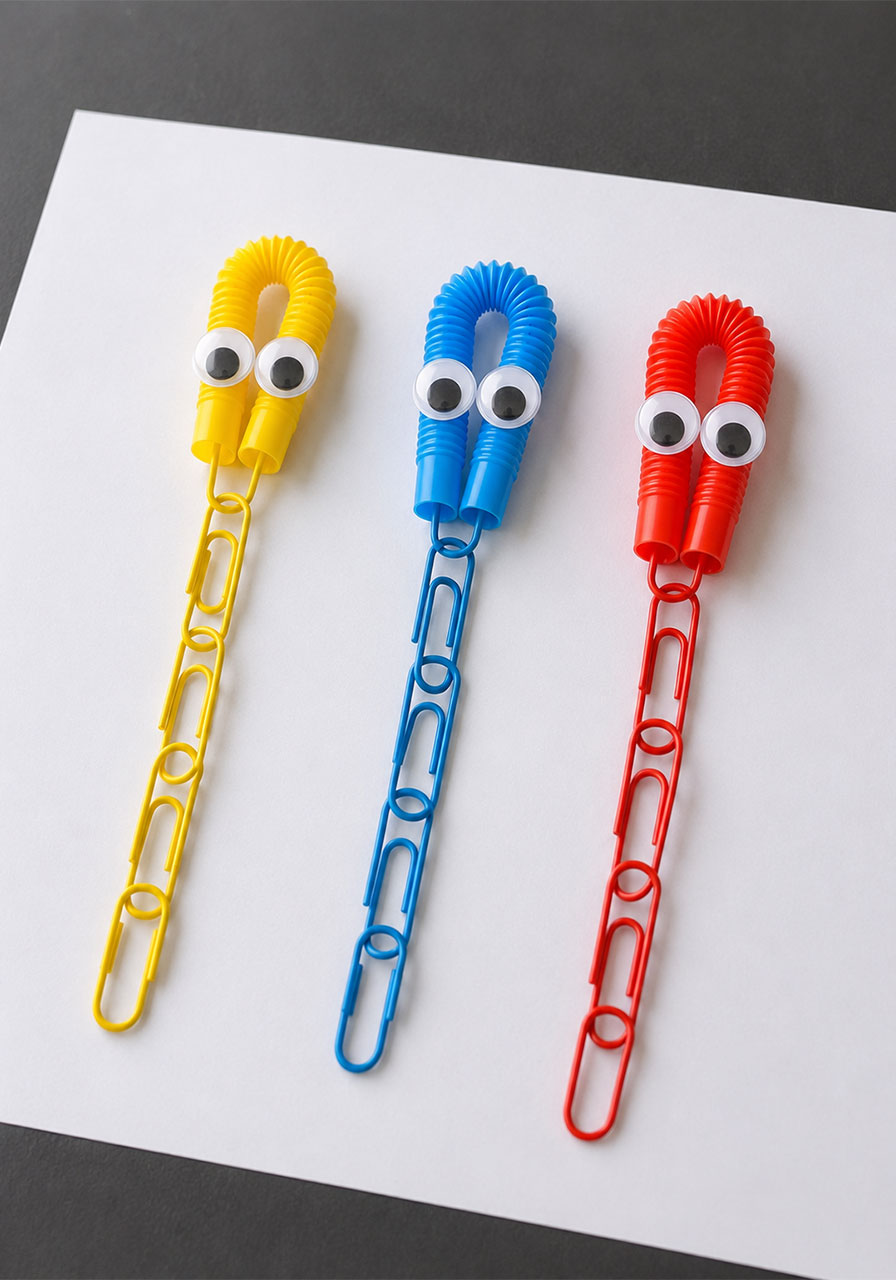
Assembling Your Floating Octopus Bottle
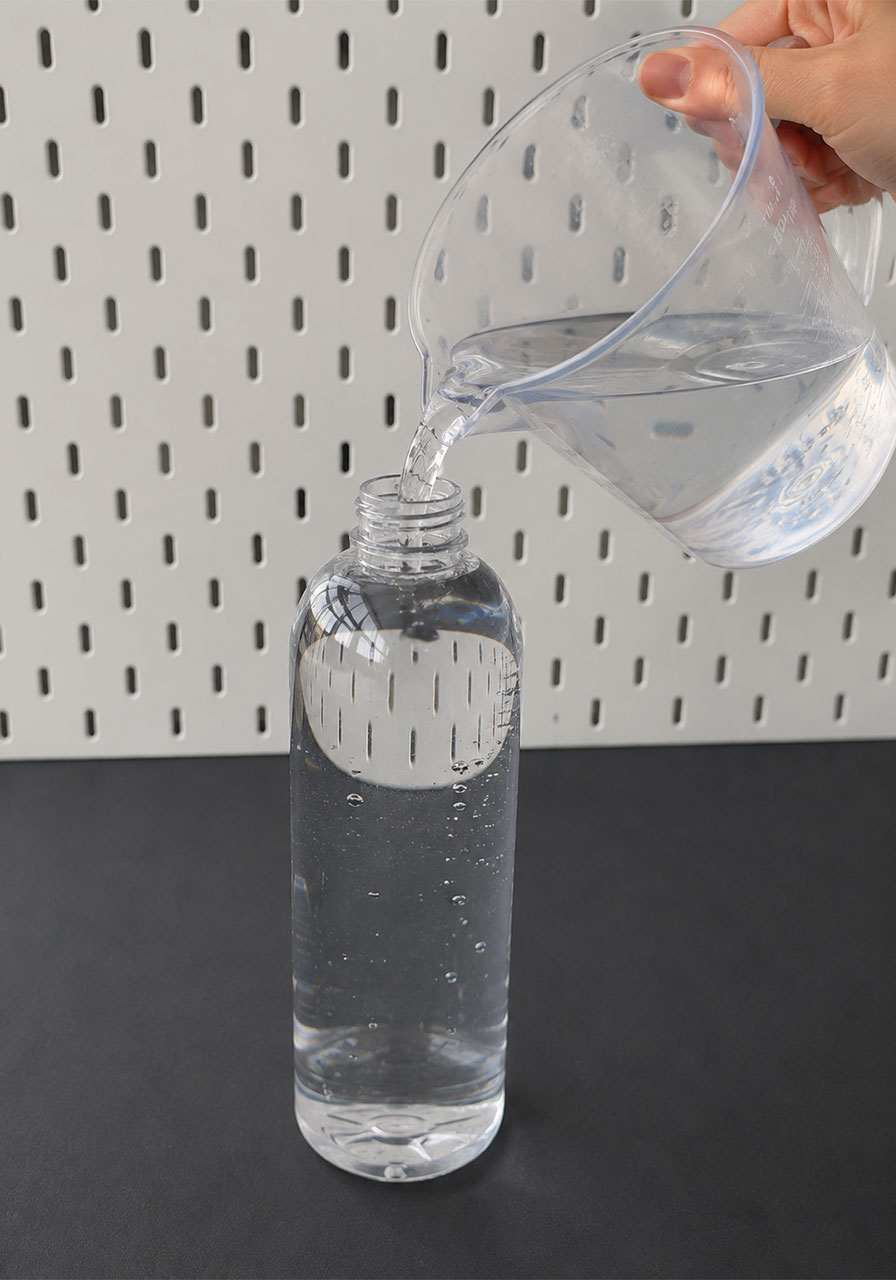
Fill your plastic bottle all the way to the very top with water. There should be no air gap left at all. This detail matters more than it sounds like it should.
Gently drop your octopus divers into the bottle, letting the paperclip chains sink down naturally.
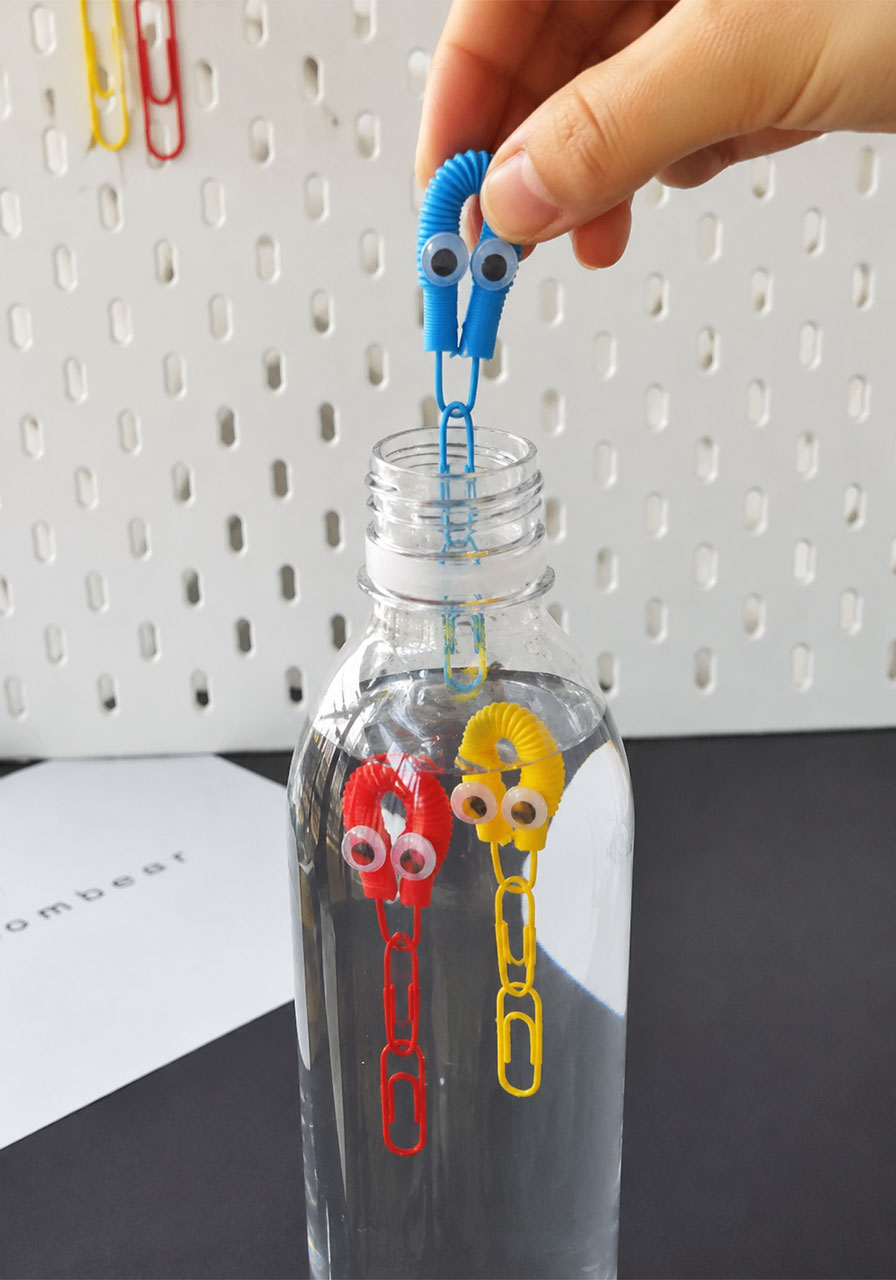
Screw the cap on as tightly as you possibly can. A loose cap is the number one reason this experiment fails to work correctly.
Now for the fun part. Squeeze the sides of the bottle firmly, and watch your octopus divers sink straight to the bottom. Release your grip, and watch them float back up to the top.
The Science Behind It (Explained Simply)
Here’s what’s actually happening inside that bottle. Trapped inside the ridged part of the straw is a small pocket of air. That air pocket is what makes your octopus float in the first place.
When you squeeze the bottle, you’re increasing the pressure on all the water inside it. That pressure pushes into the straw and compresses the tiny air bubble trapped inside.
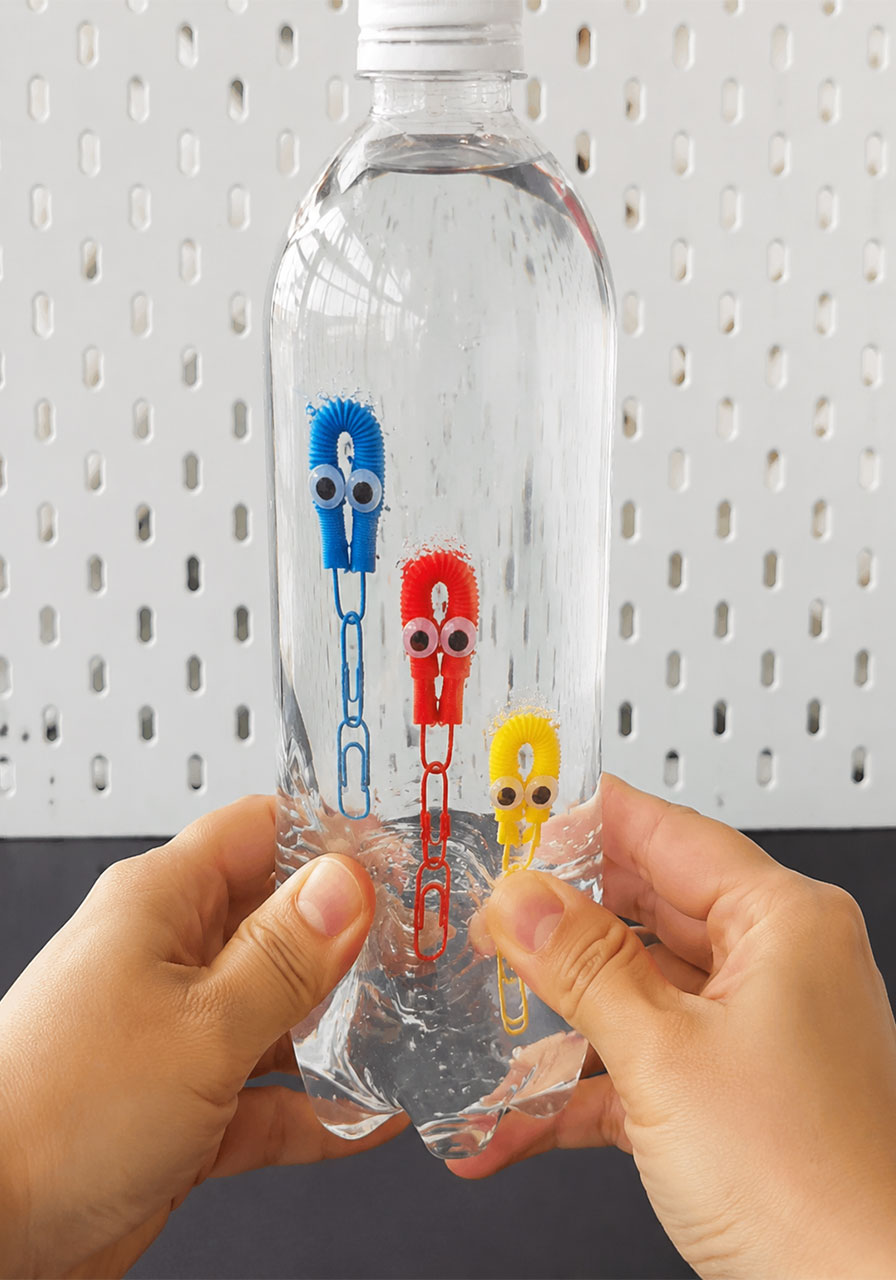
A smaller air bubble means less buoyancy. Less buoyancy means the octopus becomes heavier than the water around it, so it sinks straight down.
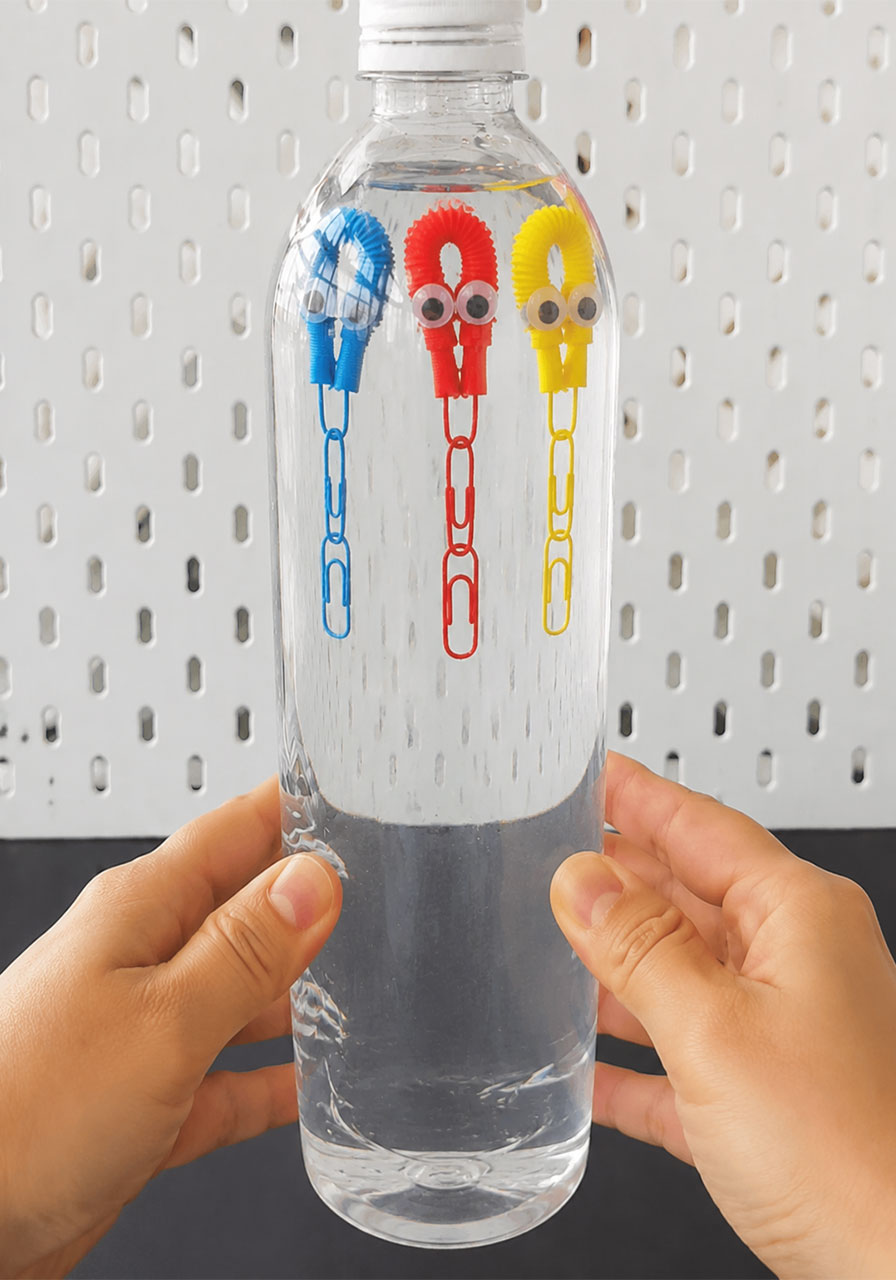
The second you let go of the bottle, the pressure drops back to normal. The air pocket expands back to its original size, buoyancy returns, and your octopus floats right back up to the surface.
This is the exact same principle that lets real submarines rise and sink in the ocean, just on a much smaller and much cuter scale.
Pro Tip: Getting the Perfect Float
If your octopus sinks to the bottom and stays there, you’ve added too many paperclips. Remove one or two and try again.
If your octopus floats at the very top and won’t sink no matter how hard you squeeze, add another paperclip or two to the chain.
The sweet spot is when your diver floats almost fully submerged, with just the tiniest bit peeking above the surface. That’s when the “magic” of squeezing and releasing looks the most dramatic.
Fun Variation: Try Mini Water Balloons Instead
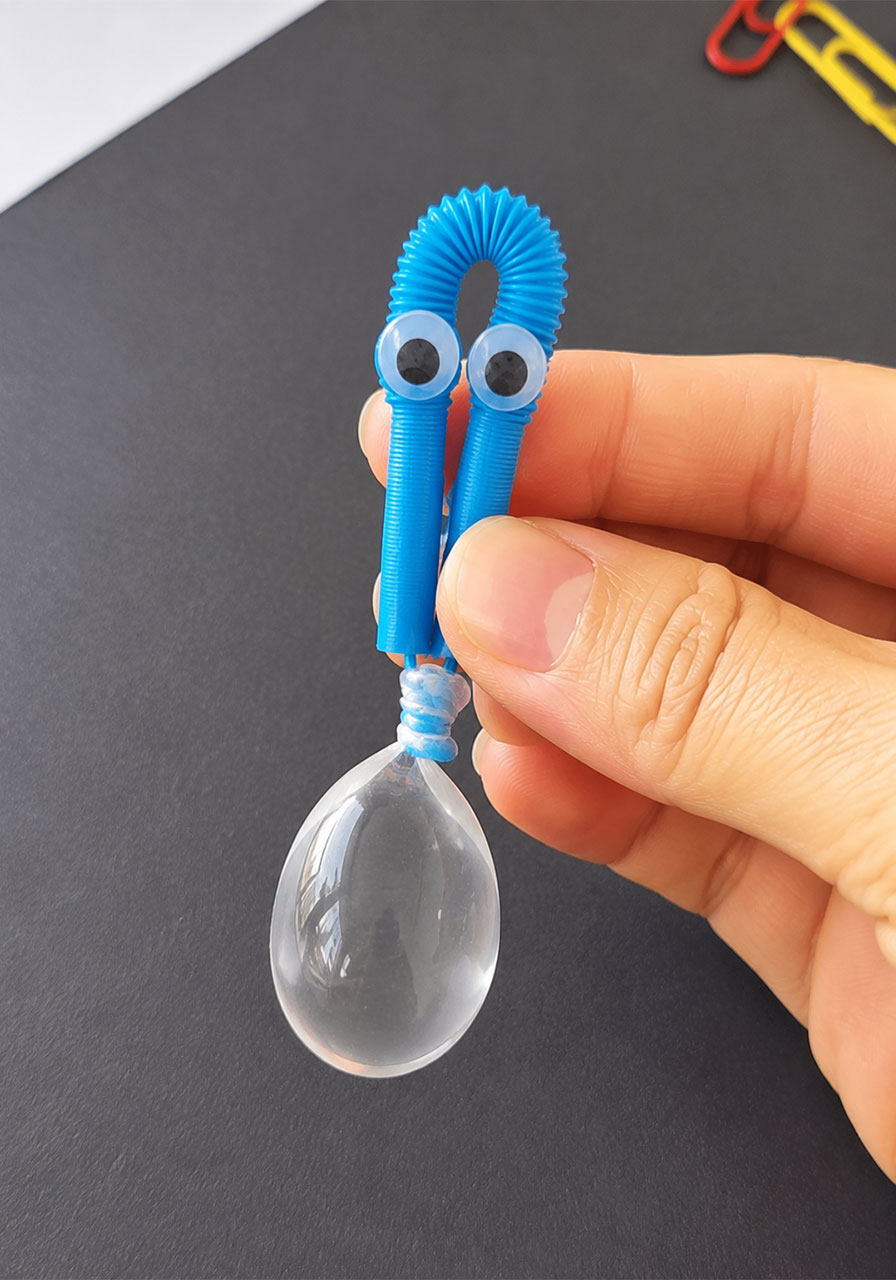
If you want an even more reliable version of this project, swap the paperclips for tiny water balloons instead.
The reason this works so well is simple. With a paperclip chain, the trapped air can sometimes get slowly replaced by water over time, which throws off your buoyancy.
A sealed water balloon doesn’t have that problem. Air can’t sneak in or out, so your diver keeps floating and sinking consistently, project after project, without needing constant adjustments.
This swap is a great option if you’re prepping this activity for a full classroom and want it to work perfectly every single time without babysitting each bottle.
Classroom Tip for Teachers
Before revealing how the trick works, ask your students to guess why the octopus sinks and floats. Let them write down their hypothesis first.
This activity naturally connects to lessons on density, pressure, buoyancy, and even basic engineering design, since kids are literally building the tool that demonstrates the concept.
It also works beautifully as a station activity. Set up two or three bottles at a table, and let small groups rotate through, testing and adjusting paperclip counts on their own.
Why This Activity Belongs in Your Back Pocket
Great STEM activities don’t need to be expensive, complicated, or time-consuming. Sometimes the best ones come from a straw, a paperclip, and a leftover water bottle.
This floating octopus project checks every box. It’s cheap, it’s fast, it’s genuinely educational, and most importantly, kids will beg to do it again.
Keep this one saved for your next classroom lesson, birthday party activity table, or rainy weekend at home. Because the best learning happens when kids don’t even realize they’re learning.
