
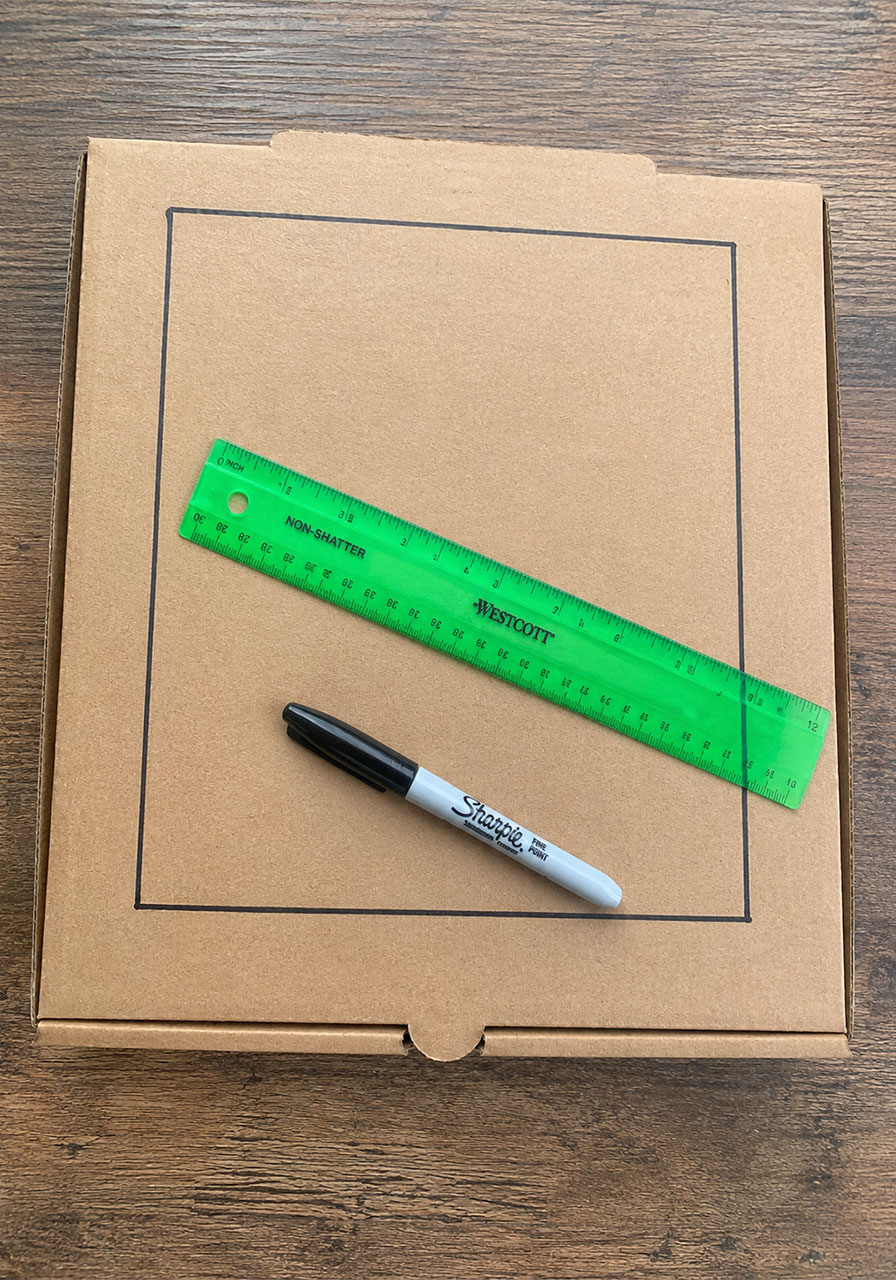
Looking for a hands-on STEM activity that actually gets kids excited about science? This DIY solar oven is one of the best summer learning projects you can do with a group of kids, and the best part is that it ends with a warm, gooey s’more.
Whether you’re a teacher planning a summer school lesson, running a science camp, or a parent looking for a screen-free afternoon activity, this pizza box solar oven checks every box. It’s cheap, it’s simple, and it teaches real science concepts kids can actually see and taste.
No electricity, no oven, no fancy equipment. Just an empty pizza box, some basic craft supplies, and a sunny day. Let’s build one.
What Kids Will Learn From This Solar Oven Project
This isn’t just a fun craft. It’s a genuine introduction to renewable energy and heat transfer, taught through a project kids will want to repeat all summer.
As they build and test their solar oven, kids will explore:
- How solar energy converts into heat energy
- How different materials reflect, absorb, or trap heat
- The basics of insulation and the greenhouse effect
- The difference between renewable and nonrenewable energy sources
It’s a perfect fit for summer learning packets, science camp days, classroom units on energy, or homeschool science lessons. Best of all, it works for a wide age range, from curious preschoolers to upper elementary students who can handle more of the science vocabulary.

Supplies You’ll Need
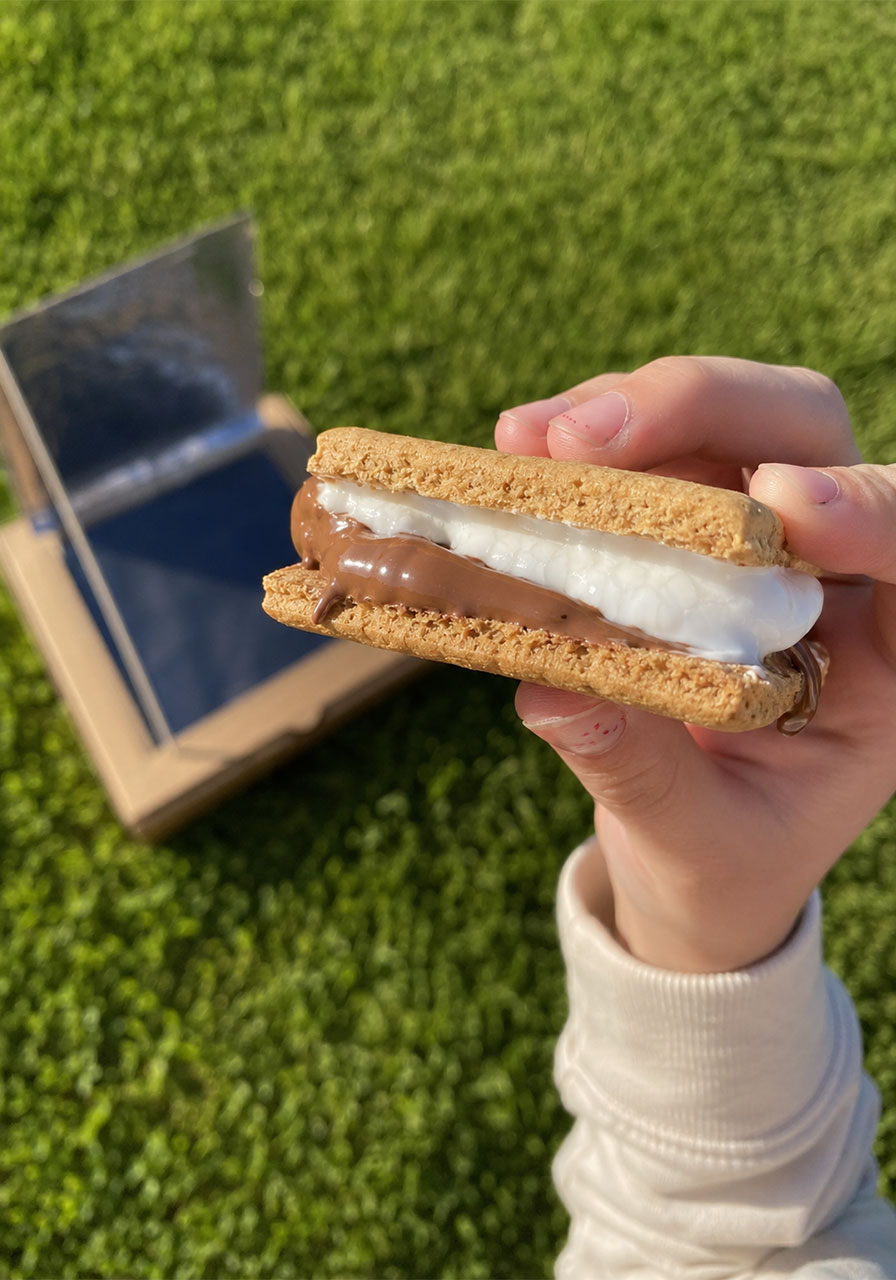
Most of these supplies are things you likely already have at home or can grab cheaply at the store. Here’s your full shopping list.
Cardboard pizza box (an empty shoebox with a lid also works)
Aluminum foil
Black construction paper
Plastic wrap, or a clear plastic sheet protector
Wooden skewer or pencil
Scissors, ruler, and a Sharpie
Hot glue gun or clear tape
Graham crackers, marshmallows, and chocolate bars
Pro Tip: If you’re doing this project with a group or a full classroom, ask families to save their pizza boxes for a week beforehand. You’ll have plenty of ovens without spending a dime.
How to Build a Solar Oven, Step by Step
Follow these steps in order and you’ll have a fully working solar oven in under 20 minutes of prep time. The only thing you can’t rush is the sun itself.
Step 1: Cut the Flap
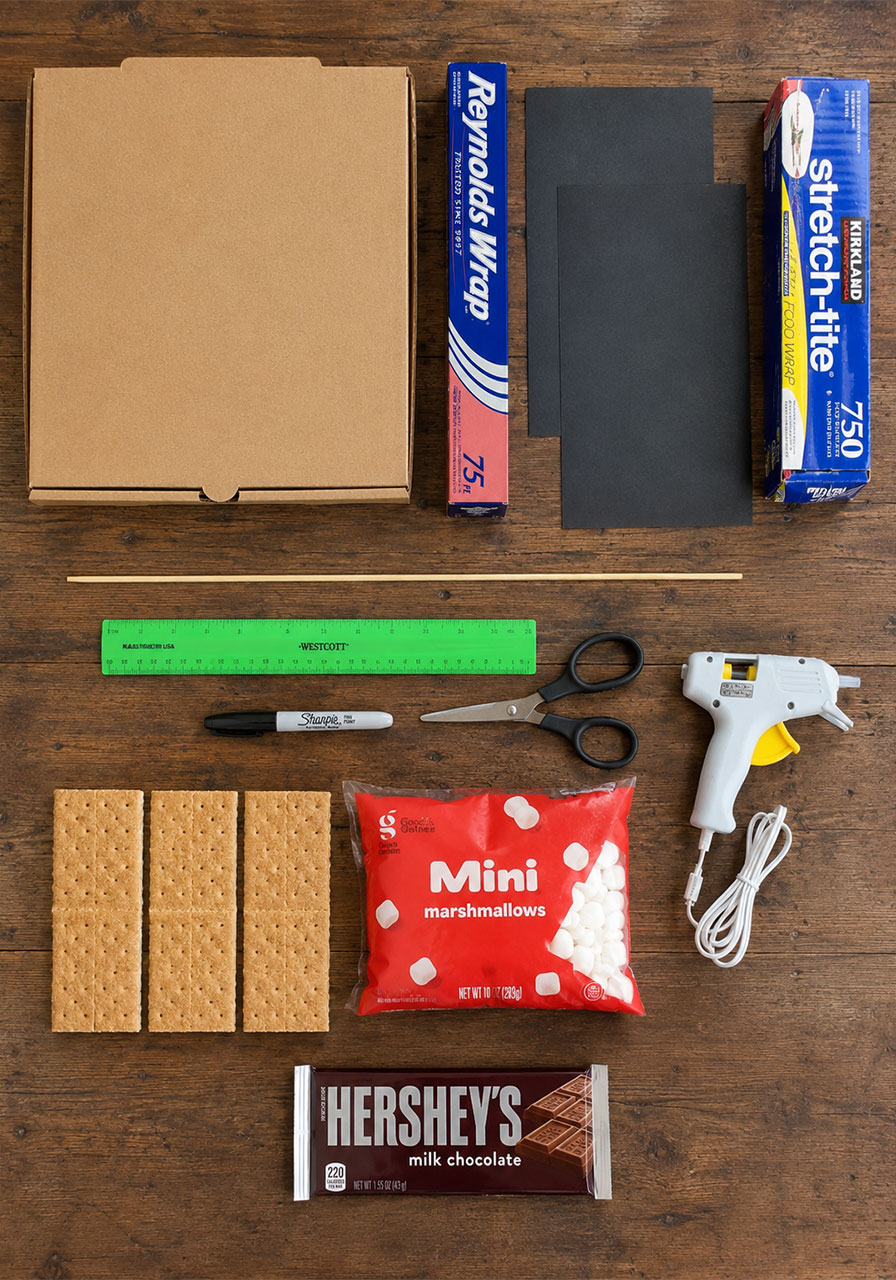
On the lid of the pizza box, use your ruler and Sharpie to draw a square, leaving about a 1-inch border around the edge. This border matters, so don’t skip it. It keeps the flap sturdy enough to fold and stand up later.
Cut along three sides of the square, leaving one side uncut. This uncut side becomes the hinge for your flap.
Step 2: Add the Foil Reflector
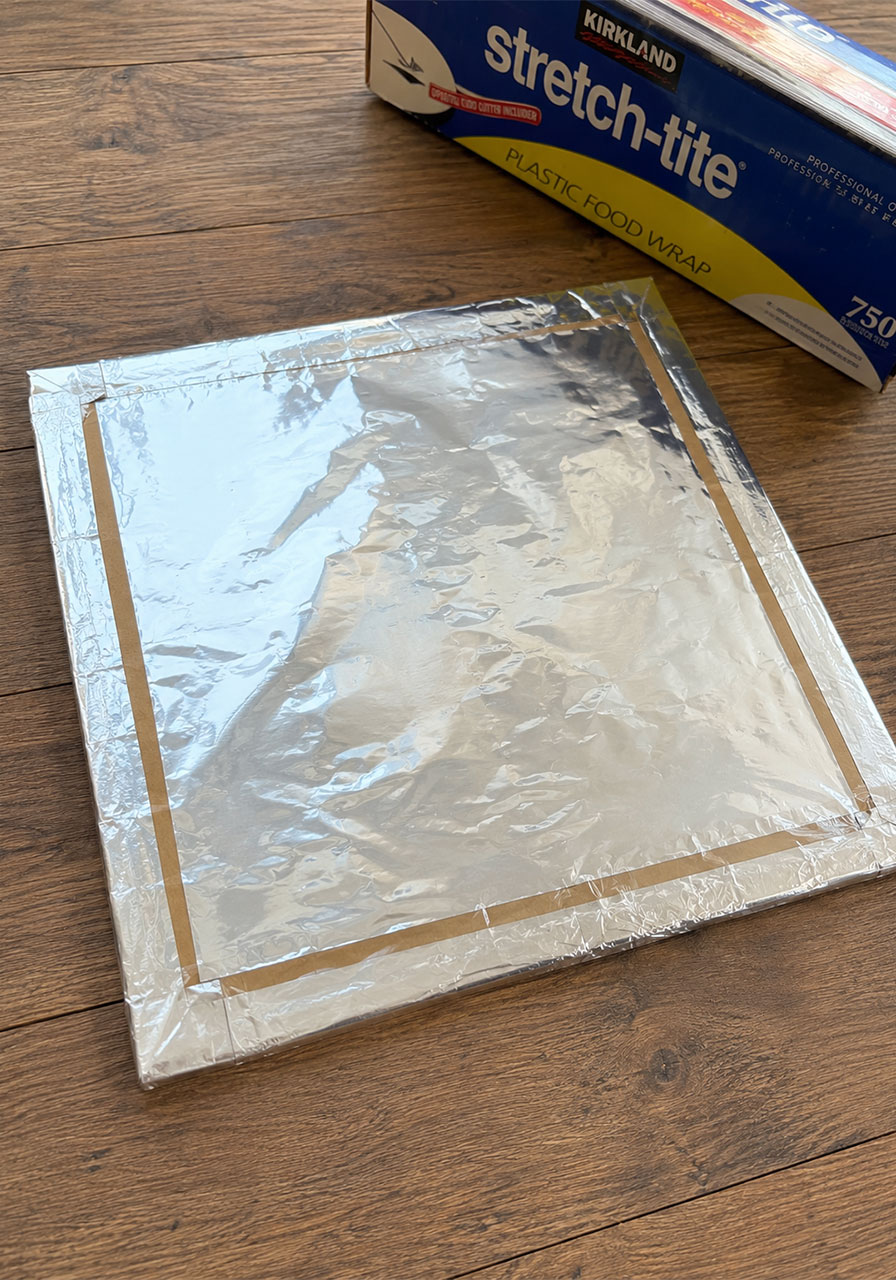
Cover the inside of the flap with aluminum foil, shiny side facing out. Smooth it down and secure the edges with tape or hot glue.
This foil is doing important work. When the flap is propped open later, it reflects extra sunlight down into the box, boosting the heat inside.
Step 3: Line the Box With Black Paper
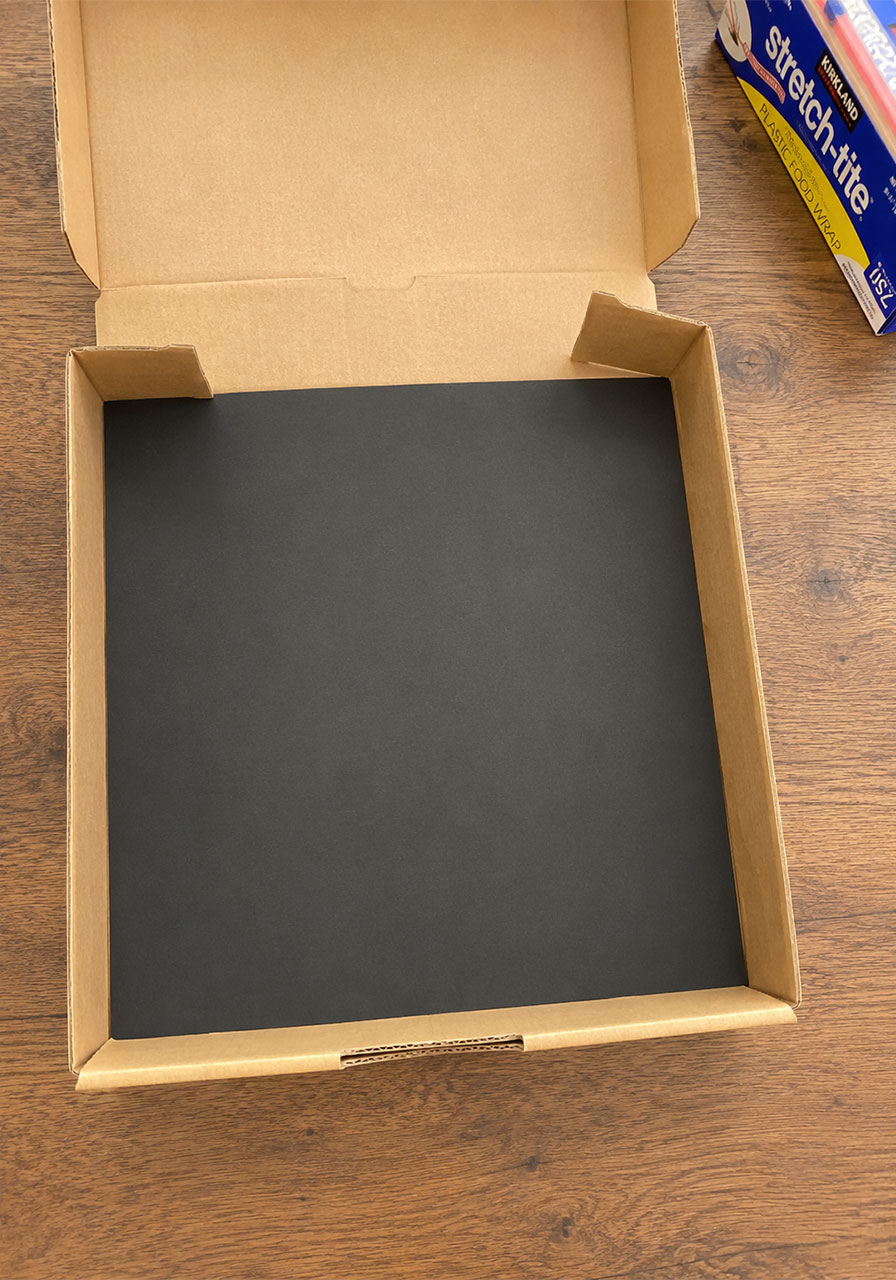
Open the pizza box and glue a piece of black construction paper to the bottom, inside the box. Black absorbs sunlight instead of reflecting it, so this layer is what actually collects and holds onto the heat your oven needs to cook.
Step 4: Seal the Window With Plastic Wrap
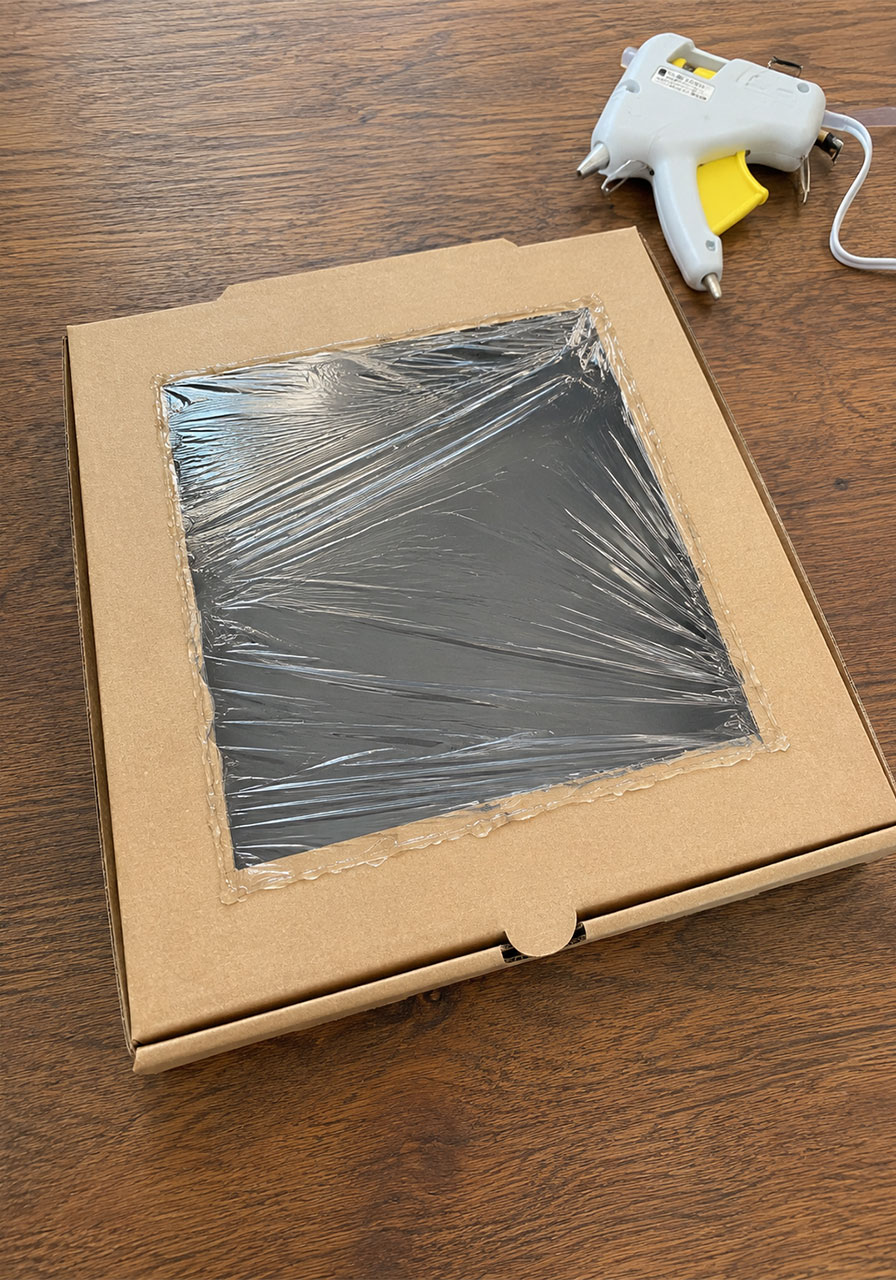
Stretch plastic wrap tightly over the cut-out opening in the lid, and secure it well around all the edges with tape or glue. No gaps.
This plastic layer acts as a window that lets sunlight in while trapping the heat inside, the same greenhouse effect that keeps a real greenhouse warm.
Step 5: Build the S’mores
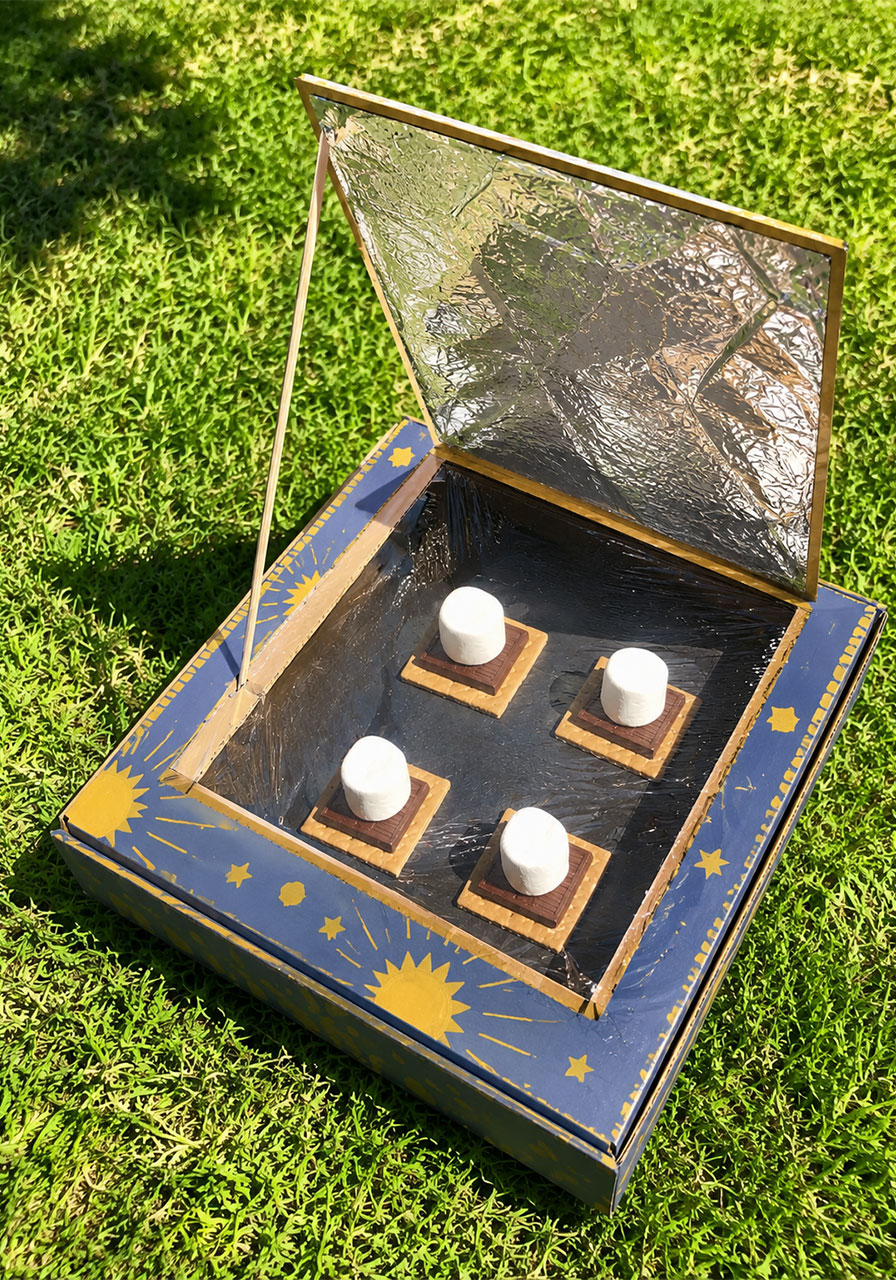
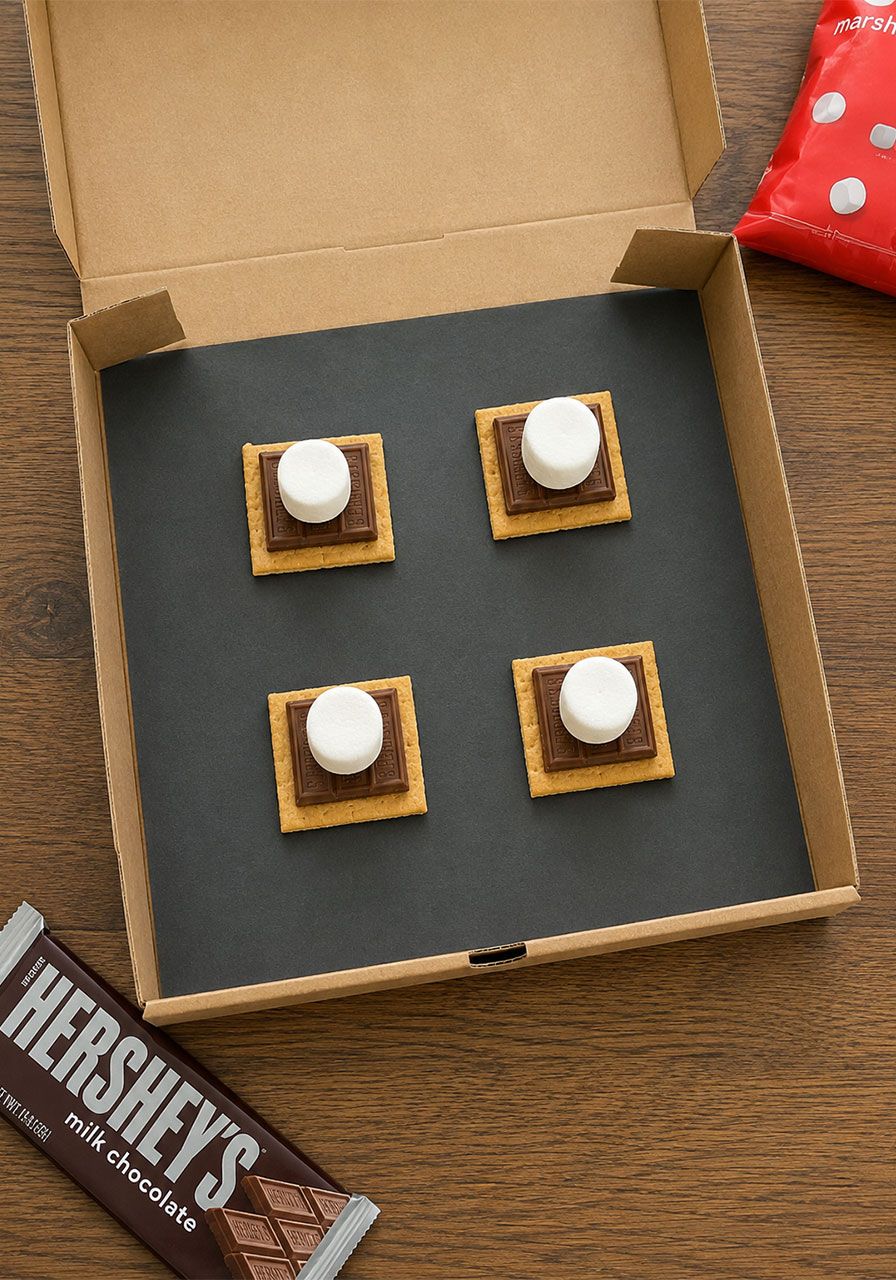
Place graham crackers topped with a piece of chocolate and a marshmallow directly onto the black paper inside the box. Feel free to make several at once. If you’re working with a group, this is the part the kids will be most excited about.
Step 6: Close and Prop Open the Flap
Close the lid of the pizza box. Use a wooden skewer or pencil to prop the foil flap open at an angle, so it catches sunlight and reflects it down through the plastic window.
Step 7: Set It in the Sun and Wait
Place your solar oven outside in a spot with full, direct sun, ideally between 11 a.m. and 2 p.m., when the sun is strongest.
Now comes the hardest part for kids: waiting. Give it 30 to 60 minutes for the marshmallows and chocolate to fully melt. Check periodically, and adjust the angle of the foil flap if the box isn’t heating as quickly as expected.
While you wait, keep the science fun going with a related activity like an Ice Cream in a Bag experiment or a Slushie in a Bag project. Both are great ways to fill the wait time without losing the group’s attention.
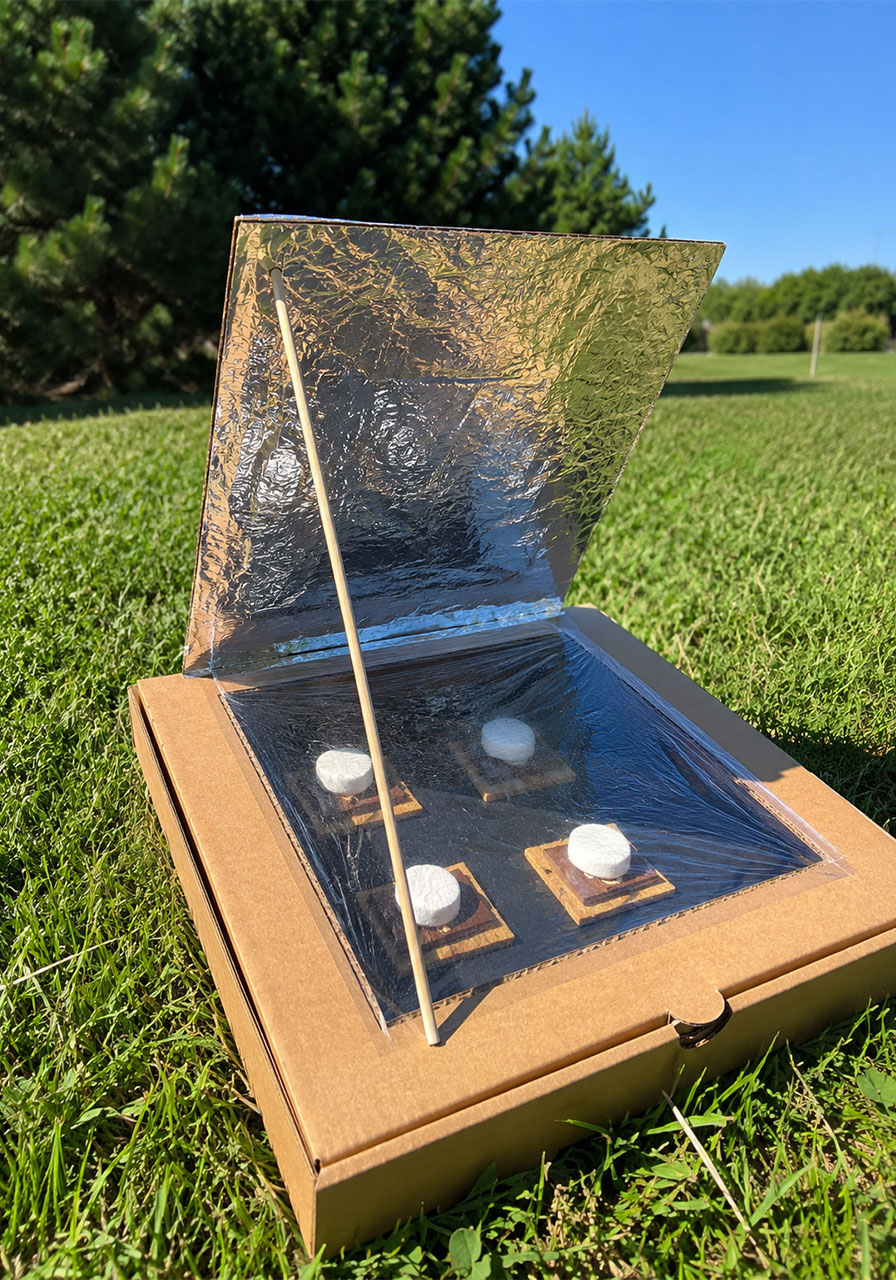
What Is a Solar Oven, Exactly?
A solar oven, sometimes called a solar cooker or sunlight oven, is a device that uses only sunlight to heat or cook food. Unlike a regular oven, it needs no electricity and no gas. It relies entirely on the sun’s renewable energy.
Solar ovens work through four key principles, and your pizza box oven uses all four:
- Reflecting sunlight with foil
- Absorbing heat with dark, black materials
- Trapping heat using clear plastic, which creates a greenhouse effect
- Insulating with cardboard and trapped air
Together, these four elements demonstrate a real-world example of energy transformation, where light energy converts into thermal energy, or heat.
How Does the Pizza Box Solar Oven Actually Work?
Here’s the step-by-step science behind what’s happening inside that pizza box while it sits in the sun.
1. Sunlight strikes the foil flap, which reflects and directs the rays down into the box.
2. The black paper inside absorbs that light energy and converts it into heat.
3. The plastic wrap window traps the rising heat inside the box, creating a mini greenhouse effect.
4. The trapped heat builds up and melts the chocolate and marshmallow.
This entire process demonstrates energy transfer in action, specifically the conversion of solar energy (light) into thermal energy (heat). It’s the same basic principle behind real solar cookers used around the world, just scaled down to pizza box size.
Turn This Into a Full Science Fair Project
If your student or child needs a science fair project, this solar oven is an easy one to extend. Simply pick one variable to change, then measure and record the results.
Try testing questions like:
- Does changing the angle of the foil flap change how much heat is reflected?
- Does black paper melt the s’mores faster than white paper?
- Does a double layer of plastic wrap trap more heat than a single layer?
Use a kitchen thermometer to track the temperature inside the box over time, or simply time how long it takes the marshmallow to fully melt in each version. Chart the results and present them on a display board for a genuinely strong, hands-on science fair entry.
Solar Oven Frequently Asked Questions
How hot does a pizza box solar oven get?
Expect temperatures between 150°F and 200°F (65°C to 93°C) in direct, strong sunlight. That’s hot enough to melt chocolate and marshmallows, though not hot enough to fully bake most foods.
Does it work on cloudy days?
Not well. This project depends on direct, strong sunlight, so clouds will significantly slow down or prevent the heating process. Save this activity for a clear, sunny day for the best results.
What other foods can I cook in a solar oven?
Besides s’mores, try nachos, mini pizzas, or soft cookies. Stick to foods that don’t require very high heat, since this oven won’t reach traditional baking temperatures.
Can I reuse the solar oven?
Yes. Just wipe it down after use and store it indoors, away from moisture, so the cardboard stays sturdy for the next sunny day.
Is this project safe for kids to do on their own?
Always supervise children during the building steps, especially anytime scissors or a hot glue gun are involved. Once the oven is built and outside in the sun, the temperature is not hot enough to burn skin, but it is hot enough to melt chocolate, so little hands may be tempted to peek.
What’s the best time of day to run this project?
Between 11 a.m. and 2 p.m. is ideal, since that’s when the sun sits most directly overhead and delivers the strongest, most consistent heat.
Is there another name for a solar oven?
You may also see it called a solar-powered oven, a sunlight oven, or a DIY solar cooker. They all refer to the same basic concept.
Why This Project Works So Well for Classrooms and Home
What makes this solar oven project stand out from other STEM activities is how little it demands. There’s no expensive kit to order, no complicated setup, and no cleanup beyond folding up a cardboard box.
It also naturally builds in patience and observation skills, since kids have to wait, watch, and adjust the angle of their flap to get the best results. That waiting period is exactly where a lot of the real learning happens, as kids start asking their own questions about why the sun’s position matters or why their friend’s oven is heating up faster.
Pair it with a simple worksheet where kids record the starting time, the temperature or melt progress every 15 minutes, and their final results, and you’ve got a full science lesson built entirely around a pizza box and a sunny afternoon.
Keep this one in your back pocket for the next warm, sunny day. It’s an easy win for any teacher or parent looking to make science feel less like a lesson and more like an adventure.
