
Looking for a hands-on STEM activity that also lets your kids get messy, creative, and totally absorbed for an hour? Pendulum painting checks every box. It’s part science lesson, part art project, and 100% mesmerizing to watch in action.
If you’ve never heard of it, here’s the short version: you build a simple swinging pendulum out of a cup, some string, and a broom handle. Fill the cup with runny paint. Set it swinging over a big piece of paper. Watch as gravity and motion turn drips of paint into stunning spiral and swirl patterns.
No two pendulum paintings ever turn out the same. That’s part of the magic. Every swing, every color, every bit of extra water in the paint changes the outcome.
This project works beautifully for homeschool science units, classroom STEAM stations, rainy-day boredom busters, or just a fun weekend activity in the backyard. Teachers love it because it sneaks real physics concepts into what feels like playtime. Parents love it because kids of nearly any age can do it with minimal supervision once it’s set up.
Let’s walk through exactly how to set it up, how to get the best swirl patterns, and how to turn this into a full science lesson if you want to take it further.
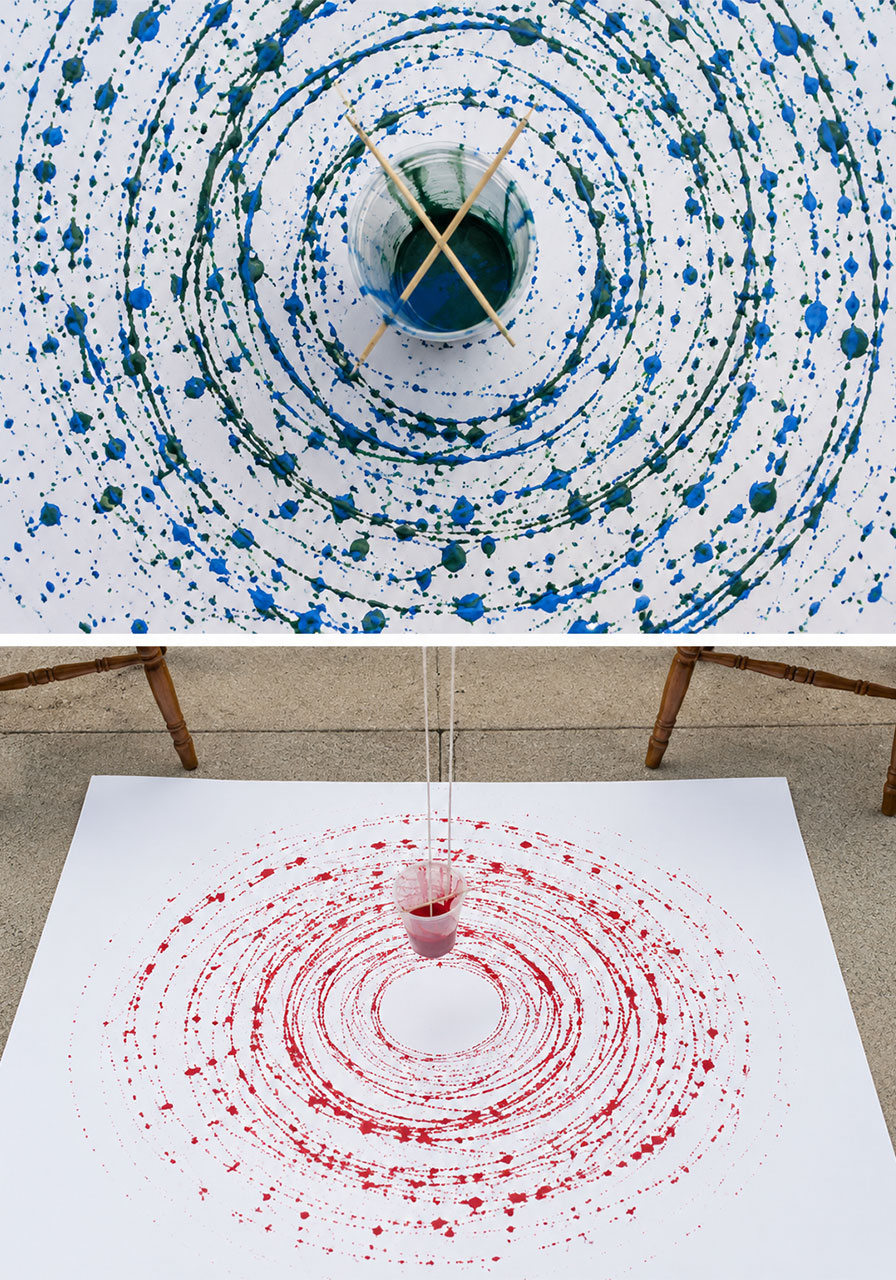
What Is Pendulum Painting?
Pendulum painting is a STEAM activity (Science, Technology, Engineering, Art, and Math) that uses a swinging weight filled with paint to create art on paper below it.
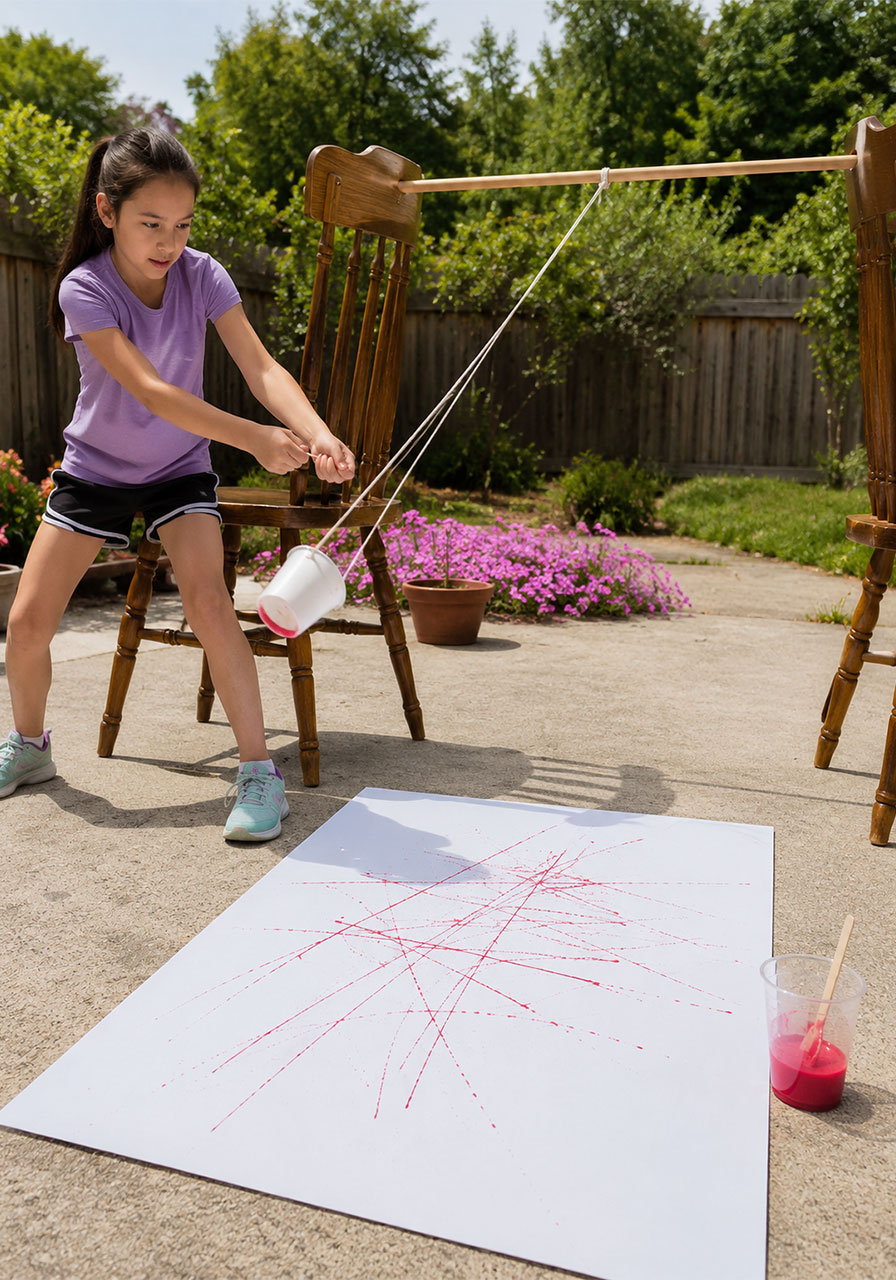
You build a simple pendulum by hanging a punctured cup from a horizontal bar. Once you fill the cup with thinned paint and get it swinging, paint drips out through a small hole in the bottom, tracing the pendulum’s path onto the paper underneath.
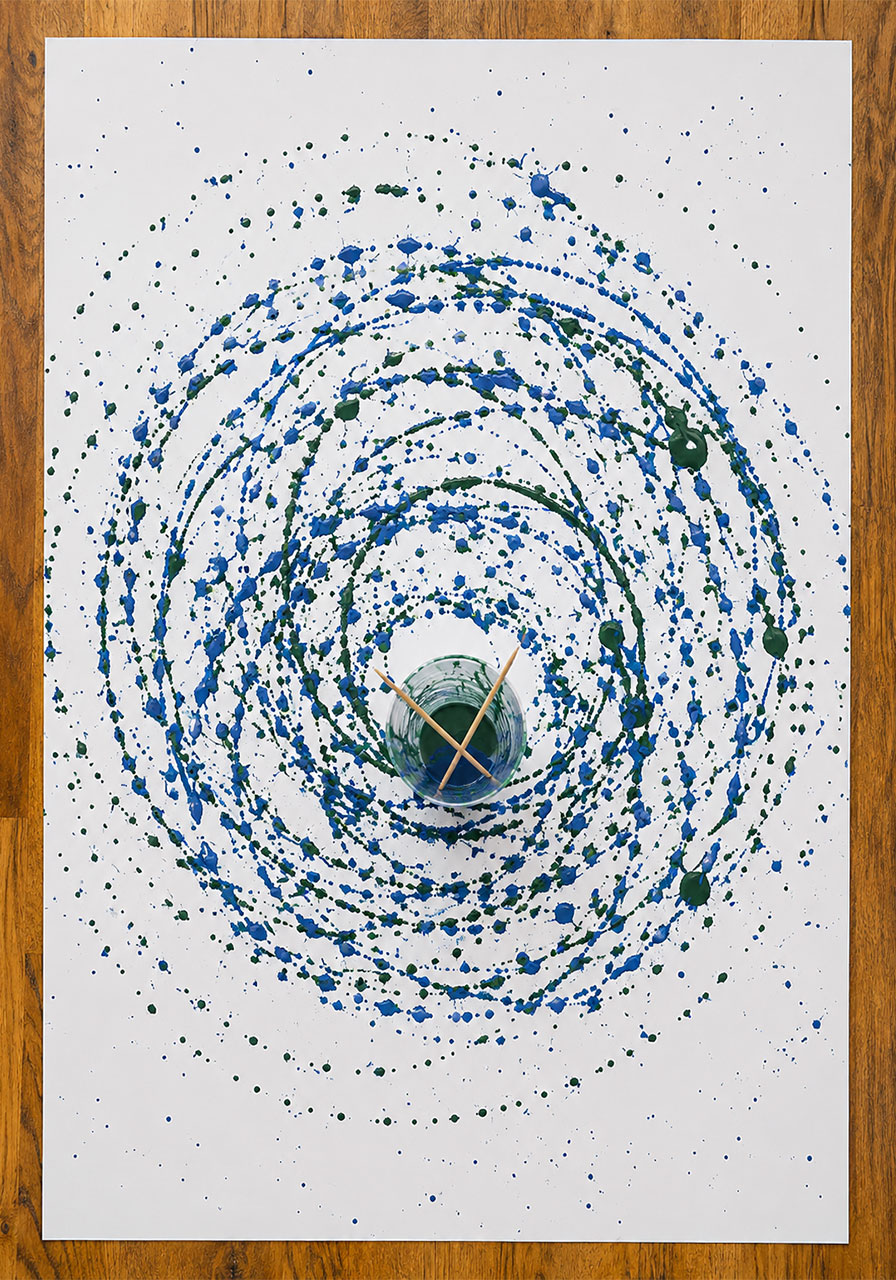
The result is a series of rings, spirals, and dotted lines that look intentional and artistic, even though the child barely has to do more than give the cup a push.

Why This Activity Is Worth the Setup
A few minutes of prep buys you a genuinely engaging science and art experience. Here’s why it’s worth doing.
It teaches real physics. Kids see pendulum motion, gravity, momentum, and friction in action instead of just reading about them.
It’s low-skill, high-reward art. There’s no pressure to “draw well.” The pendulum does the artistic heavy lifting, so every child ends up with a piece of art they’re proud of.
It’s endlessly repeatable. Change the paint color, the swing style, or the string length, and you get a completely different piece of art every time.
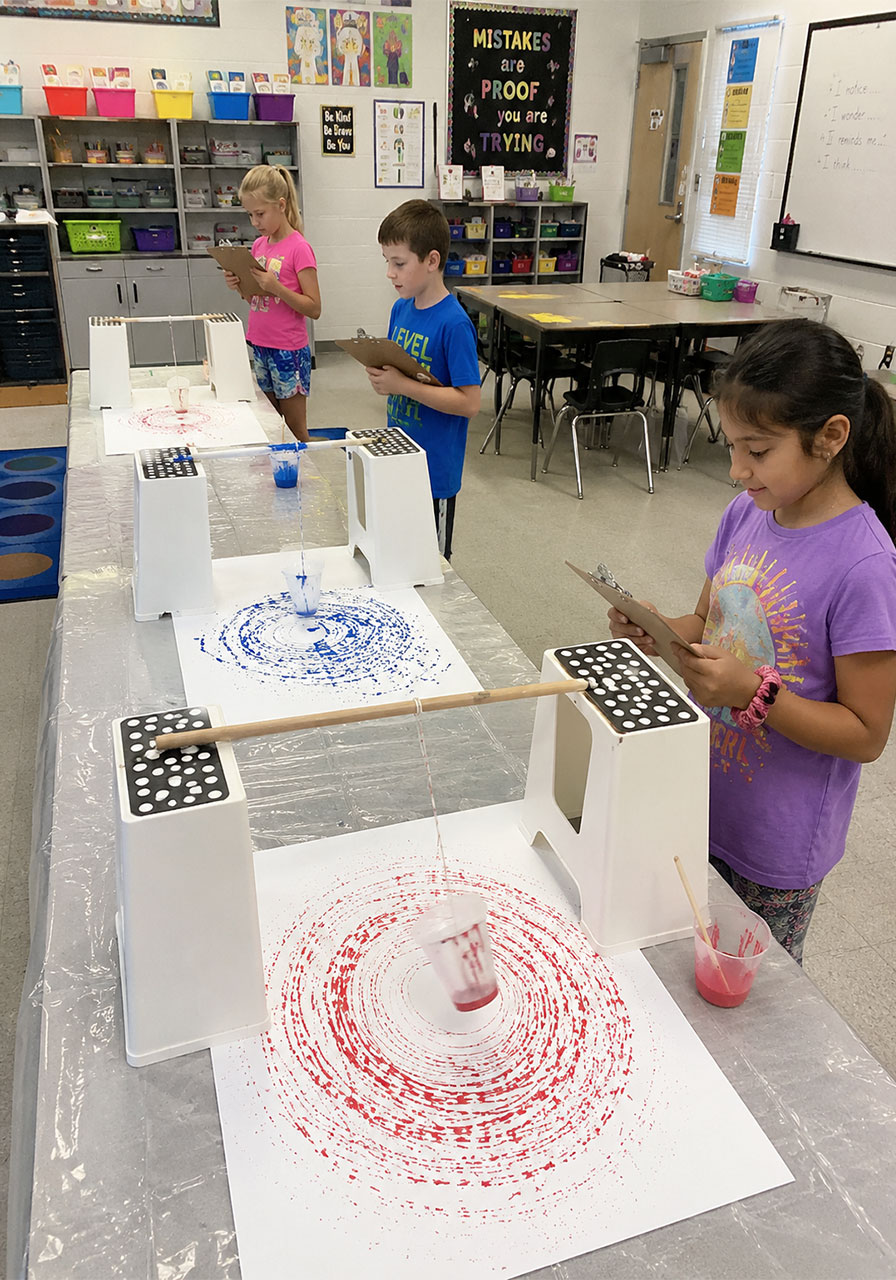
It works for a wide age range. Preschoolers can help set it up and watch. Elementary and middle schoolers can run the experiment, record observations, and test variables themselves.
Best For
Kids ages 3 and up, homeschool science lessons, classroom STEAM centers, summer break activities, and outdoor group activities for playdates or birthday parties.
Time Needed
About 15 minutes to set up, plus as much time as your kids want to spend swinging and painting. Most families spend 30 to 45 minutes total once you factor in a few rounds of colors.
Where to Do This
Outside is strongly recommended. Paint will splatter, and a hose or sprinkler makes cleanup painless. If you need to do this indoors, lay down a plastic tablecloth or a large painter’s drop cloth first to protect your floors.
What You’ll Need
2 chairs of equal height
1 broom handle, dowel, or other sturdy pole
Poster board or a large sheet of art paper
A hole punch
2 paper or plastic cups
A sharpened pencil (or a sharp knife, adult use only, for plastic cups)
Yarn or sturdy string
Tape
Washable acrylic paint, in one or more colors
Water
A quick note on cups: paper cups are easier for kids to safely poke a hole through with a pencil. If you only have plastic cups on hand, have an adult puncture the hole with a sharp knife instead, since plastic won’t give the way paper does.
How to Build Your Pendulum
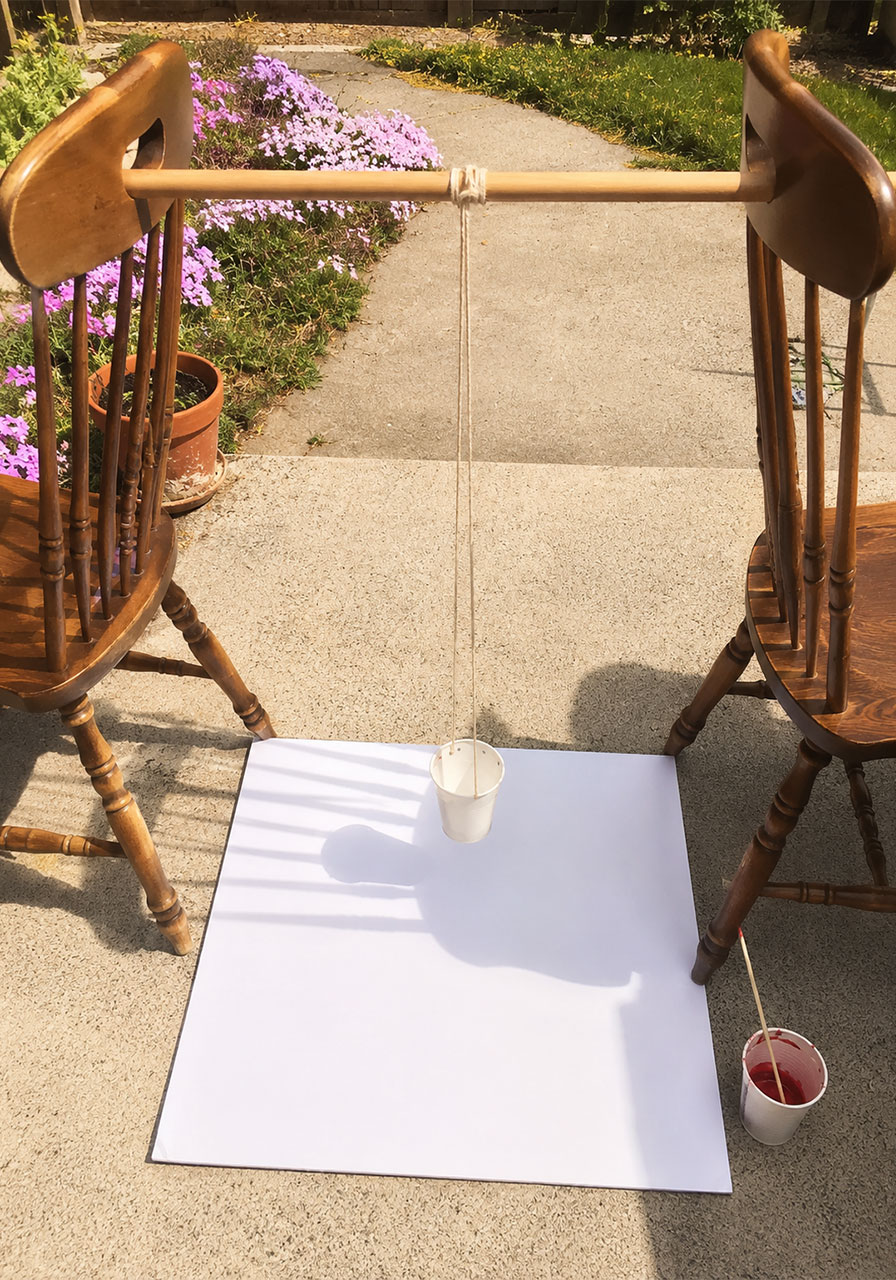
1. Set your two chairs back to back, about 2 to 3 feet apart.
2. Rest your broom handle across the tops of both chair backs so it forms a sturdy horizontal bar.
3. Punch two holes near the top rim of one cup, directly across from each other.
4. Use the tip of a sharpened pencil to poke one small hole in the center of the bottom of that same cup. This is where the paint will drip out.
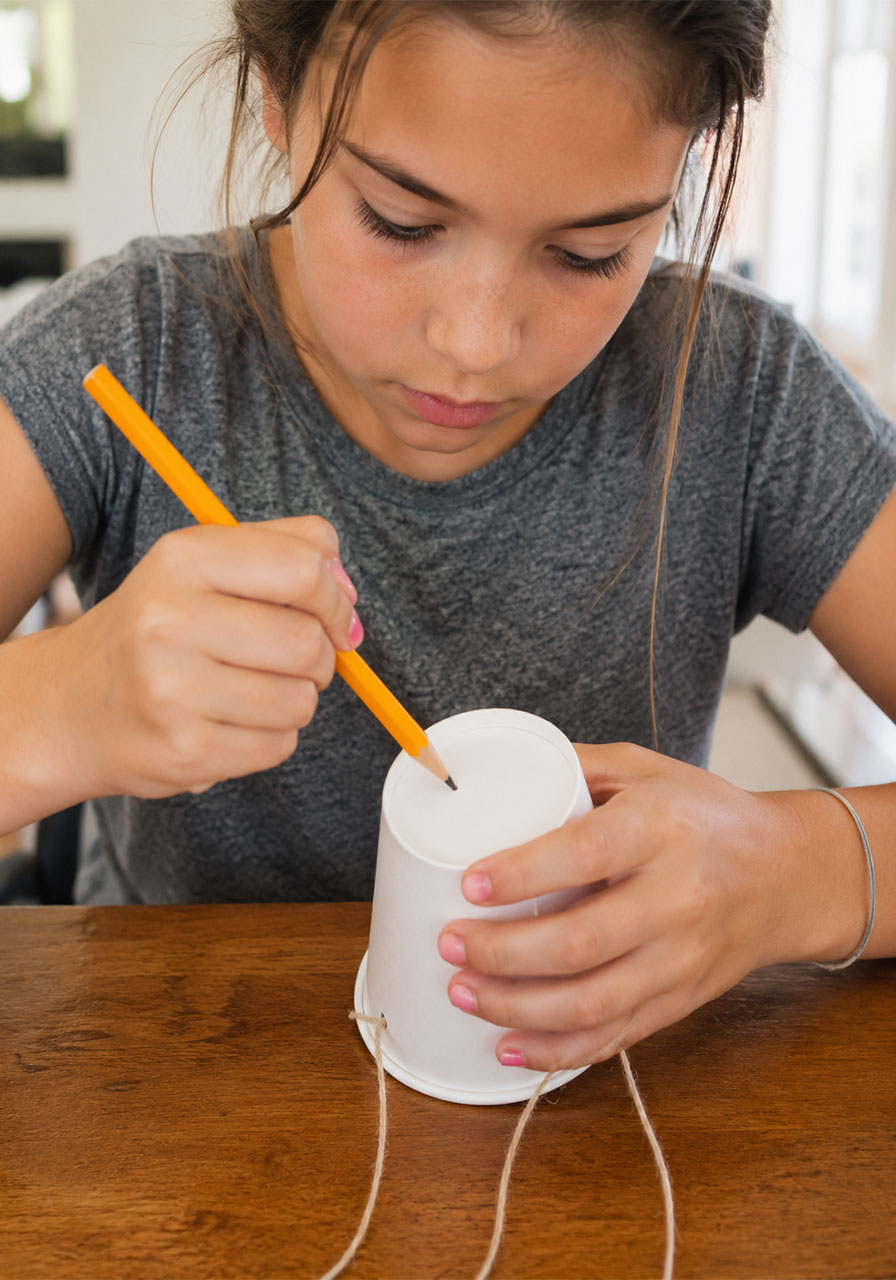
5. Thread a length of yarn through the two top holes and tie it off, then hang the cup from the center of the broom handle so it dangles about 6 inches (15 cm) above the ground.
Before you add any paint, cover the bottom hole with a piece of tape. This keeps everything mess-free until you’re ready to start.
How to Make the Paint
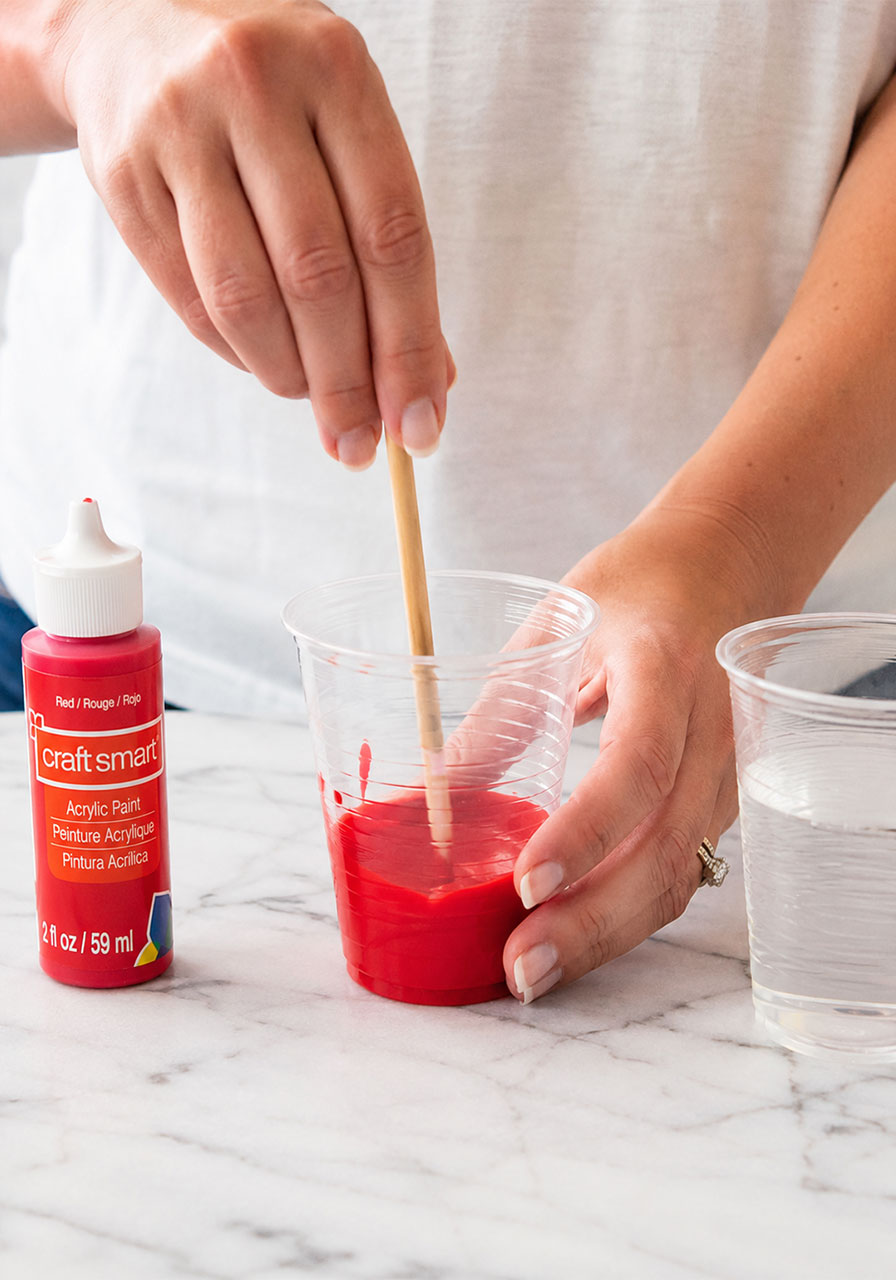
1. In your second cup, add a squeeze of washable acrylic paint.
2. Add roughly twice as much water as paint, then stir well with your pencil.
3. Check the consistency. You want it thin and runny, similar to heavy cream, so it flows freely through the small hole.
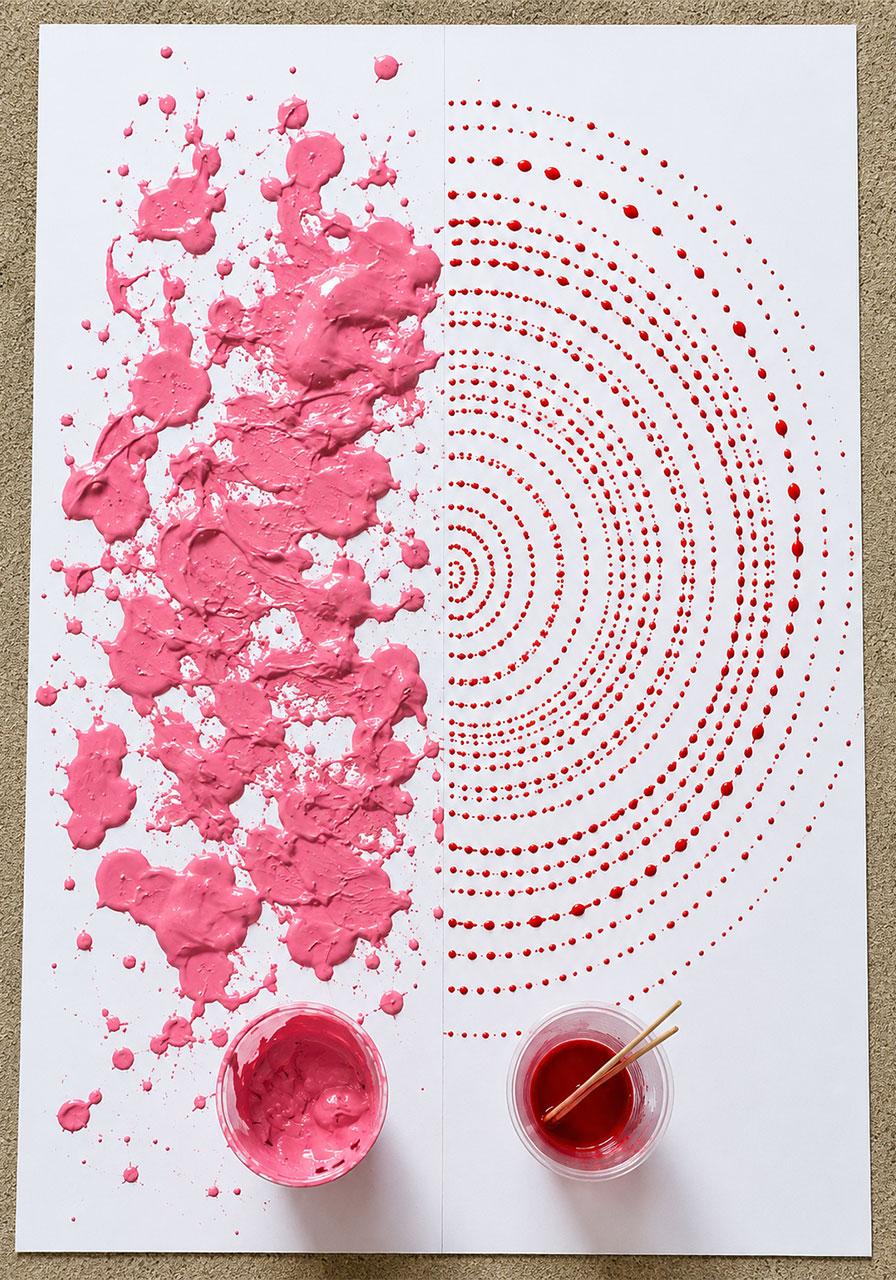
This is the single most important step for a great pendulum painting, so don’t rush it. Paint that’s too thick won’t drip in a smooth line. Paint that’s properly thinned will trace a clean, continuous swirl.
How to Paint With Your Pendulum
1. Pour your thinned paint into the hanging cup (the one with the taped bottom hole).
2. Slide your poster board or art paper underneath the pendulum, centered below the cup.
3. Peel off the tape covering the bottom hole.
4. Hold onto the string and gently start swinging the cup in a circular motion.
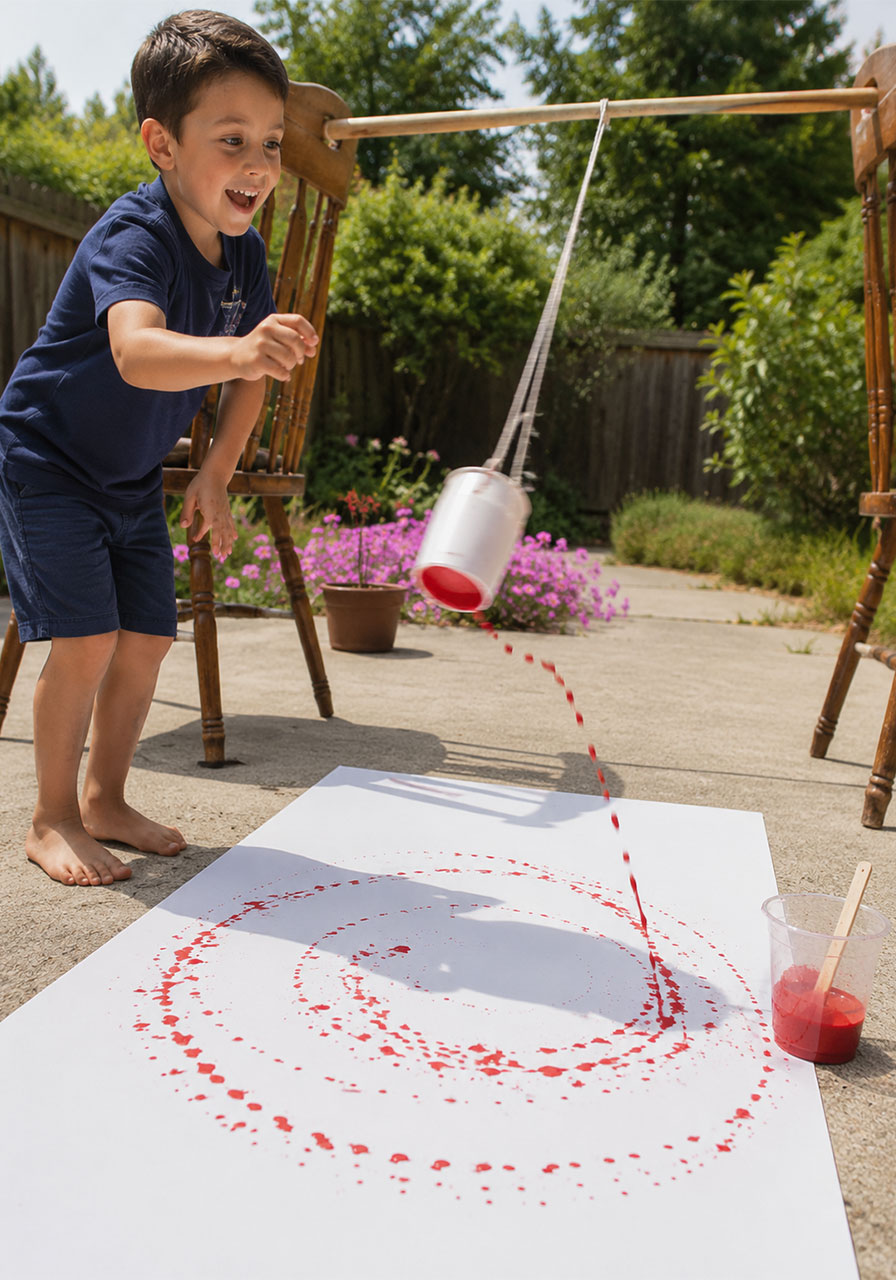
5. Let go and watch. The cup will keep swinging on its own, tracing rings and spirals in paint as it slowly loses momentum.
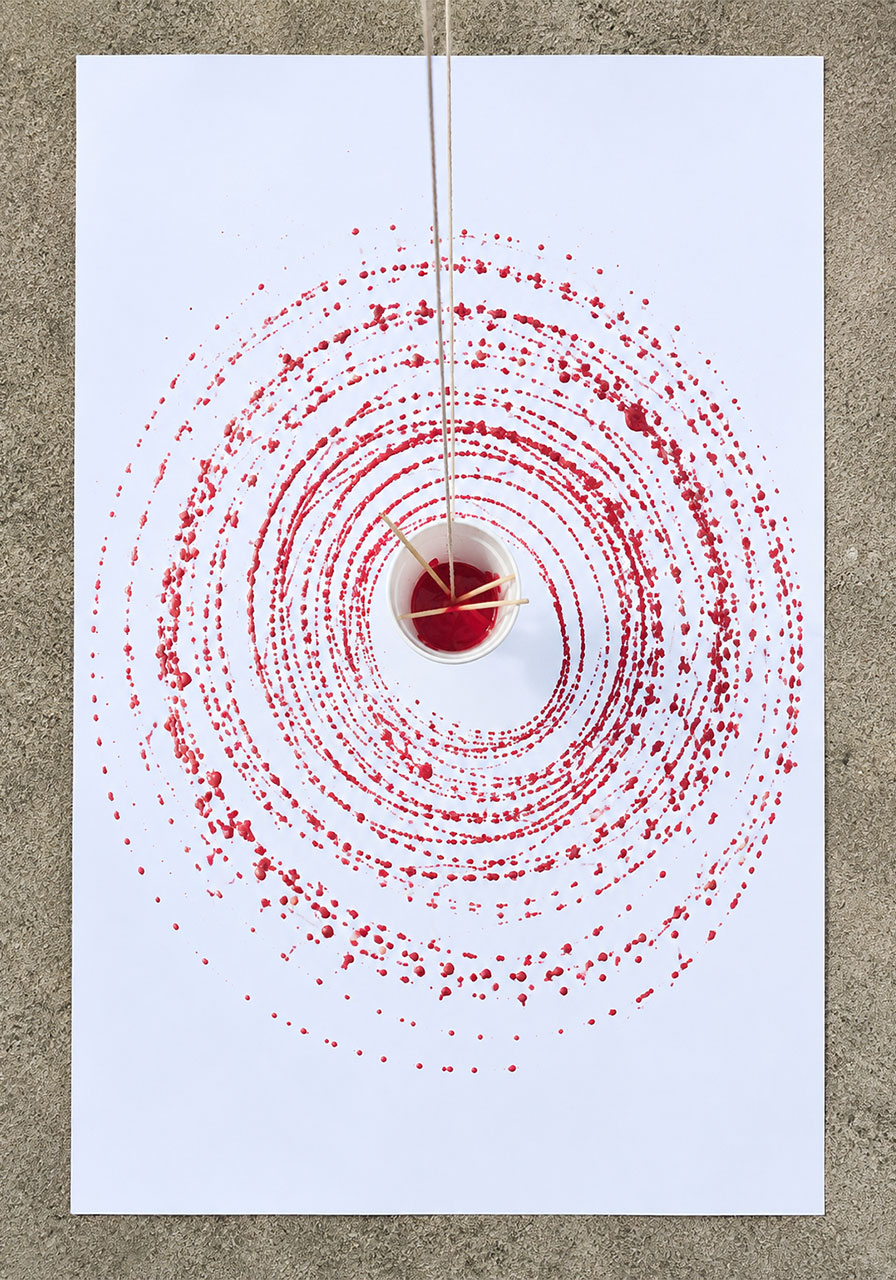
Within a minute or two, you’ll have a full spiral pattern made entirely of drips and dots. Once the cup runs low on paint or the pendulum comes to a stop, you’re done. Swap in a new color and repeat for a layered, multicolor masterpiece.
Troubleshooting Your Pendulum Painting
Getting big splotches instead of small, even dots? Your paint is too thick. Add a bit more water and stir again.
Paint stopping too quickly, before the pendulum even finishes a full swing? The hole in the bottom of your cup may be too small, or the paint may still be too thick. Try a slightly bigger hole or thinner paint.
Pendulum not swinging smoothly? Double-check that your broom handle is resting securely and level across both chairs, and that the string is tied at the exact center of the bar.
The Science Behind It: How a Pendulum Actually Works
A pendulum is any weight that hangs from a fixed point and is free to swing back and forth. In this activity, your cup of paint is the weight.
When the cup hangs straight down and isn’t moving, it’s sitting in what’s called its equilibrium position. That’s the point where gravity is perfectly balanced and the pendulum has no reason to move.
Once you pull the cup out of that resting position and let go, gravity pulls it back down and through the center, but momentum carries it past that point and up the other side. That back-and-forth motion is what creates the swinging pattern you see traced in paint.
Each swing loses a small amount of energy to friction and air resistance, which is why the pendulum gradually slows down and eventually stops. That gradual slowdown is exactly why the painted rings get smaller and tighter as the pattern spirals inward.
Turn It Into a Full STEM Lesson
If you want to stretch this into a more structured lesson, try these simple experiments and have kids predict the outcome before each one.
Change how you start the swing. Instead of swinging the cup in a circle, simply pull it back like a playground swing and let go in a straight line. Compare the resulting pattern to the circular swing. Which creates a spiral, and which creates straight, overlapping lines?
Change the string length. Try a short string and a long string with everything else identical. Ask your kids which pendulum they think will swing faster, then test it and see if their prediction was right.
Change the starting force. Give the cup a big push one time and a gentle push another time. Talk about how the size of the swings (the amplitude) compares to how long the pendulum keeps moving.
Having kids sketch predictions before each round, then compare their sketch to the real result, turns this from a fun activity into a genuine science experiment with observation and hypothesis testing built right in.
Pro Tips for the Best Results
Use two or three paint colors in the same session for a richer, layered piece of art. Let each color run out or slow to a stop before adding the next.
If you’re working with a group of kids, prep several cups of pre-mixed paint ahead of time in different colors so you can swap quickly between turns without losing momentum.
Save your best pieces. Pendulum paintings make surprisingly striking wall art once they’re dry, and they’re a fun keepsake to look back on as your kids get older.
Safety and Mess Notes
This activity is best done outdoors, since paint will splatter beyond the edges of your paper. If you’re set up over grass or pavement, a garden hose makes cleanup fast.
If you must do this indoors, use a large plastic tablecloth or drop cloth underneath the entire setup, not just under the paper, since drips can travel further than expected.
Washable acrylic paint is recommended specifically because it rinses out of clothing, hands, and most surfaces without much fuss.
Frequently Asked Questions
What age is pendulum painting appropriate for?
This works well for kids as young as 3, with adult help for setup and swinging. Kids around 6 and up can typically manage the swinging and pouring themselves, and older kids can build and run the entire experiment independently.
Can I do this without chairs?
Yes. Any sturdy horizontal bar works, including a swing set frame, a tree branch, a clothesline pole, or a step ladder with a broom handle balanced across the top.
What kind of paint works best?
Washable acrylic craft paint, thinned with water until it’s runny, gives the cleanest results. Avoid paint that’s too thick, since it will clump and splatter instead of dripping in a smooth line.
How long does one pendulum painting take?
Each swing typically runs one to two minutes before the pendulum slows to a stop. Most families spend 30 to 45 minutes total once you count setup, multiple colors, and a few repeat rounds.
Is this messy?
Yes, moderately. Doing it outdoors, using washable paint, and laying down a drop cloth if you’re indoors will keep cleanup simple.
Wrapping Up
Pendulum painting is one of those rare activities that feels like play for the kids and feels like a real science lesson for the adult running it. A little bit of setup turns into an afternoon of prediction, testing, and genuinely beautiful art.
Whether you’re planning a homeschool science week, a classroom STEAM station, or just something fun to fill a weekend afternoon, this is an activity worth keeping in your back pocket. Once your kids see that first spiral of paint take shape, don’t be surprised if “can we do the pendulum again” becomes a regular request.
