
Here’s a question that stops kids in their tracks every single time: can you stand on a flimsy paper cup without squashing it flat?
Their gut answer is always “no way.” Ours was too, honestly.
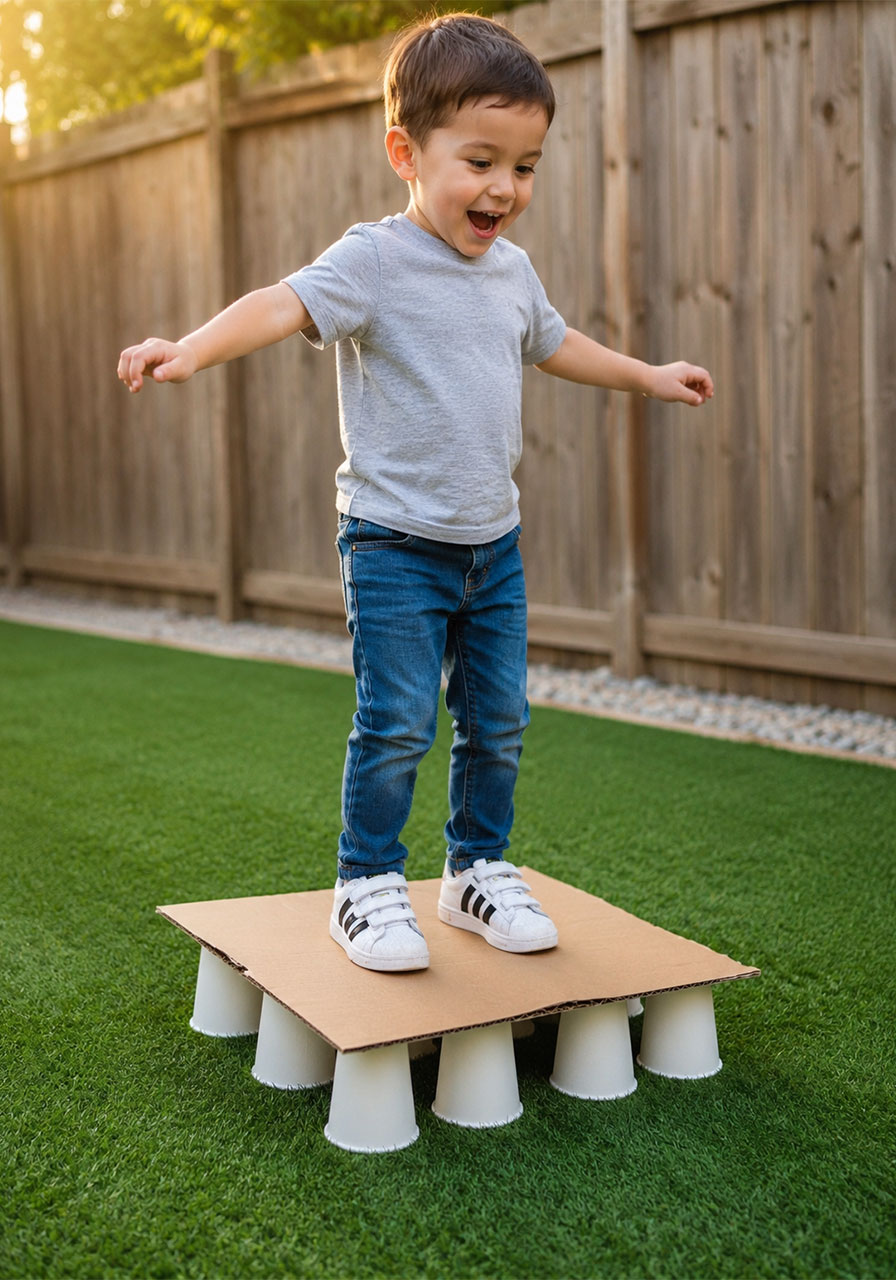
But with the right setup, the answer is a resounding yes. Not only can one paper cup hold a kid’s full body weight, you can stack a whole tower of cups and cardboard high enough to stand on twice over.
This is one of those rare STEM activities that looks like magic, costs almost nothing, and teaches real physics in under 15 minutes. If you’re a teacher looking for a hands-on lesson on force and weight distribution, or a parent hunting for a screen-free afternoon activity, this one belongs on your list.
Let’s break it down step by step so you can set it up with zero guesswork.
Why This STEM Challenge Works So Well
Kids learn best when they can see cause and effect with their own eyes.
This activity gives them exactly that. First, they watch a single cup crumple under weight. Then, minutes later, they watch the same type of cup hold that same weight without a single crease. That contrast is what makes the lesson stick.
It’s also naturally hands-on. Kids aren’t just watching you explain a concept, they’re testing it with their own two feet.
Best for: Ages 4 and up, classrooms, homeschool science lessons, birthday party STEM stations, rainy day activities
Time to Set Up: 5 minutes
Time to Play: 10-15 minutes
Group Size: Works for one child or a full classroom rotating through in small groups

What You’ll Need
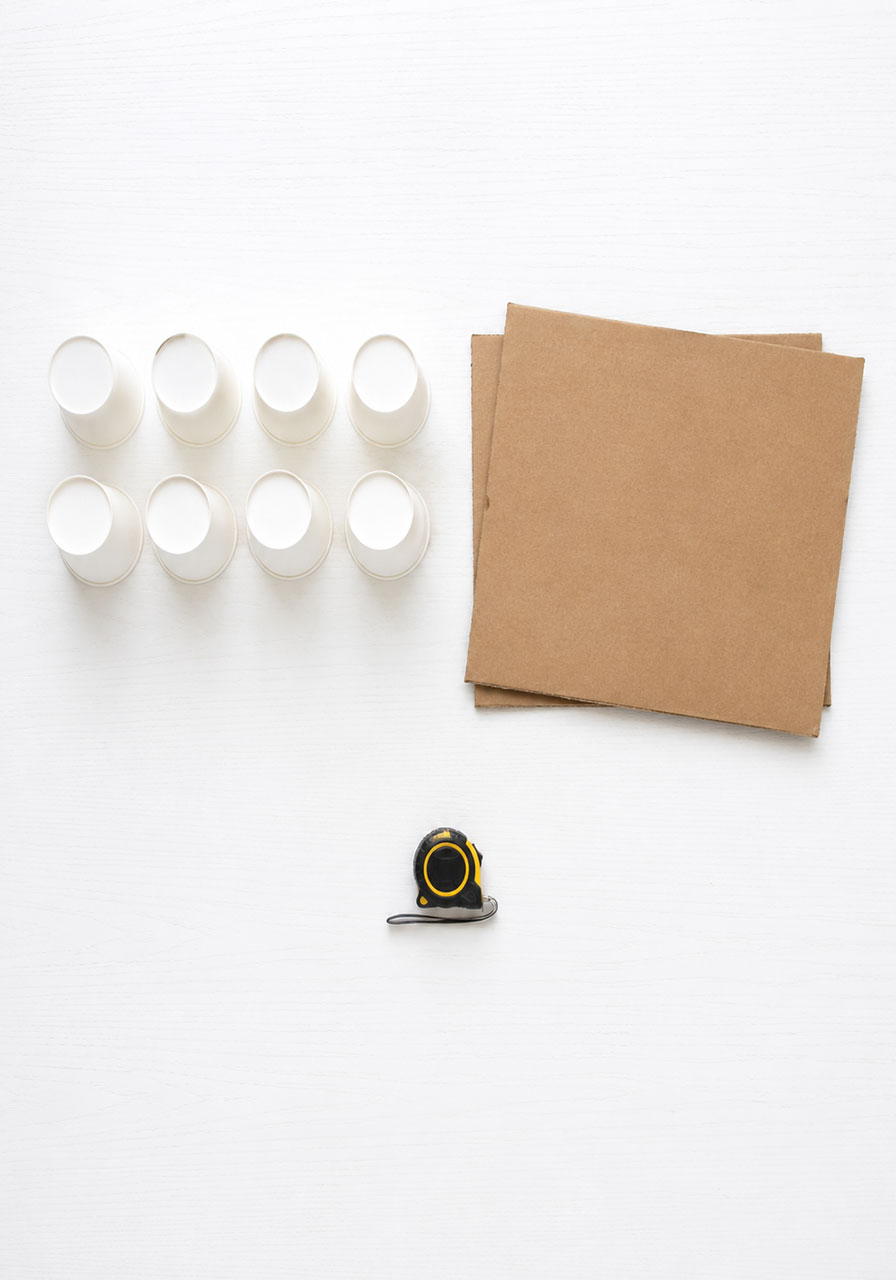
6-8 identical paper cups (plain paper cups work best, not wax-coated ones)
A flat piece of sturdy cardboard, cut to roughly 12 x 12 inches (an old cereal box or shipping box works great)
A second piece of cardboard the same size, if you want to try the two-layer tower
A flat patch of ground, grass, or floor to build on
A kid (or a few) willing to test their balance
That’s it. No glue, no tape, no special equipment. Just cups, cardboard, and curiosity.
How to Play: Step-by-Step Instructions
Follow these steps in order. Skipping the first step is tempting, but it’s actually the part that makes the whole activity click for kids.
Step 1: Test One Cup Alone
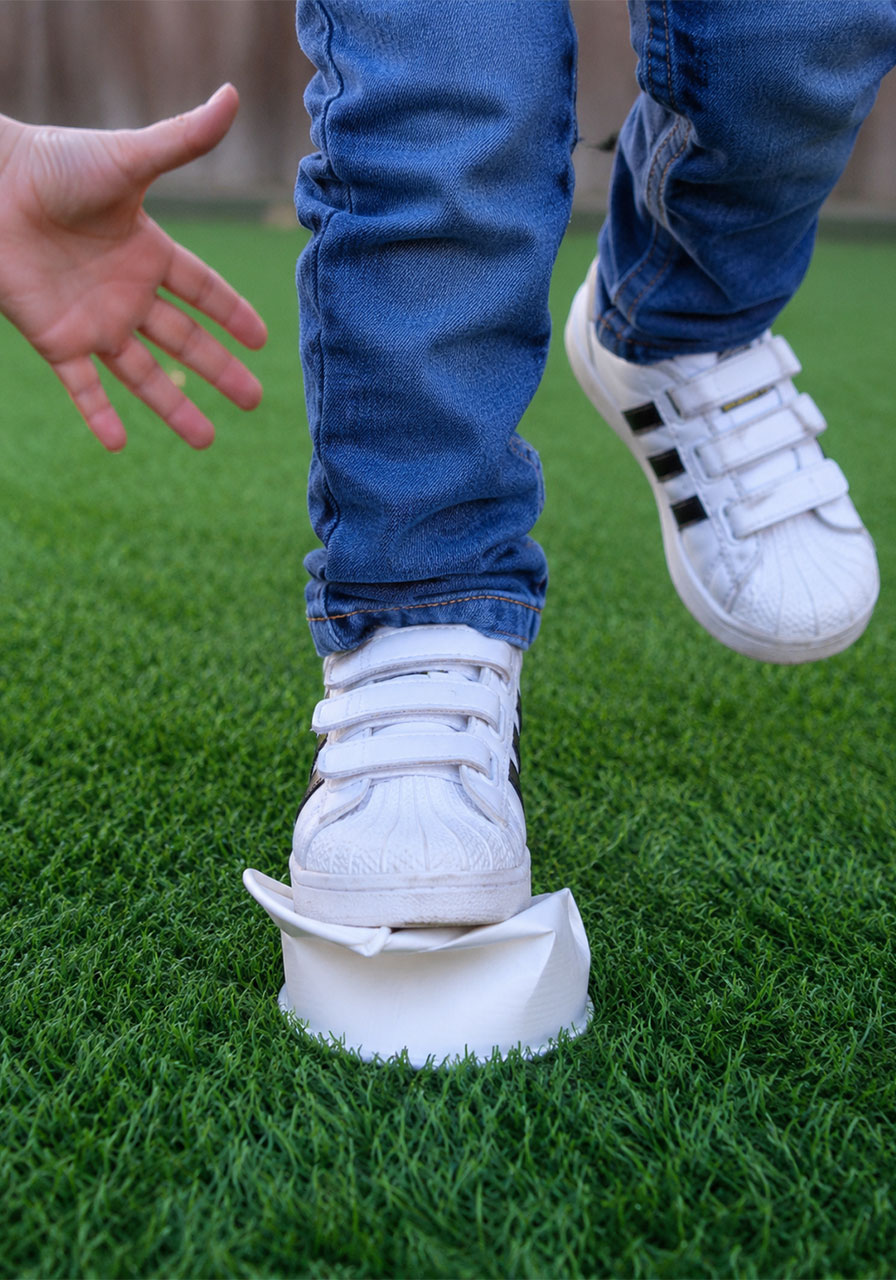
Place a single paper cup upside down on the ground.
Have your child carefully try to stand on it with one foot, holding onto your hand or a wall for balance.
Watch it collapse almost instantly. This is expected, and it’s actually the whole point. Ask your child what they think happened and why. Let them guess before you explain anything.
Step 2: Build the Cup Base
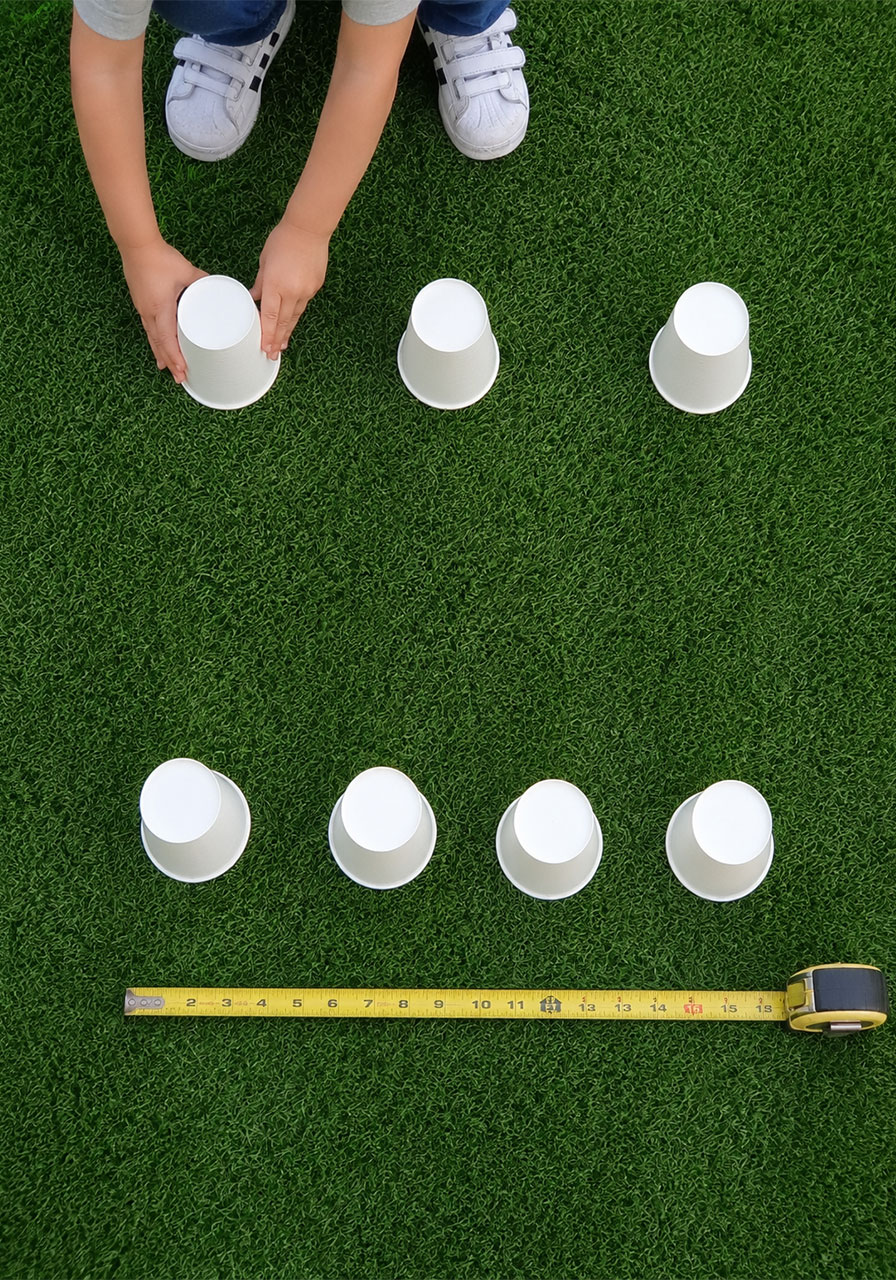
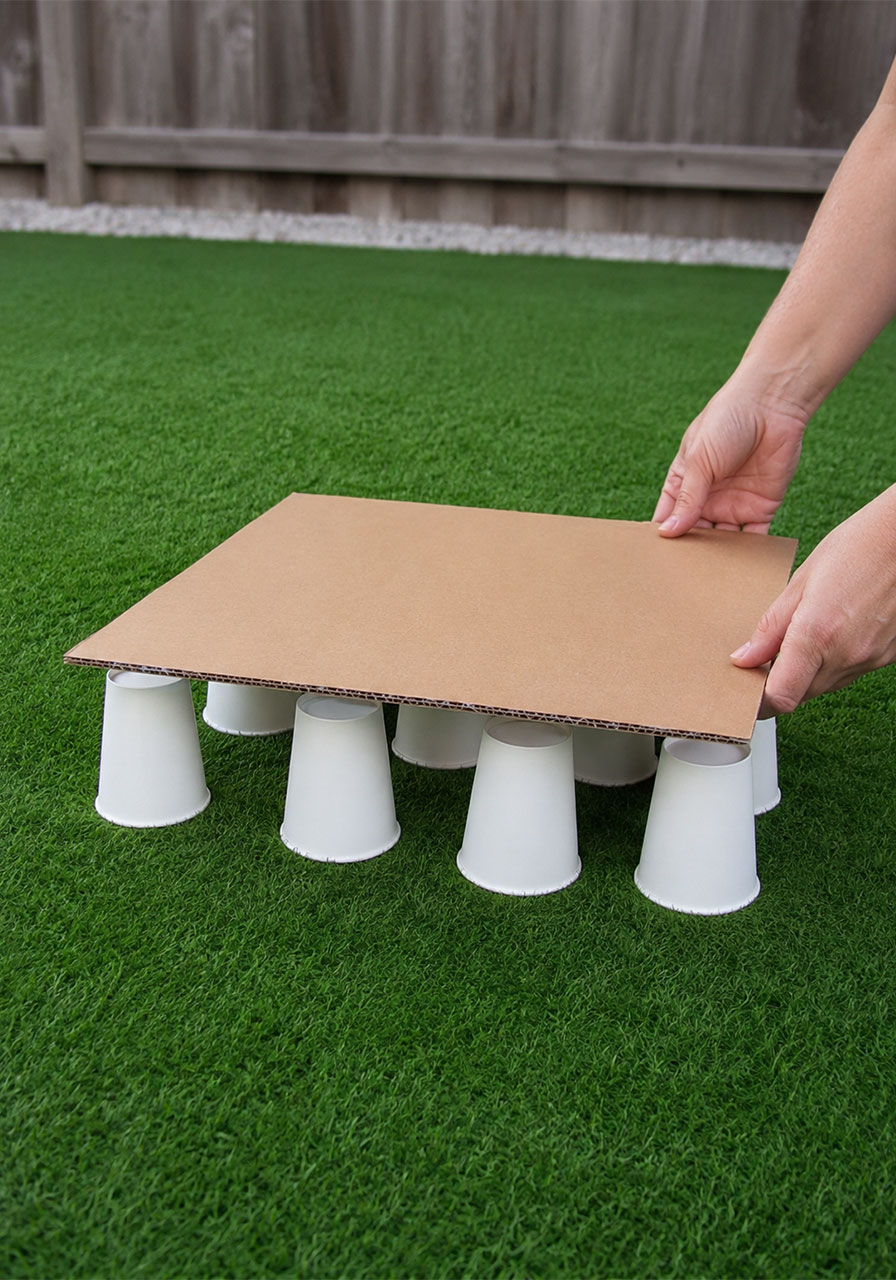
Now grab your remaining cups and place them upside down on the ground, spaced evenly apart in a grid pattern (think of the five dots on a die, spread a bit wider).
Spacing matters here. The cups need enough room between them that the cardboard sitting on top touches all of them evenly, without wobbling on just two or three.
Step 3: Add the Cardboard Platform
Lay your first piece of cardboard flat on top of the spaced-out cups.
Press down gently in the center to make sure it’s sitting evenly across all the cups before anyone steps on it.
Step 4: Stand on It
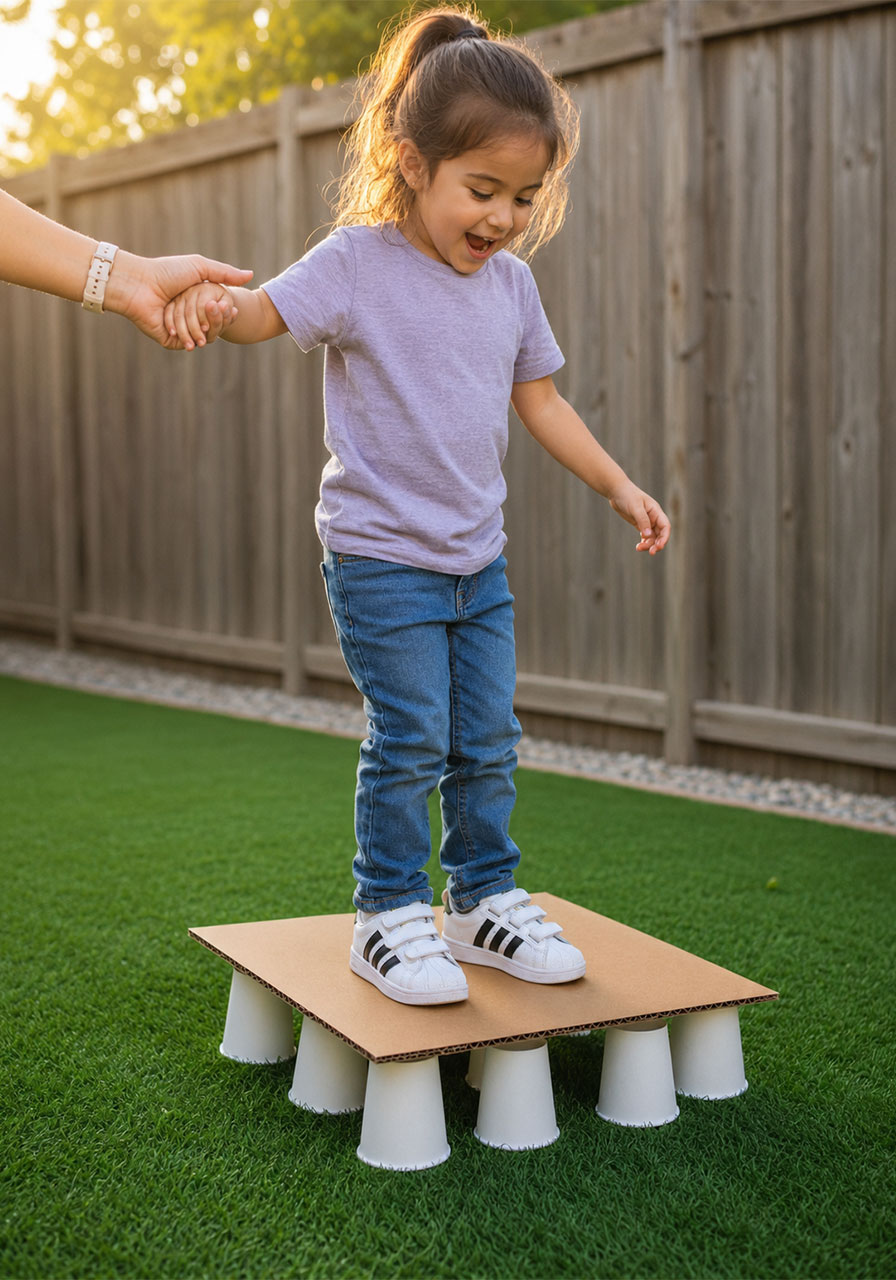
Now for the exciting part. Have your child step onto the cardboard platform, ideally holding your hand for balance since they’ll likely be a little wobbly with excitement.
The cups should hold firm. No crushing, no collapsing.
Pro Tip: Have your child step on slowly and evenly rather than jumping or stomping. A sudden, uneven force on one spot can still cause a cup to buckle, even though the setup can handle steady body weight just fine.
Step 5: Level Up With a Second Layer
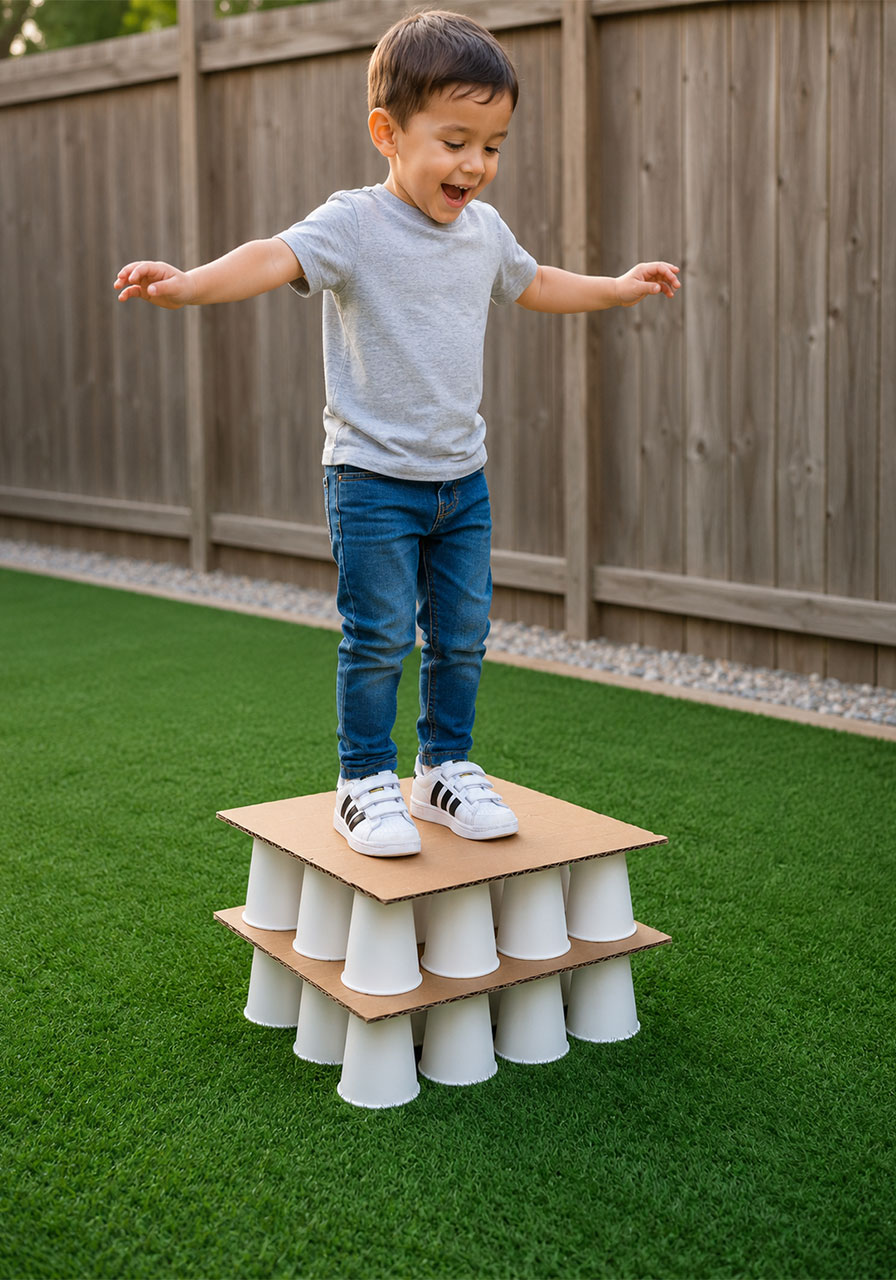
Ready to make it even more impressive? Place a second set of spaced-out cups directly on top of the first cardboard layer, then top those with your second piece of cardboard.
Have your child climb up and stand on the top layer. You’ve now built a two-story cup tower strong enough to hold a standing child, all from paper cups and cardboard.
Step 6: Try It With Different Weights
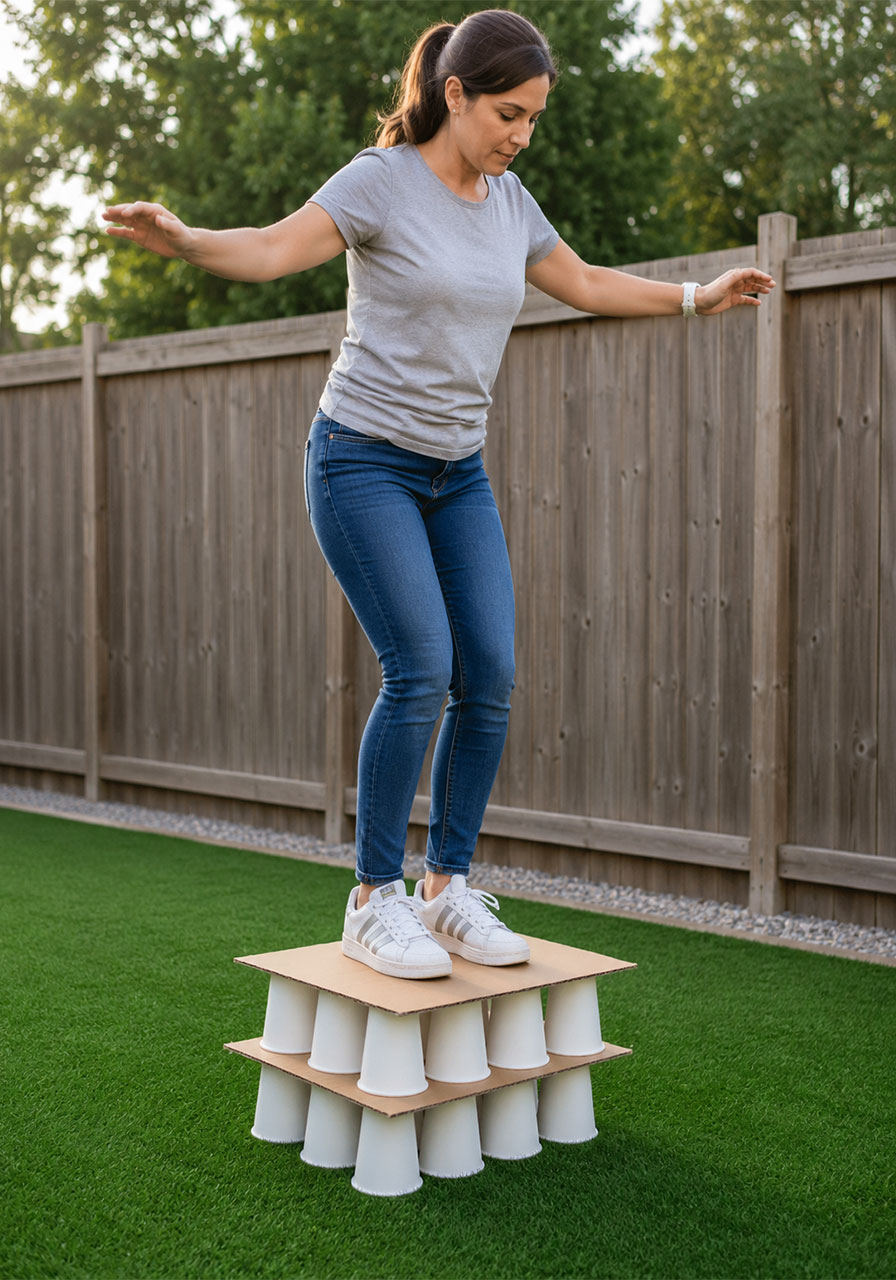
For an extra layer of learning, ask a heavier adult to carefully try standing on the same tower. Does it still hold? Compare how the tower responds to different amounts of weight, and talk through what your child notices.
Why Does This Work? The Science Explained
This activity is a hands-on lesson in a physics concept called pressure, which is force spread over an area.
When your child stood on a single cup, their entire body weight pushed down on one small point. All that force had nowhere to go, so the cup buckled and collapsed almost instantly.
When the cups were spread out and topped with cardboard, something changed. The cardboard spreads the child’s weight evenly across every single cup underneath it, instead of dumping all that force onto one spot.
Each individual cup only has to support a small fraction of the total weight, which is well within what a paper cup can handle. Spread the load, and suddenly a material that seemed way too weak turns out to be surprisingly strong.
This is the exact same principle engineers use in real life. Snowshoes work by spreading a person’s weight over a wider area so they don’t sink into snow. Bridges use multiple support columns instead of just one for the same reason. Even the legs of a table are positioned to spread weight evenly rather than balancing everything on a single point.
Paper cups turn out to be a genuinely strong shape too. Their cylinder form distributes weight along their walls rather than a single central point, which is part of why they hold up so well once the load is shared.
Talking Points for Teachers and Parents
If you’re using this as a classroom lesson or want to turn it into a deeper learning moment at home, here are a few discussion questions to ask before and after the experiment.
Before starting: “Do you think one cup can hold your weight? Why or why not?”
After Step 1: “What happened when you stood on just one cup? Why do you think that happened?”
After Step 4: “Why do you think the cups didn’t break this time, even though it’s the exact same type of cup?”
After Step 6: “Do you think the tower could hold an even heavier adult? What would you change to make it stronger?”
These simple questions turn a fun trick into genuine scientific thinking. Kids are forming a hypothesis, testing it, and revising their understanding based on what they observe. That’s the scientific method in action, even if it doesn’t feel like a lecture.
Fun Variations to Try
Change the cup spacing. Try placing the cups closer together, then farther apart, and see how much that changes the tower’s strength.
Test different cup types. Wax-coated cups, foam cups, and plain paper cups may all perform differently. Let kids predict which will be strongest before testing.
Race to build the tallest tower. See how many layers you can add before the tower becomes unstable. This works especially well for a group of kids or a classroom activity, with each team trying to out-build the others.
Turn it into a party challenge. This activity doubles as a fantastic party or classroom competition. Split kids into teams, give each team the same number of cups and cardboard, and see whose tower can hold the most weight or stand the tallest.
Safety Tips
Always have an adult standing close by to hold a child’s hand while they step onto the tower, since the wobble factor is real even when the structure holds.
Build on a soft surface like grass or carpet just in case of a tumble.
Start with one layer before attempting two, so kids build confidence and balance gradually.
Why This Activity Belongs in Your STEM Toolkit
Great STEM activities don’t need a big budget or complicated setup. They need a genuine “wow” moment, a clear reason why something happens, and enough flexibility that kids can keep experimenting long after the first try.
This paper cup challenge checks every one of those boxes. It’s affordable, it’s fast to set up, and it turns an everyday object into a lesson kids will actually remember. Save it in your back pocket for the next rainy afternoon, science fair prep session, or classroom five minutes that need filling with something genuinely worthwhile.
Frequently Asked Questions
How many cups do I need for this activity?
Six to eight cups per layer works well for a child’s body weight. Larger or heavier participants may need additional cups for extra support.
Will this work with plastic cups instead of paper?
Paper cups are recommended since their structure distributes weight effectively. Plastic cups behave differently and may crack rather than compress evenly.
What age group is this best suited for?
This activity works well for children ages 4 and up, with closer adult supervision recommended for younger kids balancing on the platform.
Can adults try this too?
Yes, though more cups and a sturdier cardboard base are recommended to safely support additional weight.
