
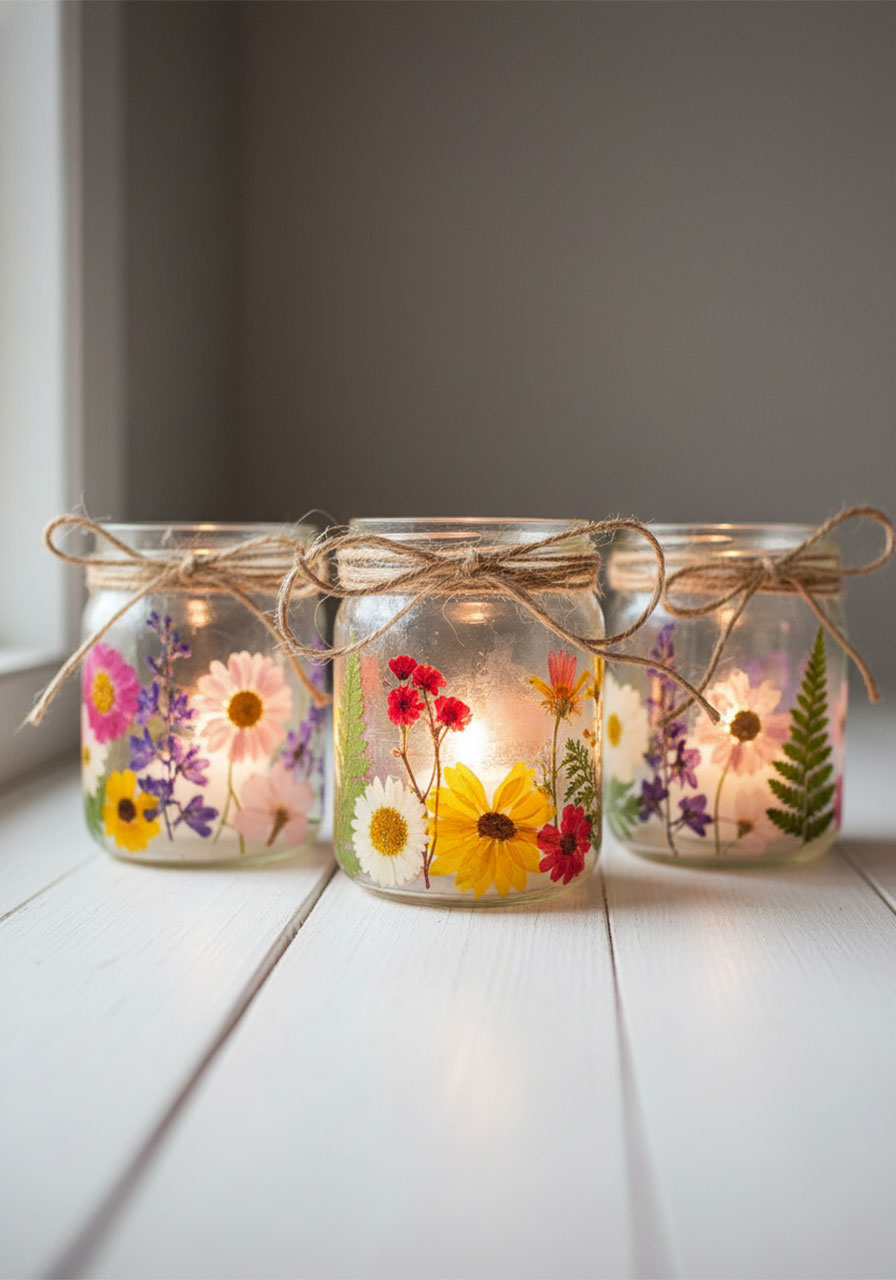
Looking for a Mother’s Day gift that’s beautiful, personal, and won’t break the bank? These pressed flower lanterns are exactly what you need. A simple glass jar, a handful of dried flowers, and a little Mod Podge are all it takes to create a glowing candle holder that looks like it came straight from a boutique shop – for almost nothing.
I first made these with a group of kids for a spring craft session, and every single parent cried happy tears when they received one. That’s the magic of something handmade. These lanterns also work beautifully as centerpieces for weddings, summer parties, or birthday tables – but honestly, giving one to a mom with a candle tucked inside? Unbeatable.
⏱ Quick OverviewBest for: Kids (with adult help), adults, classrooms, and craft groups
Time to Make: 30 – 45 minutes (plus drying time)
Skill Level: Beginner-friendly – seriously, anyone can do this
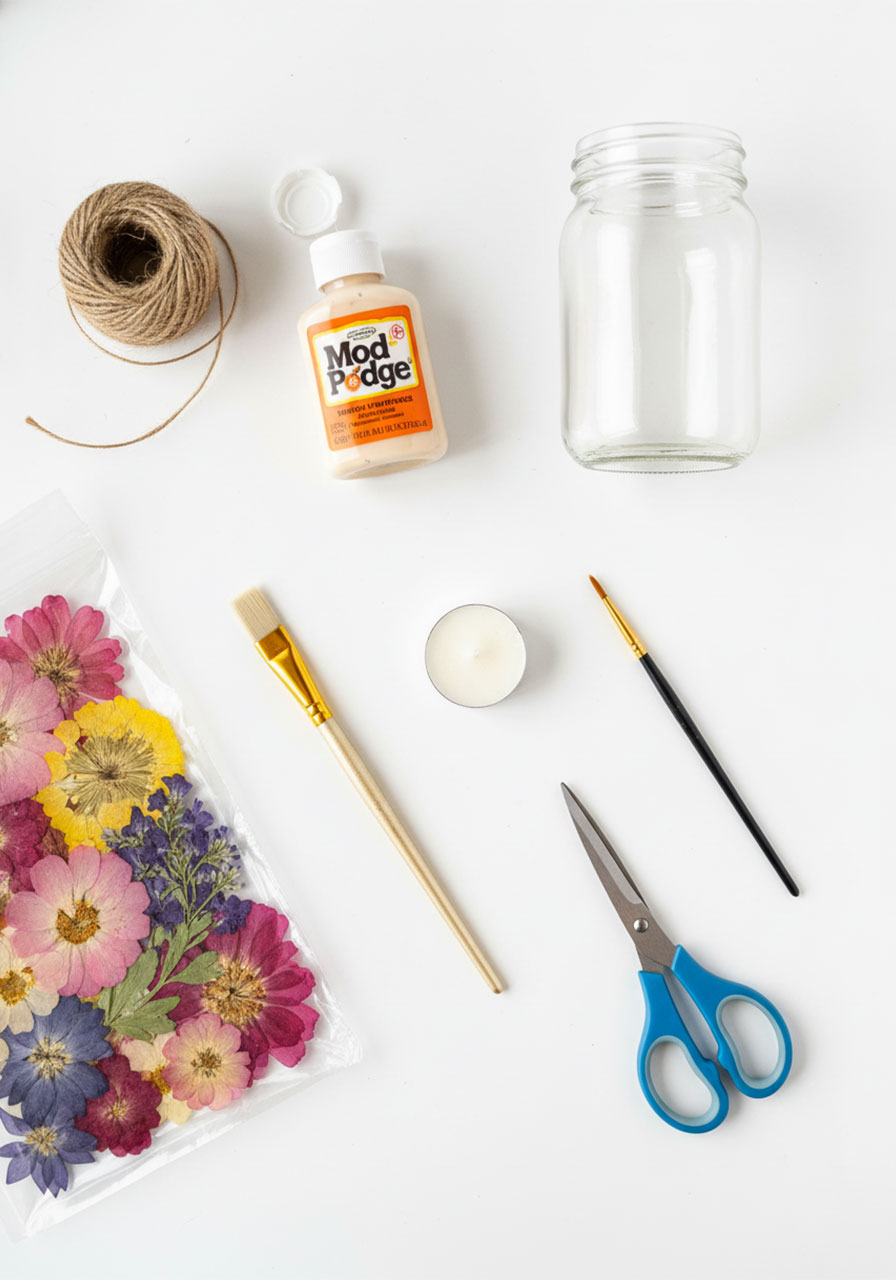
What You’ll Need
Materials
Glass jar (smooth-sided, about 8 oz – a wide-mouth mason jar or a repurposed jam jar works great)
Pressed/dried flowers (bought online or from a craft store – more on this below)
Mod Podge (matte finish is recommended)
Twine (about 4 feet per jar)
Tealight or votive candle
Tools
Paintbrush (a small flat brush works best)
Scissors (optional, for trimming stems)

Before You Start: A Few Things to Know
What kind of jar should I use?
Go for a smooth-sided glass jar – this is important! Regular mason jars often have ridges, which make it harder to press flowers flat and don’t look as clean. Dollar store jars, recycled jam jars, or wide-mouth mason jars with smooth sides are all perfect. Aim for an 8-oz size so there’s enough room to fit a candle and a lighter inside.
Where do I get pressed flowers?
Amazon and Etsy both have a huge variety of pressed flower packs – you can even find packs in a single colour palette, which makes it easy to match a theme. Craft stores like Michaels may carry a smaller selection. If you want to make it extra special, you can press flowers from your own garden (daisies, pansies, and ferns work beautifully). Just make sure they’re fully dry before using them – fresh flowers will turn brown or mold under the Mod Podge.
👩🏫 Teacher Tip: If you’re doing this as a class project, order pressed flowers in bulk from Amazon ahead of time. Plan on about 15 flowers per jar plus some greenery. One mixed pack often covers 4–6 jars.
How to Make Your Pressed Flower Lantern
1. Apply the First Layer of Mod Podge
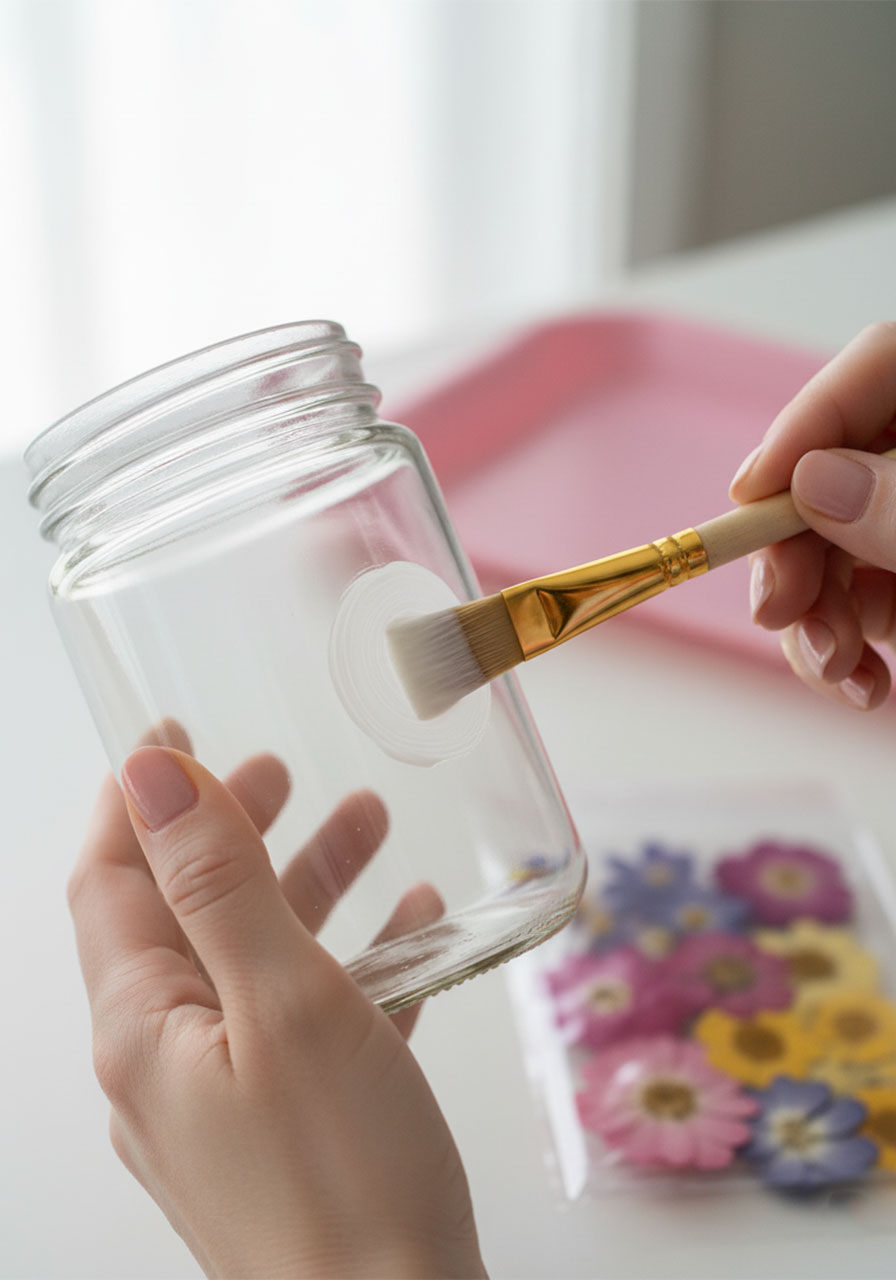
Paint a small patch (about 2–3 inches wide) on the outside of your jar using a thin layer of Mod Podge. Work in small sections – Mod Podge dries fast, and you don’t want it to set before your flower is in place.
2. Press Your First Flower Into Place
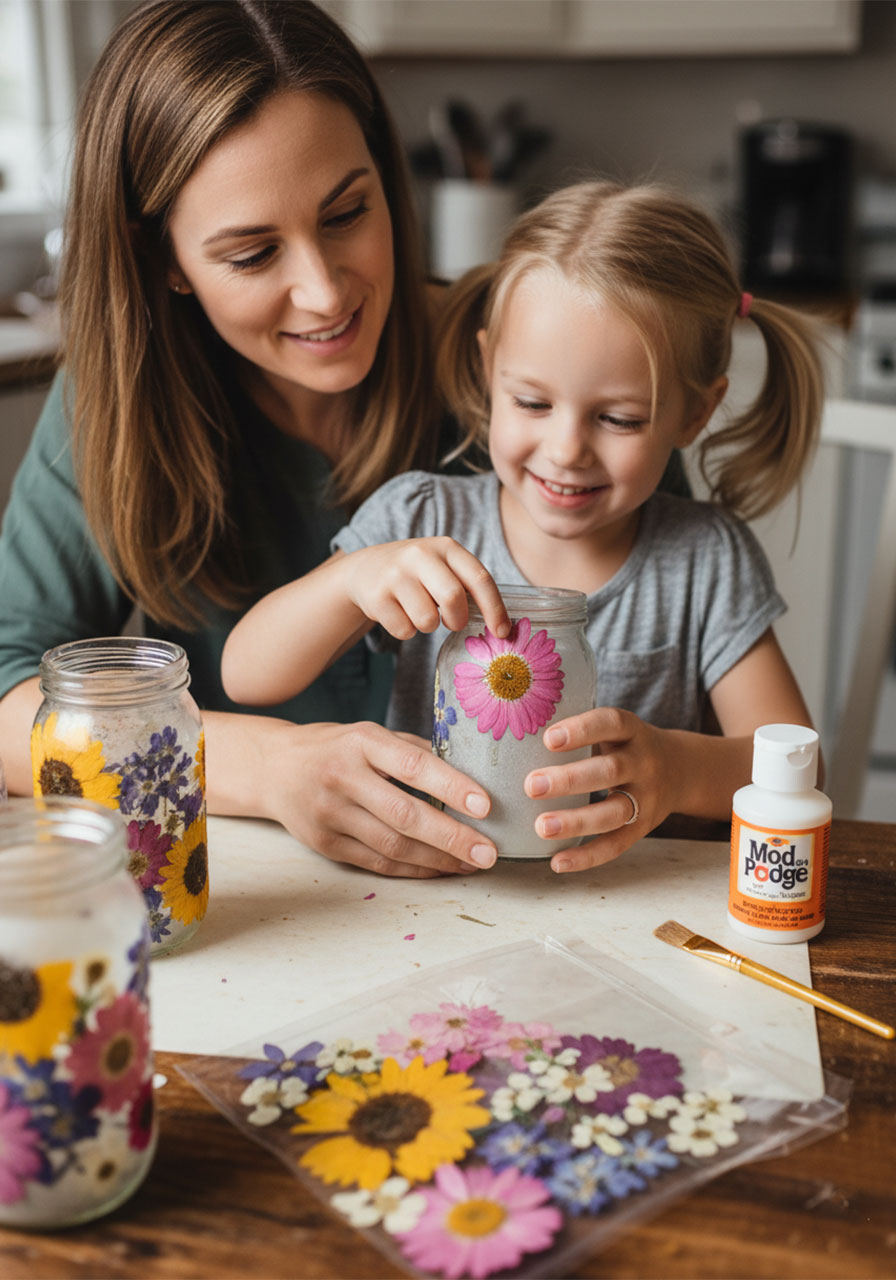
Pick up a pressed flower and gently press it onto the wet Mod Podge area. Use your finger to smooth it down flat, working from the center outward. For flowers with layered petals (like daisies), use your brush to carefully glue each petal layer down to the one beneath it – this keeps everything flat and secure.
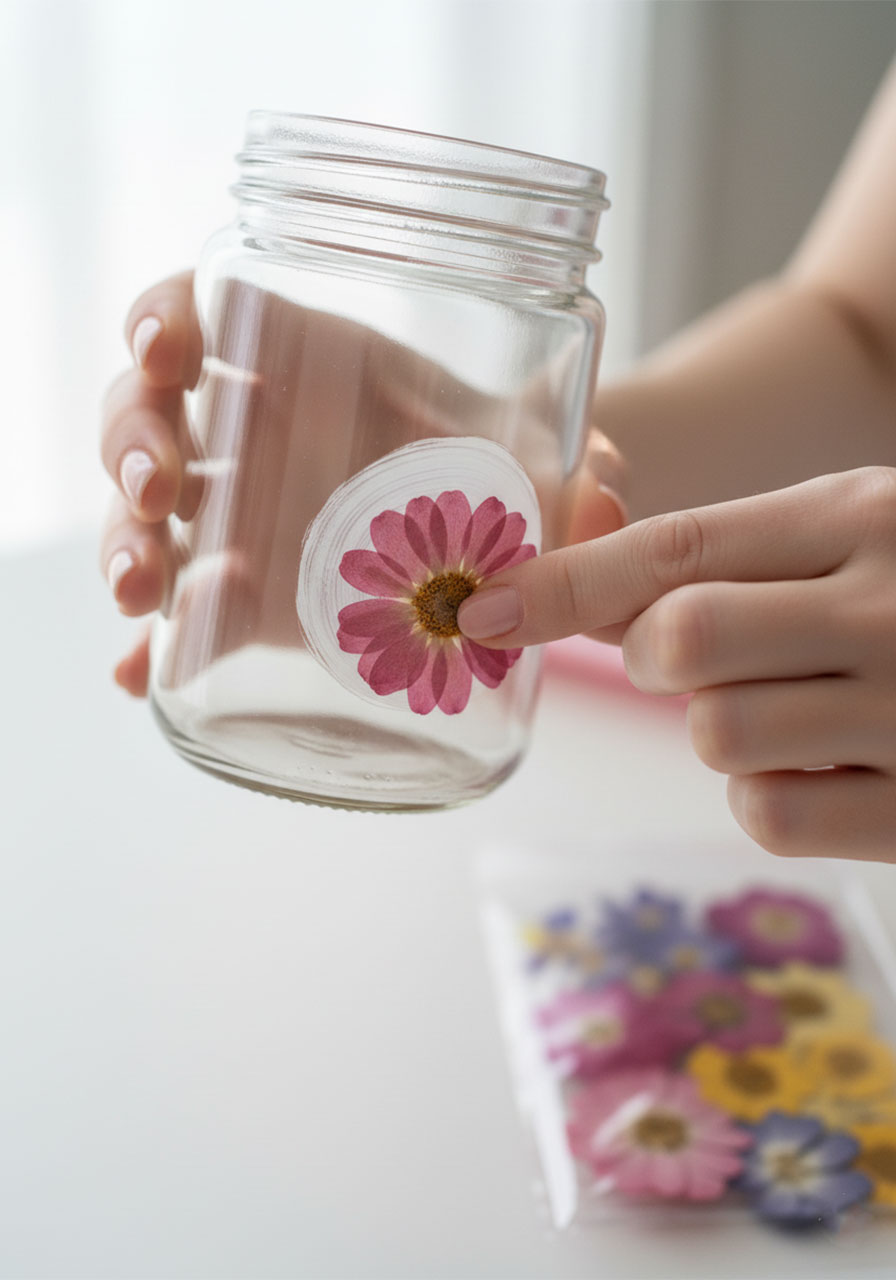
3. Seal the Flower with Another Coat
Brush another thin layer of Mod Podge over the flower to seal it in place. Don’t worry if it looks white and cloudy at this stage – it dries completely clear. This step is what gives the lantern its polished, embedded-in-glass look.
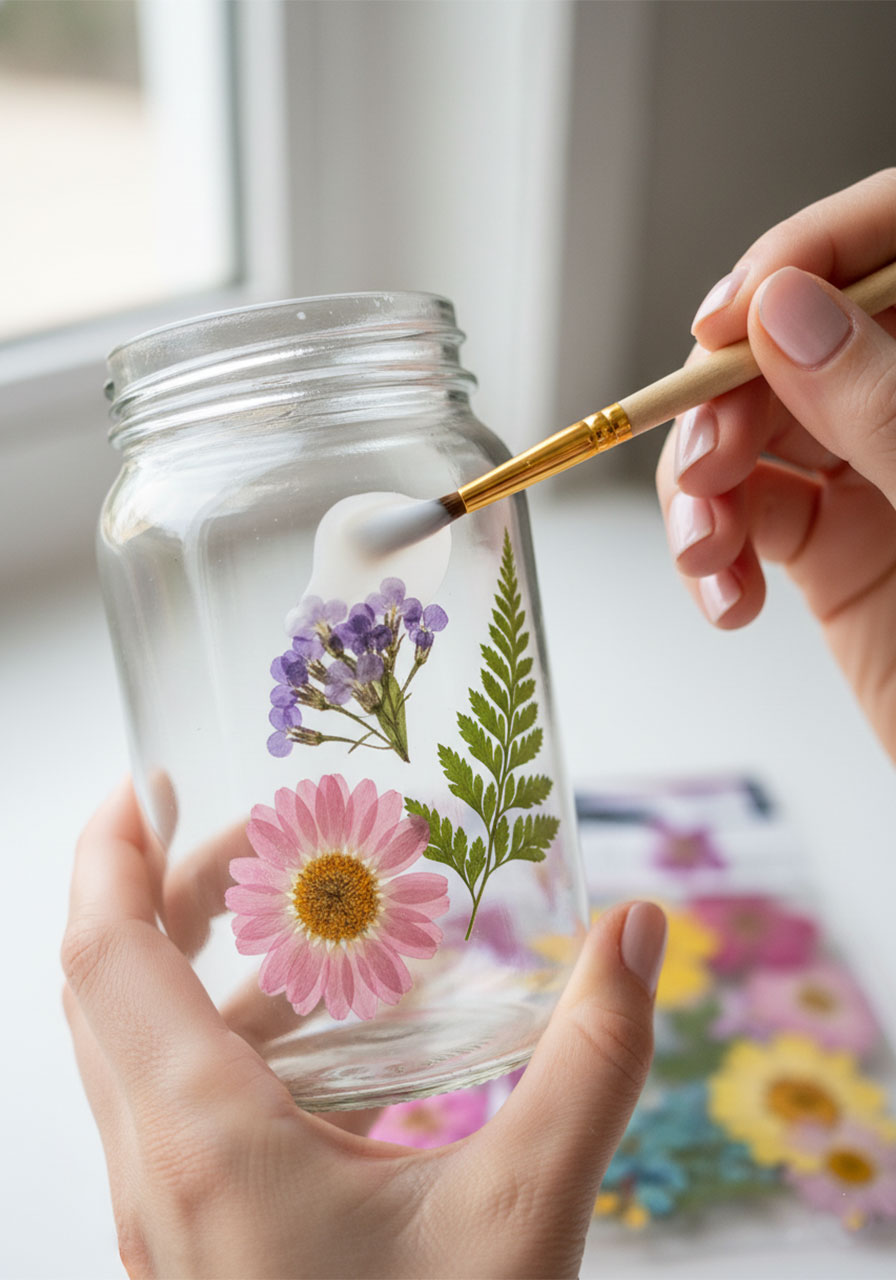
4. Repeat All Around the Jar
Keep going, section by section, until you’ve covered as much of the jar as you like. You can go for full coverage for a lush, garden-window look, or space your flowers out for a more minimal, airy feel. Mix in a few sprigs of greenery between the flowers – it fills gaps beautifully and makes everything feel more natural.
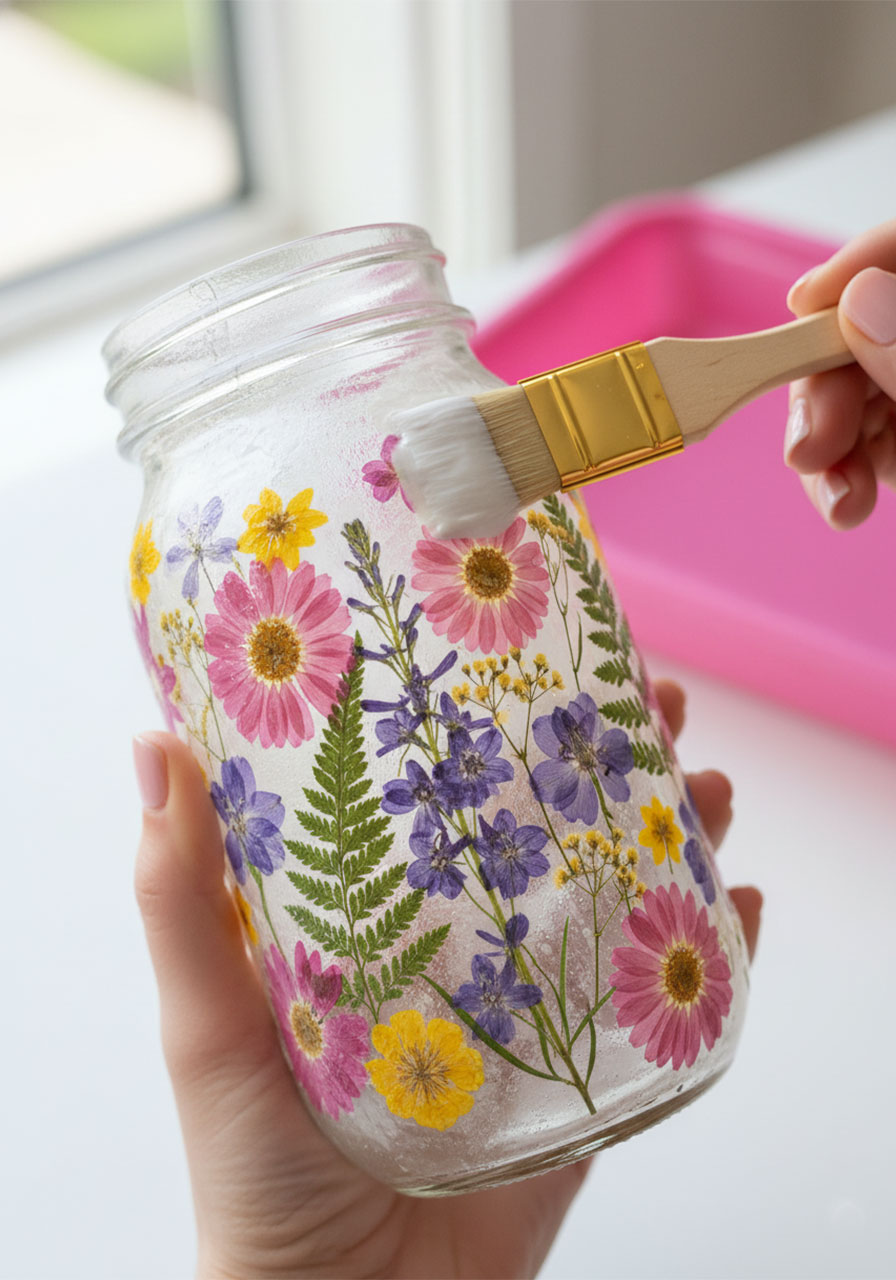
5. Apply a Final Coat Over the Entire Jar
Once all your flowers are in place, let everything sit for about 5 minutes. Then brush one final thin coat of Mod Podge over the entire outside of the jar. This step is the secret to a professional finish – it seals everything evenly and creates a gorgeous frosted-glass texture that really glows when the candle is lit.
Let the jar dry completely before handling (about 20–30 minutes).
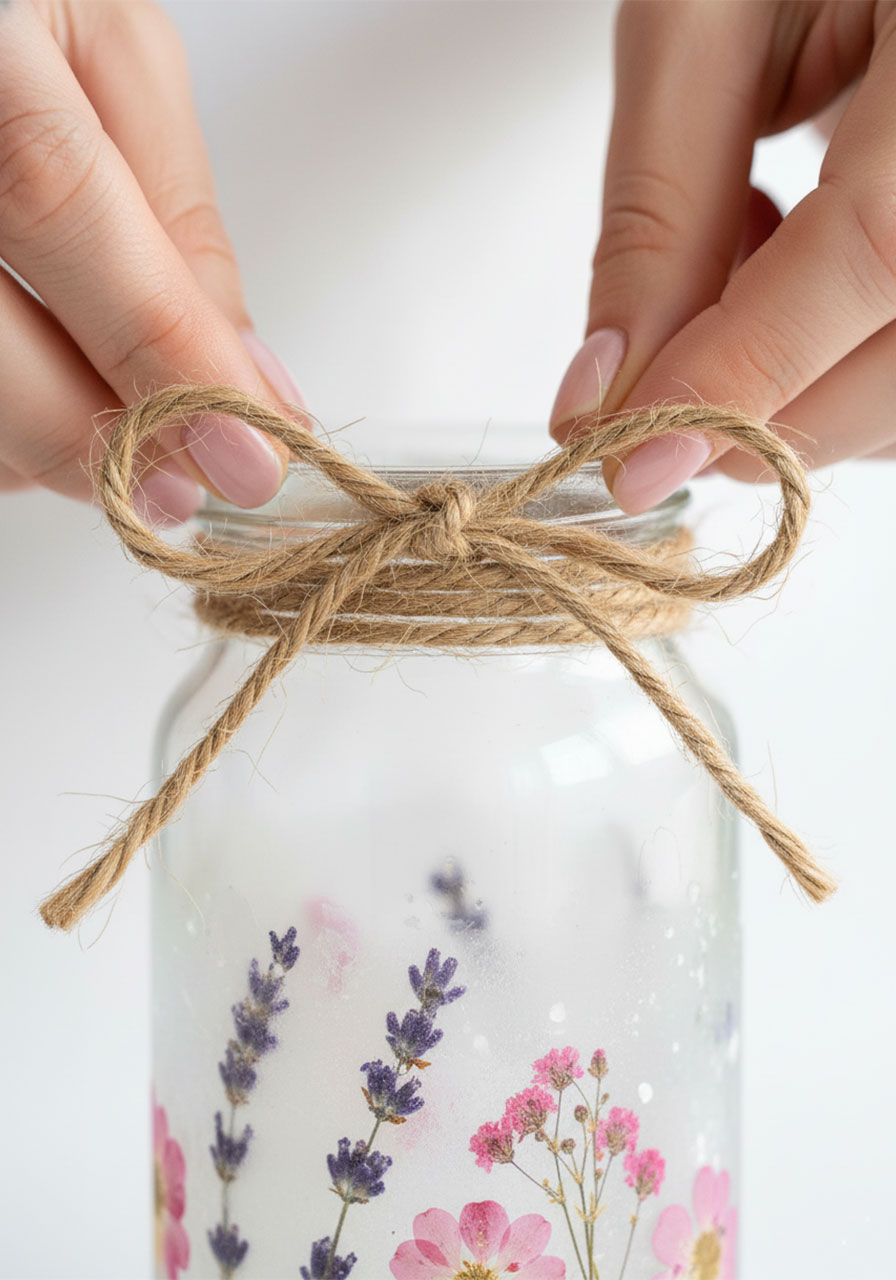
6. Tie on the Twine
Take your twine and start from the middle of the piece. Wrap it several times around the neck of the jar (just below the opening), then tie a knot and finish with a bow using the remaining ends. This rustic touch is what makes these lanterns look so charming and gift-ready – it’s the bow on top of the bow!
7. Add Your Candle and Admire!
Drop a tealight or votive candle inside, light it up, and watch your lantern come to life. The warm glow through the glass illuminates every petal from behind – it’s genuinely breathtaking.
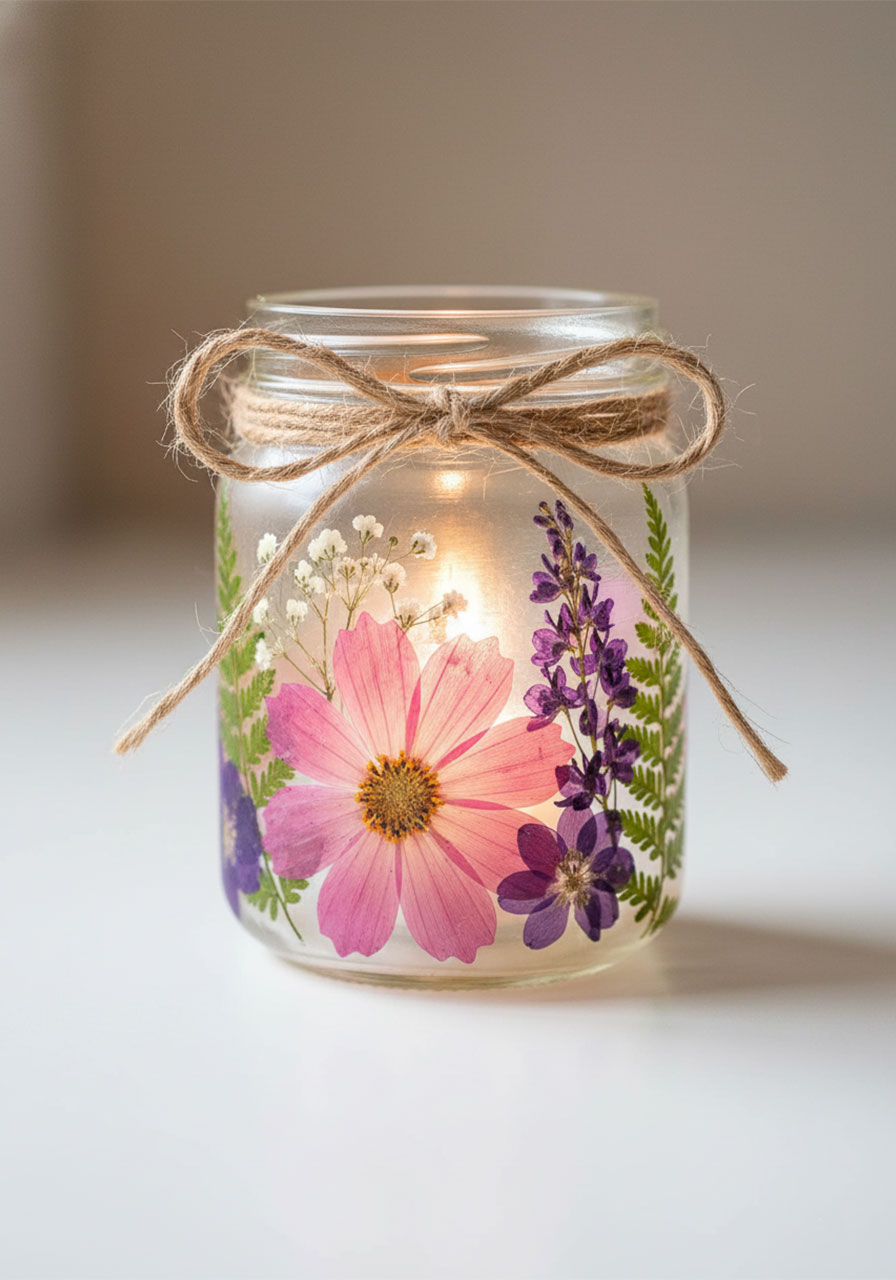
💡 Pro Tip: Upgrade the Candle Dollar store tealights burn for less than an hour – fine for a quick display, but not ideal for a gift. Swap in a larger votive candle for a longer, more impressive glow. Battery-operated tealights are another great option, especially if kids or safety are a concern.
Make It Even More Special: Fun Variations to Try
One-Colour Theme: Use flowers in a single colour family (all pinks, all purples) for a sophisticated, curated look. Perfect for a Mother’s Day gift with a favourite colour in mind.
Wildflower Mix: Go bold with a mix of colours for a vibrant, garden-party vibe.
Lavender Lantern: Use only pressed lavender sprigs for a calming, elegant look – and the faint scent is a lovely bonus.
Make a Set of Three: Three lanterns in coordinating colours displayed together make an absolutely stunning table centerpiece for Mother’s Day brunch.
Common Questions, Answered
Can I use Mod Podge Gloss instead of Matte?
Yes! Matte gives a soft, frosted finish, while gloss creates a shinier look. Both work perfectly – it just comes down to the look you prefer. Satin finish also works well as a middle ground.
Why did my flowers turn brown?
This usually happens for one of two reasons: the flowers weren’t completely dry before applying (unlikely if bought pre-pressed), or the flower’s pigment reacted with the Mod Podge and oxidized. Applying a very thin coat over delicate petals helps reduce this risk.
Can kids do this activity?
Absolutely – this is one of the best crafts for kids and adults to do together. Younger children can place and press the flowers while an adult handles the brushing. Kids as young as 5 or 6 can participate with supervision.
Can I hang the lantern?
Yes! Wrap the twine tightly around the neck of the jar several times before tying, then loop the remaining twine into a handle. You can also thread picture-hanging wire through the twine bow for extra stability.
Why This Makes the Perfect Mother’s Day Gift
Here’s the thing about store-bought gifts: they’re forgotten. A handmade lantern that a child pressed flowers into and carefully assembled? That gets displayed on the mantle. It gets pointed out to every visitor. It gets kept.
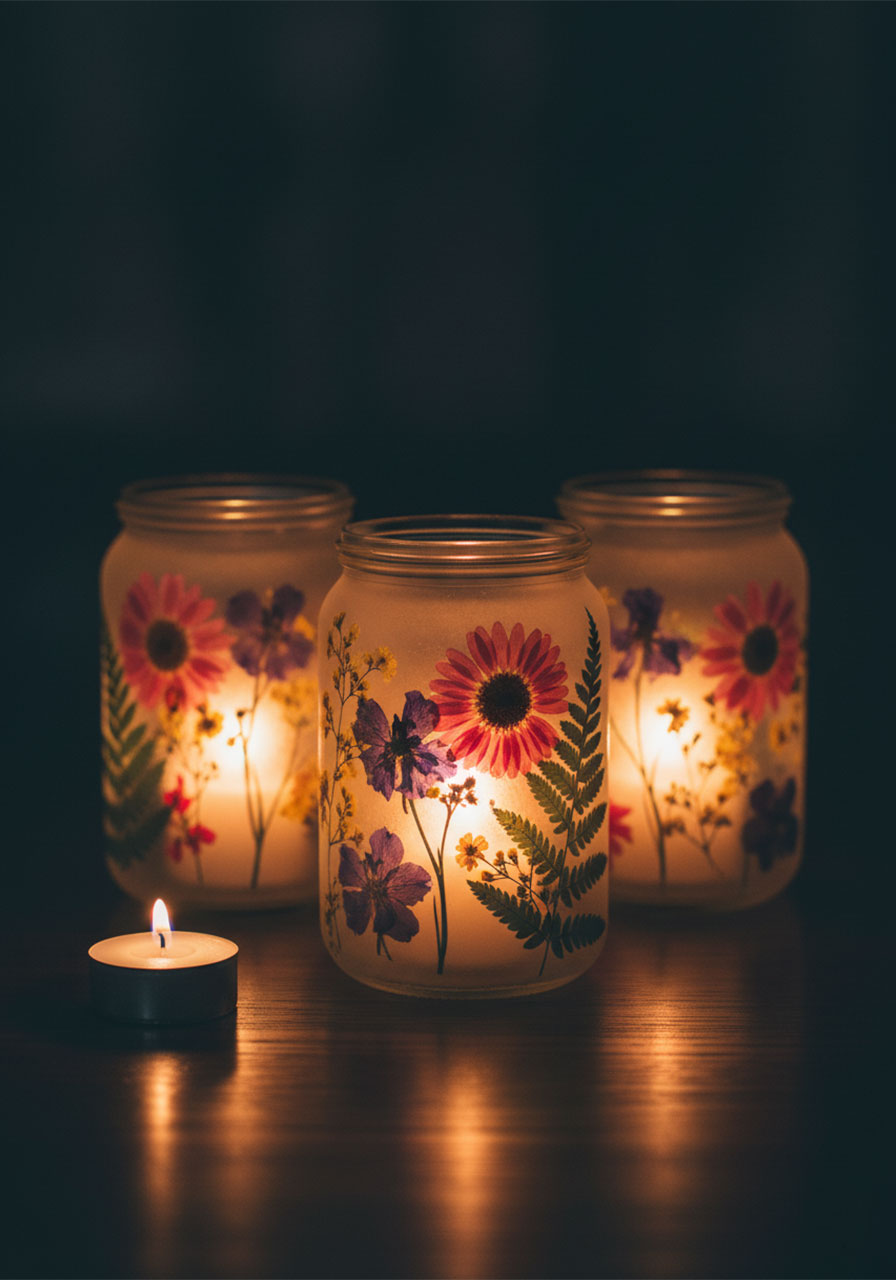
Whether you’re a parent crafting with your kids at the kitchen table, or a teacher organizing a class Mother’s Day project, this activity delivers on every level: it’s simple enough for beginners, beautiful enough to be genuinely impressive, and personal enough to make any mom feel truly seen.
Add a ribbon, a candle, and a handwritten card – and you’ve got a gift that’s guaranteed to cause happy tears. You’re welcome.
More Mother’s Day Ideas to Keep the Fun Rolling:
30+ Mother’s Day Crafts for Kids of All Ages
15 Easy Mother’s Day Brunch Ideas That Will Make Mom Feel Like a Queen
23 Easy DIY Mother’s Day Gift Ideas She’ll Actually Love (No Craft Skills Required!)
How to Make a 3D Pop-Up Heart Mother’s Day Card (Step-by-Step)
DIY Mother’s Day “Flower Shop” Pop-Up Card Your Kids Will Be So Proud To Give
The Sweetest DIY Mother’s Day Gift: A Decorated “Mama” Mug Filled with Paper Heart Wishes
How to Make the Cutest Mothers Day Flower Pots (A Fingerprint Keepsake She’ll Treasure Forever)
How to Make a DIY Pop-Up Flower Bouquet Mother’s Day Card
DIY “Helping Hands” Bouquet: The Sweetest Mother’s Day Craft Kids Can Make
