

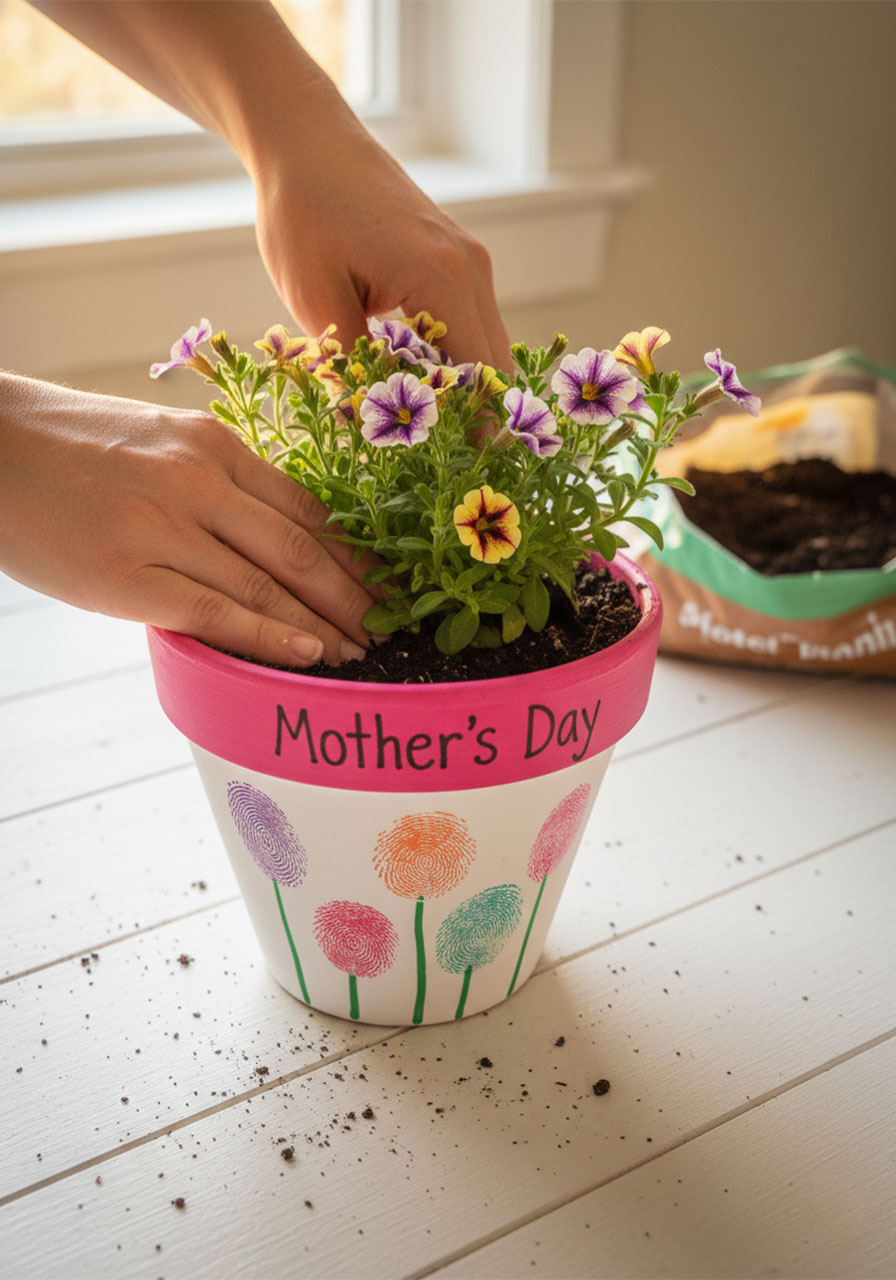
If you’re looking for a Mother’s Day gift that’s equal parts adorable and meaningful, this is it. These handpainted Mothers Day flower pots use your child’s actual fingerprints to create the flower stems – which means every single pot is one-of-a-kind, and Mom gets to keep a little piece of those tiny hands forever.
The result? A bright, colorful pot painted with a hot pink rim, cheerful fingerprint flowers in every color of the rainbow, and “Mother’s Day” written right across the top – filled with real blooms to complete the gift. It looks like something from a boutique. It costs next to nothing. And kids absolutely love making it.
Whether you’re a parent doing this at home or a teacher planning a whole classroom of them, this step-by-step guide walks you through everything from first brushstroke to finished gift.
Best for: Kids ages 3 and up, parents, teachers, classroom Mother’s Day craft
Time to Make: 45–60 minutes (plus drying time)
Skill Level: Beginner – no painting experience needed at all
What You’ll Need
1 plain terracotta or white clay pot (a 4–6 inch pot works perfectly)
Acrylic craft paint – hot pink, white, green, and any bright flower colors you like (purple, orange, teal, red, yellow all appear in the inspiration image)
Paintbrushes – one medium flat brush for base coats, one thin brush for detail work
A black marker or paint pen (for writing the text)
A pencil or dotting tool (optional, for drawing guidelines)
Paper plate or paint palette for mixing colors
A cup of water and paper towels for cleaning brushes
Mod Podge or clear acrylic sealer spray (to protect the finished design)
A small flowering plant to pop inside when done – calibrachoa, petunias, or violas work beautifully
Pro Tip: Terracotta pots are very affordable at any craft store or dollar store. Grab a few extras – once kids start, they always want to make one for grandma too!


Step-by-Step Instructions
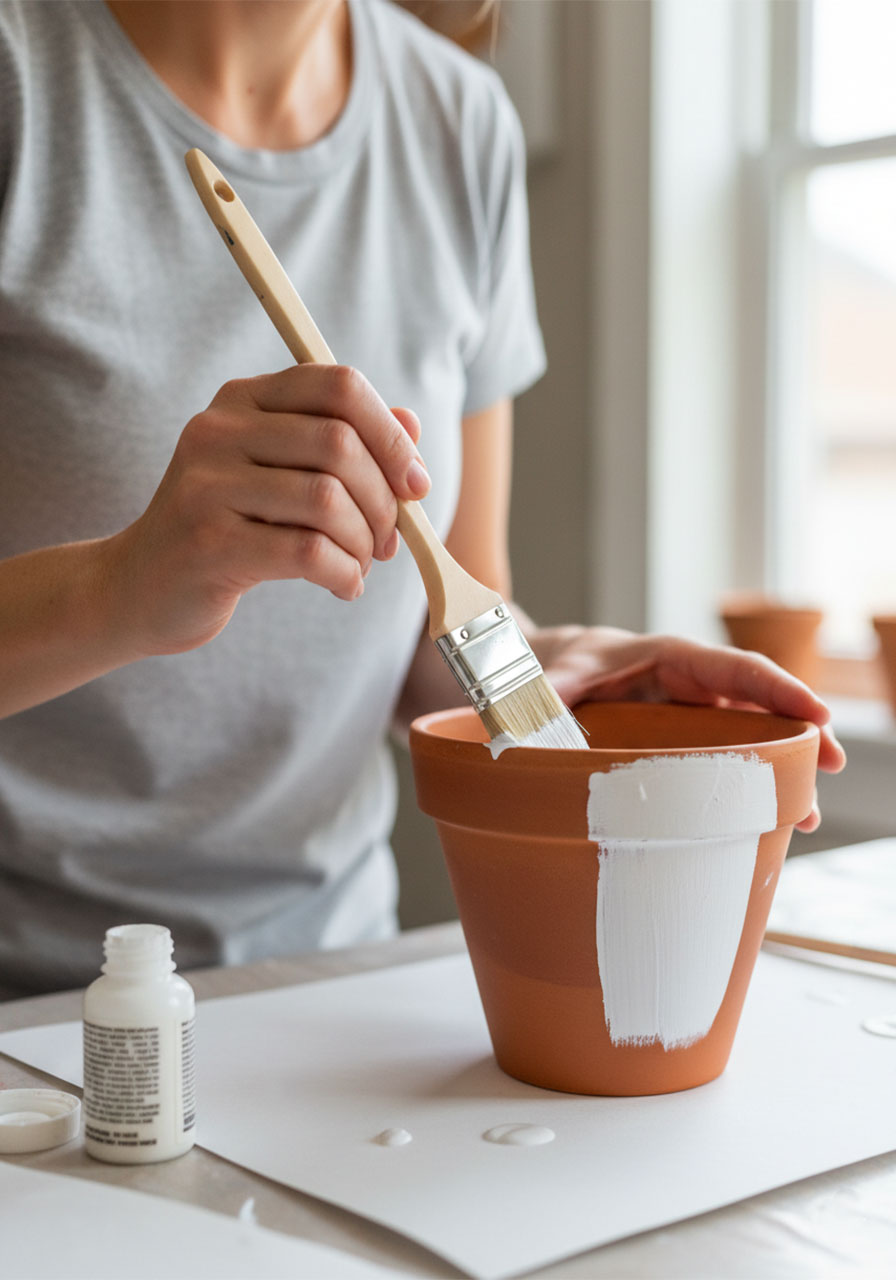
Step 1: Paint the Base of the Pot White
Start by painting the entire body of the pot (everything below the rim) with two coats of white acrylic paint. Use your medium flat brush and apply in smooth, even strokes. Let the first coat dry completely – about 15–20 minutes – before adding the second coat.
The white base is essential. It makes every color you paint on top pop vibrantly, especially against the terracotta clay underneath. Don’t skip this step!
Teacher Tip: If you’re doing this as a classroom activity, paint the white base coats the day before so kids arrive to a dry, ready-to-decorate pot. It saves a ton of time and keeps little hands out of wet paint!
Step 2: Paint the Rim Hot Pink
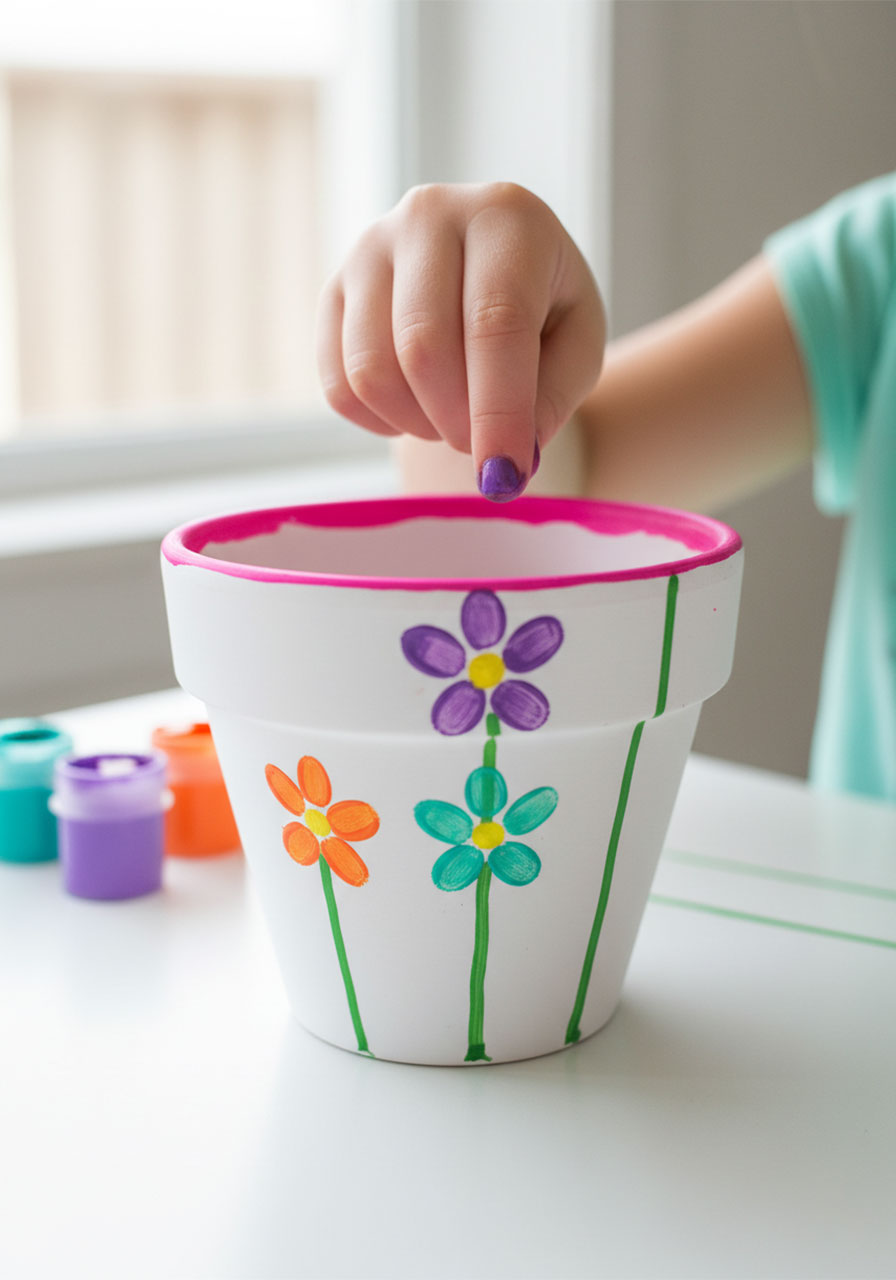
Once the white base is fully dry, load your flat brush with hot pink paint and carefully coat the entire rim of the pot. Paint around it evenly, making sure you cover the curved lip at the top. Two thin coats are better than one thick coat – thick paint tends to drip.
Let this dry completely before moving on. The pink rim is the “frame” that makes the whole design feel finished and intentional – it’s one of the first things you notice on the final pot!

Step 3: Add the Fingerprint Stems
Here’s where the magic (and the mess!) begins. This is the signature element that makes these Mothers Day flower pots truly special.
Pour a small amount of green paint onto your palette or paper plate. Have your child press their index finger (or pinky for smaller stems) into the green paint, then press it repeatedly in a vertical line going upward from the bottom of the pot to about halfway up. Repeat the finger press 6–8 times per stem, slightly overlapping each print to create a dotted, organic-looking stem. Make 4–5 stems total, spreading them across the front of the pot at slightly different heights.
The fingerprint dots don’t need to be perfectly straight – the slightly wobbly, organic look is exactly what makes these stems so charming.
Pro Tip: Wipe the child’s finger between colors using a damp paper towel. Keep a stack nearby – things get wonderfully messy at this stage!

Step 4: Add the Fingerprint Flower Heads
Now for the flowers! Choose your brightest colors – purple, orange, teal, red, hot pink are all great choices. For each flower head:
1. Press your child’s fingertip into the chosen paint color.
2. Make 5–6 oval petal prints arranged in a circle at the top of each stem, pressing each one at a slight outward angle like clock positions (12, 2, 4, 6, 8, 10 o’clock). The prints should all touch in the center.
3. Once the petals dry, dip a fingertip into yellow or orange paint and press one single dot right in the center of the petals. This is the flower’s center and it immediately ties the whole design together.
Use a different color for each flower so the pot looks bright and full of life. Don’t overthink the arrangement – vary the heights slightly so some flowers look taller than others, just like a real garden.
Fun Variation: Let kids choose their own color combinations! A child who loves purple might make every flower purple in different shades. Totally works – and Mom will love knowing her child made every creative decision.
Step 5: Write “Mother’s Day” on the Rim
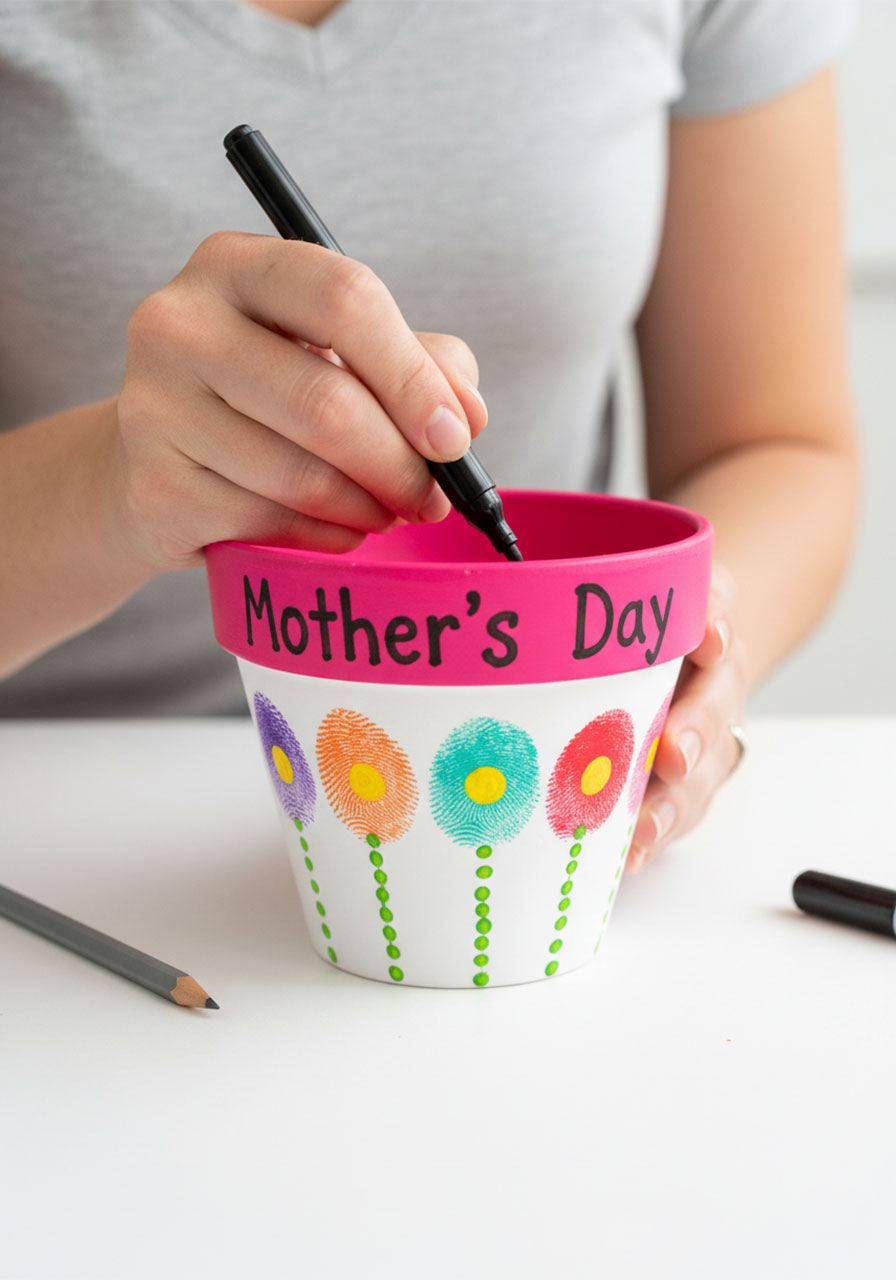
Once the pink rim is completely dry, use a black paint pen or black marker to write “Mother’s Day” across the front of the rim in your neatest handwriting. You can also let older kids (ages 8+) write it themselves for an extra personal touch.
If you’re nervous about writing freehand, lightly pencil in the letters first and trace over them with the marker. Erase any pencil lines once the ink dries.
Teacher Tip: For a classroom keepsake, write the child’s name and the year on the back of the pot in small letters. Moms absolutely love this detail when they rediscover it years later.
Step 6: Seal the Pot
Once every layer of paint is fully dry (give it at least one hour, or ideally overnight), apply a coat of Mod Podge or clear acrylic sealer over the entire painted surface. This step protects all that beautiful fingerprint artwork from chipping, fading, and moisture – especially important since this pot will actually be used for a plant!
If using spray sealer, do this outside or in a well-ventilated area. Let it dry fully before handling.

Step 7: Plant It Up and Gift It!
Now for the best part. Add a small flowering plant – calibrachoa (mini petunias), violas, or pansies all work beautifully and are easy to find at any garden center in spring. They’re also inexpensive and very hard to kill, which is a bonus for busy moms!
Pop the plant in, give it a little water, and your gift is complete. For an extra-special presentation, add a small tag or ribbon around the rim.
Why These Mothers Day Flower Pots Are Such a Hit
What makes this gift genuinely special – beyond how pretty it looks – is the fingerprint element. Those little dotted stems are made from your child’s actual hands. As kids grow up, those tiny fingerprints become something irreplaceable. Many moms keep these pots for years, long after the plant has been replanted or replaced, simply because of what those little prints represent.
It’s functional, it’s beautiful, and it’s deeply personal. That’s a rare combination for a handmade gift – and it’s exactly why this one goes viral every Mother’s Day.
Tips for Making These in a Classroom
Prep the white base the day before so class time is spent on the fun decorating steps.
Set up a paint station with small dollops of each color on paper plates so kids can rotate without waiting.
Use washable acrylic paint – it comes off hands and tables easily with soap and water.
Have wet wipes ready at every seat for quick finger color changes between stems and petals.
Budget about 45 minutes for a class of kids to complete the fingerprint design. Sealing and planting can happen the next day.
Label the bottom of each pot with the child’s name in pencil before painting begins so finished pots don’t get mixed up.

Customize It Your Way
This design is a perfect starting point, but there are so many ways to make it your own:
Change the rim color to Mom’s favorite – lavender, mint green, or bright coral all look stunning.
Add a personal message on the back of the pot like “Grown with love” or “You make me bloom.”
Use thumb prints for bigger flowers and pinky prints for smaller ones to create varied sizes in the same pot.
Add leaf details with a small brush dipped in green paint – two small strokes angled off each stem look adorable.
Make a matching set – one pot for Mom, one for Grandma, one for a teacher. The more the merrier!

There’s something about a gift you made with your own hands – literally, your own fingerprints – that no store-bought present can ever replicate. These Mothers Day flower pots are the kind of gift that lives on the kitchen windowsill for years. And every spring when Mom replants it, she’ll smile remembering exactly who made it.
More Mother’s Day Ideas to Keep the Fun Rolling:
30+ Mother’s Day Crafts for Kids of All Ages
How to Make a DIY Pop-Up Flower Bouquet Mother’s Day Card
DIY “Helping Hands” Bouquet: The Sweetest Mother’s Day Craft Kids Can Make
“I Love You This Much!” DIY Handprint Card for Mother’s Day
Surprise Mom with This Magic Foldable Heart Flower Card
How to Make a DIY Tissue Paper Heart Flower Bouquet for Mother’s Day
How to Make a Stunning Quilled Heart Mother’s Day Card (Step-by-Step)
DIY Mother’s Day Flower: The Cutest Toilet Paper Roll Craft Kids Can Actually Make
