

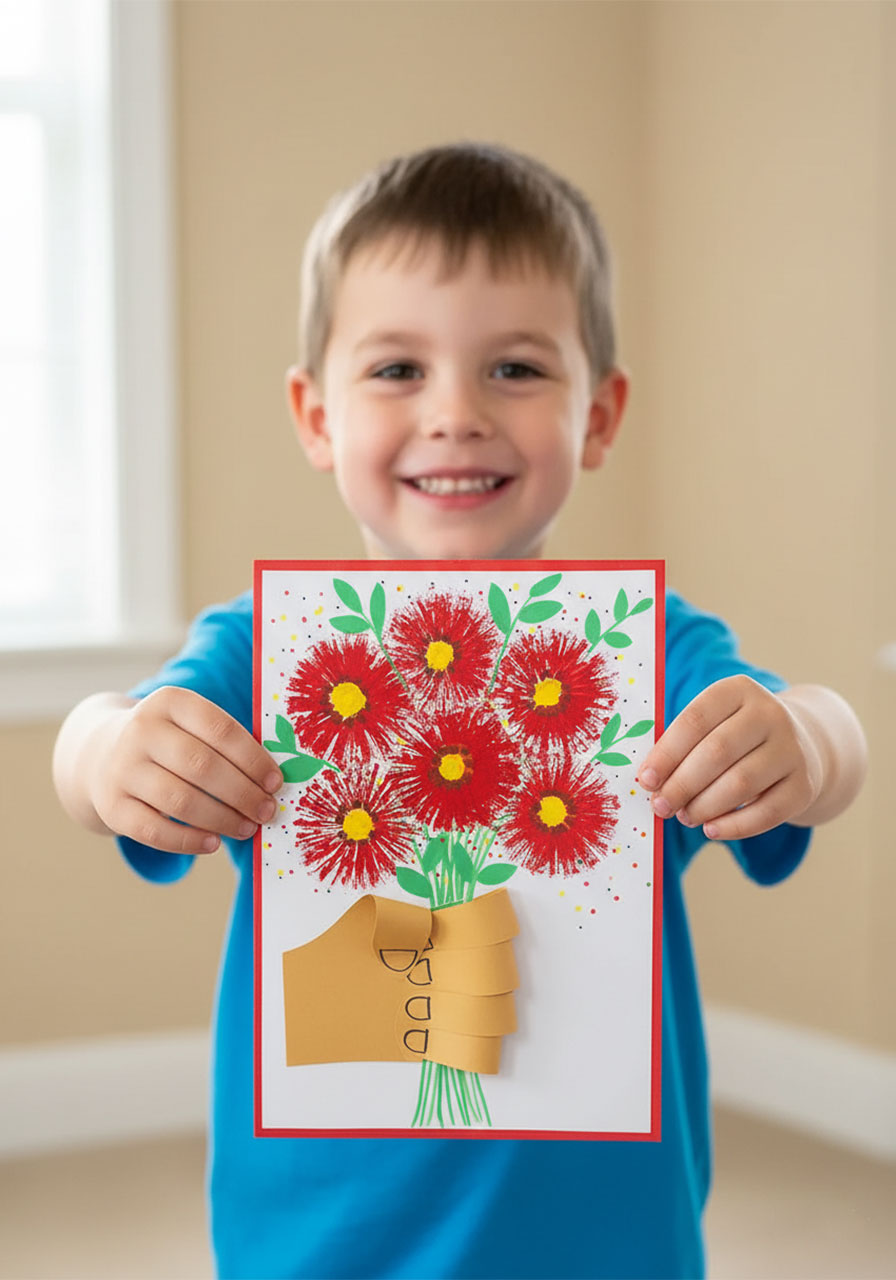
Want to give Mom something she’ll actually keep – not just stick on the fridge for a week? This heartfelt handprint bouquet craft is exactly that. It’s a 3D keepsake that turns your child’s hand into the “vase” holding a gorgeous bouquet of fluffy red flowers, and it looks so good you’ll barely believe a kid made it.
The best part? No expensive supplies, no complicated technique, and zero crafting experience required. Whether you’re a teacher planning a classroom Mother’s Day project or a parent putting together something special at home, this one is a guaranteed winner – every single time.
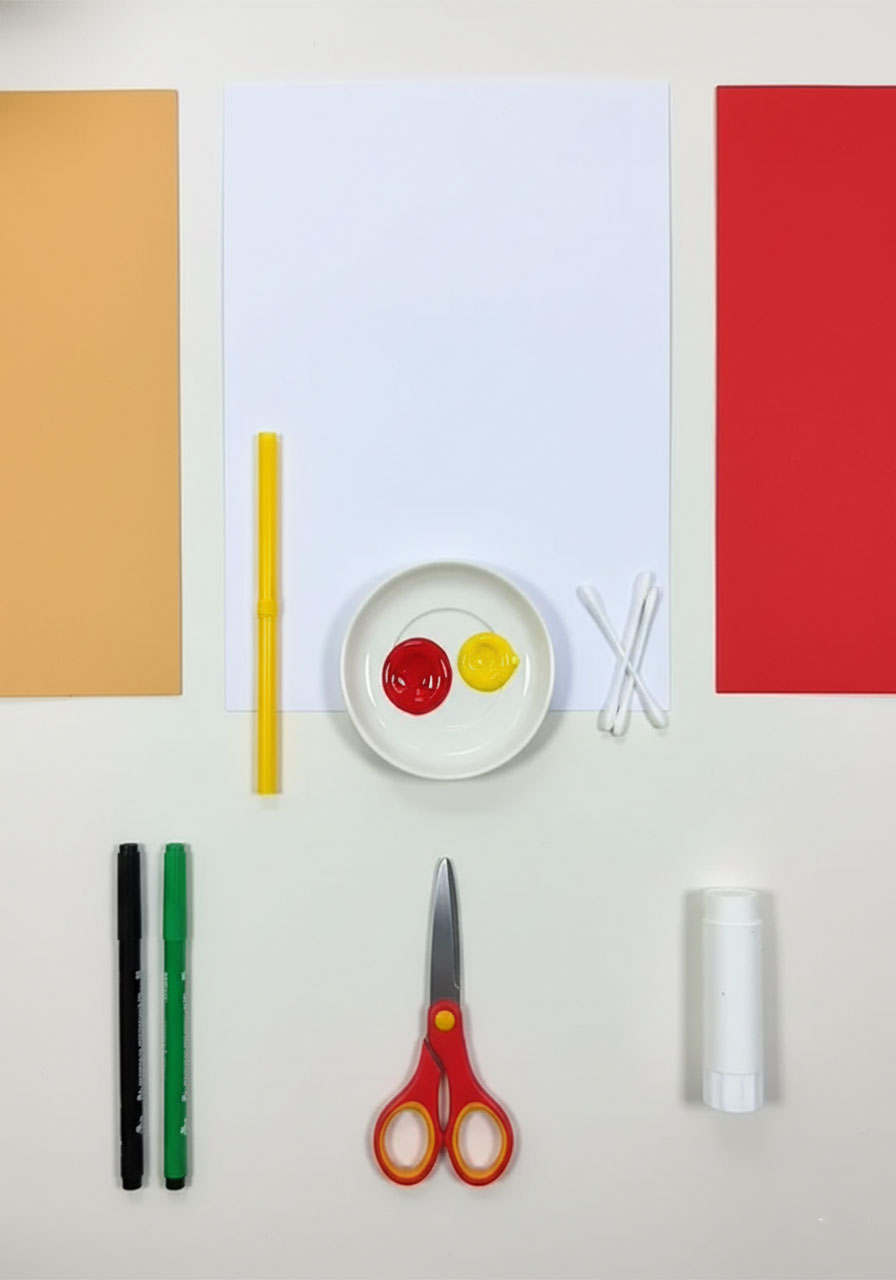
What You’ll Need
Construction paper: one sheet of tan/brown (for the hand), one sheet of white (for the background), and one sheet of red cardstock (optional, for a festive border)
Markers: black and green
Paint: red and yellow (washable tempera works great for kids; acrylic is fine for older children)
One wide plastic straw (the chunky smoothie-style straws – they create the best flower texture!)
Cotton swabs (Q-tips)
Scissors
Glue stick or white craft glue
A small plate or palette for the paint
Best for: Ages 4 and up (with adult help for cutting). Perfect for classrooms and home alike.
Time to Complete: About 30–45 minutes (plus drying time).
Mess Level: Medium – lay down some newspaper or a plastic tablecloth before you get started!

Step-by-Step Instructions
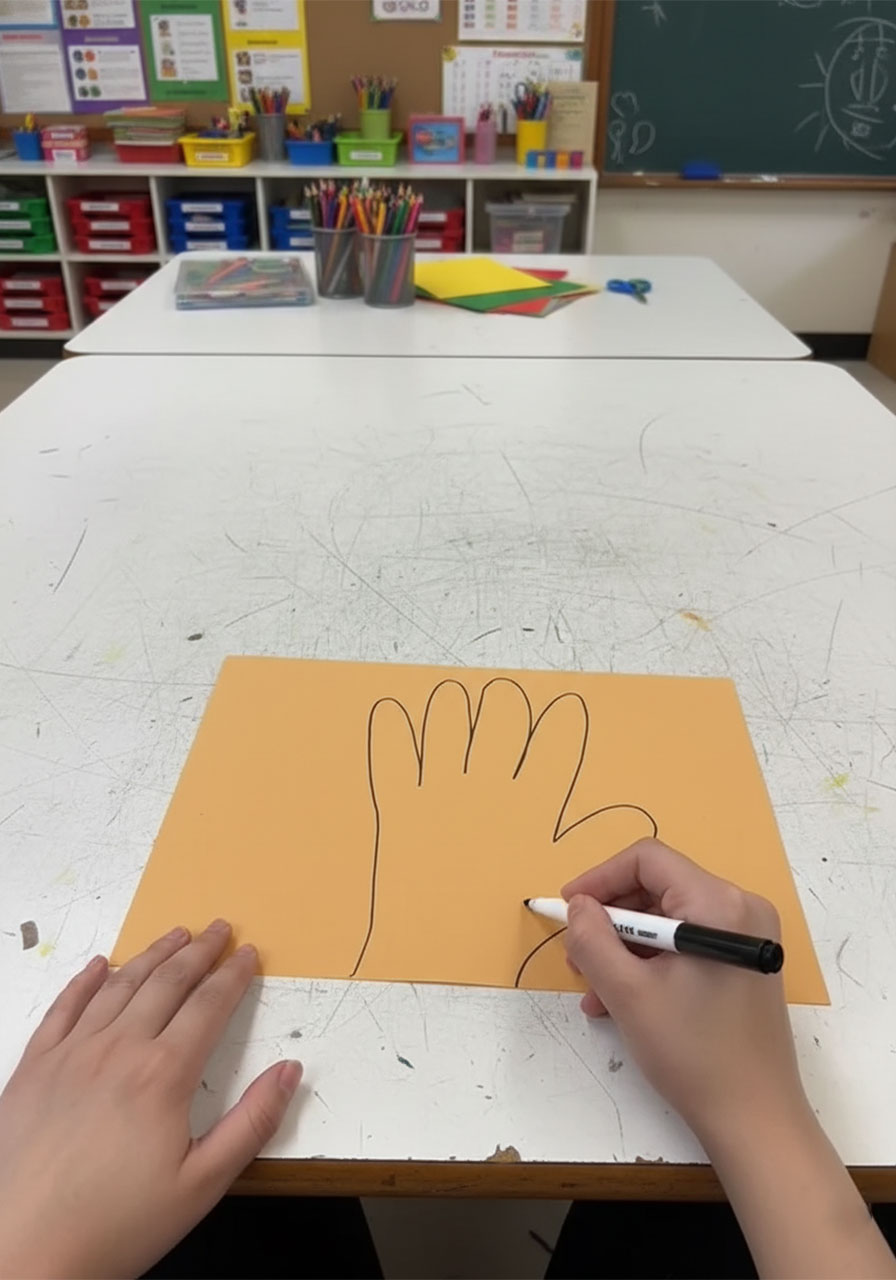
Step 1: Trace and Cut the “Helping Hand”
Place your child’s hand flat on the tan construction paper, fingers spread wide. Using a black marker, trace all the way around the hand and partway down the wrist. Cut the handprint out carefully – this paper hand is going to become the vase that “holds” the whole bouquet. How cool is that?
Teacher tip: If you’re doing this with a whole class, trace the hands ahead of time and pre-cut them to save time during the activity.

Step 2: Build the Background and Stems
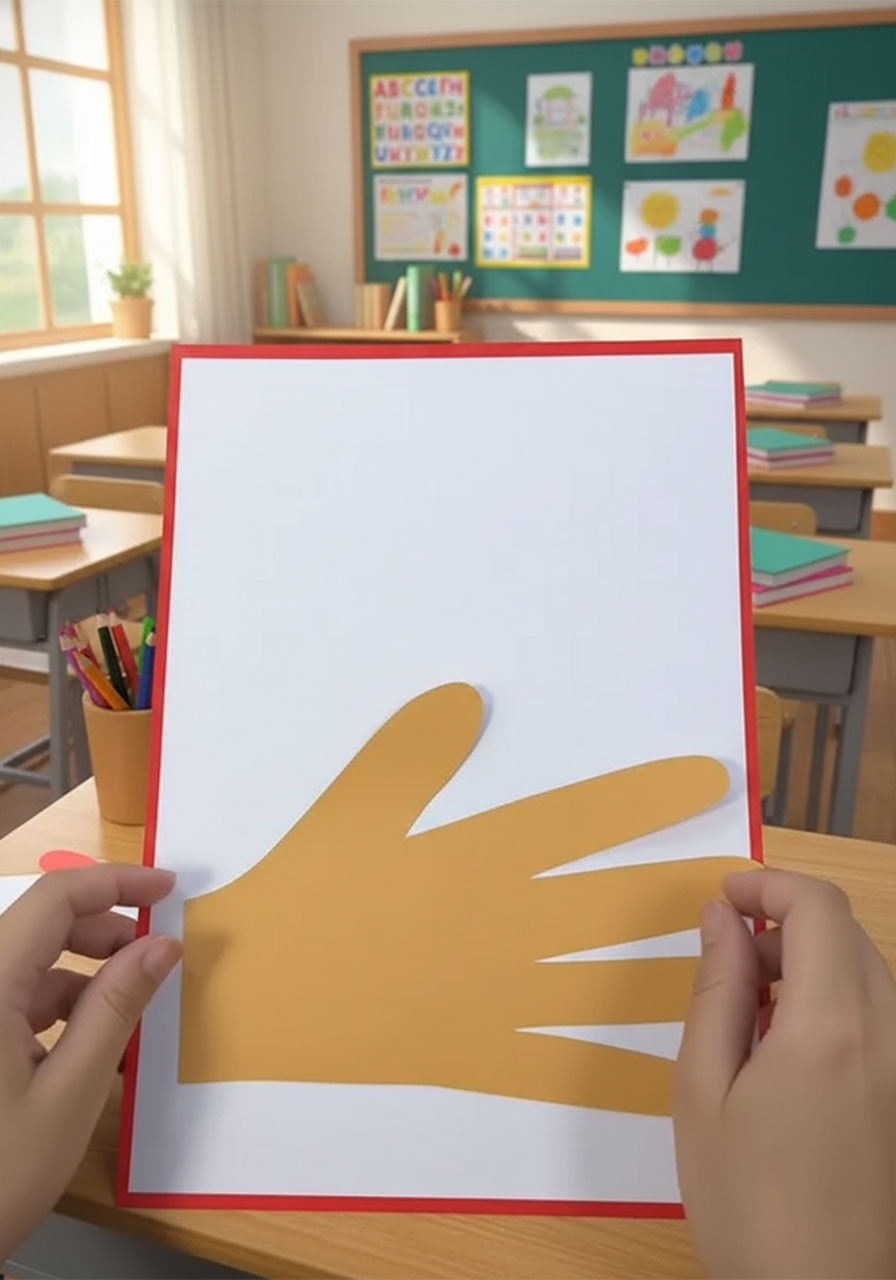
Take your white sheet of paper and glue the wrist end of the paper hand to the bottom center. The fingers should be pointing upward, not glued down yet – you’ll fold those in a later step.
Now, using your green marker, draw 5–7 long, thin stems growing upward from the palm area. Draw them fanning out slightly so they look like a real bouquet. Add a few curved lines along the stems to suggest leaves – it makes the whole thing feel lush and full.

Step 3: Fold the Fingers to “Hold” the Stems
Here’s where the magic happens. Gently bend each paper finger forward (toward you), then glue the fingertips down against the stems so the hand looks like it’s gripping the bouquet. Press firmly and hold for a few seconds until the glue sets.
Once the fingers are in place, grab your black marker and add small curved lines for knuckles or tiny “D”-shaped fingernails. This little detail gives the hand a surprisingly realistic, 3D look that takes the whole craft to the next level.


Step 4: Make the Straw Stamp (The Secret Flower Trick!)
This is the step kids go absolutely wild for. Take your wide plastic straw and use scissors to cut thin slits into one end – cut about 8–10 slits, each roughly 1 inch deep, all the way around the circumference. Then gently fan the cut pieces outward with your fingers so it looks like a little sunburst or feather duster.
Pour a small amount of red paint onto your plate. Dip the fanned end of the straw into the paint, then press it firmly onto the paper at the top of one of your green stems. Lift it straight up – and there’s your flower! Repeat for each stem, reloading the straw with paint each time.
Pro tip: Press the straw flat, then twist it slightly as you lift for even fluffier, more textured blooms.


Step 5: Add the Yellow Flower Centers
Let the red paint dry for a few minutes (or use a hair dryer to speed things up!). Then dip a cotton swab into yellow paint and dab a bright, round center right in the middle of each flower. Don’t overthink it – one confident dot of yellow is all you need to make those red blooms pop.

Step 6: Finish the Details
Now it’s time to make your bouquet look polished and complete:
Use your green marker to draw a few small leaf shapes along the stems and peeking out from behind the flowers.
Add colorful confetti dots scattered across the background using red, yellow, and any other marker colors you have on hand.
If you have a red sheet of construction paper, glue your white page on top of it to create a bold, festive border around the whole piece.
Step 7: Write Mom’s Message
In the corner of the page – or on the back if you prefer – have your child write (or dictate while you write) a sweet message. Keep it personal and simple. A few ideas to get you started:
- “Happy Mother’s Day! I love you to the moon and back.”
- “To the best Mom – thanks for always giving me a helping hand.”
- “These flowers are from my hands to your heart.”
Don’t forget to have your child sign their name and write the year. Trust us – this is the detail that makes it a real keepsake 20 years from now.
Why Kids (and Teachers!) Love This Craft
Beyond being absolutely adorable, this project quietly packs in some great developmental wins. The straw-stamping technique is a fantastic sensory experience – kids love the unpredictable, textured result it creates. The finger-folding step builds fine motor skills, and the whole process encourages creativity and pride in the finished product.
For classrooms, it also sparks a lovely conversation: What does it mean to lend a helping hand? The craft becomes more than just art – it becomes a little lesson in gratitude and love.
Quick Tips for Best Results
Use the wide smoothie straws, not regular drinking straws. The wider diameter creates a fuller, more impressive flower bloom with each stamp.
Less paint is more. Too much paint on the straw creates a blobby mess. A thin, even coat gives you the best feathery texture.
Let each color dry before adding the next. Wet red paint + wet yellow paint = orange centers. Patience is worth it!
Make it a family affair. For a truly unforgettable gift, trace everyone’s hands – siblings, Dad, even the dog’s paw (kidding… mostly) – and create a whole bouquet from the whole family.
This Mother’s Day, skip the store-bought card and give Mom something made with the most important ingredient of all: your child’s own two hands. She’ll treasure it forever – and your little one will beam with pride every time she looks at it on the wall.
Happy crafting!
More Mother’s Day Ideas to Keep the Fun Rolling:
30+ Mother’s Day Crafts for Kids of All Ages
“I Love You This Much!” DIY Handprint Card for Mother’s Day
Surprise Mom with This Magic Foldable Heart Flower Card
How to Make a DIY Tissue Paper Heart Flower Bouquet for Mother’s Day
How to Make a Stunning Quilled Heart Mother’s Day Card (Step-by-Step)
DIY Mother’s Day Flower: The Cutest Toilet Paper Roll Craft Kids Can Actually Make
Handprint Flower Bouquet The Perfect DIY Mother’s Day Craft
The Cutest DIY Pull-Tab Mother’s Day Card Kids Can Actually Make (No Glue, No Scissors!)
