Perfect for parents and teachers to make with kids | Age 6+ with adult help | Craft time: 45–60 minutes
Who says flowers have to wilt? This Mother’s Day, skip the store-bought card and give Mom or Grandma something she’ll want to keep on her shelf forever – a gorgeous 3D Tulip Bouquet Card that opens up to reveal hidden love notes tucked right inside the petals.
Yes, you read that right. Secret messages. Hidden inside the flowers. It’s equal parts craft project and heartfelt gift, and the look on Mom’s face when she discovers them? Absolutely priceless.
Whether you’re making this with your class, at the kitchen table with your kids, or sneaking off for a solo crafting session, this step-by-step guide walks you through every fold, snip, and glue dot. No special skills required – just a little patience and a lot of love.
What You’ll Need
| Supply | What It’s For |
|---|---|
| Pink cardstock or construction paper | Tulip petals (you’ll need several 4×4 cm squares per tulip) |
| White cardstock (A4 or letter size) | The 28 cm bouquet base |
| Green paper | Stems and leaves |
| Pink and red markers or crayons | Decorating the bouquet wrapper |
| Scissors | Cutting petals, base, and stems |
| Glue stick or craft glue | Assembling everything |
| Pencil | Drawing petal shapes before cutting |
| Small strips of paper | Writing the secret messages inside the petals |
| Optional: stickers, glitter, washi tape | Extra sparkle for the finishing touches |
🌷 Teacher’s Tip: Pre-cut the 4×4 cm squares and the 28 cm semi-circle bases before class to save time and keep little hands from getting frustrated. The folding and decorating steps are where the real fun (and learning!) happens.


Step 1: Fold Your 3D Tulip Blooms
This is the magic step – and the one that makes this card so special. You’ll make 3 tulips total, so repeat these steps three times.
Best for: Ages 7+ (younger kids will need help with the diagonal folds)
Time per tulip: About 10 minutes
How to Fold Each Tulip:
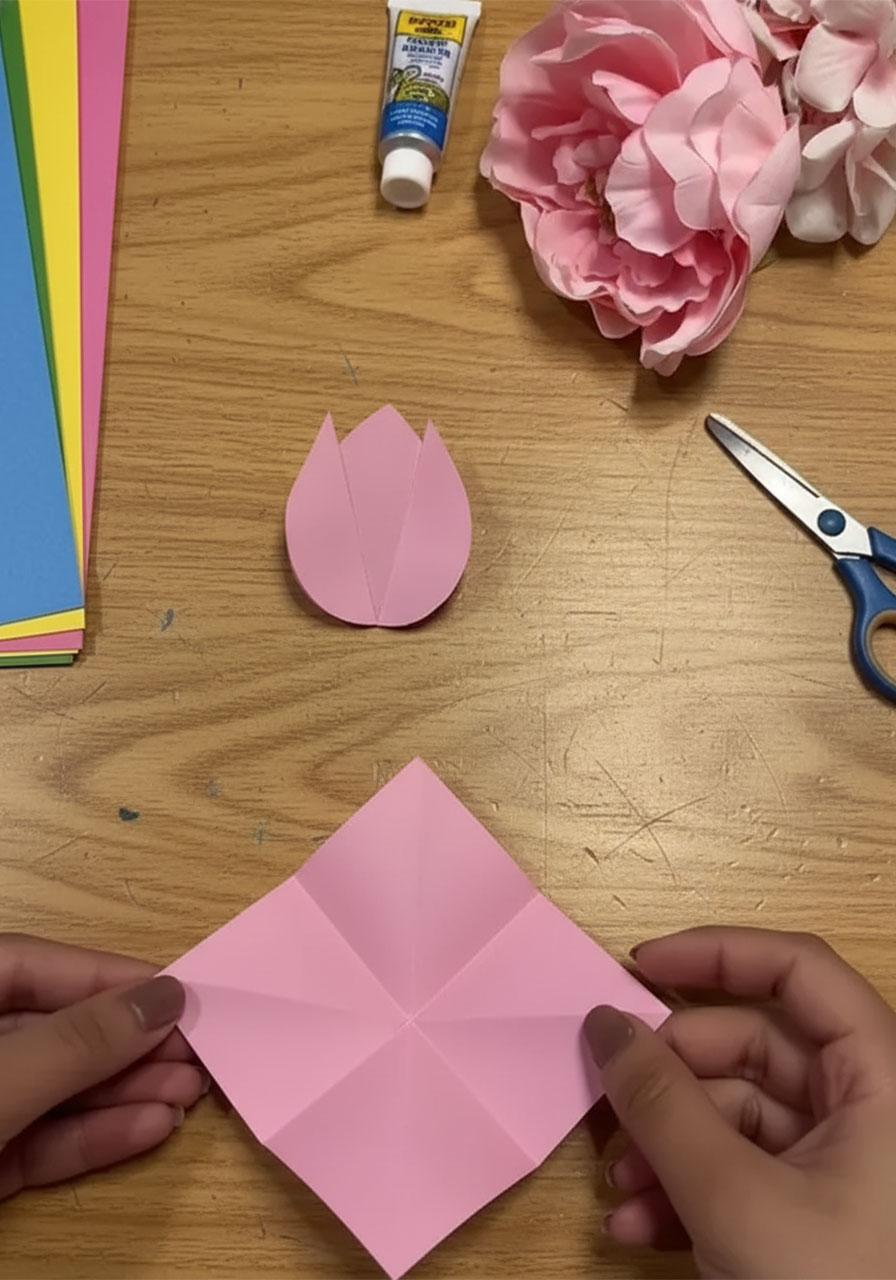
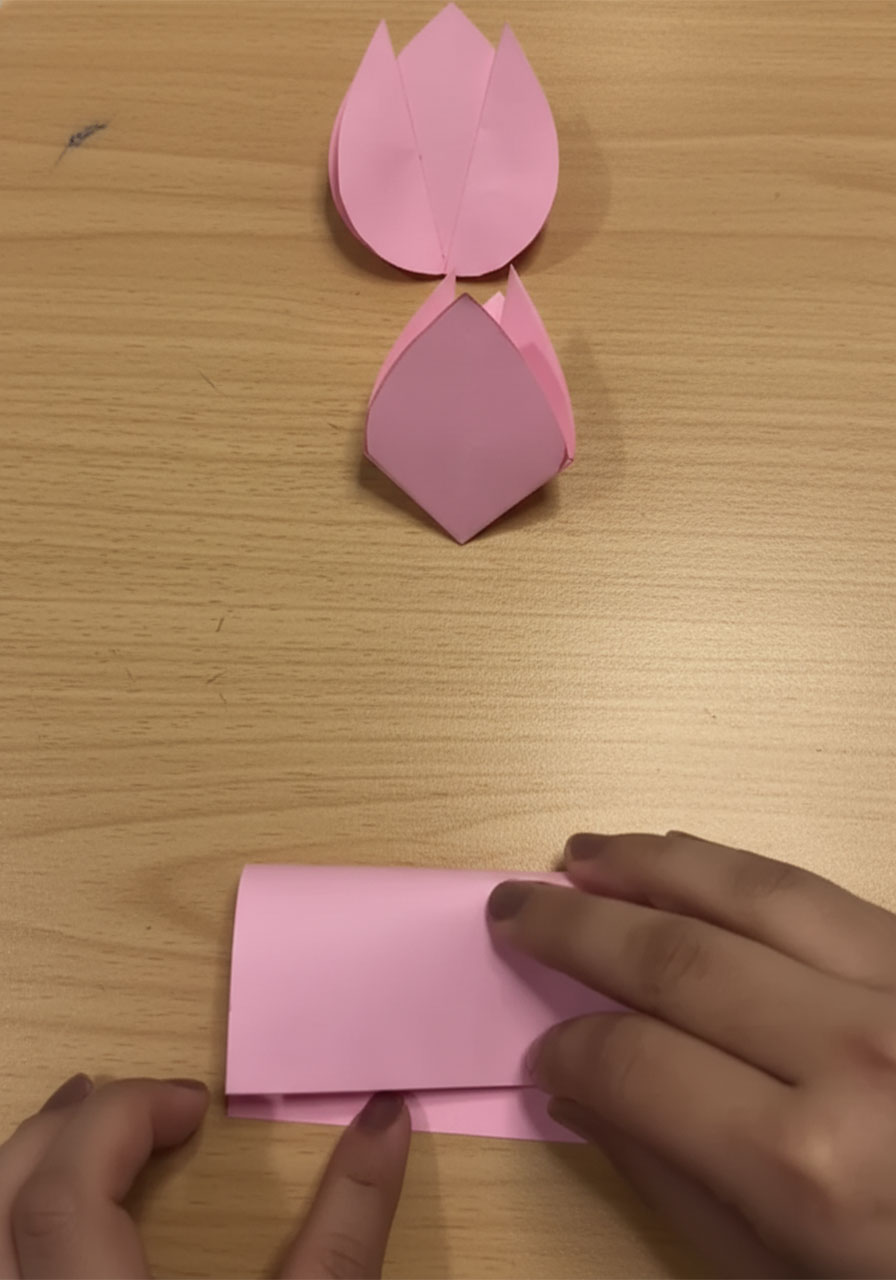
1. Start with a 4×4 cm pink square. The more precise your square, the neater your tulip will look – but don’t stress if it’s not perfect!
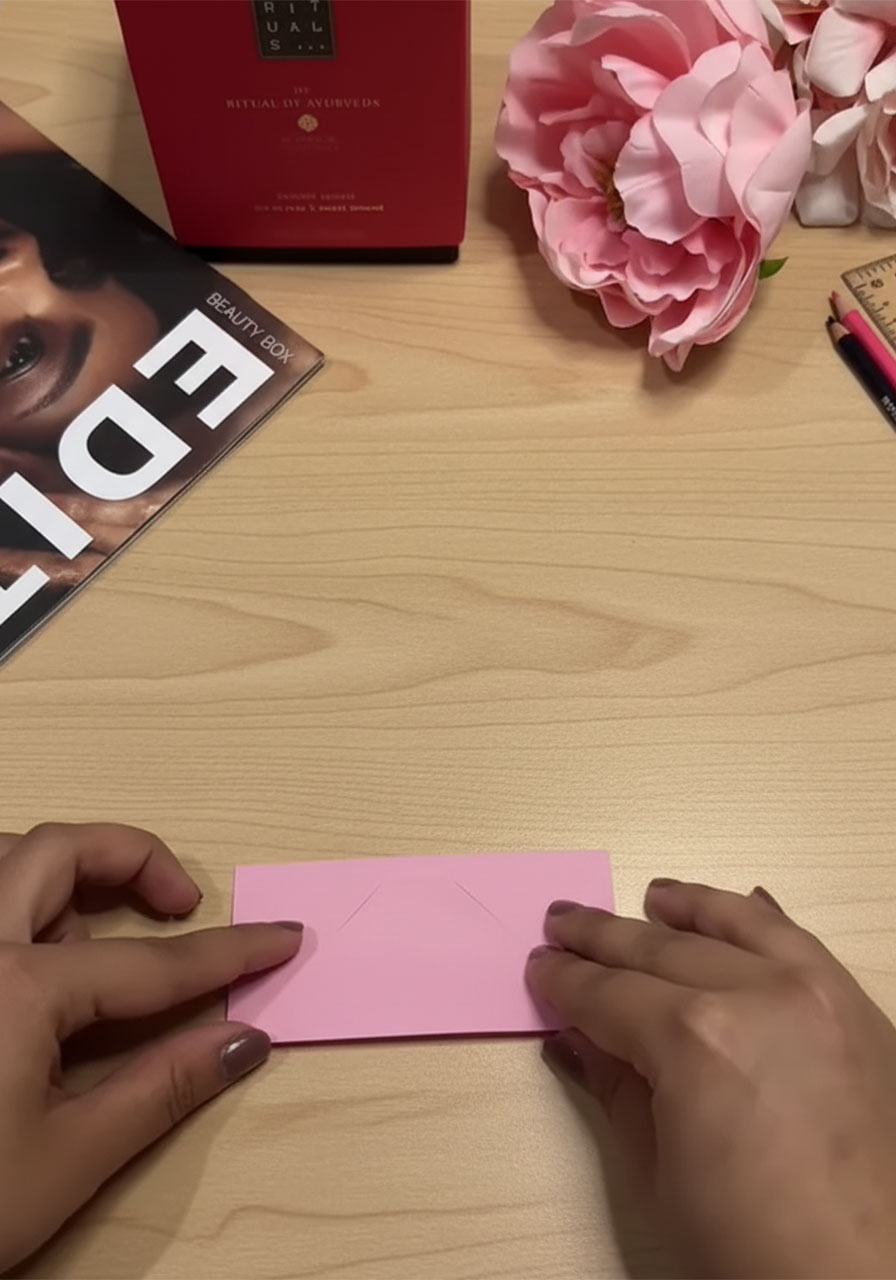
2. Make your four folds. Fold the square diagonally corner-to-corner (both ways), then fold it in half horizontally and vertically. You’ll have crisp crease lines going in all four directions. Open the paper back out flat after each fold – you’re just creating the fold lines.
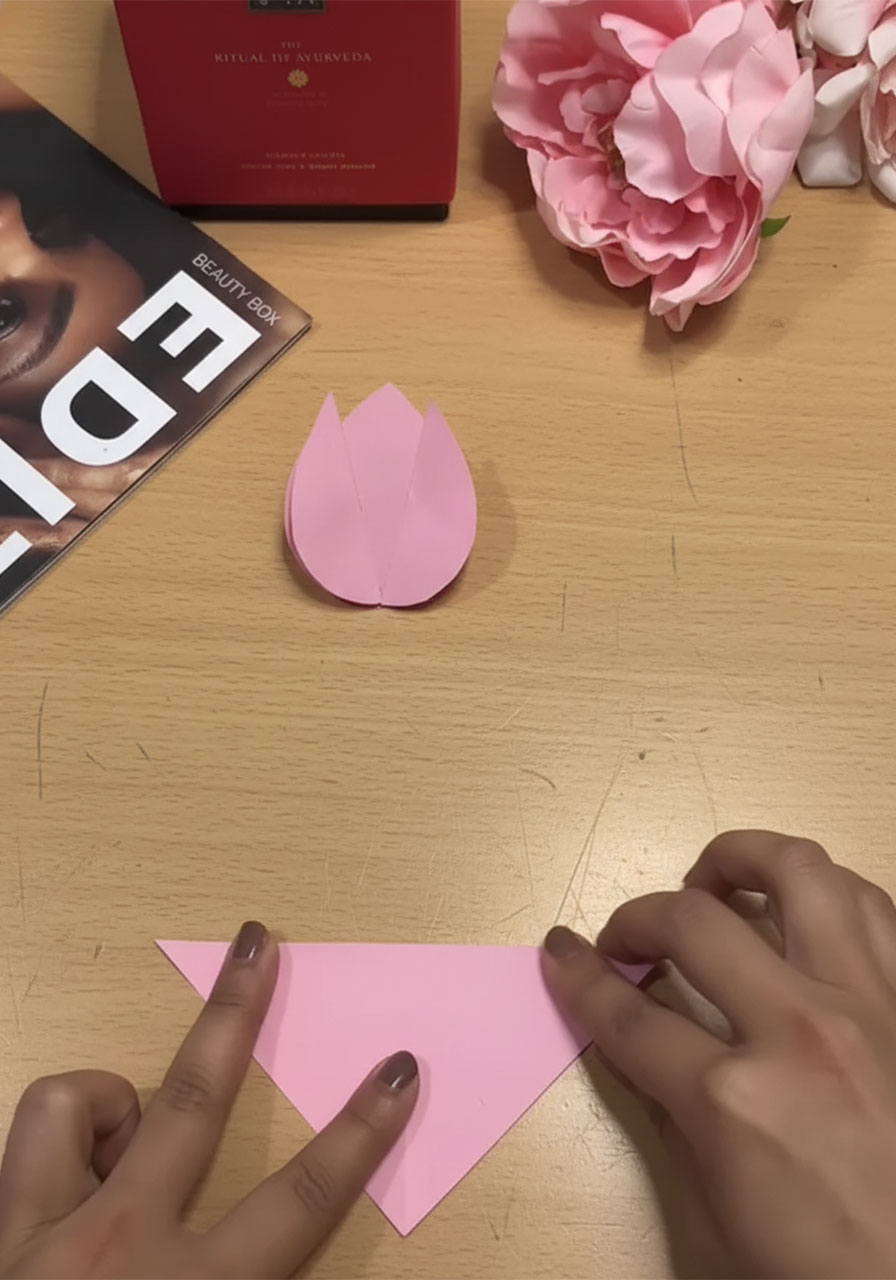
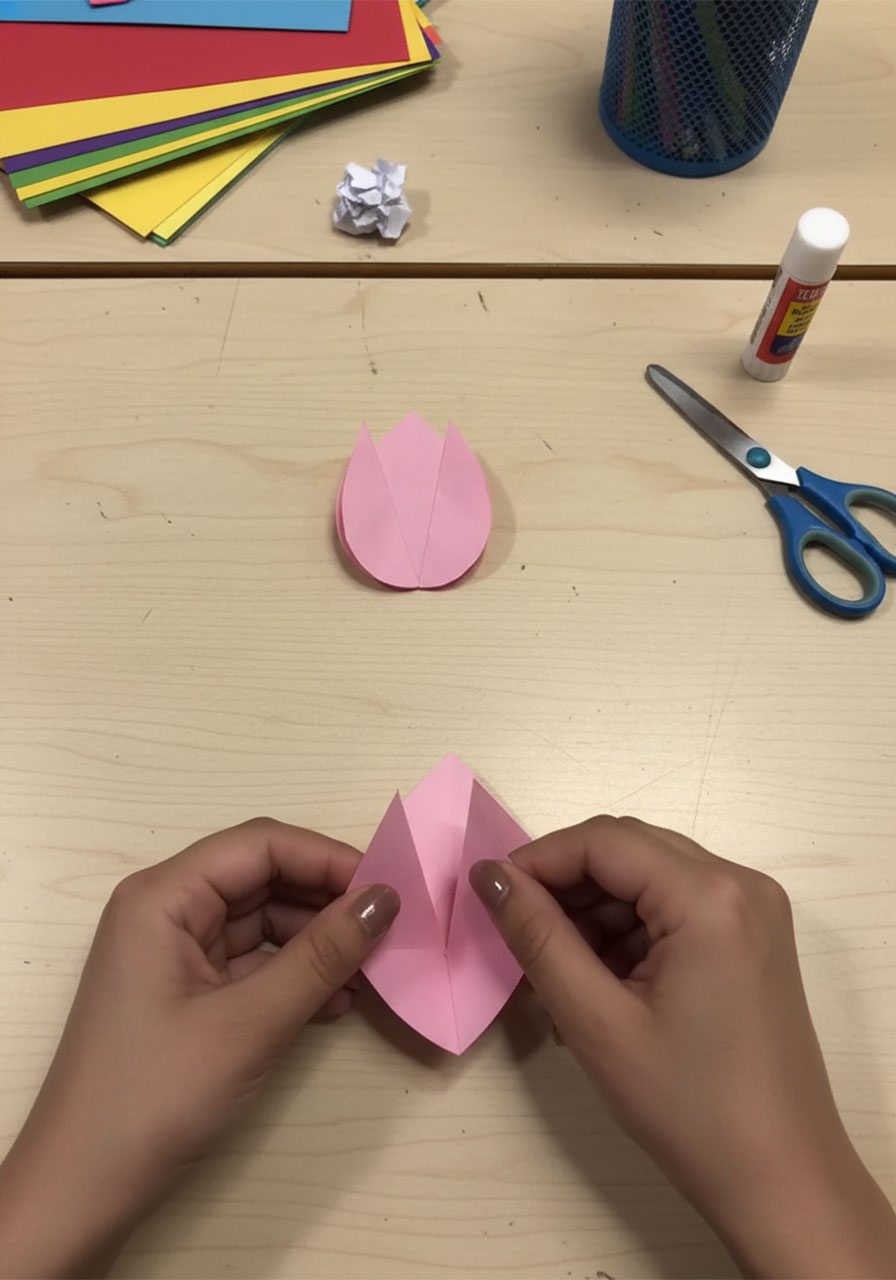
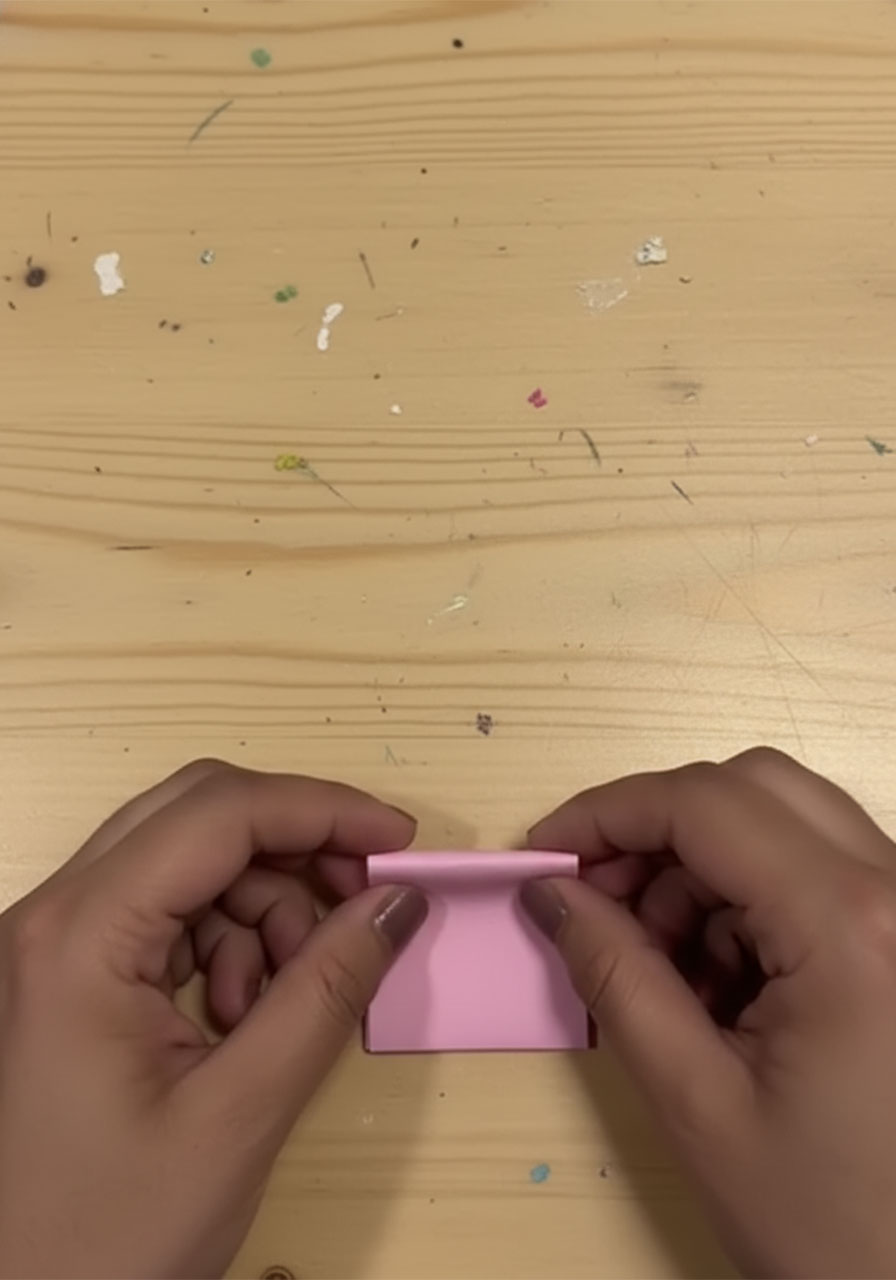
3. Push inward from all four sides. Gently press the four sides of the square inward toward the center at the same time. The paper will naturally collapse into a small square shape with four triangular flaps (this is called a “waterbomb base” in origami). Flatten it down.
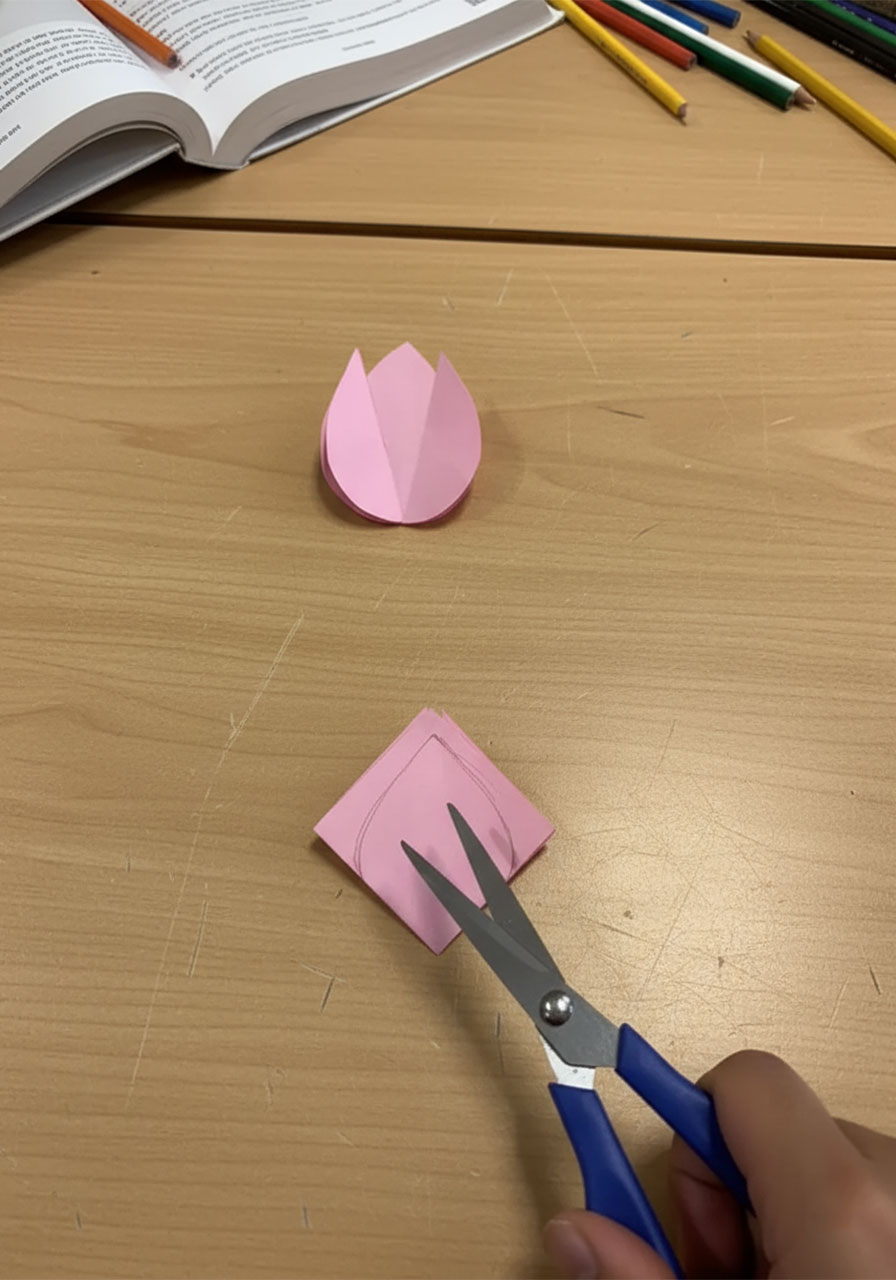
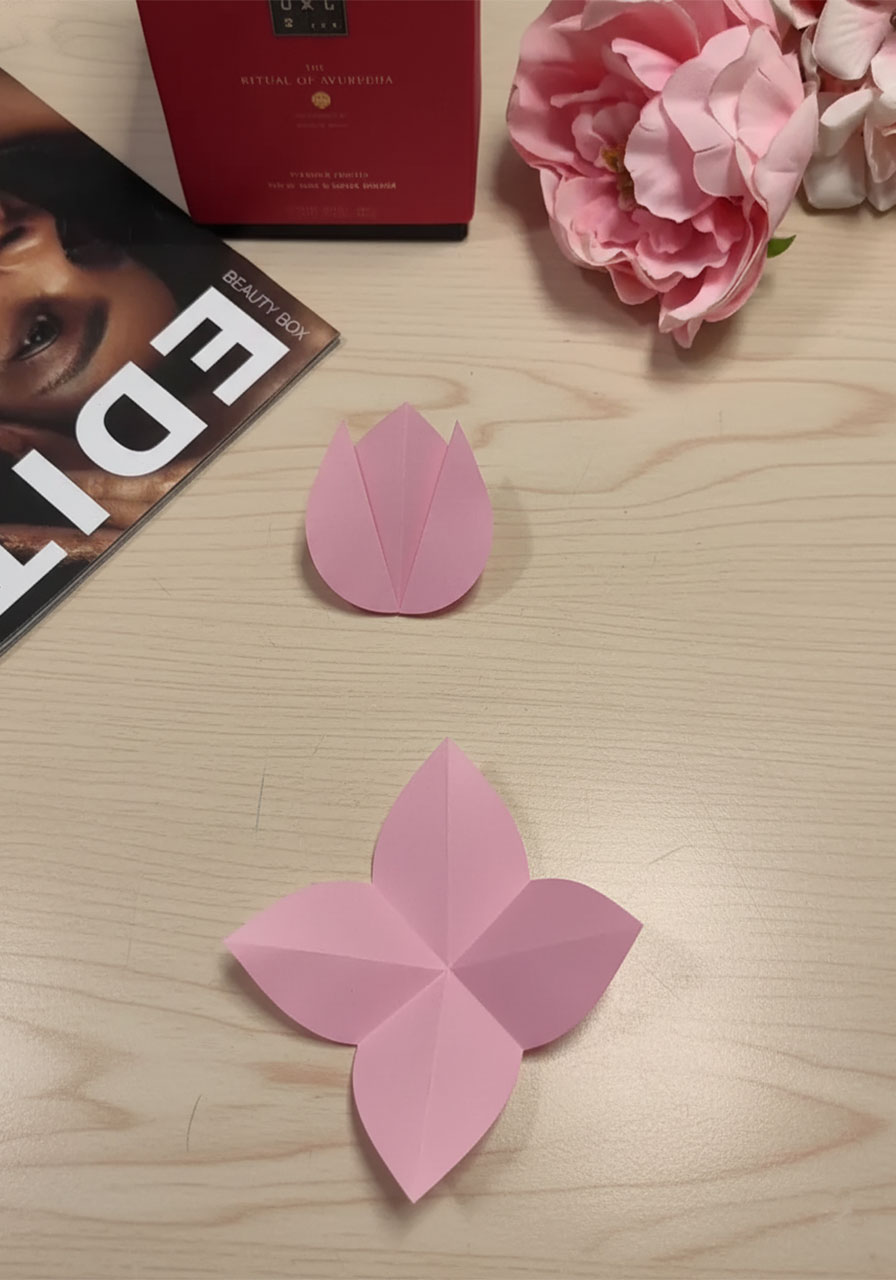
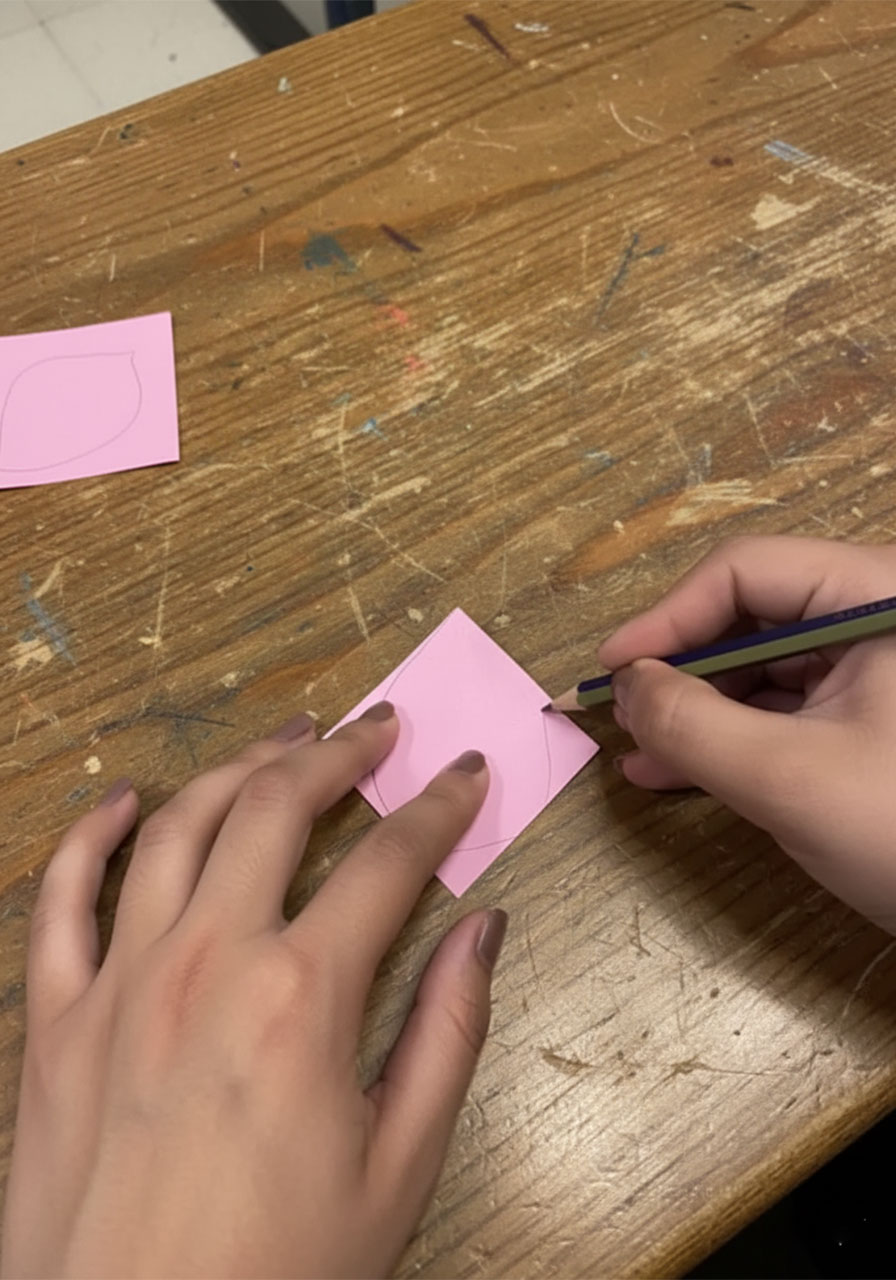
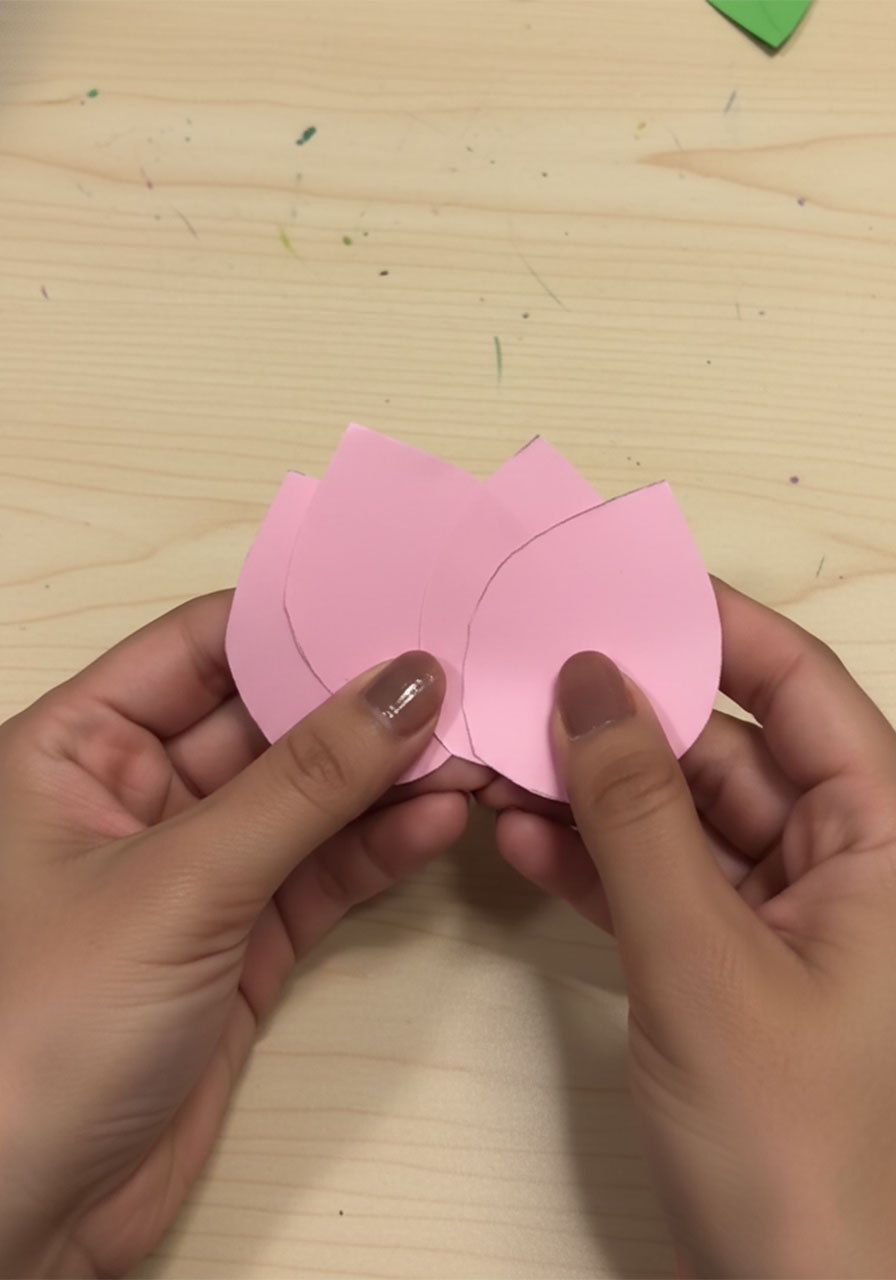
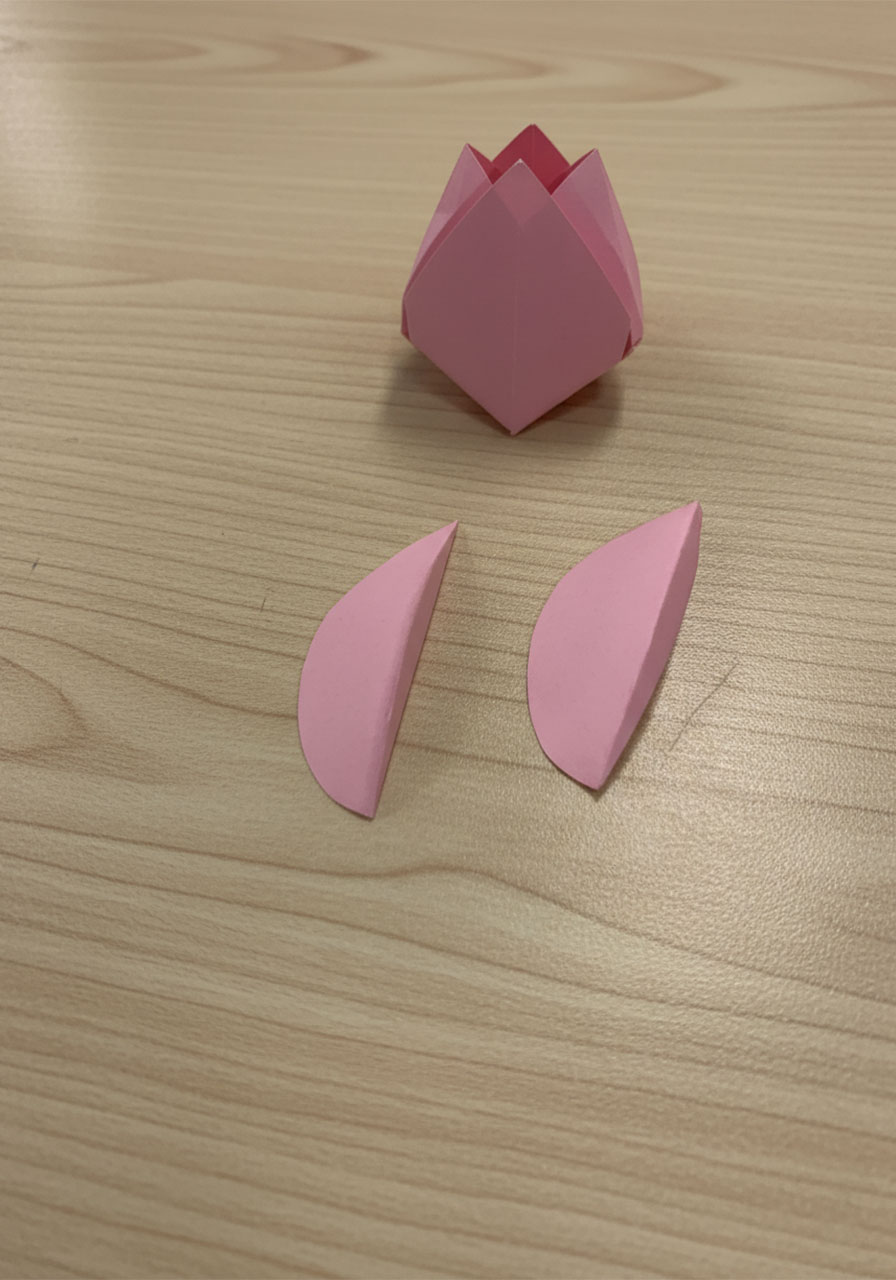
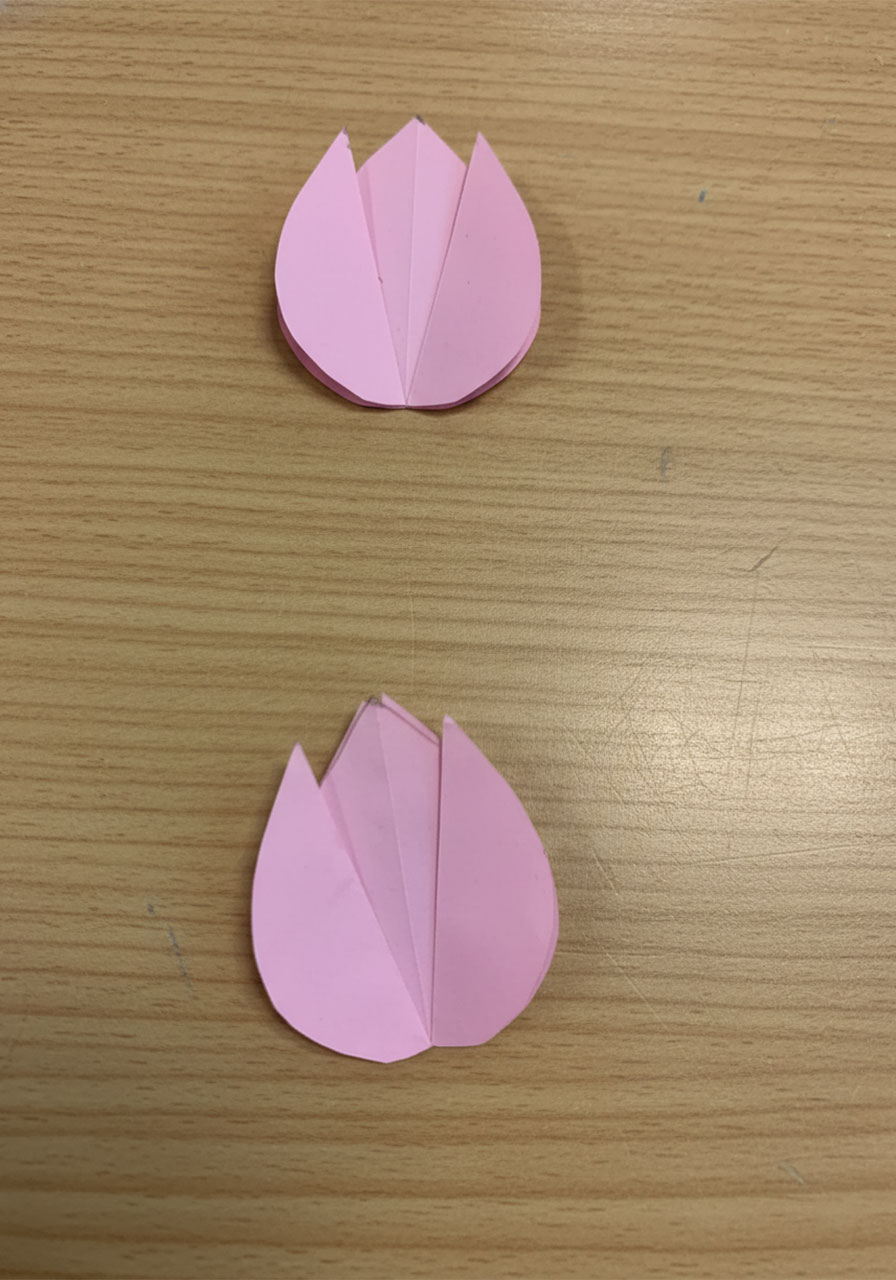
4. Draw your petal shape and cut. With your folded square sitting in front of you (it looks like a smaller square with flaps), draw a rounded tulip petal outline on the top layers. It should look like a wide, smooth arch. Cut through all the layers at once – when you open it up, you’ll have a symmetrical tulip shape! The cut creates the “petals at the top” look.
5. Add extra petals for that 3D effect. Cut two additional individual petal shapes from a separate piece of pink paper. Fold each one slightly down the middle (like a gentle crease). Glue one to the front of your tulip and one to the back. This gives the flower that gorgeous layered, full look you see in the finished card.
💡 Pro Tip: Make all three tulips before moving on to the next step – it’s easier to get into the folding rhythm when you do them back-to-back. Your second and third tulips will look noticeably better than your first, and that’s completely normal!
Step 2: Build the Bouquet Base
This is what transforms your three little tulips into a full, beautiful bouquet presentation. It looks impressive, but it’s just a cleverly folded piece of cardstock.
How to Make the Bouquet Base:
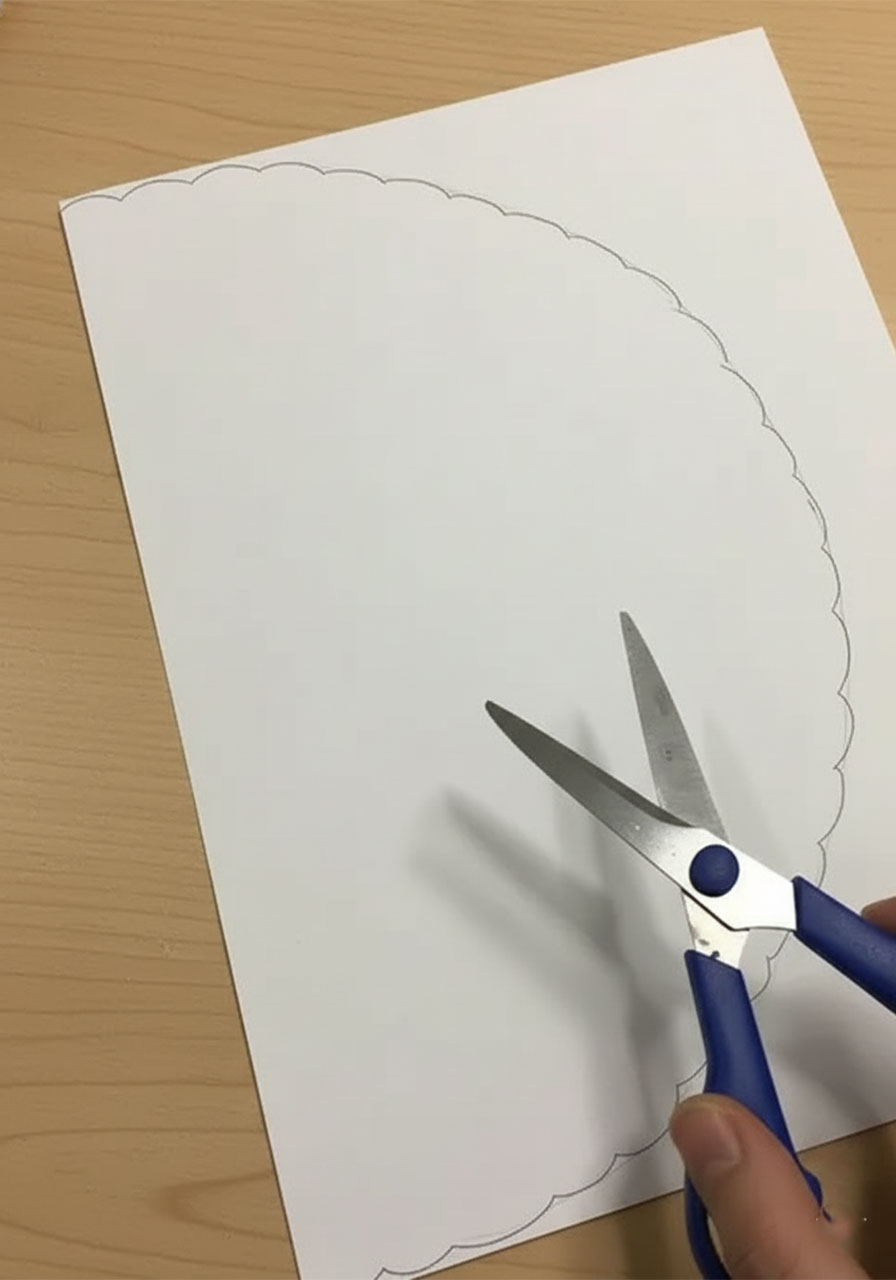
1. Cut your semi-circle. On your white cardstock, draw and cut out a semi-circle with a diameter of approximately 28 cm (that’s about 11 inches across). To make the top edge look like a fancy wrapped bouquet, cut a scalloped (wavy) edge along the curved top instead of a plain straight line. Decorative scissors work great here, or just draw and cut small bumps by hand.
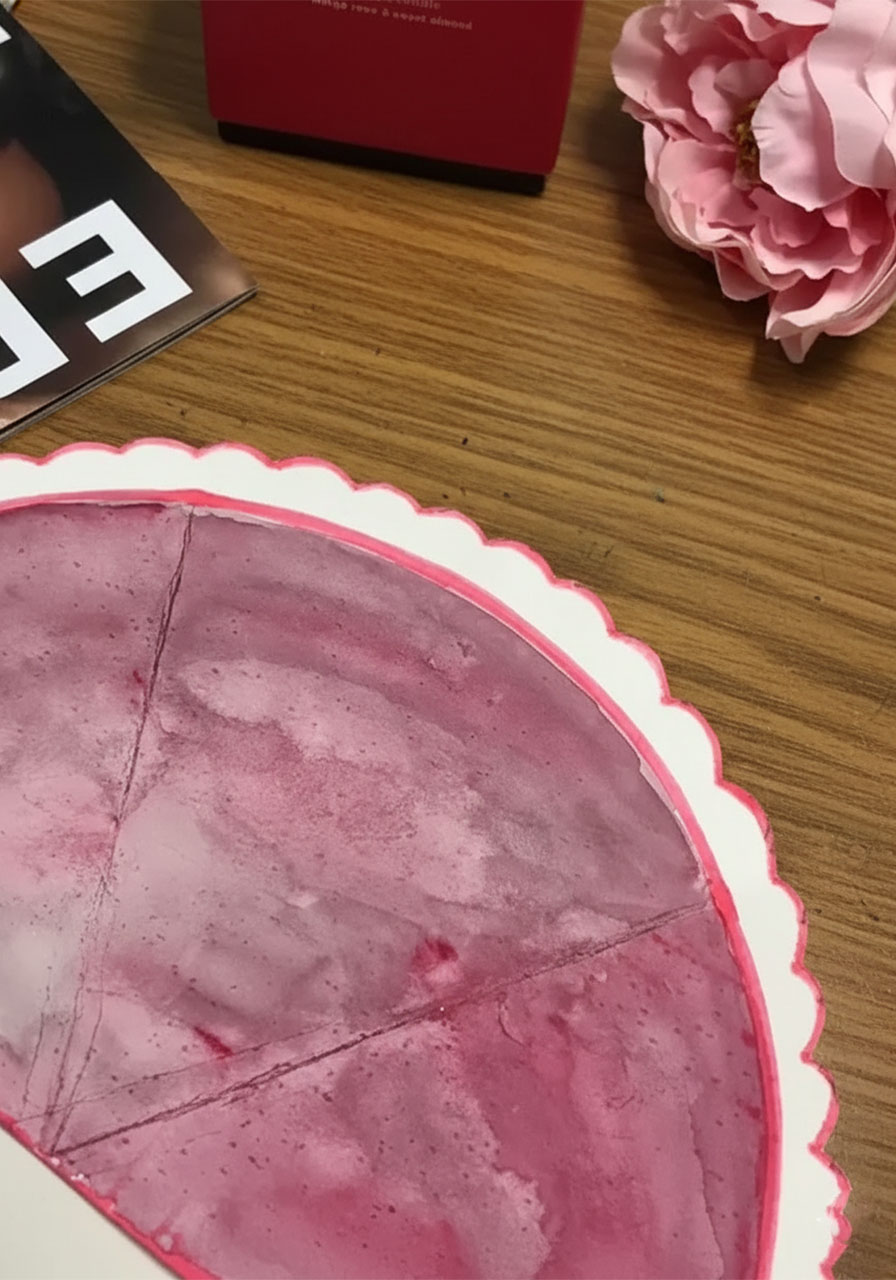
2. Tri-fold the semi-circle. Fold the semi-circle into thirds so the two side sections fold over and overlap slightly in the middle – just like the paper wrapping on a real flower bouquet. Make crisp folds so it holds its shape well.
3. Decorate the inside (the “bouquet” part). Unfold the card and color the entire inside section a rich, vibrant pink. Watercolor paint, markers, or crayons all work beautifully. This is the backdrop your tulips will sit against.
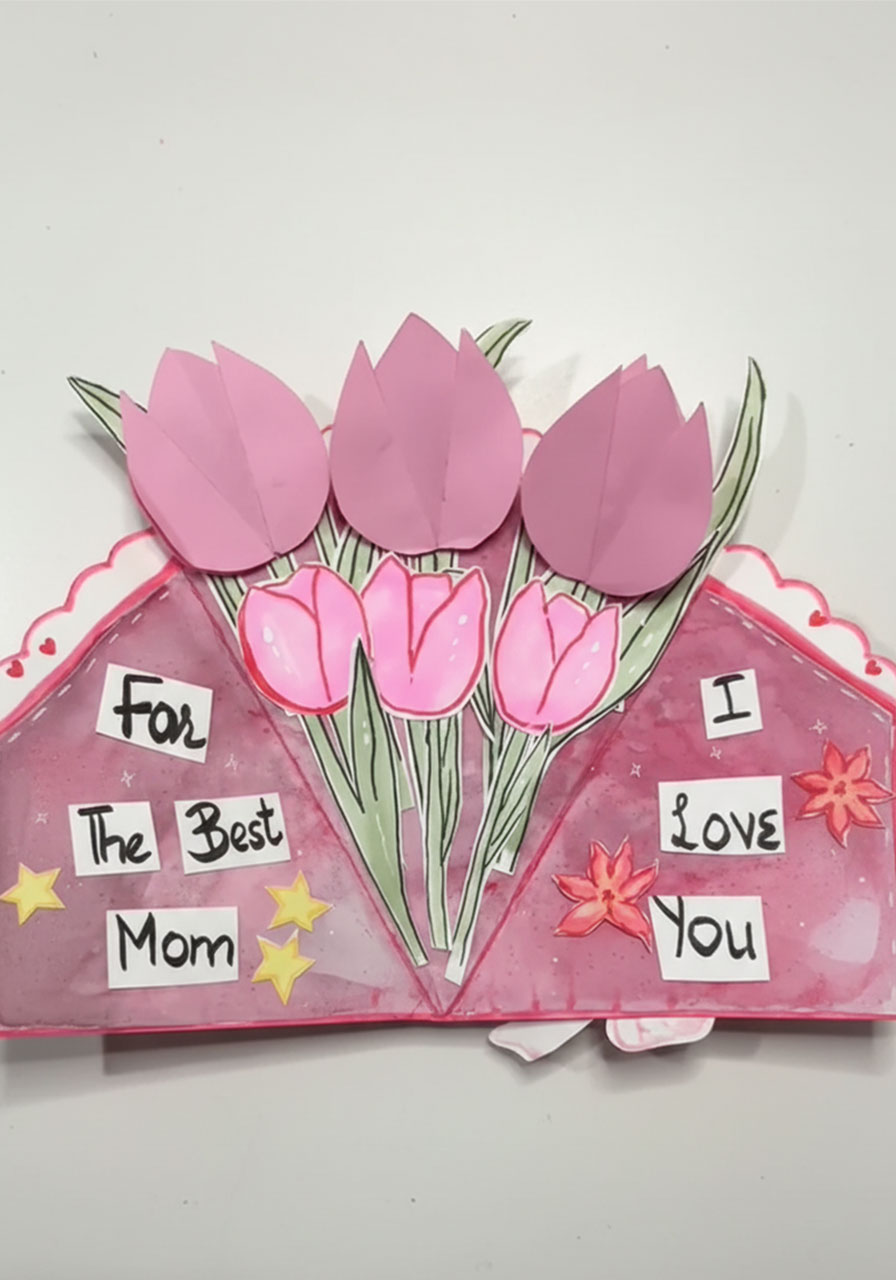
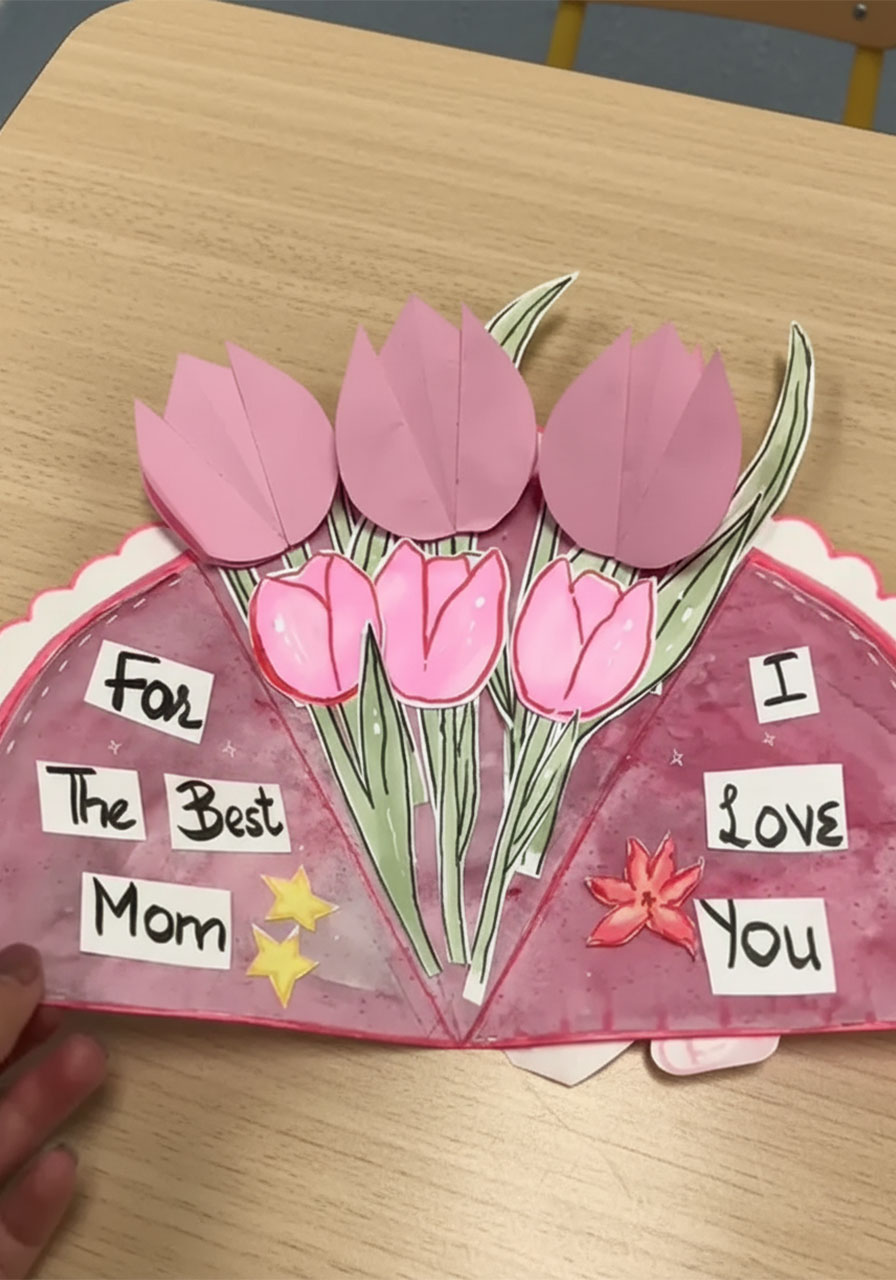
4. Decorate the outer panels. On the two side flaps (the outside “wrapper” sections), draw a cute grid pattern and fill it with small red hearts. This creates that adorable wrapping paper look you see on the finished card. You can also write your messages here: “For the Best Mom” on the left panel and “I Love You” on the right.
🎨 Fun Variation: Let kids choose their own color scheme for the inner bouquet section! Purple watercolor with yellow tulips makes a stunning combination. Or try red and gold for a bold, festive feel.
Step 3: Assemble the Whole Card
Now comes the most satisfying part – bringing everything together into the finished bouquet card. This is a great step to do as a team: one person holds, another glues!
1. Add the stems. Cut three long, thin strips from your green paper – these are the tulip stems. Curl them slightly for a natural look (wrap them around a pencil). Glue them vertically into the center panel of the open card, spaced evenly apart.
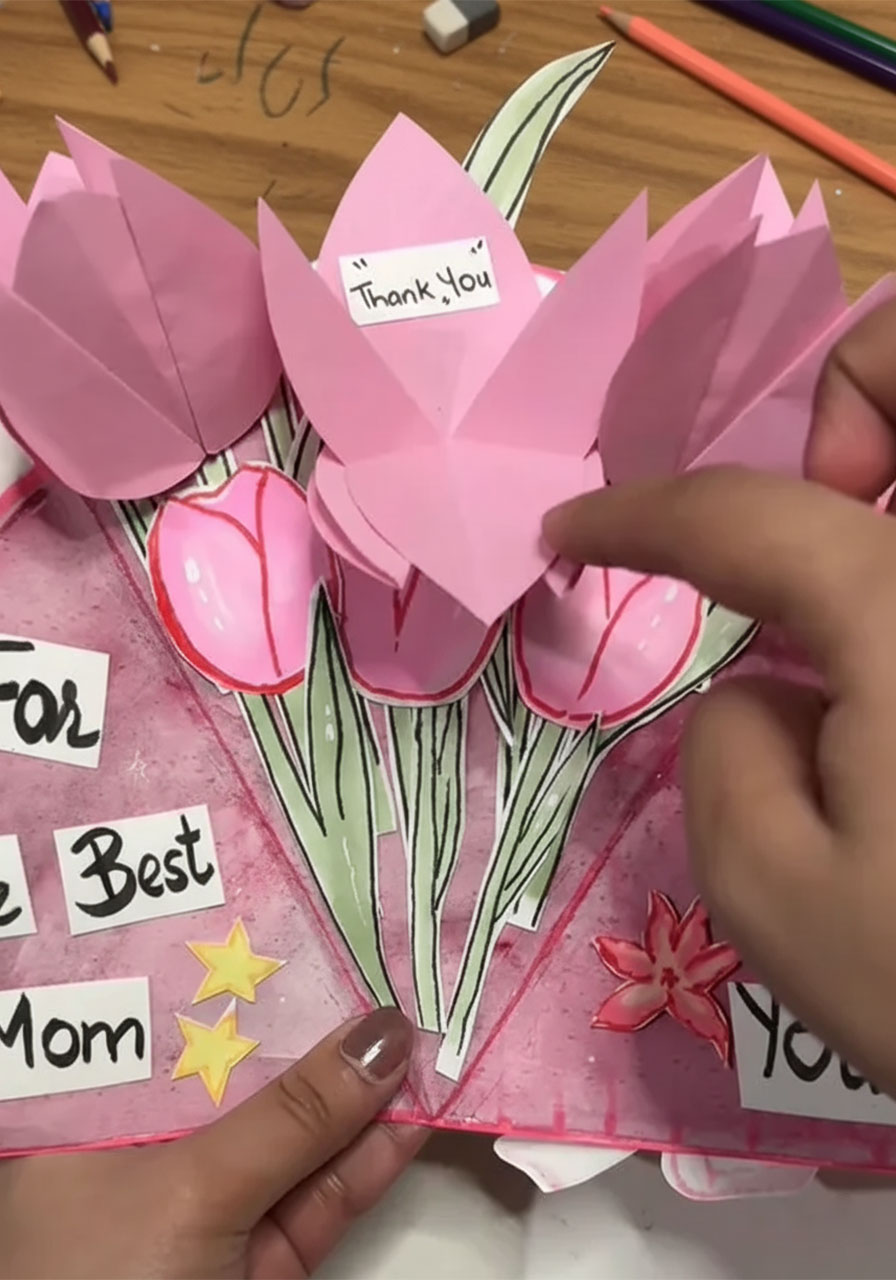
2. Write your secret messages. Before gluing the tulips down, this is the moment! Write tiny notes on small slips of paper – “You’re the Best!”, “Thank You!”, “I Love You So Much!” – and tuck them underneath the bottom of each tulip. When Mom lifts the flowers, she’ll find your hidden notes. Cue the happy tears.
3. Glue on the tulips. Attach one 3D tulip to the top of each stem. Make sure they’re securely glued and facing forward so the petals are visible when the card is open.
4. Add the finishing details. Glue or draw small green leaves along the stems. Add any stickers, stars, or small drawings to fill in the space around the flowers. The more personal, the better!
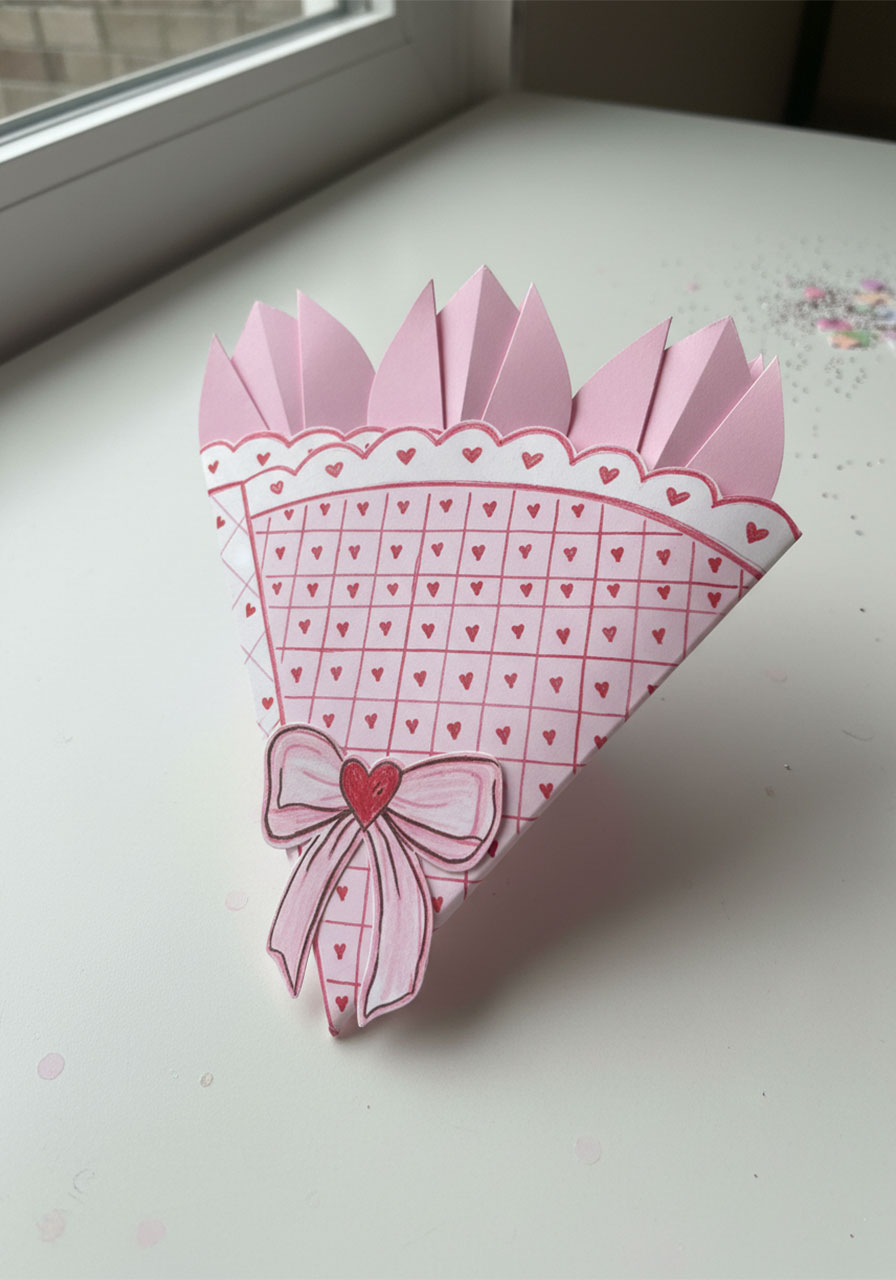
5. Attach the bow. Cut a simple bow shape from pink paper (two loops and two tails) and glue it to the front of the card at the bottom, right where the “wrapping” meets. This is what gives it that gorgeous bouquet-of-flowers presentation look when the card is closed.
🌸 Pro Tip for Teachers: Have each child write their secret message on a separate piece of paper before the assembly step. It gives them time to think about what they want to say without feeling rushed, and you can help with spelling beforehand.
The Finished Card: What to Expect
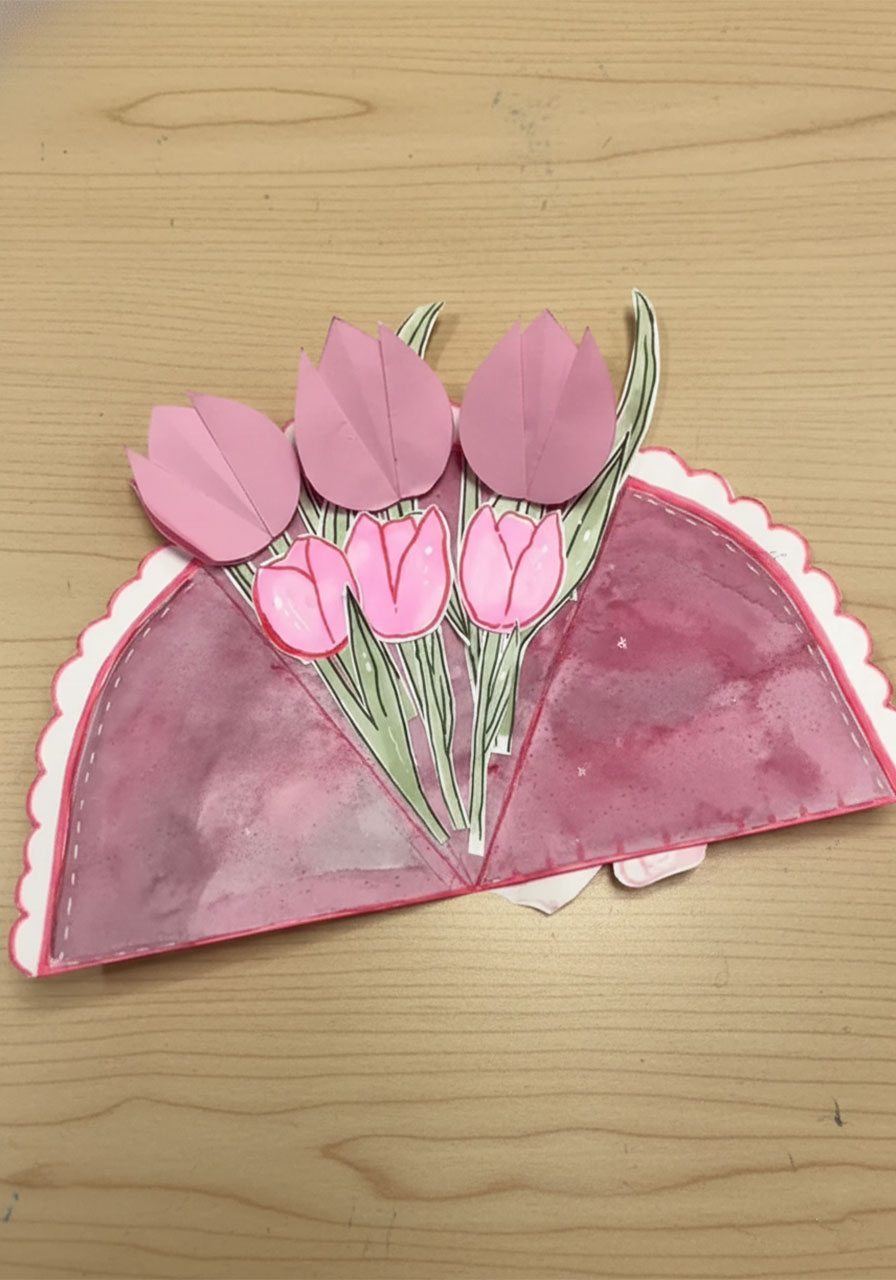
When the card is closed, it looks like a gorgeous, wrapped bouquet tied with a pink bow – ready to hand over as a gift.
When Mom opens it, three beautiful 3D pink tulips bloom up from the center, surrounded by personalized love notes on the side panels.
And when she looks under the petals? She finds your tiny hidden messages waiting for her.
That’s three layers of love in one handmade card. It’s the kind of gift that doesn’t get thrown away – it gets kept on the windowsill, put on the fridge, or saved in a memory box.
💝 Making This for Grandma? Try using a mix of purple, yellow, and pink tulips – one color to represent each grandkid! It’s a gorgeous way to make the card feel like a gift from the whole family.
Quick-Reference Summary
| Step | What You’re Making | Time |
|---|---|---|
| 1 | 3 folded 3D tulips (with extra petal layers) | ~30 min |
| 2 | Semi-circle bouquet base (scalloped + decorated) | ~15 min |
| 3 | Assembly: stems, secret notes, bow, finishing touches | ~15 min |
With these steps in your back pocket, you’re ready to help the kids (or yourself!) create a Mother’s Day gift that’s genuinely one of a kind. Because the best gifts aren’t just beautiful – they’re made with love, and they tell a story. This tulip bouquet card does both.
Happy crafting! 💕
More Mother’s Day Ideas to Keep the Fun Rolling:
30+ Mother’s Day Crafts for Kids of All Ages
The DIY “Forever Bouquet” Card That Will Make Mom Cry Happy Tears This Mother’s Day
How to Make a DIY 3D “MOM” Pop-Up Card She’ll Actually Keep Forever
Bloom Her Away: How to Make a DIY Mother’s Day Flower Pop-Up Card
12 Hilarious Mother’s Day Games the Whole Family Will Love
How to Make a DIY Mini Paper Rose Bouquet (The Cutest Mother’s Day Gift That Lasts Forever!)