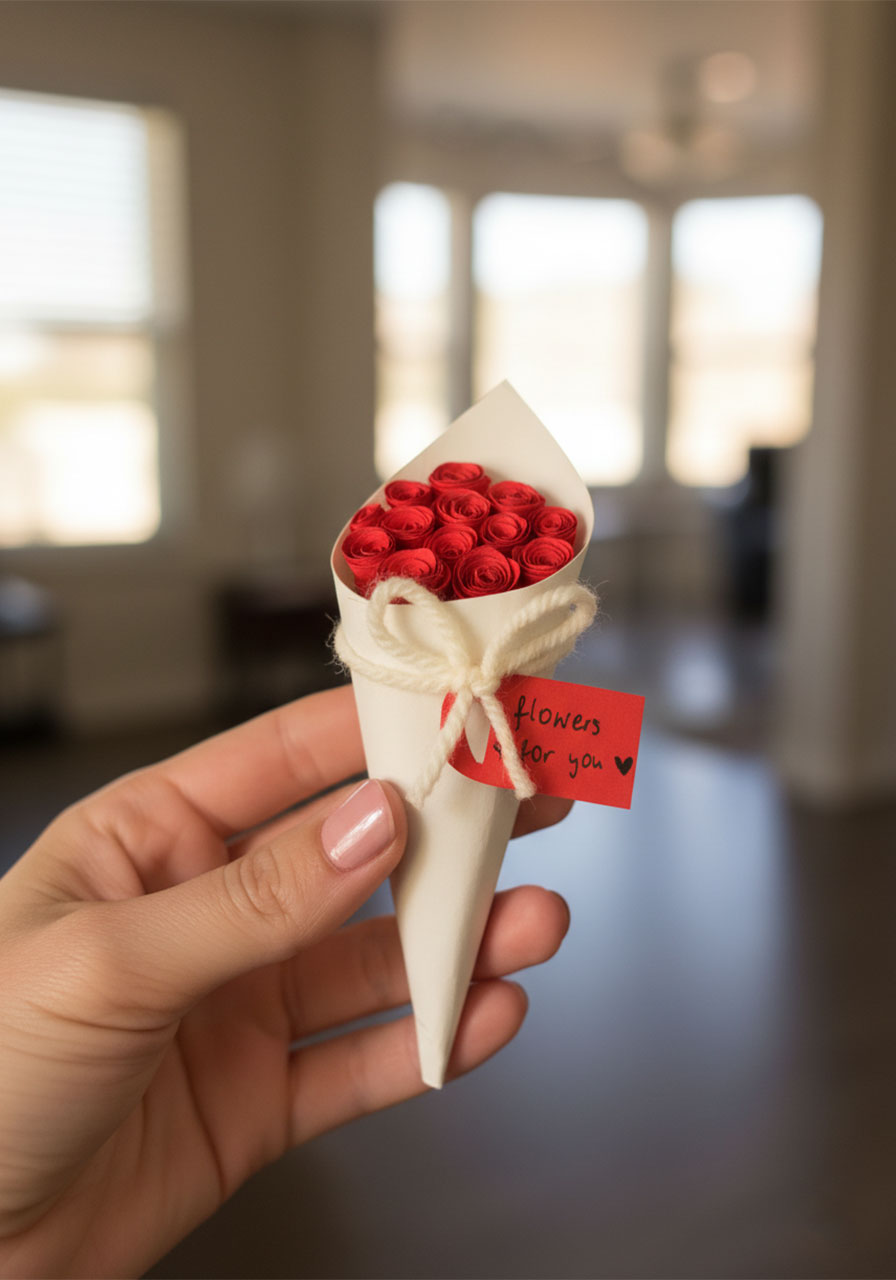
Store-bought flowers wilt in a week. A handmade mini paper rose bouquet? That sits on Mom’s desk forever – and every time she looks at it, she’ll know exactly how much thought went into it.
This project is legitimately easier than it looks. You only need a few basic supplies, and the whole thing comes together in under 30 minutes. Kids as young as 6 or 7 can tackle most of the steps with a little help, and older kids can own this project completely from start to finish. Teachers, this one also makes a gorgeous end-of-year gift idea – a whole classroom could make these!
Here’s everything you need to know to pull it off perfectly.

Best for: Kids ages 6+ & adults
Time to Make: 20–35 minutes
Skill Level: Beginner-friendly
Occasion: Mother’s Day, Teacher Appreciation, Birthdays
🛒 What You’ll Need
White cardstock or heavy paper (for the cone wrapper)
Red construction paper or cardstock (for the roses)
Scissors
Craft glue or a hot glue gun (adult supervision needed for hot glue)
White yarn or twine
A black fine-tip marker
That’s it! No special tools, no fancy craft supplies. If you’ve got paper and scissors at home or in the classroom, you’re basically already set.


🌹 Step-by-Step Instructions
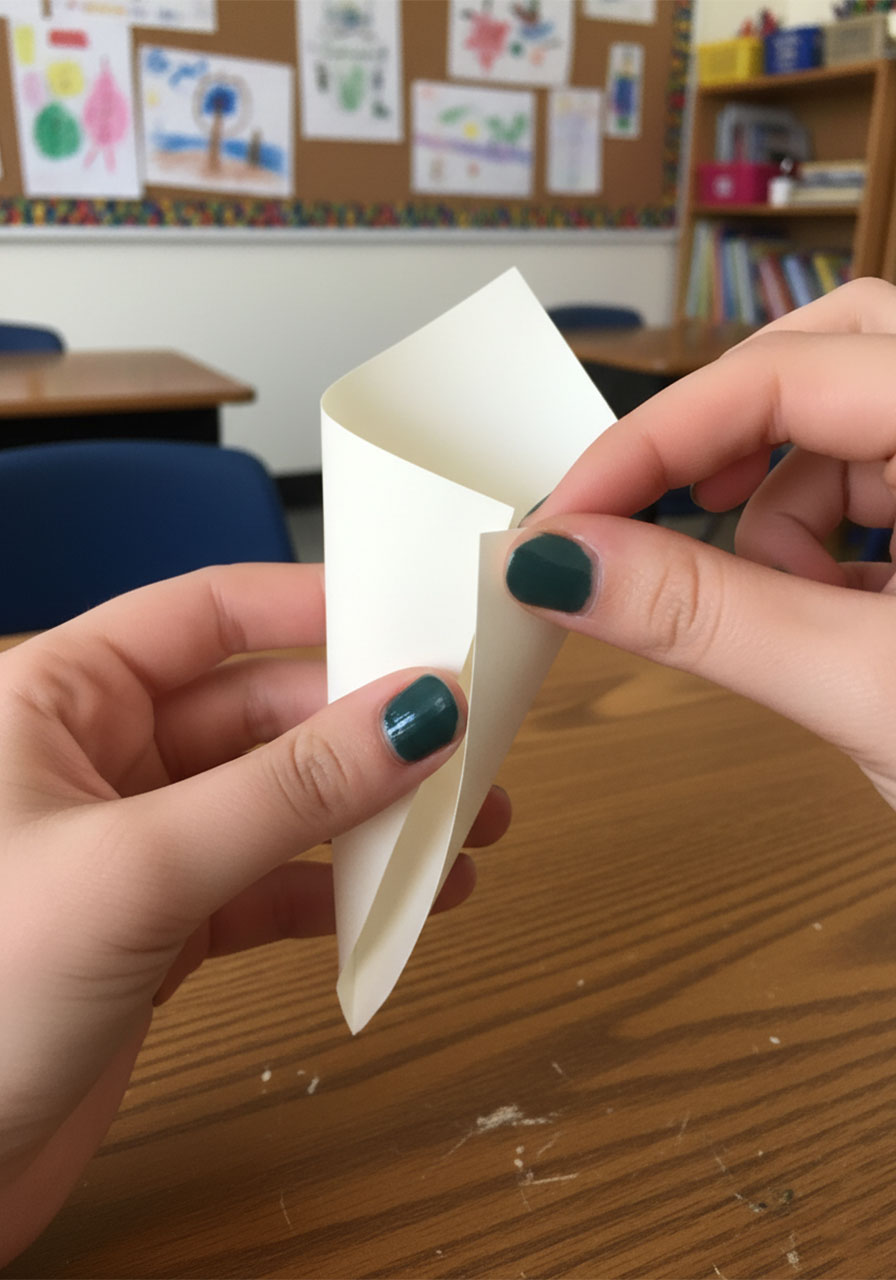
1. Roll the Bouquet Cone
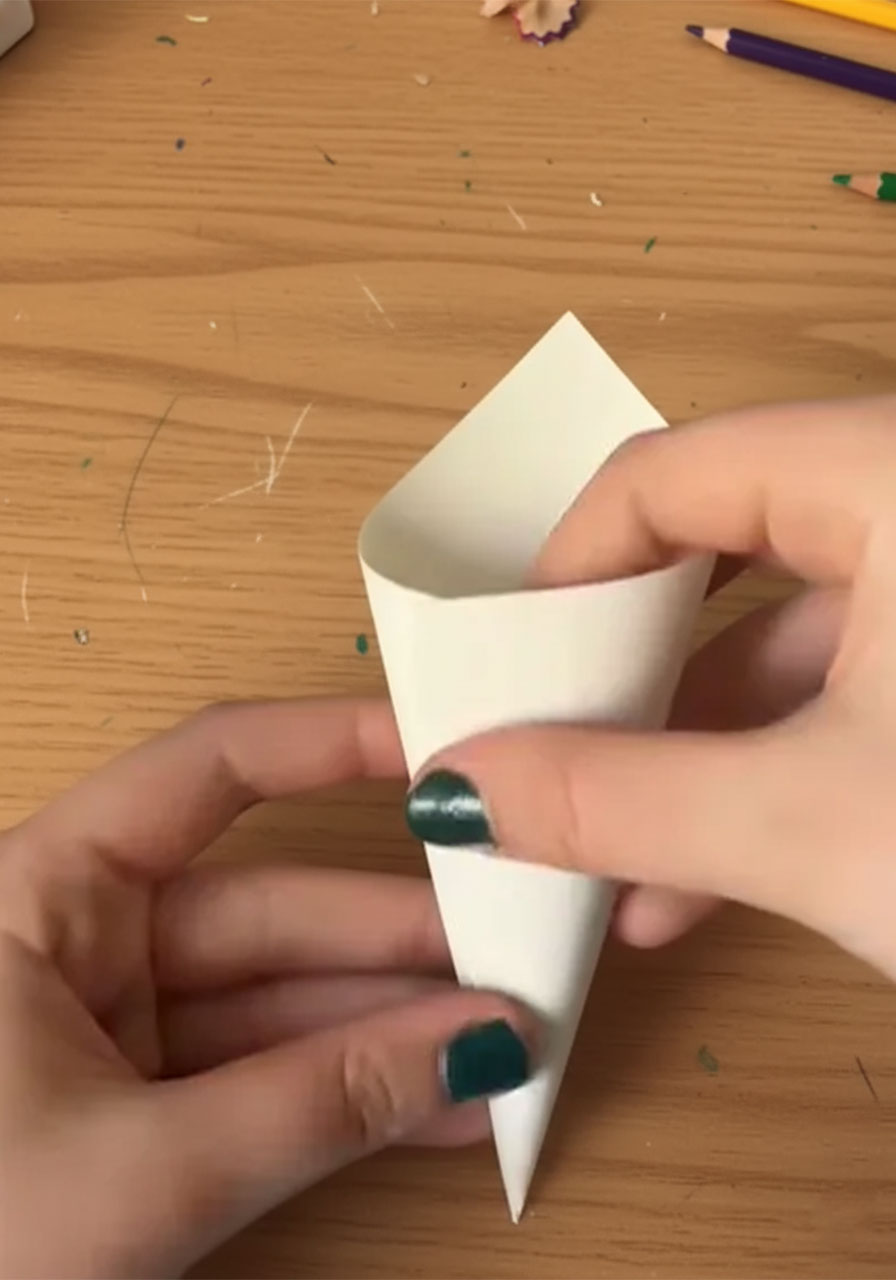
Take your white cardstock and roll it diagonally into a cone shape – think old-fashioned ice cream cone. Pinch the pointed tip firmly with one hand while you adjust the roll with the other until you get a shape you like. Then secure the overlapping edge with a dab of glue or a small piece of tape on the inside.
Once it’s dry, use scissors to trim the open top edge into a smooth, even circle. This little trim makes a huge difference – your cone will look like it came from a real flower shop.

2. Cut Out Your Rose Circles
From your red paper, cut out small circles roughly 1.5 to 2 inches in diameter. They don’t need to be perfectly round – slightly wobbly circles actually make more realistic-looking roses! Aim for about 12–15 circles total so your bouquet looks full and lush.
Pro Tip: Stack 2–3 sheets of red paper on top of each other and cut multiple circles at once to save time. This is especially helpful if you’re making these in a classroom setting!
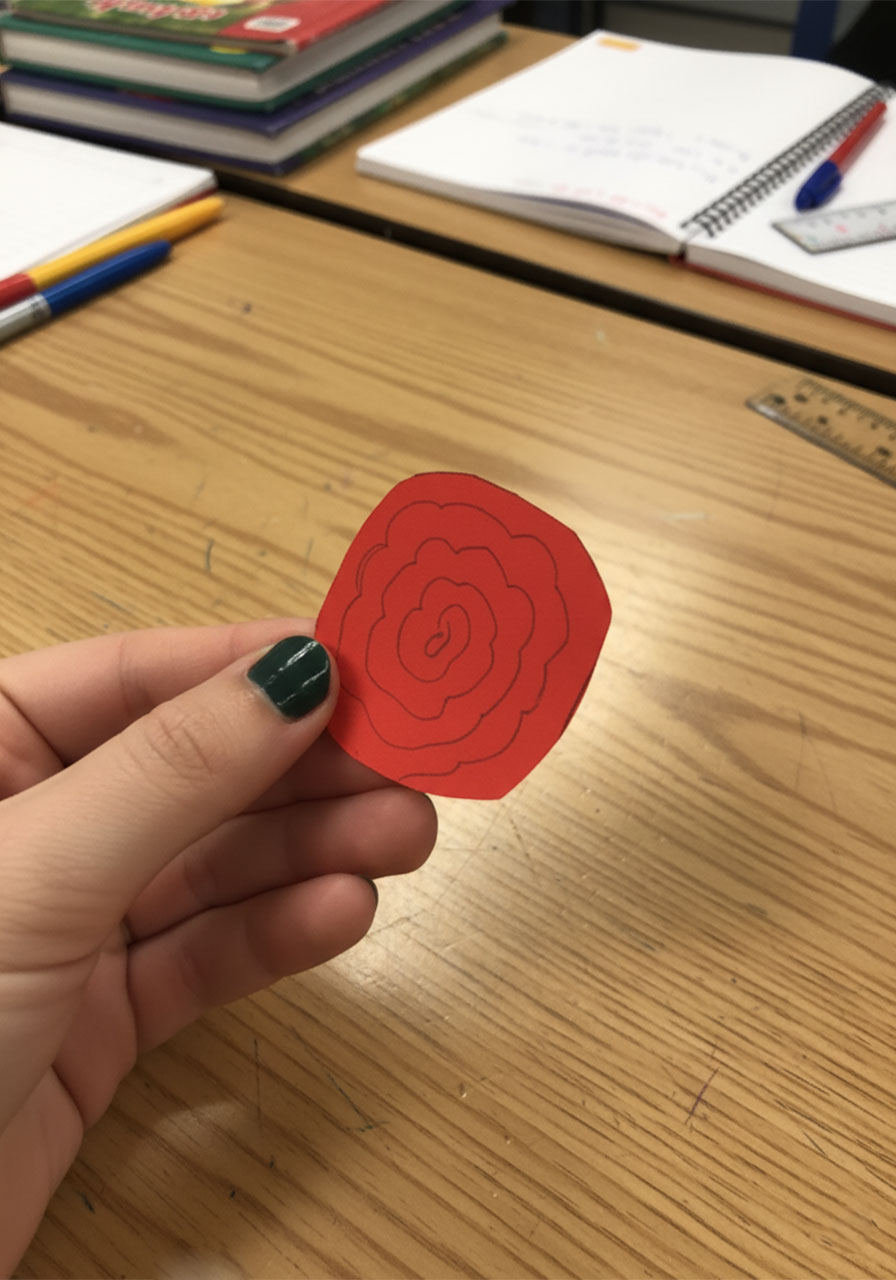
3. Cut the Spiral
This is the fun part. Take one of your red circles and, starting from the outer edge, cut a wavy, curving spiral working your way toward the center – like you’re peeling an apple in one long, unbroken strip.
The key word here is wavy. Instead of cutting a perfectly smooth spiral, let your scissors curve gently in and out as you go. Those little curves become the natural-looking petal edges once the rose is rolled. Leave a small flat circle at the very center – that’s the base that holds everything together.

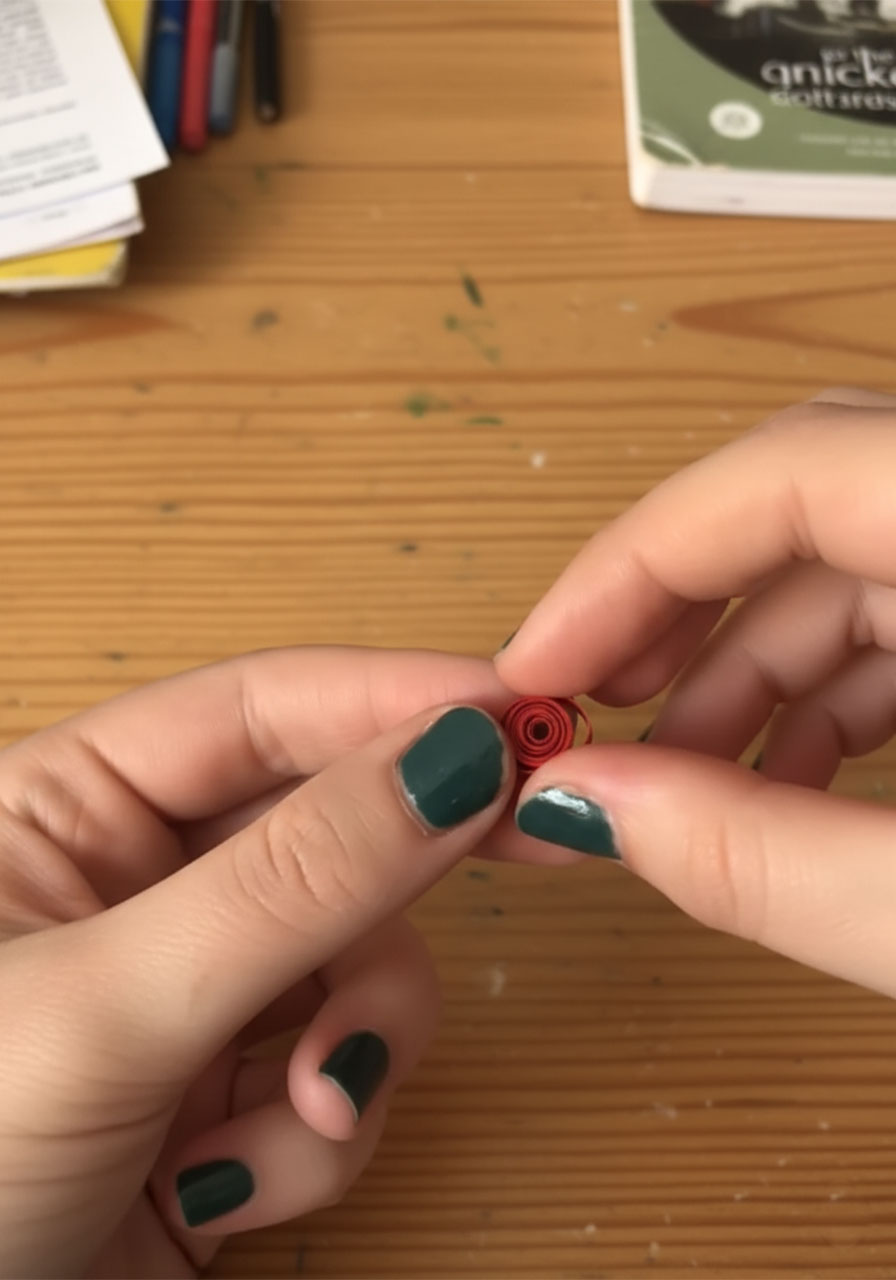
4. Roll Your Rose
Starting from the outer end of your spiral (the “tail”), begin rolling the paper tightly toward the center. Keep your rolling snug at first – this creates the tight inner core of the rose bud.
When you reach the center circle, let the rolled paper “spring” open just a tiny bit. That natural loosening is what gives your rose its bloomy, layered look. Then press the base of the roll against the flat center circle and secure with a small dot of glue.
Hold it for about 10 seconds while the glue sets, then set it aside. Repeat for all your circles.
Pro Tip: The tighter you roll at the start, the more closed and bud-like your rose looks. The looser you roll, the more open and bloomed it appears. Mix both styles in one bouquet for a really beautiful, natural effect!

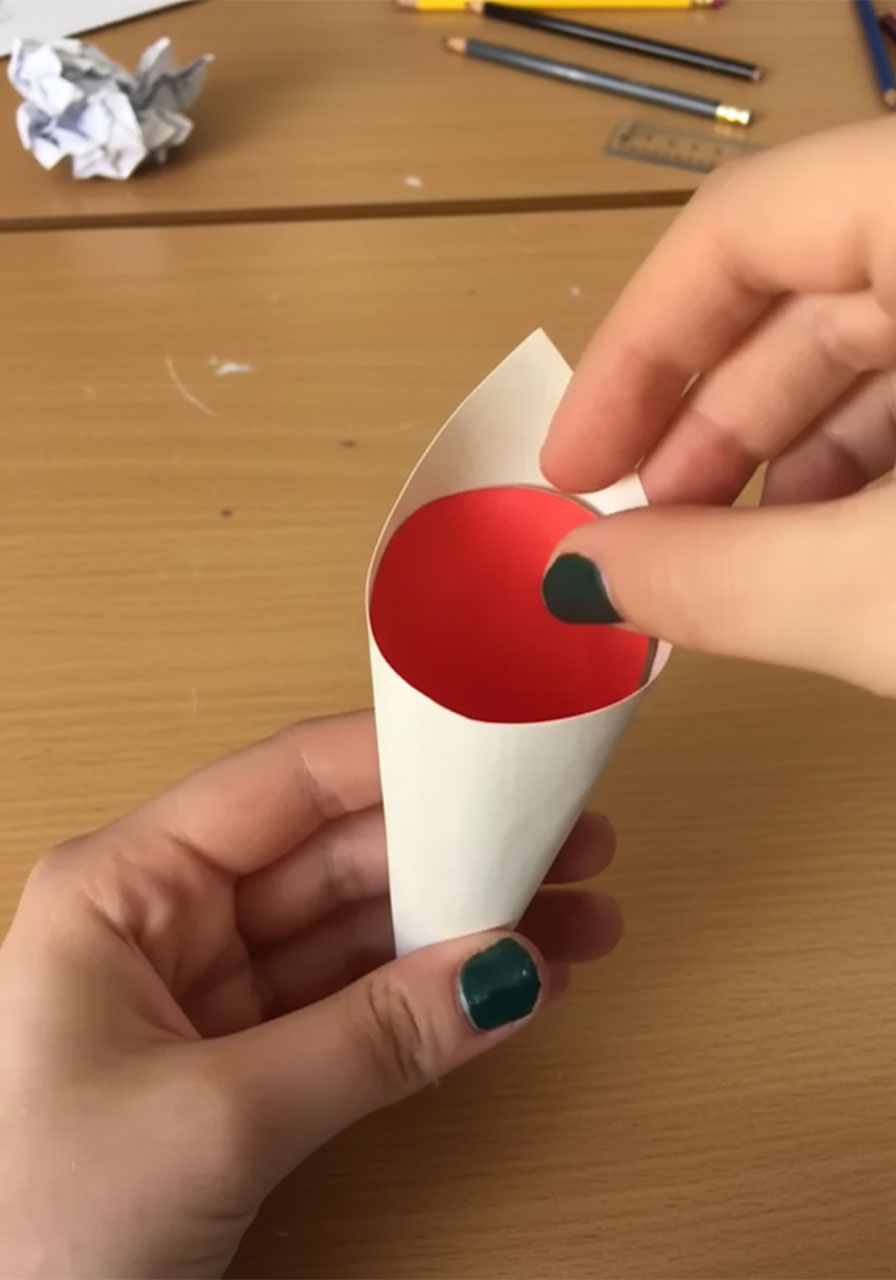
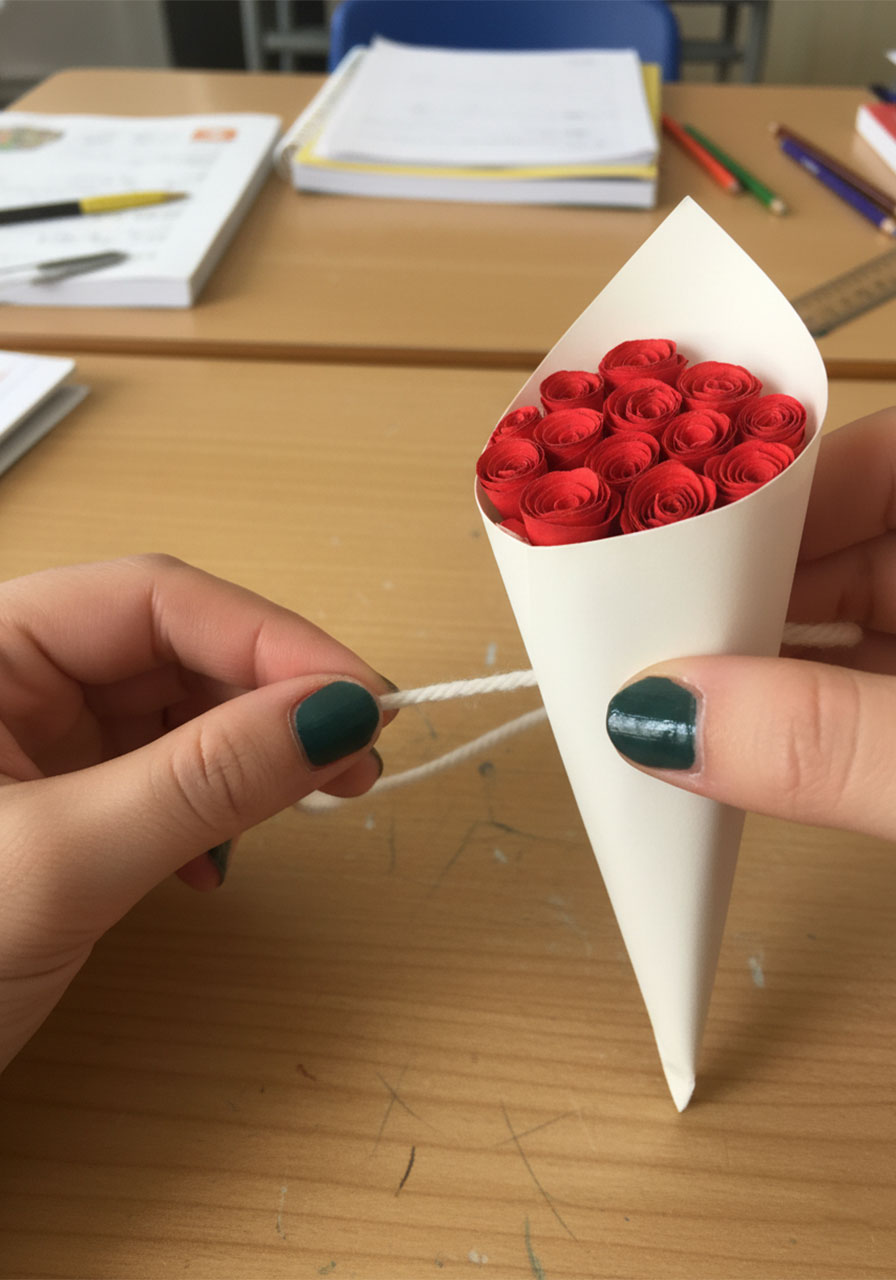
5. Fill the Cone
Apply a dot of glue to the flat base of each paper rose and start tucking them into the open top of your cone. Start from the outside edges and work inward, packing the roses tightly together so there are no big gaps. The bouquet should look full all the way to the center.
If a rose feels wobbly, just add a touch more glue around its base and press it against the neighboring roses for support. Once they’re all packed in together, they’ll hold each other in place beautifully.
6. Add the Finishing Touches
The bow: Cut a length of white yarn or twine (about 12–15 inches). Wrap it around the middle of the cone two or three times, then tie a neat bow at the front. This is the moment the whole thing transforms from “cute craft” to “actual gift.”
The gift tag: Cut a small rectangle from leftover red paper – about 1 inch wide and 2 inches long works perfectly. Use your marker to write a sweet message: “Flowers for you ♥”, “Happy Mother’s Day!”, or even just “I love you.” Tuck one end of the tag behind the bow so it hangs down the front of the cone. Done!


🎨 Fun Variation: Swap the red paper for pink, peach, lavender, or yellow to match Mom’s favorite colors. You can also mix two or three colors in one bouquet for a vibrant spring look. White roses on a kraft-paper cone gives it a gorgeous rustic feel, too!
💡 Classroom Tip (For Teachers): This is a wonderful whole-class project for Mother’s Day week. Pre-cut the cone shapes and rose circles ahead of time so students can jump straight into rolling and assembling. Assign each student one cone and 12 rose circles, and even your youngest crafters will end up with a finished bouquet they’re proud to bring home.

Why This Gift Works So Well
There’s something about a handmade gift that store-bought flowers just can’t compete with. When Mom unwraps this mini paper rose bouquet and sees that someone sat down, rolled each tiny rose by hand, and tied a little bow just for her – that’s what she’ll remember. Not the price tag, not the packaging. The effort.
And the best part? These paper roses don’t wilt, don’t need water, and don’t drop petals all over the kitchen table. They sit on a shelf or desk and look beautiful for years.
With this project in your back pocket, you’re officially ready to give Mom a Mother’s Day she’ll genuinely want to keep. 🌹
More Mother’s Day Ideas to Keep the Fun Rolling:
30+ Mother’s Day Crafts for Kids of All Ages
How to Make a DIY Heart Waterfall Card: The Sweetest Handmade Gift for Mom
How to Make a Mother’s Day Flower Pot Craft
Easy Coffee Filter Flowers – The Prettiest Mother’s Day Craft for Kids and Classrooms
Mother’s Day Flower Pot Craft: The Cutest Preschool Gift Mom Will Actually Keep
The Cutest DIY Mother’s Day Gift Ever: A Kid’s Handprint Flower Mug
How to Make a Shrinky Dinks Flower Handprint Keychain for Mother’s Day
Salt Dough Flower Magnets: The Cutest Mother’s Day Gift Kids Can Actually Make