You know those store-bought cards that come with a sad little envelope and a generic “Wishing you a wonderful day”? Yeah, we’re not doing that this year.
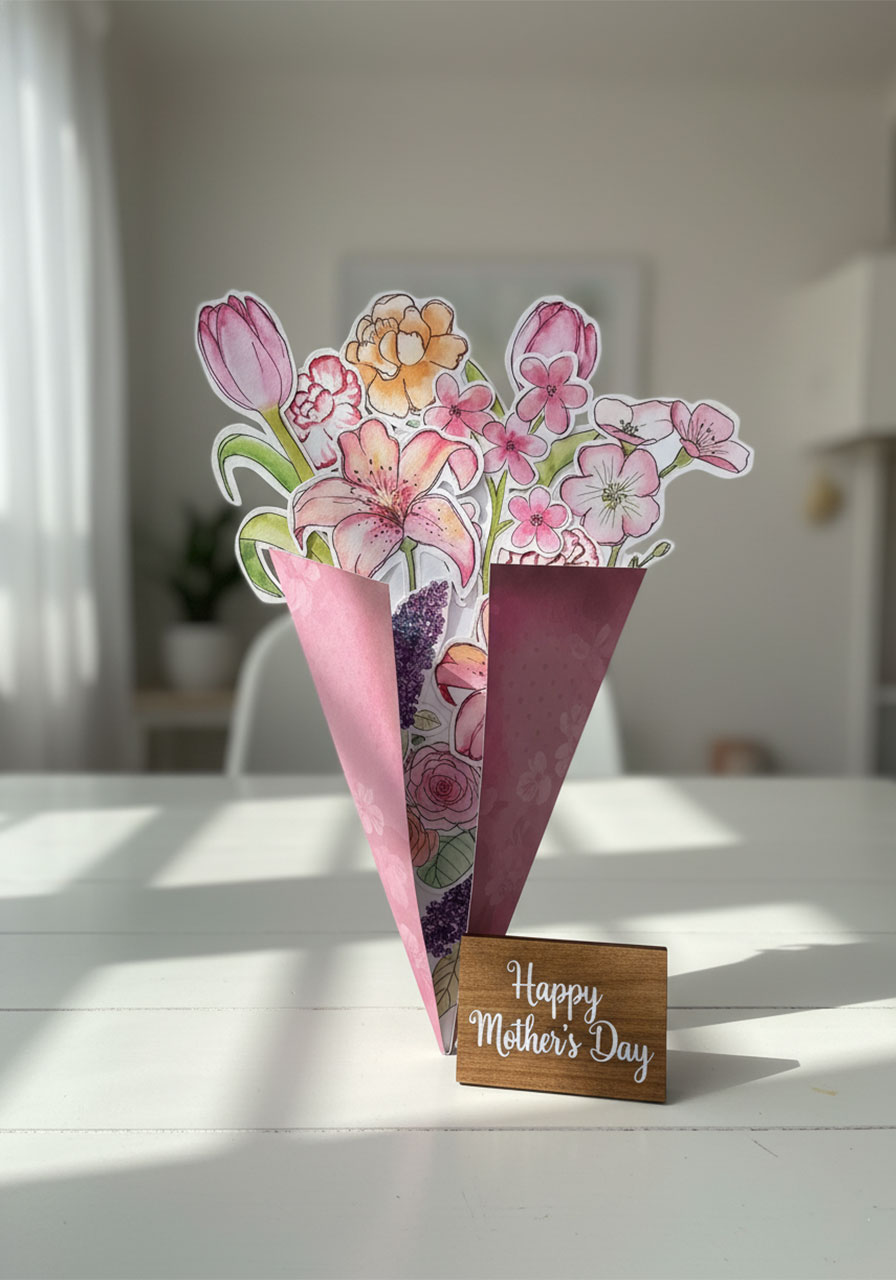
This Mother’s Day, give Mom something she’ll actually keep – a hand-painted paper flower bouquet that doubles as a heartfelt letter. It looks absolutely stunning, it never wilts, and she can display it on her mantel for years. The best part? You don’t need to be an artist. You just need a few supplies, a little patience, and love for the most important woman in your life.
Kids can make this with a grown-up’s help, and parents will love making it right alongside their little ones. This is the kind of project that becomes a cherished memory in itself.

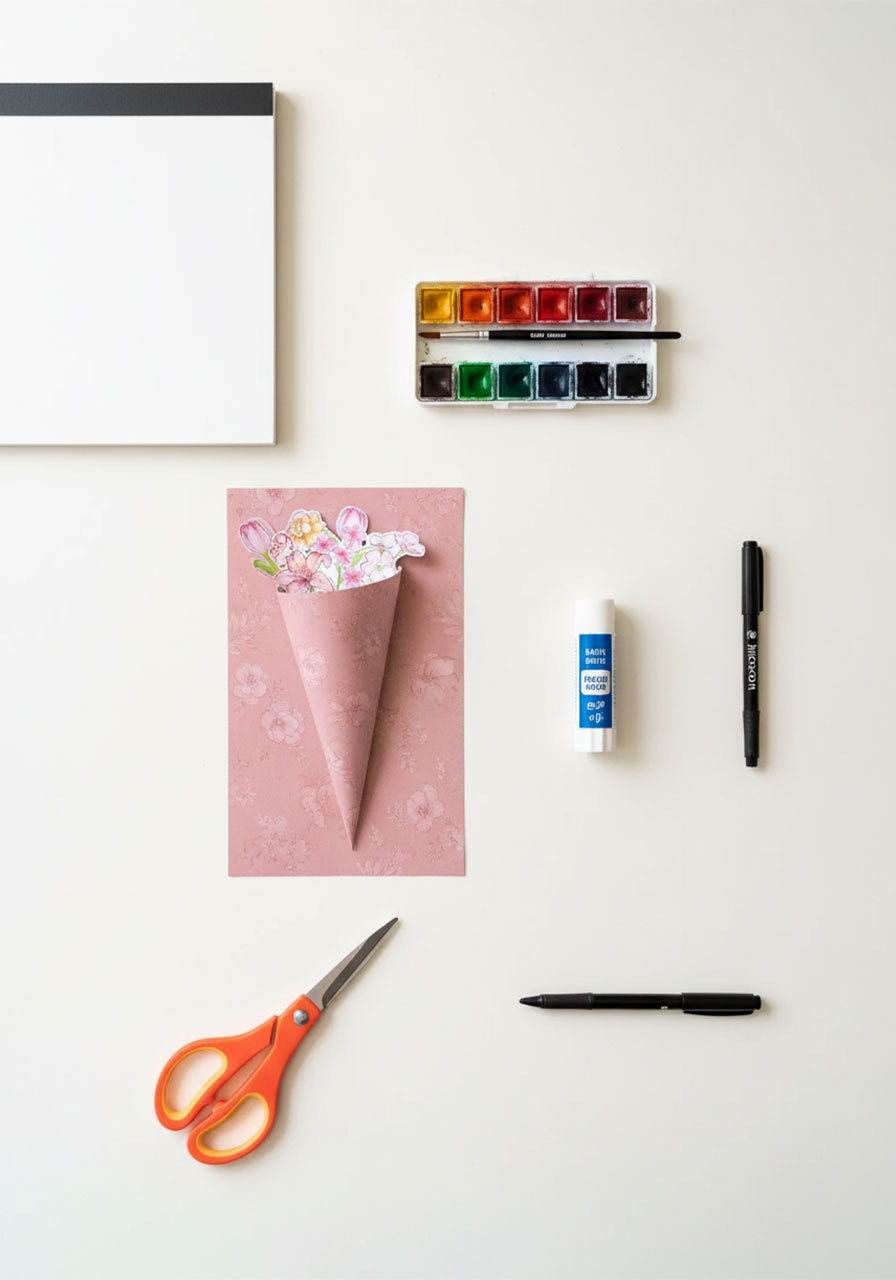
What You’ll Need
Watercolor paper or thick cardstock (for painting the flowers)
Watercolor paints (a basic set works perfectly)
A fine-tip black pen or marker (for outlining)
Colored or patterned paper – soft pink, dusty rose, or a floral print work beautifully (for the bouquet wrap)
Scissors
A glue stick or double-sided tape
A pen or marker for writing your message
Time to Make: About 1–2 hours (including drying time)
Best For: Kids ages 6+ with adult help, teens, adults
Difficulty: Easy to Moderate – no art experience needed!


How to Make It: Step-by-Step
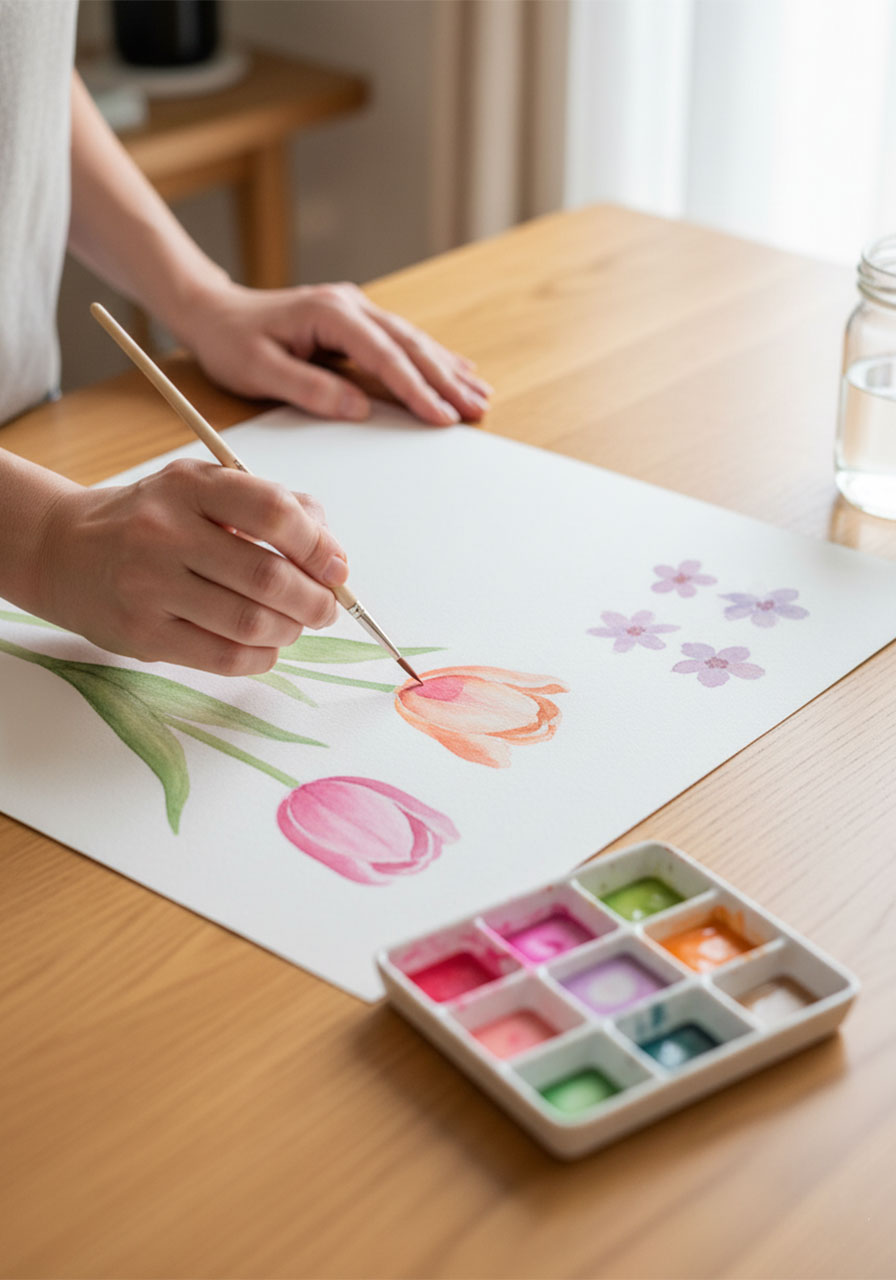
Step 1: Paint Your Flowers
Start by painting individual flowers on your watercolor paper or cardstock. Space them out so each one has room – you’ll be cutting them out later. Go for a mix of shapes and sizes: tall tulips with long stems, big open lilies, small round blossoms, maybe a cluster of tiny wildflowers.
Don’t stress about making them perfect. Watercolors are wonderfully forgiving – the slightly uneven edges and soft color bleeds are exactly what make them look gorgeous. Aim for soft pinks, peachy oranges, and lavender purples for a classic, romantic bouquet feel. Paint a few more flowers than you think you’ll need so you have options when it’s time to arrange.
Pro Tip: Let each flower dry fully before painting one right next to it – this stops the colors from bleeding into each other.
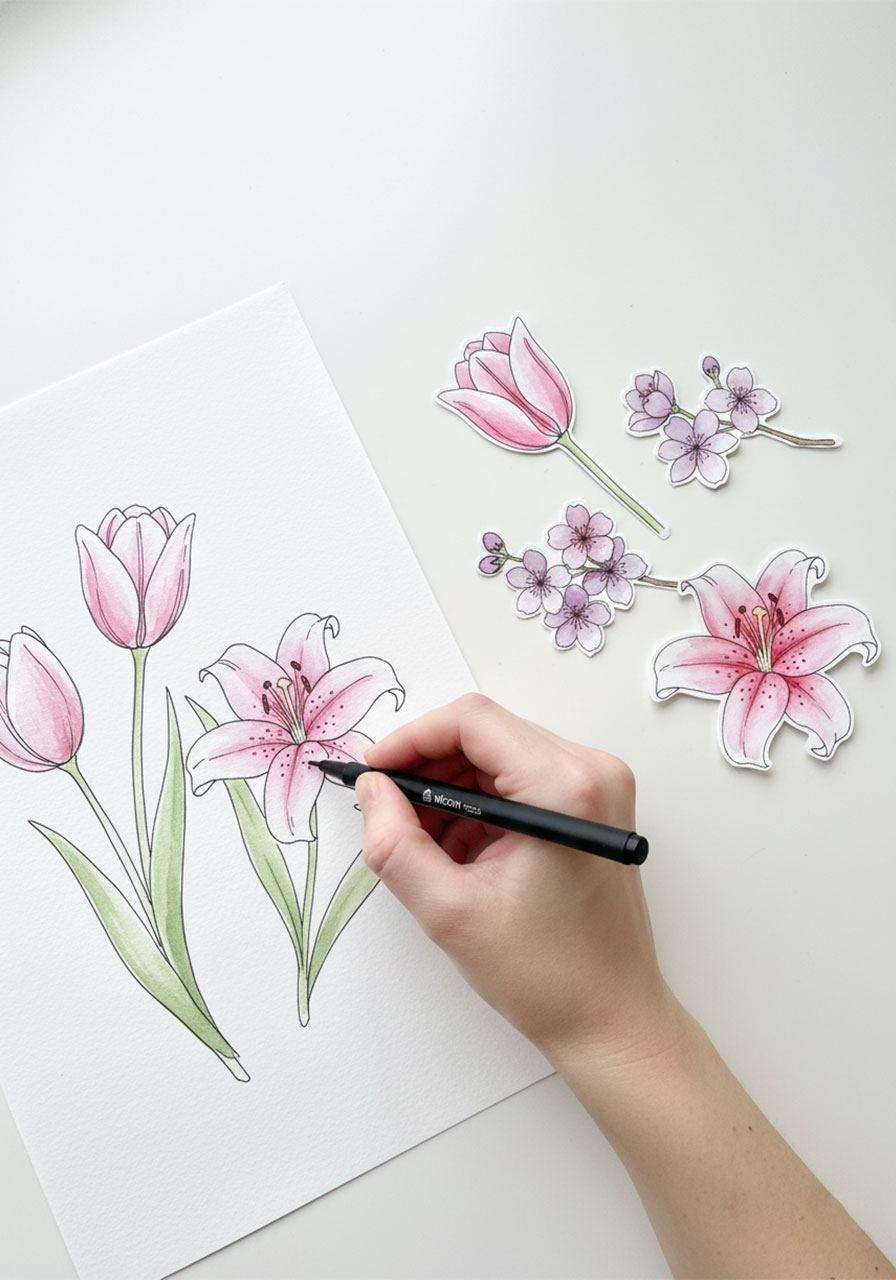
Step 2: Dry, Then Outline
Once your flowers are completely dry (this is the waiting game – be patient!), grab your fine-tip black pen and trace around the petals, stems, and leaves. Add small detail lines inside the petals too. This step is a total game-changer – it makes the flowers look crisp, whimsical, and intentional, like something out of a beautiful illustrated book.
After outlining, carefully cut each flower out. Take your time around the curves – the cleaner the cut, the more stunning the final bouquet.
Pro Tip: Small scissors with pointed tips (like nail scissors) make cutting around petals much easier.
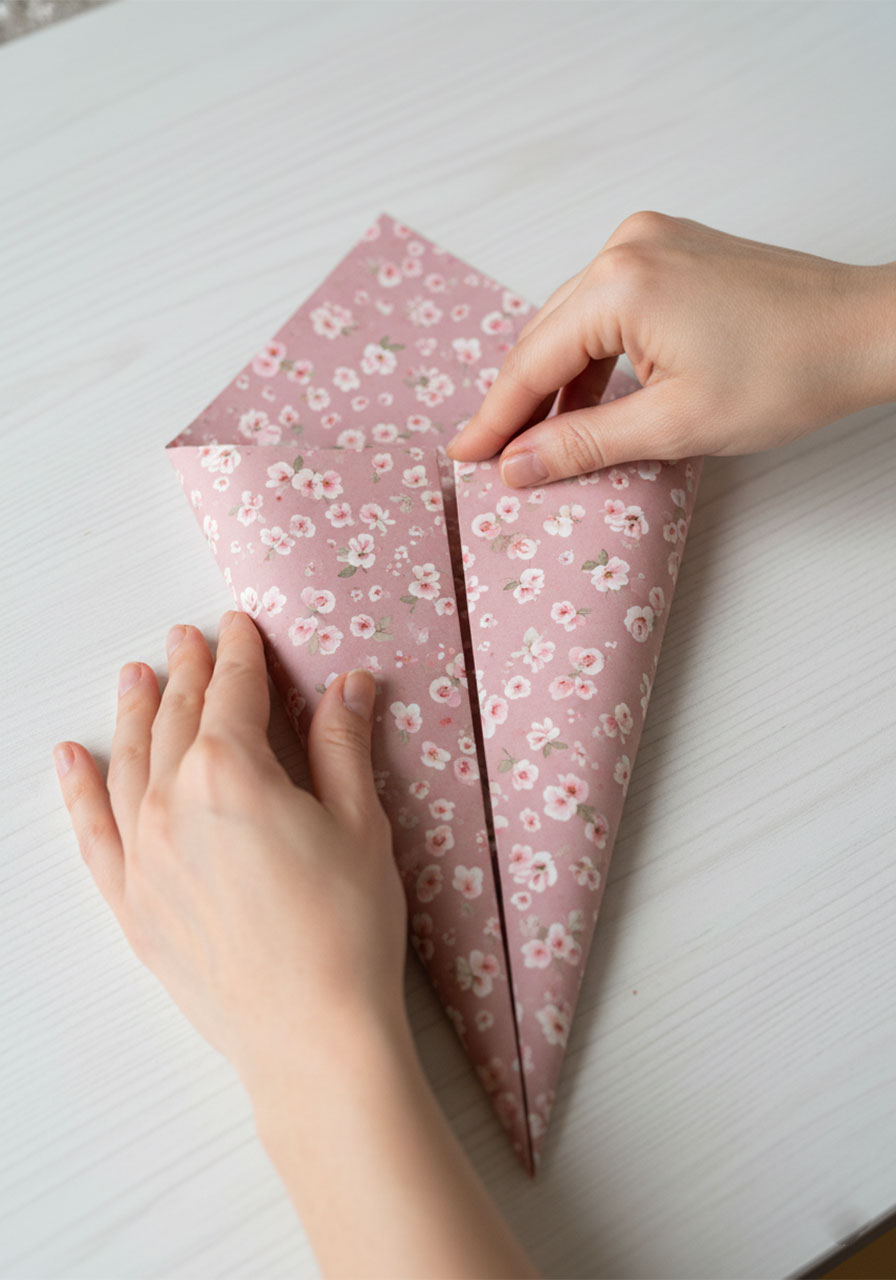
Step 3: Make the Bouquet Wrap
Take your colored or patterned paper and fold it into a wide “V” shape – like a cone that’s been flattened. Think of it as the wrapping paper around a real flower bouquet. A soft pink paper decorated with a floral print makes this look extra special and finished.
This wrap will also become the card itself – so make sure it’s big enough to write a message inside when unfolded!
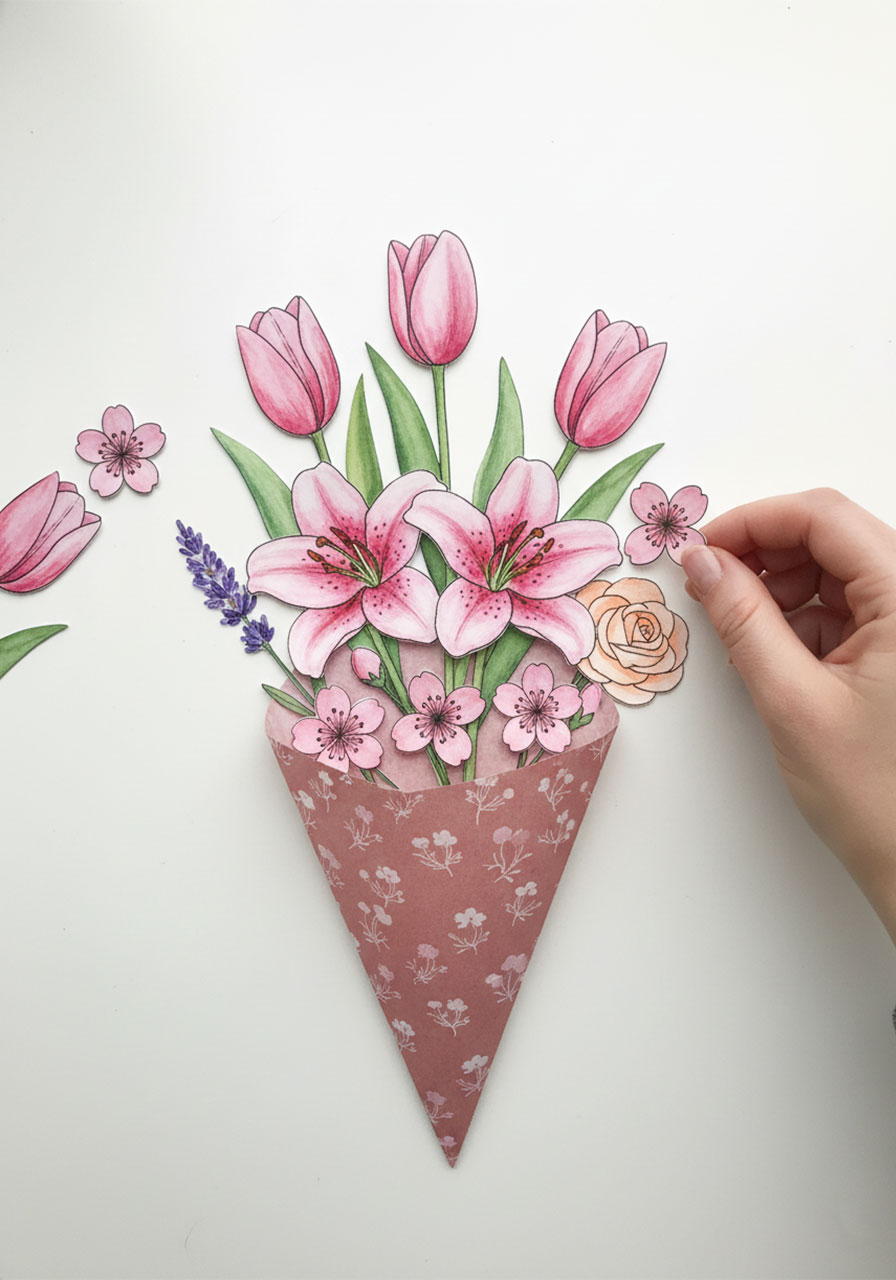
Step 4: Arrange Your Flowers
Here’s where it gets exciting. Before you touch the glue, lay all your cut-out flowers inside the open wrap and play with the arrangement. This step is worth taking your time on.
Place the tallest flowers with long stems (like tulips) at the back and center – these are your “hero” flowers.
Tuck medium flowers (like lilies or roses) in the middle layer.
Fill in the gaps with small blossoms and clusters at the front to create a full, lush look.
Let some flowers peek up above the top edge of the wrap – this gives it that real bouquet silhouette that looks absolutely beautiful.
Once you love how it looks, glue each flower into place on the inside back of the wrap.
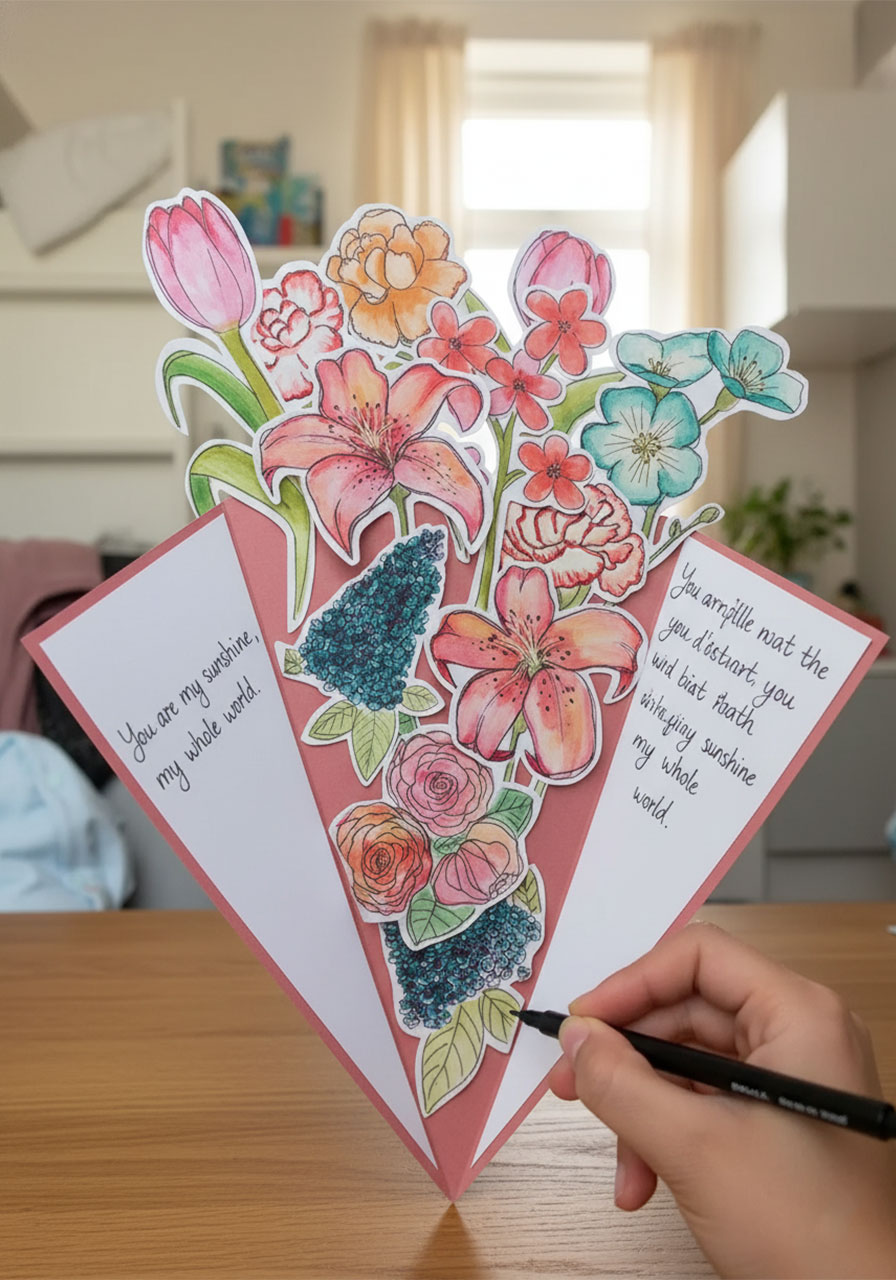
Step 5: Write Your Message on the Inside Flaps
This is the secret that makes this card truly unforgettable. When Mom opens the bouquet wrap, the inner flaps reveal your handwritten message. Use this space to write:
- Things you love most about her
- Your favorite memories together
- Reasons she’s the best mom in the world
- A simple, heartfelt “Happy Mother’s Day – I love you”
Kids can dictate their message for a grown-up to write, or practice writing it themselves – wobbly letters and all. That authenticity is what makes Mom tear up in the best way.
Why This Card Is So Special
Real flower bouquets are beautiful – for about a week. Then they droop, drop petals, and end up in the bin. This paper bouquet? It sits on Mom’s mantel, gets pulled out of a memory box years later, and still looks just as beautiful as the day she opened it.
It shows her you didn’t just grab something off a shelf. You sat down, got a little paint on your hands, and made something just for her. In a world of quick texts and e-cards, that handmade effort says “I love you” in a way nothing else quite can.
And honestly? The process of making it together is just as sweet as the gift itself.

Quick Tips for the Best Results
Paint at least 8–10 flowers of different sizes so you have plenty to work with when arranging.
Use a mix of flower shapes – tall and narrow, wide and open, small and clustered – for a bouquet that looks full and interesting.
Let the paint fully dry before outlining. Rushing this step will smudge the ink.
Don’t glue until you love the layout. Rearrange as many times as you need before committing.
Add a little glitter to the lilac clusters or flower centers for a magical sparkle effect that kids absolutely love.
Whether you’re a parent doing this with your kids or a teacher running it as a class project, this Forever Bouquet Card is the kind of Mother’s Day gift that gets framed – not recycled. Grab your watercolors and get started. Mom is going to love it. 💐
Looking for more creative ideas for celebrations and gatherings? You’re in the right place. Play Party Games is your go-to for making every occasion feel extra special.
More Mother’s Day Ideas to Keep the Fun Rolling:
30+ Mother’s Day Crafts for Kids of All Ages
How to Make a DIY 3D “MOM” Pop-Up Card She’ll Actually Keep Forever
Bloom Her Away: How to Make a DIY Mother’s Day Flower Pop-Up Card
12 Hilarious Mother’s Day Games the Whole Family Will Love
How to Make a DIY Mini Paper Rose Bouquet (The Cutest Mother’s Day Gift That Lasts Forever!)
How to Make a DIY Heart Waterfall Card: The Sweetest Handmade Gift for Mom