Best for: Parents & Teachers | Ages: Kids 6+ with adult help | Time to Make: 30–45 minutes | Cost: Under $5
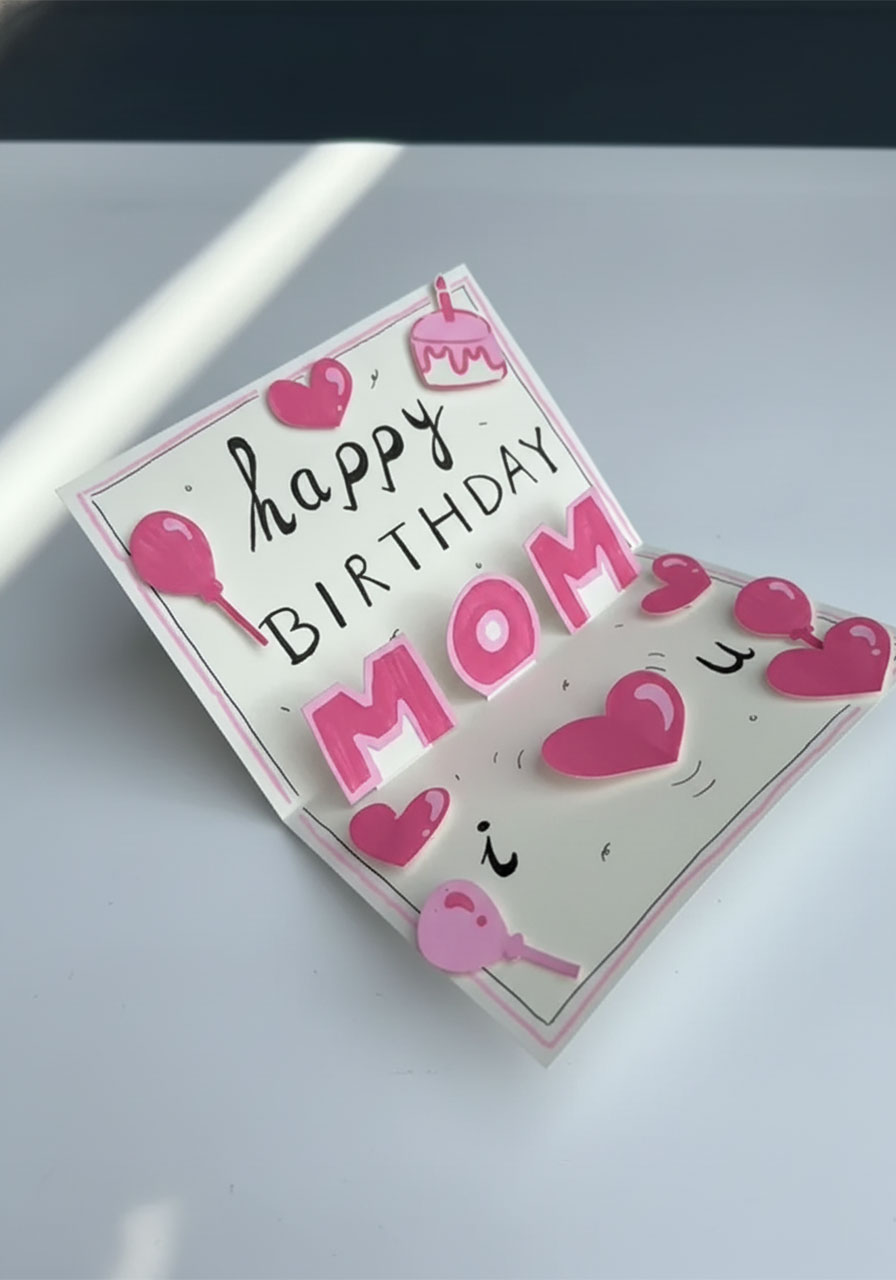
Want to make Mom (or Grandma, or your favorite teacher) absolutely melt this Mother’s Day or birthday? Skip the store-bought card. This DIY 3D Pop-Up “MOM” Card is the kind of handmade gift that goes straight on the mantle – and stays there. The moment she opens it and those big pink letters pop up at her? Instant tears. The good kind.
The best part: you don’t need to be crafty. You don’t need fancy supplies. All you need is some paper, scissors, markers, and about 30 minutes. Kids as young as 6 can make this with a little help from a grown-up, and older kids can tackle it almost entirely on their own. It also makes a wonderful classroom craft project for Mother’s Day week!
✨ Why This Card Works: This isn’t just a card – it’s an experience. Every time she opens it, the “MOM” letters spring up to greet her. That pop-up moment never gets old, and it quietly tells her: someone took real time and care to make this just for her.

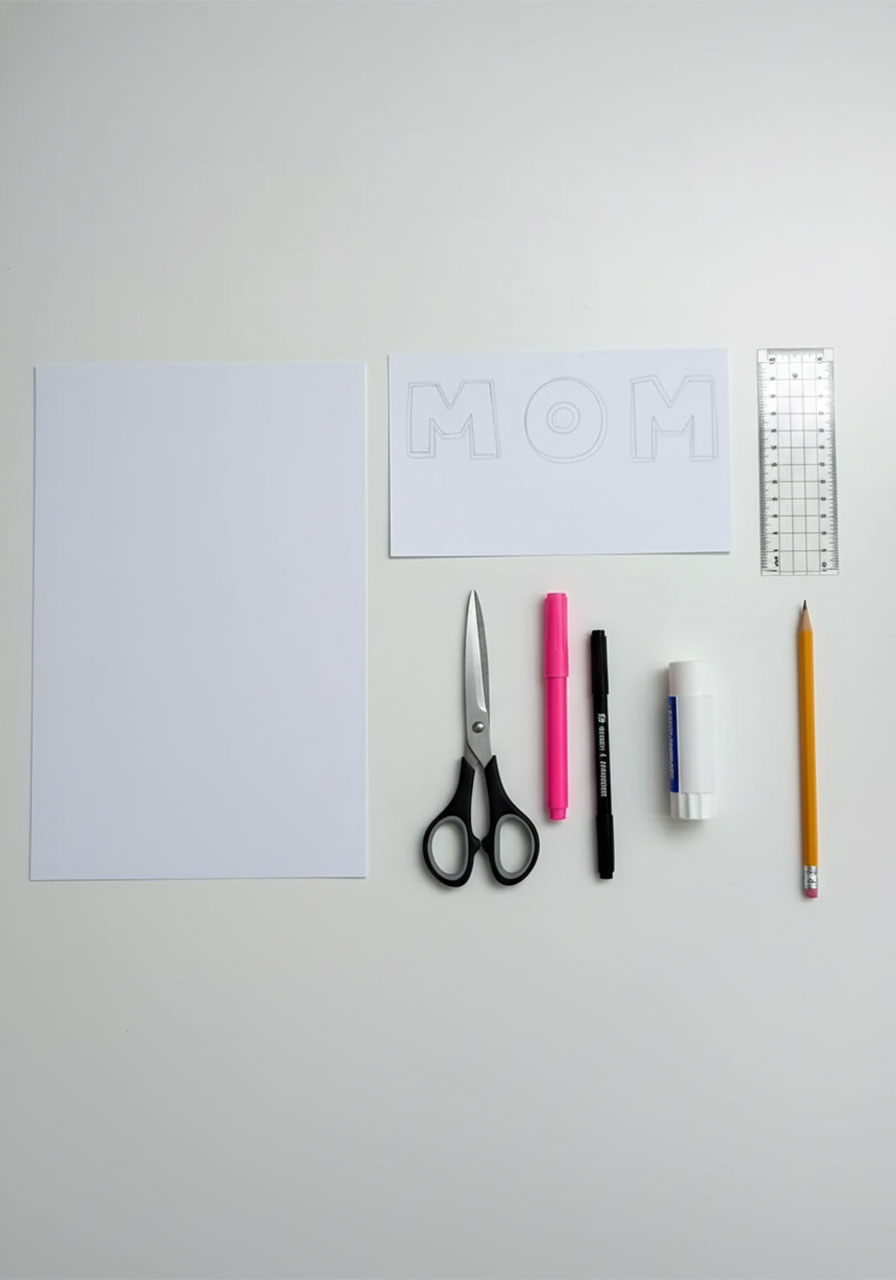
What You’ll Need
2 sheets of cardstock or thick watercolor paper – one for the card base, one for the letters. Thick paper holds the pop-up structure much better than regular printer paper.
Scissors – sharp ones for clean cuts. Kids should use child-safe scissors with an adult helping on the straight cuts.
Pink marker or paint – bright pink is the classic choice, but use her favorite color if you know it!
Black fine-liner or marker – for writing the message and adding little drawings.
Craft glue or a glue stick – liquid craft glue holds best, but a glue stick works fine too.
A ruler and pencil – for making those pop-up cuts even and accurate.


Step-by-Step Instructions
Step 1: Make the Card Base
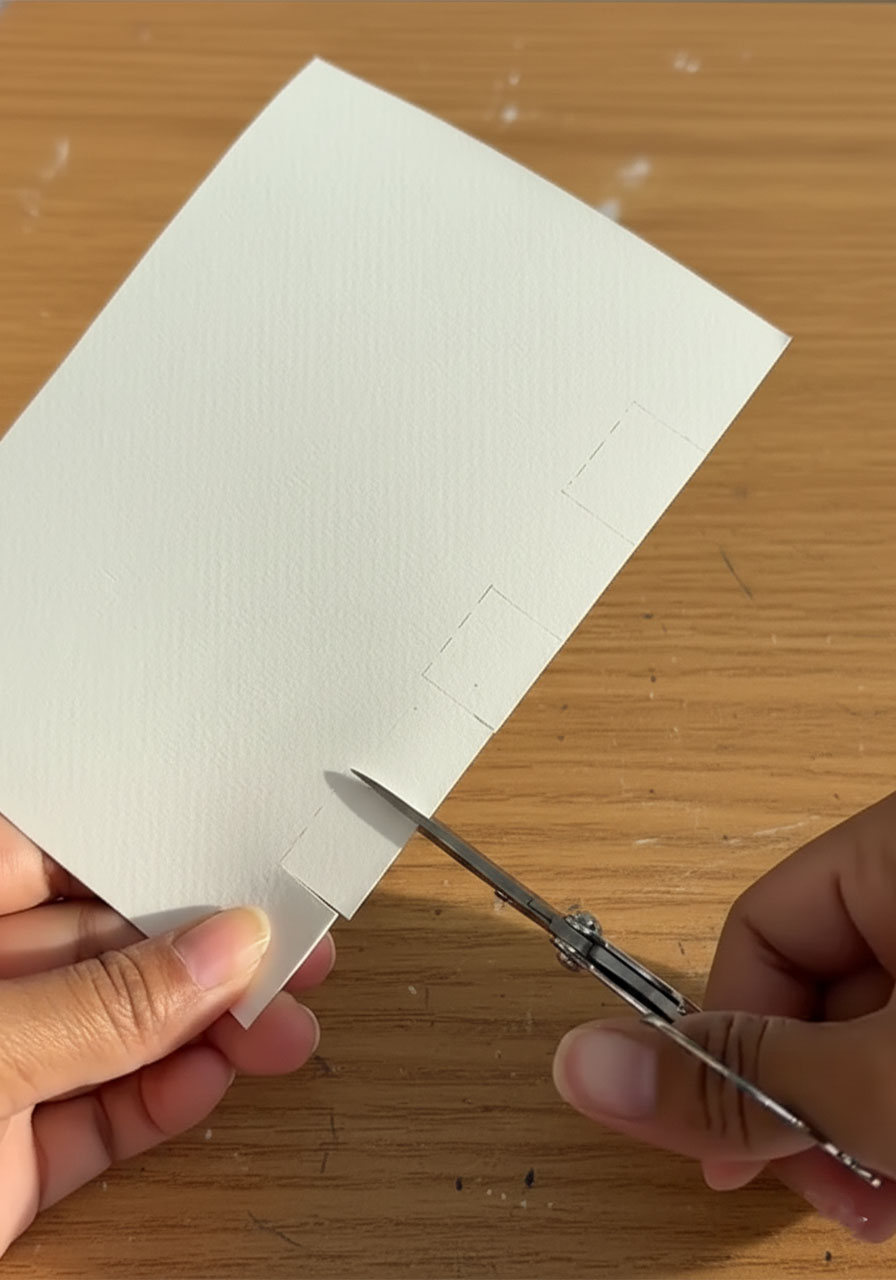
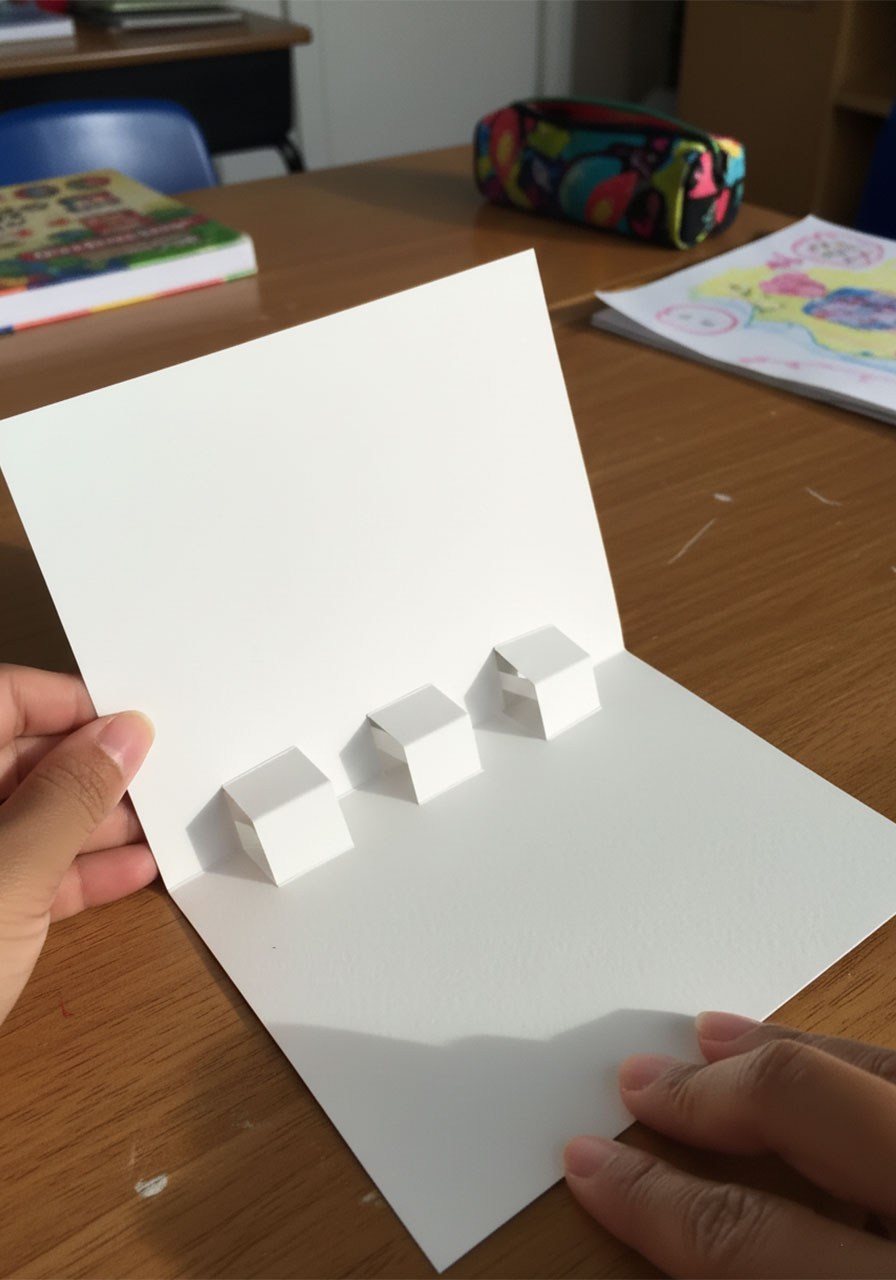
Fold one sheet of cardstock in half to create your card shape. This folded piece will be the “spine” of your card.
Now, along the folded edge, use a ruler and pencil to lightly mark three sets of parallel lines – each pair about 1 inch apart and 1 inch deep into the paper. You’ll have three pairs total, spaced evenly across the fold. These marks show you exactly where to cut.
Cut along those lines with your scissors. You should now have three small “tabs” cut into the folded edge of your card.
Step 2: Create the Pop-Up Platforms
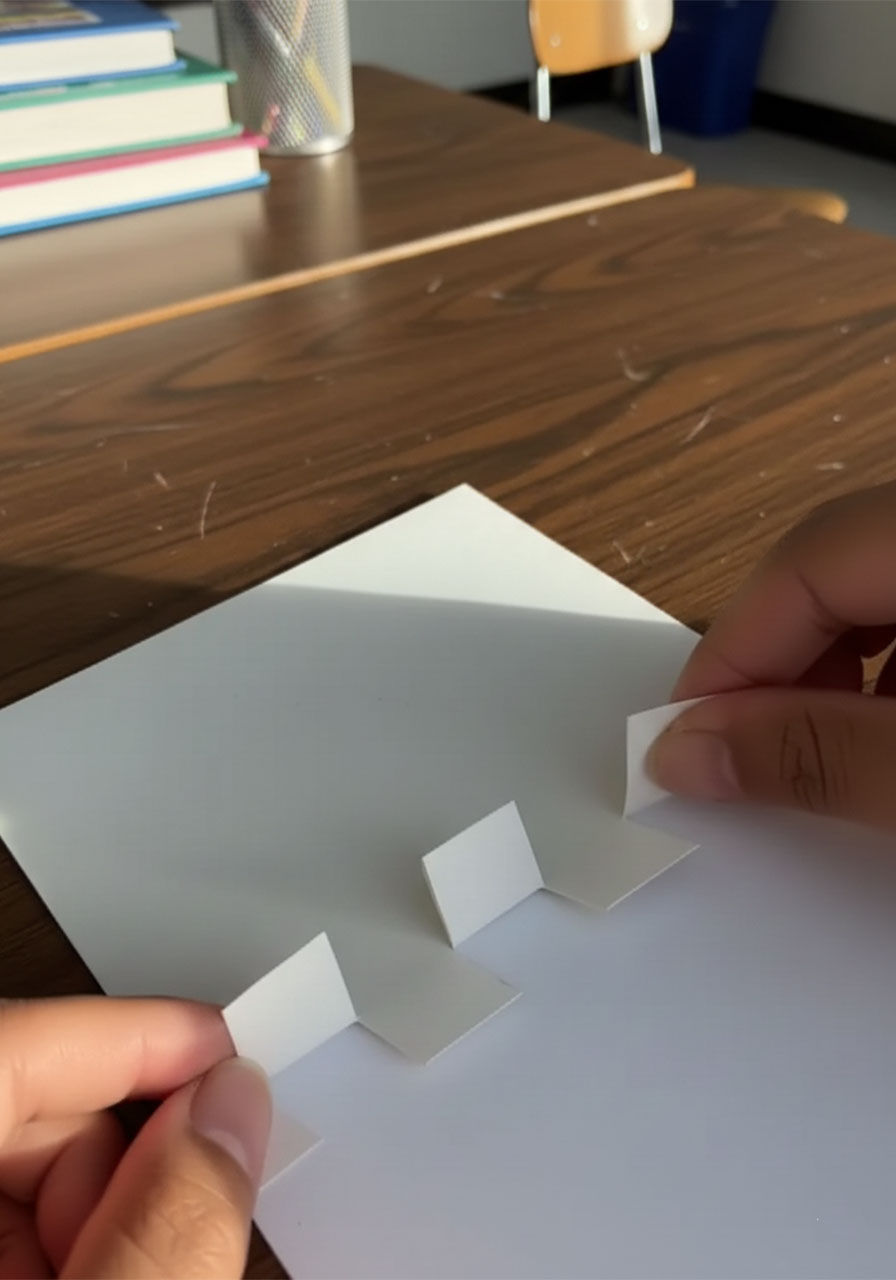
This is the magic step! Open the card slightly and push each of the three cut tabs inward – toward the inside of the card. Crease them firmly so they fold forward, away from the spine.
Now open the card fully and lay it flat on the table. You should see three little rectangular platforms standing up from the base – almost like tiny shelves. That’s exactly what they are! Give each one a firm crease at the base so they hold their shape when the card opens.
💡 Pro Tip: Before you glue anything, practice opening and closing the card a few times. Make sure each tab pops up cleanly and lies flat when the card is closed. If a tab doesn’t fold flat, re-crease it until it does. A card that closes perfectly is one she can open again and again!
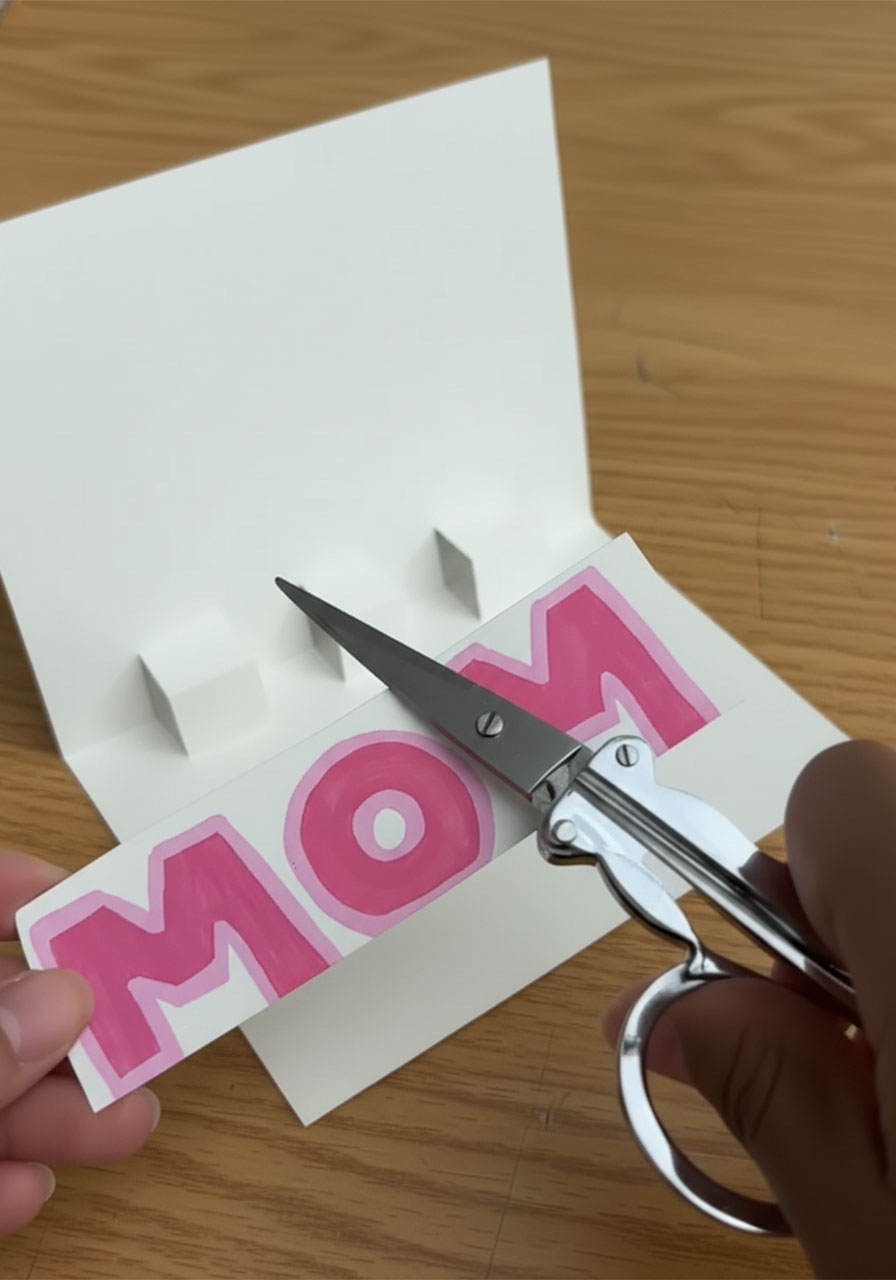
Step 3: Draw and Color the “MOM” Letters
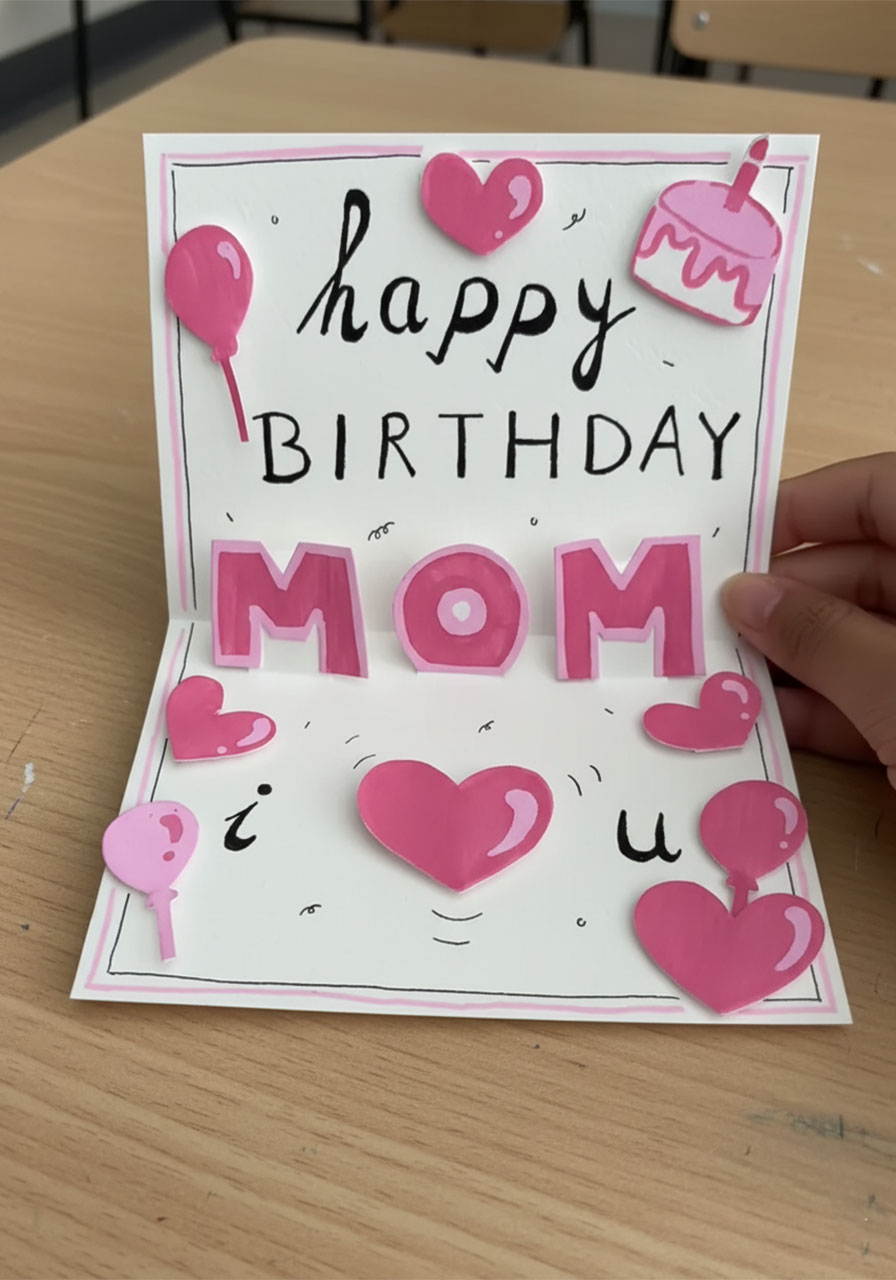
On your second sheet of paper, draw the three letters – M, O, M – in a big, chunky block style. Make each letter roughly the same height as your pop-up tabs (about 1 inch tall) so they fit nicely.
Color each letter in with your bright pink marker. Here’s the trick that makes them look polished: leave a thin white border around the edge of each letter before you fill in the color, then outline the whole letter with your black fine-liner. It gives each letter a fun “sticker” effect that really pops.
Once colored and outlined, carefully cut each letter out.
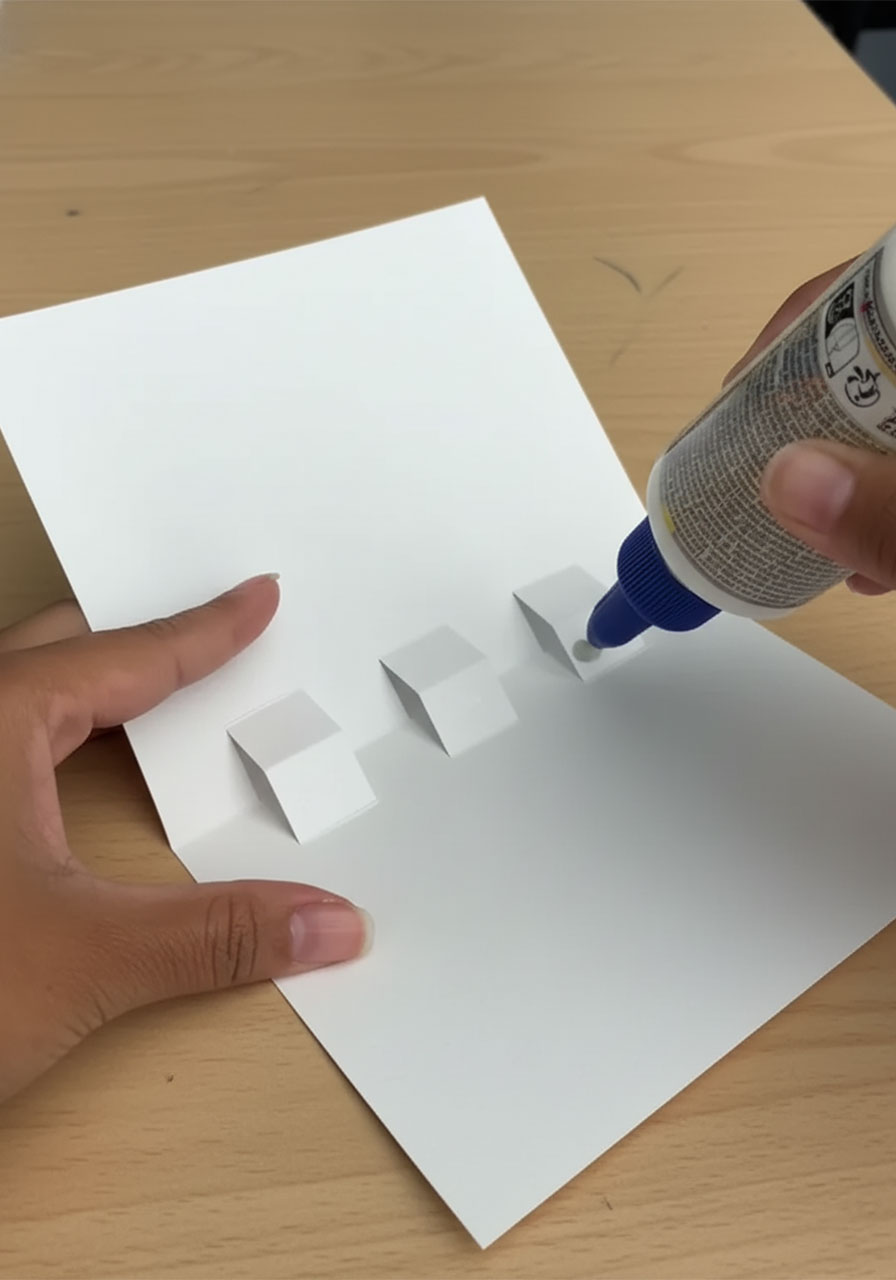
Step 4: Glue the Letters to the Pop-Up Tabs
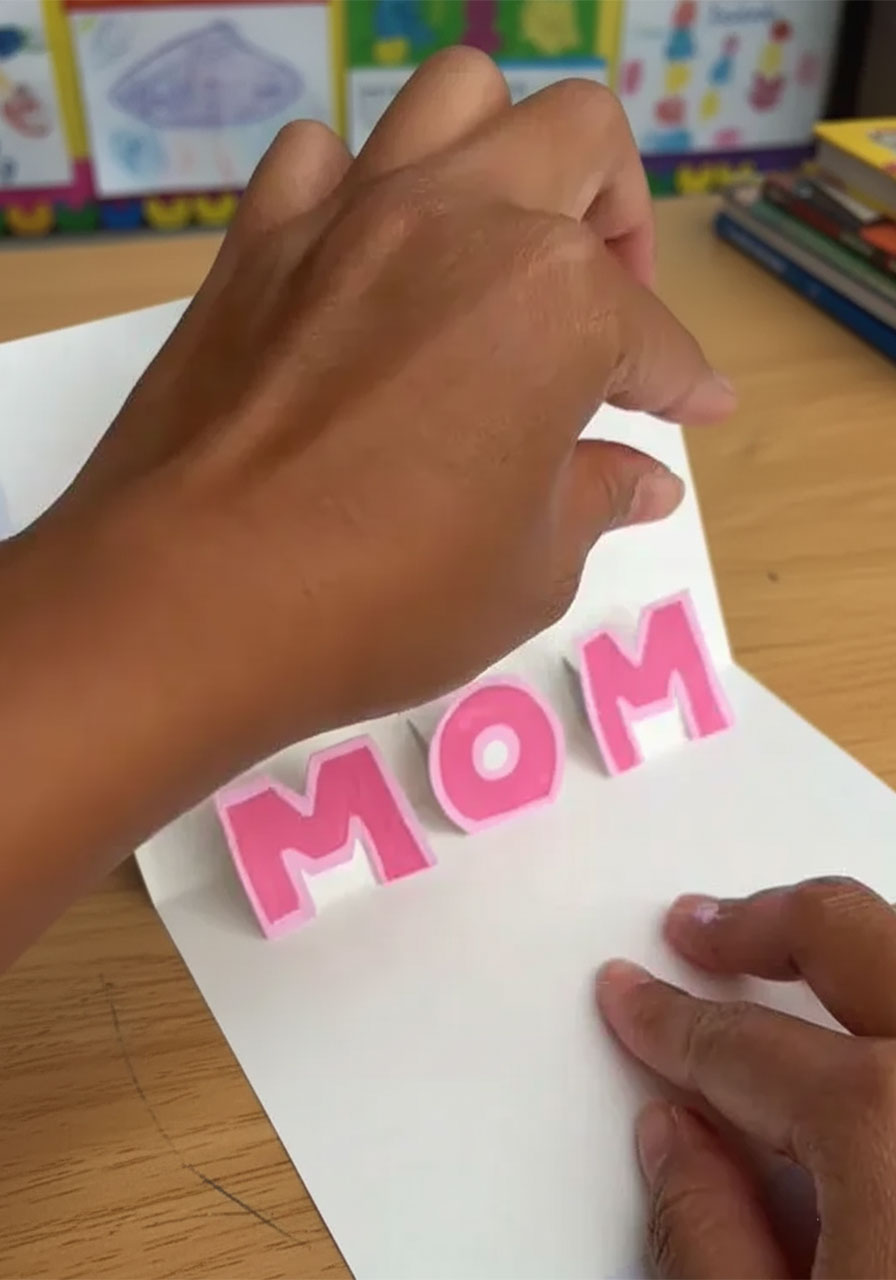
Apply a small dab of glue to the front face of each pop-up tab. Then press one letter firmly onto each tab – M on the left, O in the middle, M on the right.
Hold each one in place for about 30 seconds so the glue grabs. Then gently close the card to make sure the letters fold down flat inside without poking out. If a letter is too tall and sticks out the bottom, trim a tiny bit off the bottom of that letter.
💡 Pro Tip: Let the glue dry for 5–10 minutes before you start decorating the rest of the card. This way you won’t accidentally smudge the letters while you’re drawing.
Step 5: Write the Message
Use your black marker to write “happy BIRTHDAY” or “Happy Mother’s Day” across the upper half of the card. A great look: write “happy” in a flowing lowercase script, then “BIRTHDAY” in bold block capitals right below it. It’s the same style you see in the finished card – and it looks way more personal than typed text.
At the bottom of the card, write “i ♥ u” – the little heart drawn by hand makes it extra sweet.
Step 6: Decorate!
Now comes the really fun part. Fill the space around the letters and message with small hand-drawn decorations in pink and black. Here are some ideas to get you started:
Balloons – simple oval shapes with a string dangling below
Hearts – scattered in different sizes all around the card
A birthday cake – a little layered cake with a candle on top
Stars or sparkles – tiny four-pointed stars add a celebratory feel
A border – trace a simple pink border around the entire inside of the card to frame everything neatly
The more love you put into the little details, the more she’ll treasure it. There’s no such thing as too many hearts on this one.
Classroom Tip for Teachers
This makes an absolutely wonderful Mother’s Day craft for elementary classrooms! Here’s how to set it up smoothly with a full class:
Pre-fold the cardstock and make the tab cuts yourself before the activity – this saves a lot of time and ensures the mechanics work correctly for every student.
Let kids push the tabs inward themselves (it’s deeply satisfying and they love it!).
Set out pre-drawn letter templates so younger students can trace the M, O, M shapes instead of drawing them freehand.
Have pink and red crayons or markers ready, and let kids choose their own color scheme.
Allow 45 minutes for the full project, including drying time.
🏆 Why She’ll Love It: Handmade cards carry a weight that store-bought ones simply can’t match. When a child (or grown-up!) takes the time to cut, color, and create something by hand, the recipient feels it. This card isn’t going in a drawer – it’s going on the fridge, the mantle, or her desk at work. And every time she opens it to show someone, those “MOM” letters pop right back up. That little moment of joy never gets old.
Make It Your Own: Fun Variations
Change the word: Use the same technique to spell “DAD,” “BFF,” “YAY,” or even someone’s name (as long as it’s three letters!).
Try different colors: Red and gold for a festive feel, purple and silver for a glamorous look, or her absolute favorite color combination.
Add a photo: Cut a small photo to fit inside the card and glue it behind the letters as a sweet surprise backdrop.
Upgrade the paper: Use watercolor paper and paint the letters for a more artistic, gallery-worthy finish.
With this card in hand, you’re not just giving a gift – you’re giving a memory. And honestly? That’s what the best parties, the best crafts, and the best moments are all about.
More Mother’s Day Ideas to Keep the Fun Rolling:
30+ Mother’s Day Crafts for Kids of All Ages
Bloom Her Away: How to Make a DIY Mother’s Day Flower Pop-Up Card
12 Hilarious Mother’s Day Games the Whole Family Will Love
How to Make a DIY Mini Paper Rose Bouquet (The Cutest Mother’s Day Gift That Lasts Forever!)
How to Make a DIY Heart Waterfall Card: The Sweetest Handmade Gift for Mom
How to Make a Mother’s Day Flower Pot Craft
Easy Coffee Filter Flowers – The Prettiest Mother’s Day Craft for Kids and Classrooms