
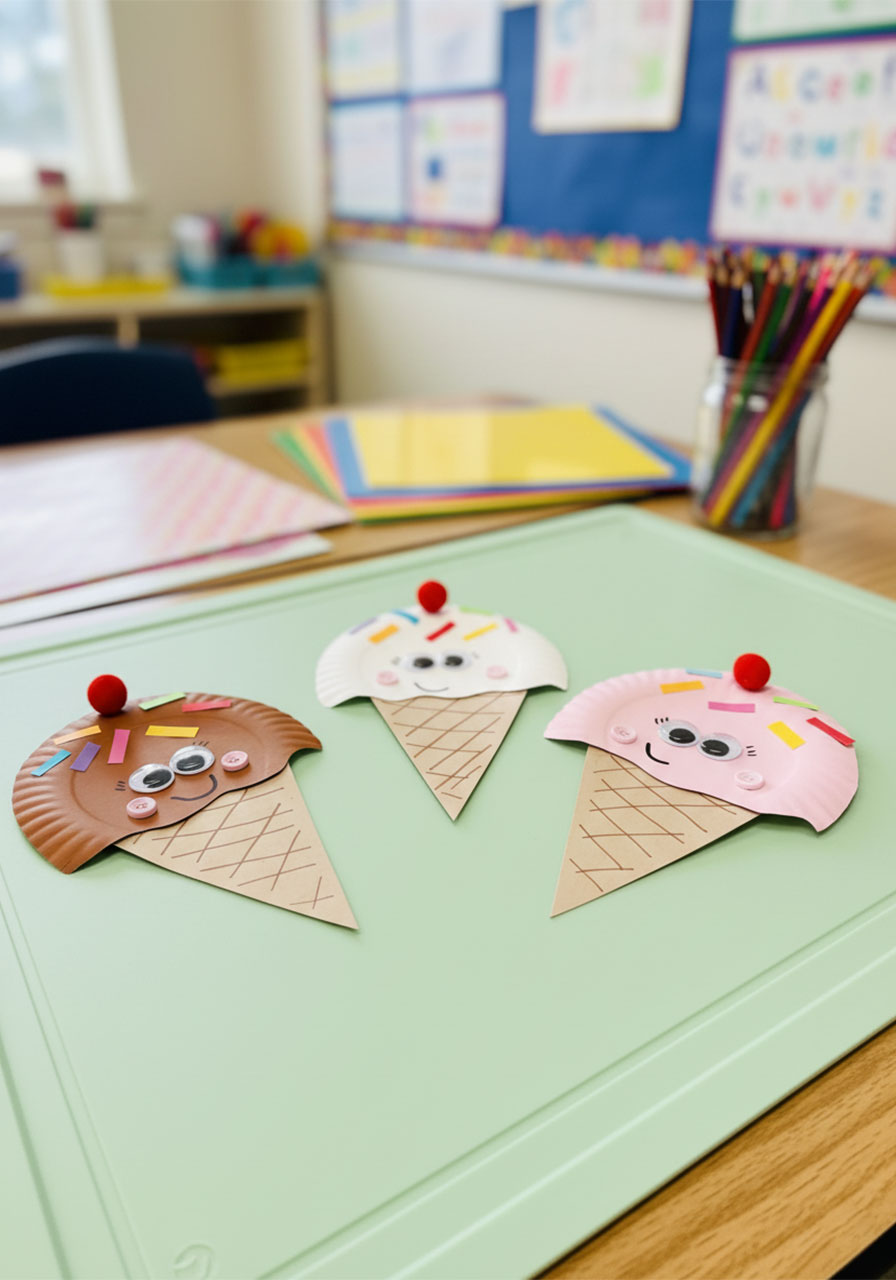
Summer is here, and if you’re hunting for a craft that’ll keep kids busy, creative, and genuinely excited – this is it. These adorable Paper Plate Ice Cream Cone characters are so easy to make that even the littlest crafters can jump right in, and so cute that you’ll want to display them all over the fridge (or the classroom wall).
With just a few basic supplies – paper plates, cardstock, paint, googly eyes, and some colorful “sprinkles” – kids get to build their very own smiley ice cream scoop in their favorite flavor. Chocolate, strawberry, vanilla, or something totally made-up? All flavors welcome. 🍦
This craft works beautifully for preschool and elementary classrooms, summer camps, rainy-day activities at home, or a low-key birthday party craft station. Parents and teachers, this one’s a keeper.
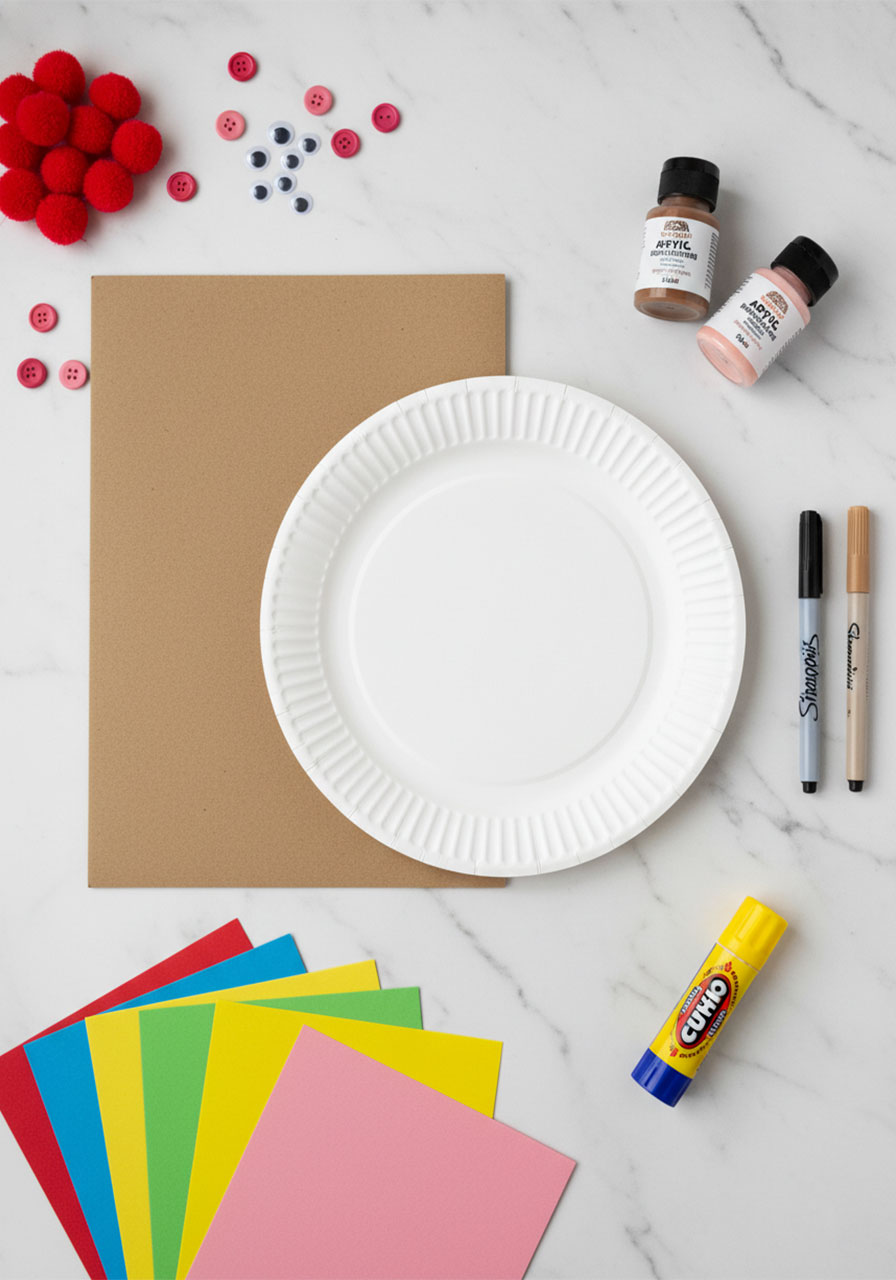
What You’ll Need
Everything below is easy to find at a craft store or online. No fancy tools required!
Paper plates – dessert size works best (one per ice cream scoop)
Kraft paper or light brown cardstock – for the cone
Colorful cardstock – a rainbow of colors for cutting out the paper “sprinkles”
Acrylic craft paint – brown (chocolate), pink (strawberry), or any flavor you like! Skip the paint and leave the plate white for vanilla.
Googly eyes – ¾ to 1 inch size
Small pink buttons – ½ inch, for the rosy cheeks
Red mini pom poms – one per cone, for the cherry on top
Black and light brown markers – Sharpie black + Crayola light brown works perfectly
Glue stick
Scissors
Cone template
Pro Tip: Set up a little “ice cream shop” station for kids – lay out all the paint colors, sprinkles, and decorations and let them choose their own flavor combinations. They love the ownership, and it keeps them engaged from start to finish!

How to Make Paper Plate Ice Cream Cones – Step by Step
1. Prep the ice cream scoop.
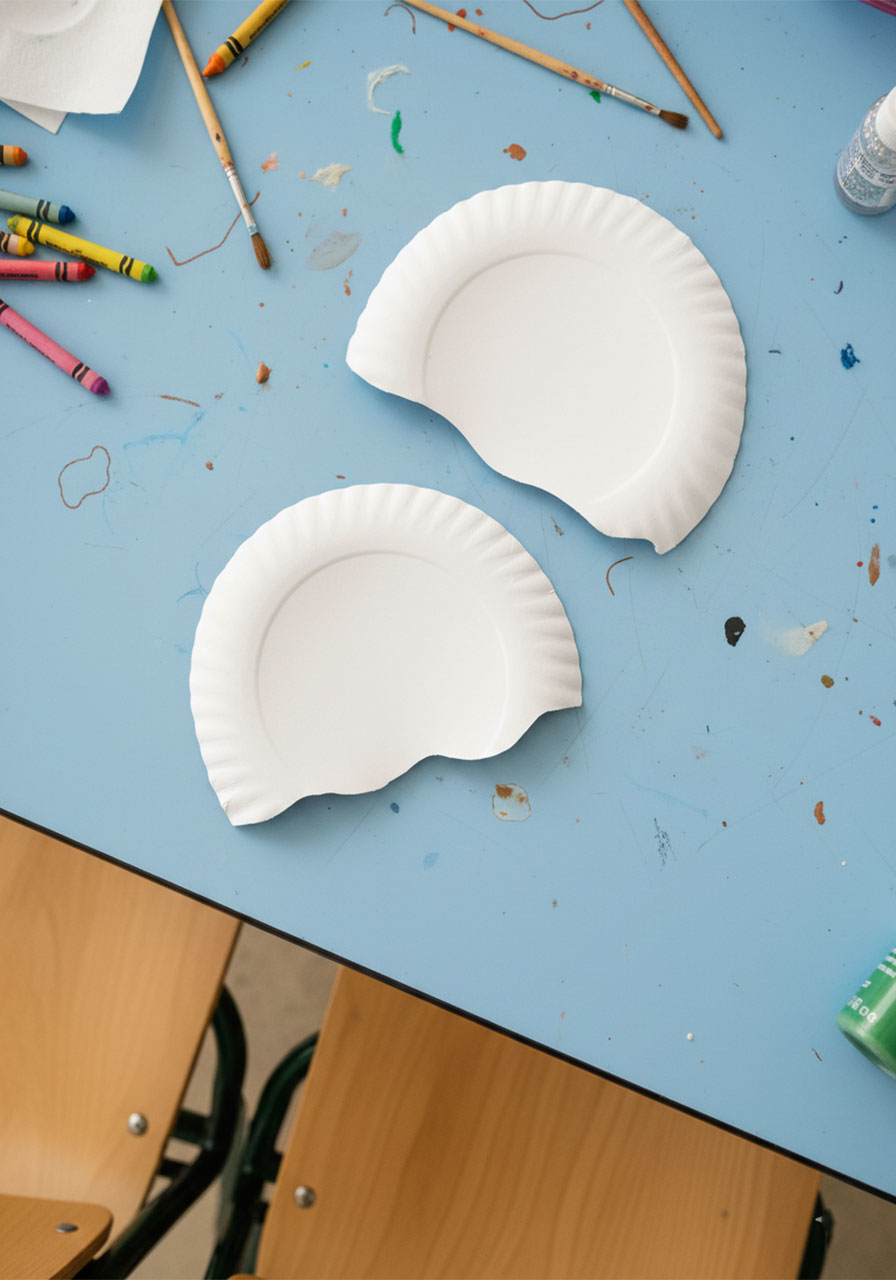
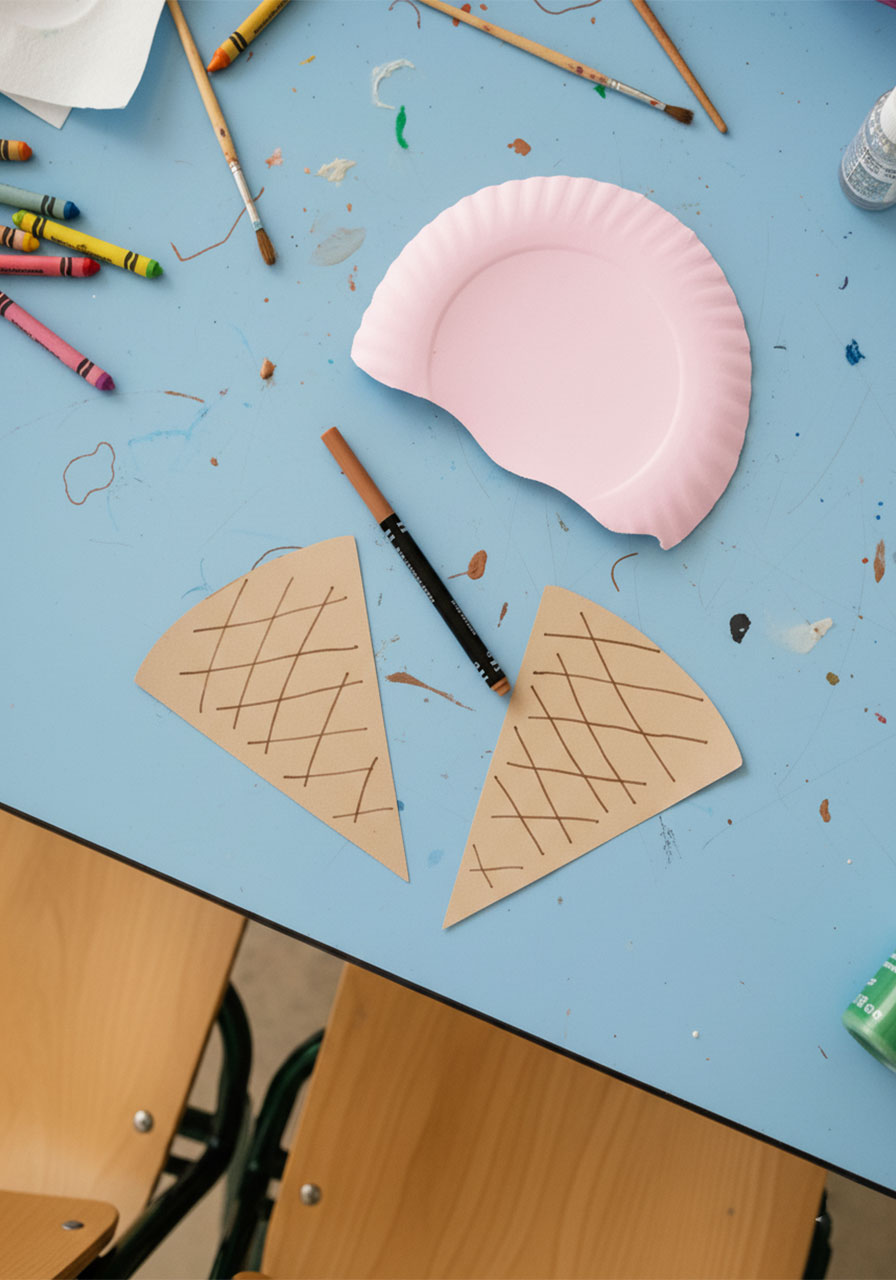
Take a dessert-size paper plate and cut off the bottom flat section so you’re left with just the round ridged rim. This becomes the “scoop” of ice cream.
2. Shape the bottom.
Trim the cut edge into a soft, wavy curve – this gives it that classic melty ice cream scoop look. Don’t stress about making it perfect; a little wobble is part of the charm!
3. Paint your scoop.
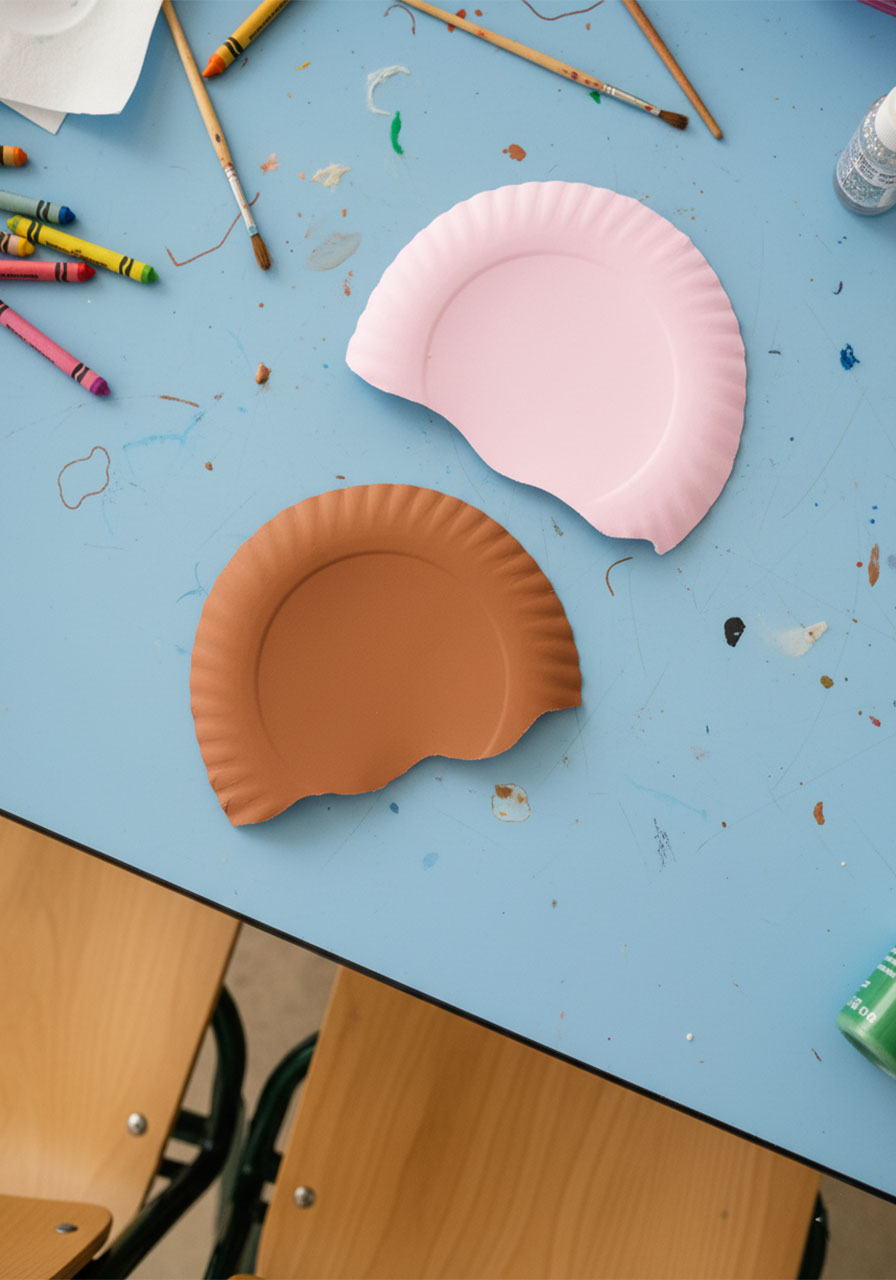
Paint the front of the plate in your chosen ice cream color – brown for chocolate, pink for strawberry, or leave it white for vanilla. Set aside and let it dry completely before moving on.
4. Cut out the cone.
Using the cone template and your kraft/brown cardstock, cut out a cone shape. Then use your light brown marker to draw a crosshatch grid pattern across it – this is what makes it look like a real waffle cone!
5. Make the sprinkles.
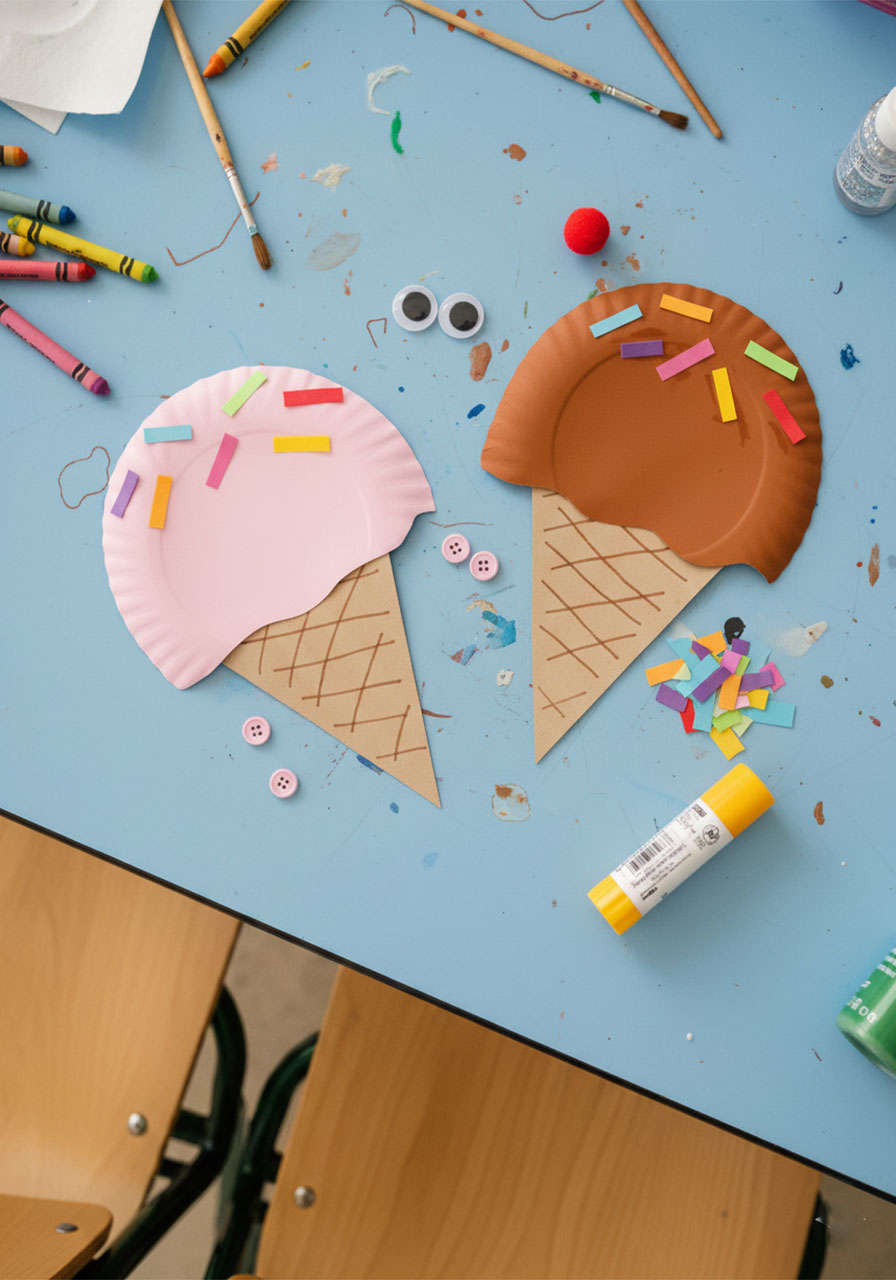
Cut small rectangles (roughly ½ inch) from your colorful cardstock. Make a big pile in different colors – the more the merrier!
6. Assemble the cone.
Glue your painted scoop to the top of the cone. Then glue the colorful sprinkles all over the top of the scoop. Pile them on!
7. Add the face.
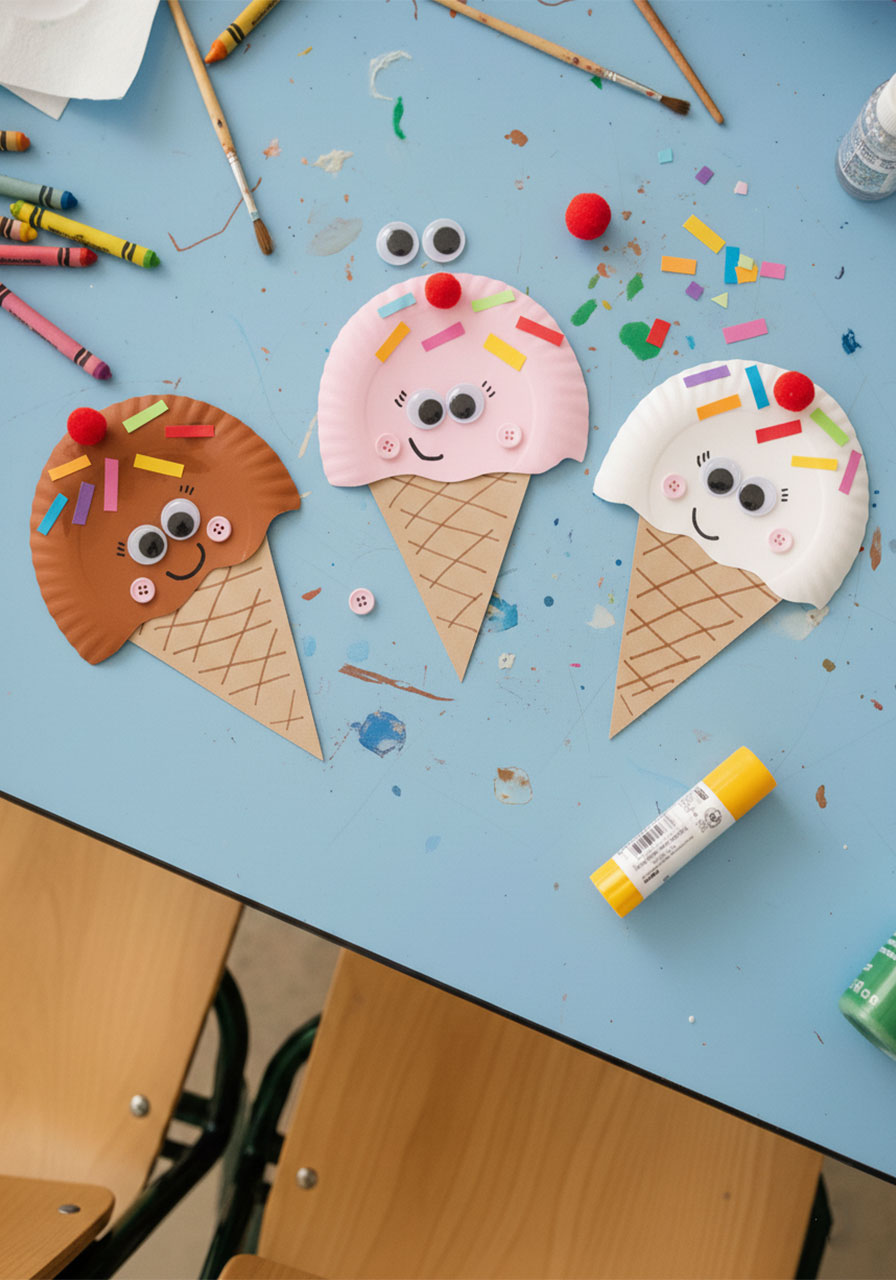
Glue on two googly eyes and two pink buttons below the eyes as rosy cheeks. Use your black marker to draw on little eyebrow lines and a sweet little smile. Your ice cream scoop officially has a personality now. 😄
8. Top it with a cherry!
Glue one red pom pom right on top of the scoop. Done – you’ve got the cutest ice cream cone on the block.
Fun Variations to Try
Once kids nail the basic version, here are some creative twists to keep the fun going:
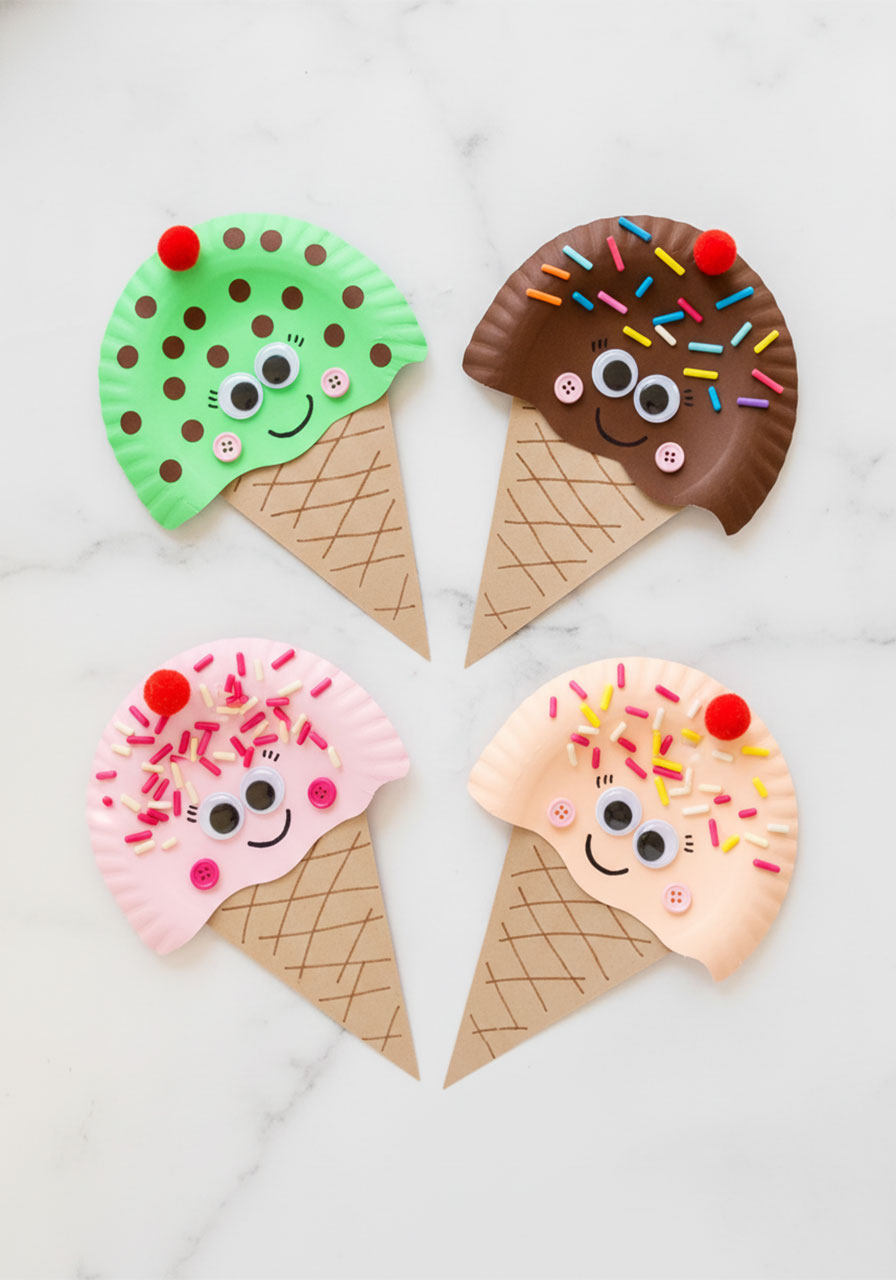
Mint Chip: Paint the scoop light green and add tiny brown paper “chips” as sprinkles.
Cookie Dough: Leave the plate white and glue on small tan or light brown paper dots for the cookie dough chunks.
Rainbow Sherbet: Blend orange, pink, and yellow paint on the plate for a swirled effect before it dries.
Double Scoop: Make two painted scoops, stack them on a slightly larger cone, and you’ve got a double-decker masterpiece.
Extra Texture: Let kids glue on torn tissue paper, crinkled foil, or small craft foam pieces on the scoop for a 3D textured effect.
Tips for Parents & Teachers
For preschoolers: Pre-cut the plates and cone shapes ahead of time so little hands can focus on the fun parts – gluing, painting, and decorating.
For classrooms: This is a fantastic end-of-year or summer-themed craft. Set up stations (painting station, sprinkle-cutting station, decorating station) to keep a group of kids moving and organized.
Drying time tip: Paint takes 15–30 minutes to dry fully. If you’re doing this in one session, paint the plates first, do a read-aloud or snack break, and come back to decorate once they’re dry.
No pink buttons? Draw the rosy cheeks directly onto the plate with a pink marker, crayon, or paint pen – works just as well!

Frequently Asked Questions
Can I use regular full-size paper plates instead of dessert-size?
Absolutely! Just keep in mind that the cone template is sized for dessert plates. If you go bigger, scale up your cone template accordingly – or freehand a larger cone from kraft paper. You can also skip the paper plate altogether and just cut an ice cream scoop shape from cardstock if that’s easier.
What if I don’t have pink buttons for the cheeks?
No buttons, no problem! Draw the rosy cheeks on with a pink crayon, marker, or paint pen. You could also use pink pom poms for extra dimension and a cute fluffy look.
What ages is this craft best for?
This craft is genuinely great for a wide range – kids ages 3 and up can participate with some adult help, while kids 6 and up can mostly do it independently. The painting, cutting, and gluing steps can be adjusted based on the age and skill level of each child.
Can this be used as a party craft activity?
Yes, and it’s a fantastic one! Set up a little “ice cream parlor” craft station with different paint colors, sprinkle options, and face accessories. Kids can each make their own flavor and take it home as a keepsake. Perfect for summer birthday parties!
There you have it – one of the sweetest (literally) summer crafts you can do with kids this season. Whether you’re planning a full classroom activity or just need something fun for a Tuesday afternoon, these paper plate ice cream cones deliver big smiles with minimal prep. Now grab those googly eyes and get scooping! 🍦✨
More Summer Craft & Activity Ideas to Keep the Fun Rolling:
How to Make Moon Sand With Only 2 Ingredients (Kids Go Absolutely Wild for This!)
Easy Jellyfish Suncatcher Craft for Kids (That Looks Stunning in a Window!)
Paper Loop Pufferfish Craft: The Cutest 3D Summer Activity for Kids
Egg Carton Ladybug Craft Ideas Kids (and Teachers!) Will Absolutely Love
Pool Noodle Boats: The Easiest DIY Water Toy Kids Will Absolutely Love
How to Make Beaded Pipe Cleaner Flowers (A Fun Kids Craft That Takes Under 10 Minutes!)
