
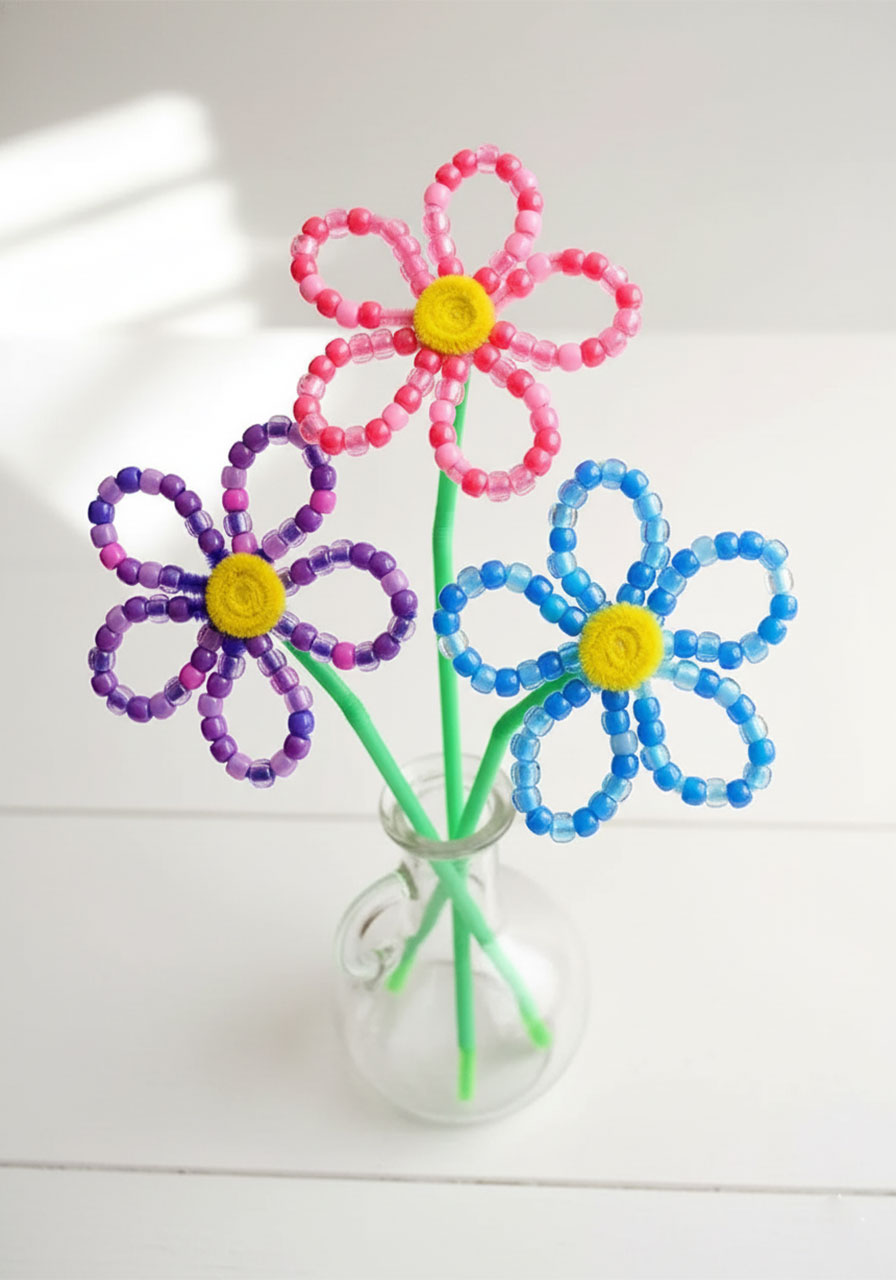
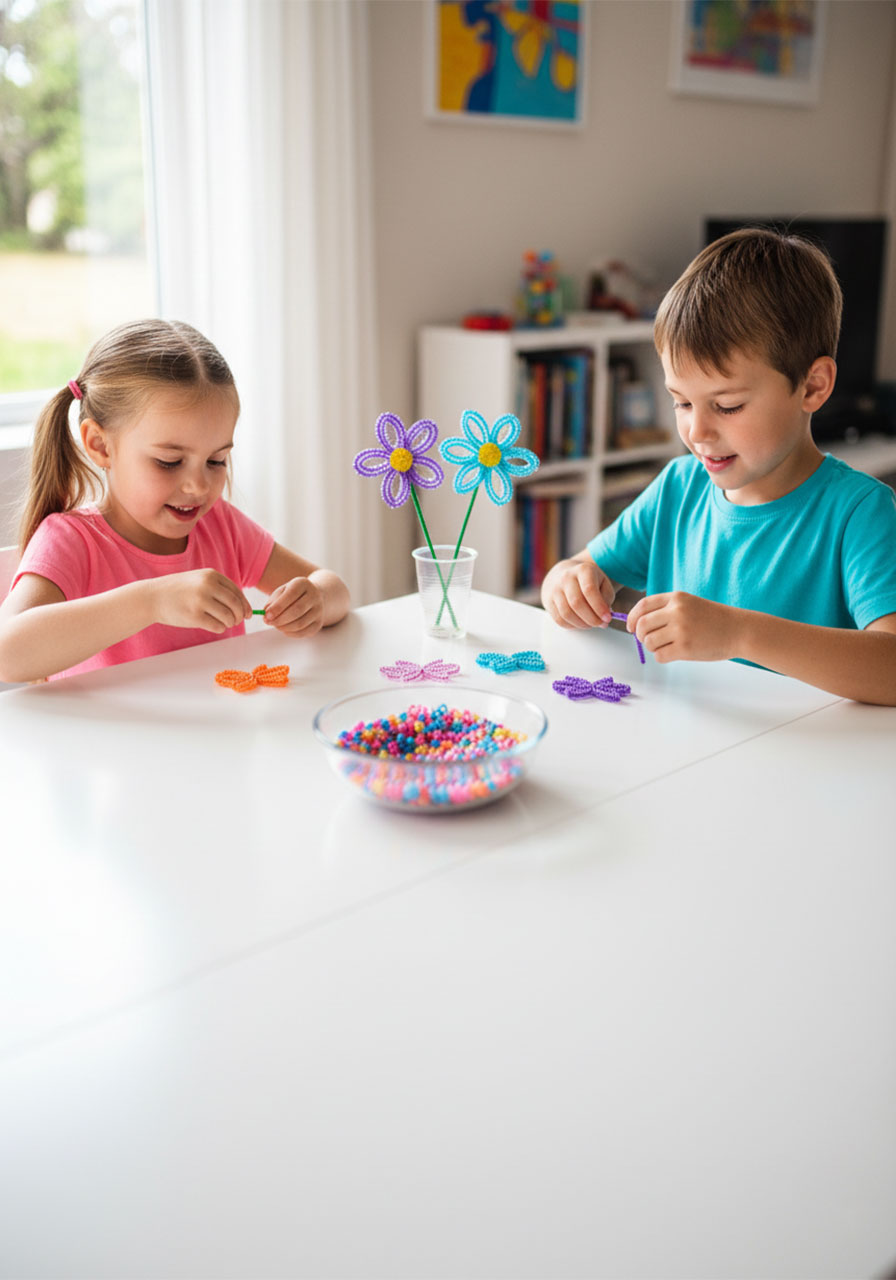
Looking for a craft that’s equal parts easy, adorable, and actually holds a kid’s attention? These beaded pipe cleaner flowers are your answer. They come together in under 10 minutes, use only a handful of supplies you can grab at the dollar store, and the results are genuinely pretty – the kind of thing kids want to display on their nightstand or gift to someone they love.
Bonus: all that bead-threading is secretly great for building fine motor skills. Parents and teachers, this one is a total win.
Why Kids (and Adults!) Love This Craft
There’s something almost magical about watching a plain pipe cleaner transform into a bright, beaded flower. Kids feel a real sense of accomplishment when they hold the finished product – and because each flower is quick to make, they’ll want to create a whole bouquet in every color of the rainbow.
This craft is perfect for spring and summer activity tables, birthday party craft stations, classroom projects, or a rainy afternoon at home. It also makes a heartfelt, handmade gift – imagine a little vase full of these for Mother’s Day or a teacher appreciation week!

What You’ll Need
To make one flower, you’ll need:
1 green pipe cleaner, full length (about 12 inches) – this is the stem
5 pipe cleaners in your chosen petal color, cut to 6 inches each (or buy the 6-inch size at the dollar store – so handy!)
1 yellow pipe cleaner, cut to 6 inches – this becomes the center
Plastic pony beads – you’ll use about 10–15 per petal
White craft glue or a low-temp hot glue gun (for the center)
Optional but highly recommended: a green drinking straw to use as an extra-sturdy stem
Don’t have 6-inch pipe cleaners? No problem – just cut regular 12-inch pipe cleaners in half. Easy fix!

How to Make Beaded Pipe Cleaner Flowers – Step by Step
Step 1: Thread the Beads onto Each Petal Pipe Cleaner
Take one of your five 6-inch colored pipe cleaners and slide pony beads onto it, one by one, until the beads fill the middle section of the pipe cleaner – leaving about half an inch of bare pipe cleaner on each end.
Aim for around 10–15 beads per pipe cleaner. Going over 15 beads leaves you without enough pipe cleaner to twist the petal into shape. Going under 10 is totally fine – even 5 beads per petal looks charming!
Repeat this step for all five petal pipe cleaners.
💡 Teacher Tip: Pre-cut the pipe cleaners to 6 inches before class starts. For younger kids (ages 4–6), try using larger beads or chunky plastic beads that are easier to grab. This step alone is a great fine motor workout – threading those tiny holes takes focus and coordination!
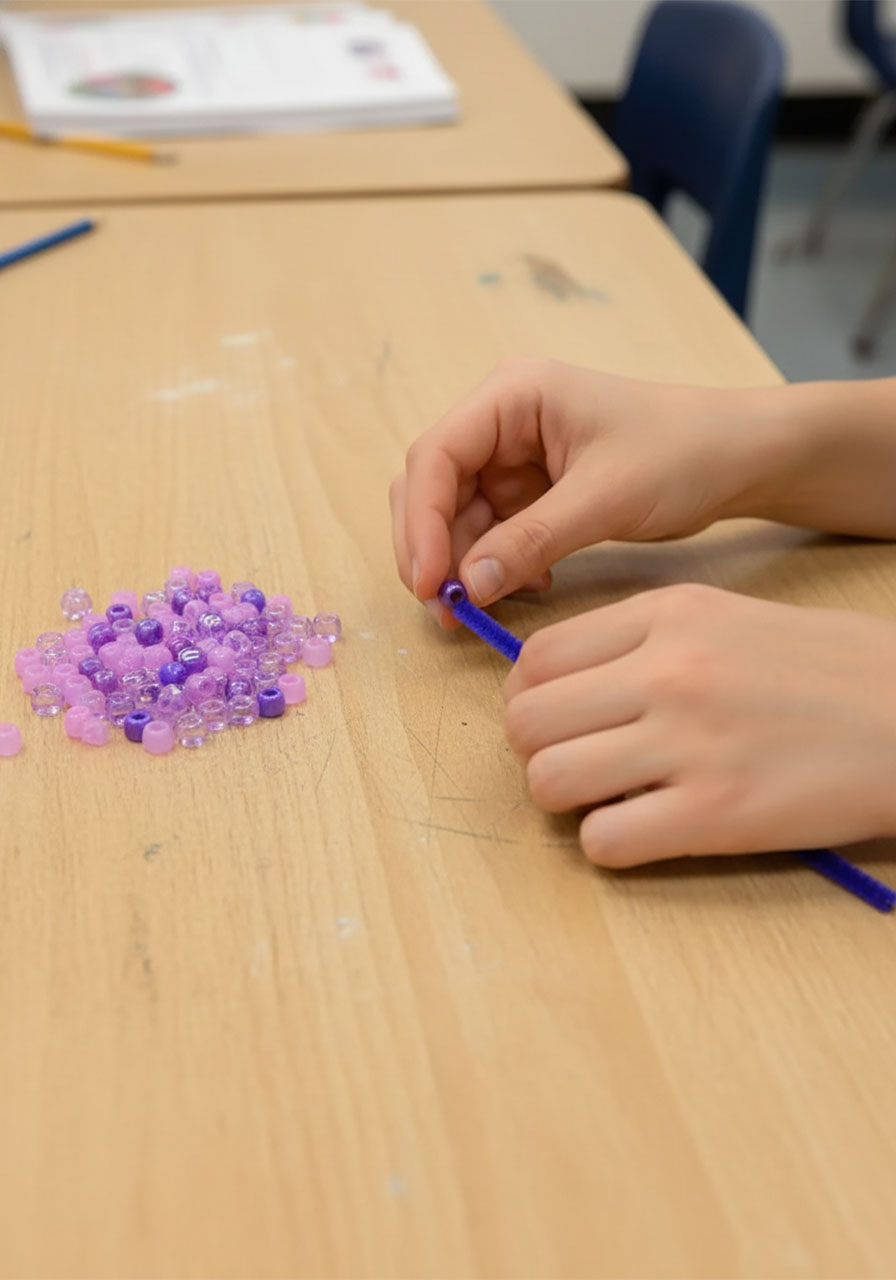

Step 2: Shape Each Petal into a Teardrop Loop
Once a pipe cleaner is beaded, bring both bare ends together and twist them tightly around each other – like you’re tying a twist tie. The beaded section will naturally bow outward into a rounded teardrop shape. That’s your petal!
Repeat for all five pipe cleaners so you end up with five matching petals.

Step 3: Attach the First Petal to the Green Stem
Lay your 12-inch green pipe cleaner flat on the table. Position the twisted end of one petal at the very top of the green pipe cleaner, about 1.5 inches from the end. Wrap the twisted petal tail firmly around the green stem to lock it in place.
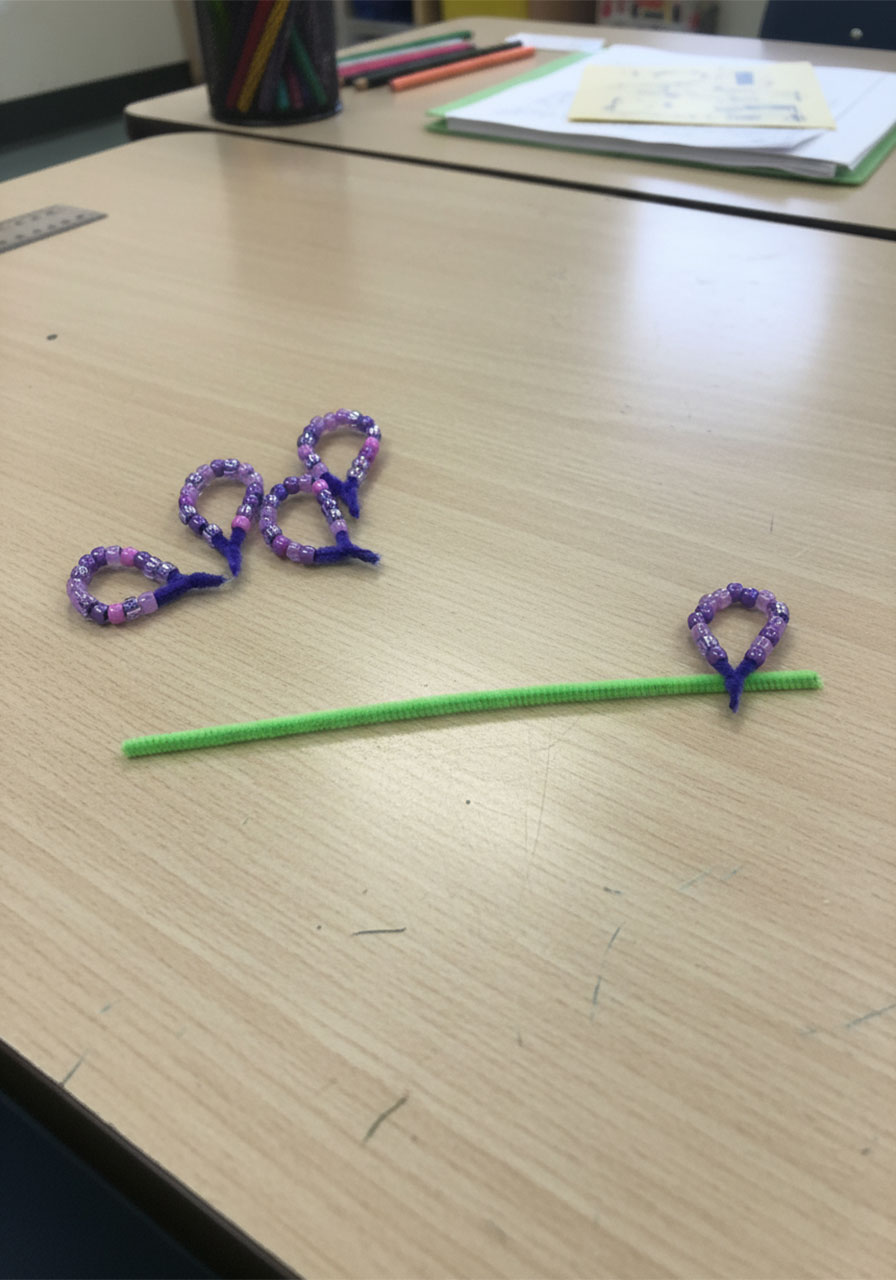

Step 4: Add the Remaining Four Petals
Place the second petal right next to the first – no gap between them – and wrap its twisted tail around the green stem the same way. Continue adding petals one by one until all five are attached snugly around the top of the stem.
The goal is to have the petals sitting flush against each other with no green pipe cleaner peeking through between them.
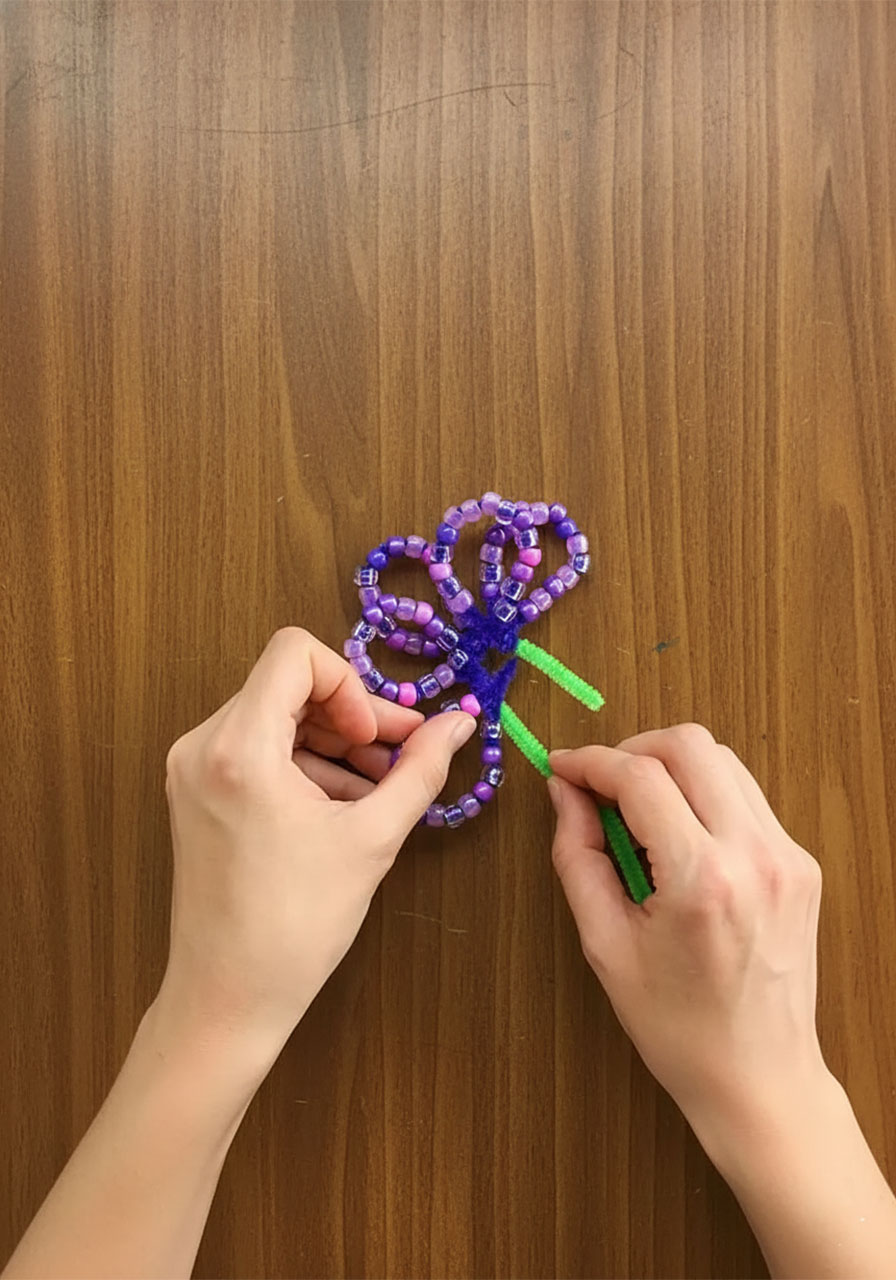
Step 5: Secure the Stem End
You’ll have about 1.5 inches of green pipe cleaner sticking up above where the petals are attached. Fold that short end back down over the top of all the petal twists, then wrap it tightly down the stem. This closes up the center of the flower and keeps everything locked together.


Step 6: Fan Out the Petals
The petals will naturally bunch together at first – that’s normal! Gently bend and spread each petal outward into an even flower shape, like the numbers on a clock face. Take your time with this step; a little gentle reshaping makes a big difference in the final look.

Step 7: Make the Yellow Center
Take your 6-inch yellow pipe cleaner and pinch one end, then roll it into a tight, flat spiral – think of it like rolling up a tiny snail shell. The tighter you roll it, the neater the center looks.

Step 8: Attach the Center
Add a small dab of white glue (or a dot of hot glue if an adult is helping) to the very center of your flower where all the petal twists meet. Press the yellow spiral firmly onto the glue and hold it for 30 seconds. Let it dry completely before moving the flower around.
💡 No-Glue Option: Before you roll the yellow pipe cleaner into a spiral, tuck one end of it underneath the flower between two petals, twist it around through the center, and then roll the remaining length into a spiral on top. This method holds the center without any glue at all – great for younger crafters!


Step 9: Add a Straw Stem (Optional but Highly Recommended!)
Here’s a little secret: the beaded flowers are surprisingly heavy and the pipe cleaner stem alone won’t keep them standing upright. The simple fix? Slide the green pipe cleaner stem down into a green drinking straw.
The straw supports the weight beautifully and, as a bonus, you can use a bendy straw to give your flowers those charming, natural-looking curved stems. Pop several finished flowers into a small vase and you’ve got a stunning (and totally handmade!) flower arrangement.

Display & Gift Ideas
Flower Arrangement: Make five or more flowers in different colors, slip each into a bendy straw, and arrange them in a small glass vase. So cheerful on a windowsill or kitchen table!
Mother’s Day Gift: Have kids make a small bouquet and tie it with a ribbon. It’s the kind of handmade gift that actually gets kept and displayed.
Classroom Display: Each student makes one flower, and together you create a giant class garden on a bulletin board. A beautiful end-of-year project!
Party Activity: Set up a craft station at a spring or summer birthday party. Kids take their finished flower home as a party favor – no loot bag needed!
Variations to Try
Rainbow Bouquet: Make one flower in every color – purple, blue, orange, pink, yellow – for a vibrant, eye-catching display.
Fewer Beads for Beginners: Younger kids can use just 3–5 beads per petal for a simpler, quicker version that still looks great.
Mix Bead Colors: Use two or three different bead colors on each petal for a fun, mixed effect.
Mini Flowers: Cut the petal pipe cleaners to just 4 inches and use smaller beads for a delicate, tiny flower – adorable as a gift topper or bookmark decoration.
🌸 Pro Tip: Dollar stores are goldmines for this project. You can often find both the pony beads and the 6-inch pipe cleaners in the same aisle – grab a variety pack of bead colors and let the kids mix and match. You’ll have enough supplies for an entire classroom for just a few dollars.
Quick-Reference Supply List
Per flower:
1 green pipe cleaner (12 inches) – stem
5 pipe cleaners in one color (6 inches each) – petals
1 yellow pipe cleaner (6 inches) – center
50–75 plastic pony beads in your petal color
White craft glue or hot glue gun
1 green drinking straw (optional, for support)
Frequently Asked Questions
What age is this craft best for?
This craft works well for ages 5 and up with minimal adult help. Kids aged 3–4 can join in with pre-threaded pipe cleaners – let them do the petal-shaping and arranging steps, which are great for little hands.
Can I use any type of bead?
Yes! Any bead with a hole large enough to slide over a pipe cleaner works perfectly. Standard plastic pony beads are the most popular choice because they’re affordable, colorful, and easy to handle. Larger beads mean fewer beads per petal and a chunkier, bold look.
Why won’t my flower stand up straight?
The beads add weight, which makes the pipe cleaner stem droop. Just insert the stem into a drinking straw – that’s the trick! A bendy straw also lets you angle the flower head for a more natural, realistic look.
How long does one flower take to make?
About 5–10 minutes per flower once you get the hang of it. The first one might take a few extra minutes, but by the second or third flower, your kids will be flying through them!
Whether you’re planning a summer afternoon at home, a classroom craft station, or a Mother’s Day surprise, these beaded pipe cleaner flowers deliver big results with minimal effort. Make one bouquet and we guarantee you’ll be back for another – in every color you can find!
More Summer Craft & Activity Ideas to Keep the Fun Rolling:
How to Make Moon Sand With Only 2 Ingredients (Kids Go Absolutely Wild for This!)
Easy Jellyfish Suncatcher Craft for Kids (That Looks Stunning in a Window!)
Paper Loop Pufferfish Craft: The Cutest 3D Summer Activity for Kids
Egg Carton Ladybug Craft Ideas Kids (and Teachers!) Will Absolutely Love
Pool Noodle Boats: The Easiest DIY Water Toy Kids Will Absolutely Love
Paper Plate Ice Cream Cone Craft: The Cutest Summer Activity for Kids
