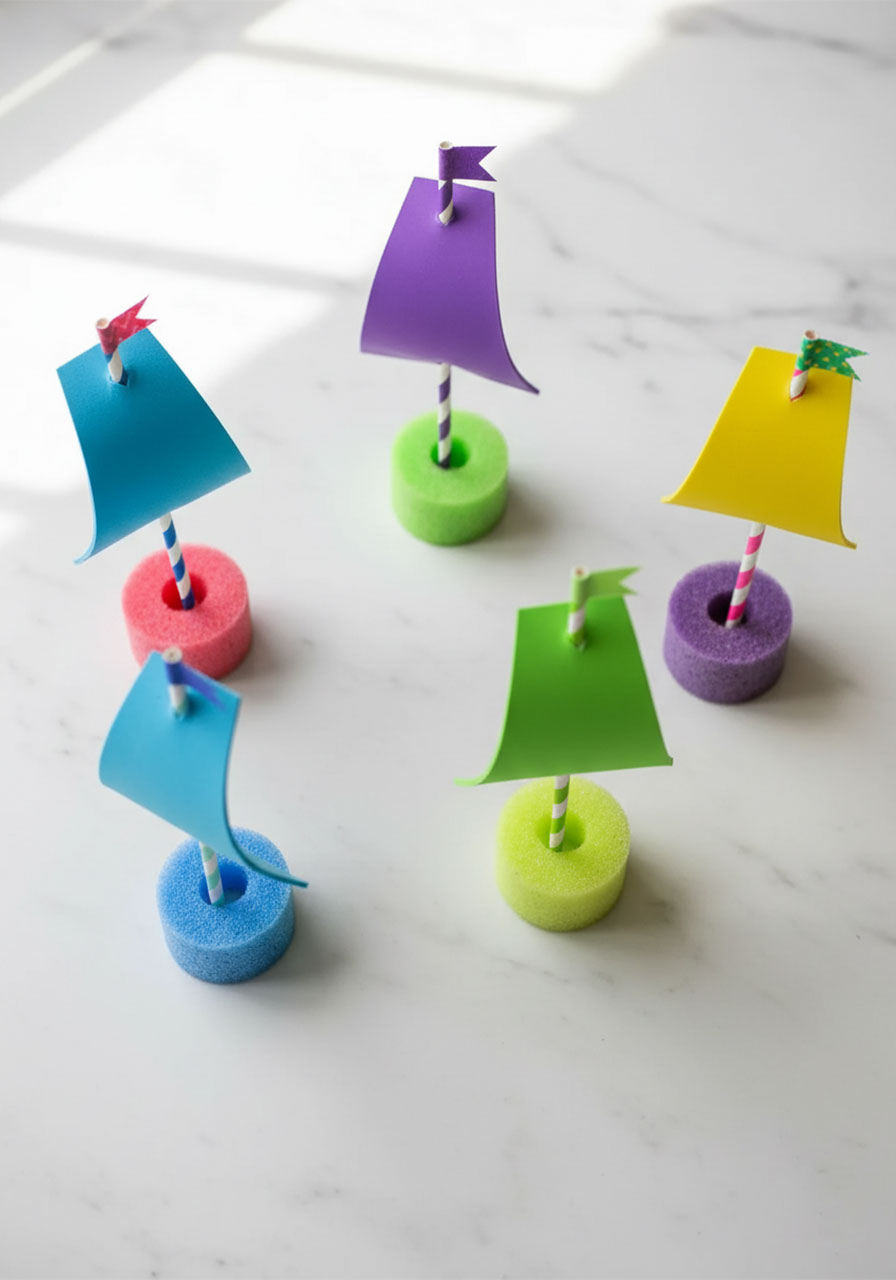
Looking for a summer activity that’s cheap, quick to make, and keeps kids entertained for hours? Say hello to pool noodle boats – the most satisfying little DIY water toy you’ll make all season.
Seriously. One pool noodle. A few foam sheets. Some paper straws. That’s basically it.
In under 30 minutes, you’ll have a whole fleet of colorful boats ready to sail across a bin of water, the bathtub, or even the actual pool. Kids go absolutely wild for these – and honestly? Adults do too.
Whether you’re looking for a fun summer afternoon craft, an activity for a birthday party, or a classroom project, this one checks every box.
Let’s build some boats!
Why You’re Going to Love This Craft
Here’s the thing about pool noodle boats – they look impressive, but they’re incredibly beginner-friendly. Even the littlest crafters (with a little help from a grown-up for the cutting parts) can put these together.
A single pool noodle gives you multiple boats. That means you can make one for every kid without breaking the bank – perfect for classrooms, summer camps, or party activities.
Got an old pool noodle that’s starting to rip or fall apart? This is the perfect way to give it a second life. Chop it up, decorate it, and watch it sail. Upcycling has never been this cute.
And the best part? Once the boats are built, the play doesn’t stop there. Grab some small plastic animals, toy figures, or water-safe characters and let the kids put passengers on their boats. Instant imaginative play, no batteries required.


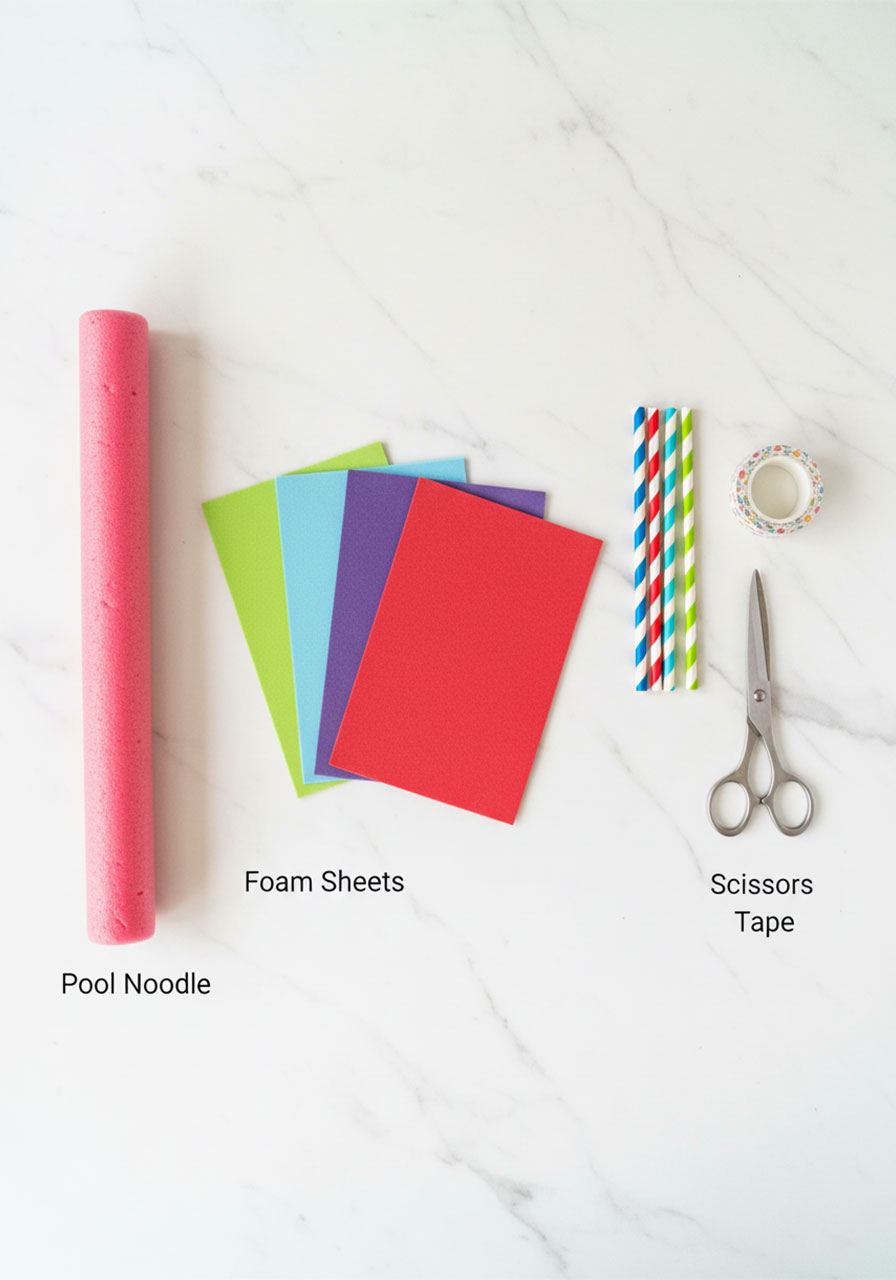
What You’ll Need to Make Pool Noodle Boats
No need for a supply run – you probably have most of this at home already!
1 pool noodle (any color – go wild!)
Colored foam sheets
Paper straws (colorful striped ones look especially adorable)
Colored washi tape
Scissors
A serrated knife (for the adult cutting the noodle)
A clear plastic bin or tub (for sailing time!)
Optional: small toy figurines or plastic animals to ride the boats
Pro Tip: Pick foam sheets and straws in different colors so each kid can have their own unique boat. Mix and match for maximum fun!
How to Make Pool Noodle Boats – Step by Step
Follow these simple steps and you’ll have a full fleet ready in no time.
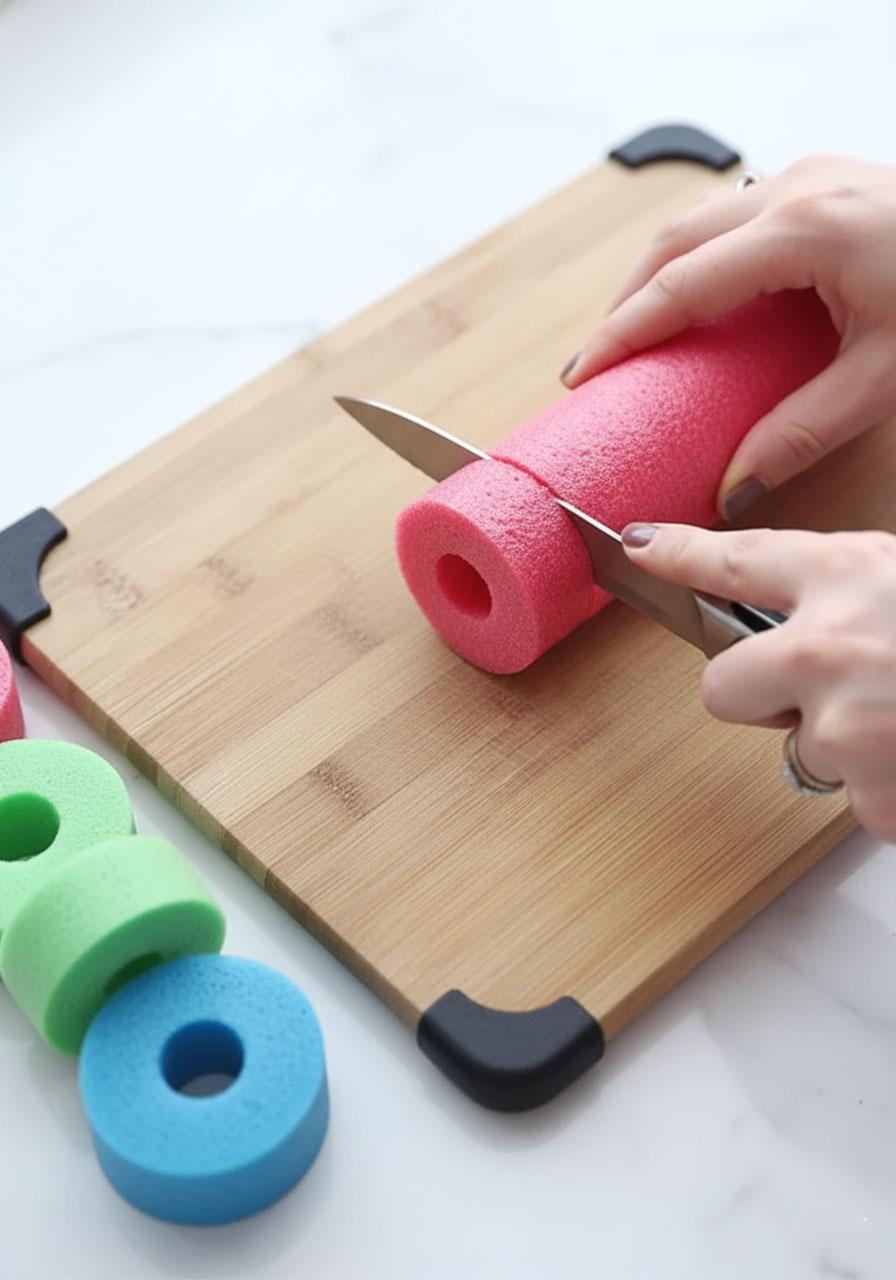
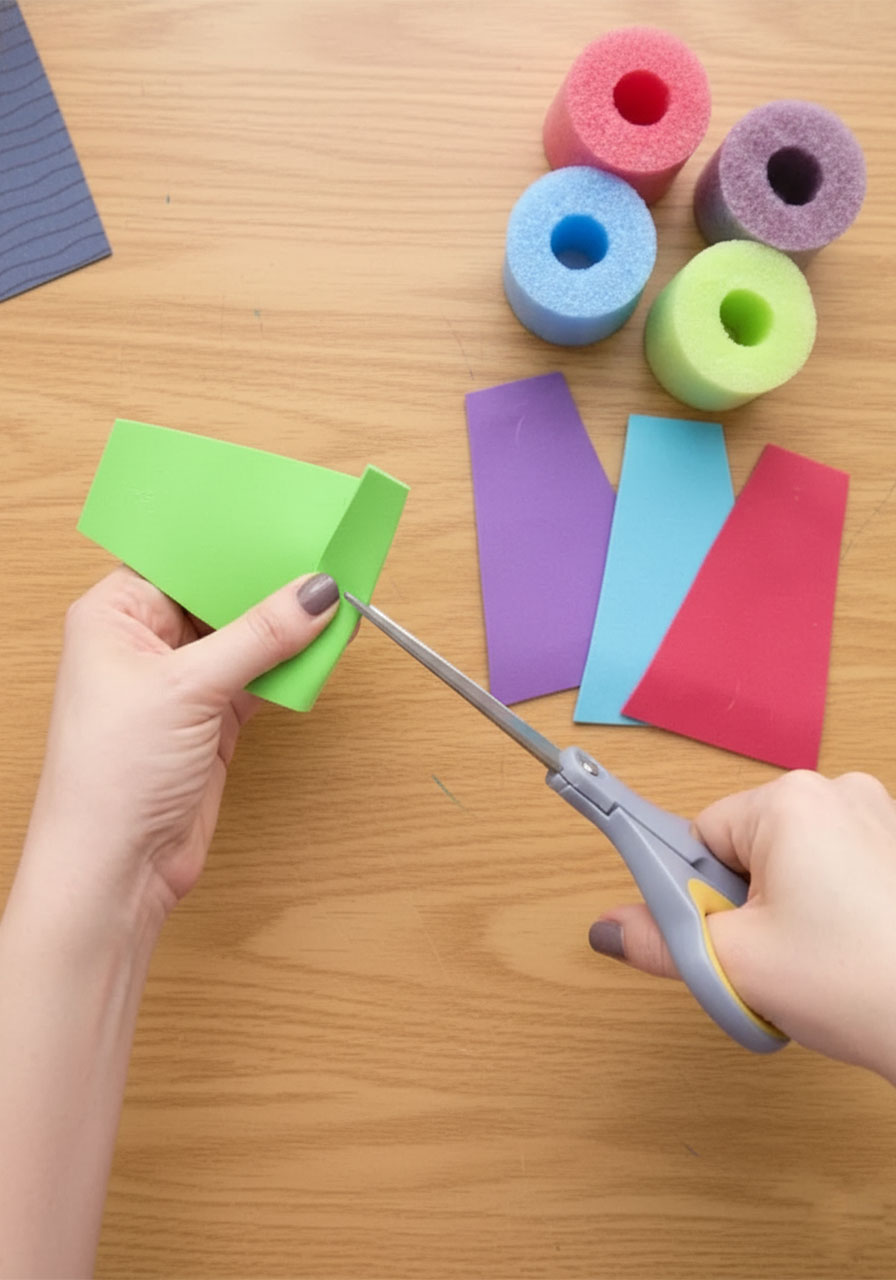
Step 1: Cut the Pool Noodle into Boat Bases
This step is for the adults! Using a serrated knife, carefully cut the pool noodle into discs that are about 3 inches thick. These chunky little rounds are the hulls of your boats.
One standard pool noodle can yield around 10–12 boat bases – plenty for a whole group. Lay them out on a cutting board and slice away. It’s surprisingly satisfying.
Safety note: Always have an adult handle the knife. Kids can do everything else!
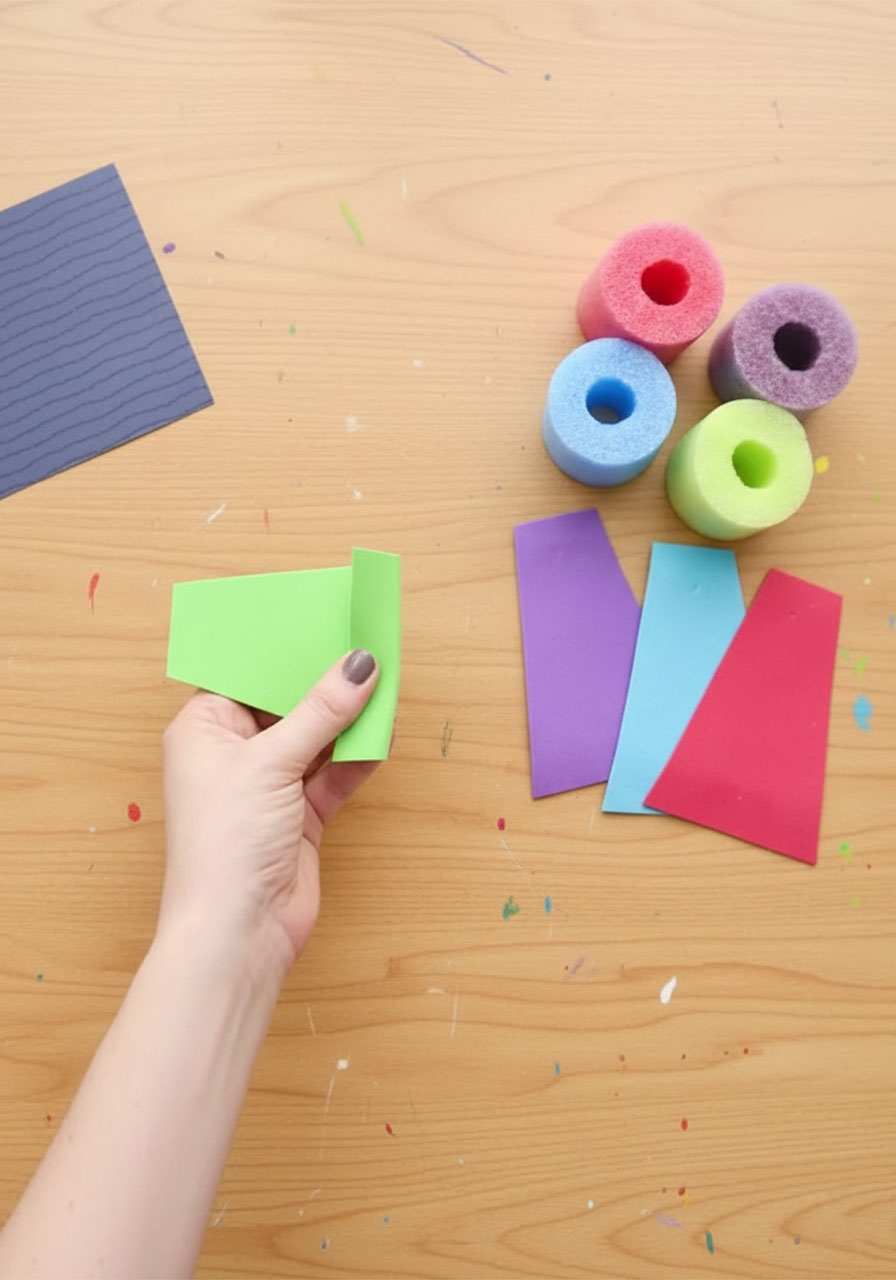
Step 2: Cut the Foam Sheets into Sails
Now it’s the kids’ turn! Take a colored foam sheet and cut it into a sail shape – think a wide trapezoid or a slightly curved triangle. The sail doesn’t need to be perfect; a little wonkiness just adds character.
You can use our sail template to trace and cut a consistent shape. This is especially helpful if you’re doing this as a group craft and want all the sails to look similar.
Cut one sail per boat. Cut extras if you’d like kids to decorate or personalize their sails before assembly.
Step 3: Make Slits in the Sail
Using the tip of your scissors, carefully snip a small ½-inch slit at the top and another at the bottom of the foam sail – right along the center line.
These two slits are what hold your straw mast in place. Make them just wide enough for the straw to slide through snugly. Not too big, or the sail will flop around!
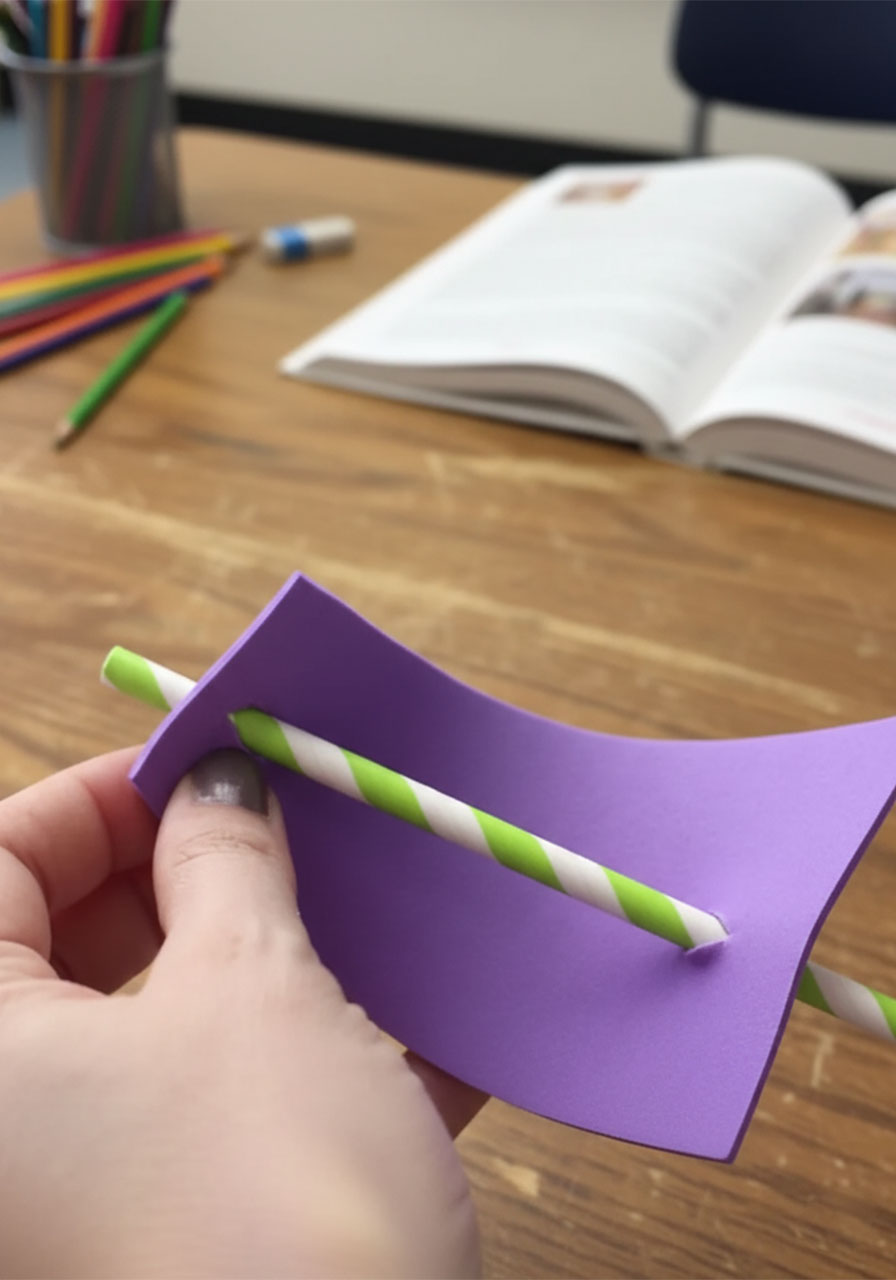
Step 4: Thread the Straw Through the Sail
Take your paper straw and thread it through the bottom slit first, then push it back through the top slit. The straw runs behind the sail and pokes out at both ends.
When you’re done, the sail should bow out slightly, like it’s catching a breeze. Adorable, right?
This is a great step for kids to do themselves – it takes a little patience but feels super rewarding when it clicks into place.

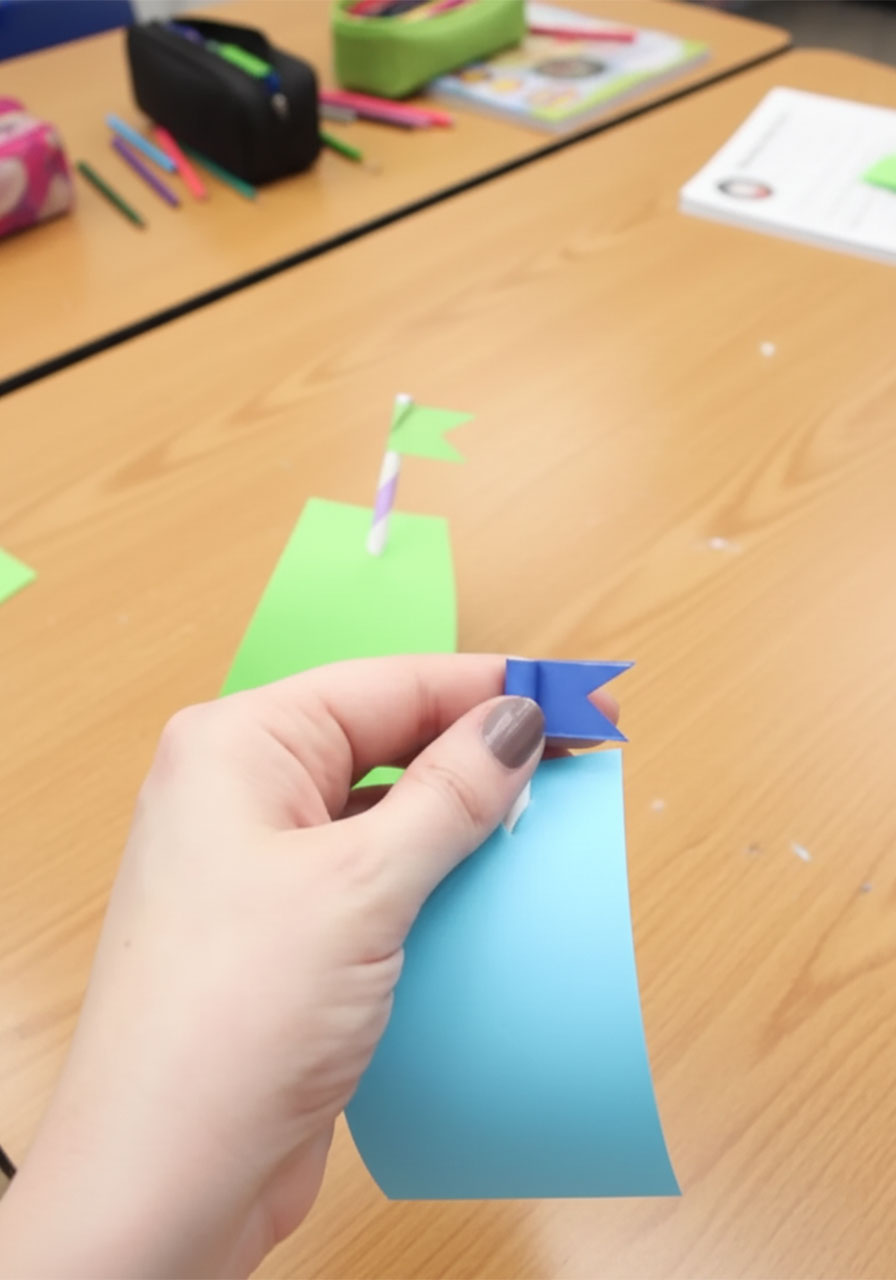
Step 5: Make the Flag
Time for the finishing touch! Tear off a small piece of washi tape and wrap it around the very top of the straw. Then use scissors to snip a small triangle notch out of the free end of the tape – this creates that classic little pennant flag shape.
You can also fold a tiny scrap of foam sheet in half, cut a small triangle notch out of the folded end, and glue or tape it to the top of the straw for a sturdier flag option. Both look fantastic!
Variation: Let kids pick a washi tape pattern that matches their sail color. Polka dots, stripes, stars – the more personality, the better.
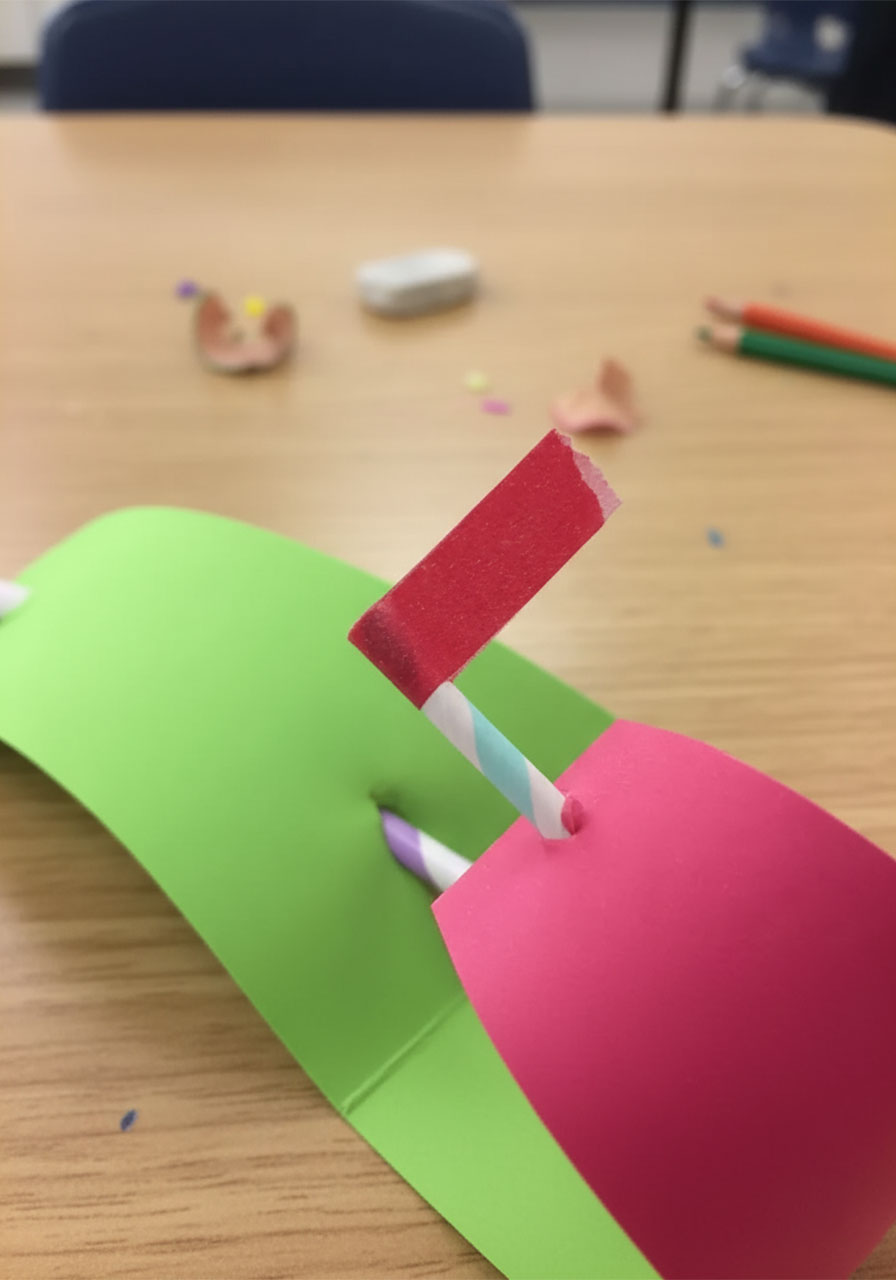
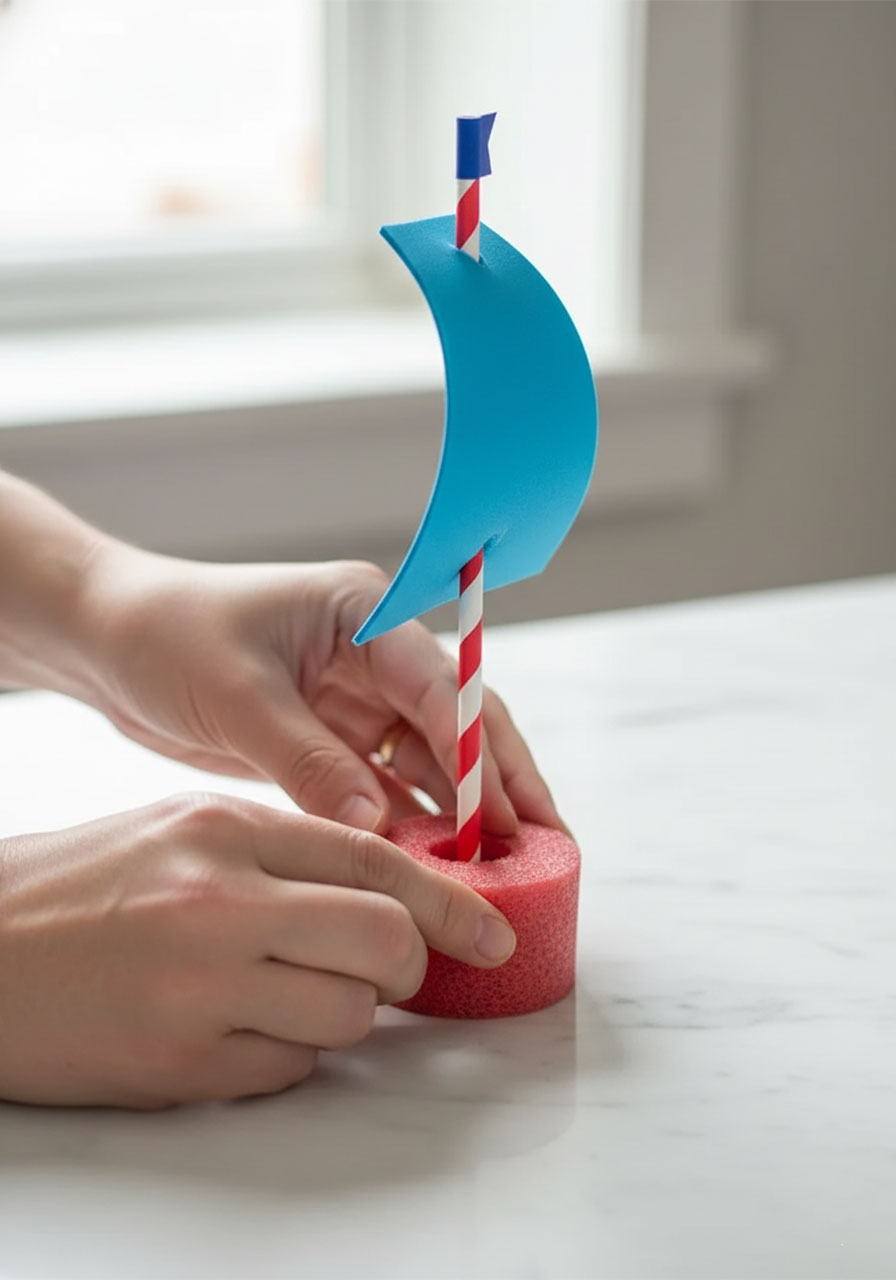
Step 6: Attach the Mast to the Boat
Almost there! Take the bottom of the straw and press it firmly into the top center of the pool noodle disc.
If the straw isn’t going in easily, use the tip of your scissors to gently poke a small starter hole in the noodle first. Then slide the straw in and press it down until it feels secure.
The foam noodle grips the straw surprisingly well, so once it’s in, it’s not going anywhere – even in water!
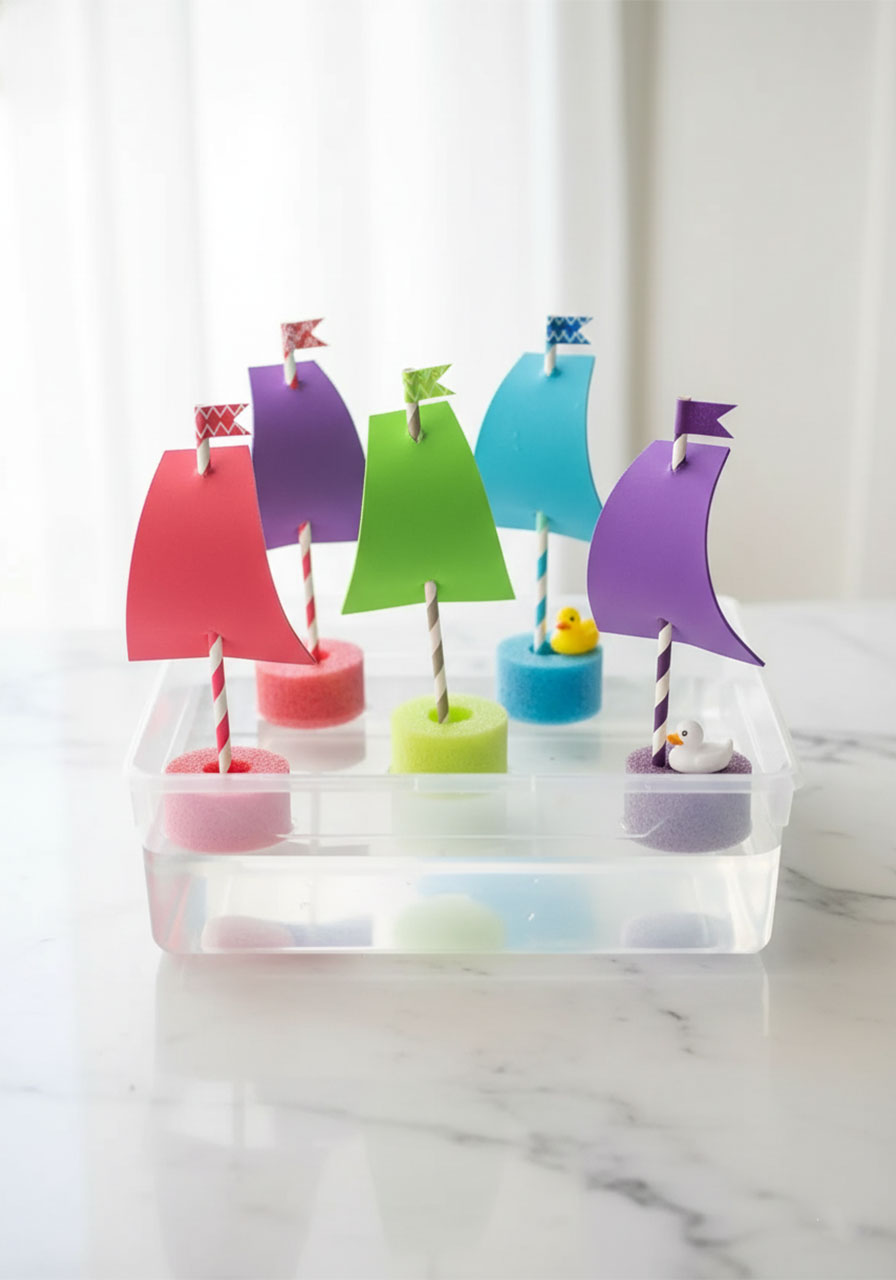
Step 7: Set Sail!
Fill a clear plastic bin with a few inches of water, line up your fleet of boats, and give them a gentle push.
Watch them float! (Spoiler: they float beautifully.)
Kids can race them by blowing gently on the sails, add small plastic animals or toy figures as passengers, or just splash around and play. It’s open-ended fun that kids can direct themselves – which means you get to sit back and enjoy the show.
Fun Ways to Play with Pool Noodle Boats
Once the boats are built, the fun is just getting started. Here are some ways to extend the play and make the most of your fleet:
Boat Race: Line up the boats at one end of a bin or kiddie pool. On “go,” each kid blows on their sail to move their boat to the other side. First one there wins!
Cargo Challenge: How many small plastic animals can fit on a boat before it tips? Kids will love testing the limits.
Bathtub Adventure: These boats are perfectly sized for the bathtub, too. Bath time just got a whole lot more exciting.
Fleet Parade: Set up a longer tub of water and let the whole fleet sail in formation. Great for imaginative storytelling.
Sink or Float Science: Turn it into a mini science lesson – what happens when you add weight to the boat? A great intro to buoyancy for curious kids!

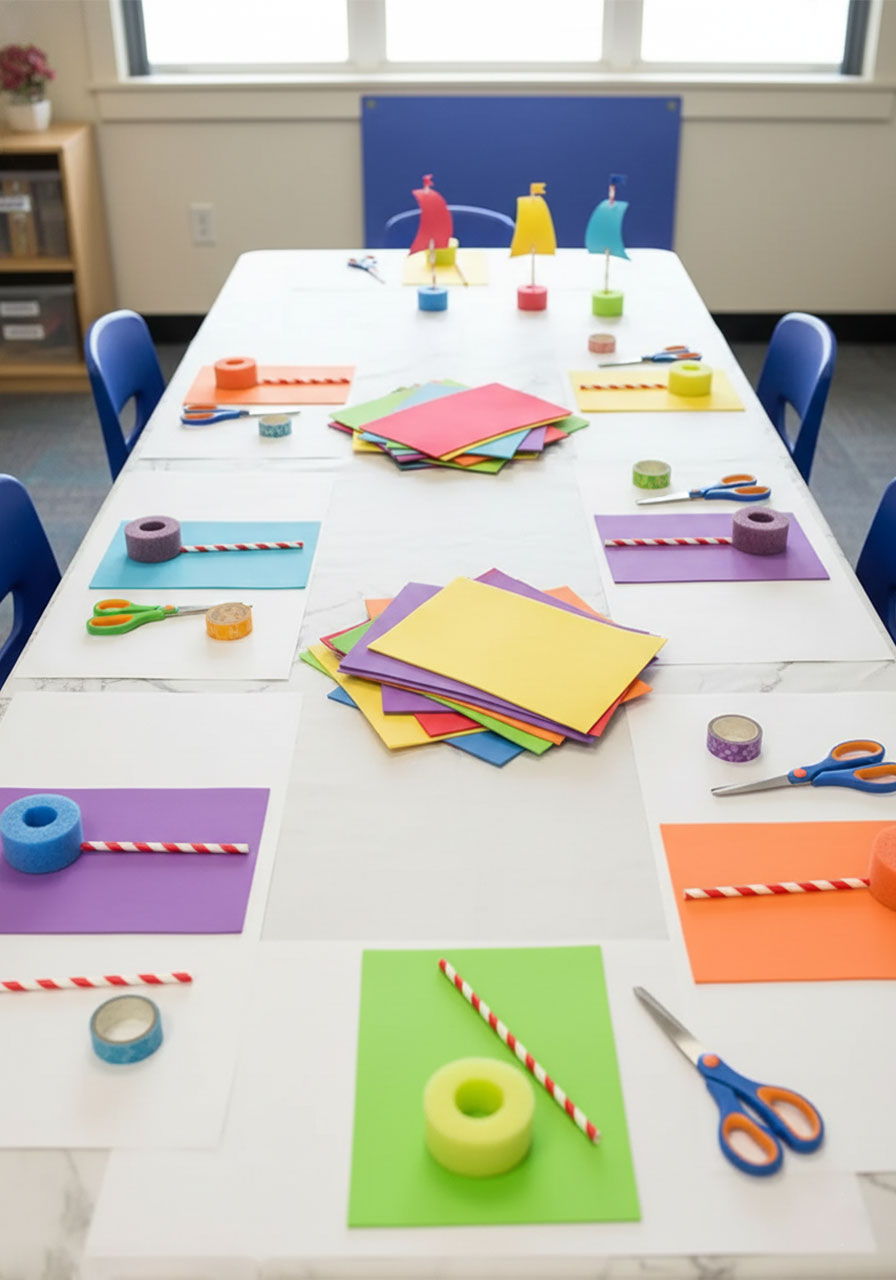
Pool Noodle Boat Tips for Teachers and Party Hosts
Planning to do this craft with a group? Here are a few things that will make your life so much easier:
Prep the noodles ahead of time. Cutting the noodle pieces is the only step that requires adult supervision with a knife. Do this before the kids arrive so everyone can jump straight into the fun parts.
Pre-cut the sail slits too. If you’re working with younger kids (preschool or early elementary), making the slits in the sails ahead of time speeds things up significantly and reduces frustration.
Set up a “sail decorating” station. Before assembly, let kids draw on or decorate their foam sails with markers. This personalizes each boat and adds a fun creative step.
Use a long storage bin as your “sea.” A clear under-bed storage bin works perfectly and lets everyone watch the boats float without leaning too far over.
Make it a birthday party activity. Set up a craft table, let each kid build and decorate their own boat, and then have a race at the end. Kids get to take their boat home as a party favor. Win-win!
Frequently Asked Questions
What age is this craft best for?
Pool noodle boats are great for kids ages 3 and up! Younger kids will need adult help with the straw threading and sail slits, but they can absolutely help choose colors, decorate sails, and assemble the final boat. Older kids (8+) can handle most of the steps independently.
Do the boats actually float?
Yes, they float really well! Pool noodle foam is naturally buoyant, so the boat base sits happily on the water. The paper straw and foam sail are lightweight enough that they don’t tip the boat over. Just avoid loading them up with heavy objects.
Can I use cardstock instead of foam sheets for the sails?
You can, but foam sheets are strongly recommended. They’re waterproof, flexible, and hold their shape much better than paper. Cardstock will get soggy and fall apart quickly once it’s near water. Stick with foam for best results!
How do I keep the straw from falling out of the noodle?
The noodle foam grips the straw naturally, but if it feels loose, try making a slightly smaller starter hole (or no hole at all – just push the straw in firmly). You can also add a tiny dab of hot glue at the base of the straw if you need extra security. Just keep glue guns away from young kids.
More Summer Craft & Activity Ideas to Keep the Fun Rolling:
How to Make Moon Sand With Only 2 Ingredients (Kids Go Absolutely Wild for This!)
Easy Jellyfish Suncatcher Craft for Kids (That Looks Stunning in a Window!)
Paper Loop Pufferfish Craft: The Cutest 3D Summer Activity for Kids
Egg Carton Ladybug Craft Ideas Kids (and Teachers!) Will Absolutely Love
Paper Plate Ice Cream Cone Craft: The Cutest Summer Activity for Kids
How to Make Beaded Pipe Cleaner Flowers (A Fun Kids Craft That Takes Under 10 Minutes!)