
Father’s Day is coming up fast – and if you’re on the hunt for a gift that will actually make Dad stop and smile (maybe even get a little misty-eyed), you’ve landed in the right place.
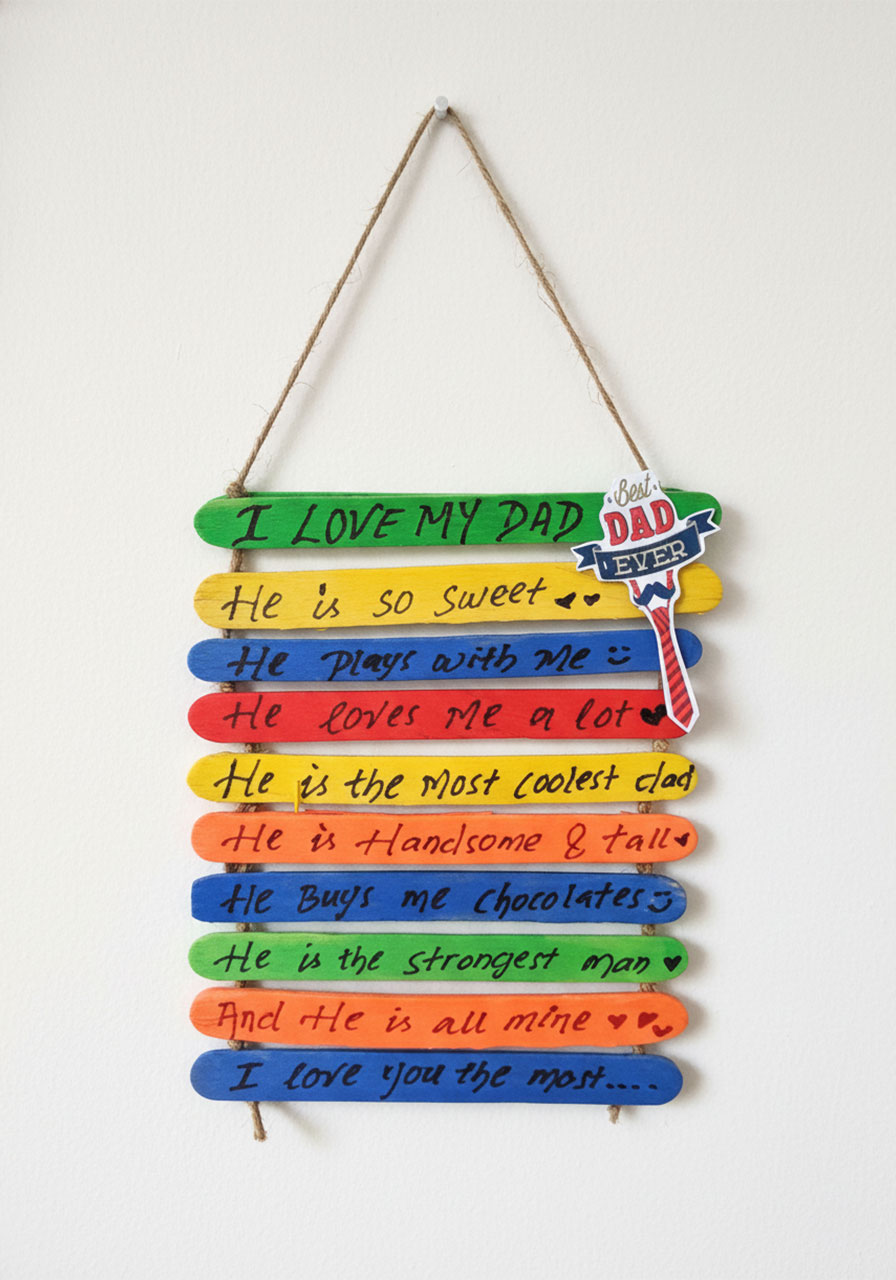
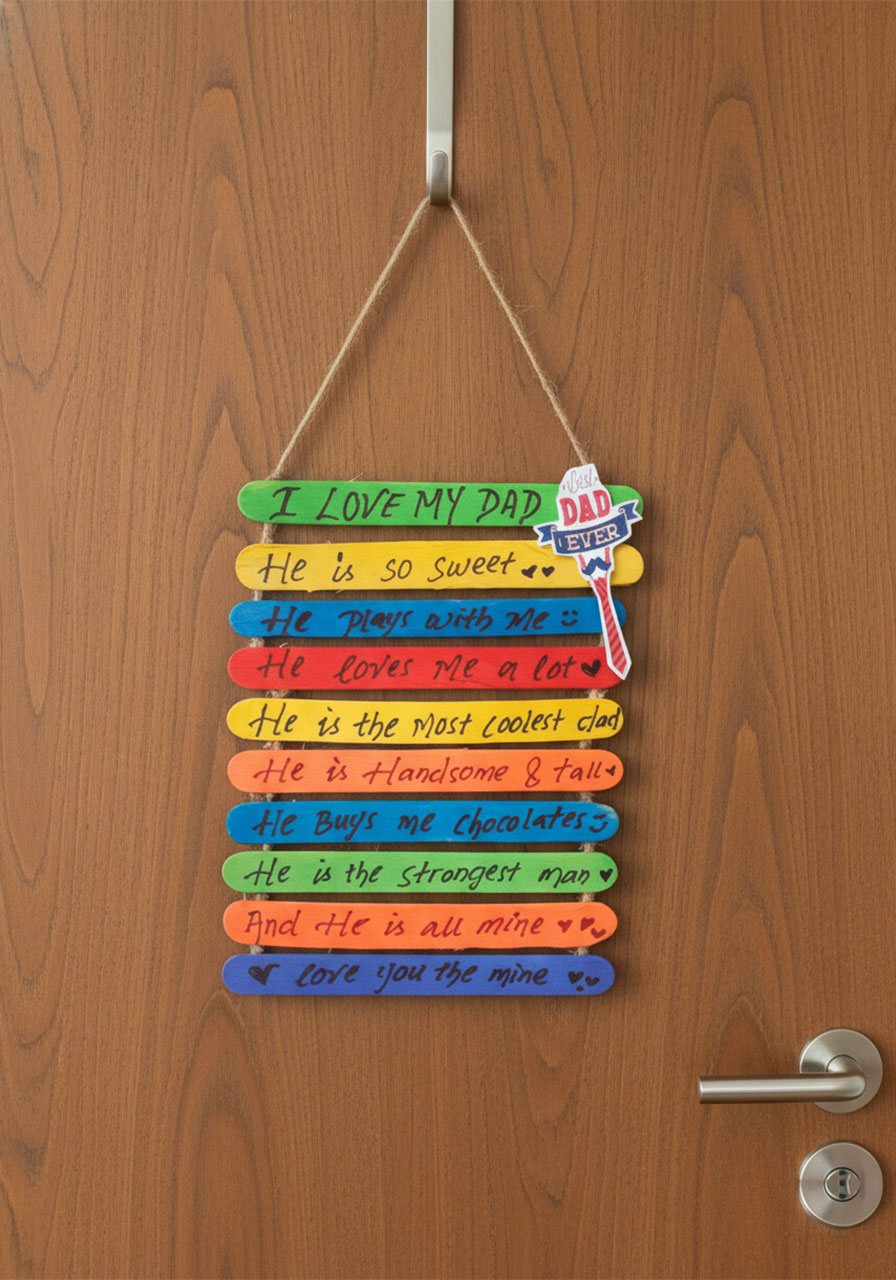
This adorable popsicle stick wall hanging is one of those rare crafts that’s just as fun to make as it is meaningful to receive. Kids get to write out their very own love notes to Dad – one colorful stick at a time.
And the end result? A rainbow-bright keepsake he’ll want to hang in his office, on the bedroom door, or wherever he wants a daily reminder that he’s loved.
The best part? You probably already have most of what you need.
Let’s dive in!
Why You’ll Love This Father’s Day Craft
Before we get into the how-to, here’s why this project is such a winner – for kids and the grown-ups helping them make it.
It’s genuinely easy. There are no complicated cuts, no tricky folds, and no special skills required. If your kiddo can hold a marker and press a popsicle stick flat, they can make this.
It’s deeply personal. Each stick carries a message in the child’s own words (and handwriting!). That makes it 100x more meaningful than anything from a store shelf.
It’s budget-friendly. A pack of colored popsicle sticks costs next to nothing. This is a high-impact gift on a very low budget.
It works for any age. Whether you’re crafting with a 4-year-old or a 10-year-old, this project scales beautifully. Little ones can dictate their messages while you write; older kids can get creative with their own phrases.
And yes – it photographs beautifully. If you’re a parent or teacher who loves sharing classroom or family moments online, this one is seriously camera-ready.—

What You’ll Need
What You’ll Need:
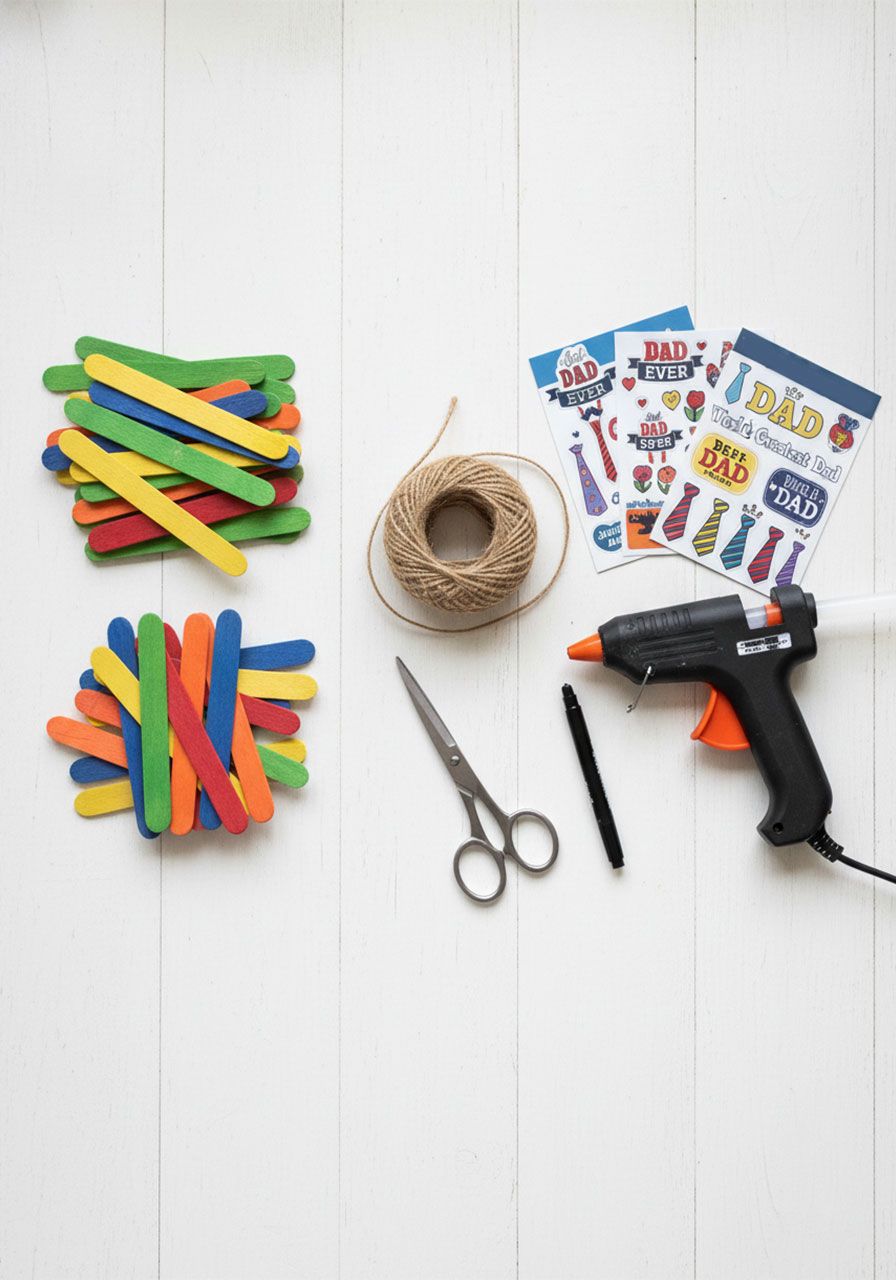
10–12 multi-colored popsicle sticks – Pre-colored craft sticks (green, yellow, blue, red, orange) work perfectly and save a step. You can find them at any craft store or online.
Jute twine or string – This forms the hanger and the “spine” that holds all your sticks together.
A hot glue gun – Adult hands only for this part! The glue sets fast and holds everything securely.
A black marker – A fine-tip permanent marker gives the neatest results.
Father’s Day stickers – A “Best Dad Ever” or “World’s Greatest Dad” sticker adds a fun finishing touch. Find these in the party section or dollar store.
Scissors – For trimming the twine at the end.
🎨 Pro Tip: Don’t have colored popsicle sticks on hand? No problem! Grab a pack of plain wooden craft sticks and let the kids paint them first. It adds an extra activity to the session – and drying time means a great snack break!
Step-by-Step Instructions
Ready to get crafting? Here’s exactly how to pull this off, start to finish.
Step 1: Cut and Shape Your Hanger
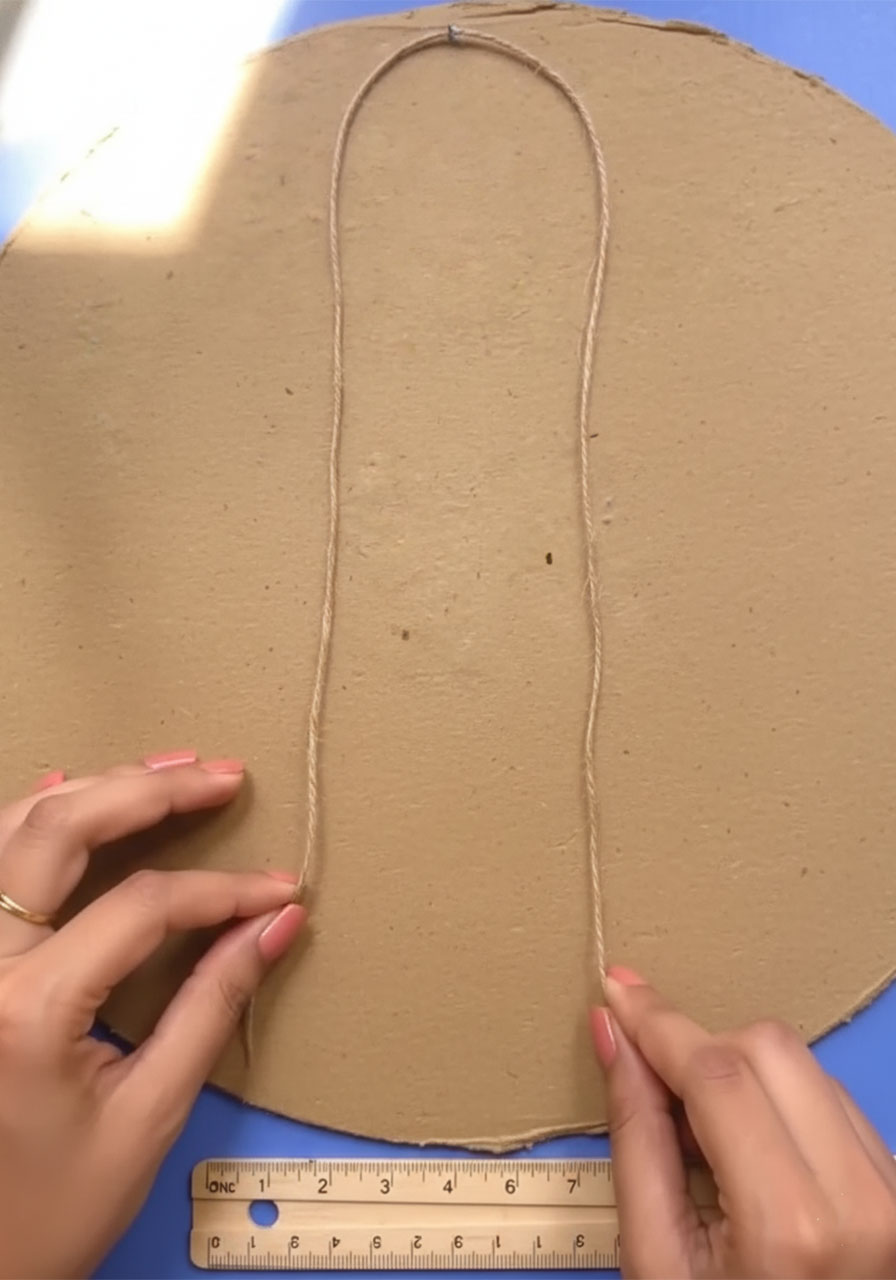
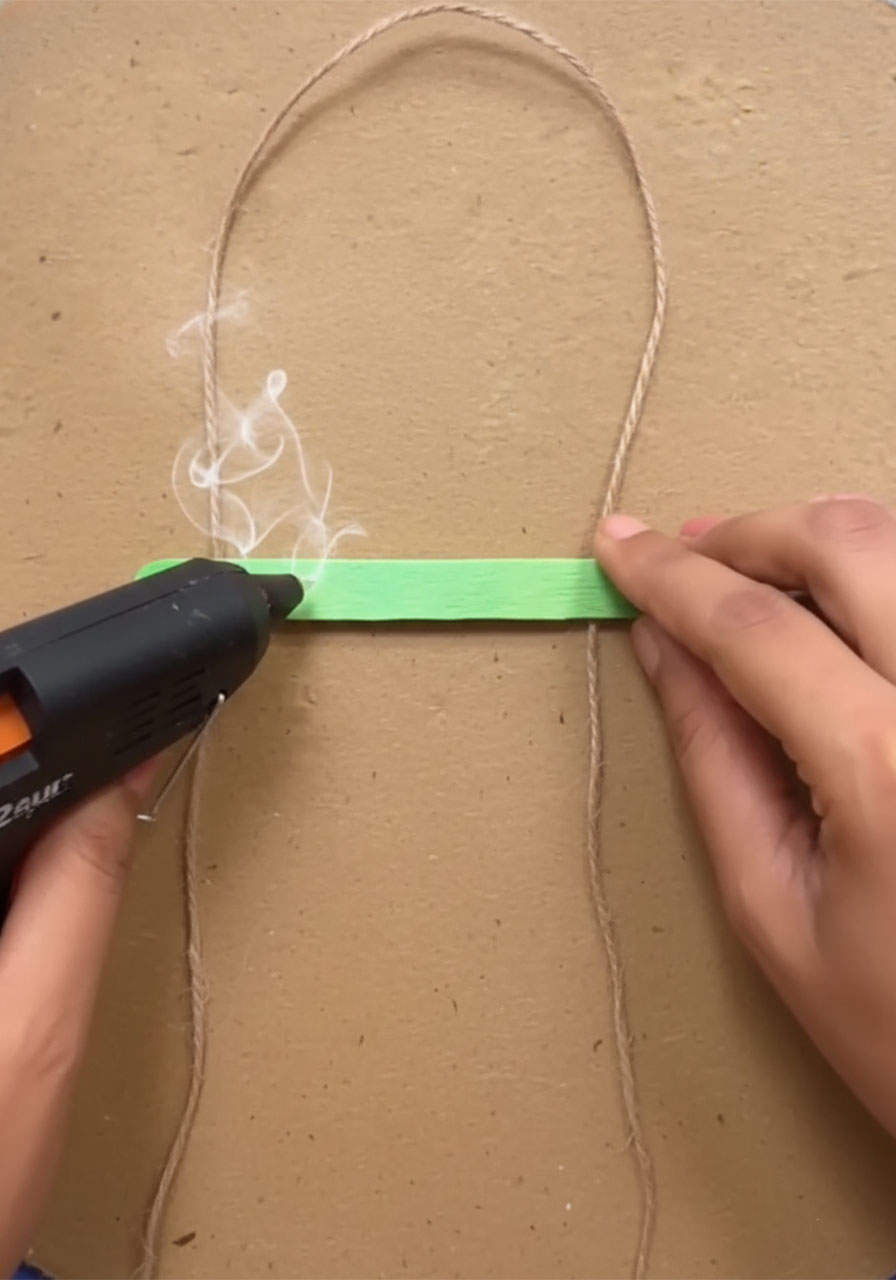
Cut a piece of jute twine about 18–24 inches long. Fold it in half to create a loop.
Lay it flat on your workspace with the loop at the top (like an upside-down U shape) and the two loose ends hanging down. This loop will become your hanger, and the two trailing strands will act as the “rails” that hold your popsicle sticks.
Space the two strands about 2–3 inches apart. That’s roughly the width of your popsicle sticks – which is exactly what you want.
Step 2: Glue the First Stick (The Top Bar)
This is where the glue gun comes in – and where an adult should step up to help.
Apply a small line of hot glue across both twine strands near the top. Press your first popsicle stick firmly over both strands and hold for a few seconds until set.
This top stick is your anchor. It keeps the two twine rails in place and gives the hanging its structure. Use a bright, eye-catching color here – green looks great and gives a cheerful first impression.
Step 3: Build Your Message Ladder
Now for the fun part – and this is where the whole thing comes together quickly.
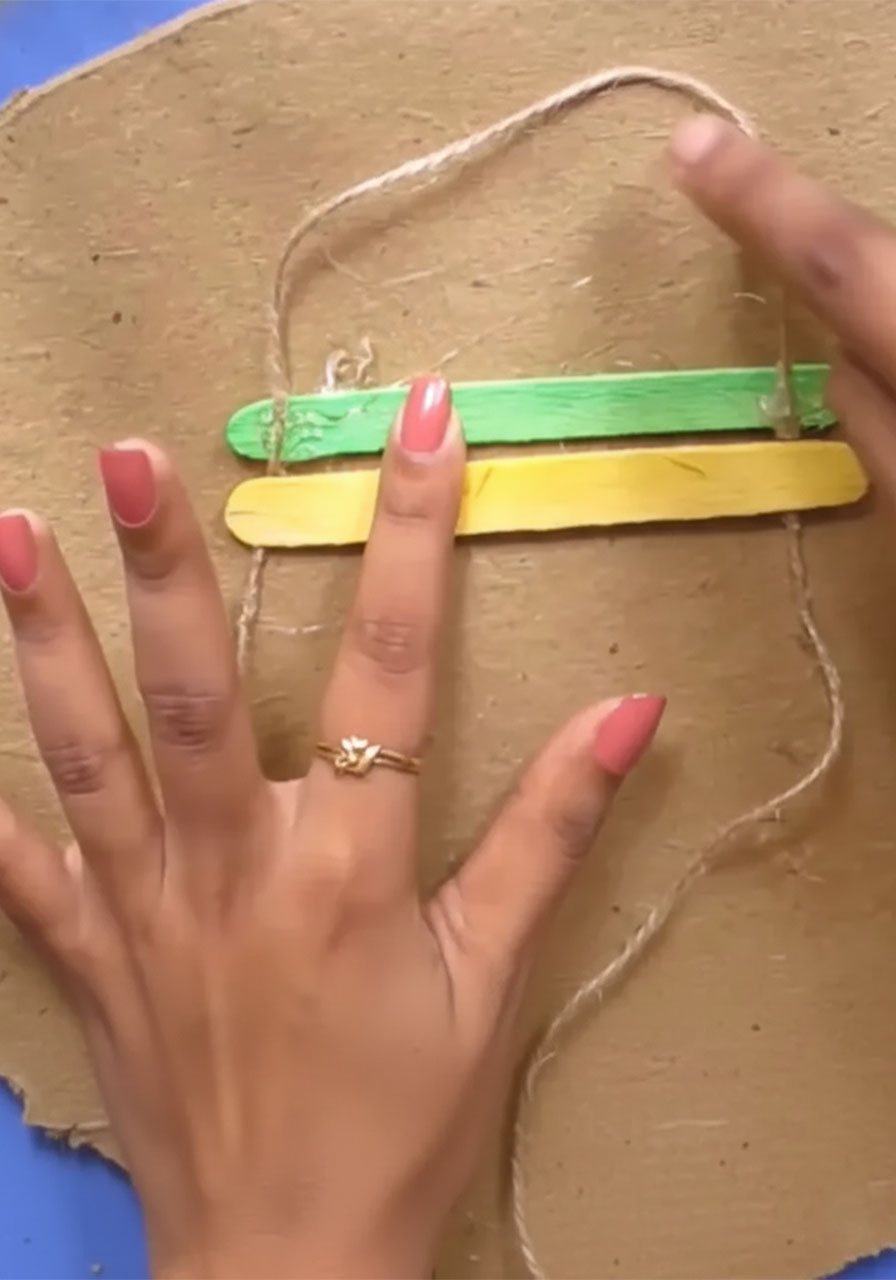
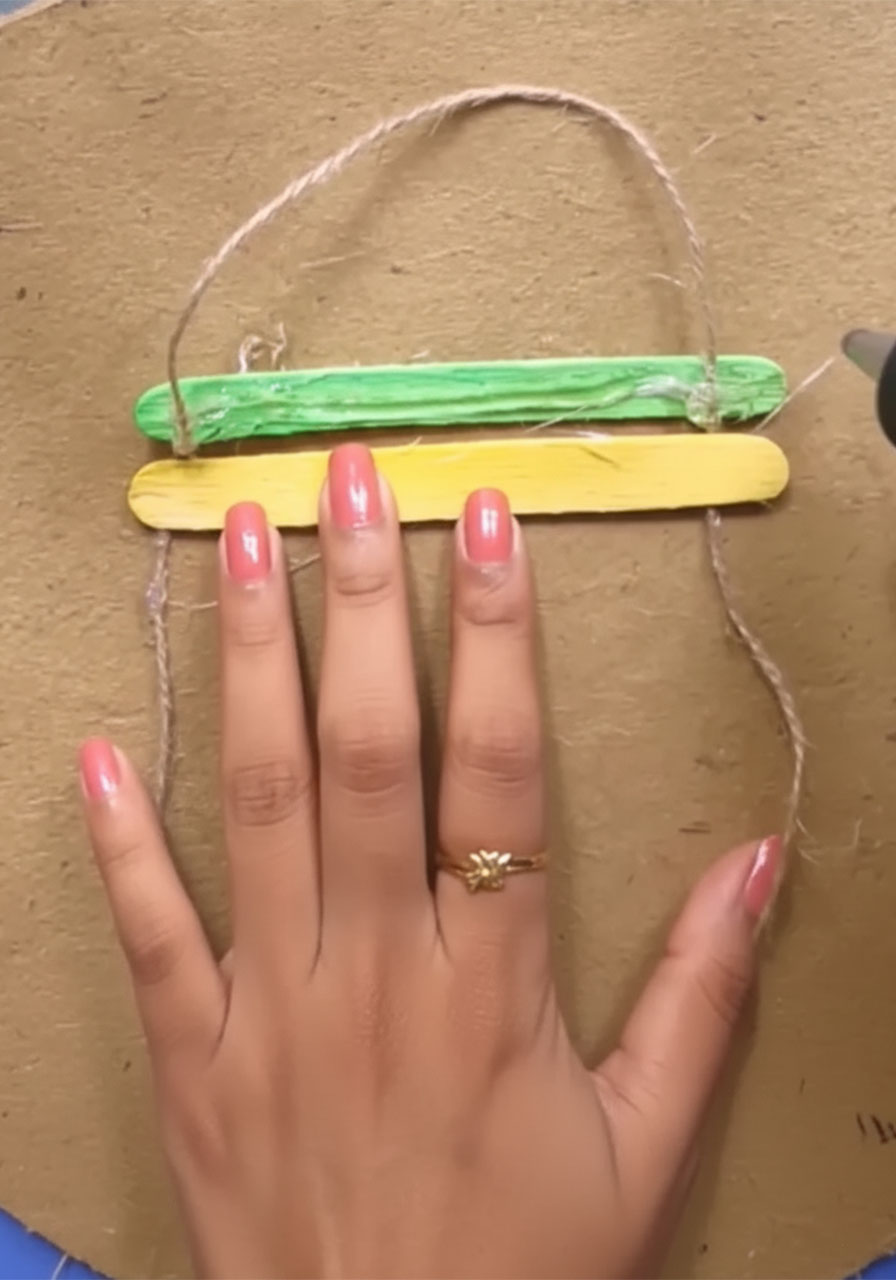
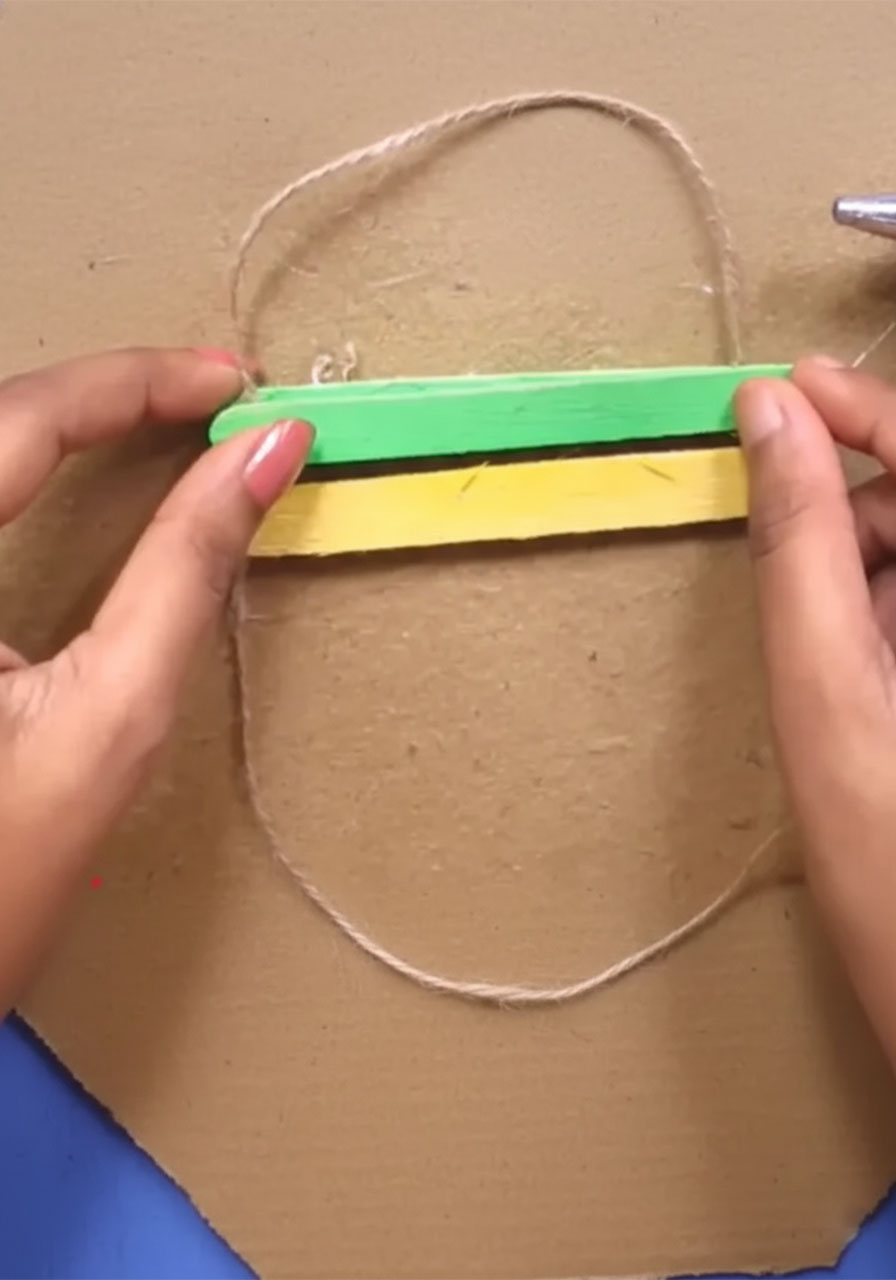
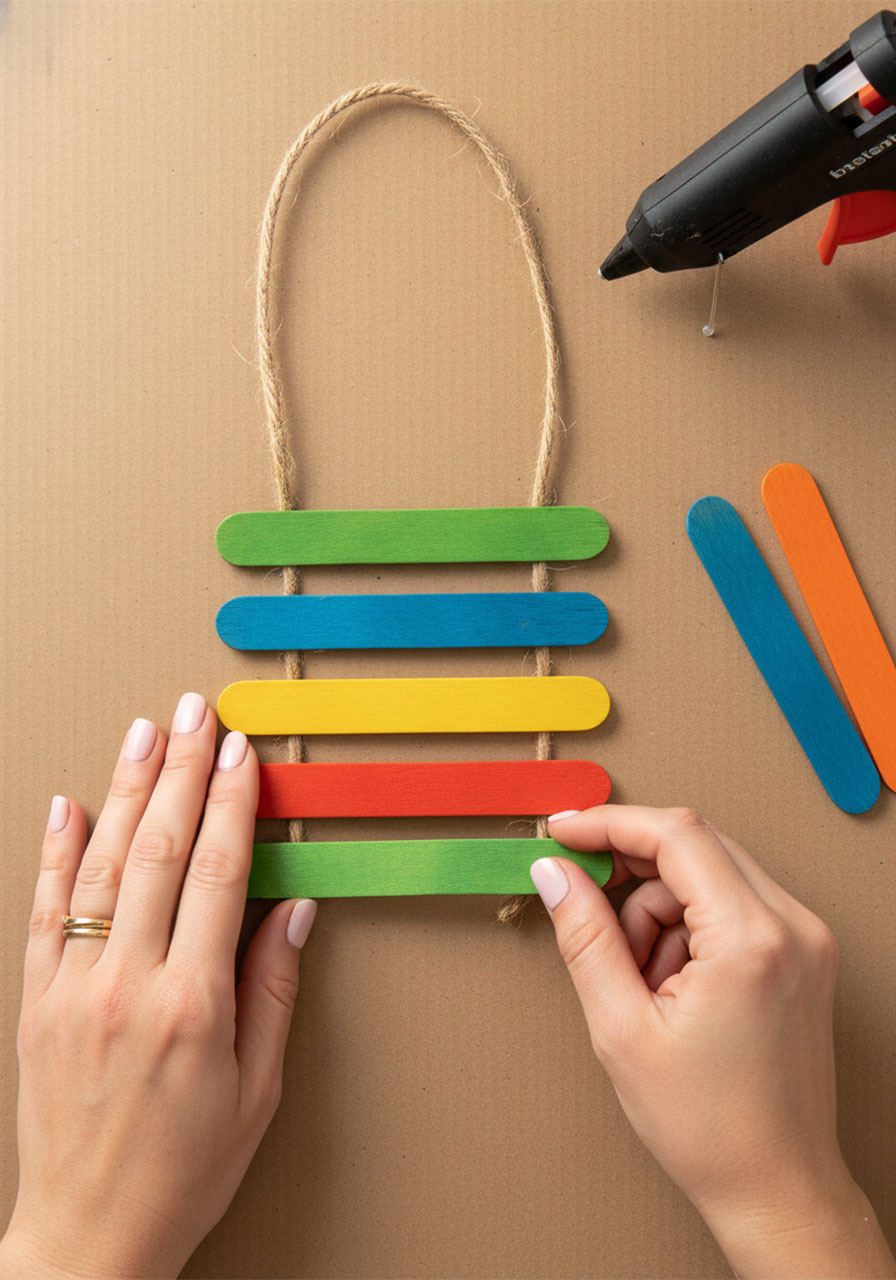
Continue adding sticks one by one, working your way down the twine. Apply a small dab of glue to each stick where it crosses the twine strands, then press it down.
Leave just a tiny sliver of space between each stick (about 1–2mm) so the finished piece fans out slightly when hung up – giving it that beautiful layered rainbow effect you saw in the photos.
Alternate your colors as you go! A pattern like green → yellow → blue → red → orange → blue → green → orange keeps things vibrant and visually interesting.
Repeat until you have all 10–12 sticks secured.
✂️ Pro Tip: Lay everything out flat and dry before checking alignment. Once cool, gently fan the sticks out from the top to test the cascade effect. Adjust any sticks that look uneven while the glue is still slightly warm.
Step 4: Trim the Extra Twine
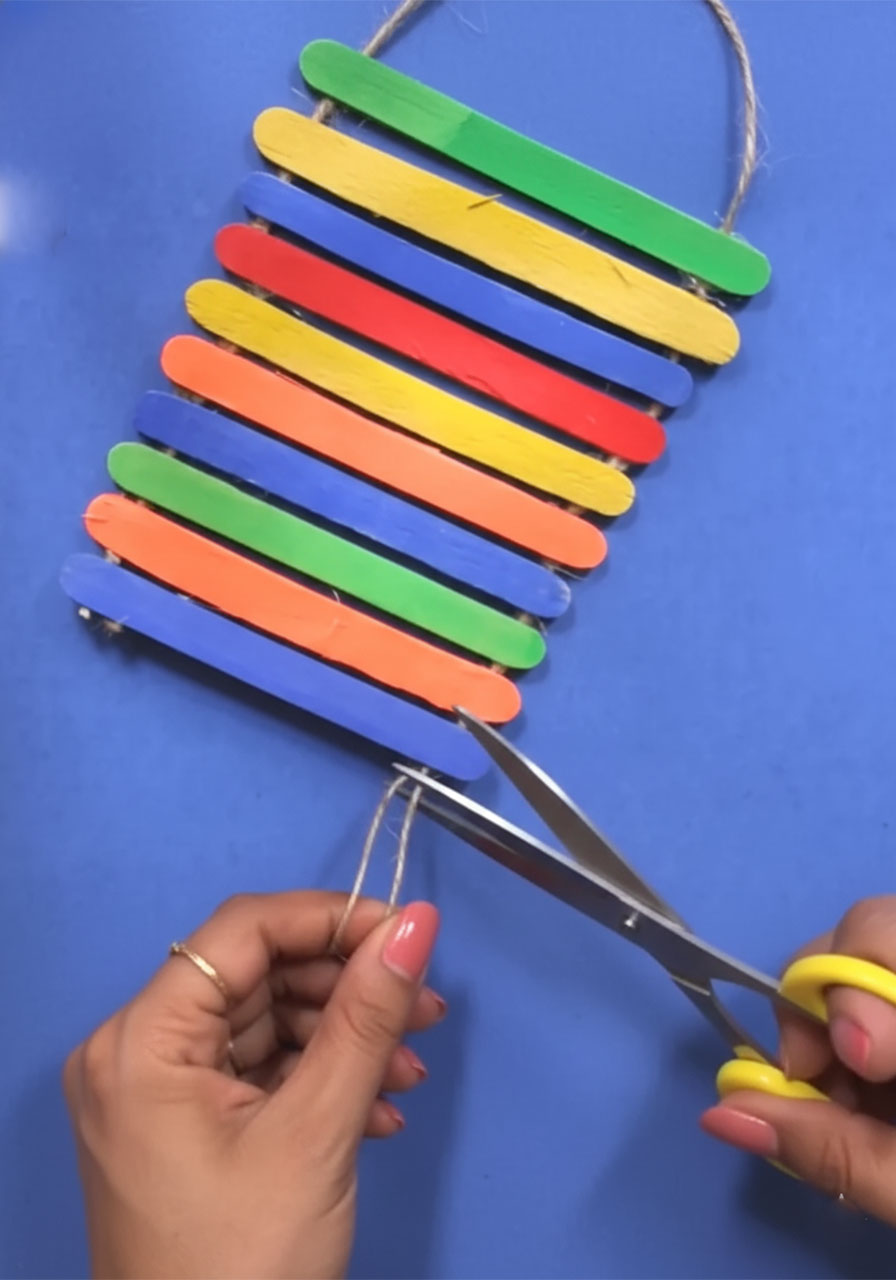
Once all your sticks are glued, you’ll likely have a bit of extra twine peeking out below the bottom stick. Grab your scissors and snip it clean.
Take a moment to also check the sides – if any twine is sticking out awkwardly between sticks, a quick trim tidies everything up beautifully.
Step 5: Add Your Sticker Decoration
Before you write, give the hanging that extra finishing touch!
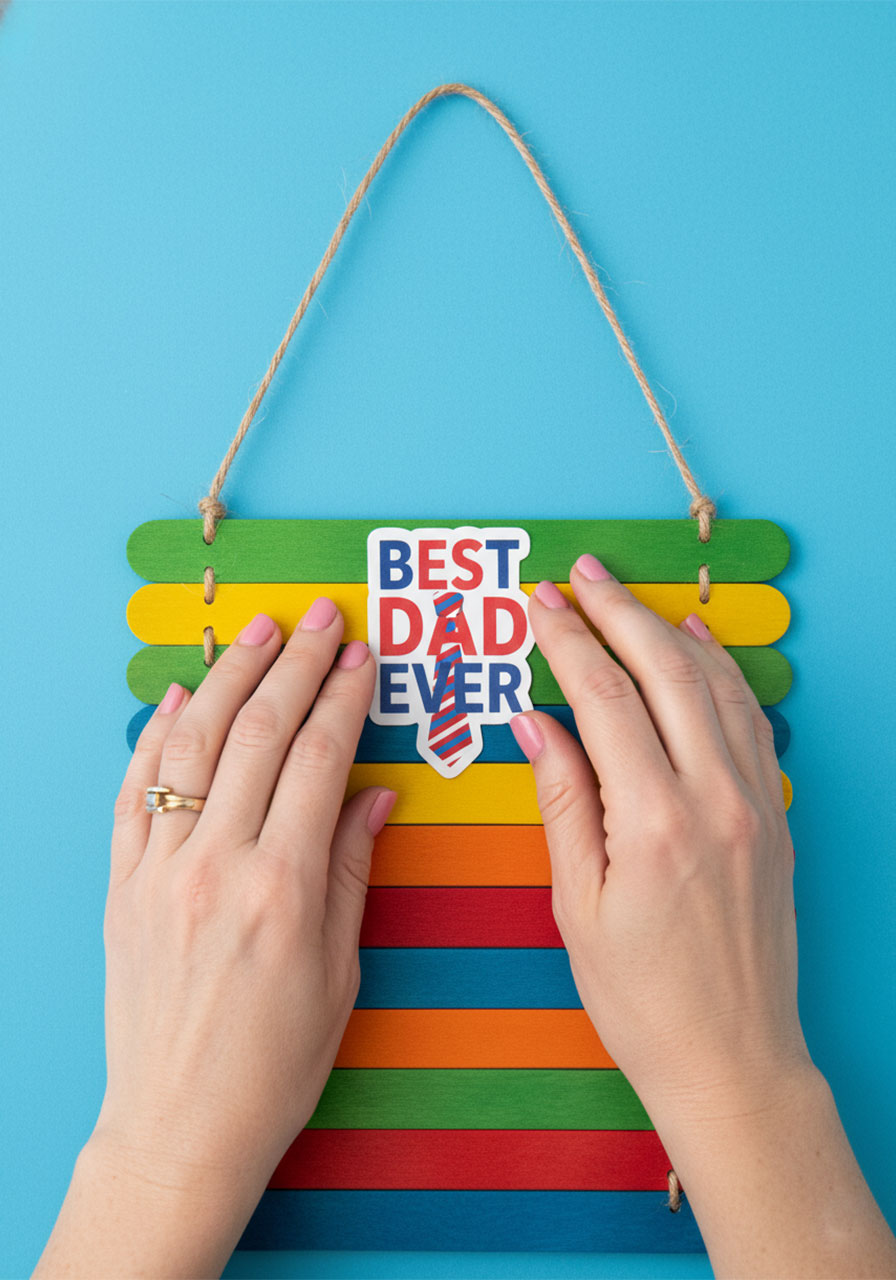
Stick your “Best Dad Ever” sticker onto the top right corner of the first popsicle stick. This small detail makes the piece look polished and intentional – like something you’d actually buy in a gift shop.
If you have multiple stickers, feel free to use one at the top and add a small heart or star elsewhere on the piece.
Step 6: Write Your Heartfelt Messages
Here it is – the moment that turns a craft project into a treasured keepsake.
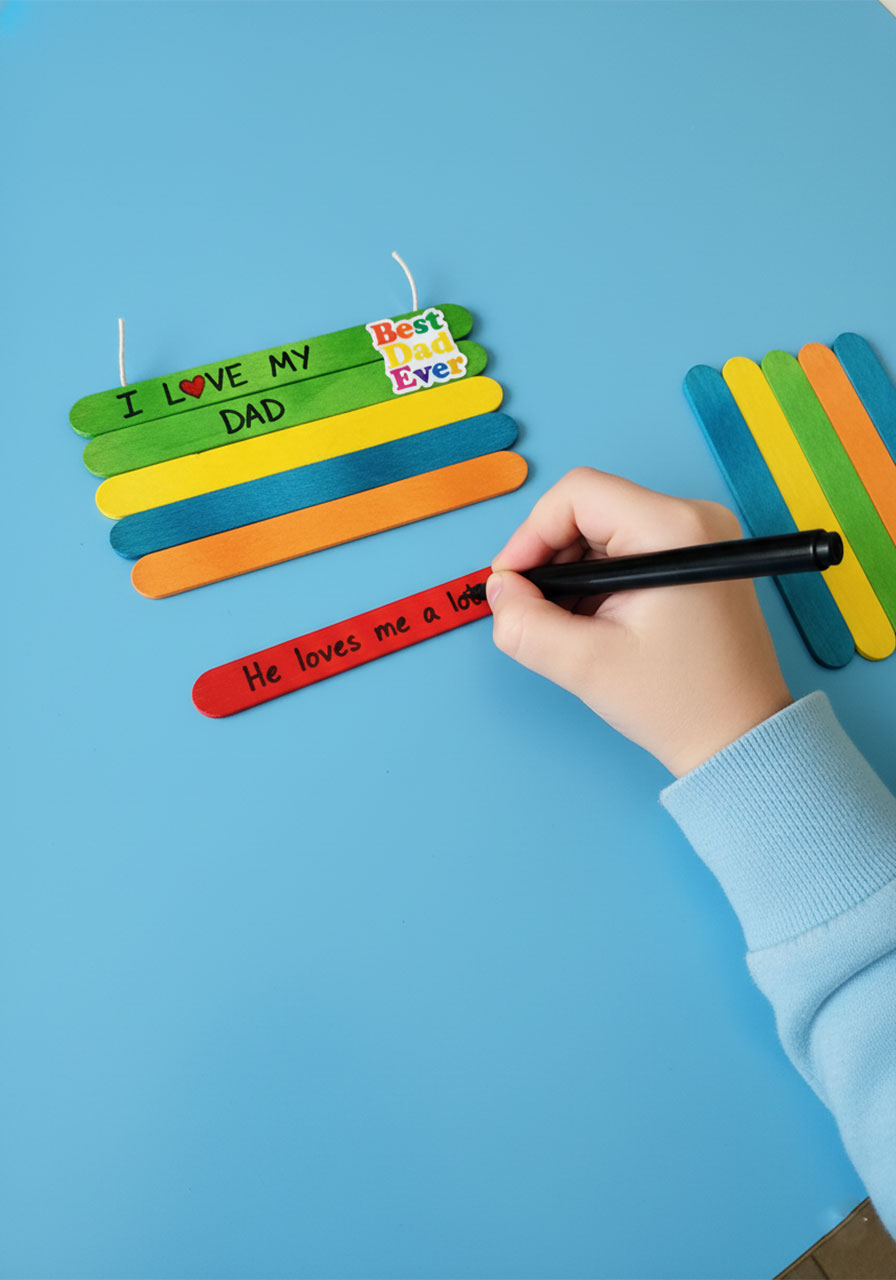
Hand the marker to your child and have them write one message on each stick. Encourage them to think about what makes their dad specifically amazing. The more personal, the better!
Need some inspiration to get started? Here’s what the original creator wrote on her sticks:
- “I LOVE MY DAD” ❤️
- “He is so sweet”
- “He plays with me”
- “He loves me a lot”
- “He is the most coolest dad”
- “He is Handsome & tall”
- “He Buys me Chocolates”
- “He is the Strongest man”
- “And He is all mine”
- “I love you the most…”
Of course, your child’s version might sound totally different – and that’s what makes it perfect. “He makes the best grilled cheese,” “He lets me stay up late on Fridays,” or “He gives the best piggyback rides” are all equally wonderful.
✏️ Pro Tip for Teachers: Doing this as a classroom craft? Have students brainstorm their messages on scratch paper first. That way, they can plan out their spacing and make sure each stick gets one clear, complete thought.
Ideas for What to Write on Each Stick
Stuck on what to write? Here are some age-appropriate prompts to spark ideas.
For Little Ones (Ages 3–6)
Keep it short and sweet! Little kids often come up with the most heartwarming answers to simple questions like “What’s your favorite thing to do with Daddy?” or “How does Daddy make you happy?”
- “He gives the best hugs”
- “He reads me bedtime stories”
- “He makes me laugh”
- “He is my superhero”
- “He is my best friend”
For Older Kids (Ages 7–12)
Older children can get more specific and descriptive. Encourage them to think about a memory, a trait, or something Dad does that no one else does quite the same way.
- “He always believes in me”
- “He taught me how to ride a bike”
- “He never misses my games”
- “He works so hard for our family”
- “He makes every day an adventure”
💡 Fun Variation: For grandpas, swap out “Dad” messaging for “Grandpa” or “Pop-Pop” ones! Phrases like “He tells the best stories” and “He spoils me with snacks” work perfectly for a grandparent version of this gift.
How to Display the Finished Wall Hanging
The jute loop makes this incredibly easy to hang just about anywhere.
Dad can hang it on a door hook in his home office, a nail on the wall next to his favorite chair, or even on the fridge where the whole family can see it every day.
Because the sticks fan out slightly when hung, the finished piece has a beautiful layered rainbow look that catches the eye immediately.
It’s lightweight, durable, and – unlike a lot of kids’ crafts – actually looks great as home decor. Dads genuinely keep these for years.
Tips for Doing This Craft in a Classroom
This project is a fantastic option for kindergarten through 5th grade classrooms in the week before Father’s Day. Here’s how to make it run smoothly.
Prep the twine in advance. Cut twine pieces to the correct length before class so students aren’t struggling with scissors and twine at the same time.
Set up a glue gun station. Designate one adult-supervised spot in the room for the hot glue step. Students bring their sticks and twine to the station in small groups.
Use the writing prompt sheet. Print out a list of message suggestions and put one on each desk. This helps students who freeze up when faced with a blank stick.
Finish with the sticker as a reward. Letting each child place their own “Best Dad Ever” sticker at the end gives them a satisfying “done!” moment.
The whole project – from setup to finished hanging – takes about 30–40 minutes in a classroom setting. Perfect for a dedicated craft period.

Why Handmade Gifts Mean More Than You Think
There’s a reason handmade gifts end up in keepsake boxes and not the donation pile.
When a child takes the time to think about why they love someone and writes it down in their own words and handwriting, it becomes a time capsule. Years from now, Dad isn’t going to remember a gift card. But he absolutely will remember the stick that said “He buys me chocolates” in wobbly six-year-old handwriting.
This craft is also a quiet, lovely way to teach kids the practice of gratitude – the habit of noticing and naming the good things in their lives and the people who make them possible.
That’s a lesson worth way more than any store-bought toy.
Quick Recap: You’ve Got This!
Let’s do a speedy rundown so you’ve got the full picture before you start shopping for supplies.
1. Cut and shape your jute twine into a loop with two trailing strands.
2. Hot-glue the first popsicle stick across both strands near the top.
3. Keep gluing sticks down the length of the twine, alternating colors.
4. Trim any excess twine at the bottom and sides.
5. Add a festive “Best Dad Ever” sticker to finish it off.
6. Write one loving message on each stick – in your child’s own words.
That’s it. Six steps, a handful of supplies, and you’ve got a gift that Dad will genuinely treasure.
With this hanging in your craft arsenal, you’re set to make this Father’s Day one he’ll talk about for years. Because the best gifts aren’t bought – they’re made with a little glue, a lot of color, and a whole lot of love. 🎉
More Father’s Day Ideas to Keep the Fun Rolling:
A “Corny” Father’s Day: How to Make a Pop-Up “Pop-Corn” Card for Dad
How to Make a DIY #1 Dad Award Ribbon for Father’s Day (Kids Will Love This!)
Make Dad Feel Like Royalty: The “Dad, You Are My King!” DIY Pull-String Father’s Day Card
The Cutest 5-Minute Father’s Day Gift Wrap Trick (That Looks Like You Tried Super Hard)
Grand Slam Pop-Up: The 3D Baseball Father’s Day Card Your Kids Can Actually Make
The Cutest Father’s Day Craft Kids Can Make: A Handprint Trophy
