

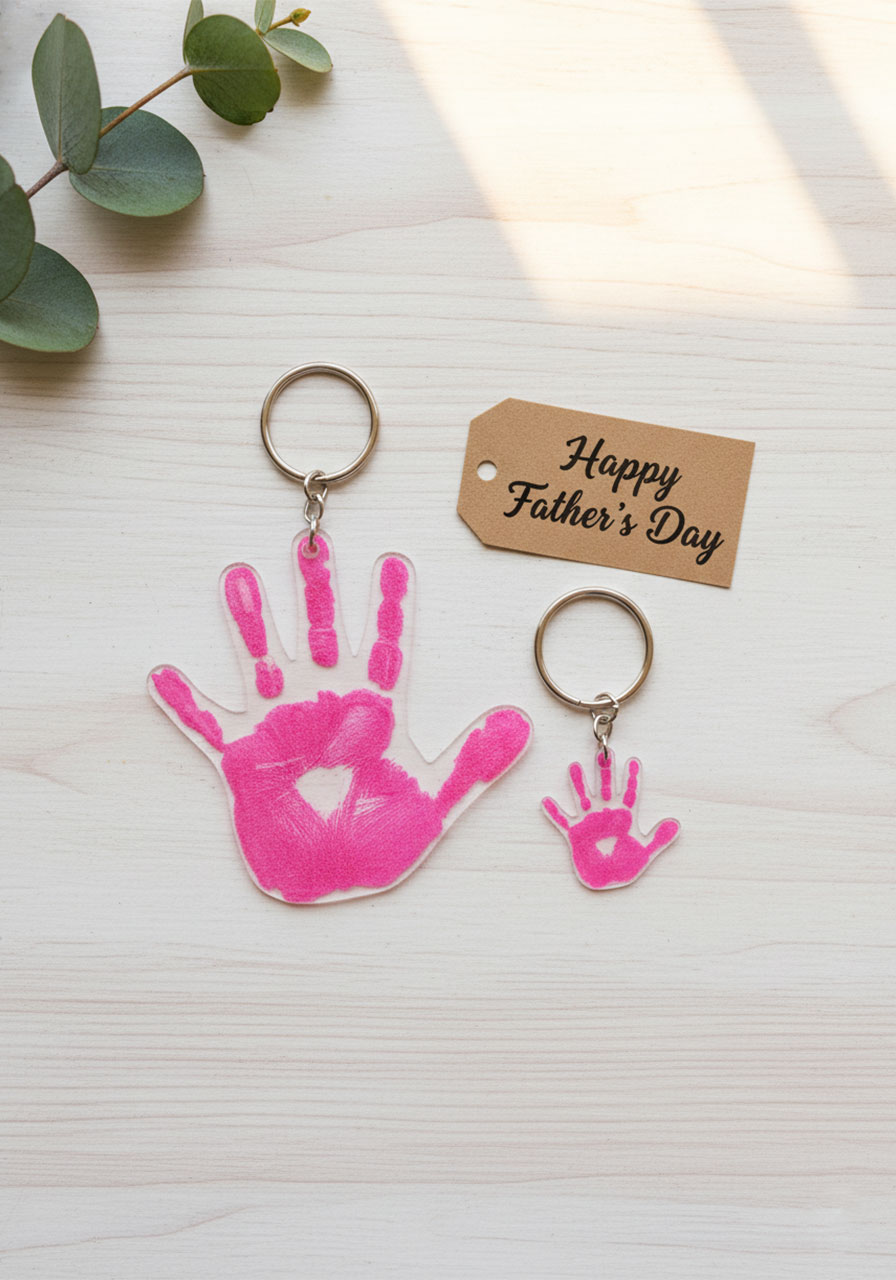
If you’ve been scrolling for a Father’s Day gift idea that’s personal, adorable, and won’t cost a fortune – stop right here. These DIY Handprint Keychains are exactly what you’ve been looking for.
Dad carries his keys every single day. Imagine him pulling them out and seeing a tiny, perfect version of your child’s hand dangling right there. That’s the kind of gift that gets kept forever – not in a drawer, but actually used.
And here’s the best part: kids can help make them. Even toddlers.
We’ve seen these keychains turn into instant tearjerkers at Father’s Day brunches, end-of-year teacher gift exchanges, and Christmas mornings. One mom told us she made a batch for the grandparents and everyone cried. In the best way.
Here’s exactly how to pull this off – step by step, no craft experience required.
Why This Craft Is So Incredibly Special
Most handprint crafts end up on the fridge for a few months before quietly disappearing. This one is different.
When you bake shrink film in the oven, the plastic shrinks down to about 20% of its original size – turning that big painted handprint into a tiny, durable, thick little charm. It’s almost like magic watching it happen.
The result is a keychain that’s tough enough to survive a car key ring for years. Dad can actually use it every day. Grandma can clip it to her bag. Teachers can hang it at their desk.
It’s a tiny piece of your child – preserved exactly as they are right now – that someone gets to carry with them everywhere.
That’s what makes it hit differently.

Who This Craft Is Perfect For
This project is ideal for parents with young children (ages 2 and up) who want to make a meaningful, handmade gift without spending hours on a complicated project.
It’s also a fantastic classroom craft for teachers doing a Father’s Day or Mother’s Day activity. The steps are easy enough to manage with a group – just have wet paper towels on standby!
Gift-giving occasions where this keychain absolutely shines:
- Father’s Day
- Mother’s Day
- Christmas and holiday gifts for grandparents
- End-of-year teacher appreciation gifts
- Birthdays for anyone who loves that little one
What You’ll Need
The supply list is short and inexpensive. Most of these can be found at your local craft store or ordered online.
Clear Shrink Film Sheets – Use the clear version. You’ll be able to see the handprint right through it, which makes the finished keychain look polished and professional.
Apple Barrel Indoor/Outdoor Gloss Paint – This specific paint is key. It sticks to the plastic properly. Other acrylic paints have been known to peel right off, so stick with this one.
Mod Podge (Gloss Finish) – This seals the paint so it doesn’t scratch off during everyday use.
A paintbrush – Medium-sized works great for painting little hands.
Scissors – Smaller craft scissors make cutting around the fingers much easier.
A Sharpie marker
A hole punch
Parchment paper
A baking sheet
Key rings – To attach once the keychain is done!
Pro tip: Lay everything out before you bring the kids in. Once the paint comes out, things move fast.

How to Make DIY Handprint Keychains – Step by Step
Step 1: Paint Your Child’s Hand
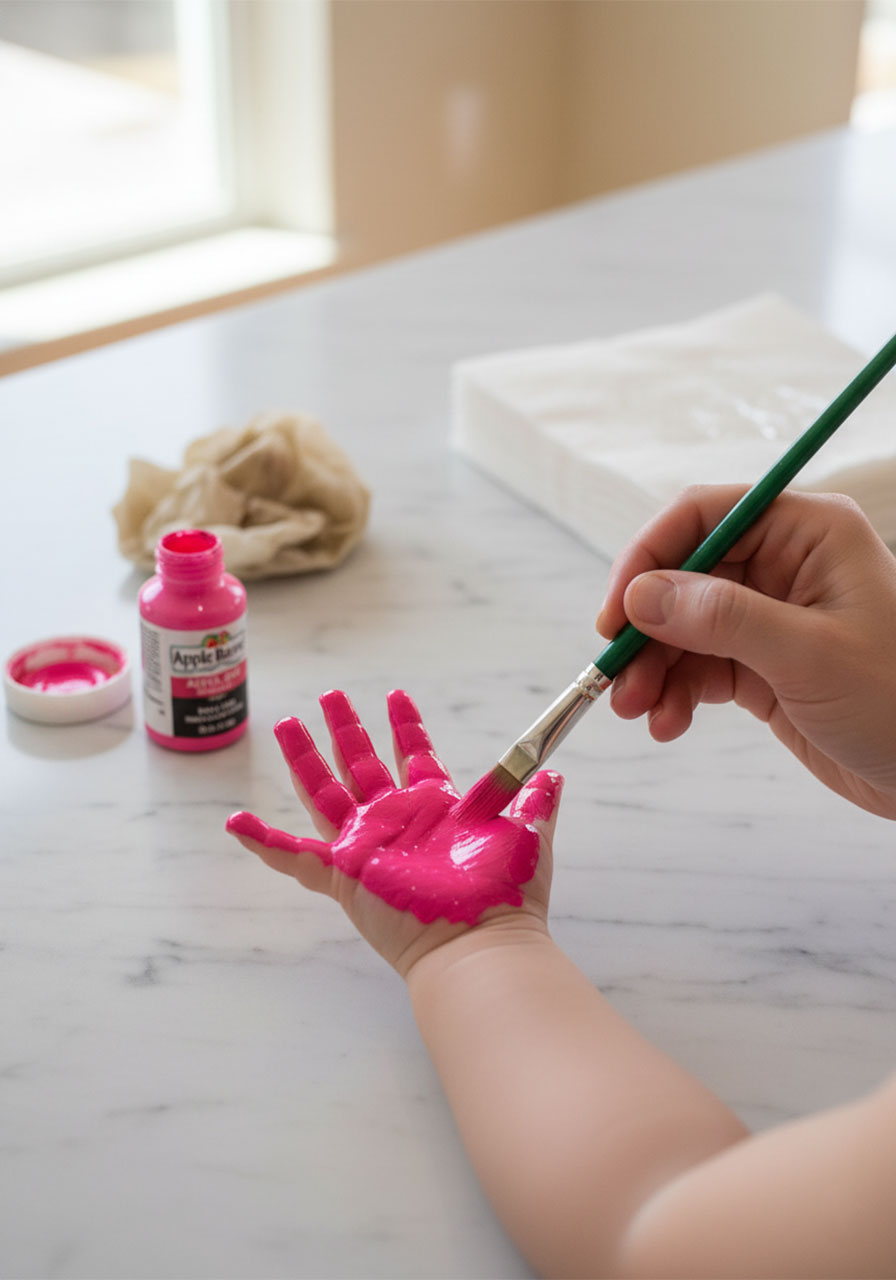
Dip your brush into the paint and coat your child’s entire hand – palm and all fingers.
You want a solid, even layer of paint. Not too thick (you’ll lose the fine lines of their palm), and not too thin (you want full coverage). One smooth layer is the sweet spot.
Have a damp paper towel nearby. Kids tend to panic the moment their hand is covered in paint, and you’ll want to move quickly to the next step before anyone freaks out.
Step 2: Press the Hand Onto the Shrink Film
Gently guide your child’s painted hand down onto the shrink film sheet, paint side down.
Press each finger individually to make sure the whole print transfers. Don’t wiggle or slide – just press straight down and lift straight up.
If your first print doesn’t turn out perfectly, no worries. That’s what extra film sheets are for. Make a few – you’ll want backups anyway for all the grandparents!
Wash your child’s hand right away while the handprints dry completely.

Step 3: Add the Name and Year
Once the paint is fully dry (give it at least 20-30 minutes to be safe), flip the shrink film sheet over to the blank side.
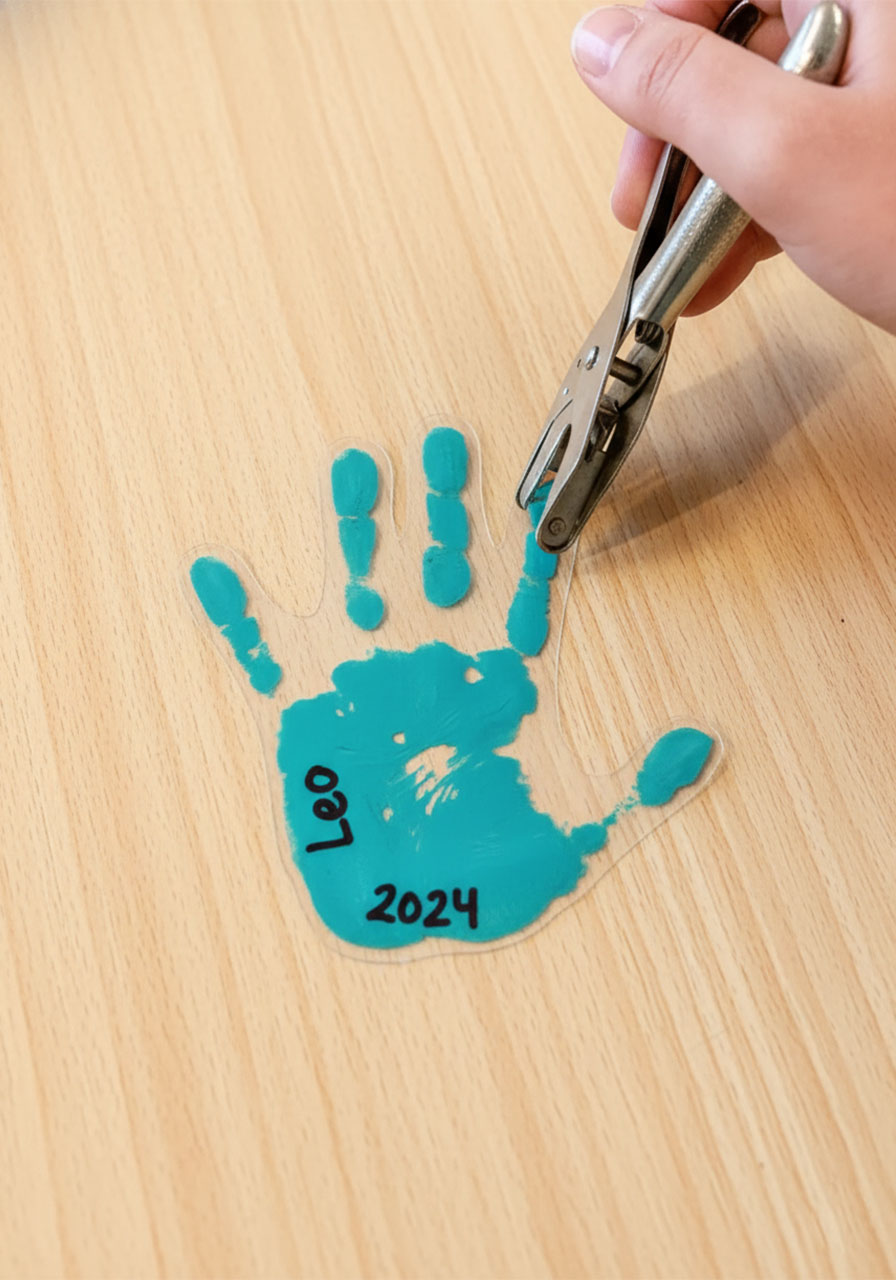
Use your Sharpie to write your child’s name and the year along the base of the palm. Writing on the back means the text will appear on the front of the finished keychain – neat and readable.
Keep the letters fairly large. Remember, everything is about to shrink down dramatically, so what looks big now will end up perfectly sized.

Step 4: Cut Out the Handprints
Time to cut! Use a smaller pair of scissors for better control around the fingers.
You can cut in between each finger if you want the classic handprint look. Just make sure you don’t cut the fingers too narrow – thin strips of plastic can curl and fuse together in the oven, which is a bummer after all that work.
If cutting between every finger feels too fiddly, you can also cut around the outer edge of the whole hand shape and leave the finger gaps filled in. It still looks adorable.

Step 5: Punch the Hole BEFORE Baking
This step is easy to forget – don’t skip it!
Use your hole punch to make a small hole in one of the middle fingers (the middle, ring, or pointer finger all work well). This is where the key ring will attach.
The hole needs to go in before baking because the plastic becomes almost impossible to punch cleanly once it’s been shrunk and hardened.
Step 6: Arrange on a Parchment-Lined Baking Sheet
Line your baking sheet with parchment paper. Place each cut-out handprint marker-side down, paint-side up.
Give each piece plenty of room. During baking, the plastic will curl, twist, and move around before it flattens out – and if two pieces are too close together, they can fuse. Spread them out generously.
Step 7: Bake at 325°F for 2–3 Minutes
Preheat your oven to 325°F. Once it’s fully up to temperature, place the baking sheet inside and watch through the oven window.
Here’s what’s going to happen: the handprints will start curling, folding, and going completely wild. It looks alarming. It is actually totally fine.
After about 2–3 minutes, the plastic will suddenly relax and lie flat. That’s your cue – they’re done! Pull the sheet out immediately.
If any piece is still a little wavy, gently press it flat with a spatula right away, while it’s still hot. Work fast – once the plastic cools, it hardens and you can’t reshape it without risking cracking.
If two pieces got stuck together in the oven: use two butter knives to carefully pry them apart while they’re still warm. It’s worth a try before tossing them.


Step 8: Seal with Mod Podge
Let your keychains cool for a few minutes, then brush on a coat of Gloss Mod Podge over the paint side.
This protective layer is what keeps the paint from scratching off after months of being in a pocket or bag. The gloss finish dries clear and shiny, making the keychain look even more polished.
Let it dry completely before handling.

Step 9: Attach the Key Ring
Thread a key ring through the punched hole and you’re done!
The keychain is ready to gift. Wrap it in a small box, tie it with a ribbon, or just hand it over – it speaks for itself.
Tips for Getting the Best Results
After making these with kids of all ages, here are the things that make the biggest difference:
Use Apple Barrel Gloss paint specifically. Other paints – even other acrylics – may not adhere properly to the plastic surface. This one has been tested and works.
Stick with clear shrink film. Frosted film works, but you lose that beautiful see-through effect that makes the handprint look so clean and crisp.
Don’t rush the drying time. If the paint isn’t fully dry before you add the Sharpie or start cutting, you risk smearing everything.
Make multiples in one session. Once you have the paint out and the film ready, it’s just as easy to make six as it is to make one. Extra keychains = gifts for grandma, grandpa, aunts, and teachers.
Stay at the oven. The baking window is short. Don’t walk away – 30 extra seconds can mean the difference between flat and perfectly shaped, or overdone and stuck.
Can You Do a Footprint Instead?
Yes – and it’s absolutely adorable.
The process is the same: paint the foot, press onto the film, cut, punch, bake, and seal. Footprint keychains are especially sweet for baby’s first Father’s Day or Mother’s Day.
Fair warning though: painting a toddler’s foot is significantly more chaotic than painting their hand. Tiny feet are ticklish. Things get giggly fast. Budget extra time and extra paper towels if you go this route.
The footprint keychains are worth it – just go in prepared.
How to Turn This Into a Group or Classroom Activity
Teachers, this one’s for you!
This craft works beautifully as a Father’s Day or Mother’s Day classroom project. Here’s how to run it efficiently with a group:
Set up an assembly line: one station for painting, one for pressing, one for drying.
Have paper towels and a small bowl of water at every station for quick cleanups.
Let the handprints dry overnight before adding names with Sharpie.
Do all the cutting yourself (or have an adult helper) – scissors and little fingers don’t mix.
Bake them in batches at the end of the day, away from the kids.
Send each child home with their finished keychain in a small bag with a note about what it’s made of. Parents will be floored.
More Ways to Personalize Your Keychains
The basic design is already beautiful, but here are a few ways to make yours even more unique:
Use multiple colors – paint different fingers in different shades for a rainbow effect.
Add a small heart or star stamp to the palm before pressing.
Write a short message on the back of the keychain with Sharpie after baking – “I love you, Dad” fits perfectly.
Make a set – one for Dad’s car keys, one for his work bag, one for Grandpa.
Use seasonal colors – red and green for Christmas, pastels for Easter, orange for fall birthdays.
Frequently Asked Questions
Can I use any shrink plastic, or does it have to be a specific brand?
Any clear shrink film should work for this project. The key detail is choosing clear over frosted – you want to be able to see the handprint through the plastic for that polished look.
What if the handprint doesn’t come out clearly?
This usually happens when there’s either too much paint (blobby, loses detail) or too little (gaps in the print). Aim for an even, medium layer of paint and press each finger gently but firmly. Practice on paper first if you’re unsure.
Do I have to use the oven? Can I use a heat gun?
A heat gun or embossing heat tool can work, but results are less predictable. The oven gives you more even, consistent heat which is much easier to control – especially when you’re working with multiple pieces at once.
How durable is the finished keychain?
Very! Once sealed with Mod Podge, these keychains hold up well to daily use. The paint doesn’t scratch easily and the plastic is thick and strong after baking. Some families still have theirs years later.
My keychains came out wavy – what did I do wrong?
They probably needed a few more seconds in the oven, or needed to be flattened with a spatula right after coming out. Next time, keep your spatula ready at the oven door so you can press them flat the second they come out.
The Finished Gift – What to Expect
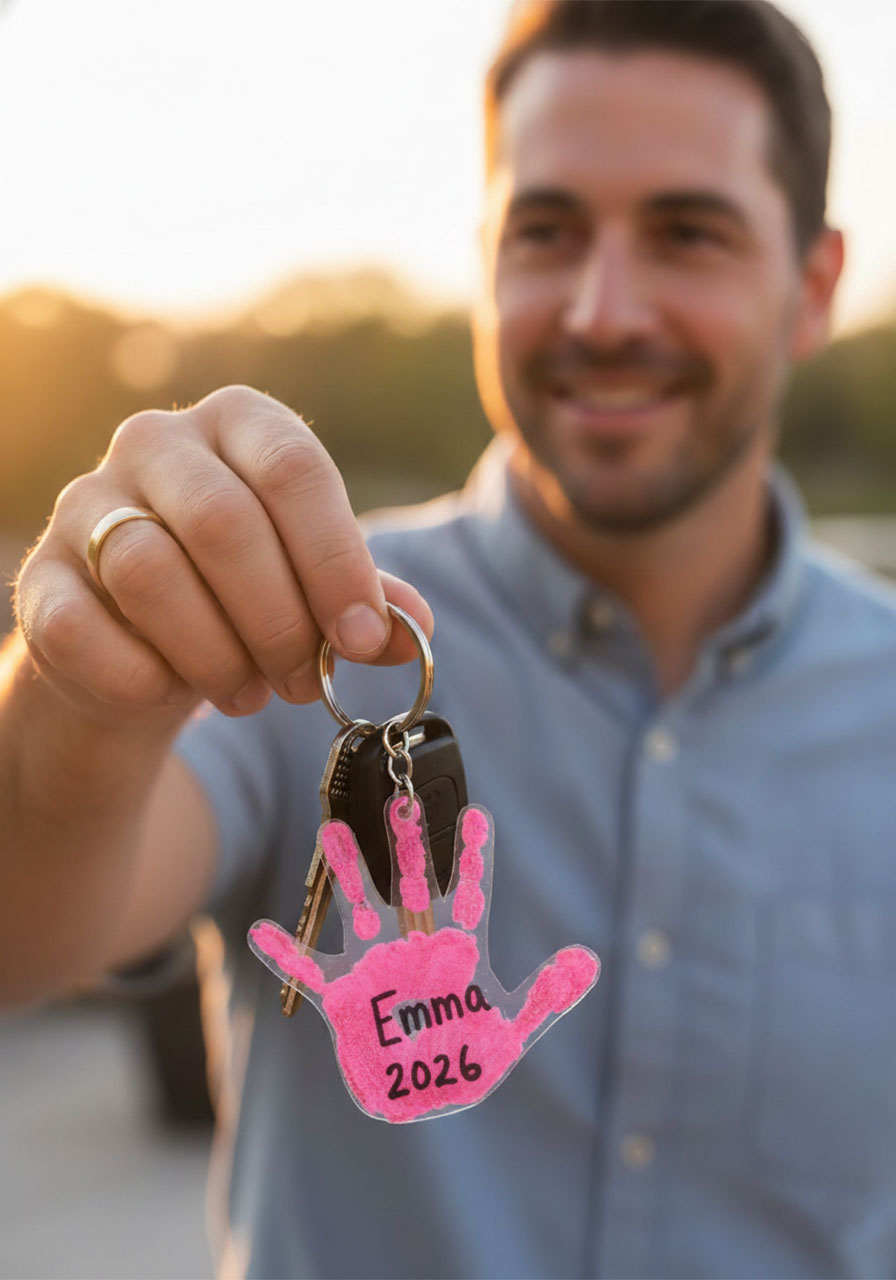
Once everything is assembled, you’re going to have a small, thick, shiny keychain charm with your child’s perfectly preserved handprint on it.
The paint color will stay vivid. The name and year will be clear. And it will be tiny – remember, the shrink film reduces to about 20% of its original size, so what started as a full-sized handprint becomes a perfectly palm-sized charm.
It’s the kind of gift that gets noticed immediately. The kind that gets brought up years later. The kind that, honestly, dads tend to never take off their key ring.
A tiny piece of your child, right there in his pocket, every single day.
That’s a pretty great Father’s Day gift.
More Father’s Day Ideas to Keep the Fun Rolling:
10 Reasons to Make This Colorful Father’s Day Popsicle Stick Wall Hanging With Your Kids
A “Corny” Father’s Day: How to Make a Pop-Up “Pop-Corn” Card for Dad
How to Make a DIY #1 Dad Award Ribbon for Father’s Day (Kids Will Love This!)
Make Dad Feel Like Royalty: The “Dad, You Are My King!” DIY Pull-String Father’s Day Card
The Cutest 5-Minute Father’s Day Gift Wrap Trick (That Looks Like You Tried Super Hard)
Grand Slam Pop-Up: The 3D Baseball Father’s Day Card Your Kids Can Actually Make
The Cutest Father’s Day Craft Kids Can Make: A Handprint Trophy
