If you’re looking for a sensory activity that will keep kids entertained for hours, moon sand is your new best friend. It’s soft. It’s moldable. It crumbles apart in the most satisfying way. And the best part? You can whip up a whole batch in under 10 minutes with just two ingredients you probably already have at home.
This is one of those activities where kids don’t even realize how much they’re learning – building hand strength, exploring textures, and sparking their creativity – all while having an absolute blast.
Whether you’re a parent looking for a rainy-day activity or a teacher planning a sensory station, this moon sand recipe is guaranteed to be a hit.
Let’s dive in!
What Is Moon Sand, Exactly?
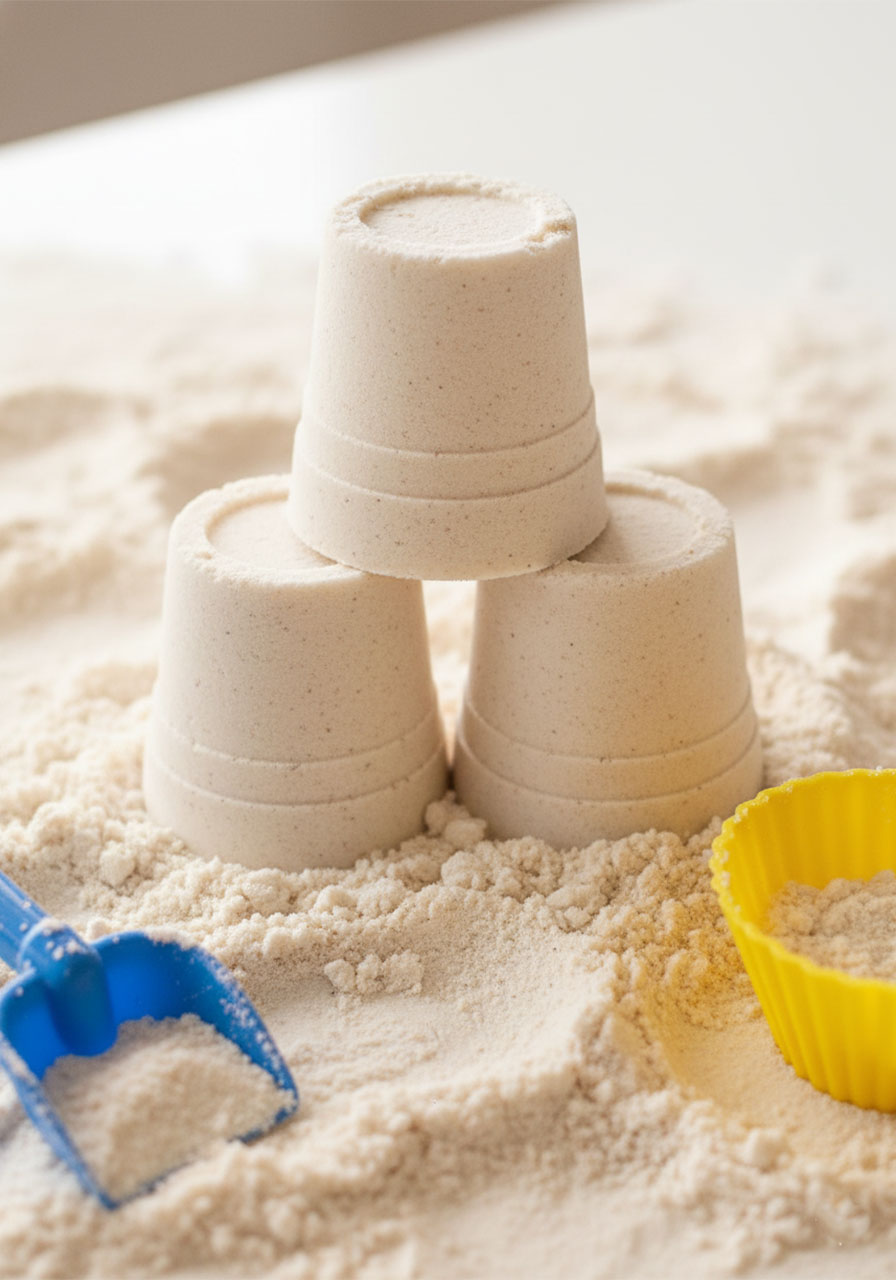
Moon sand is a homemade play sand that feels silky soft and crumbly – but here’s the magic: squeeze it in your hand and it holds its shape perfectly. Press it into a mold and it pops out clean as a castle. Then crumble it apart and it falls back into soft, fluffy sand. Over and over again.
It goes by a few names – kinetic sand, moldable play sand, sensory sand – but they all describe the same irresistibly satisfying texture that kids (and let’s be honest, adults too) can’t stop touching.
Unlike store-bought kinetic sand, this DIY version costs just a few dollars to make and takes only minutes to put together. No special equipment. No mess you can’t handle. Just pure, squeezable fun.


Why Kids (and Teachers!) Love This Activity
Moon sand isn’t just fun – it’s genuinely valuable for kids’ development. Here’s why it’s a favorite in homes and classrooms alike:
Sensory exploration: The soft, crumbly texture provides rich tactile stimulation – great for sensory play and sensory processing development.
Fine motor skills: Scooping, pressing, molding, and crumbling all build hand and finger strength.
Open-ended creativity: There are no rules. Kids can build, destroy, and rebuild to their hearts’ content.
Calming effect: The repetitive scooping and squishing has a genuinely soothing, almost meditative quality. Great for winding down an energetic group!
Easy cleanup: Spills vacuum right up, and it doesn’t stick to hands or surfaces the way playdough can.
It’s the kind of activity that starts as a 20-minute plan and turns into two hours of absorbed, independent play. You’re welcome.
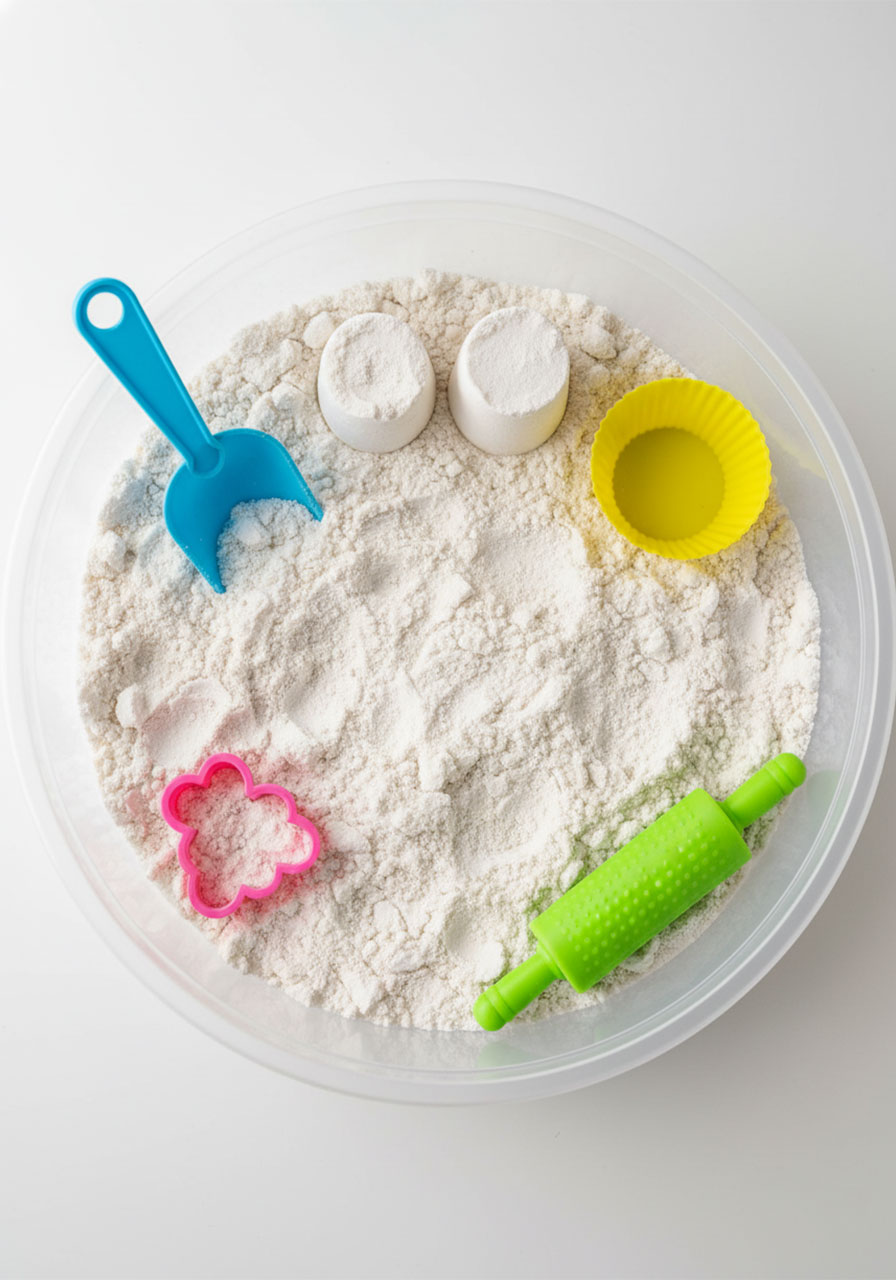
What You’ll Need to Make Moon Sand
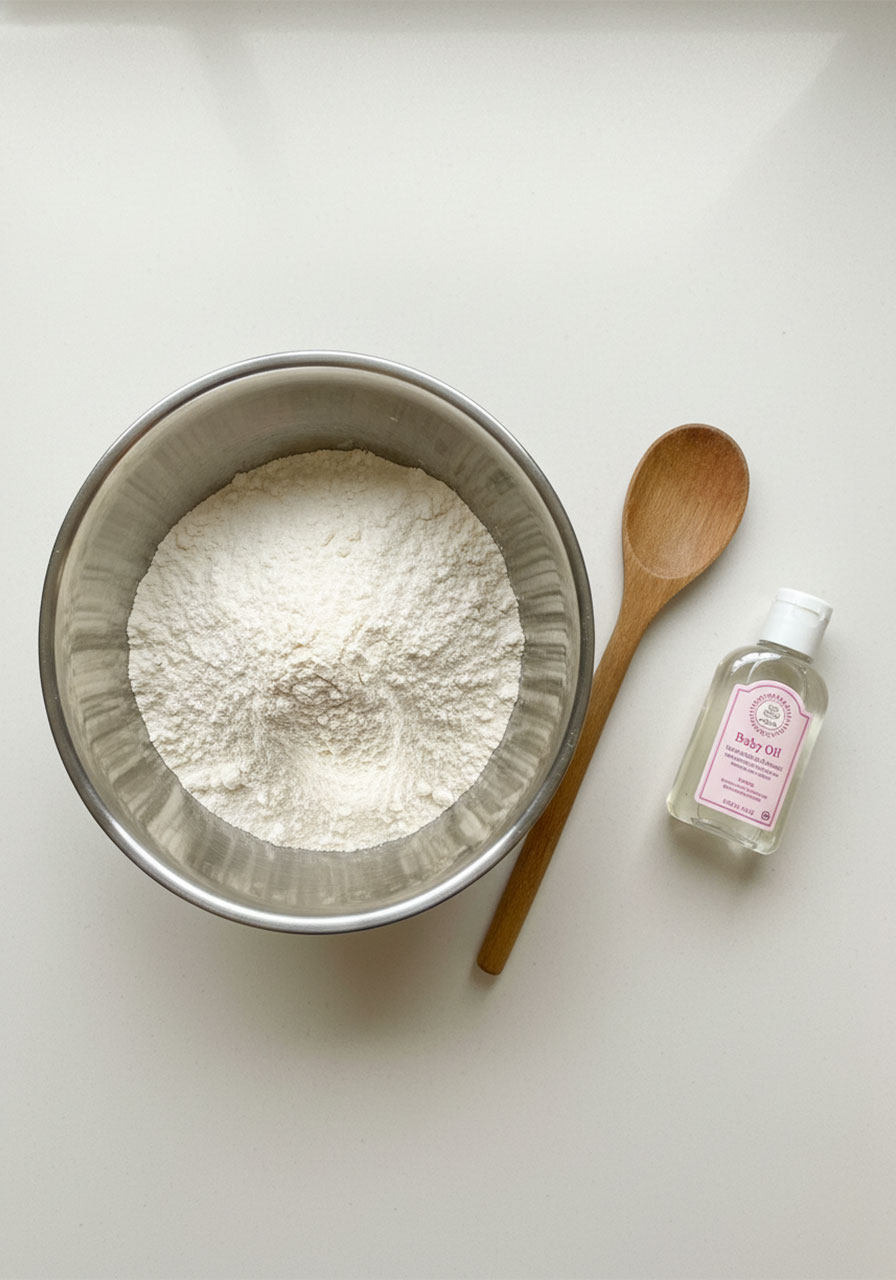
This recipe couldn’t be simpler. You only need two ingredients:
8 cups all-purpose flour
1 cup baby oil
That’s it. Seriously.
You’ll also want to grab:
A large mixing bowl
A wooden spoon
Measuring cups
An airtight container or zip-lock bag for storage
Beach toys, cookie cutters, or play dough molds for playing
What Kind of Oil Works Best?
Baby oil is the gold standard for this recipe. It gives the sand that perfectly silky, soft texture and it’s gentle on little hands. You can usually grab a bottle at the dollar store, which makes this activity incredibly budget-friendly.
Don’t have baby oil? No worries! Other oils work too:
Vegetable oil – works great, very common
Canola oil – another solid option
Coconut oil – works well, especially in warmer temperatures when it’s in liquid form
If you’re making this for very young children who might put it in their mouths, go with a cooking oil to keep it taste-safe. Baby oil is not edible, so for toddlers, vegetable or canola oil is the better choice.
Step-by-Step: How to Make Moon Sand
Ready? This is going to take about 10 minutes from start to finish. Here we go!
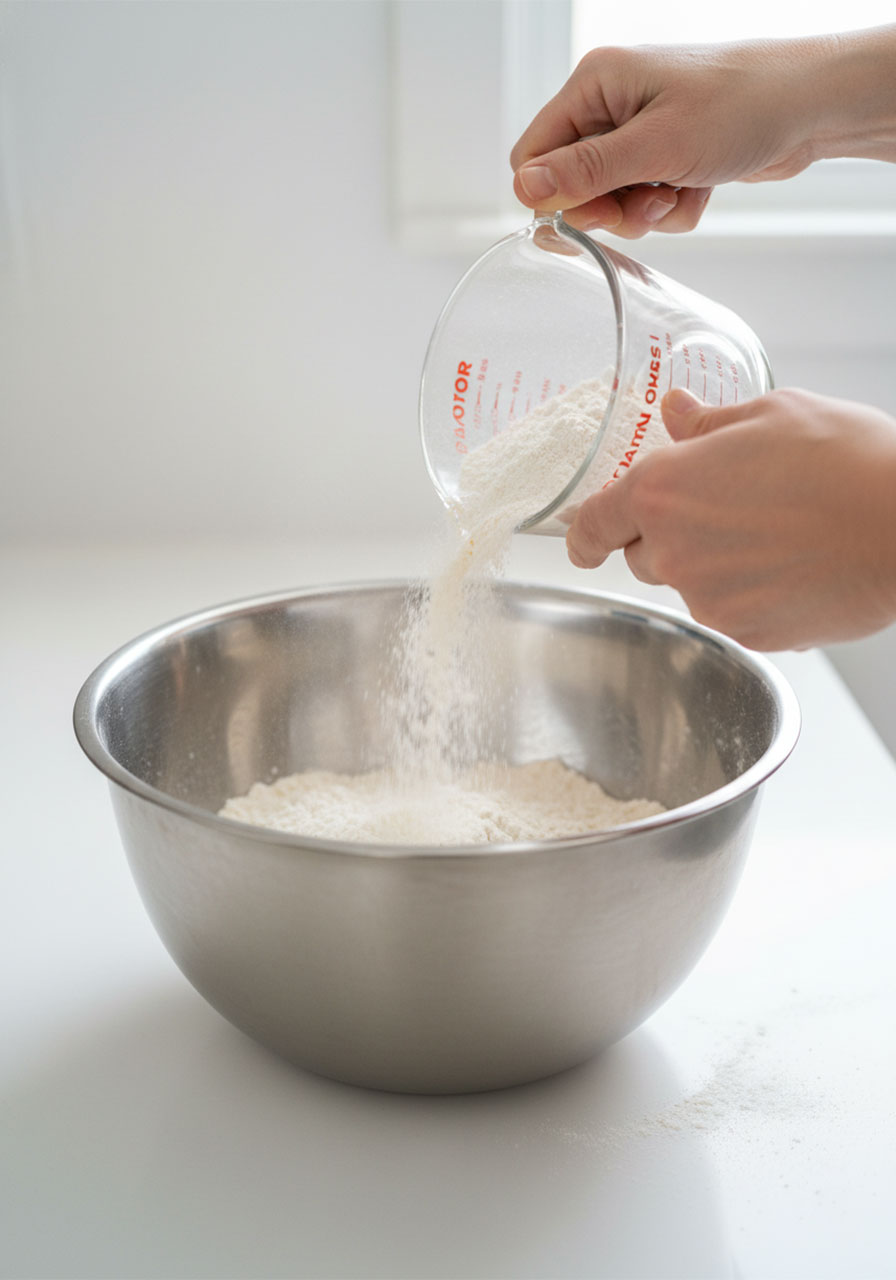
Step 1: Measure Your Flour
Pour 8 cups of all-purpose flour into a large mixing bowl. Make sure your bowl is big enough to stir comfortably – you’ll need the room.
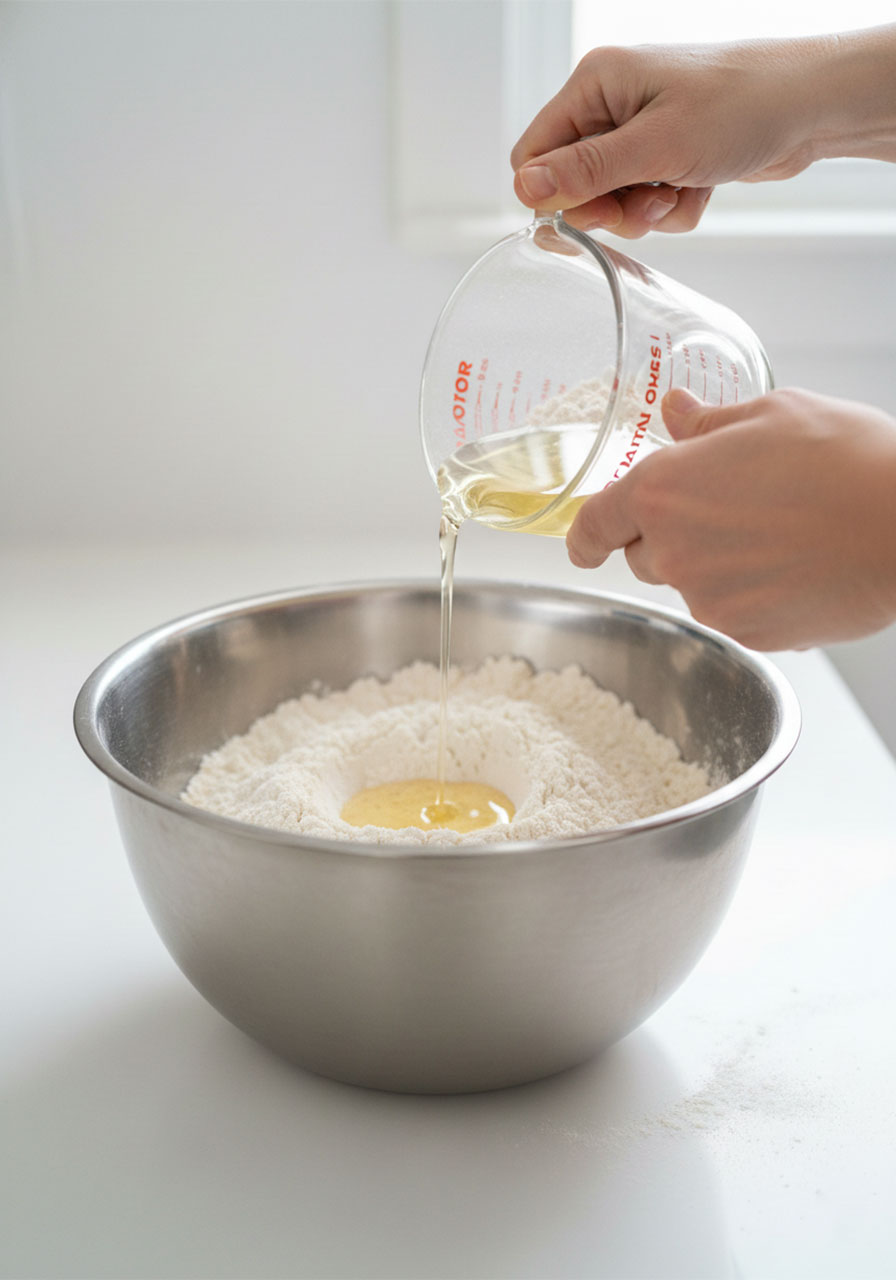
Step 2: Add the Baby Oil
Pour 1 cup of baby oil directly over the flour. You’ll immediately see the flour start to clump around the oil – that’s exactly what you want!
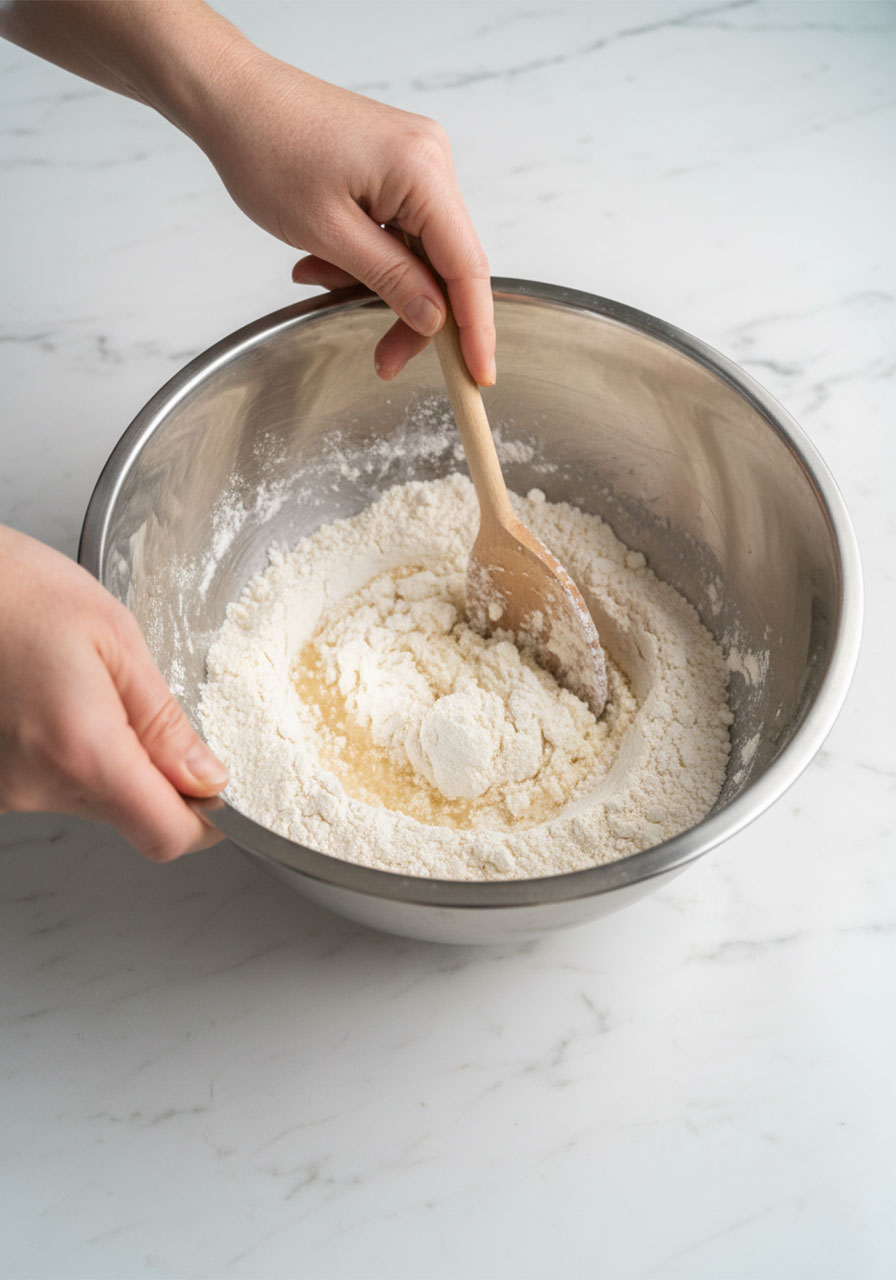
Step 3: Mix It Together
Using a wooden spoon, stir the flour and baby oil together. Keep stirring until the mixture looks and feels consistent throughout – no dry pockets of flour, no greasy clumps.
This usually takes about 5 minutes of good stirring. Toward the end, use your hands to knead the mixture and make sure everything at the bottom of the bowl is fully incorporated.
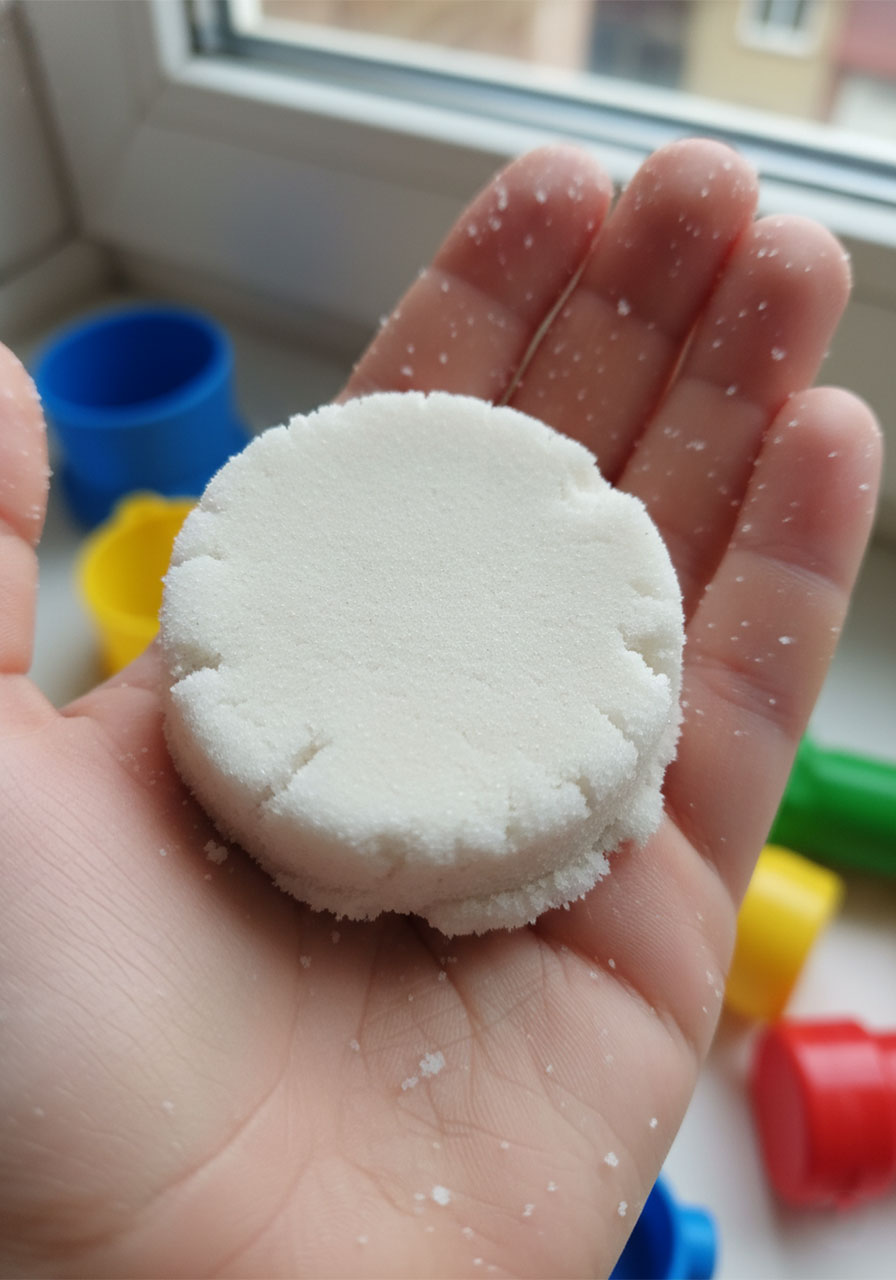
You’ll know it’s ready when you can scoop up a handful, squeeze it, and it holds its shape – then falls back apart when you break it open.
Step 4: Test the Texture
Grab a small handful and squeeze it in your palm. It should form a soft, smooth shape without crumbling immediately. When you break it apart, it should fall back into soft, fluffy sand.
If it’s too dry and won’t hold its shape at all, add a tiny splash more oil and mix again. If it feels too wet or greasy, sprinkle in a bit more flour.
Step 5: Play!
That’s it – your moon sand is officially ready! Set it out in a large container or on a baking tray lined with a drop cloth if you’re indoors, and let the building begin.
Tips for the Best Moon Sand Experience
After making this recipe a few times, we’ve picked up a few tricks that make it even better:
Play outdoors when you can. It’s not a disaster indoors (it vacuums up easily!), but the backyard means total freedom – no crumb anxiety.
Use a tray indoors. A rimmed baking sheet or a shallow plastic storage bin keeps the sand contained and makes cleanup a breeze.
Dry molds work best. If sand is sticking to your molds and not releasing cleanly, make sure the mold is completely dry. After a few uses, molds can get a bit sticky – just wipe them down and try again.
Divide and conquer. If you’re playing with more than one child, split the sand into individual containers so everyone has their own “sandbox.” Less fighting, more fun.
Encourage kids to help make it. The mixing process is half the fun! Kids love being involved in making their own activities, and stirring the bowl is a great job for little helpers.
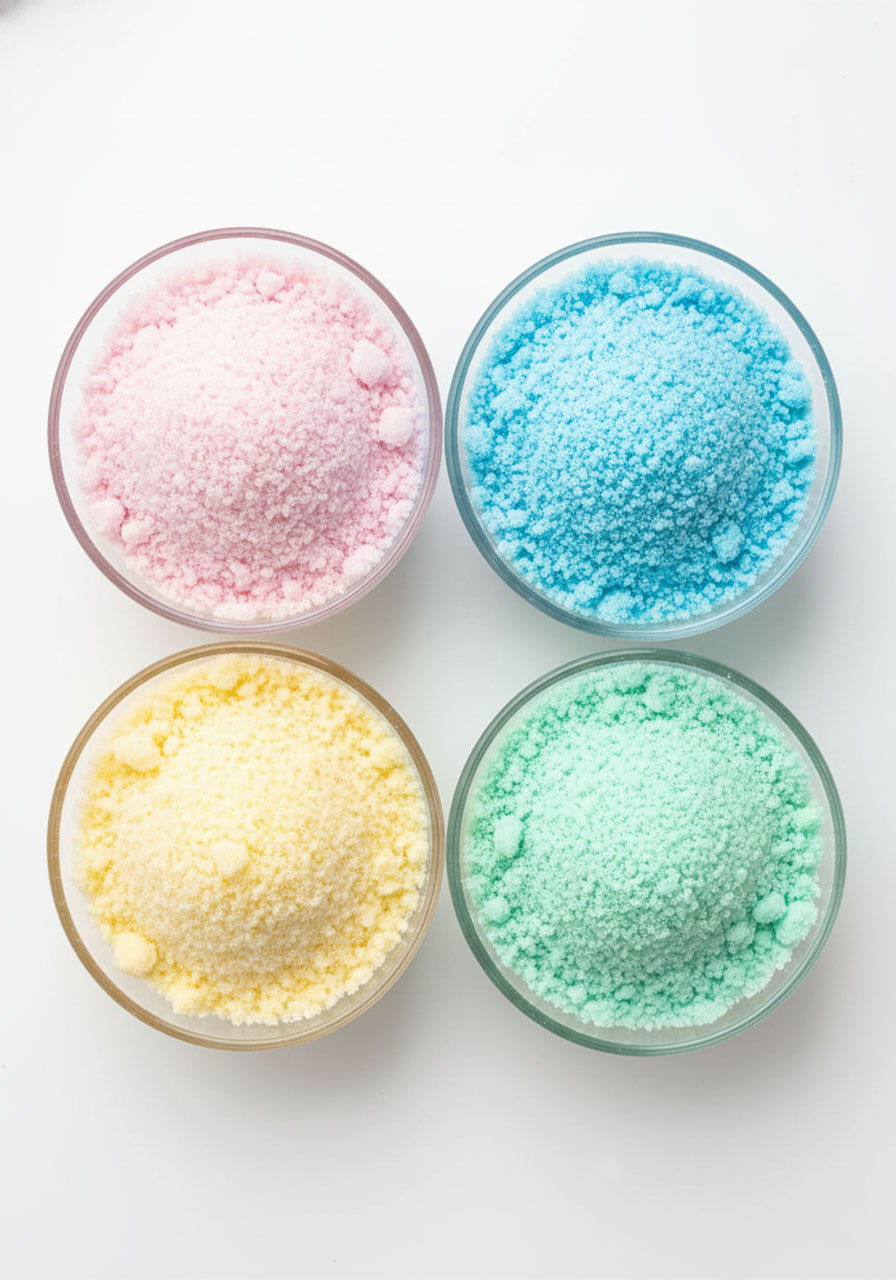
Can You Make Colored Moon Sand?
Absolutely – and it looks incredible! Here are three easy ways to add color:
Gel food coloring: Mix a few drops into the baby oil before combining with the flour. This gives you the most even, vibrant color.
Powdered tempera paint: After mixing your flour and oil, add 1 heaping tablespoon of powdered tempera paint and mix it in. This is a great classroom option because the colors are so bright.
Liquid food coloring: This works, but since it’s water-based, it won’t blend with the oil as evenly. You’ll get a more speckled, marbled look – which some kids actually love!
Want to make it a rainbow activity? Divide your batch into separate bowls before adding oil, then color each portion a different shade. Red, blue, yellow, green – the kids can mix them together and watch what happens. Bonus learning moment!
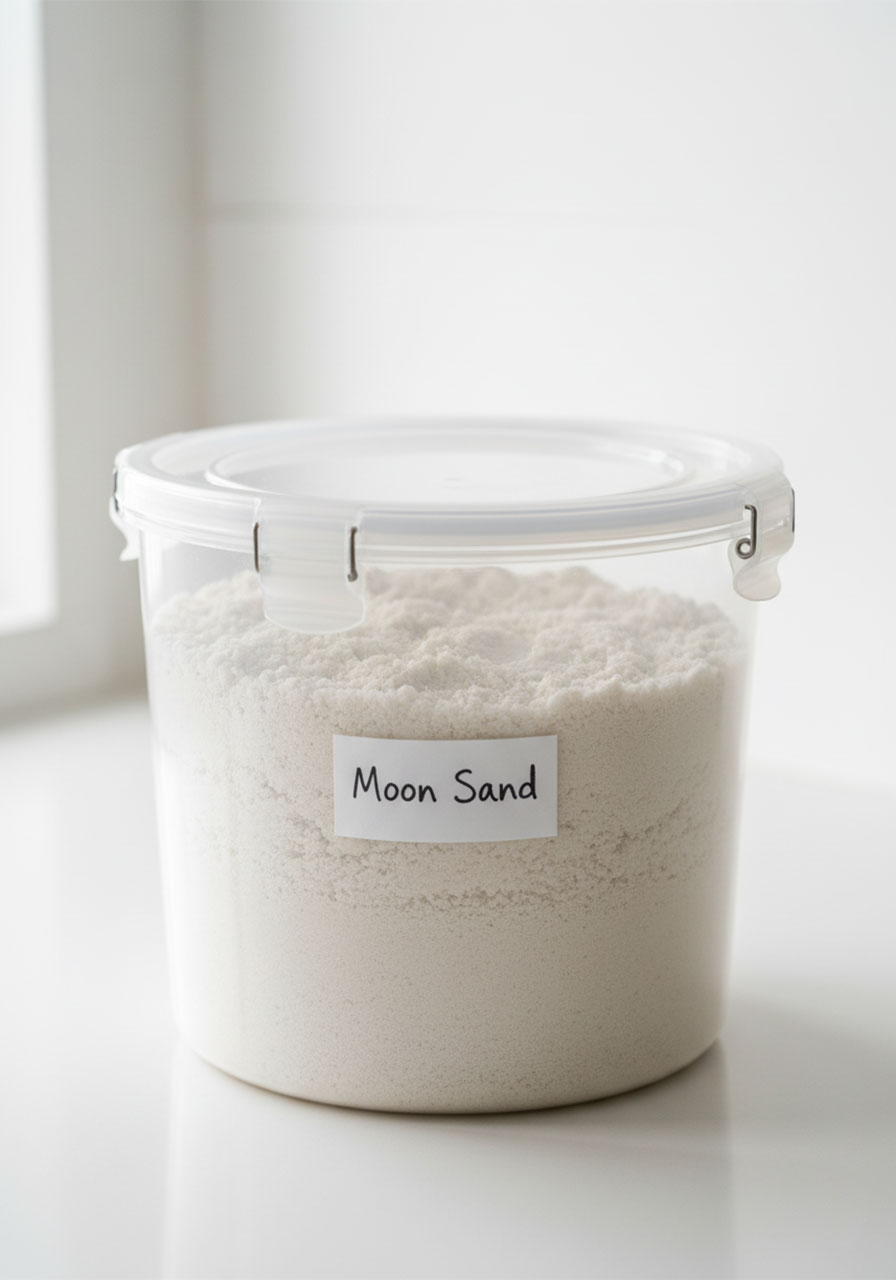
How Long Does Moon Sand Last?
With proper storage, your moon sand will stay fresh and playable for 2 to 4 weeks. Here’s how to keep it in great shape:
Store it in an airtight container or a sealed zip-lock bag between play sessions.
Make sure kids have reasonably clean hands before playing – dirt and debris shorten its lifespan.
If it starts to smell off or look dingy and grey, it’s time to toss it and make a fresh batch. (Which is easy enough that this is not a tragedy!)
The good news: a fresh batch costs under a dollar to make. So when it’s time to say goodbye to the old sand, it’s really just an excuse to make it all over again.
Fun Ways to Play With Moon Sand
Once you’ve made your moon sand, the play possibilities are endless. Here are some ideas to spark the imagination:
Build a sandcastle town: Use cups, bowls, and containers as molds to build towers, walls, and roads.
Make a sensory bin: Bury small toys or plastic animals in the sand and let kids dig them out. This is endlessly entertaining for toddlers and preschoolers.
Cookie cutter shapes: Press cookie cutters into packed moon sand for clean, satisfying shapes. Stars, hearts, dinosaurs – whatever you’ve got!
Pretend play: Set up a “beach” or “construction site” with small toy vehicles and figures. The sand is the perfect backdrop.
Sensory writing: Older kids can practice writing letters and numbers by drawing in the sand with a finger or a stick. Great for early literacy practice!
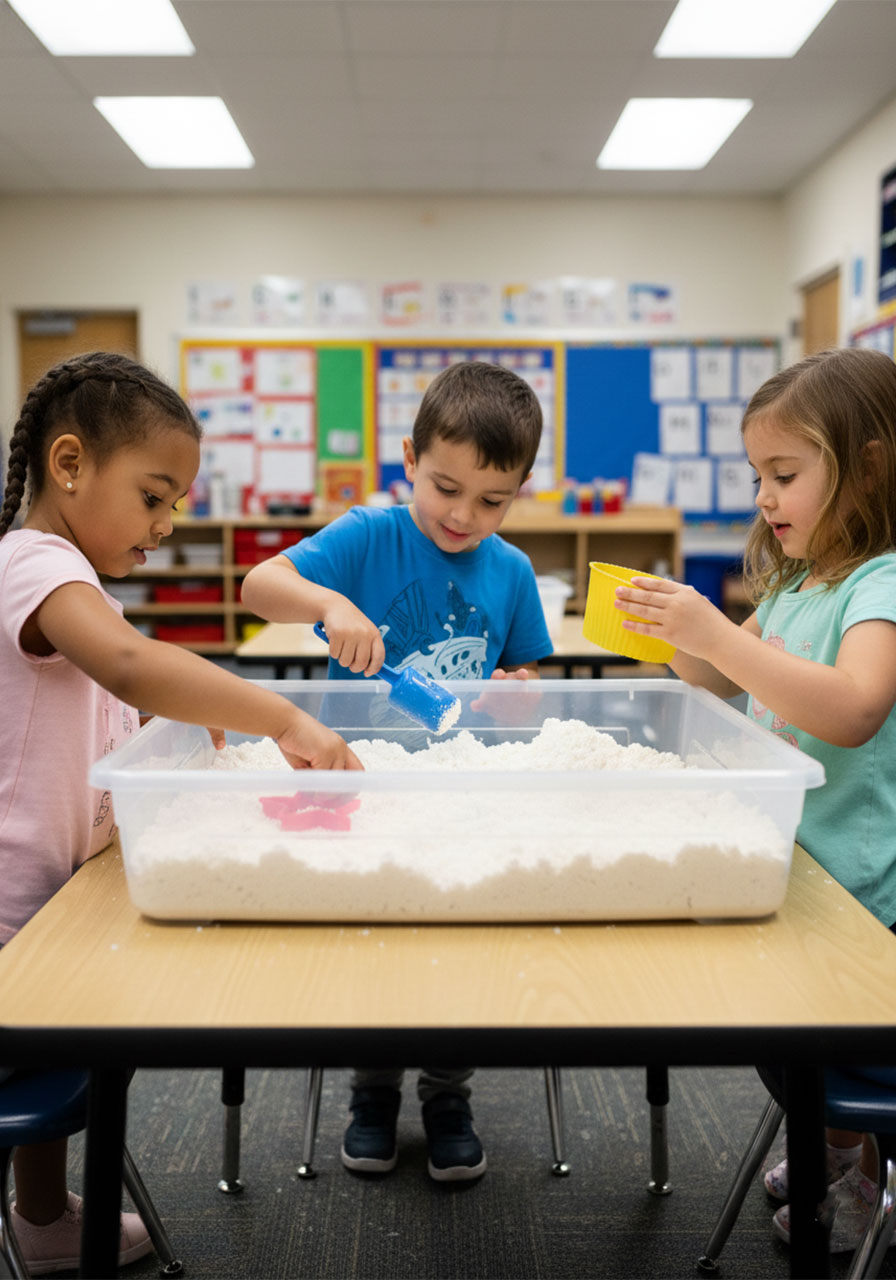
Moon Sand for the Classroom
Teachers – this one’s for you. Moon sand is an incredible addition to a sensory table or exploration station. Here’s why it works so well in a classroom setting:
It’s easy to make in bulk – just scale up the recipe (keep the 8:1 flour-to-oil ratio).
It’s low-allergen when made with flour and baby oil, though always check for flour sensitivities in your class.
It cleans up easily – a quick vacuum or sweep handles any spills.
It supports multiple learning areas at once: fine motor, sensory processing, math (measuring), science (exploring texture and properties), and creative play.
Kids can rotate through the station independently, which makes it great for free-choice or center time.
Tip for teachers: set a “2 cups per student” rule for individual portions at the station so everyone gets a satisfying amount of sand to work with without the whole batch getting too messy.
Moon Sand vs. Store-Bought Kinetic Sand: Is It Worth Making at Home?
Great question! Here’s a quick comparison:
Cost: Homemade moon sand costs roughly $1–2 per batch. A 2-pound container of store-bought kinetic sand typically runs $10–15.
Ingredients: You control exactly what goes in it – great for parents with specific concerns about chemicals or allergens.
Texture: Store-bought kinetic sand has a slightly finer, more satisfying “flow” to it. Homemade moon sand has a softer, fluffier texture – which many kids actually prefer!
Customization: Homemade wins here. You can add color, scent (a drop of essential oil is lovely!), or adjust the texture to your preference.
Lifespan: Store-bought lasts longer. Homemade lasts 2–4 weeks but is so cheap and quick to make that replacing it isn’t a hassle.
The verdict? For a fun, budget-friendly, customizable sensory activity – homemade moon sand is absolutely worth it.
Frequently Asked Questions
Is moon sand safe for toddlers?
Moon sand made with baby oil is not taste-safe. If you’re making this for children under 3 who might put it in their mouths, swap the baby oil for vegetable or canola oil to make it safer. Always supervise young children during play.
My moon sand is too dry. What do I do?
Add a tiny bit more oil – start with just a tablespoon – and mix thoroughly. Keep adding small amounts until the texture feels right. You want it to hold its shape when squeezed but crumble apart easily when broken.
My moon sand is too greasy. How do I fix it?
Sprinkle in a small amount of extra flour and knead it in until the texture balances out. Add flour gradually – a tablespoon at a time – until it feels right.
Can I add glitter to moon sand?
Yes! A sprinkle of fine glitter mixed in before playing makes for a gorgeous, sparkly sensory experience. Use cosmetic-grade glitter for safety, especially with young kids.
Does moon sand stain?
If you use colored moon sand (with food coloring or tempera paint), there’s a small chance it could stain fabric or carpet. Play on a tray or drop cloth indoors to be safe, and dress kids in play clothes.
Can I add scent to moon sand?
Absolutely! Add 2–3 drops of a kid-safe essential oil (lavender is lovely and calming!) to the baby oil before mixing. It turns moon sand into a full sensory experience – touch AND smell.
The Bottom Line
Moon sand is one of those rare activities that checks every box: it’s cheap, it’s easy, kids love it, and it keeps them engaged in genuinely meaningful play. Whether you’re setting up a backyard activity for a summer afternoon or building a sensory station for your classroom, this two-ingredient recipe delivers every single time.
Make a big batch, grab some molds, and get ready to be amazed at how long the kids stay entertained. And hey – if you squeeze a handful yourself, we won’t judge. It really is that satisfying.
Happy playing! 🏖️
Tried this moon sand recipe? We’d love to hear how it went! Drop a comment below and let us know what molds or color combinations your kids loved most.
More Summer Craft & Activity Ideas to Keep the Fun Rolling:
Easy Jellyfish Suncatcher Craft for Kids (That Looks Stunning in a Window!)
Paper Loop Pufferfish Craft: The Cutest 3D Summer Activity for Kids
Egg Carton Ladybug Craft Ideas Kids (and Teachers!) Will Absolutely Love
Pool Noodle Boats: The Easiest DIY Water Toy Kids Will Absolutely Love
Paper Plate Ice Cream Cone Craft: The Cutest Summer Activity for Kids
How to Make Beaded Pipe Cleaner Flowers (A Fun Kids Craft That Takes Under 10 Minutes!)