
There is something magical about watching jellyfish glide through the water. Those glowing, color-shifting bells. Those long, wispy tentacles trailing behind them like ribbons in the breeze. Every time we visit our local aquarium, the jellyfish tank stops us dead in our tracks.
And if your kids are anything like mine, they will stand at that tank for a solid ten minutes just… watching.
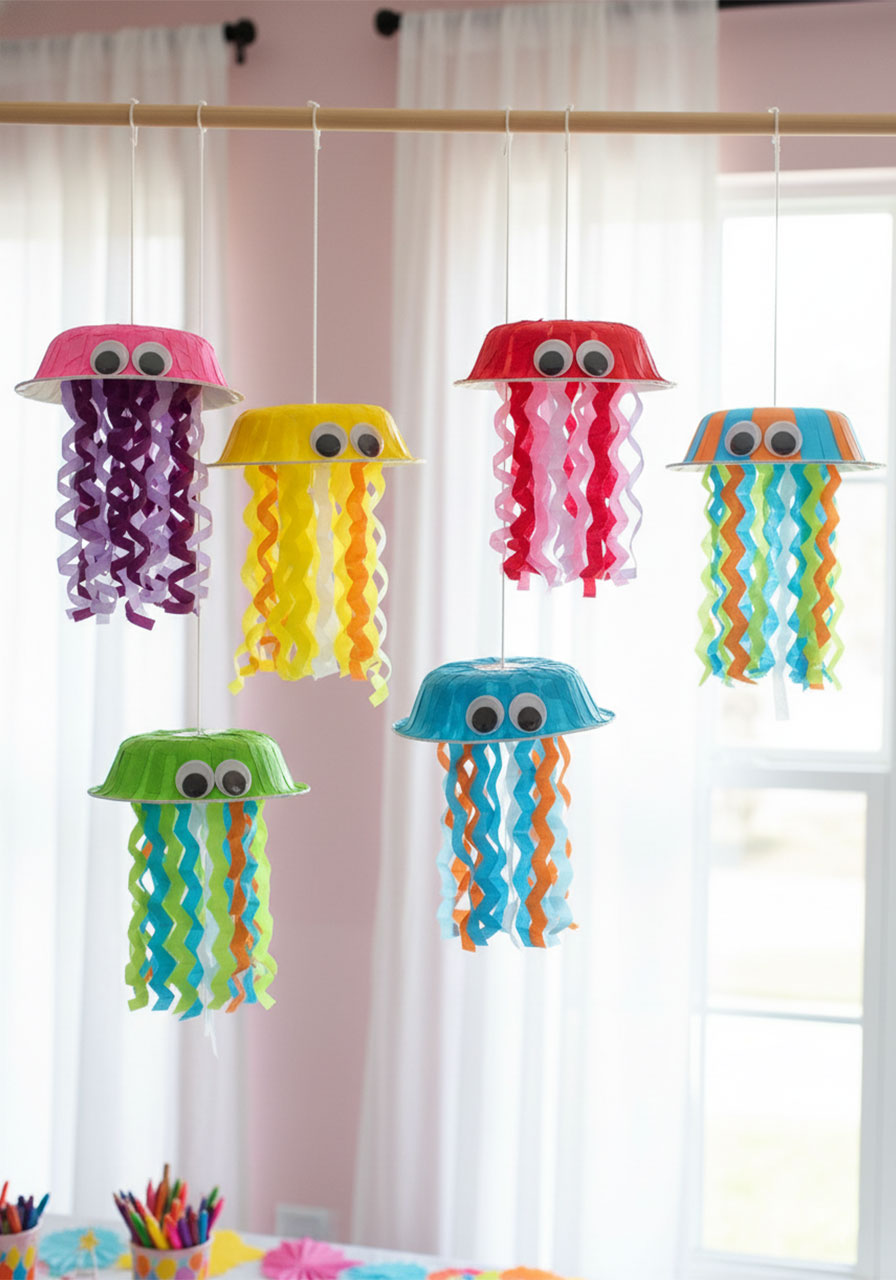
That moment of pure wonder is exactly what inspired this paper bowl jellyfish craft. It is bright, it is wiggly, it is outrageously cute, and – here is the part that made me do a little happy dance – it requires absolutely zero paint.
No paint means no mess. No mess means no stress. And no stress means you can actually enjoy making this with your kids instead of spending the whole time silently panicking about your kitchen table.
This craft is perfect for summer, an ocean-themed birthday party, a beach playdate, or honestly just a rainy afternoon when you need something fun to do. The end result is a hanging jellyfish decoration your kids will be so proud of. My daughter carried hers around by the string for the rest of the day, watching the tentacles jiggle and bounce. Total win.
Let’s dive in!

What You’ll Need
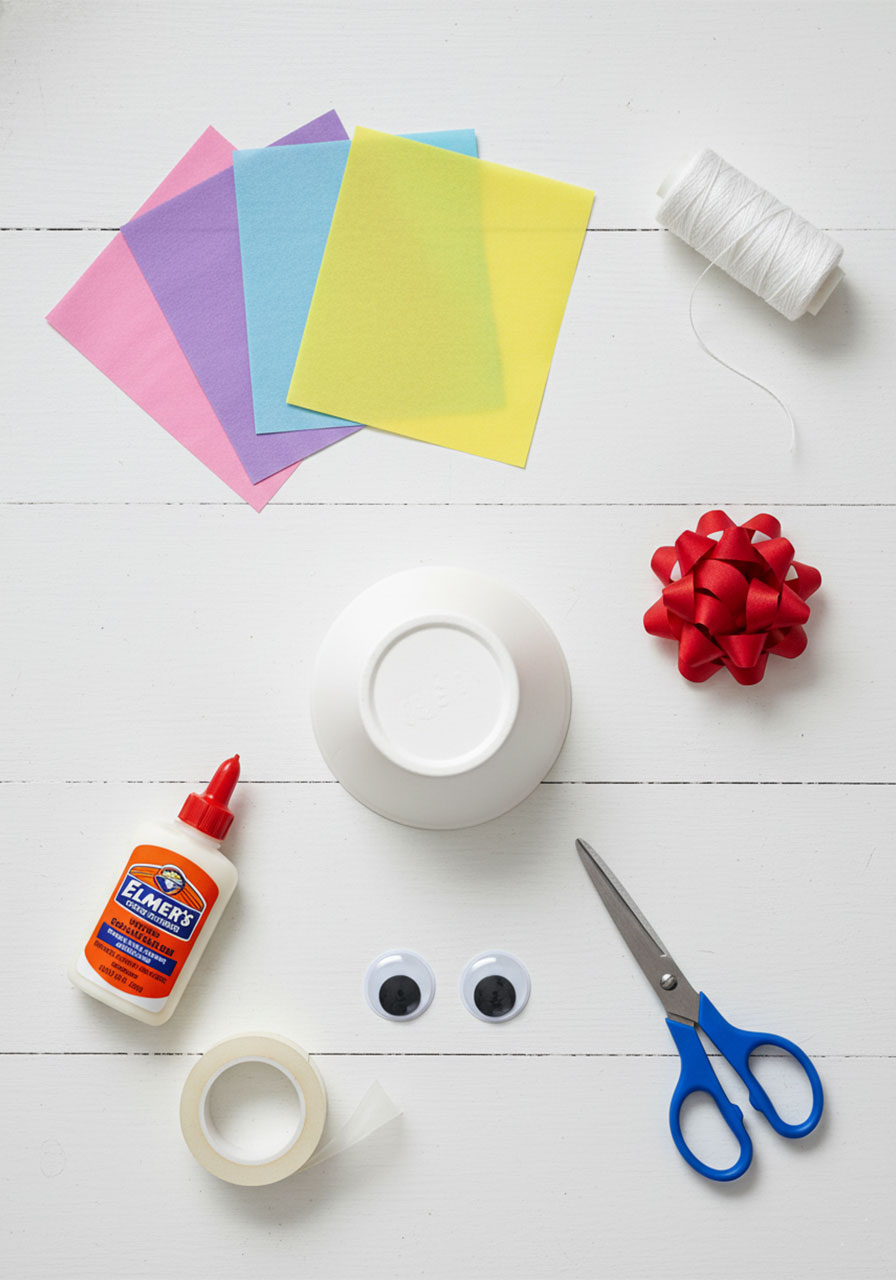
The supply list for this one is refreshingly simple. You likely already have most of this at home, and anything you don’t can easily be picked up at a dollar store or ordered online.
Small paper bowl
Tissue paper (in any colors you love – the more, the merrier!)
Self-adhesive curly gift bow (in matching or contrasting colors)
Googly eyes
White string (to hang it)
School glue
Packaging tape (or any strong tape)
Scissors
A quick note on colors: Do not overthink this! Jellyfish are naturally wild and colorful creatures, so there are no wrong choices here. Pink and purple? Gorgeous. Blue and yellow? Stunning. Rainbow everything? Absolutely go for it.

How to Make Your Paper Bowl Jellyfish
Step 1: Cut Your Tissue Paper into Squares
Start by cutting your tissue paper into small squares. They do not need to be perfectly even – a little variation actually makes the finished bowl look more textured and interesting, kind of like real jellyfish skin.
Plan to use at least two or three different colors. The more layering and color variety you add, the more vibrant and eye-catching your jellyfish will be. Think of it as creating your own little piece of underwater art.
This is also a great fine motor skills moment for little ones! Even toddlers can help tear tissue paper into rough pieces while older kids handle the scissors.
Step 2: Cover the Bowl with Tissue Paper
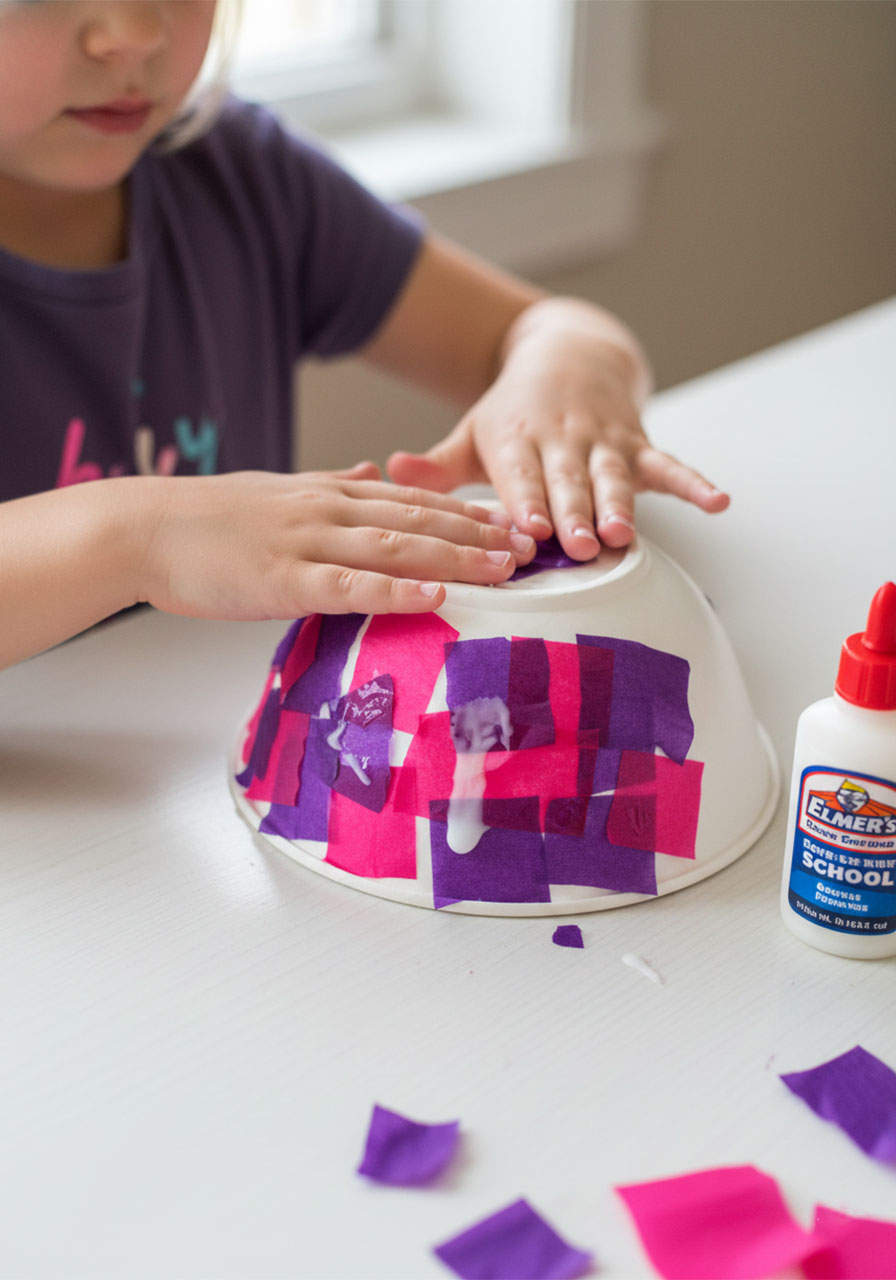
Flip your paper bowl upside down so the bottom is facing up. This rounded bottom will become the dome-shaped bell of your jellyfish.
Spread school glue all over the outside of the bowl – the bottom and all the way down the sides. Then start pressing your tissue paper squares on, overlapping them as you go to cover every inch of the bowl completely.
Work in sections and keep adding glue as needed. If any corners of tissue paper are popping up stubbornly, just dab a little extra glue on top and smooth them down with your finger.
Want an extra beautiful effect? Layer two or three tissue paper colors on top of each other. Where the colors overlap and the glue dries, you get these gorgeous translucent, jewel-toned patches that honestly look stunning.
Once you are happy with your coverage, set the bowl aside and let the glue dry completely. This is the perfect time for a snack break!
Step 3: Thread the String Through the Bowl
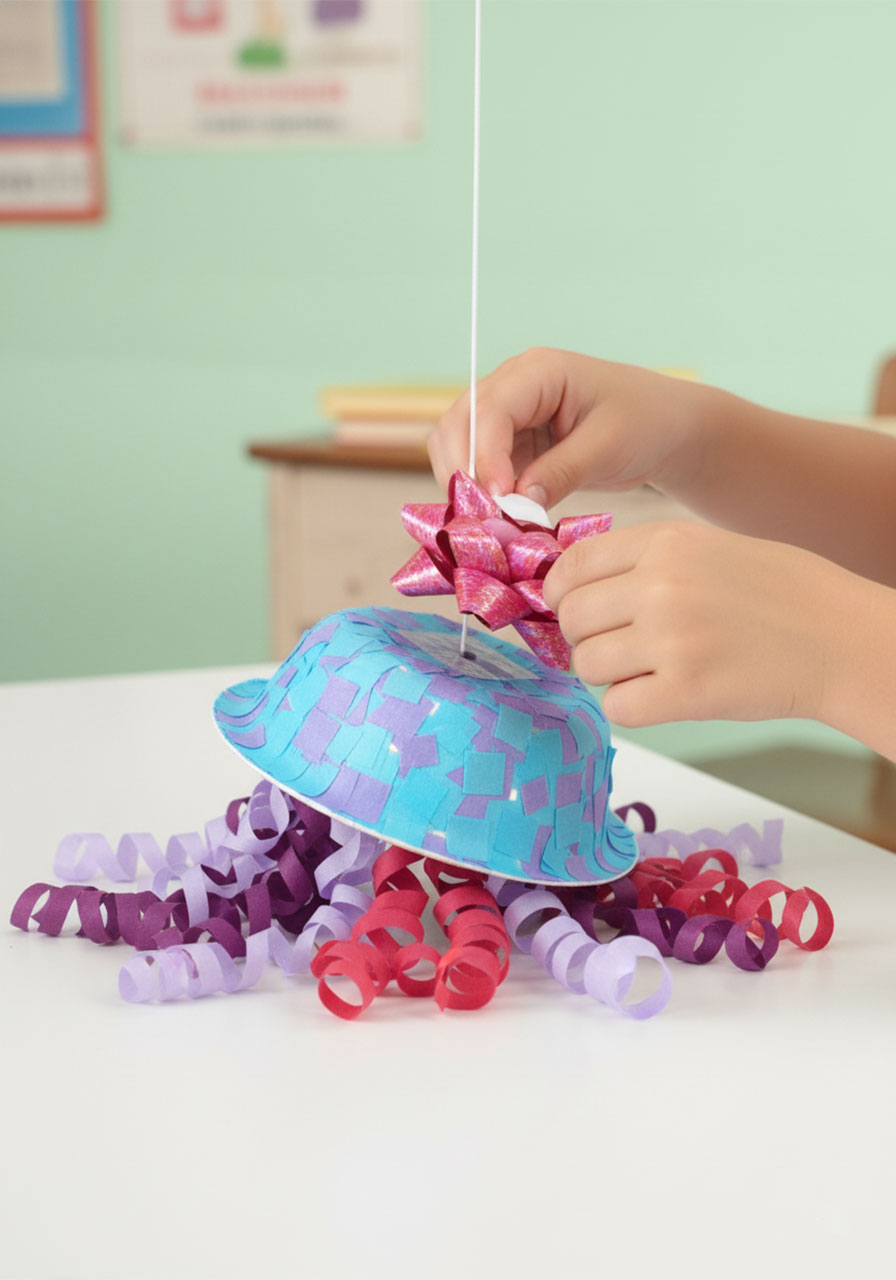
This step is a job for a grown-up. Use the tip of your scissors to carefully poke a small hole right in the center of the paper bowl (the very top of the dome when flipped upside down).
Thread your white string through the hole from the outside in, leaving a long tail on the outside for hanging. On the inside of the bowl, tie a secure knot at the end of the string so it cannot pull back through, then lay a piece of packaging tape right over the knot to hold it firmly in place.
Give the string a gentle tug to make sure it is not going anywhere. This is what will let your jellyfish hang and sway, so you want it solid!

Step 4: Attach the Curly Gift Bow for Tentacles
Here comes the most delightful part of this whole craft – the tentacles!
Peel the adhesive backing off your curly gift bow and press it firmly onto the inside of the bowl. Position it right in the center so when the jellyfish hangs, all those gorgeous curly ribbons cascade down evenly from the middle, just like real jellyfish tentacles floating through the water.
Self-adhesive bows stick really well, but if yours needs a little extra help, a small piece of tape inside the bow center will do the trick.
Now hold it up by the string and watch those tentacles move. Is there anything more satisfying? I think not.
Step 5: Add the Googly Eyes
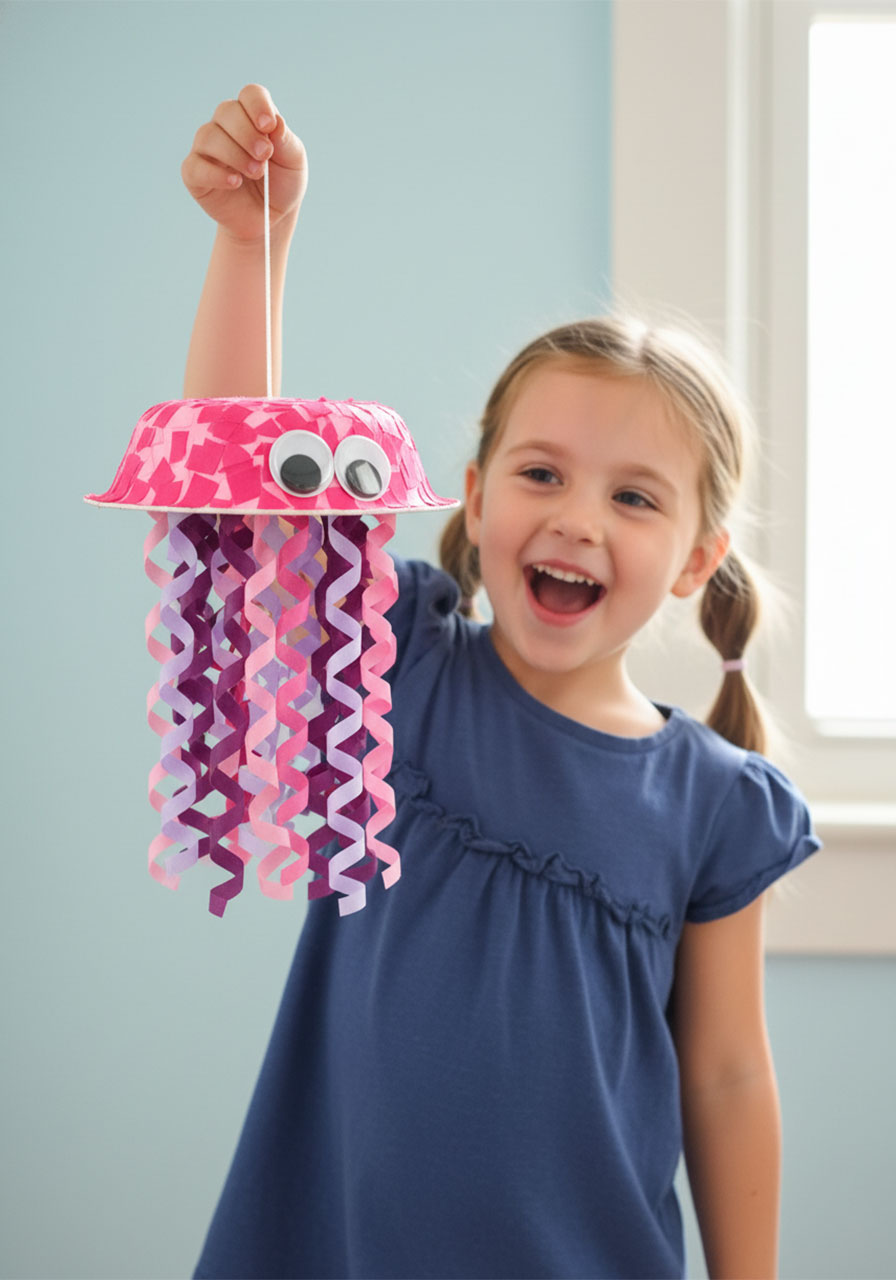
Almost there! Finish your jellyfish by gluing two googly eyes onto the front of the bowl dome.
Position them side by side near the bottom edge of the dome so they peek out adorably when the jellyfish is hanging. The bigger the googly eyes, the more personality your jellyfish will have!
Let the glue dry, then hold up your jellyfish and admire your work. Is it not the cutest thing you have ever seen?
Tips to Make Your Jellyfish Even More Amazing
This craft is already wonderful as-is, but here are a few easy ways to take it up a notch.
Try iridescent or metallic tissue paper.
Regular tissue paper is beautiful, but iridescent or shimmery tissue paper makes the jellyfish look like it is actually glowing. If you can find it at your local craft store, grab a pack. Your kids will be obsessed.
Mix ribbon colors intentionally.
If you want a cohesive, polished look, choose gift bow colors that match or complement your tissue paper colors. If you want maximum fun and chaos, mix every color imaginable. Both approaches are correct.
Make a whole school of jellyfish.
These look absolutely spectacular hanging in a cluster. If you are making these for a party, make six to eight of them in coordinating colors and hang them at slightly different heights from a branch, a dowel rod, or even a curtain rod. The effect is jaw-dropping.
Add more texture with curled ribbon.
Want even fuller, more dramatic tentacles? Cut additional strips of curling ribbon, curl them with scissors, and tape them inside the bowl alongside the gift bow. The layered ribbons give your jellyfish that gorgeous, flowing look you see in the aquarium photos.
Let kids personalize them.
Every jellyfish can have its own personality! One could have a wide smile drawn on with a marker, another could have three eyes, another could be teeny tiny using a mini paper bowl. The possibilities are endless.
Fun Ways to Use Your Jellyfish Craft
Once your jellyfish are finished and dry, the fun is just getting started. Here are some ideas for what to do with your beautiful creations.
Hang them as party decorations.
These are absolutely perfect for an ocean-themed birthday party, a Finding Nemo party, or any kind of summer celebration. String them up above the snack table or in a window and watch your guests’ faces light up.
Create a bedroom mobile.
Hang three or four jellyfish from a wooden dowel or a clothes hanger to make a dreamy bedroom mobile. They are especially magical if you can hang them near a window where the breeze will make them sway and swirl.
Use them for imaginative play.
My daughter spent an entire afternoon after making hers walking around the house holding it by the string, narrating underwater adventures while the tentacles swayed. Zero screens. Zero fights. Just pure imaginative play. That alone made this craft worth every minute.
Give them as gifts.
These make surprisingly sweet handmade gifts from kids to grandparents, teachers, or family friends. Tuck one in a bag with a little card that says “Made just for you!” and watch the recipient melt.
Why This Craft Is Such a Win for Busy Moms
I want to take a moment to talk about why this specific craft has become a go-to in our house, because I think it deserves a little appreciation beyond just the cute factor.
First, the supplies are cheap and easy to find. We are talking paper bowls, tissue paper, and a gift bow – nothing exotic or expensive.
Second, the mess factor is genuinely minimal. A little school glue and some tissue paper scraps? That cleans up in under two minutes. Compare that to a paint craft, which requires covering the table, changing clothes, and scrubbing fingers for ten minutes after. No contest.
Third, kids of a wide age range can do this together. Younger toddlers can tear tissue paper and press it onto the bowl while older kids handle the string and scissors steps. Everyone gets to participate. Everyone feels proud.
And finally, the finished result looks genuinely impressive. These jellyfish look like something you would see on a craft store shelf, not a Tuesday afternoon project. And when your kid holds it up and says “I made this!” – there is nothing better than that moment.
Frequently Asked Questions
What age is this craft appropriate for?
This craft is wonderful for kids ages three and up with adult supervision. Younger toddlers (ages two to three) can participate in the tissue paper tearing and gluing steps. The scissors and string steps are best handled by an older child or adult.
How long does it take to make?
Active crafting time is about twenty to thirty minutes, plus drying time for the glue. I usually set ours on a drying rack and we come back to finish it after lunch. The whole project from start to finished hanging jellyfish is easily done in an afternoon.
Can I use a paper plate instead of a paper bowl?
A paper plate will work in a pinch, but a paper bowl gives you that beautiful rounded dome shape that makes the jellyfish look really three-dimensional and realistic. If you have the option, go for the bowl!
What if my tissue paper keeps falling off?
Make sure you are using enough glue and that you are pressing the tissue paper down firmly. If pieces are still lifting after drying, you can brush a thin layer of watered-down school glue (sometimes called Mod Podge style) over the top of everything to seal it all in place. Works like a charm.
Can we make these for an ocean-themed birthday party?
Absolutely yes! These are one of the best ocean party crafts out there. If you are setting them up as party activities, pre-cut the tissue paper squares ahead of time to make the process faster. You can have a whole group of kids each make their own jellyfish in about twenty minutes. They also double as their own party favor to take home!
These paper bowl jellyfish crafts are one of those rare activities that are just as fun to make as they are to display. Whether you hang them in a bedroom window, string them up for a party, or just let your kids carry them around the house all afternoon, they are guaranteed to bring a big smile to everyone’s face.
So grab your tissue paper, round up your googly eyes, and get ready to bring a little piece of the ocean into your home. Your kids are going to love every single minute of this one.
Happy crafting, friend!
More Summer Craft & Activity Ideas to Keep the Fun Rolling:
Handprint Pineapple Craft – Printable Template for Kids
Summer Popsicle Tissue Paper Craft For Kids (So Easy, So Cute!)
Sandcastle Texture Summer Art Project for Kids (Easy & So Much Fun!)
Handprint Fish Puppet Craft: The Cutest 20-Minute Activity Your Kids Will Beg to Do Again
Sun Threading Activity for Kids (Easy Summer Fine Motor Fun!)
