If your kids are restless and the beach feels far away, this sandcastle texture art project is about to become your new favorite summer activity.
It’s creative. It’s hands-on. And it sneaks in real learning – shapes, design thinking, fine motor skills – without kids even realizing it.
Best of all? You probably already have everything you need sitting right in your kitchen and craft drawer.
This is the kind of project that gives kids total creative freedom while giving you a peaceful, productive afternoon. And honestly? There’s something quietly grounding about slowing down to make something beautiful with your child – a little moment of joy and connection that feeds the soul just as much as it does their growing minds.
Let’s dive in.
Why Kids Absolutely Love This Project
Building a sandcastle on the beach is pure magic for little ones. They get to design, engineer, problem-solve, and imagine – all at the same time.
This art project brings that same magic indoors, minus the sunscreen and the seagulls.
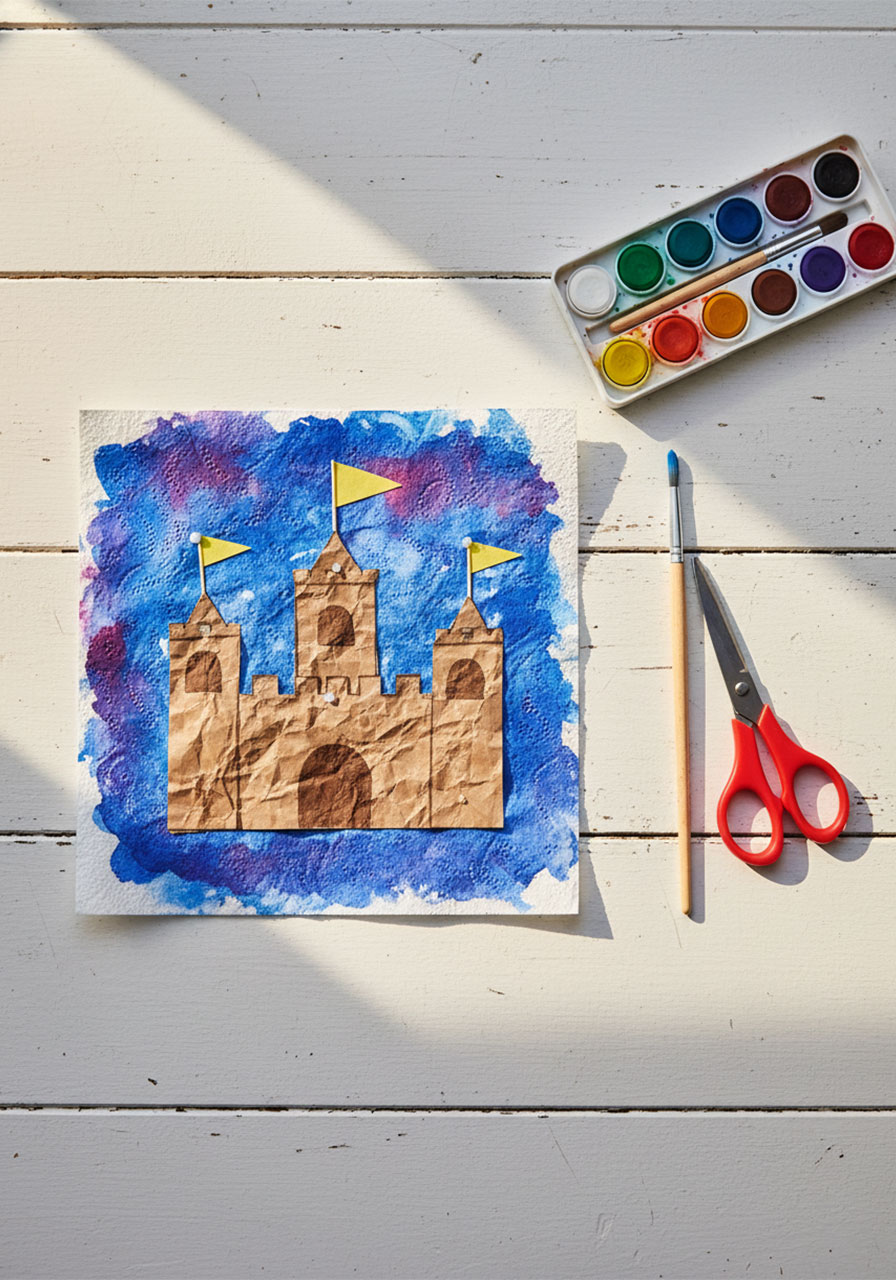
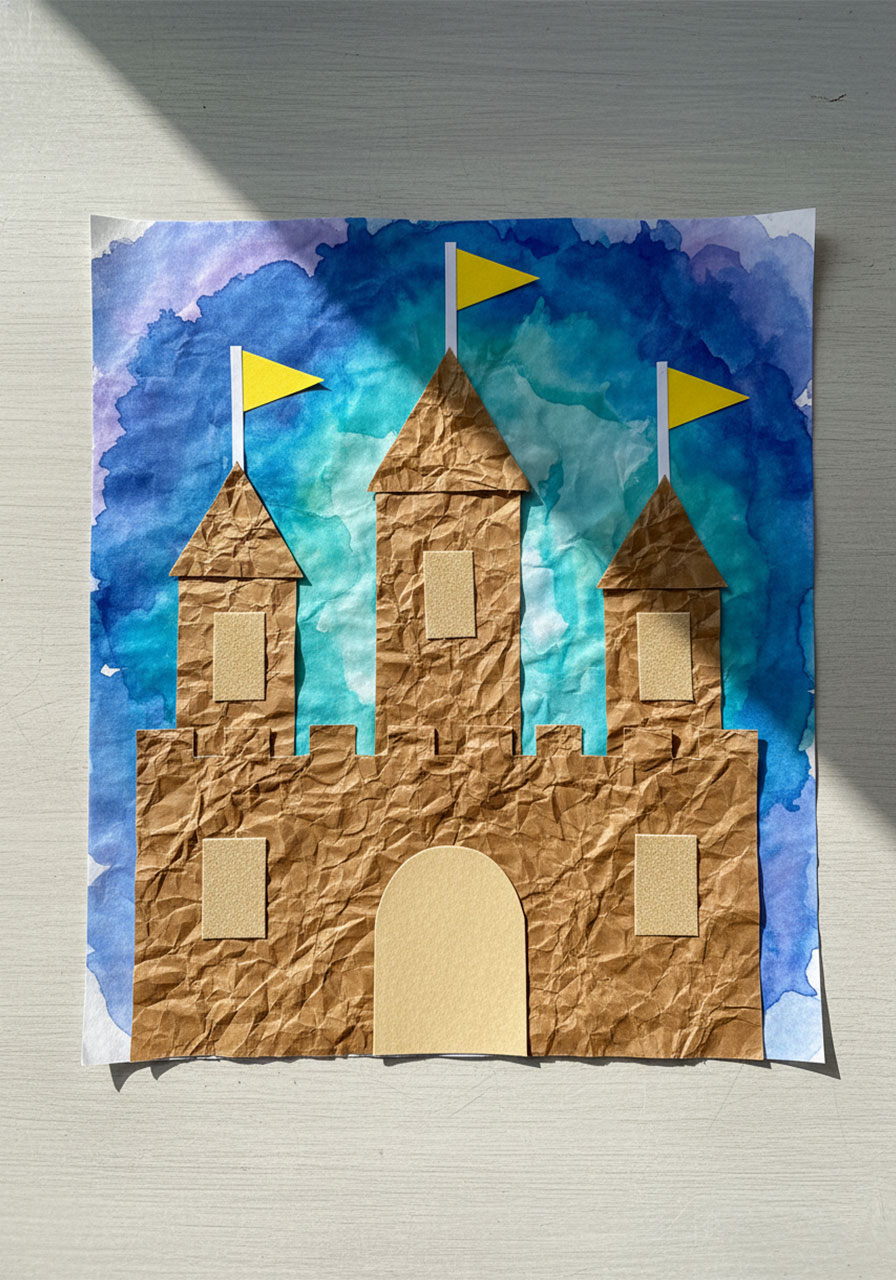
Instead of sand and waves, kids work with paper bags, watercolors, and textures they can actually touch and feel. The result is a stunning 2-D sandcastle collage that’s totally one-of-a-kind.
Every single child who does this project will create something different. That’s the beauty of it.
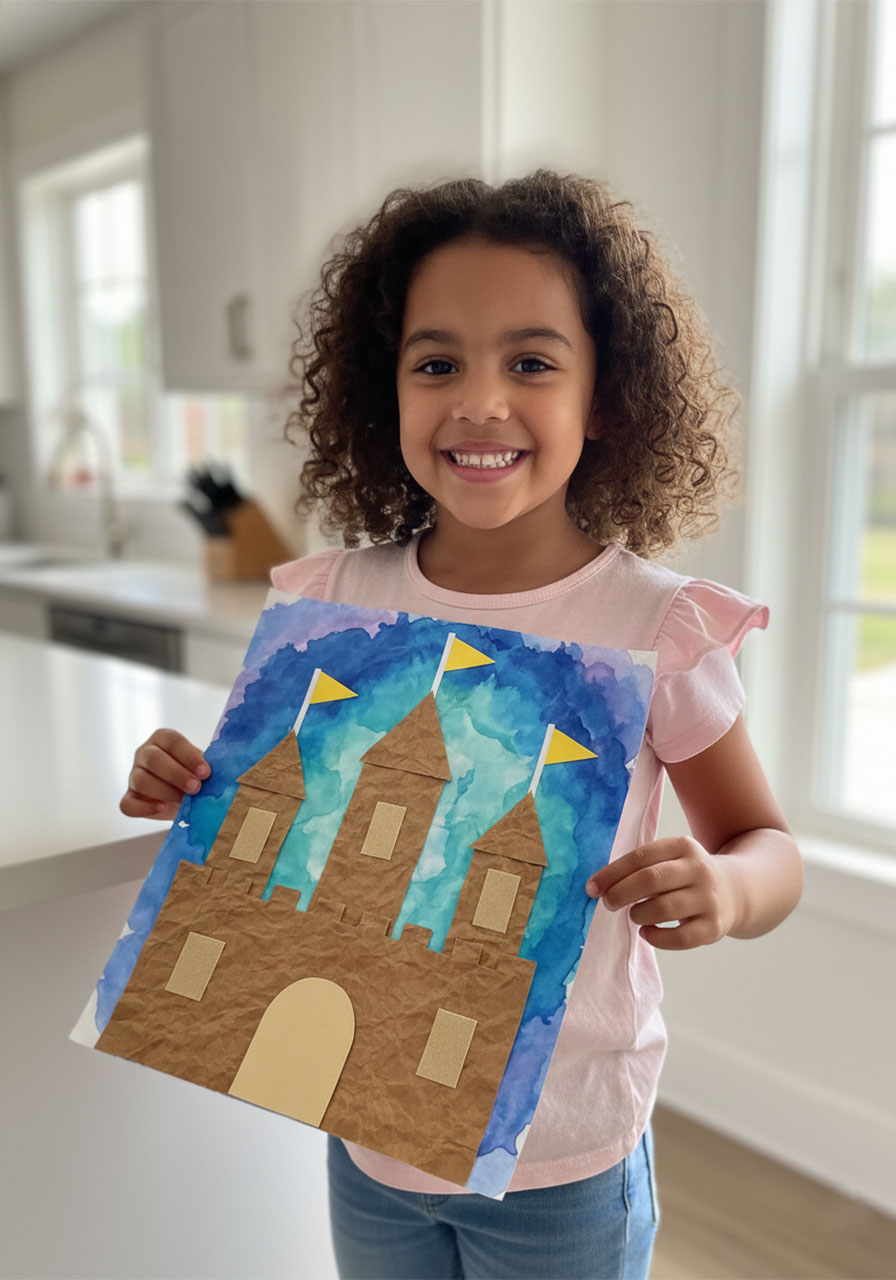
And when they hold up their finished artwork? That pride on their face? Priceless.


What Skills Does This Teach?
This isn’t just a fun craft. It’s a full-brain workout disguised as play.
Here’s what kids are quietly developing while they create:
Design thinking – planning shapes, colors, and structure before they build
Math skills – identifying squares, rectangles, and triangles
Fine motor development – cutting, crumpling, and gluing
Sensory exploration – feeling and comparing different textures
Creativity and storytelling – imagining who lives inside their castle
Watercolor technique – a gentle introduction to painting with real art supplies
It’s the kind of activity that checks every box – and then some.
A Quick Note on Watercolors (Read This First!)
If your child has never painted with watercolors before, this project is the perfect place to start.
Here’s a little secret from experienced art teachers: skip the fancy watercolor paper at first.
Instead, start on a paper towel. Seriously.
Paper towels are soft and absorbent, which means that even if your child uses a little too much water (and they will!), the colors will bleed and blend in the most beautiful, dreamy way. It actually looks intentional.
Remind kids to go “round and round” with the brush in the paint cake to pick up rich, bold color. If puddles appear, that’s okay – the paper towel handles it beautifully.
This is how kids learn: by doing, experimenting, and discovering through happy mistakes.
And the result – that swirly, colorful background – becomes the sky behind their sandcastle. It’s stunning every single time.
Materials You’ll Need
Paper towels (the background canvas!)
Brown paper lunch bags
Sandpaper (for extra texture detail)
Watercolor paint set
Paintbrush
Construction paper (for flags, windows, and doors)
Elmer’s school glue
Scissors
Newspaper (to protect your table)
That’s it! Simple, affordable, and totally worth it.

Before You Start: Design Your Dream Castle
Before the glue comes out and the cutting begins, take a few minutes to plan.
This is one of the most important – and most fun – parts of the whole project.
Ask your child a few imagination-sparking questions:
- How many towers will your castle have?
- Will it have a big front door? How many windows?
- What color flags will fly from the top?
- Who lives inside? A princess? A fairy? A family of friendly dragons?
Some kids love to base their castle on their own home – which is a sweet and meaningful way to make the project personal.
Others will go wild with imagination and create a fortress for pirates, fairies, or talking animals. And that is absolutely perfect.
There are no wrong answers here. Every castle is a masterpiece.
Step-by-Step Instructions
Step 1: Explore Your Textures
Before you paint anything, lay out all your supplies on the table.
Let your child touch each one: the smooth paper towel, the rough sandpaper, the crinkly paper bag.
Talk about what you feel. Is it rough or smooth? Hard or soft? Bumpy or flat?
This sensory warm-up primes the brain and makes the whole activity feel intentional and exciting – not just “another craft.”
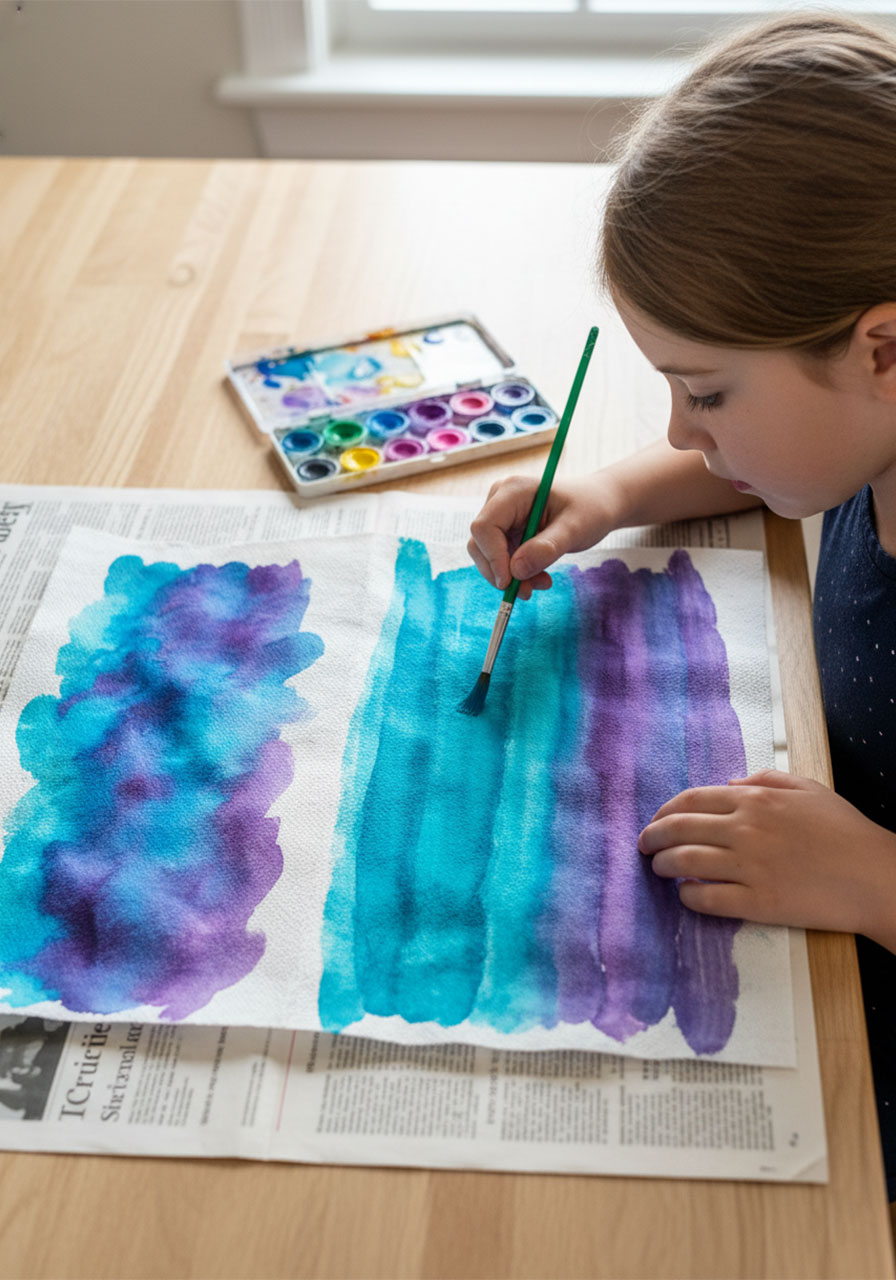
Step 2: Paint the Sky Background
Lay a piece of newspaper on the table to protect the surface.
Place a paper towel flat on top of the newspaper.
Now paint! Use blues, purples, and teals to create a dreamy sky effect across the entire paper towel.
Don’t overthink it. Sweeping horizontal strokes look amazing. Let the colors bleed and blend into each other.
Set this aside to dry completely before moving on.
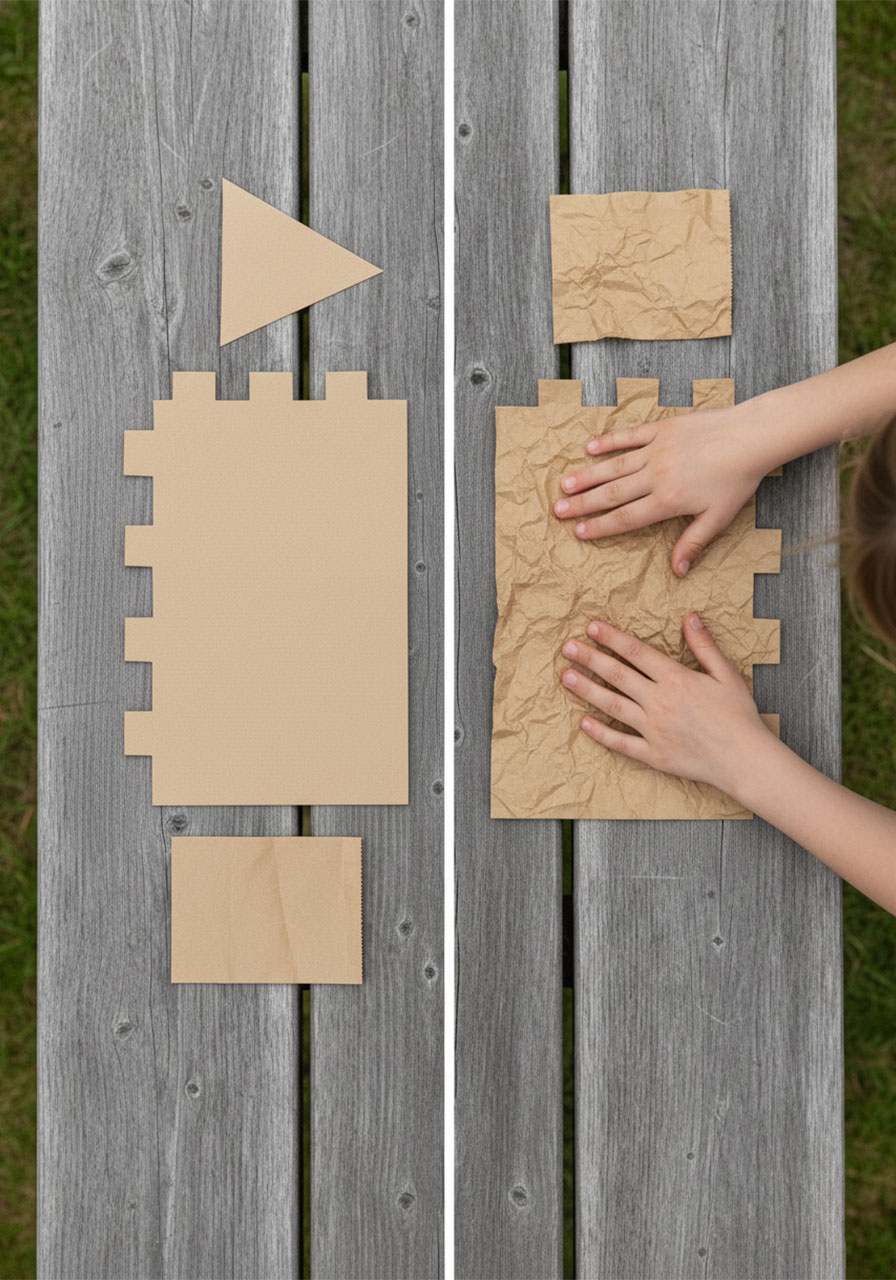
Step 3: Draw and Cut Your Castle Pieces
Grab the brown paper lunch bag and draw the parts of your sandcastle directly on it.
Think in shapes:
- Rectangles and squares for the towers and walls
- Triangles for pointed rooftops
- A rectangle with a zigzag or notched top edge for the battlement (that classic castle wall with the bumpy top!)
Cut out all the pieces carefully.
Don’t worry about perfect edges. Rough cuts actually look more like a real sandcastle!
Step 4: Crumple and Unwrap for Texture Magic
Here’s the step kids go absolutely wild for.
Take each paper bag piece and crumple it up into a tight ball. Really scrunch it!
Then gently unfold it and smooth it back out.
Look at all those beautiful creases, folds, and wrinkles. That’s your sandcastle texture – and it looks incredibly realistic. The paper now has the same kind of worn, sandy surface you’d expect from a real castle built at the beach.
This simple trick is the secret to making this project look so good.
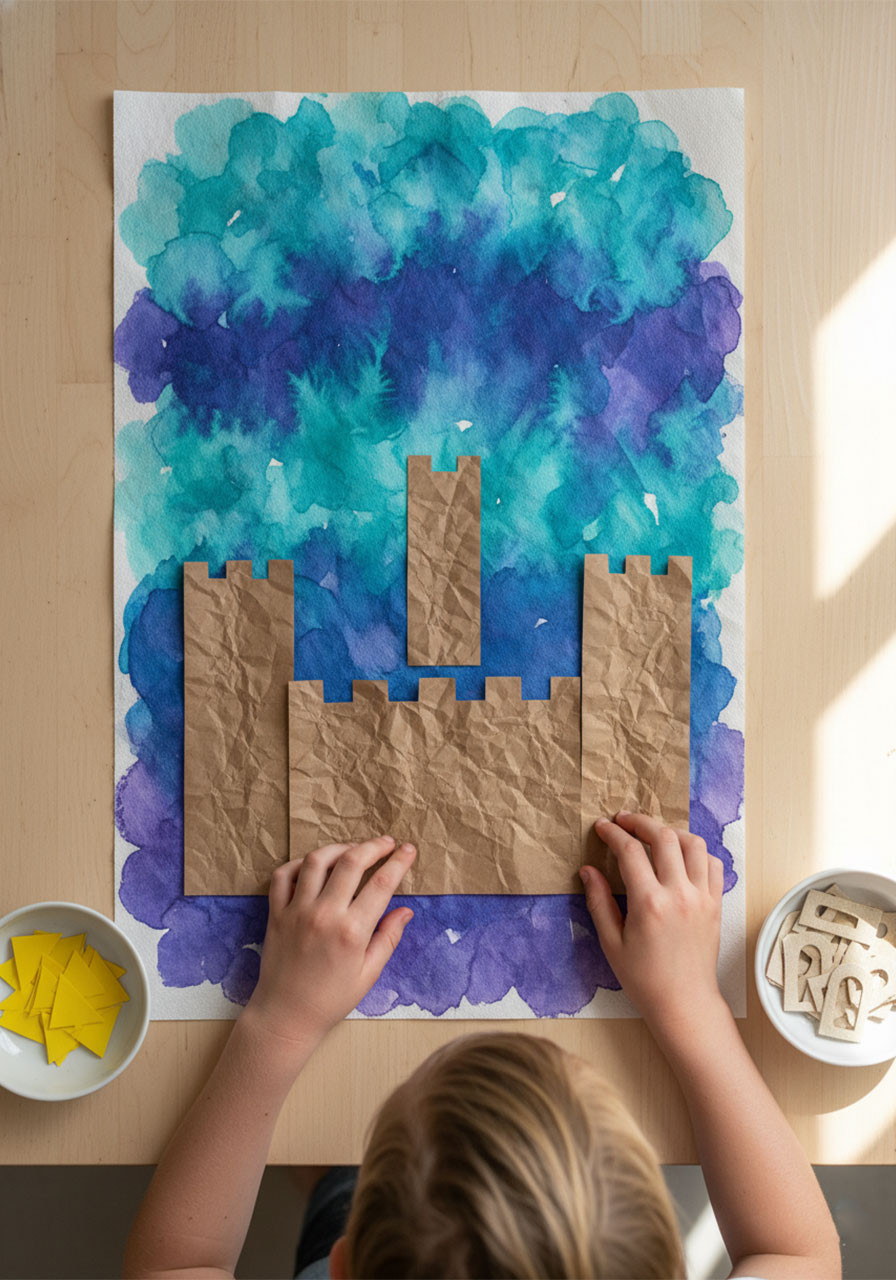
Step 5: Arrange Your Castle Layout
By now, your sky background should be dry.
Place all your crumpled castle pieces on top of it and start arranging.
Try different layouts. Move the towers around. See what looks tallest, grandest, most epic.
Don’t glue anything down yet – just play with the arrangement until it feels right.
This is a great moment to talk about design: Why do we put the biggest piece in the center? Why do taller towers go in the back?
Step 6: Glue Everything Down
Once you’re happy with the layout, it’s time to make it permanent.
Glue each piece of the castle down onto the painted paper towel.
Press firmly and hold for a few seconds to make sure each piece sticks.
Start with the background pieces (walls) first, then layer the towers and details on top.
Step 7: Add the Finishing Touches
Now comes the really fun part – the details that bring the castle to life.
Cut small rectangles and arch shapes from sandpaper or light-colored construction paper for windows and doors.
Glue these onto the castle walls.
For flags, cut triangle shapes from yellow or bright-colored construction paper. Glue them to thin strips of paper or toothpicks, and attach them to the tops of the towers.
Stand back and take a look. That is a seriously impressive sandcastle.
Imagine and Tell: The Story Behind the Castle
When the glue is dry and the castle is complete, sit down together and ask your child to tell you the story of their sandcastle.
Who lives inside?
Where is this castle located – on a beach? On a cloud? In a magical forest?
Is it a peaceful kingdom or an adventurous outpost?
This storytelling moment is pure gold. It extends the creative thinking, builds language skills, and gives children a chance to truly inhabit their creation with their imagination.
You might be amazed by what they come up with.
And if you want to make this even more meaningful, you can frame it as a small spiritual practice: What does your dream home look like? What kind of peace and joy would you want to fill it with? Even young children can engage with the idea of creating a space that feels beautiful, safe, and full of love.
Talk About Texture When You’re Done
Once the artwork is finished, do a quick texture review together.
Run your fingers over the different surfaces and ask:
- Which part feels the roughest?
- Which part is the smoothest?
- Can you find something bumpy? Something soft?
Also ask: What shapes can you find in your castle? Squares, rectangles, triangles – they’re all there!
This reflection step is simple, but it reinforces everything the child just learned and makes the experience feel complete.
Extend the Fun: What to Do Next
Love this project? Here are a few ways to keep the learning going:
Read a great book together. “How to Code a Sandcastle” by Josh Funk is a perfect companion. It covers design thinking, sequencing, and parts of a castle – all wrapped in humor and creativity. Kids love it.
Take it to the beach. Challenge your child to build a 3-D version of their 2-D artwork at the beach. It’s a brilliant engineering challenge that they’ll be so excited to try.
Try beach sensory play. If your child loved exploring textures, set up a sensory bin with sand, shells, and water for even more tactile exploration.
Use beach counting mats. Extend the math connection with some beach-themed counting and addition activities.
Make it a series. Once kids create one collage, they’ll want to make more. Try a seashell collage, an ocean scene, or a lighthouse next!
Why This Activity Is Good for the Whole You
As moms, we’re always looking for activities that do double (or triple) duty – something that keeps kids engaged, sparks their creativity, and gives us a moment to breathe.
But here’s what makes this one extra special.
Sitting side by side, creating something with your hands, being present without screens – it’s genuinely restorative. For both of you.
There’s real research behind the idea that creating art reduces stress, boosts mood, and helps us feel more grounded. And when you do it alongside your child, you’re modeling something powerful: that making time to create, imagine, and play is valuable. That beauty matters. That slowing down is a gift.
That’s good for body, mind, and spirit – and that’s exactly the kind of summer memory worth making.
Quick Recap: Sandcastle Texture Art Project at a Glance
Best for: Kids ages 3–10, home or classroom
Time to complete: 45–60 minutes
Prep needed: Minimal – mostly gathering supplies
Mess level: Medium (newspaper on the table and you’re set!)
Skill level: Beginner-friendly
Final Thoughts
This sandcastle texture art project is one of those rare activities that somehow manages to be educational, creative, calming, and wildly fun – all at the same time.
Kids get to make real design decisions. They get to work with their hands. They get to create something they’re genuinely proud of.
And you get a beautiful piece of artwork to hang on your fridge – or frame, because honestly, some of these turn out that gorgeous.
So gather your supplies, clear off the kitchen table, and let the creating begin. Your little architects are ready to build something amazing.
Happy crafting, mama. You’ve got this. ☀️
More Summer Craft & Activity Ideas to Keep the Fun Rolling:
Handprint Fish Puppet Craft: The Cutest 20-Minute Activity Your Kids Will Beg to Do Again
Sun Threading Activity for Kids (Easy Summer Fine Motor Fun!)
Yarn Pom Pom Turtle Craft (Printable Template!)
How to Make Easy Painted Fairy Houses for the Garden (Kids Will Absolutely Love This!)
Paper Plate Butterfly Craft: The Easiest, Most Colorful Kids Project You’ll Make This Season