Let’s be real for a second. Dad probably has a drawer full of “#1 Dad” mugs, generic ties, and gift cards he’ll never use. What he doesn’t have? A tiny, hand-painted version of himself – made by his favorite little human – hanging on the wall of his office.
This craft is adorable. Like, genuinely stop-you-in-your-tracks adorable.
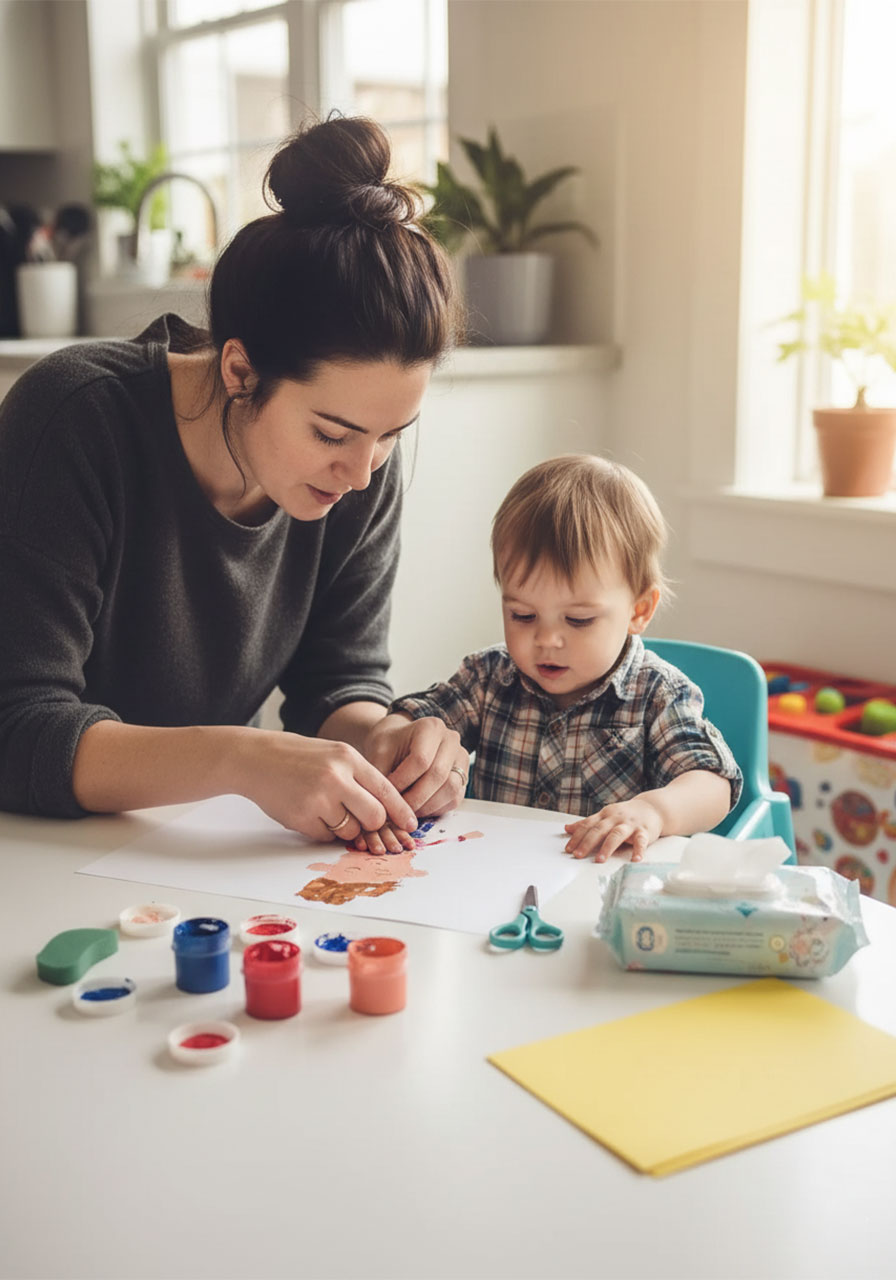
And the best part? You don’t need to be crafty. You don’t need fancy supplies. You just need a little paint, a willing (or at least bribe-able) kid, and about 30 minutes of your afternoon.
Whether you’re making this as a mom looking for a meaningful Father’s Day gift, a teacher putting together a class project, or a grandma sneaking in a craft afternoon with the grandkids – this one is a guaranteed hit.
Here’s exactly how to make the Handprint Mini-Me Dad, step by step.

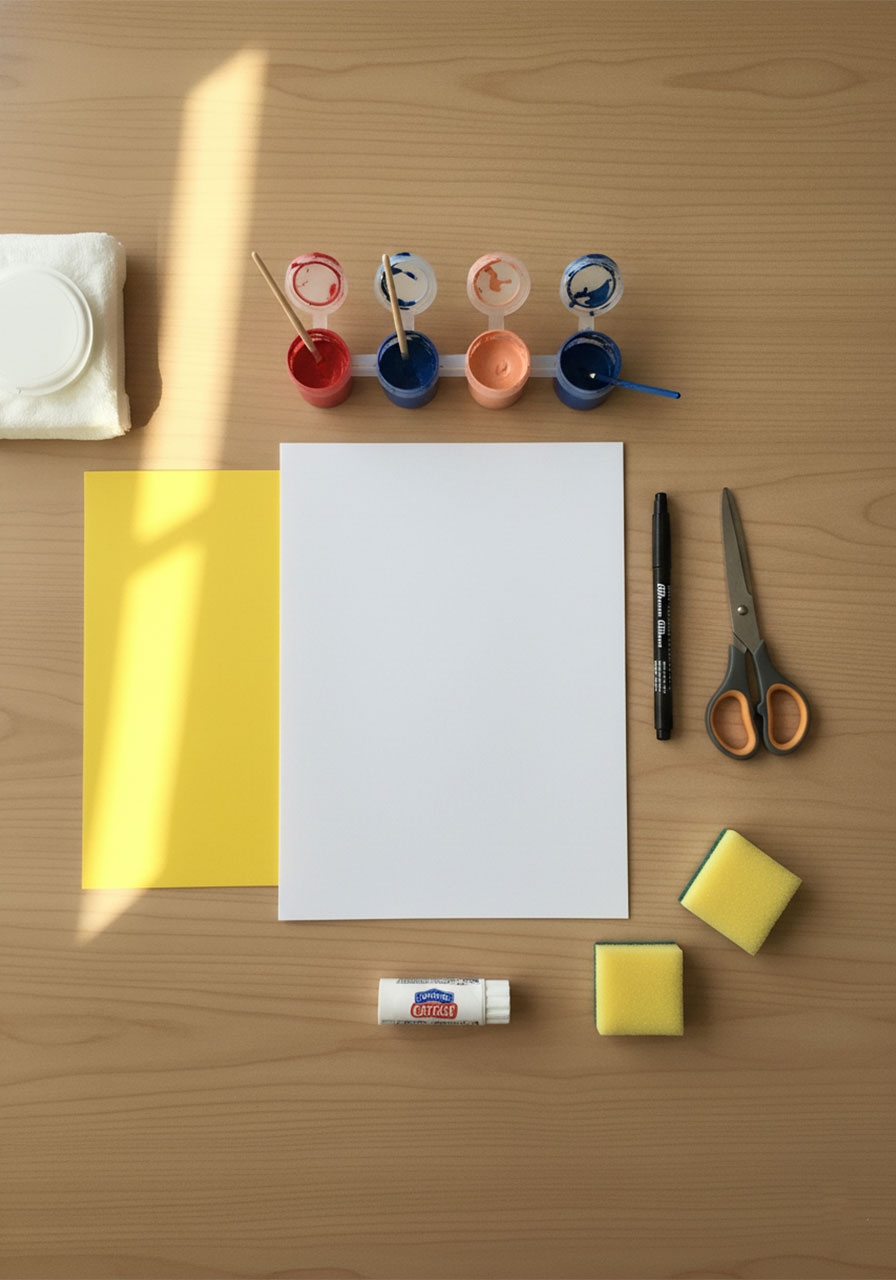
What You’ll Need
Before you get started, gather everything on this list. Having it all within arm’s reach saves you from running to the kitchen mid-craft with paint on your hands (ask me how I know).
White cardstock – Regular printer paper works in a pinch, but cardstock holds the paint much better and won’t wrinkle or tear when it dries.
Washable tempera paint – You’ll need four colors: red, blue, a peach or skin-tone shade, and brown. Washable is non-negotiable if you’d like to keep your sanity.
Paintbrushes or a small sponge – A sponge is actually the secret weapon here (more on that below).
Yellow construction paper – Just a small piece. This becomes Dad’s very dapper tie.
Black permanent marker – A fine-tip Sharpie is perfect for adding the face details.
Scissors and a glue stick – For cutting and attaching the tie.
Baby wipes or a wet cloth – Trust me, you’ll thank yourself later.
That’s it! Everything on this list can be found at a dollar store or craft store for well under $15 total.

How to Make the Handprint Mini-Me Dad
Step 1: Paint the Body First
Start at the bottom – we’re going to build Dad from the legs up, which sounds funny but makes total sense once you see it come together.
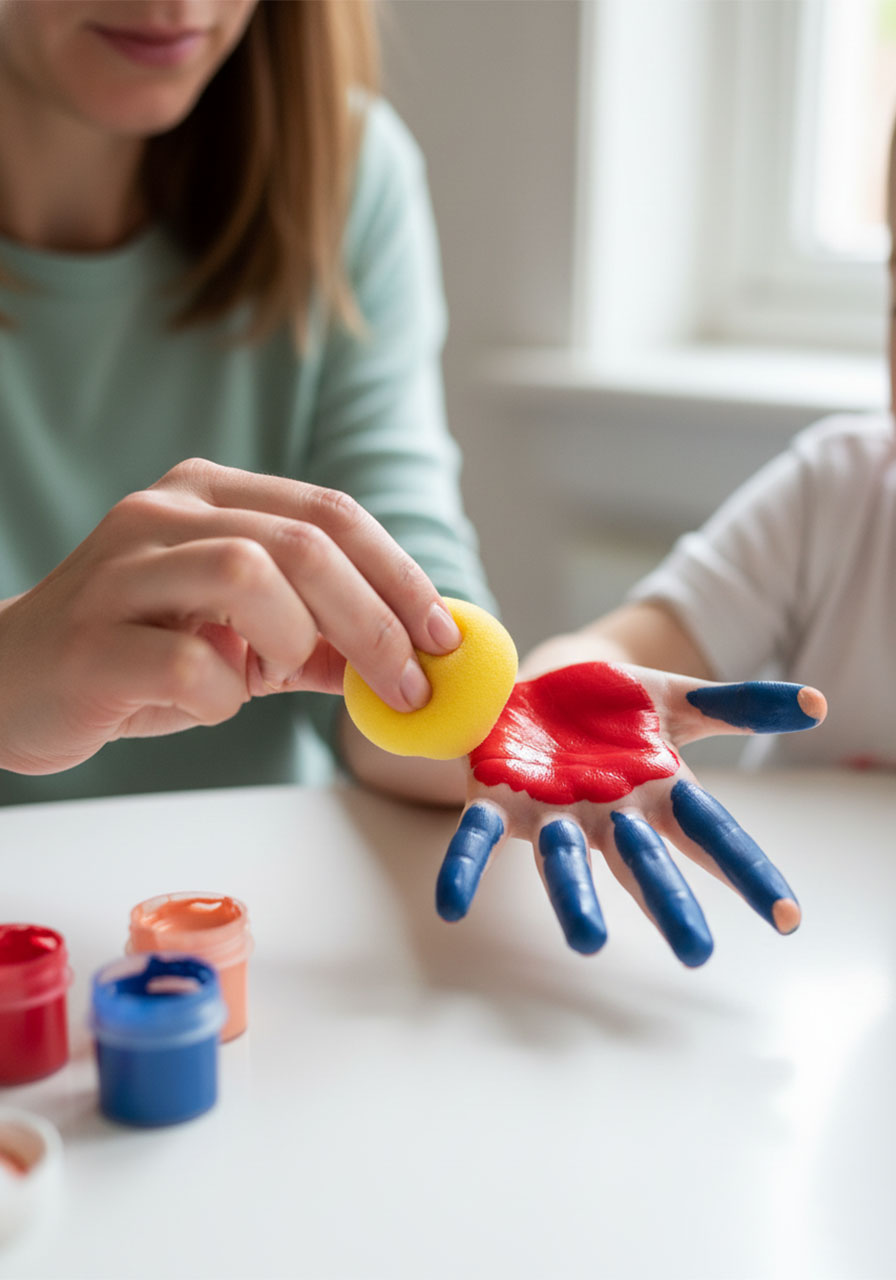
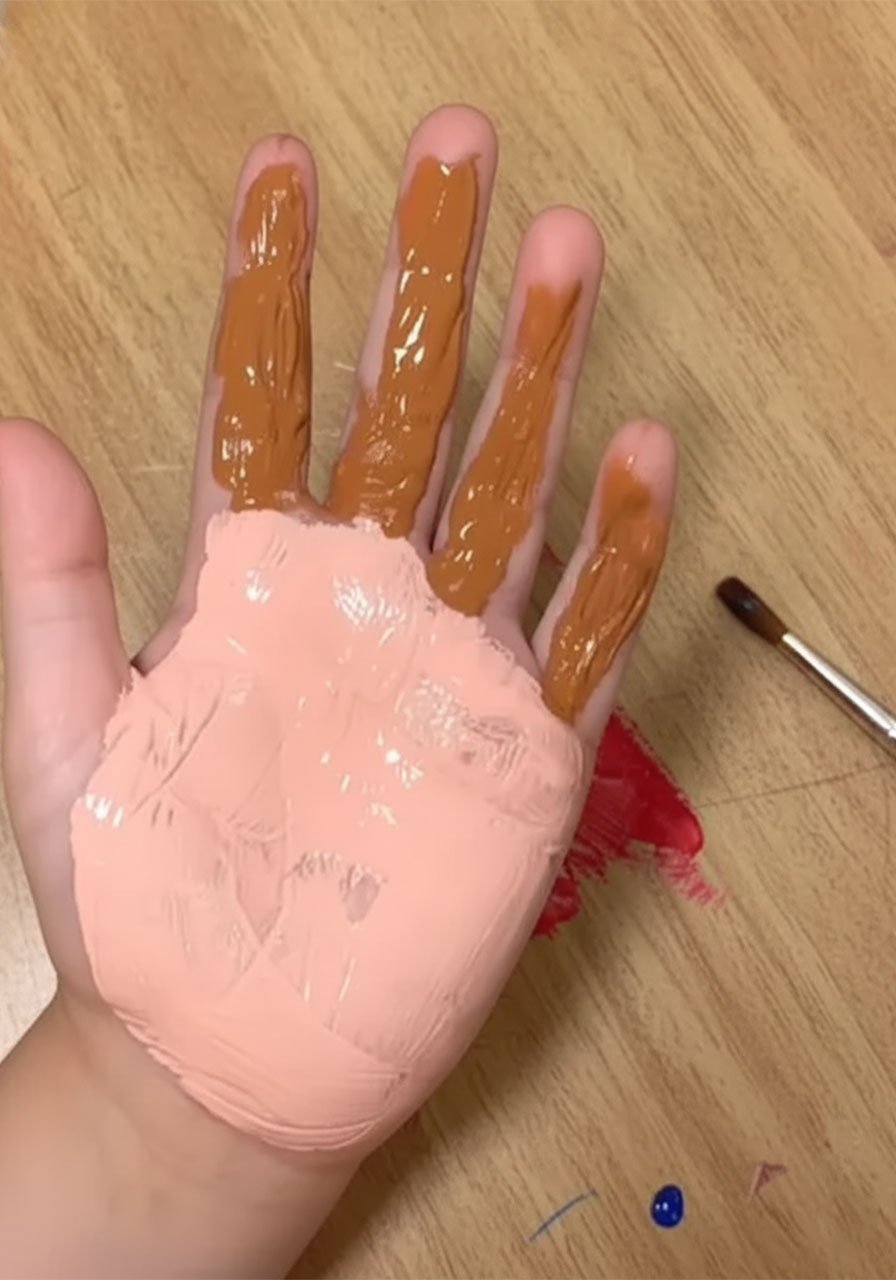
Paint your child’s hand in three separate sections, like this:
Paint the palm red – this is going to be Dad’s shirt.
Paint the four fingers (not the thumb) blue – these become the legs.
Dab a tiny bit of skin-tone paint on the very tips of the thumb and pinky – these are the hands peeking out from the sleeves.
A small paintbrush works here, but a sponge is even better – especially if your kiddo is ticklish. Sponges apply paint faster and with less of the “stop wiggling!” struggle.
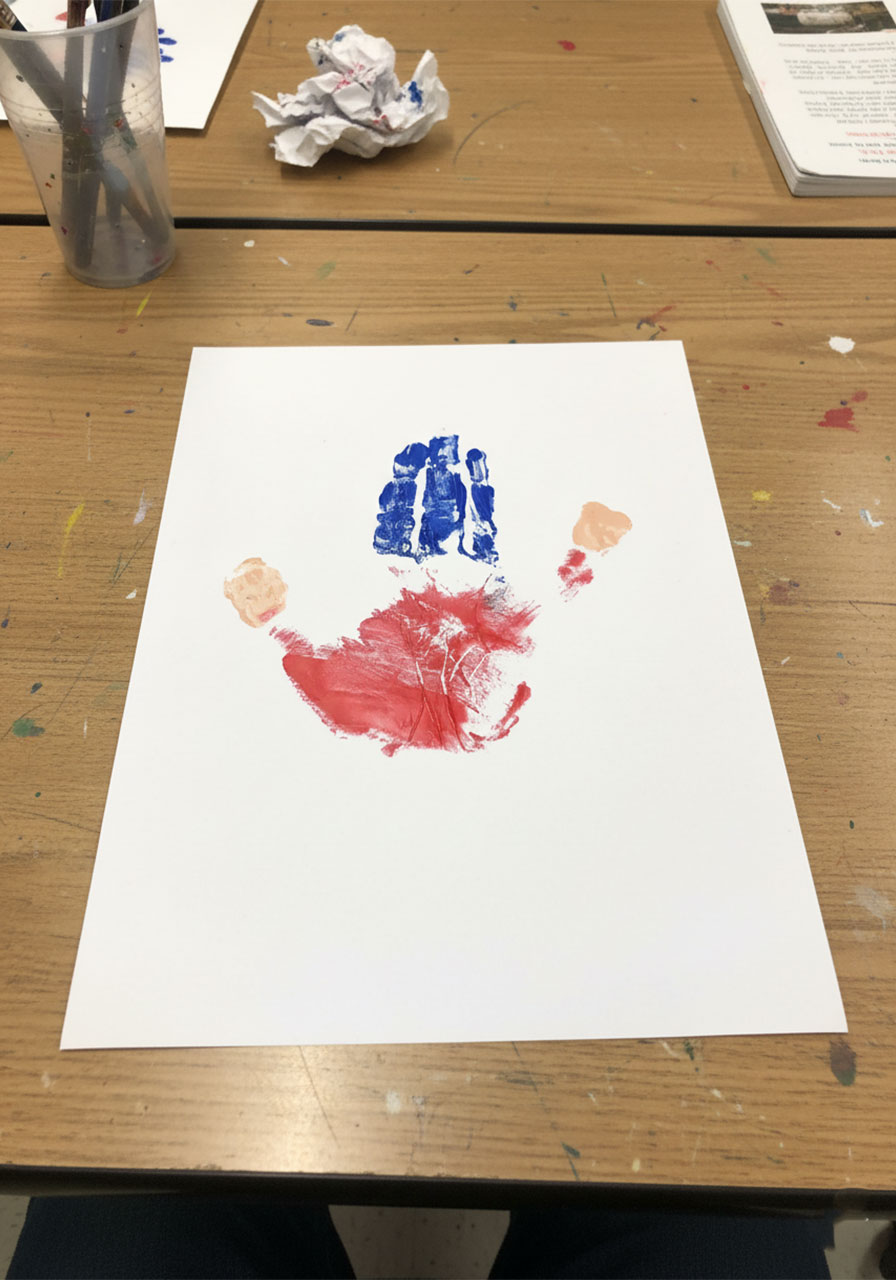
Step 2: Make the First Stamp (The Body)
Press the painted hand firmly onto the lower half of the cardstock. Make sure every finger makes solid contact with the paper.
When you lift the hand back up, do it straight up – no dragging, no wiggling – to keep the print clean and crisp.
You’ll immediately see it: a little body with a red shirt, blue legs, and tiny hands on either side. It already looks like a person! Take a second to appreciate that, because it’s genuinely charming.
Now wash or wipe that hand clean before moving on.
Step 3: Paint the Head and Hair
Now we’re building the top half of Dad’s Mini-Me. Paint the same hand again, this time like this:
Palm = skin-tone paint – this becomes the face.
Four fingers = brown paint (or whatever color matches Dad’s hair – blonde, gray, black, it’s all fair game!).
This is the step where kids usually start to get excited because they can see the whole idea clicking into place.
Step 4: The Flip Stamp (This Is the Fun Part!)
Here’s the magic move that makes the whole craft work.
Turn the paper upside down.
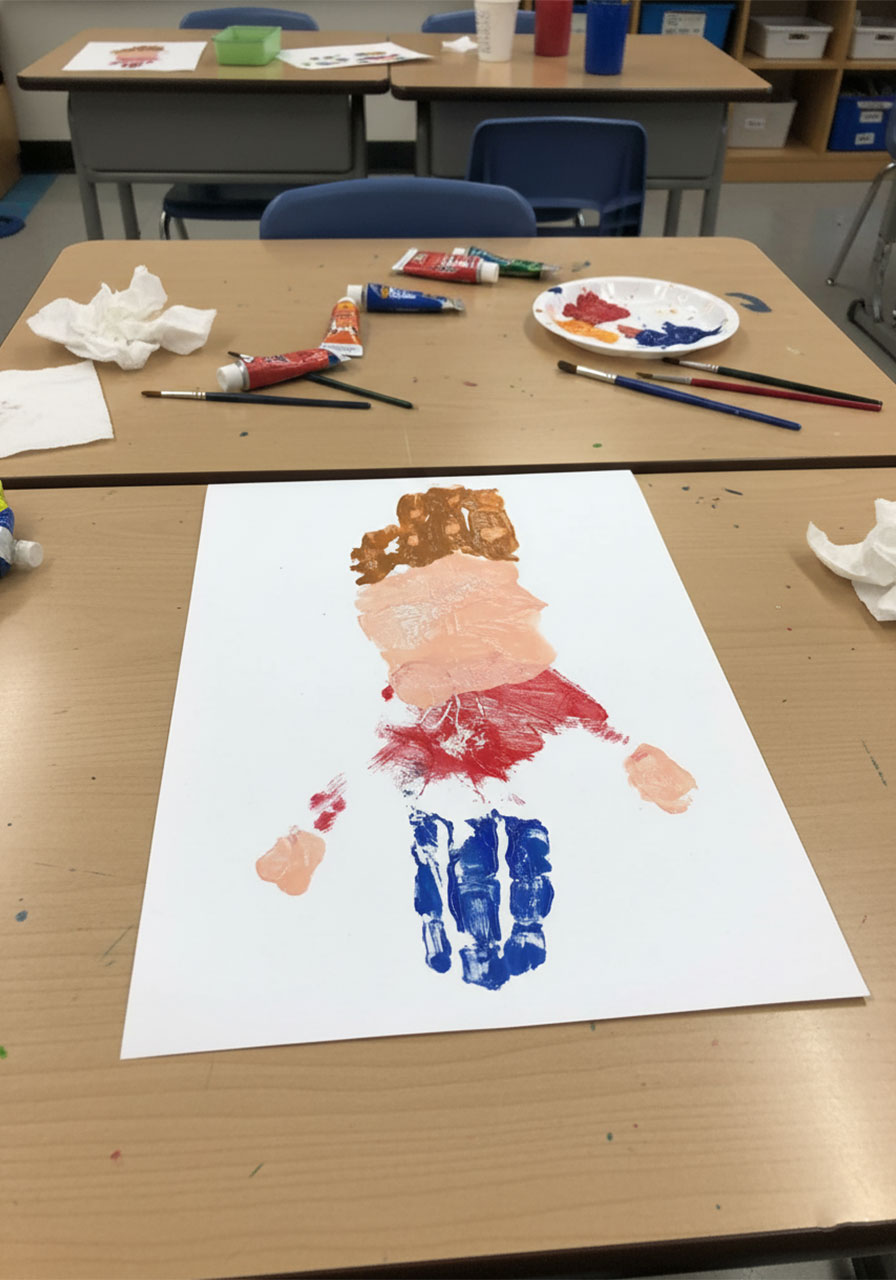
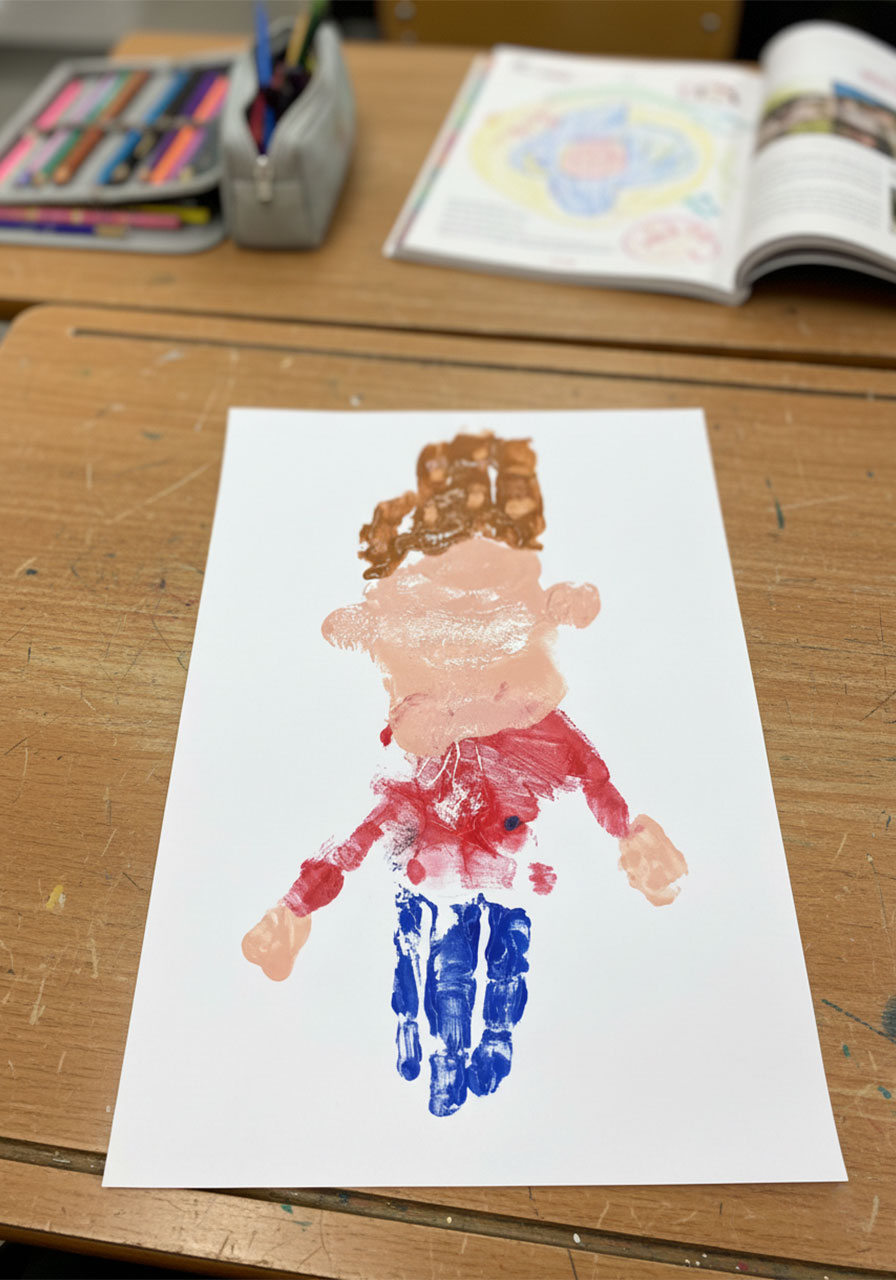
Then stamp the painted hand directly above the body print – so the two prints are touching or just barely overlapping. When you flip the paper back around, the palm becomes the face and the fingers become the hair. Instant adorable cartoon Dad.
Yes, it feels a little counterintuitive. Yes, it totally works. Just remind your kiddo to press down firmly and lift straight up, same as before.
Now step back and look at what you’ve got. That little painted person is already melting hearts.
Step 5: Make the Tie While the Paint Dries
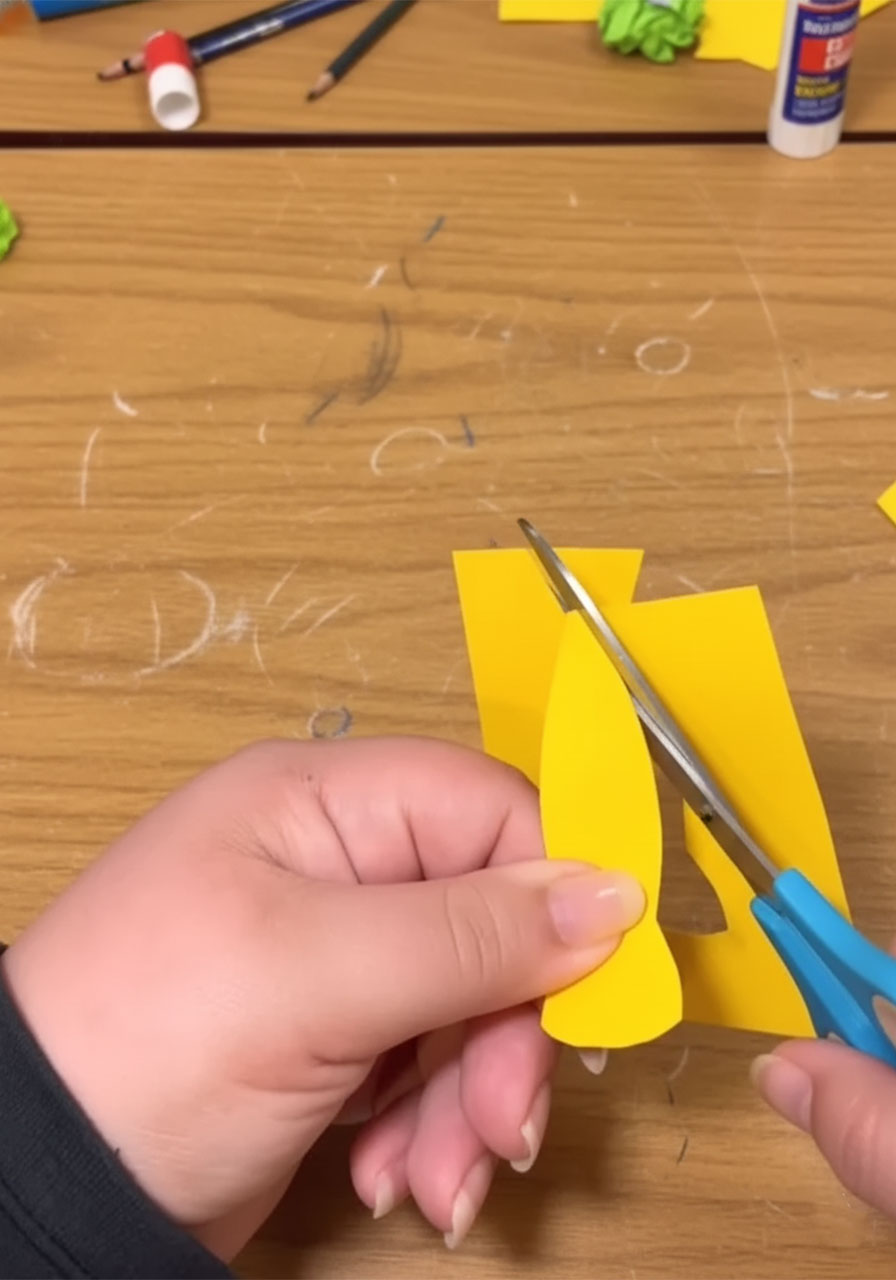
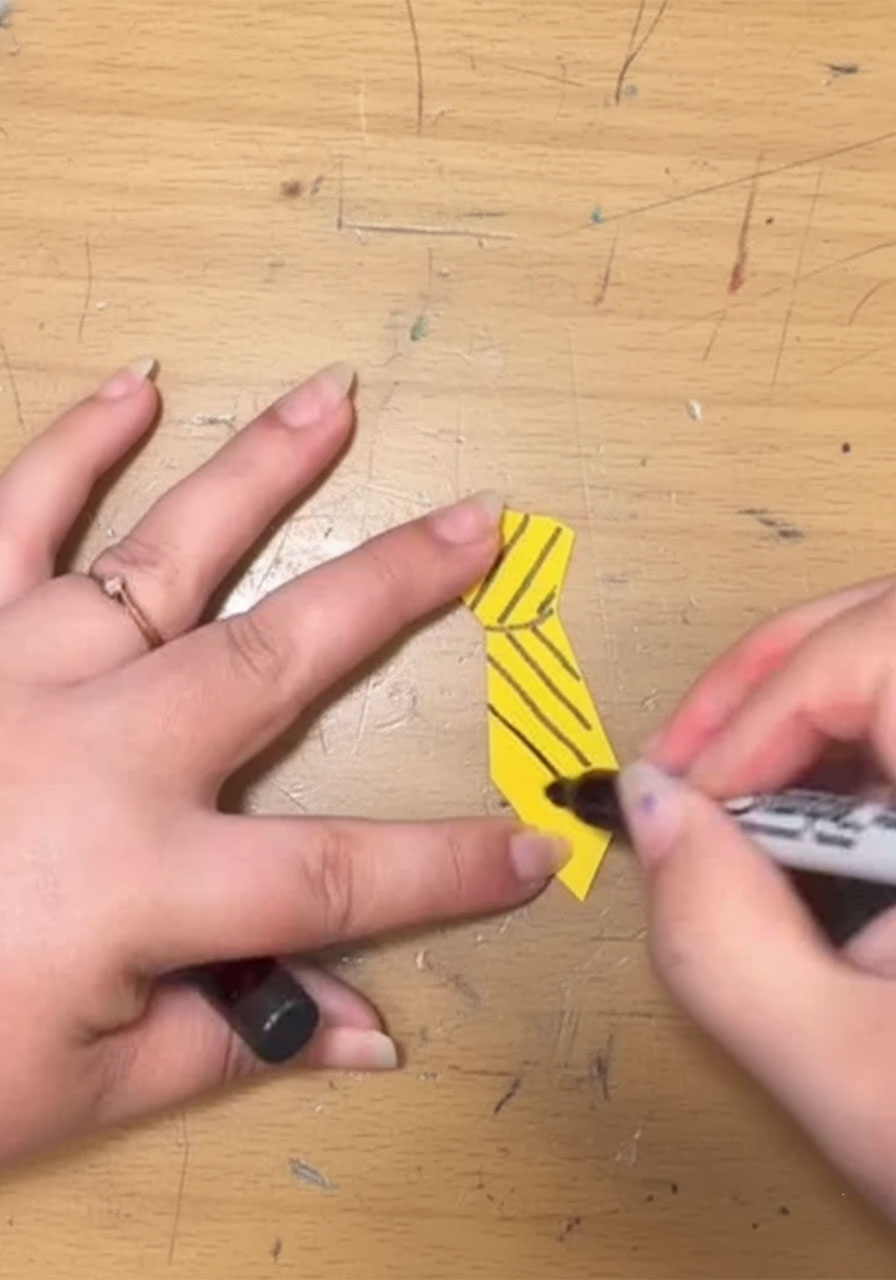
While you’re waiting for the paint to dry (which takes about 10–15 minutes), grab your yellow construction paper and scissors.
Cut out a simple tie shape – think a small triangle at the bottom with a narrow rectangle on top. It doesn’t have to be perfect. Imperfect is part of the charm.
Use your black Sharpie to draw diagonal stripes across the tie for that classic “businessman Dad” look.
Set it aside until the paint is fully dry.
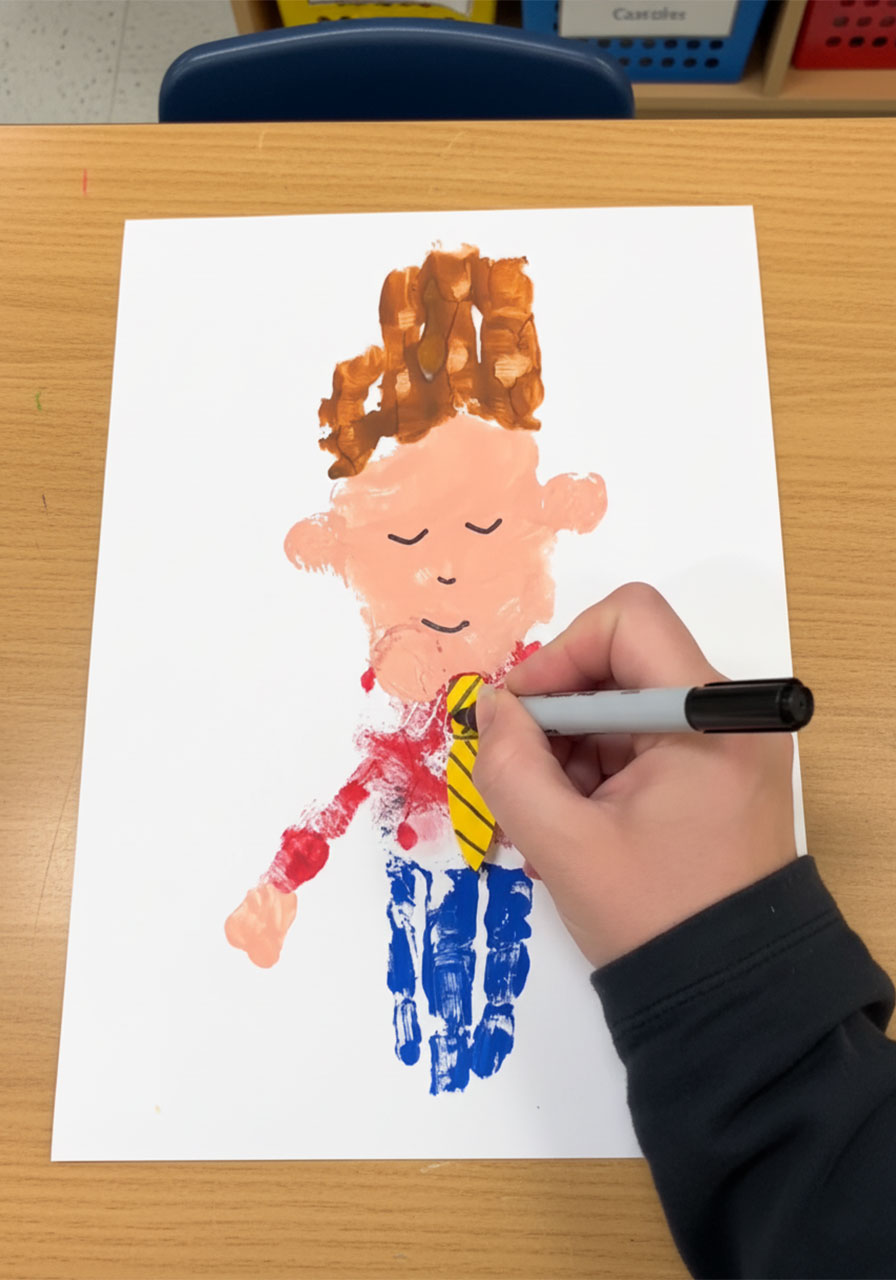
Step 6: Add the Face Details
Once the paint is completely dry to the touch, it’s time to bring Dad to life.
Using your fine-tip black marker, draw on:
- Two small closed or open eyes
- A warm smile (or a big goofy grin – your call)
- Tiny ears on either side of the palm
- Eyebrows if you’re feeling extra
Keep the details simple – the handprint itself does most of the visual storytelling. A few clean lines go a long way.
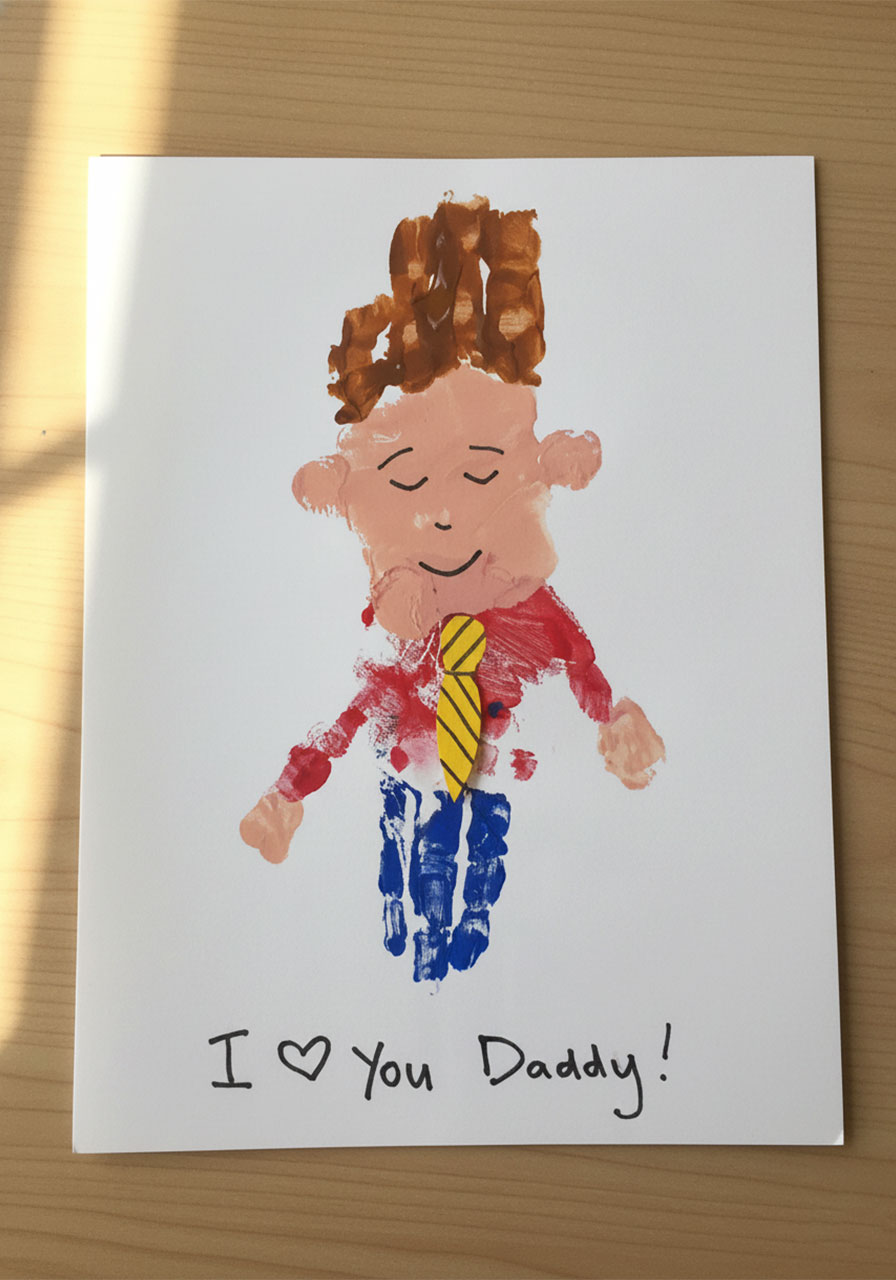
Step 7: Glue on the Tie and Write the Message
Glue the yellow tie right where the face meets the body – it’ll overlap the two stamps perfectly and hide any gap between the prints.
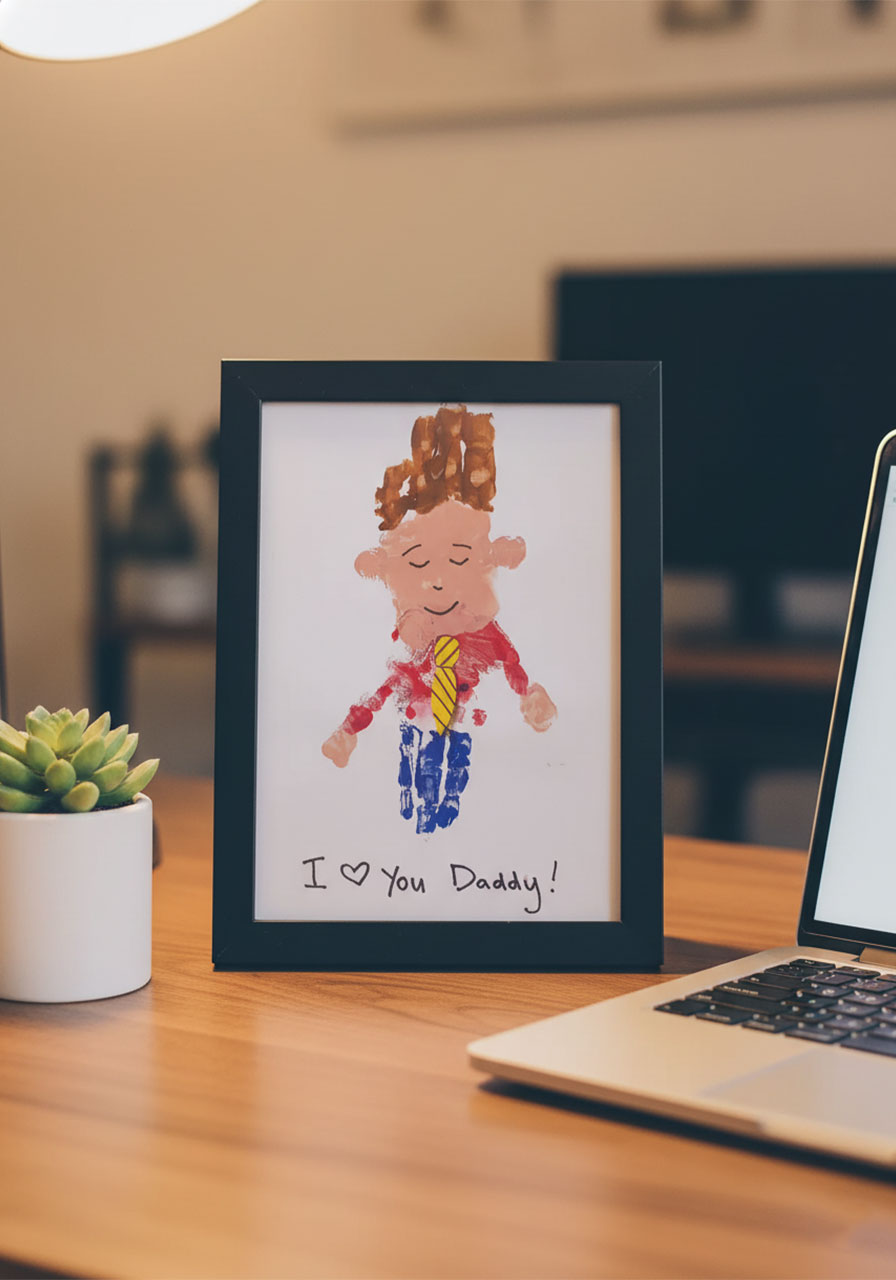
Then at the bottom of the page, write your message. The classic works beautifully:
“I ❤️ You Daddy!”
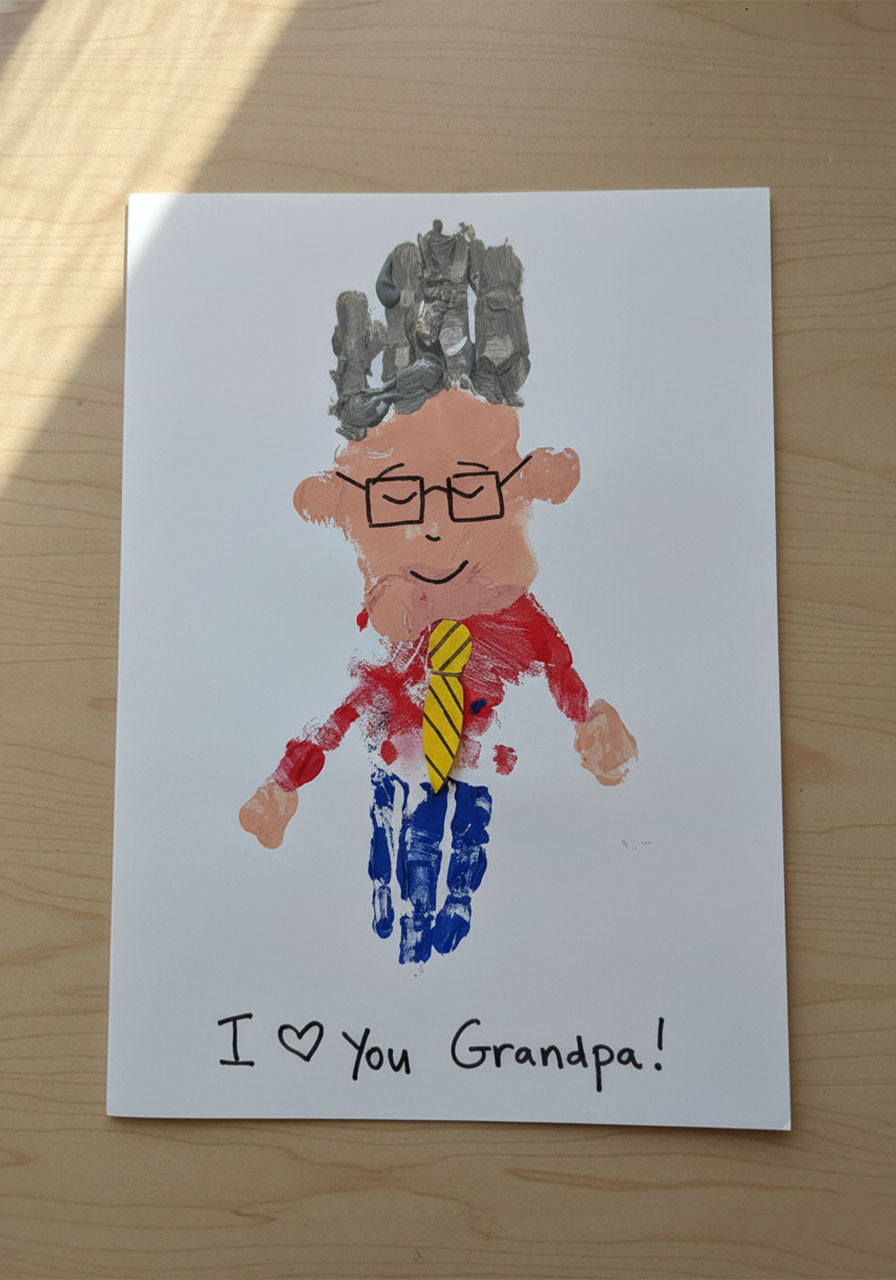
Or customize it – “Happy Father’s Day, Papa!” or “We love you, Grandpa!” works just as well.
And just like that? You’re done.
Tips That Actually Make a Difference
Use a Sponge If Your Kid Is Ticklish
Painting a child’s palm with a brush can send even the calmest kid into a giggle spiral. Swap in a small makeup sponge or a craft sponge instead – it applies the paint faster and with less of that ticklish sensation that makes tiny hands curl up at the worst possible moment.
Customize the Hair Color for Dad
Brown is the default, but this craft is a great opportunity to get specific. Is Dad a blonde? Use yellow. Silver fox? Mix a little white and gray. Salt and pepper? Dab both colors on different fingers. The more personalized it feels, the more Dad is going to love it.
What If Dad Is Bald?
Great question, and one that comes up more than you’d think. Simply skip the brown paint on the fingers during the second stamp. The palm becomes a round, clean face – and honestly, the bald version is arguably even cuter. A few little strokes of a gray marker on the sides if he has some hair there, and you’re golden.
Let Each Layer Dry Before Moving On
If the first stamp is still wet when you do the second, the prints can bleed together and the face gets muddy. Patience here is worth it. Use that drying time to cut out the tie!
Frame It
This is the upgrade that takes the whole project from “adorable fridge art” to “desk centerpiece Dad actually shows off to his coworkers.” A simple 5×7 or 8×10 frame from a dollar store or craft store – and this becomes the kind of gift that sits on a shelf for years.
You can even date the back of the paper and write your child’s age. Five years from now, that detail is going to make Dad’s heart absolutely melt.
Fun Variations to Try
Make a Whole Family Wall
Once you’ve made one Mini-Me Dad, it’s hard not to keep going. Make a Mini-Me Mom, Mini-Me siblings, even Mini-Me pets (use a smaller hand for the dog? Why not). Line them all up in matching frames and you’ve got an entire gallery wall that’s genuinely one-of-a-kind.
Make It a Grandpa Gift
Swap the message at the bottom to “I ❤️ You Grandpa!” and you have a gift that grandparents will treasure. Grandpas especially love a personalized keepsake they can display – and this one has a way of making even the stoic ones get a little teary-eyed.
Add a Date Stamp
Write the date and the child’s age lightly in the corner before framing. In ten years, this becomes a genuine time capsule – a snapshot of exactly how tiny those hands were, and exactly how much they loved their dad.
Turn It Into a Card
Don’t have time to frame it? Fold a piece of cardstock in half and create the Mini-Me on the front panel. Write a heartfelt message inside. A handmade card like this is more meaningful than anything you’d find in a store – and it takes the same amount of time.
Why This Craft Works So Well
It’s easy to find party favors, printable games, or themed decorations. But finding a Father’s Day activity that’s also a genuine keepsake? That’s rarer.
The Handprint Mini-Me hits every mark. It’s simple enough for toddlers (with a little help). It’s engaging enough that older kids actually enjoy it. And the finished result looks so charming and intentional that most people can’t believe it came from a child’s hand.
Most importantly, it’s the kind of gift that doesn’t end up in a junk drawer. It gets framed. It gets photographed. It gets shown off.
Because the best Father’s Day gifts aren’t the most expensive ones – they’re the ones that make Dad feel seen, loved, and a little bit lucky.
This craft does all three.
More Father’s Day Ideas to Keep the Fun Rolling:
How to Make the Best Dad Ever 3D Pop-Up Father’s Day Card (Step-by-Step DIY)
Father’s Day Handy Dad Heart Card (The Cutest Craft for Your Handy Dad or Grandpa!)
Father’s Day Pop Up Card – I Whaley Love You Dad! (The Cutest Card He’ll Ever Get)
How to Make a Suit-and-Tie Father’s Day Card (He’ll Actually Want to Keep)
The Cutest Father’s Day Craft: Printable Toolbox Cards Kids Can Color & Gift
Dad, You Rock! How to Make a Handprint Guitar Father’s Day Card (Printable Included)
How to Make a Magic Flip Card for Father’s Day (That Looks Way Harder Than It Is)