Let’s be real: the moment you start pricing out birthday party decorations at the party store, your jaw hits the floor. Balloon arches for $80? A simple tissue paper garland for $30? No thank you! Here’s the good news – you can throw an absolutely stunning birthday bash without emptying your wallet, and your guests will think you hired a professional party planner.
I’m talking glitter, glamor, and gorgeous backdrops made from things you can grab at the dollar store (or raid from your craft closet). The secret? A little creativity goes a long way, and DIY birthday party decorations don’t have to look “homemade” in that sad, construction-paper kind of way. We’re going for that “wow, where did you get this?” reaction.
Ready to transform your party space on a shoestring budget? Let’s dive into the best cheap DIY birthday party decorations that’ll make your celebration unforgettable – without the sticker shock.

Why DIY Your Birthday Party Decorations?
Save Serious Cash: We’re talking about creating $200 worth of decorations for under $30. Your wallet will thank you.
Get Exactly What You Want: No more settling for “close enough” at the store. DIY means you control the colors, the theme, and the vibe.
Impress Your Guests: There’s something magical about handmade touches that make your party feel personal and special. Plus, you get major bragging rights when people ask where you bought everything!


1. Confetti-Filled Balloons
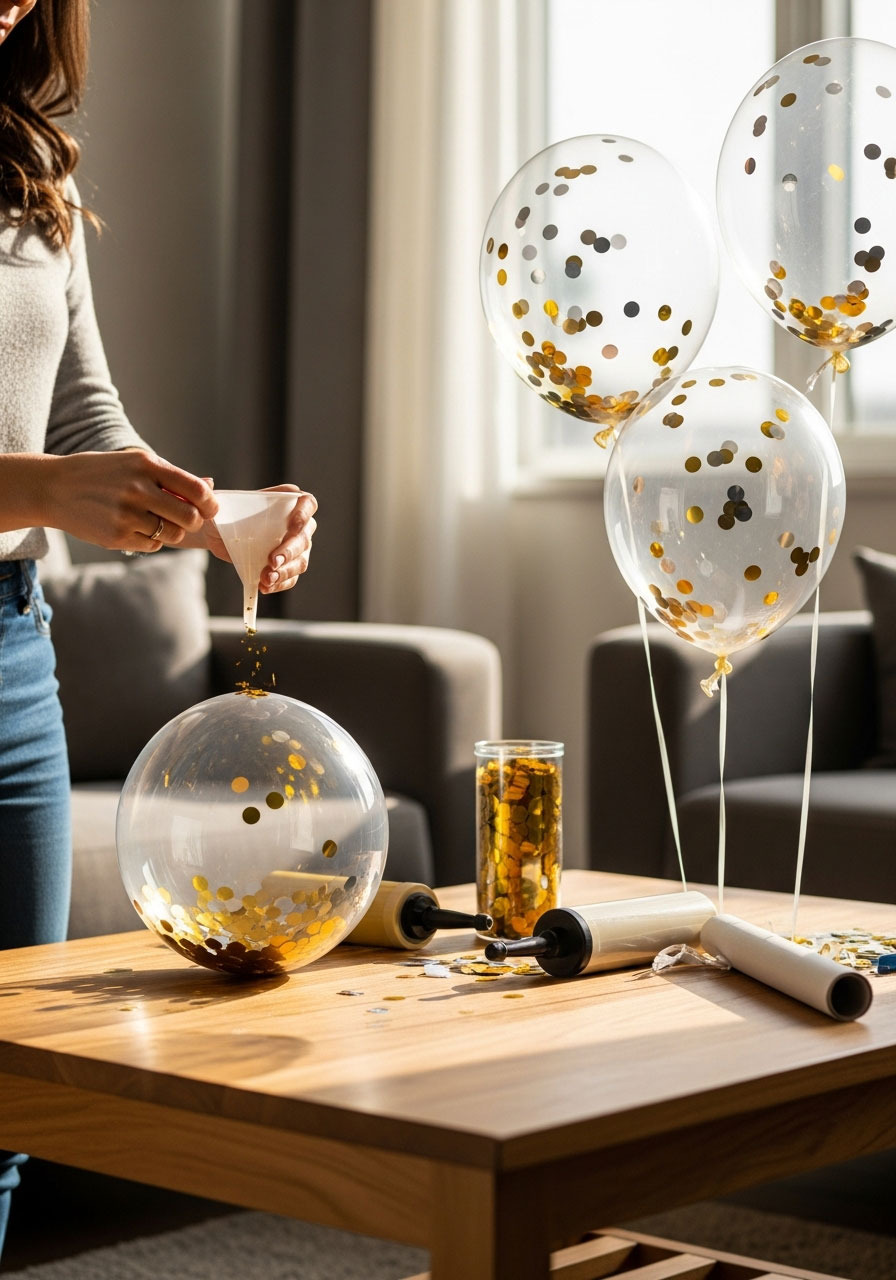
Why This Works: These balloons add instant sparkle and sophistication to any party space. They look expensive but cost next to nothing!
What You’ll Need:
- Clear balloons (from the dollar store)
- Confetti (metallic is best!)
- Balloon pump (optional, but it saves your lungs)
How to Make Them:
1. Before inflating, use a funnel or rolled paper to pour 1-2 tablespoons of confetti into each clear balloon.
2. Inflate the balloon and tie it off.
3. Rub the balloon against your clothes or hair to create static – this makes the confetti stick to the sides for that magazine-worthy look!
4. Cluster them together or scatter them around the party space.
Pro Tip: Mix different colors of confetti for a rainbow effect, or stick to metallic gold and silver for an elegant vibe. These look incredible when hung at different heights!
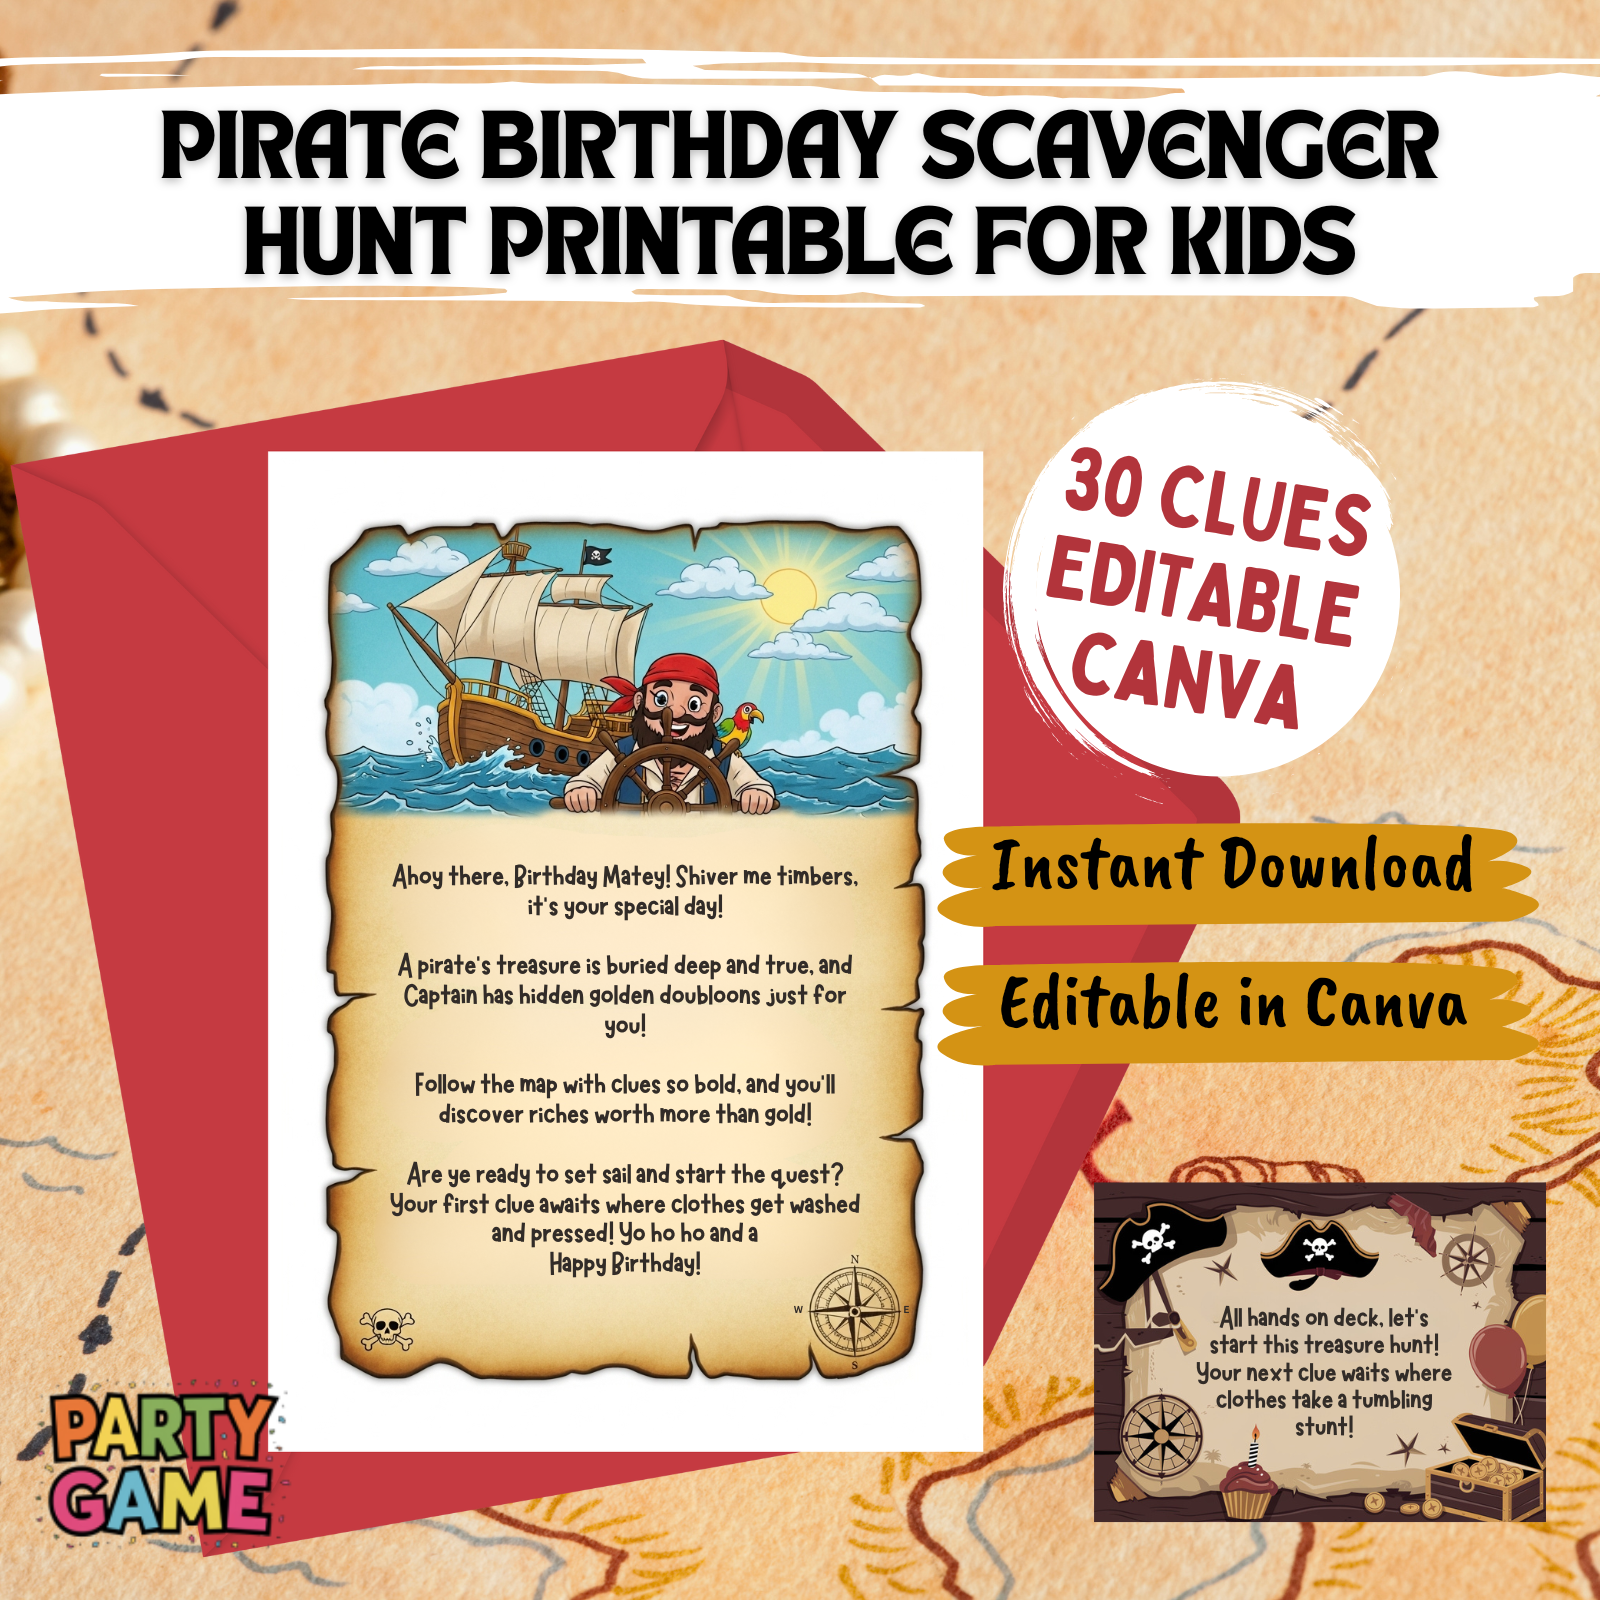
Pirate Birthday Scavenger Hunt for Kids Printable
Instant Pirate Adventure: Download, print, and play in 15 minutes! No stress – just instant, unforgettable fun for kids ages 4-12
Indoor Party Lifesaver: Perfect for apartments & houses. Keep 1-10 kids wildly entertained for 45 minutes with clever rhyming clues
A Treasured Memory: Watch your birthday child become the hero of an epic story. Includes a thrilling intro and congratulatory treasure letter
Fun That Secretly Teaches: Kids race to solve riddles while building reading, problem-solving, and teamwork skills. Fun with a hidden purpose!

Indoor Birthday Scavenger Hunt Printable for Kids – 12 challenges
Your 15-Minute Party Hero: Instantly download, print, and hide. Get 1-2 hours of immersive, screen-free fun with 12 unique puzzles. Stress-free entertainment, guaranteed
More Than a Hunt – It’s a “”Cake Bandit”” Adventure! Kids don’t just find clues; they solve the mystery of the stolen cake! This engaging storyline creates a memorable birthday mission
Ultimate Indoor Party Lifesaver: Perfect for bad weather or small spaces. Keeps kids ages 4-10+ happily challenged with picture matching, mazes, and secret codes
Fun That Secretly Builds Genius: Laughter meets learning! These 12 clever challenges boost problem-solving, teamwork, and critical thinking skills without the kids even noticing

Difficult Birthday Scavenger Hunt Printable for Adults – The Oracle’s Birthday Prophecy
Forget Boring Parties. Unleash the Oracle: Transform a birthday into an epic mystery with 30 brain-teasing riddles, ciphers, and challenges. Customize the perfect adventure for your guests
Be the Host of the Most Memorable Party: Provide the clever, shared activity that gets everyone laughing and collaborating. It’s the highlight that guests will talk about for years
Sophisticated Fun, Zero Effort: Just download, pick your 10 favorite clues from 30 options, and hide them. Get a complete, themed adventure without the stress of planning from scratch
Challenge Adult Minds with “The Prophecy”: Move beyond simple games. This hunt features logic puzzles, cryptic ciphers, and hilarious dares designed specifically to engage and thrill adults

Happy Birthday Decorations
Everything in one box = party stress solved – Banner, honeycomb balls, swirls, and garland all coordinated. No last-minute runs to three different stores at 9 PM the night before.
Photo-ready in 15 minutes – Easy assembly means you spend less time wrestling with decorations and more time enjoying the birthday person’s reaction. Looks expensive, sets up fast.
Reusable = smart money – Quality materials hold up through the party AND pack away for next year. Stop buying flimsy decorations that rip before cake time.
Saves you $50+ vs. party store prices – Get the complete coordinated look without the markup. Guests think you hired a decorator; you paid a fraction of the cost.
2. DIY Glitter-Dipped Vases

Why This Works: Turn boring dollar store vases into glamorous centerpieces that’ll have everyone asking where you shopped.
What You’ll Need:
- Glass vases (dollar store finds work perfectly)
- Mod Podge or white glue
- Glitter in your party colors
- Foam brush
How to Make Them:
1. Apply a thick layer of Mod Podge to the bottom third of your vase using the foam brush.
2. While still wet, roll the vase in glitter or sprinkle glitter generously over the glued area.
3. Let dry for 2-3 hours (overnight is even better).
4. Gently tap off any excess glitter, then fill with flowers or greenery.
Pro Tip: Do this outside or over a large sheet – glitter gets EVERYWHERE. But trust me, the results are totally worth the cleanup!
3. Tissue Paper Pom Poms

Why This Works: These fluffy beauties are THE party decoration hack. You can buy premade ones for $10 each, or make four of them for $1. We’ll take option two!
What You’ll Need:
- Tissue paper (8-10 sheets per pom pom)
- Scissors
- Floral wire or pipe cleaners
How to Make Them:
1. Stack 8-10 sheets of tissue paper and accordion-fold them (each fold should be about 1 inch wide).
2. Secure the center with floral wire, leaving enough wire to hang it later.
3. Trim both ends into rounded or pointed shapes – this affects how the finished pom pom looks!
4. Carefully separate each layer of tissue paper, pulling toward the center. Be gentle; tissue paper tears easily!
5. Fluff and shape until you’ve got a full, gorgeous pom pom.
Pro Tip: Make these a day or two before your party – they hold up beautifully and you’ll avoid last-minute stress. Hang them at varying heights for maximum visual impact!
4. DIY Photo Backdrop

Why This Works: Every birthday party needs a photo spot! This backdrop gives you that professional party-planner look without the professional price tag.
What You’ll Need:
- Streamers in coordinating colors (dollar store)
- Tape or command hooks
- A blank wall or tension rod
How to Make It:
1. Attach streamers to the top of your wall or tension rod using tape.
2. Cut streamers to different lengths for a layered, waterfall effect.
3. Gently twist each streamer as you work your way down – this catches the light beautifully!
4. Space them close together for full coverage (about 2-3 inches apart).
Fun Variation: Add a “Happy Birthday” banner in the center, or tape cutout letters spelling the birthday person’s name! For extra flair, hot glue silk flowers or paper rosettes randomly throughout the streamers.
5. Painted Glass Bottles

Why This Works: Got empty wine bottles, beer bottles, or pasta sauce jars? Don’t toss them – transform them into colorful vases or candle holders!
What You’ll Need:
- Clean glass bottles
- Acrylic paint in your party colors
- Foam brushes or sponges
How to Make Them:
1. Make sure your bottles are completely clean and dry (remove any labels).
2. Pour about 2 tablespoons of acrylic paint inside the bottle.
3. Swirl the paint around to coat the inside, adding more paint as needed.
4. Turn the bottle upside down on paper towels to drain excess paint and let dry for 24 hours.
5. Use as vases for single stems or cluster them together as a centerpiece!
Pro Tip: This works best with chalk paint or acrylic paint mixed with a little water. For the outside of bottles, use spray paint for faster, more even coverage – just do it in a well-ventilated area!
6. Dollar Store Pool Noodle Cactus
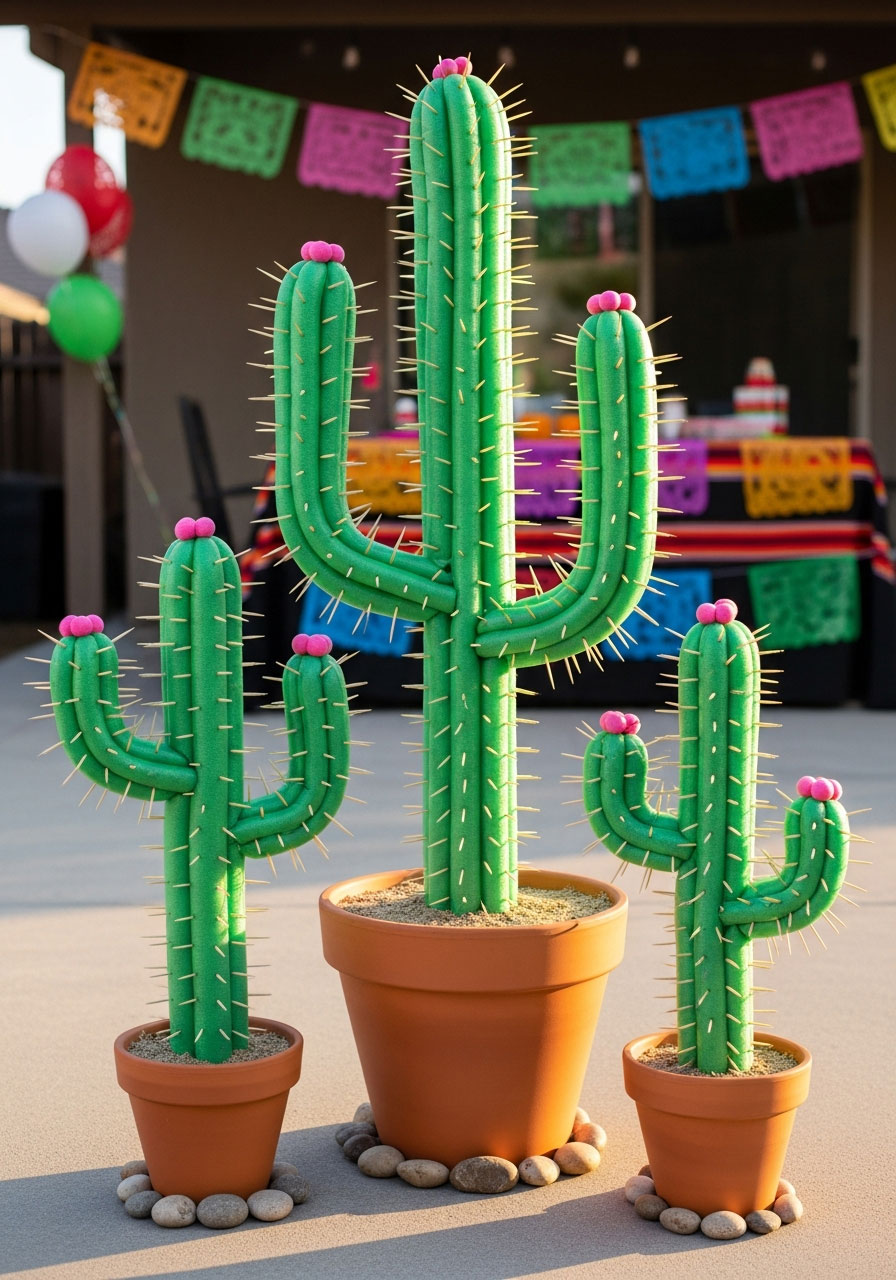
Why This Works: This quirky, fun decoration is an instant conversation starter and works perfectly for summer birthdays, fiesta themes, or any party that needs a pop of personality!
What You’ll Need:
- Green pool noodles (dollar store)
- Small foam balls or styrofoam
- Toothpicks
- Terra cotta pots (optional)
- Hot glue gun
How to Make Them:
1. Cut pool noodles into different heights to create various “cacti.”
2. For arms, cut smaller pieces and attach with toothpicks at angles.
3. Stick toothpicks all over the cactus to create “spines.”
4. Add small foam balls to the tips of some toothpicks for “cactus flowers.”
5. Stand them in terra cotta pots weighted with sand, or mount on foam bases.
Pro Tip: Spray paint them different shades of green for a more realistic look, or go wild with hot pink and turquoise for a whimsical vibe!
7. Hula Hoop Chandelier

Why This Works: This overhead statement piece transforms your party space and looks incredibly expensive – but it’s made from a hula hoop!
What You’ll Need:
- 1-2 hula hoops (dollar store)
- String lights or battery-operated fairy lights
- Ribbon, tulle, or greenery
- Fishing line or clear string for hanging
How to Make It:
1. Wrap your hula hoop with ribbon, tulle, or leave it as-is depending on your theme.
2. Wind string lights around the hoop, securing with zip ties or tape.
3. Add hanging elements: tie ribbons, paper flowers, or greenery to dangle down.
4. Use fishing line to hang from the ceiling at three or four points for balance.
Pro Tip: For outdoor parties, use solar-powered string lights so you don’t need to worry about batteries or outlets. Double up two hoops at different heights for an even more dramatic effect!
8. DIY Tassel Garland

Why This Works: Tassel garlands scream “party!” and you can customize them to match any color scheme. Plus, they’re surprisingly easy to make!
What You’ll Need:
- Tissue paper or crepe paper
- Scissors
- String or twine
- Tape
How to Make Them:
1. Cut tissue paper into rectangles (about 8×12 inches).
2. Fold each rectangle in half lengthwise.
3. Cut fringe along the open edge, stopping about 1 inch from the folded top.
4. Roll the fringed paper tightly, then twist the top to secure.
5. Fold the twisted top over to create a loop and secure with tape.
6. Thread tassels onto string, spacing them 4-6 inches apart.
Fun Variation: Mix metallic tissue paper with regular colors for extra sparkle! Hang these across doorways, above food tables, or as a photo booth backdrop.
9. Glitter-Dipped Plastic Cups

Why This Works: Basic plastic cups become party-perfect with just a little glitter magic. Your guests will feel fancy drinking out of these!
What You’ll Need:
- Clear or colored plastic cups
- Mod Podge
- Glitter
- Foam brush
How to Make Them:
1. Apply Mod Podge to the bottom 2-3 inches of each cup using a foam brush.
2. Dip the cup into a plate of glitter or sprinkle glitter over the glued area.
3. Tap off excess and let dry for at least 2 hours.
4. Once dry, they’re ready to use!
Pro Tip: Make these the day before – you want them completely dry before adding any drinks. Want to skip potential glitter mess? Use glitter spray paint instead for a similar effect!
10. Spray-Painted Dollar Store Buckets

Why This Works: Metal-looking ice buckets and planters are expensive. Dollar store buckets plus spray paint? Not expensive at all!
What You’ll Need:
- Plastic or metal buckets (dollar store)
- Spray paint in metallic or bold colors
- Newspaper or drop cloth
How to Make Them:
1. Clean and dry your buckets thoroughly.
2. In a well-ventilated area, apply thin, even coats of spray paint.
3. Let dry between coats (usually 15-20 minutes).
4. Apply 2-3 coats for full coverage.
5. Use as ice buckets, utensil holders, or planters!
Pro Tip: Metallic gold, silver, or rose gold instantly makes cheap buckets look high-end. Use them to hold flowers, candy, or ice down drinks!
11. Sequin Letter Garland

Why This Works: Spell out “HAPPY BIRTHDAY” or the birthday person’s name with this eye-catching banner that looks custom-made!
What You’ll Need:
- Cardboard (cereal boxes work great!)
- Sequins or glitter
- Glue
- String
- Scissors
How to Make It:
1. Draw large letters on cardboard and cut them out.
2. Cover each letter with glue and sprinkle with sequins or glitter.
3. Let dry completely (at least 4 hours).
4. Punch holes at the top corners of each letter and thread onto string.
Pro Tip: Use different colored sequins for each letter for a rainbow effect, or stick to one color for a more sophisticated look. This also works beautifully with metallic washi tape instead of sequins!
12. Painted Plastic Flatware

Why This Works: Boring white plastic utensils get a serious upgrade with a coat of paint – and you don’t have to pay for fancy color-coordinated cutlery!
What You’ll Need:
- White plastic forks, spoons, and knives
- Acrylic paint or spray paint
- Foam brush (if using acrylic)
How to Make Them:
1. If using acrylic paint, apply thin coats to just the handles with a foam brush.
2. If using spray paint, lay utensils on newspaper and spray in a well-ventilated area.
3. Let dry completely before using.
4. Display in mason jars or painted buckets for extra style points!
Pro Tip: Stick to painting just the handles – you don’t want anyone eating paint! Metallic gold or silver looks incredibly chic.
13. Rainbow Pool Noodle Arch

Why This Works: This showstopper decoration is perfect for outdoor birthday parties and creates an amazing entrance or photo backdrop!
What You’ll Need:
- Pool noodles in rainbow colors (or your party colors)
- PVC pipe or sturdy stakes
- Zip ties or duct tape
- Optional: Command hooks for indoor hanging
How to Make It:
1. Bend pool noodles to create arch shapes.
2. Secure the ends with PVC pipe stakes pushed into the ground (outdoor) or attach to walls with Command hooks (indoor).
3. Arrange pool noodles in rainbow order, securing them together with zip ties.
4. Add tissue paper clouds or balloon clusters at the base!
Pro Tip: This also works as a “drive-through” birthday parade decoration if you’re celebrating from a distance!
14. Yarn Pom Pom Garland
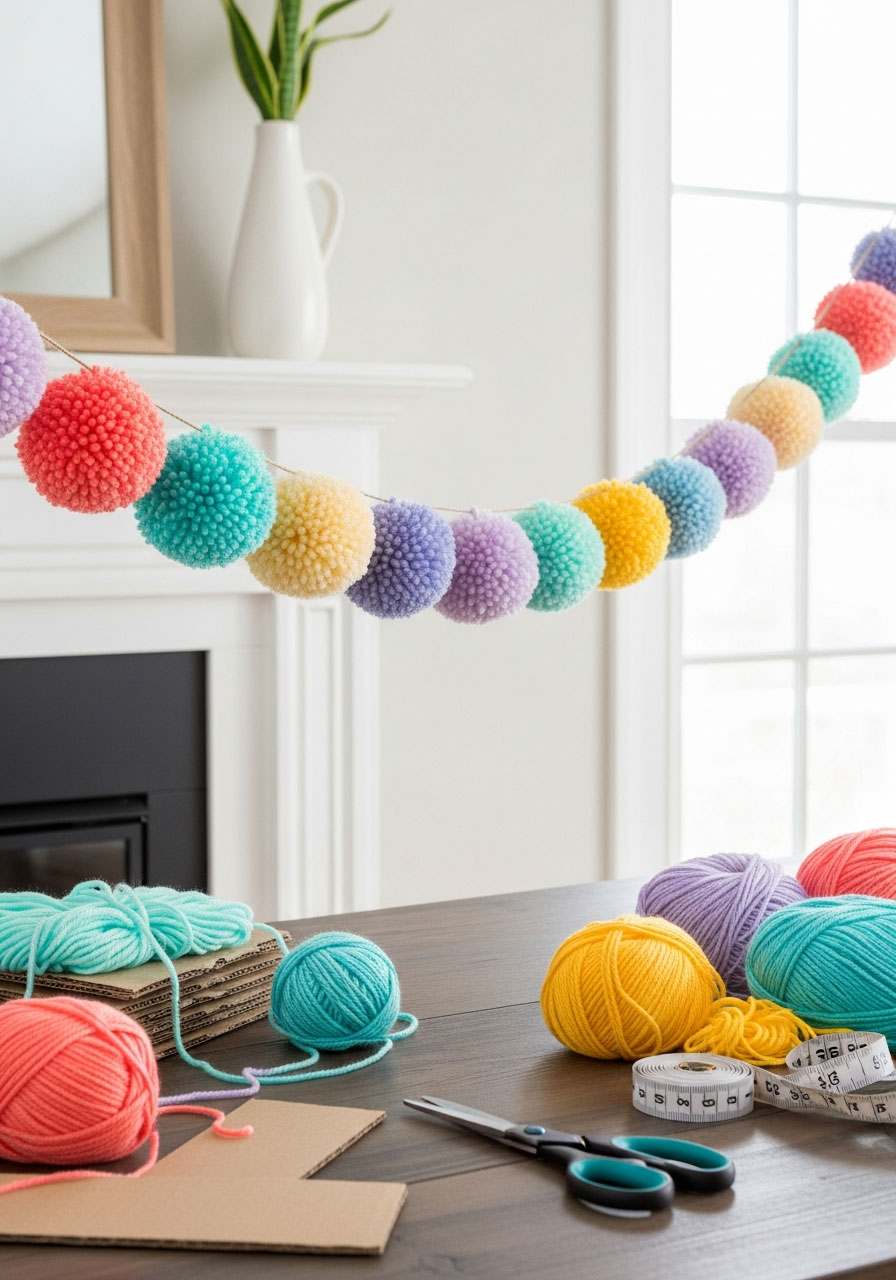
Why This Works: Softer and more textured than tissue paper pom poms, yarn pom poms add a cozy, colorful touch to any party!
What You’ll Need:
- Yarn in various colors
- Cardboard or pom pom maker
- Scissors
- String for garland
How to Make Them:
1. Wrap yarn around a piece of cardboard about 50 times (more wraps = fuller pom pom).
2. Slide the yarn off the cardboard and tie tightly in the center with a separate piece of yarn.
3. Cut the loops on both sides.
4. Trim into a round shape, fluffing as you go.
5. String pom poms together on twine or ribbon.
Pro Tip: Make these while watching TV – it’s the perfect mindless craft activity! Mix different sizes for visual interest.
15. Watermelon-Themed Mason Jars

Why This Works: Perfect for summer birthdays! These adorable jars can hold utensils, flowers, or drinks.
What You’ll Need:
- Mason jars
- Pink and green acrylic paint
- Black permanent marker
- Foam brush
How to Make Them:
1. Paint the top two-thirds of the jar pink and let dry.
2. Paint the bottom third green (like a watermelon rind).
3. Once dry, use a black marker to draw small “seeds” on the pink section.
4. Fill with pink lemonade, flowers, or straws!
Fun Variation: This technique works for any fruit theme – try strawberries (red with green tops) or pineapples (yellow with green leaves)!
16. Tissue Paper Pom Pom Flowers

Why This Works: These oversized flowers make a HUGE impact and are surprisingly simple to create – even if you’re not crafty!
What You’ll Need:
- Tissue paper in various colors
- Paper plates or cardboard circles
- Hot glue gun
- Scissors
How to Make Them:
1. Make several tissue paper pom poms (see #3 for instructions).
2. Instead of fully opening them, leave them slightly flattened.
3. Hot glue the flat side to a paper plate or cardboard circle.
4. Add a contrasting color pom pom in the center as the “flower center.”
5. Attach to walls or hang from ceiling!
Pro Tip: These look incredible in a cluster of 3-5 in different sizes. Go BIG – make some as large as 24 inches across for serious wow factor!
17. Dollar Store Balloon Clouds with Rainbow Tassels

Why This Works: Dreamy, whimsical, and ridiculously photogenic – these balloon clouds are easier than they look!
What You’ll Need:
- White balloons (lots of them!)
- Fishing line or clear string
- Rainbow tassels (DIY or store-bought)
- Balloon pump
How to Make Them:
1. Inflate 15-20 white balloons to slightly different sizes.
2. Tie them together in clusters using fishing line to create cloud shapes.
3. Attach rainbow tassels to the bottom of each cloud.
4. Hang from ceiling at different heights.
Pro Tip: Add a touch of blue or gray balloons to your white ones for a more realistic cloud effect. These are magical for unicorn or rainbow-themed parties!
18. Dip-Dyed Cupcake Liners

Why This Works: A tiny pop of color that makes a big difference! Perfect for lining cupcakes, holding candy, or as confetti.
What You’ll Need:
- White cupcake liners
- Food coloring or watered-down acrylic paint
- Small bowls
- Paper towels
How to Make Them:
1. Mix food coloring with a little water in small bowls.
2. Dip the bottom edge of each cupcake liner into the colored water.
3. Place on paper towels to dry (about 30 minutes).
4. Use as regular cupcake liners or scatter as colorful accents!
Pro Tip: Create an ombre effect by using different shades of the same color. These add a custom touch without any custom pricing!
19. Fringed Tissue Paper Garland

Why This Works: This garland has movement and texture that makes your party feel lively and festive – and it’s crazy easy to make!
What You’ll Need:
- Tissue paper or crepe paper in party colors
- Scissors
- String or ribbon
- Tape or hot glue
How to Make It:
1. Cut tissue paper into strips about 3 inches wide and 12 inches long.
2. Fold each strip in half lengthwise.
3. Cut fringe along the open edge, stopping about 1/2 inch from the fold.
4. Unfold and attach to string using tape or hot glue, slightly overlapping each piece.
5. Hang wherever you need a burst of color!
Fun Variation: Alternate colors for a rainbow effect, or use all one color for a monochromatic look. These look fantastic hung in doorways or behind food tables!
20. Glitter-Dipped Balloons

Why This Works: Regular balloons become party glamor with just a little glitter! These catch the light beautifully and look expensive.
What You’ll Need:
- Balloons in your party colors
- Mod Podge
- Glitter
- Foam brush
- Balloon pump
How to Make Them:
1. Inflate balloons to desired size.
2. Apply Mod Podge to the bottom third of each balloon with a foam brush.
3. While wet, sprinkle or roll in glitter.
4. Let dry for 1-2 hours before hanging.
Pro Tip: Do this over a large sheet or outdoors – glitter cleanup is real! Mix glittered balloons with plain ones for balance, or go all-out glitter for maximum sparkle!
21. DIY Glitter Party Cups
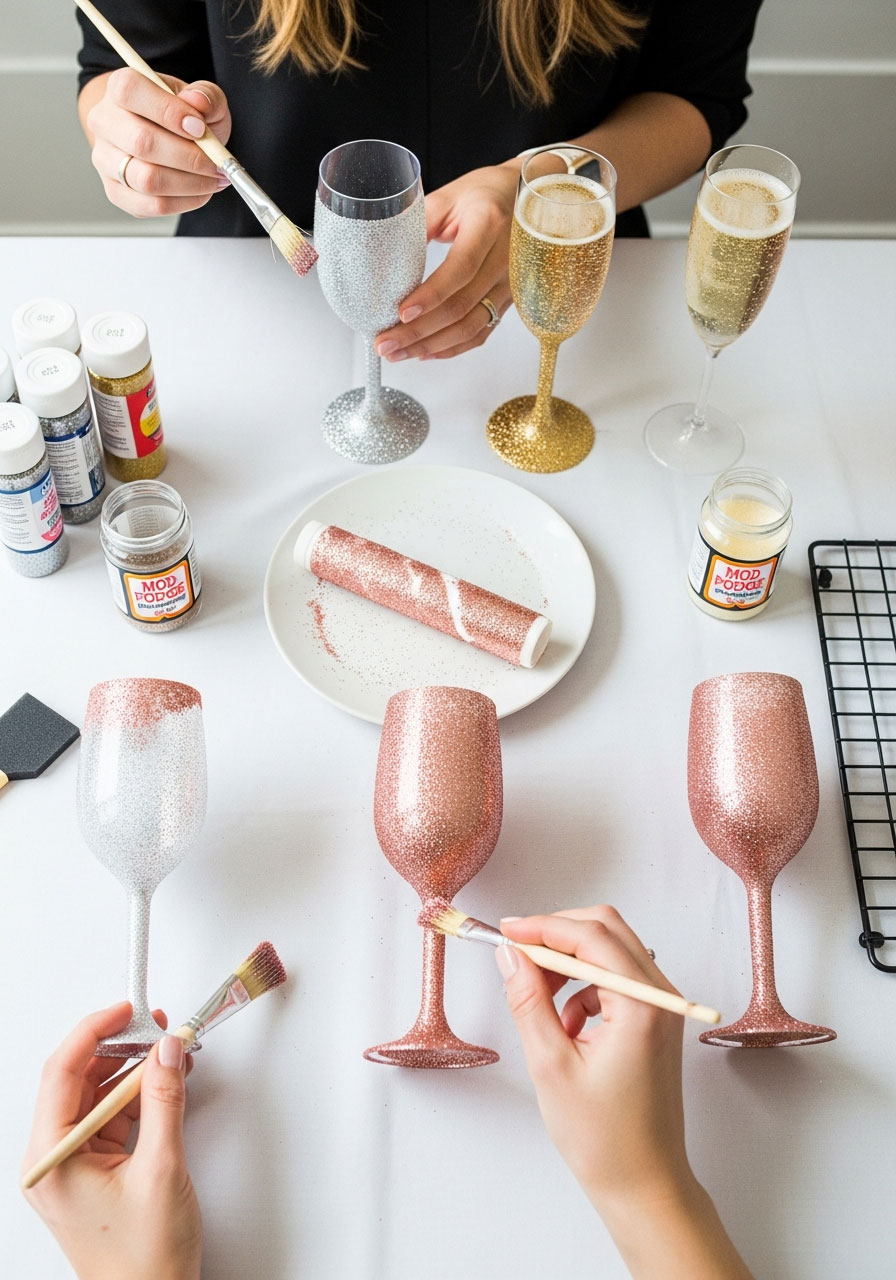
Why This Works: Plastic wine glasses get a major upgrade! Your guests will feel VIP drinking from these.
What You’ll Need:
- Clear plastic wine glasses or champagne flutes
- Glitter
- Mod Podge
- Foam brush
How to Make Them:
1. Apply Mod Podge to the stem and bottom of each glass.
2. Dip in glitter or sprinkle glitter over the glued areas.
3. Tap off excess and let dry completely (2-3 hours minimum).
4. These are ready for your party beverages!
Pro Tip: Stick to decorating the stem and base only – you want to avoid glitter near the rim where people will be drinking!
22. Rainbow Balloon, Streamer & Star Combo

Why This Works: This triple-threat combination creates a cohesive, colorful party atmosphere that ties everything together!
What You’ll Need:
- Rainbow colored balloons
- Matching streamers
- Small gold star cutouts (foam or cardboard)
- Tape and string
How to Make It:
1. Create balloon clusters using 3-5 balloons tied together.
2. Hang streamers as backdrop or from ceiling.
3. Scatter gold star cutouts on walls, tables, or hang from ceiling with fishing line.
4. Arrange everything to create visual flow throughout your party space.
Pro Tip: Keep rainbow colors in order (red, orange, yellow, green, blue, purple) for a cohesive look, or mix them up for a more playful, energetic vibe!
23. Simple Hanging Balloon Flowers

Why This Works: These adorable balloon flowers add dimension and fun to your party without taking up table space!
What You’ll Need:
- Balloons: 5 of one color for petals, 1 contrasting color for center
- Balloon pump
- Fishing line for hanging
How to Make Them:
1. Inflate 5 balloons to the same size (these are your petals).
2. Tie them together in a circle formation.
3. Inflate a smaller balloon in a contrasting color for the center.
4. Push the center balloon into the middle of your petal circle.
5. Secure everything with string and hang from the ceiling!
Fun Variation: Make different sized flowers and hang them at various heights for a garden party feel. Use bright colors for summer or pastels for spring birthdays!
24. Hula Hoop Chandelier with Christmas Lights
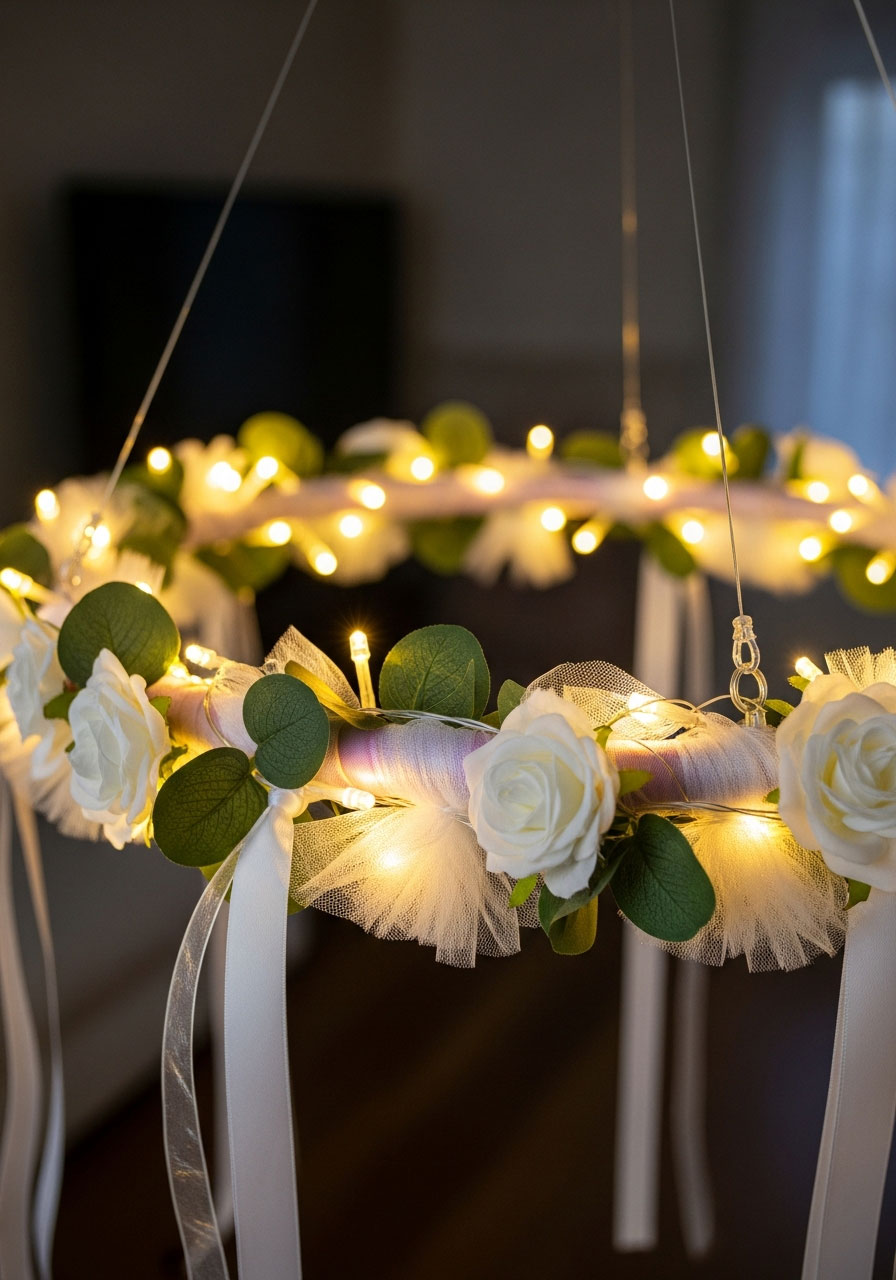
Why This Works: This enchanting overhead decoration creates ambiance and makes any space feel magical – day or night!
What You’ll Need:
- Hula hoop
- String lights or fairy lights (battery-operated is easiest)
- Ribbon or tulle
- Fishing line for hanging
- Optional: flowers, greenery, or hanging crystals
How to Make It:
1. Wrap hula hoop with ribbon or tulle if desired.
2. Wind string lights around the entire hoop, securing with zip ties or tape.
3. Add hanging elements: ribbons, artificial flowers, or greenery.
4. Hang from ceiling using fishing line at 3-4 points for balance.
5. Turn on lights and watch the magic happen!
Pro Tip: Use warm white lights for elegance or colored lights for a fun, playful vibe. This looks incredible over the food table or dance floor!
Quick Tips for Dollar Store Party Decoration Success
Shop Smart:
- Hit up dollar stores on weekday mornings for the best selection
- Check the seasonal section first – you’ll find themed items at unbeatable prices
- Don’t overlook craft supplies; they’re decoration goldmines!
Plan Your Color Scheme: Choose 2-3 main colors and stick with them throughout all your decorations for a cohesive, professional look.
Work in Layers: Combine different types of decorations (hanging, table, wall) at varying heights to create visual interest.
Make It Ahead: Most of these projects can be completed days or even weeks before your party. Your future self will thank you!
Embrace Imperfection: Handmade decorations have character! Small imperfections actually add to their charm.
The Bottom Line on DIY Birthday Party Decorations
Here’s what I’ve learned from countless parties on a budget: you don’t need to spend hundreds of dollars to create a celebration that looks absolutely stunning. With a hot glue gun, some glitter, and a quick trip to the dollar store, you can transform any space into a party paradise that’ll have your guests thinking you hired a professional decorator.
The best part? These DIY decorations let you create exactly the vibe you want – whether that’s elegant and sophisticated or fun and whimsical. Plus, there’s something special about putting your personal touch into the celebration. Your guests will feel the love and effort you put into making the day special.
So grab your glue gun, embrace your inner party planner, and get ready to throw a birthday bash that looks like a million bucks (even though it cost less than dinner for two). Your wallet – and your Instagram feed – will thank you!
Ready to start planning? Pick 3-5 of these DIY decorations that match your party theme, make a quick list, and hit up the dollar store this weekend. You’ve got this!
More Birthday Party Ideas to Keep the Fun Rolling:
40+ Magical Harry Potter Birthday Games That’ll Cast a Spell on Your Party
Rainbow Punch Piñata: The No-Bat, No-Mess Party Hack Your Kids Will Go Wild For
Candy Microphone Craft for Kids’ Karaoke Birthday Parties
15+ Cheap Girl Birthday Party Ideas That’ll Make You the Hero Parent
Birthday Cake Craft for Kids: A Super Simple DIY They’ll Love Making
45+ Unique & Useful Party Favor Ideas for Kids That Aren’t Junk!
How to Make a Crepe Paper Streamer Backdrop
7 Show-Stopping Ways to Style Your Party with Tassel Garlands
DIY Birthday Confetti Bead Garland
DIY Watercolor Paper Pinwheels: The Birthday Party Craft That’ll Have Everyone Saying “WOW!”
How To Make Epic Pom Pom Party Hats That’ll Steal the Show
As an Amazon Associate, we may earn a commission from qualifying purchases at no additional cost to you.