
Want to know the secret to throwing a party that looks like you hired a professional decorator – without actually hiring one? It’s all about the backdrop, my friend. And this crepe paper streamer backdrop is about to become your new party-planning superpower.
Here’s why we’re obsessed with this project: it’s ridiculously cheap (we’re talking under $15 in most cases), takes less than 30 minutes to put together, and the results? Chef’s kiss. Whether you’re throwing a birthday bash, a baby shower, or just want to make Taco Tuesday feel extra festive, this backdrop delivers serious wow factor with minimal effort.
The best part? You don’t need to be crafty. If you can hang a picture frame and cut in a semi-straight line, you’ve got this. Let’s dive in!

What You’ll Need
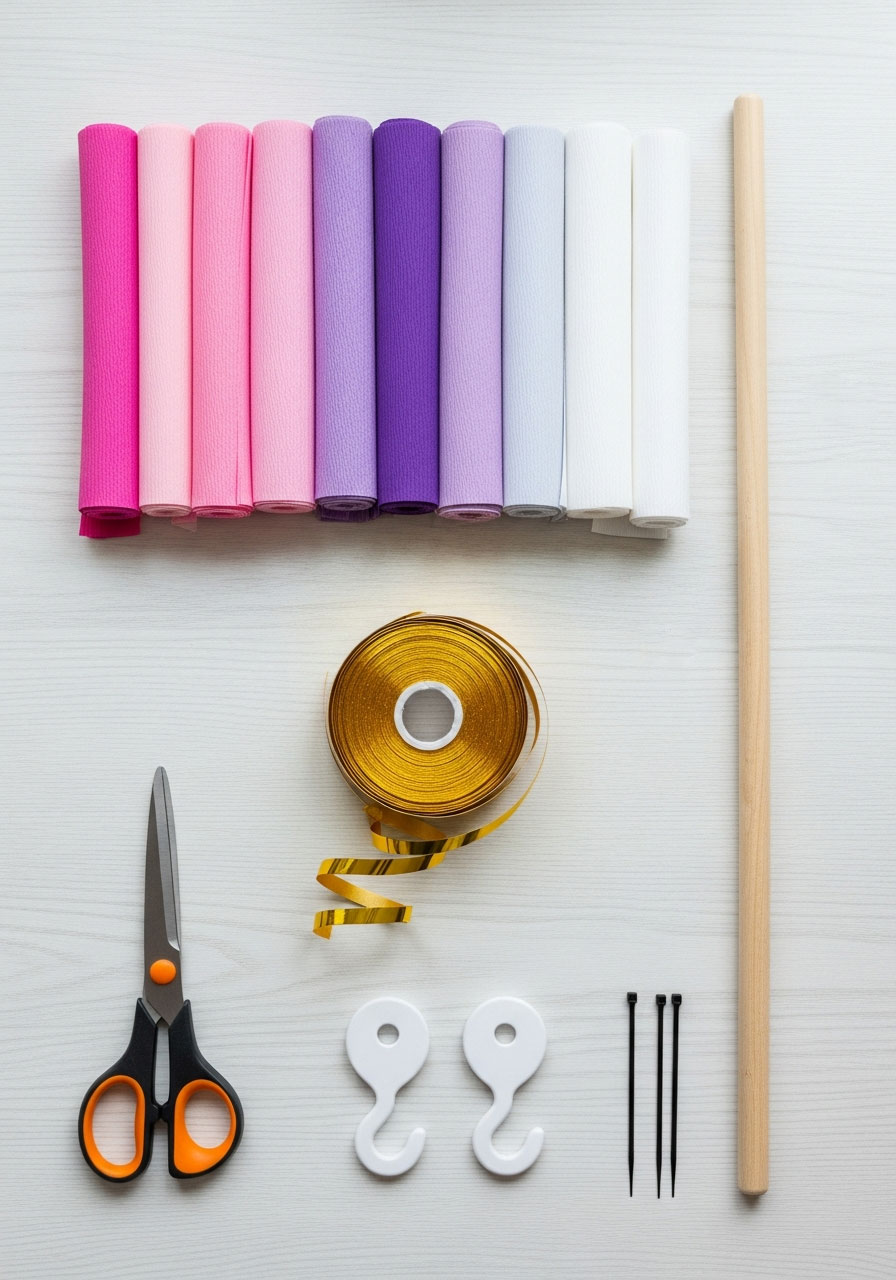
Here’s your shopping list (and chances are, you already have half of this stuff):
Crepe paper streamers – 5-8 rolls depending on your backdrop width (mix colors or go monochrome – your call!)
Gold curling ribbon – 1 spool for that touch of sparkle (optional but highly recommended)
Dowel rod or curtain rod – 1.5-2 meters long (grab one from the hardware store for around $2-5)
2 removable wall hooks – the Command brand ones work great and won’t damage your walls
2 small zip ties or cable ties – for hanging the rod
Scissors – just your regular kitchen scissors will do
Budget Check: For a 5-foot backdrop, expect to spend about $10-15 total. Not bad for a decoration that’ll be the star of all your party photos!
Pro Tip: Crepe paper streamers usually come in multi-packs of 4 colors. Grab 2 packs if you want variety, but you’ll likely only use about 5 rolls total. Save the extras for your next celebration!
Pirate Birthday Scavenger Hunt for Kids Printable
Instant Pirate Adventure: Download, print, and play in 15 minutes! No stress – just instant, unforgettable fun for kids ages 4-12
Indoor Party Lifesaver: Perfect for apartments & houses. Keep 1-10 kids wildly entertained for 45 minutes with clever rhyming clues
A Treasured Memory: Watch your birthday child become the hero of an epic story. Includes a thrilling intro and congratulatory treasure letter
Fun That Secretly Teaches: Kids race to solve riddles while building reading, problem-solving, and teamwork skills. Fun with a hidden purpose!

Indoor Birthday Scavenger Hunt Printable for Kids – 12 challenges
Your 15-Minute Party Hero: Instantly download, print, and hide. Get 1-2 hours of immersive, screen-free fun with 12 unique puzzles. Stress-free entertainment, guaranteed
More Than a Hunt – It’s a “”Cake Bandit”” Adventure! Kids don’t just find clues; they solve the mystery of the stolen cake! This engaging storyline creates a memorable birthday mission
Ultimate Indoor Party Lifesaver: Perfect for bad weather or small spaces. Keeps kids ages 4-10+ happily challenged with picture matching, mazes, and secret codes
Fun That Secretly Builds Genius: Laughter meets learning! These 12 clever challenges boost problem-solving, teamwork, and critical thinking skills without the kids even noticing

Difficult Birthday Scavenger Hunt Printable for Adults – The Oracle’s Birthday Prophecy
Forget Boring Parties. Unleash the Oracle: Transform a birthday into an epic mystery with 30 brain-teasing riddles, ciphers, and challenges. Customize the perfect adventure for your guests
Be the Host of the Most Memorable Party: Provide the clever, shared activity that gets everyone laughing and collaborating. It’s the highlight that guests will talk about for years
Sophisticated Fun, Zero Effort: Just download, pick your 10 favorite clues from 30 options, and hide them. Get a complete, themed adventure without the stress of planning from scratch
Challenge Adult Minds with “The Prophecy”: Move beyond simple games. This hunt features logic puzzles, cryptic ciphers, and hilarious dares designed specifically to engage and thrill adults

Happy Birthday Decorations
Everything in one box = party stress solved – Banner, honeycomb balls, swirls, and garland all coordinated. No last-minute runs to three different stores at 9 PM the night before.
Photo-ready in 15 minutes – Easy assembly means you spend less time wrestling with decorations and more time enjoying the birthday person’s reaction. Looks expensive, sets up fast.
Reusable = smart money – Quality materials hold up through the party AND pack away for next year. Stop buying flimsy decorations that rip before cake time.
Saves you $50+ vs. party store prices – Get the complete coordinated look without the markup. Guests think you hired a decorator; you paid a fraction of the cost.

How to Create Your Streamer Backdrop (Step-by-Step)
Step 1: Set Up Your Wall Hooks
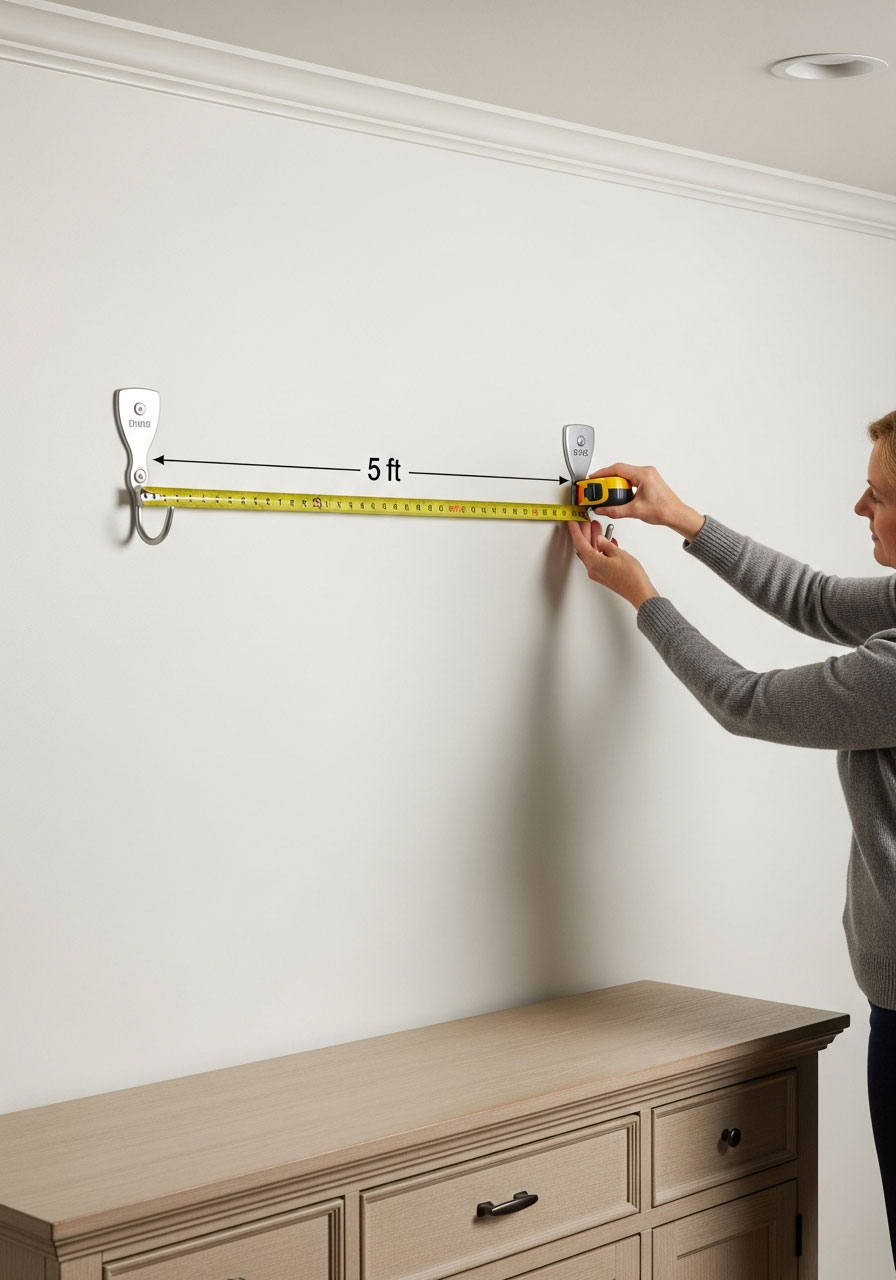
First things first – figure out where this beauty is going to hang. Standing behind your buffet table? Over your gift table? Framing the birthday throne? Once you’ve picked your spot, it’s go time.
Here’s what to do:
1. Eyeball where you want your backdrop to hang (yes, eyeball it – we’re keeping this casual and quick!)
2. Stick one removable hook on each side of your chosen area, roughly lining them up with the edges of your table or setup
3. Don’t stress about getting them perfectly level – you’ll be able to adjust later with the zip ties
The goal here is “pretty close”, not “measured with a laser level”. This is a party, not a construction site!
Step 2: Hang Your Rod
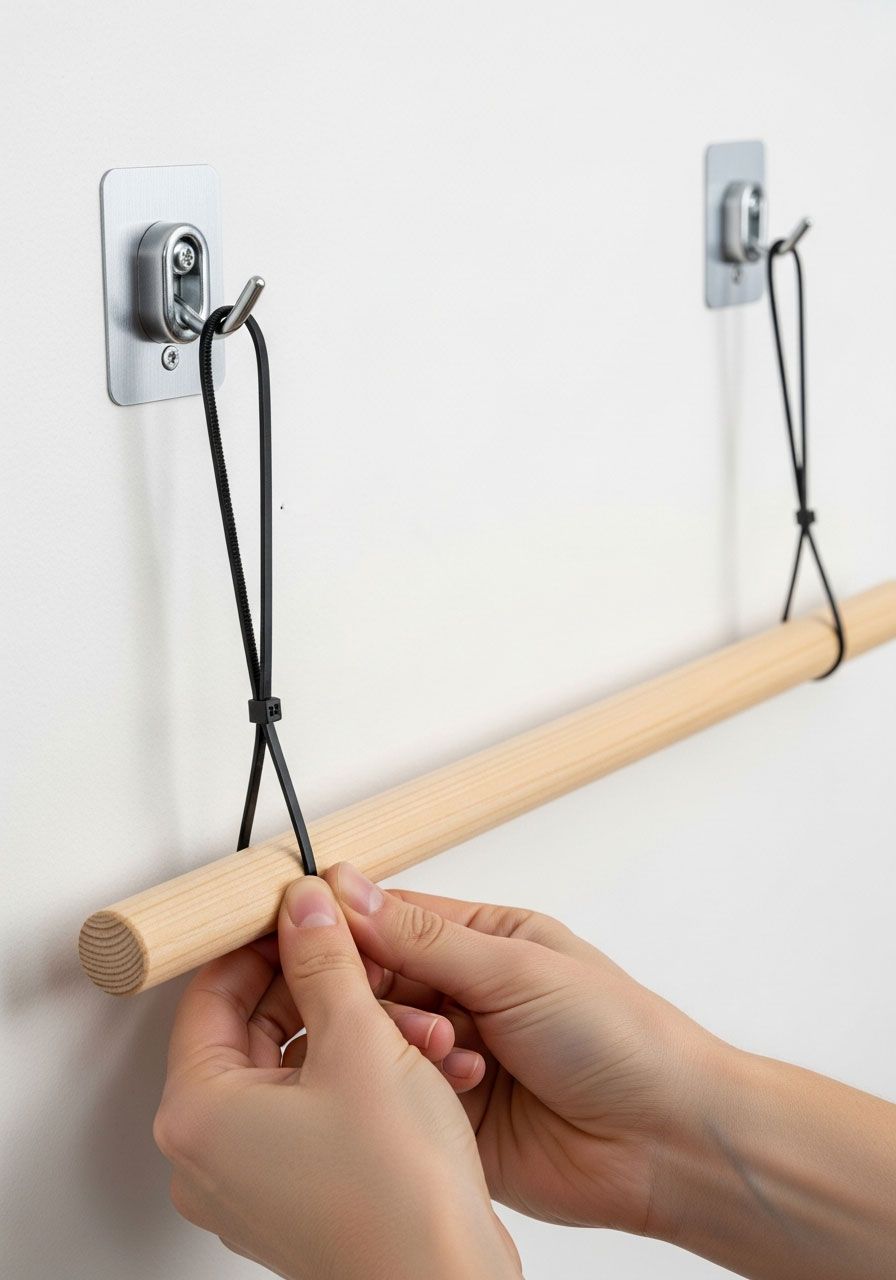
Now we’re getting somewhere! Time to get that dowel or curtain rod up on the wall.
Here’s the trick:
1. Loop your two zip ties together, leaving plenty of room in the loop
2. Hook one zip tie loop onto each wall hook
3. Slide your dowel through both zip tie loops
4. Step back and check if it’s level (if not, tighten one zip tie at a time until the rod balances out)
Why zip ties? They’re adjustable! If your backdrop looks a little lopsided when you’re done, you can easily fine-tune the height without having to move the hooks. Genius, right?
Step 3: Add Your Streamers (The Fun Part!)
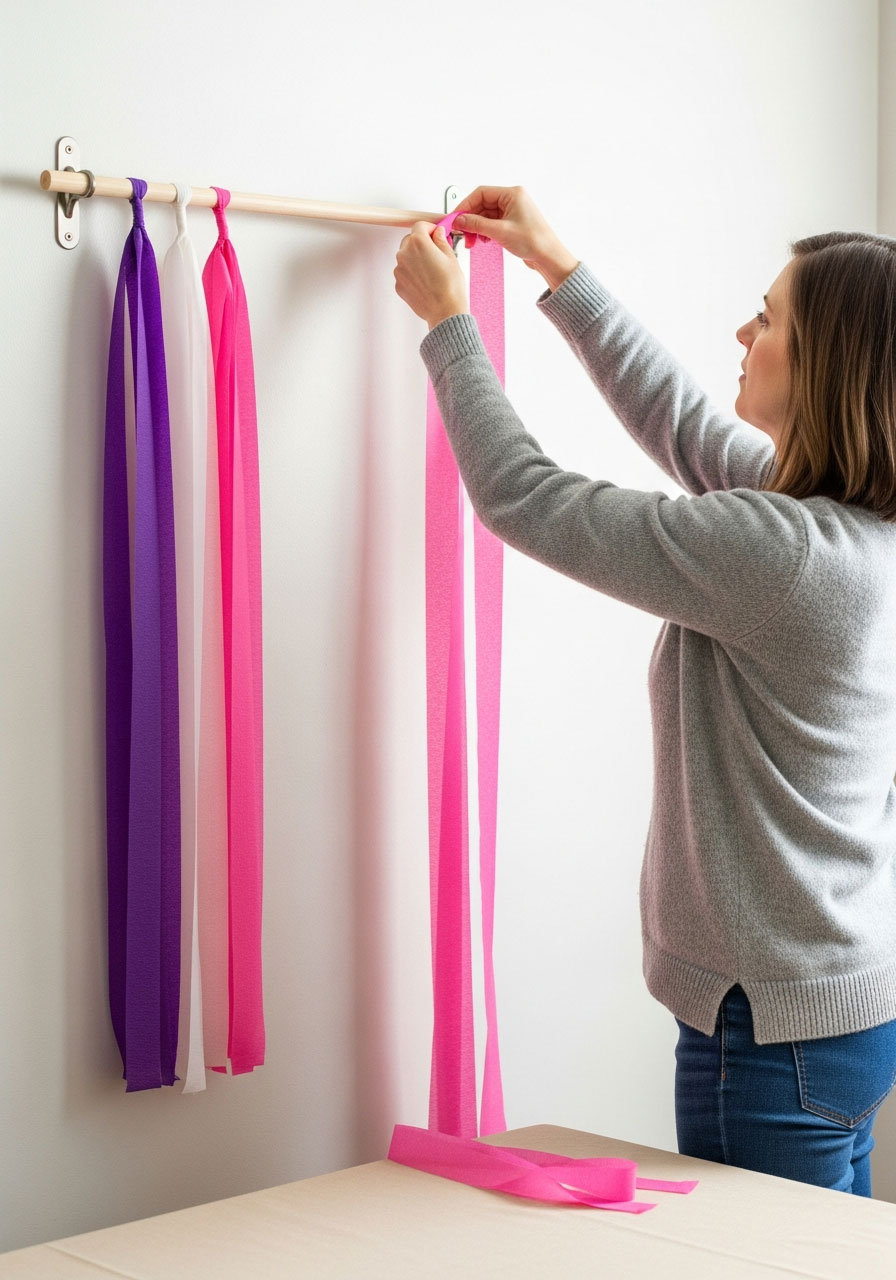
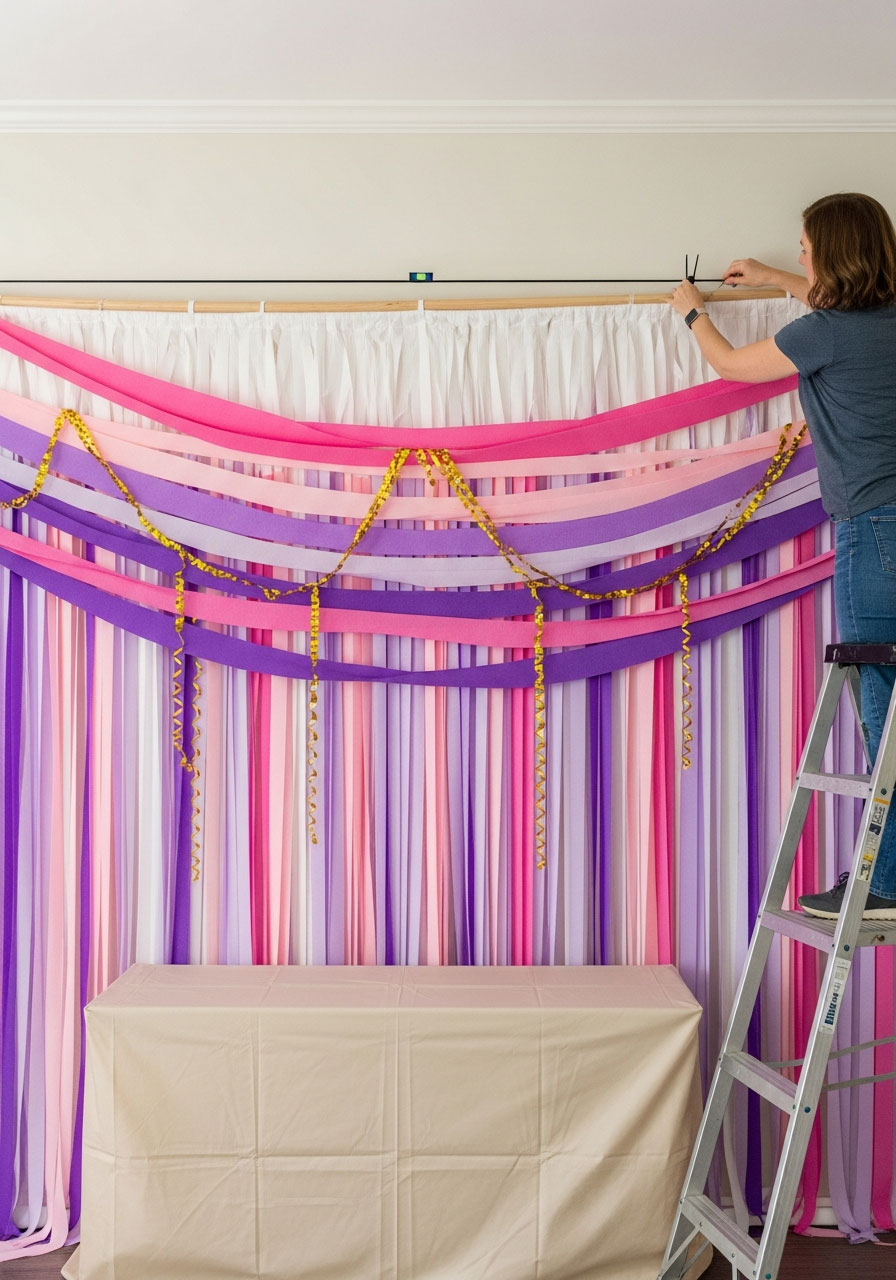
Here’s where your backdrop starts to come alive. Crepe paper streamers are so lightweight that you can simply loop them over the rod – no taping, no tying, no fuss. Plus, when you loop them over, you get double the length with half the work!
Follow this game plan:
1. Start with one color and space the streamers out evenly across the rod (about 2-3 inches apart works great)
2. Loop each streamer over the rod so both ends hang down
3. Add your other colors, filling in the gaps and mixing them randomly for a more dynamic look
4. Keep stepping back to check your spacing – you want good color distribution without any obvious patterns
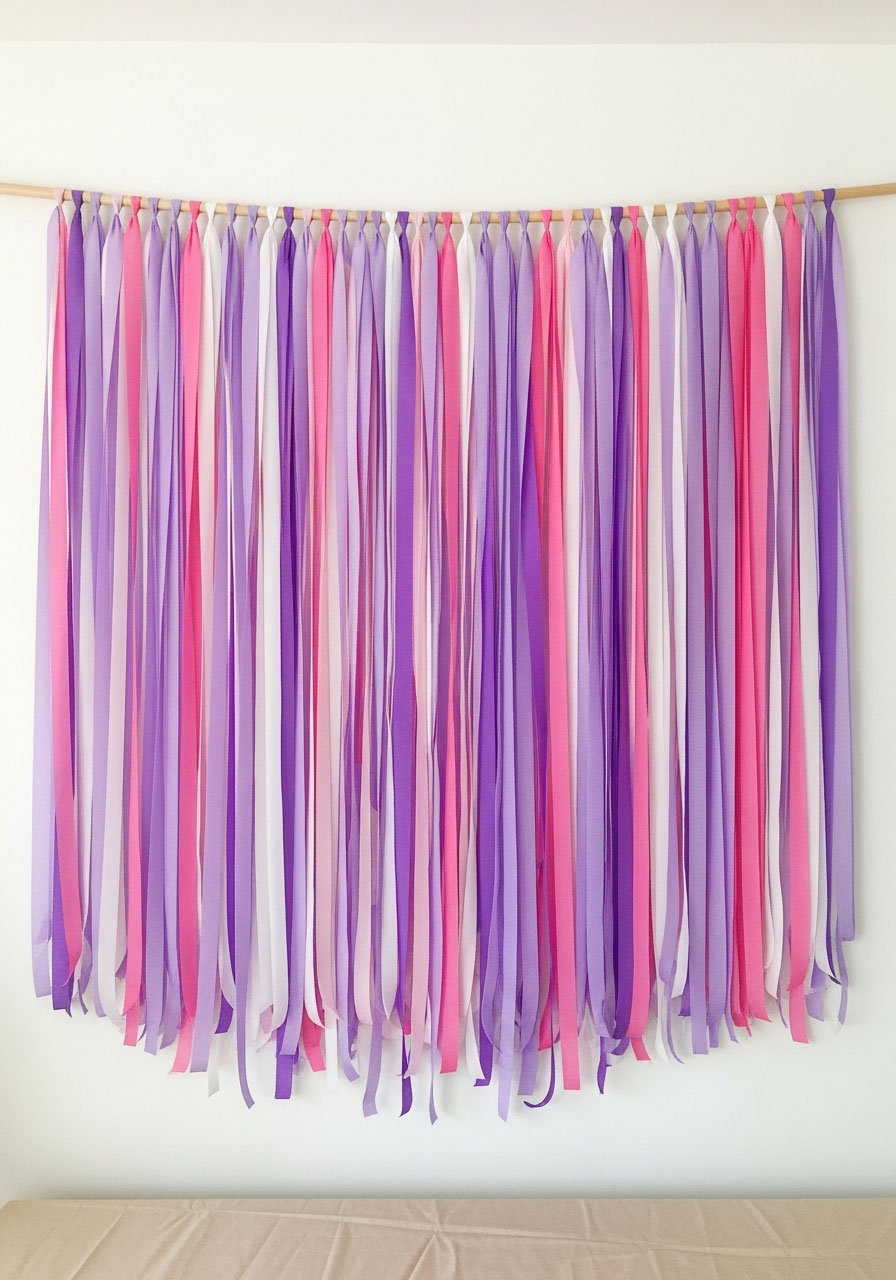
Cutting Options: You’ve got two choices here, and both look fantastic:
- Straight Cut: Simply trim all the streamers at or just below your tabletop for a clean, uniform look
- Arc Cut (Our Favorite!): Cut the streamers in the middle shorter than the ones on the edges to create a gentle curve – this keeps your buffet items visible and adds visual interest
Don’t stress about making the arc perfect on your first pass. We’ll clean it up in a minute!
Step 4: Add Some Sparkle with Curling Ribbon
Ready to take your backdrop from “nice” to “WOW”? Time for the secret weapon: metallic curling ribbon.
Here’s how to work that magic:
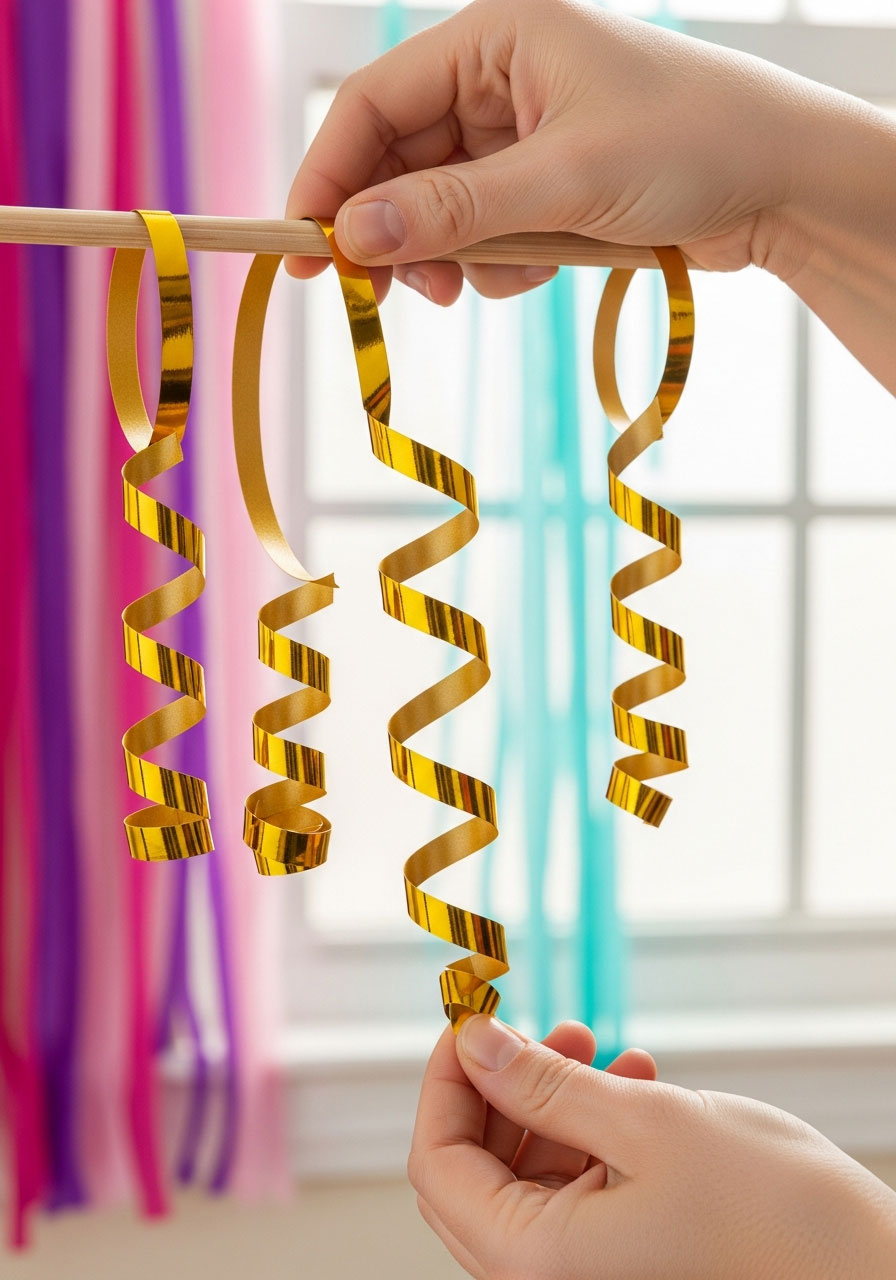
1. Grab your gold (or silver, or rose gold!) curling ribbon
2. Loop it over the rod just like you did with the streamers, but use it sparingly – think of it as the jewelry of your backdrop
3. Cut the ribbon with plenty of extra length because here’s the fun part: that “curling ribbon” name isn’t just for show – it’s going to spring up into gorgeous spirals!
4. Space the metallic ribbons randomly throughout your streamers, varying the heights for more texture and dimension
Fun Twist: Embrace those curls! They might catch you off guard at first, but trust us – the springy texture adds movement and catches the light beautifully. It’s not a mistake; it’s a feature!
Step 5: Perfect Your Arc and Final Touches
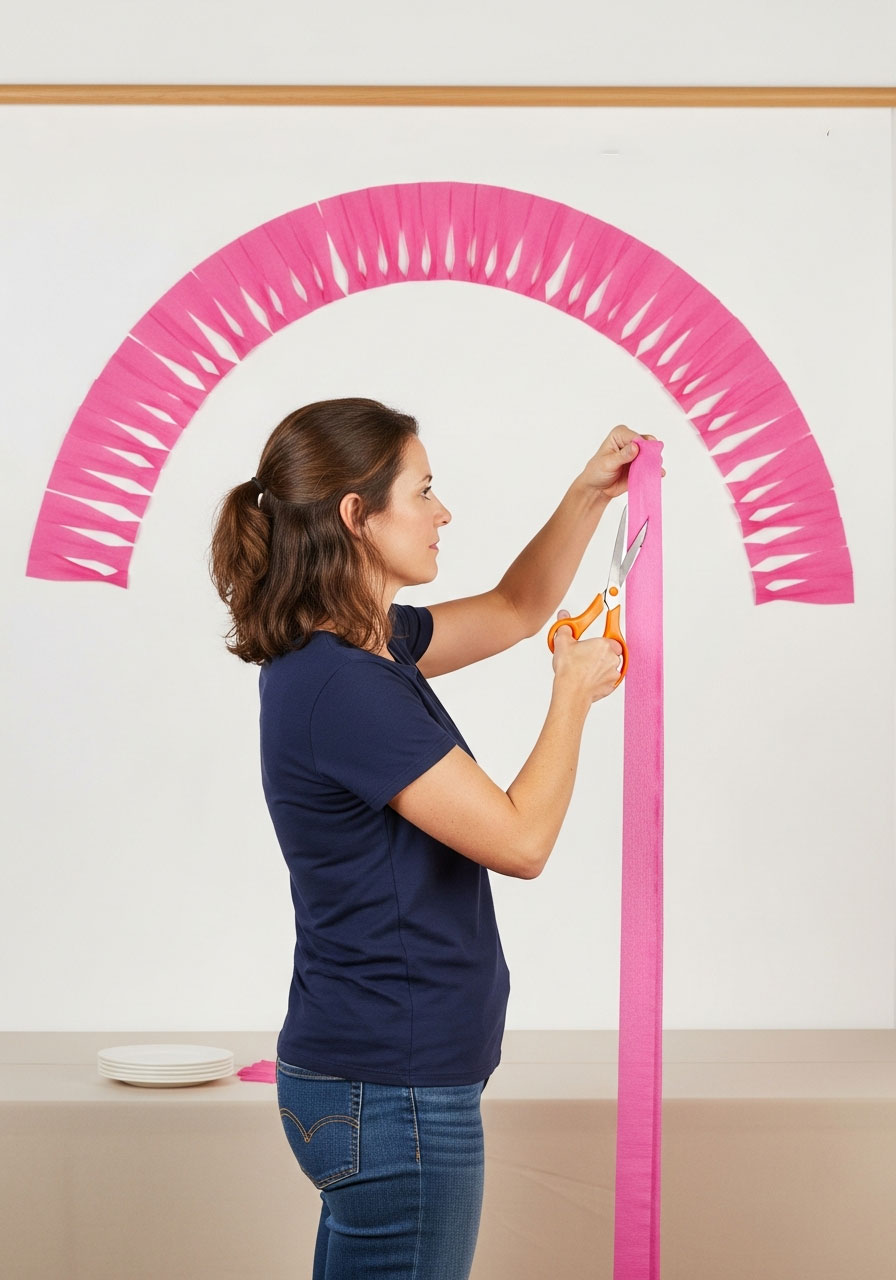
Almost there! Now it’s time to finesse your creation.
Final adjustments:
1. Step back about 6-8 feet and really look at your backdrop with fresh eyes
2. Trim the streamers to perfect your arc or straight line, cutting off any wonky pieces
3. Check if your rod is level – if it’s tilted, adjust those zip ties until it’s straight
4. Fluff and arrange any streamers that look flat or stuck together (crepe paper loves to cling to itself)
5. Make sure your metallic ribbons are evenly distributed and catching the light
Stand back and admire your handiwork! You just created a professional-looking party backdrop in under 30 minutes.
Pro Tips for Backdrop Perfection
Make it ahead: This backdrop can be assembled days or even weeks before your party! Just keep it away from humidity (bathrooms are not your friend here) and direct sunlight, which can fade the colors.
Color scheme ideas:
Rainbow: Use all the colors for a vibrant, playful vibe perfect for kids’ parties
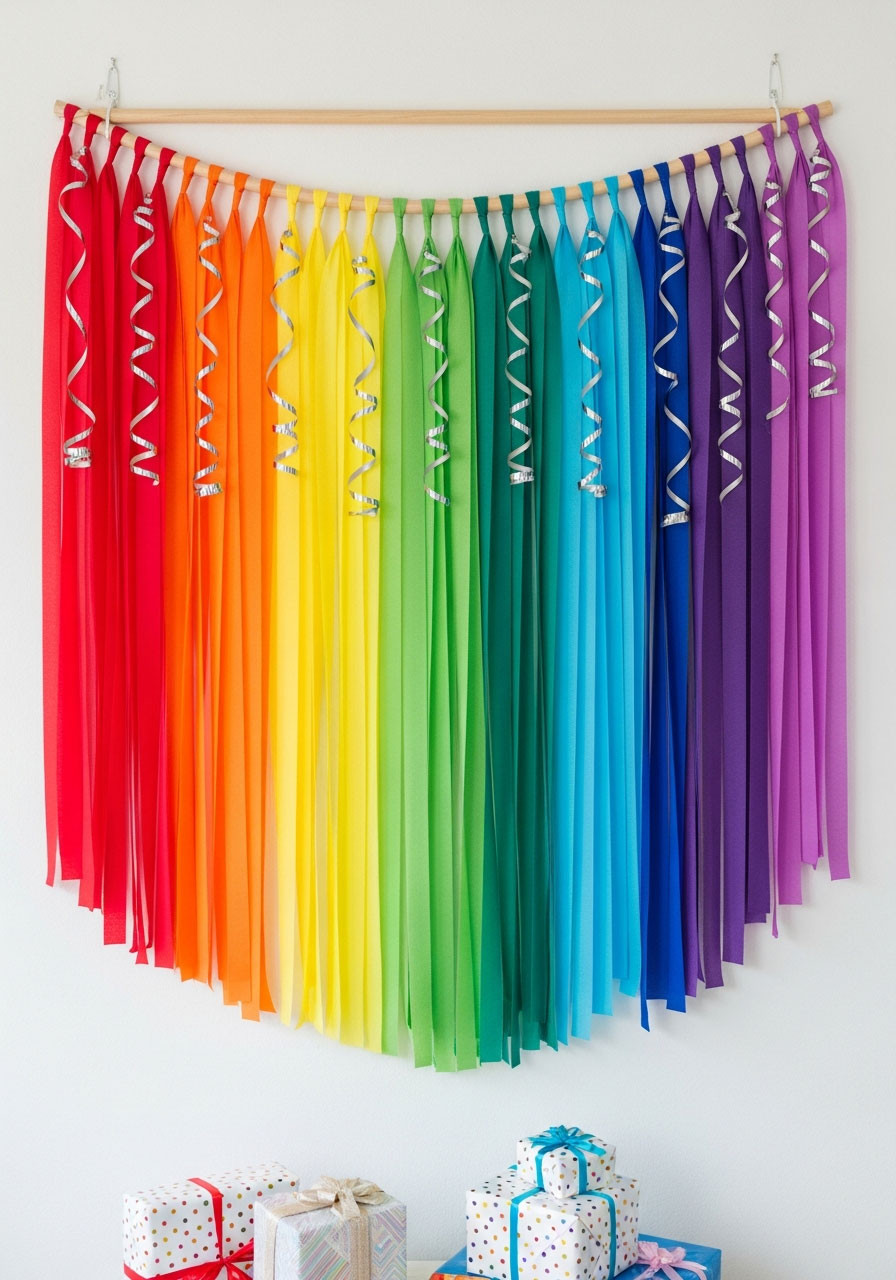
Ombré: Stick to shades of one color (light pink to hot pink, for example) for an elegant look
Two-tone: Pick two complementary colors for a sophisticated, modern feel
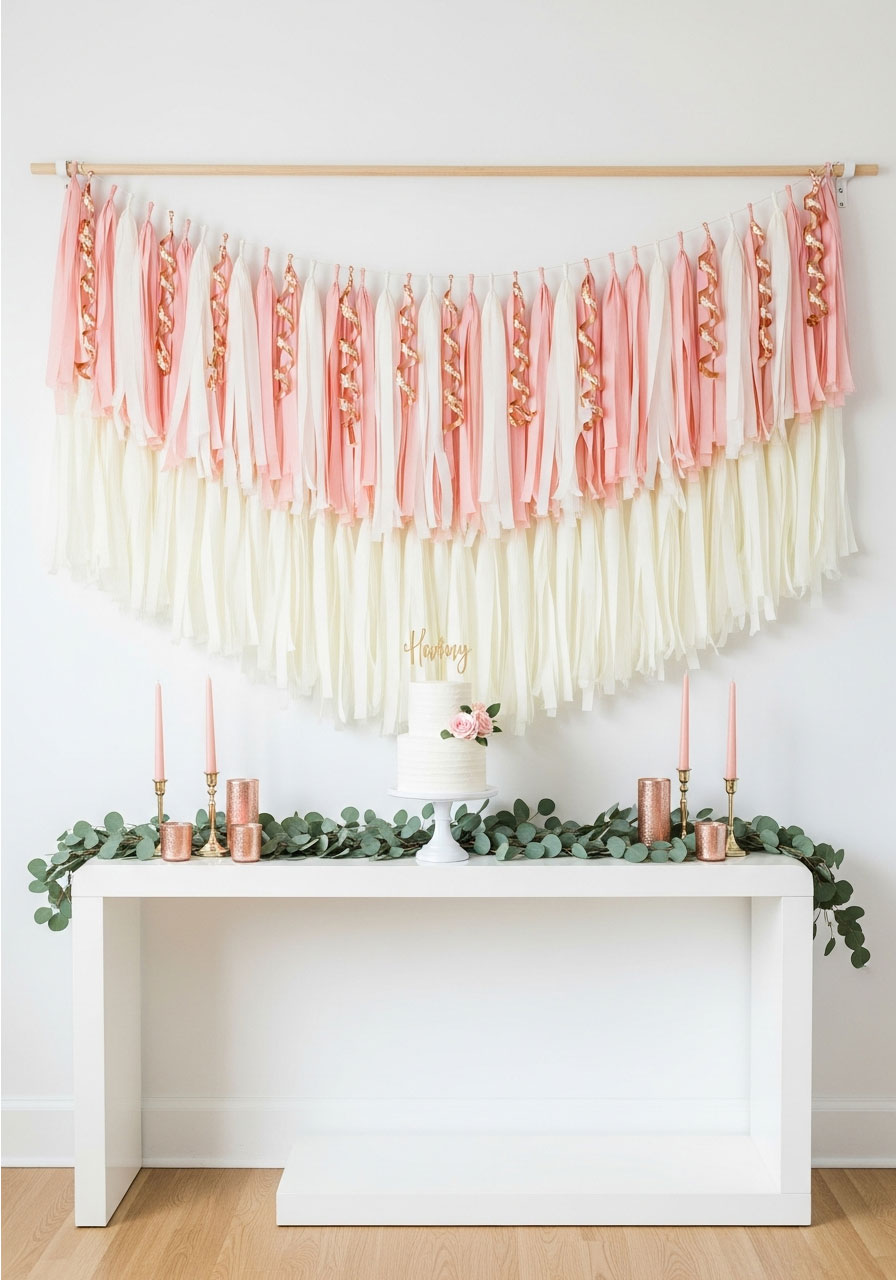
Monochrome + metallic: Go all white or all pink with gold accents for an Instagram-worthy setup
Size matters: For a dessert table, aim for 4-5 feet wide. For a full buffet or photo backdrop, go 6-8 feet for maximum impact.
Reuse and recycle: If you’re careful when taking it down, you can roll up the streamers and save them for next time! Just wrap them loosely and store in a cool, dry place.
Extra sparkle: Want even more pizzazz? Add some matching balloons at the base, string up fairy lights behind the streamers, or attach a few paper fans or pom-poms along the rod.
Why This Backdrop Is a Total Game-Changer
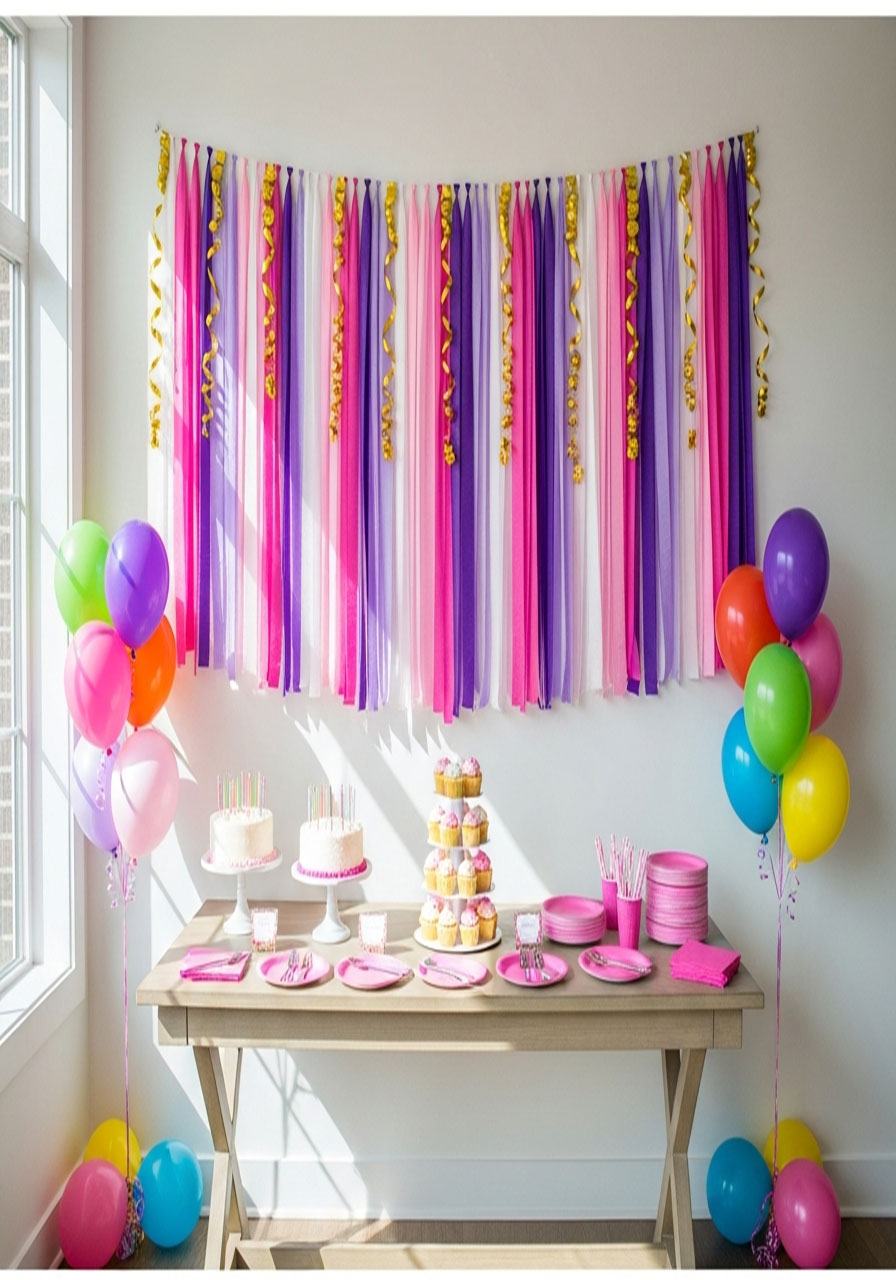
Let’s be real for a second: party planning can feel overwhelming. Between the food, the guest list, the cake, and trying to make everything look Pinterest-perfect, it’s easy to feel like you need a degree in event planning just to throw a birthday party.
That’s exactly why we love this project. It proves that creating an amazing party atmosphere doesn’t have to be complicated, expensive, or time-consuming. With less than $15 and 30 minutes of your time, you’ve just created a focal point that’ll elevate your entire celebration.
Your guests will walk in and immediately know this party is going to be special. They’ll snap photos in front of it. They’ll ask where you got it. And you’ll get to say with a casual shrug, “Oh, I just threw it together this morning”.
Because here’s the secret to being the host with the most: It’s not about spending the most money or having the fanciest decorations. It’s about creating those moments of fun and celebration that make your guests feel welcome and excited to be there. And sometimes, all it takes is some colorful streamers and a little bit of creativity.
So grab those streamers, loop ’em over that rod, and get ready to throw a party that’ll have everyone talking. You’ve got this!
Have you tried making a streamer backdrop for your party? Drop a comment below and tell us about your color combo or any creative twists you added. We love seeing how you make these ideas your own!
More Birthday Party Ideas to Keep the Fun Rolling:
40+ Magical Harry Potter Birthday Games That’ll Cast a Spell on Your Party
7+ Roar-some Dinosaur Painting Party Ideas That’ll Make You the Ultimate Party Hero
How to Host a Virtual Birthday Party That’s Actually Fun
How to Make a Giant Jenga Yard Game (For Under $10!)
12+ Re-Usable DIY Decor Ideas That’ll Save You Big on Every Birthday Party
28 My Little Pony Craft Birthday Ideas (Easy & Magical!)
DIY Fringed Tissue Paper Garland That’ll Make Your Party Pop
DIY Birthday Banner: Simple and Affordable Way to Wow Your Guests
15+ Sweet DIY Ice Cream Themed Birthday Party Ideas You Can Actually Pull Off!
28 Adorable 2nd Birthday Party Ideas For Girls
15+ Winter Birthday Party Ideas Teens Will Love (No Cringe, All Fun)
As an Amazon Associate, we may earn a commission from qualifying purchases at no additional cost to you.
