
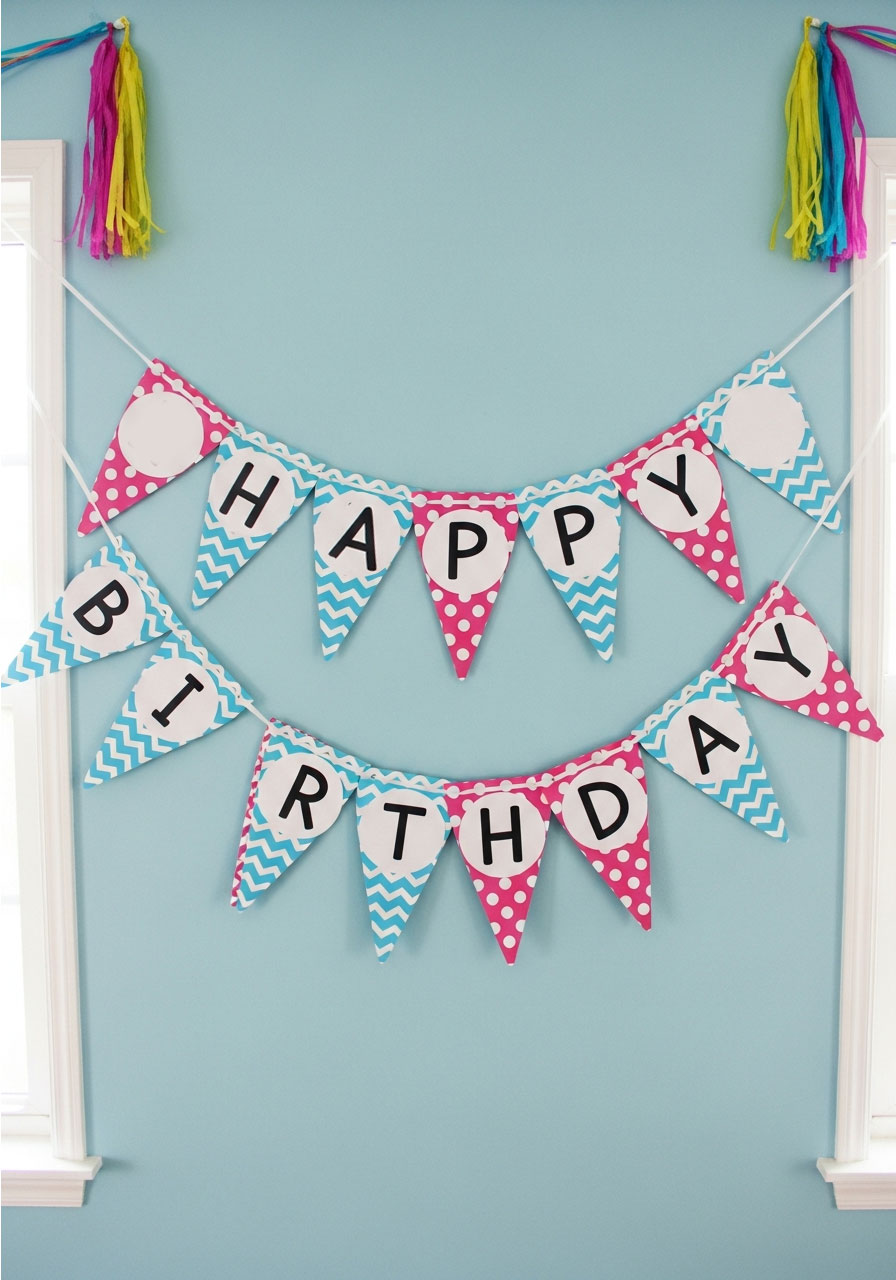
Ready to create a birthday banner that’ll make your guests say “Wait, you MADE that?” – without spending a fortune or your entire weekend? You’re in exactly the right place. We’re about to walk you through the easiest, most customizable DIY birthday banner that looks like it came from a fancy party store but costs a fraction of the price.
Whether you’re planning your little one’s first birthday bash or throwing together a last-minute celebration for your bestie, a handmade banner adds that perfect personal touch that store-bought decorations just can’t match. Plus, you get to customize every single detail to match your party theme. Win-win!

Why DIY Your Birthday Banner?
Let’s be real: those pre-made banners at the party store are cute, but they’re also expensive and pretty generic. When you make your own banner, you get to:
- Choose your exact colors to match your party theme perfectly
- Save serious cash (we’re talking $5 instead of $25+)
- Customize the message beyond just “Happy Birthday”
- Create something reusable for future celebrations
- Feel like the crafting champion you are when everyone asks where you bought it
Best for: Any birthday party, baby showers, anniversaries, or celebrations
Time to Make: 30-45 minutes
Skill Level: Beginner-friendly (seriously, if you can trace and cut, you’ve got this!)

What You’ll Need:
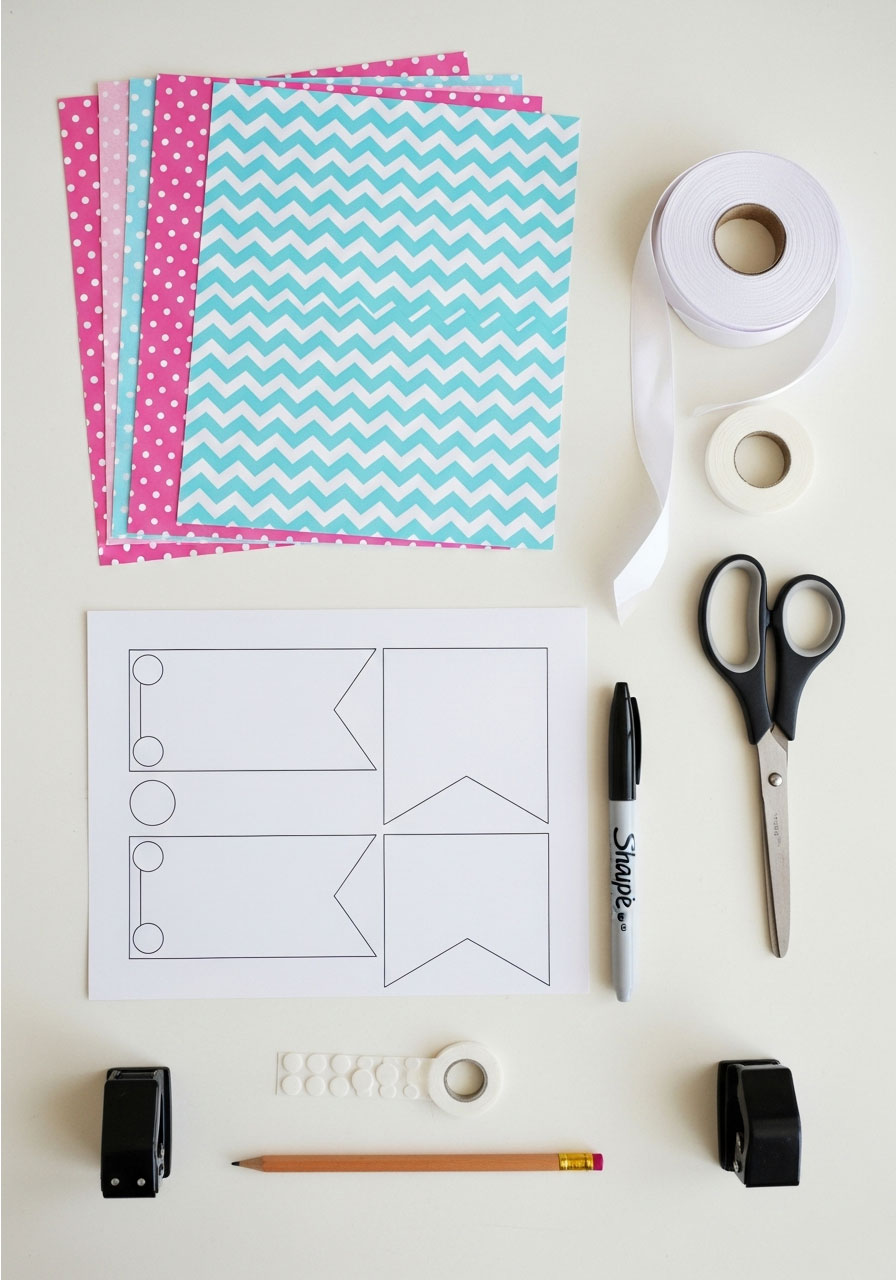
Scrapbook paper or cardstock (12×12 sheets work perfectly – snag them from Hobby Lobby or Michael’s)
DIY Birthday Banner Template
Ribbon or twine (about 6-8 feet, depending on your banner length)
Scissors or X-Acto knife
Sharpie or markers
Pencil for tracing
Adhesive dots or glue stick (hot glue works great too!)
Hole punch or X-Acto knife for ribbon holes
Pro Tip: Grab your scrapbook paper when it’s on sale – you’ll get about 2 flag pieces from each 12×12 sheet. Stock up and you’ll have supplies for multiple parties!
Pirate Birthday Scavenger Hunt for Kids Printable
Instant Pirate Adventure: Download, print, and play in 15 minutes! No stress – just instant, unforgettable fun for kids ages 4-12
Indoor Party Lifesaver: Perfect for apartments & houses. Keep 1-10 kids wildly entertained for 45 minutes with clever rhyming clues
A Treasured Memory: Watch your birthday child become the hero of an epic story. Includes a thrilling intro and congratulatory treasure letter
Fun That Secretly Teaches: Kids race to solve riddles while building reading, problem-solving, and teamwork skills. Fun with a hidden purpose!

Indoor Birthday Scavenger Hunt Printable for Kids – 12 challenges
Your 15-Minute Party Hero: Instantly download, print, and hide. Get 1-2 hours of immersive, screen-free fun with 12 unique puzzles. Stress-free entertainment, guaranteed
More Than a Hunt – It’s a “”Cake Bandit”” Adventure! Kids don’t just find clues; they solve the mystery of the stolen cake! This engaging storyline creates a memorable birthday mission
Ultimate Indoor Party Lifesaver: Perfect for bad weather or small spaces. Keeps kids ages 4-10+ happily challenged with picture matching, mazes, and secret codes
Fun That Secretly Builds Genius: Laughter meets learning! These 12 clever challenges boost problem-solving, teamwork, and critical thinking skills without the kids even noticing

Difficult Birthday Scavenger Hunt Printable for Adults – The Oracle’s Birthday Prophecy
Forget Boring Parties. Unleash the Oracle: Transform a birthday into an epic mystery with 30 brain-teasing riddles, ciphers, and challenges. Customize the perfect adventure for your guests
Be the Host of the Most Memorable Party: Provide the clever, shared activity that gets everyone laughing and collaborating. It’s the highlight that guests will talk about for years
Sophisticated Fun, Zero Effort: Just download, pick your 10 favorite clues from 30 options, and hide them. Get a complete, themed adventure without the stress of planning from scratch
Challenge Adult Minds with “The Prophecy”: Move beyond simple games. This hunt features logic puzzles, cryptic ciphers, and hilarious dares designed specifically to engage and thrill adults

Happy Birthday Decorations
Everything in one box = party stress solved – Banner, honeycomb balls, swirls, and garland all coordinated. No last-minute runs to three different stores at 9 PM the night before.
Photo-ready in 15 minutes – Easy assembly means you spend less time wrestling with decorations and more time enjoying the birthday person’s reaction. Looks expensive, sets up fast.
Reusable = smart money – Quality materials hold up through the party AND pack away for next year. Stop buying flimsy decorations that rip before cake time.
Saves you $50+ vs. party store prices – Get the complete coordinated look without the markup. Guests think you hired a decorator; you paid a fraction of the cost.
How to Make Your Birthday Banner (Step-by-Step):
Step 1: Print Your Template
Download and print the banner template. This gives you the perfect flag shape and circle size – no guessing required!
Step 2: Trace Your Flags
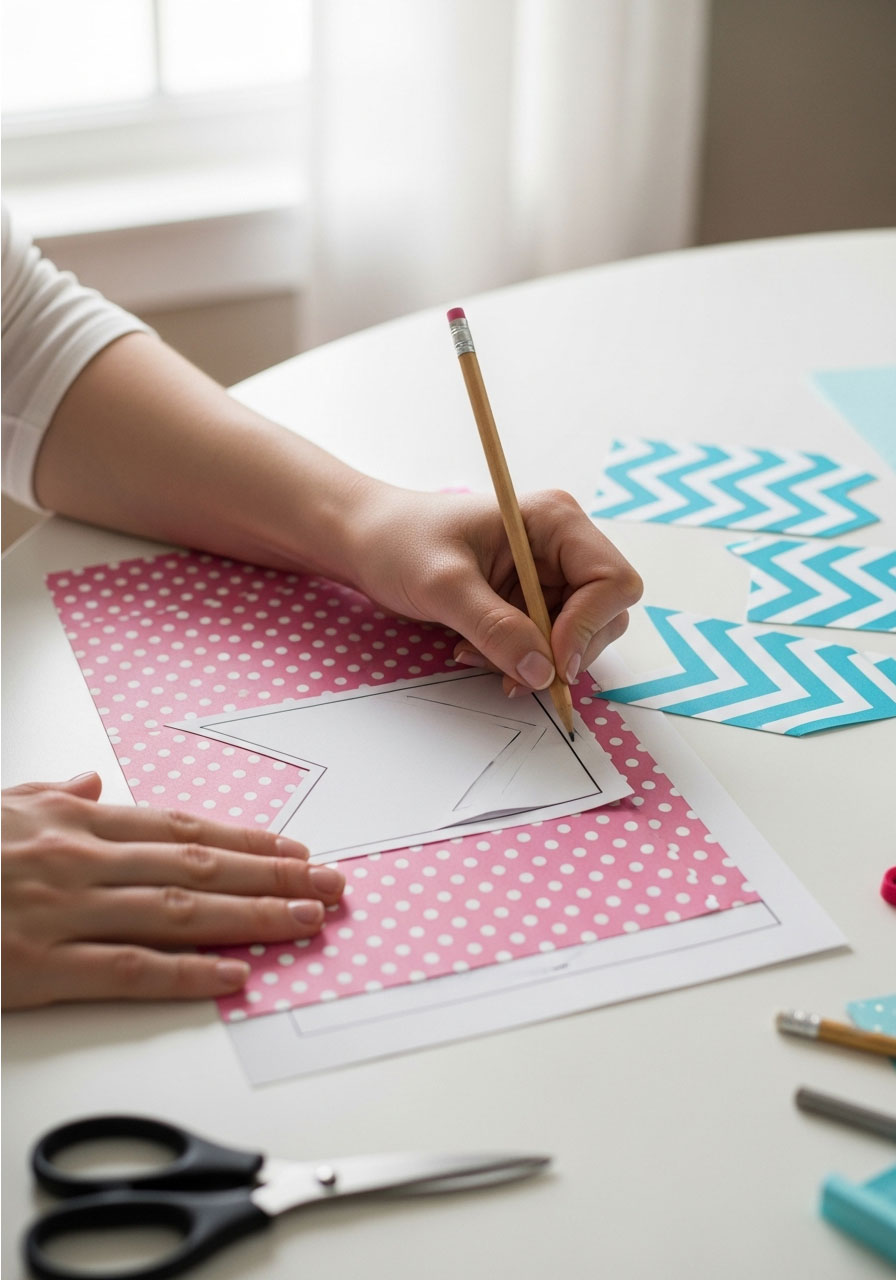
Flip your scrapbook paper over (pattern-side down) and trace the flag template with a pencil. For “Happy Birthday”, you’ll need 13 flags total. Mix and match patterns or go with a coordinated color scheme – this is where you get to flex your creative muscles!
Pro Tip: Alternate between two or three complementary patterns for a professional, put-together look that’s not too busy.
Step 3: Cut Out Your Flags
Grab your scissors and cut along your traced lines. Take your time here – clean edges make all the difference. (But honestly, even if they’re slightly wonky, nobody will notice once it’s hanging!)
Step 4: Create Your Letter Circles
Trace the circle template onto solid cardstock. Here’s the key: use solid colors (not patterns) so your letters stand out clearly. Trust us on this – you don’t want your “B” disappearing into a polka dot background.
Cut out all 13 circles (or however many letters you need for your custom message).
Step 5: Add Your Letters
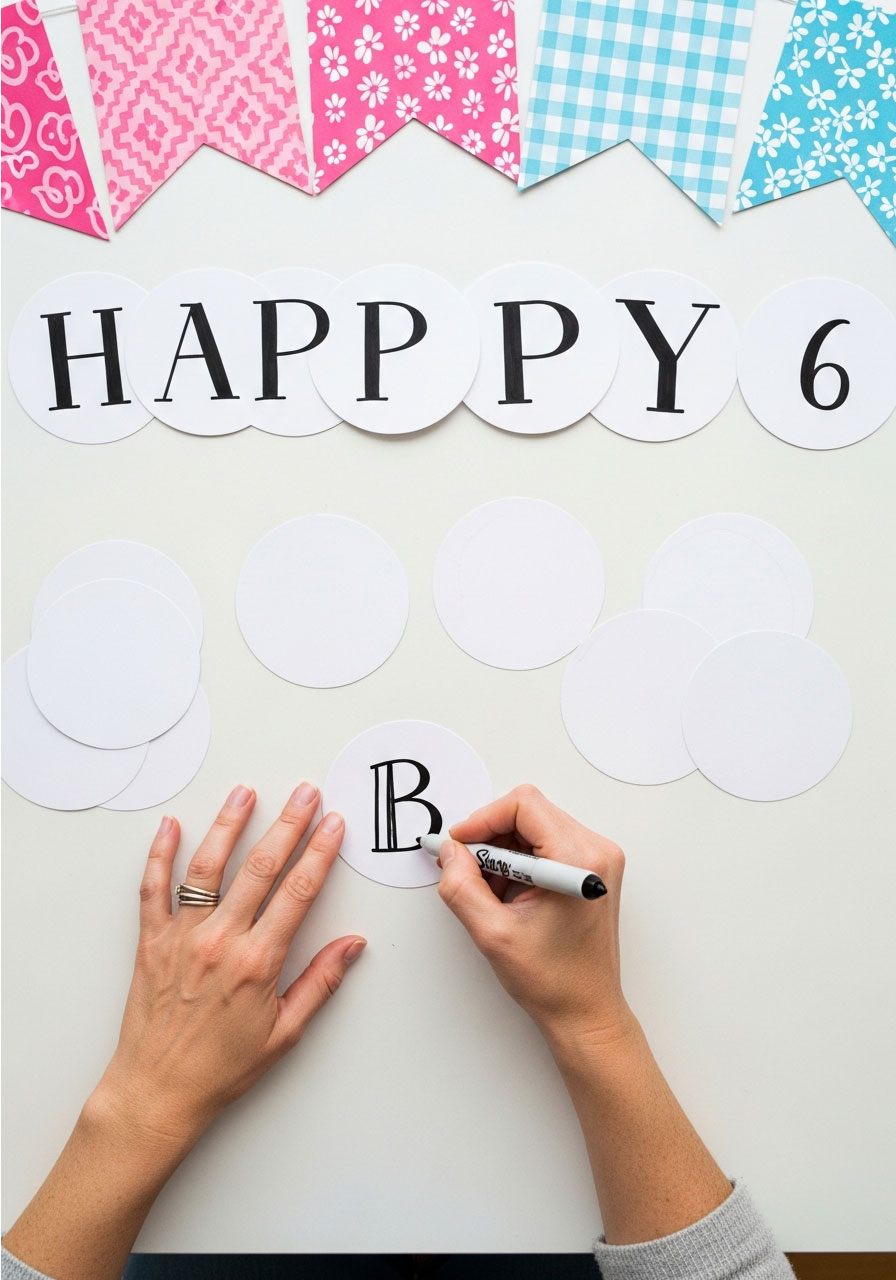
Lightly sketch your letters in pencil first, then go over them with a Sharpie once you’re happy with the placement. Don’t stress about perfect handwriting – the slightly imperfect, handmade look is actually super charming!
Fun Variation: Can’t draw letters to save your life? Print them out on sticker paper, use alphabet stickers, or even cut letters from magazines for a funky collage vibe.
Step 6: Attach Circles to Flags
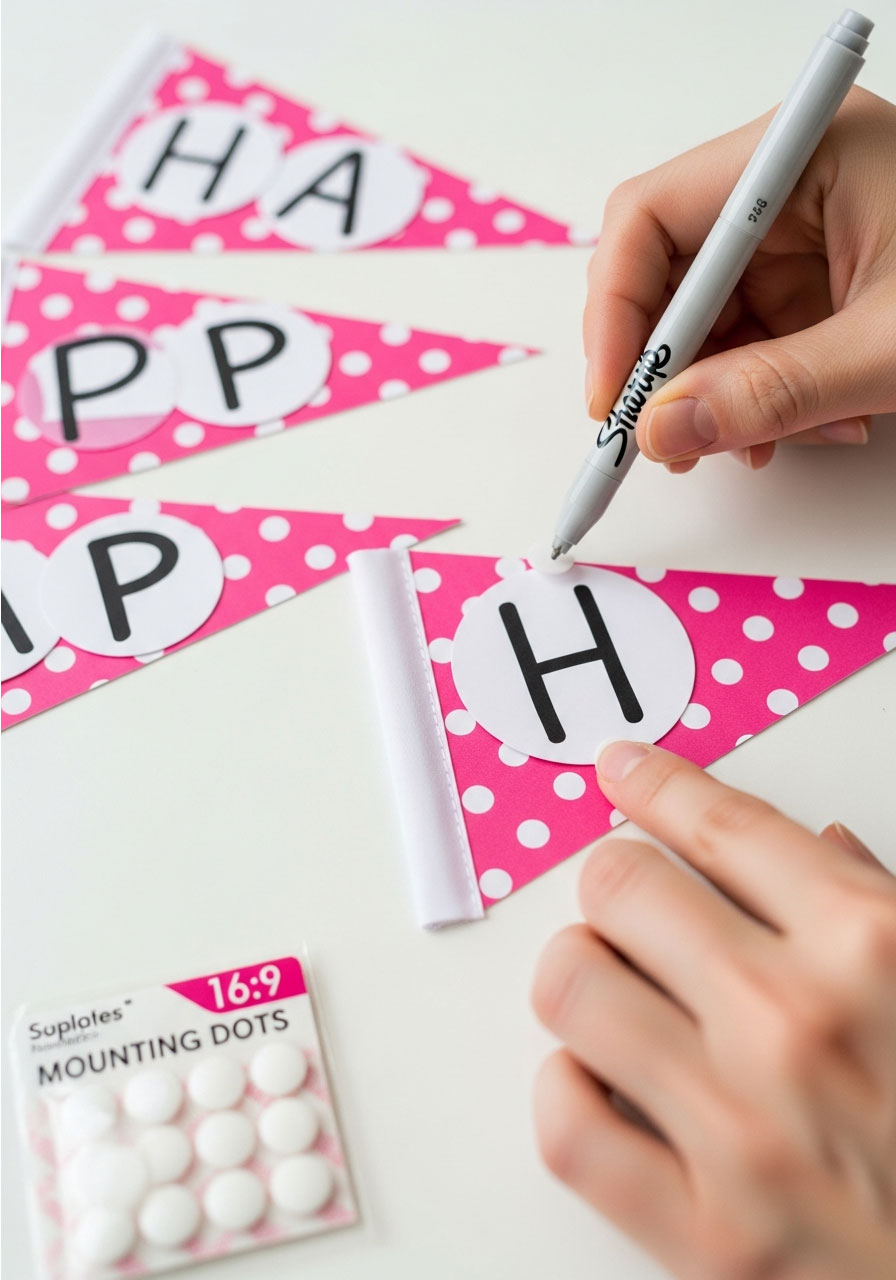
Use adhesive dots, a glue stick, or hot glue to secure each letter circle to its flag. Press firmly and let dry completely before moving to the next step.
Step 7: Make Holes for Your Ribbon
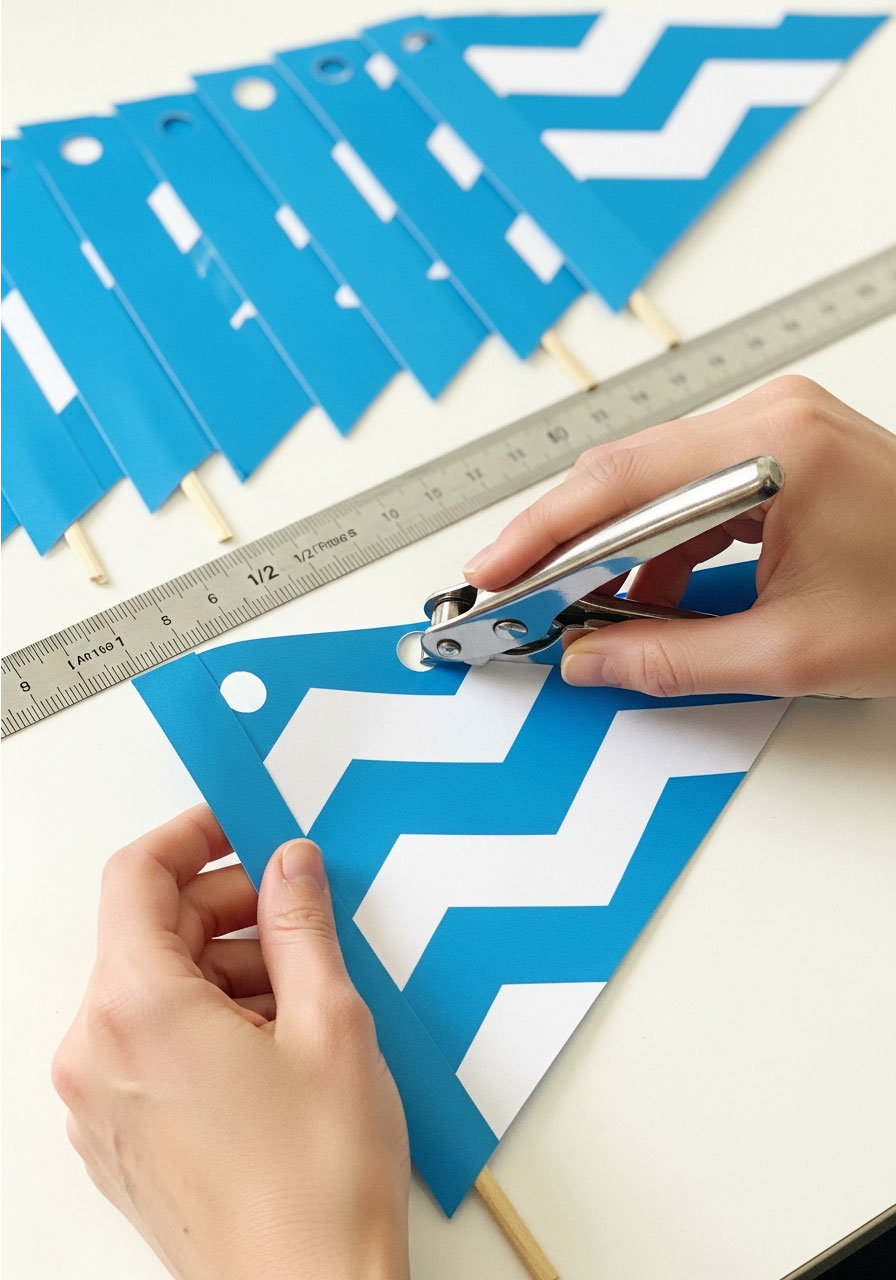
Use an X-Acto knife to cut small slits in the upper corners of each flag (about half an inch from the top). Not comfortable with a blade? A regular hole punch works perfectly too!
Pro Tip: Make your slits or holes in the same spot on each flag so your banner hangs evenly. Measure if you’re a perfectionist, eyeball it if you’re not – both work!
Step 8: String It All Together
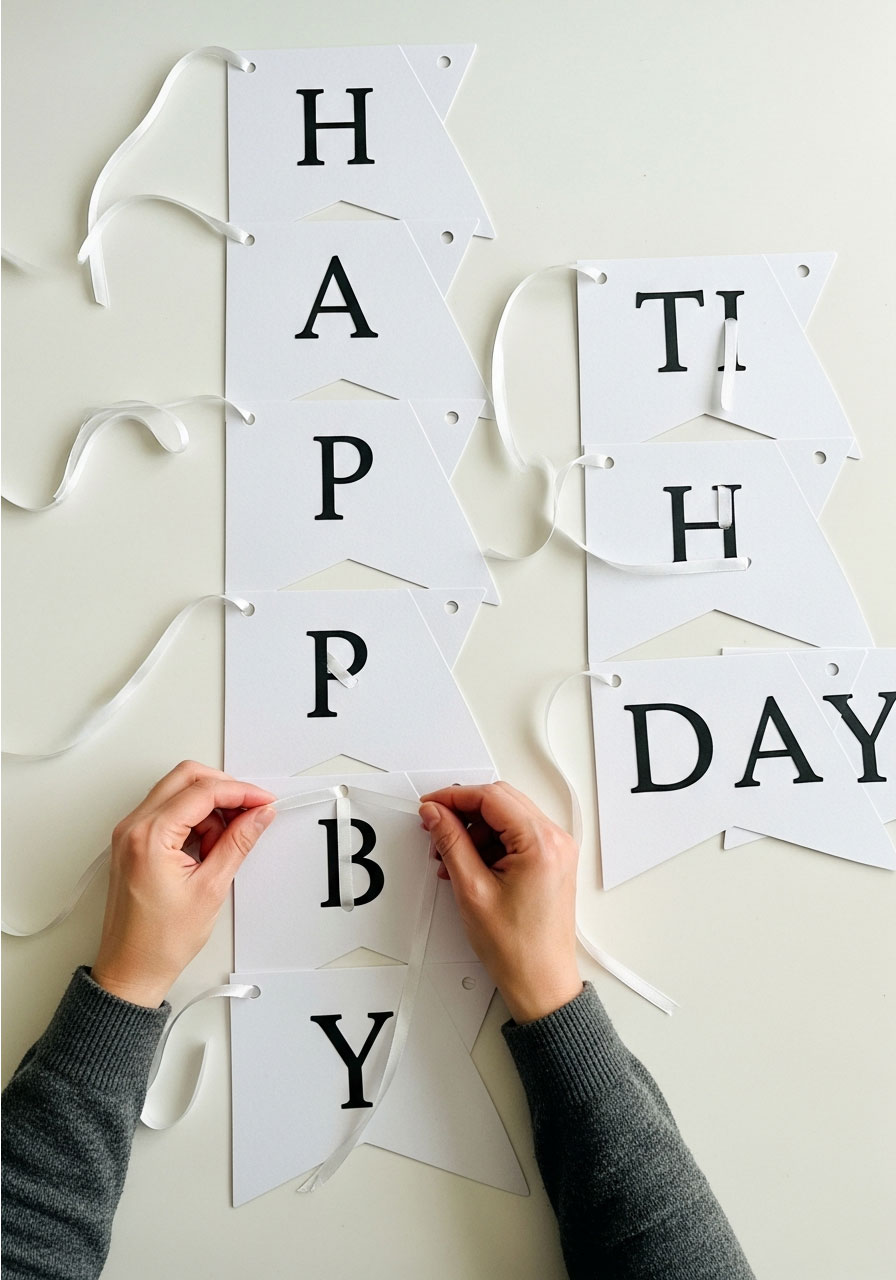
Thread your ribbon through the holes, weaving in and out of each flag. Space them evenly (or bunch them closer together for a fuller look). Leave extra ribbon on each end for hanging.
Step 9: Hang Your Masterpiece
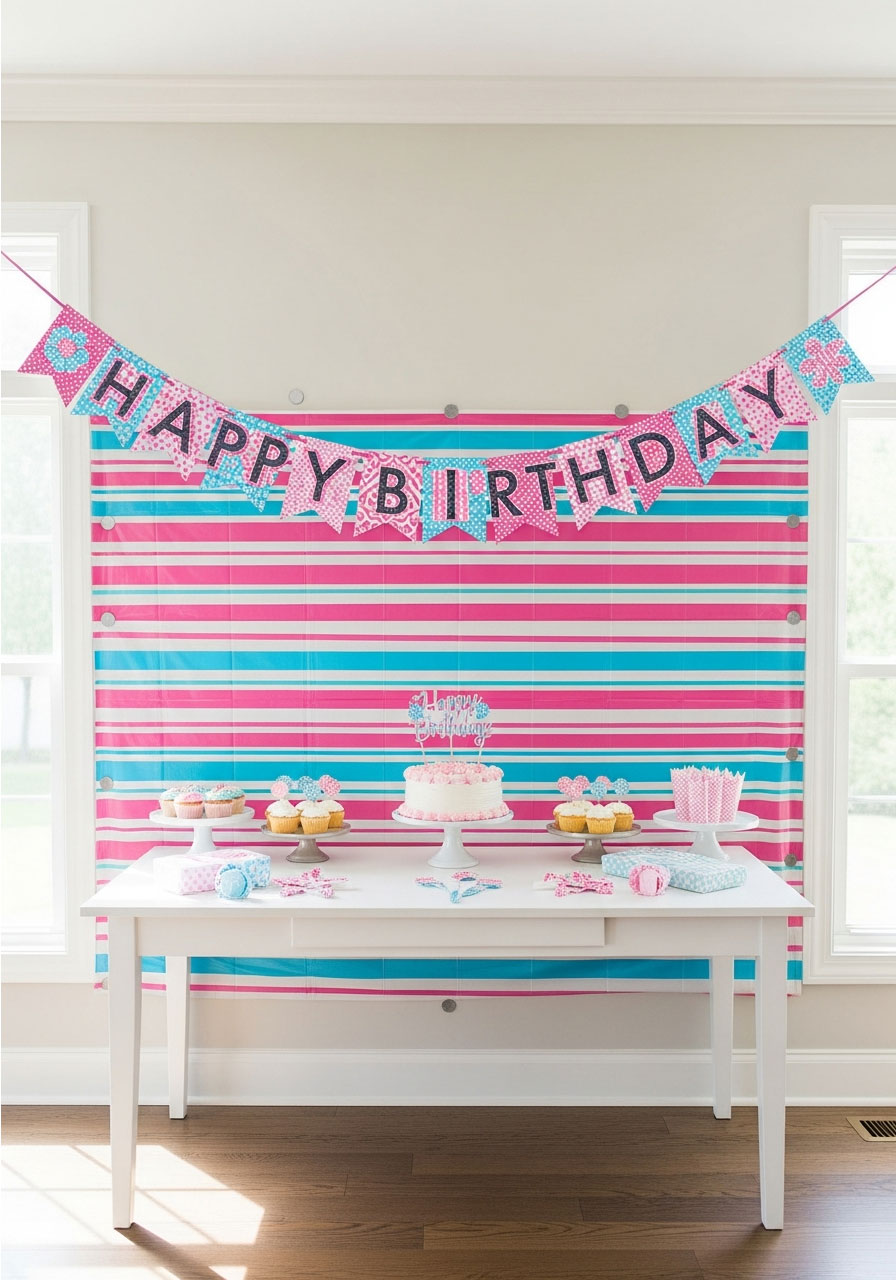
Use thumbtacks, command hooks, or tape to hang your banner. If you’re putting it against a backdrop like we did, hide the thumbtacks behind for that seamless, professional look.
Step back and admire your handiwork – you just created a custom party decoration that looks like it cost way more than it actually did!
Creative Variations to Try:
For a No-Sew Fabric Banner: Use felt instead of paper for a banner you can reuse year after year. Felt doesn’t fray, so you don’t need to hem edges!
For a Rustic Vibe: Swap cardstock for kraft paper or burlap, and use twine instead of ribbon. Add some greenery or small flowers for an outdoor party feel.

For a Glam Party: Use metallic cardstock, add glitter to your letters (seal it with Mod Podge so it doesn’t shed everywhere), or alternate between gold and your party colors.
For a Time-Saver: Skip the circles entirely and write directly on the flags. It’s faster and creates a clean, modern look.
For Extra Impact: Add tassels, pom-poms, or mini balloons between flags for dimension and wow-factor.
More Budget-Friendly Party Decoration Ideas:
Once you’ve nailed the banner, why stop there? Keep that DIY party magic going with these other super-easy decorations:
DIY Party Hats: Transform scrapbook paper into adorable party hats in about 5 minutes. Roll, tape, add elastic – done!
Bunting Cake Topper: Use the same banner technique on a mini scale to create the cutest cake decoration ever.
Cupcake Pedestals: Hit up the thrift store for mismatched plates and candlesticks, stack and glue them together, and suddenly you’ve got fancy-looking dessert displays you can use forever.
Tablecloth Party Backdrop: This is genius – plastic tablecloths from the dollar store create the easiest, cheapest backdrop imaginable. Hang, fluff, and you’re done!
Final Thoughts: You’ve Got This!
Here’s the beautiful truth about DIY party decorations: they don’t have to be perfect to be perfect. That handmade, personal touch is exactly what makes your celebration memorable. Your guests won’t be examining your banner with a magnifying glass – they’ll be too busy having a blast at the party you created.
So grab your supplies, crank up your favorite playlist, and spend a relaxing 30 minutes making something that’ll transform your party space. When your guests arrive and immediately compliment your decorations, you can smile and casually mention, “Oh, I just whipped it up this morning”. (They don’t need to know how ridiculously easy it was!)
With this simple DIY birthday banner in your party-planning arsenal, you’re ready to celebrate in style without breaking the bank. Because the best parties aren’t about how much you spend – they’re about the thought, creativity, and love you put into making someone feel special.
Now go make that banner and throw a party worth celebrating!
More Birthday Party Ideas to Keep the Fun Rolling:
40+ Magical Harry Potter Birthday Games That’ll Cast a Spell on Your Party
7+ Roar-some Dinosaur Painting Party Ideas That’ll Make You the Ultimate Party Hero
How to Host a Virtual Birthday Party That’s Actually Fun
How to Make a Giant Jenga Yard Game (For Under $10!)
12+ Re-Usable DIY Decor Ideas That’ll Save You Big on Every Birthday Party
28 My Little Pony Craft Birthday Ideas (Easy & Magical!)
DIY Fringed Tissue Paper Garland That’ll Make Your Party Pop
20 Rainbow Garland DIYs for Stunning Birthday Parties
15+ Sweet DIY Ice Cream Themed Birthday Party Ideas You Can Actually Pull Off!
28 Adorable 2nd Birthday Party Ideas For Girls
15+ Winter Birthday Party Ideas Teens Will Love (No Cringe, All Fun)
As an Amazon Associate, we may earn a commission from qualifying purchases at no additional cost to you.
