
Looking to transform your birthday bash into a vibrant, Instagram-worthy celebration? You’re in the right place! Rainbow garlands are the secret weapon of party hosts who know how to create that “WOW” moment when guests walk through the door.
We’ve rounded up 20 stunning rainbow garland projects that range from “I can whip this up in 20 minutes” to “I’m ready for a crafting adventure”. Whether you’re a hot glue gun wizard or someone who just discovered what a pom-pom maker is, there’s a perfect project here waiting for you.
Why Rainbow Garlands Are Party Gold:
- They instantly elevate any space from “meh” to “magnificent”
- They work for ANY age (toddlers and adults alike go crazy for rainbows)
- They’re reusable – make once, party many times
- They photograph beautifully (hello, party pics that actually look professional!)
Ready to dive in? Let’s get crafting!

1. Taffy Twist Fest Garland

Best for: Hosts who want maximum impact with minimal effort
Crafting Time: 45-60 minutes
Skill Level: Beginner-friendly
This twisted beauty looks like candy you can’t eat (trust me, guests will ask). The secret? You’re twisting colorful fabric strips to create a rope-like garland that’s impossibly fun and festive.
What You’ll Need:
- 6-7 different colored fabrics (1/4 yard each)
- Scissors
- Strong hands (or a friend to help twist!)
How to Make It:
1. Cut each fabric into long strips about 2 inches wide
2. Gather all your strips and tie them together at one end with a secure knot
3. Divide the strips into two equal groups of rainbow colors
4. Have someone hold the knotted end (or secure it to a doorknob) while you twist each group tightly in the same direction
5. Once both groups are super twisted, bring the ends together and let the magic happen – they’ll twist around each other naturally
6. Tie off the other end and trim any uneven edges
7. Hang your gorgeous creation and watch everyone marvel at your “advanced” crafting skills
Pro Tip: Use cotton fabrics for a more textured, bohemian look, or go with satin for extra shine and elegance!
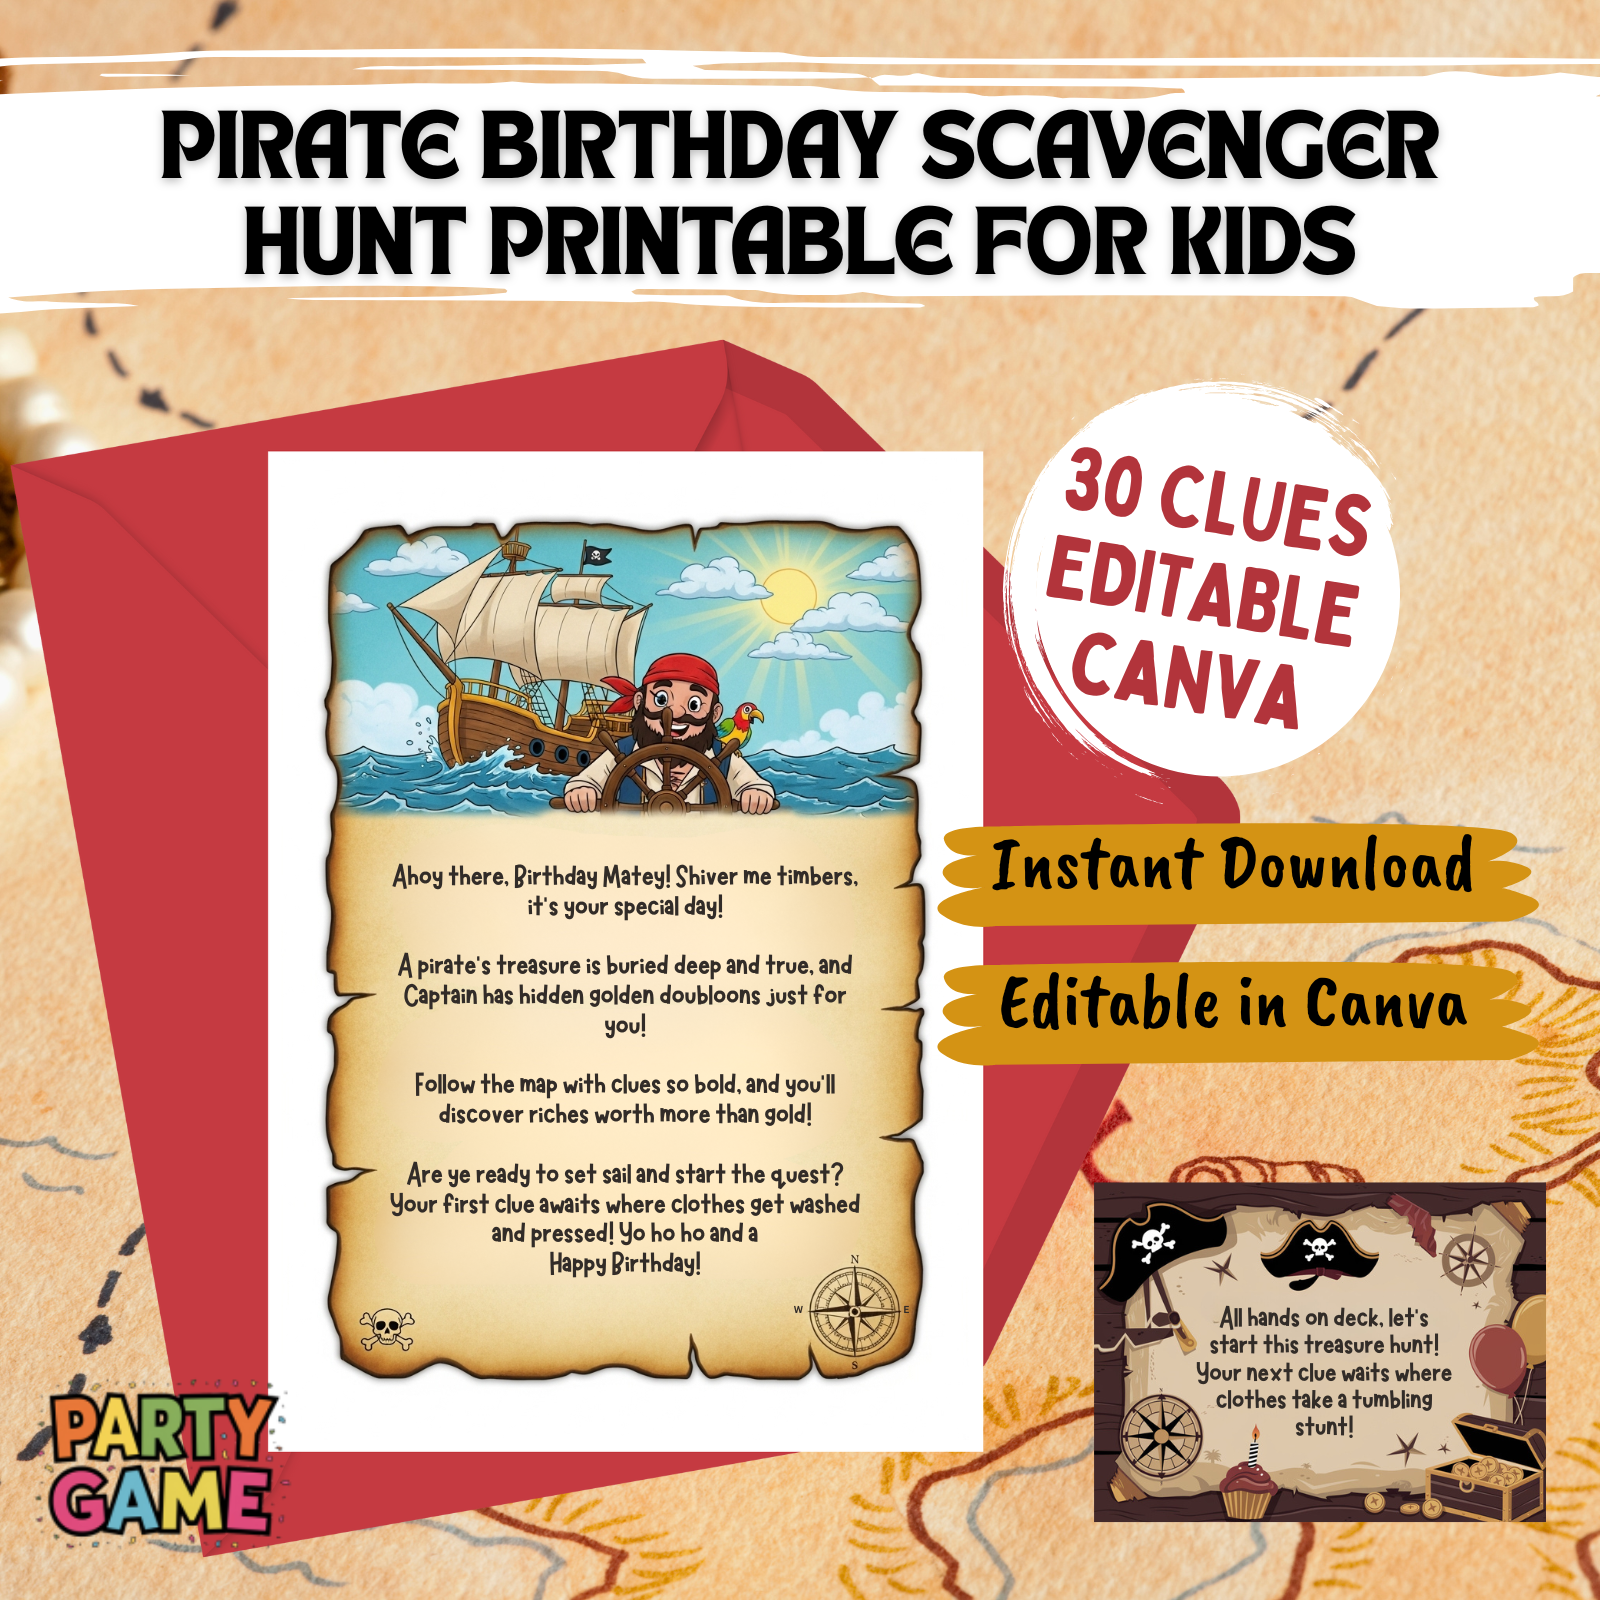
Pirate Birthday Scavenger Hunt for Kids Printable
Instant Pirate Adventure: Download, print, and play in 15 minutes! No stress – just instant, unforgettable fun for kids ages 4-12
Indoor Party Lifesaver: Perfect for apartments & houses. Keep 1-10 kids wildly entertained for 45 minutes with clever rhyming clues
A Treasured Memory: Watch your birthday child become the hero of an epic story. Includes a thrilling intro and congratulatory treasure letter
Fun That Secretly Teaches: Kids race to solve riddles while building reading, problem-solving, and teamwork skills. Fun with a hidden purpose!

Indoor Birthday Scavenger Hunt Printable for Kids – 12 challenges
Your 15-Minute Party Hero: Instantly download, print, and hide. Get 1-2 hours of immersive, screen-free fun with 12 unique puzzles. Stress-free entertainment, guaranteed
More Than a Hunt – It’s a “”Cake Bandit”” Adventure! Kids don’t just find clues; they solve the mystery of the stolen cake! This engaging storyline creates a memorable birthday mission
Ultimate Indoor Party Lifesaver: Perfect for bad weather or small spaces. Keeps kids ages 4-10+ happily challenged with picture matching, mazes, and secret codes
Fun That Secretly Builds Genius: Laughter meets learning! These 12 clever challenges boost problem-solving, teamwork, and critical thinking skills without the kids even noticing

Difficult Birthday Scavenger Hunt Printable for Adults – The Oracle’s Birthday Prophecy
Forget Boring Parties. Unleash the Oracle: Transform a birthday into an epic mystery with 30 brain-teasing riddles, ciphers, and challenges. Customize the perfect adventure for your guests
Be the Host of the Most Memorable Party: Provide the clever, shared activity that gets everyone laughing and collaborating. It’s the highlight that guests will talk about for years
Sophisticated Fun, Zero Effort: Just download, pick your 10 favorite clues from 30 options, and hide them. Get a complete, themed adventure without the stress of planning from scratch
Challenge Adult Minds with “The Prophecy”: Move beyond simple games. This hunt features logic puzzles, cryptic ciphers, and hilarious dares designed specifically to engage and thrill adults

Happy Birthday Decorations
Everything in one box = party stress solved – Banner, honeycomb balls, swirls, and garland all coordinated. No last-minute runs to three different stores at 9 PM the night before.
Photo-ready in 15 minutes – Easy assembly means you spend less time wrestling with decorations and more time enjoying the birthday person’s reaction. Looks expensive, sets up fast.
Reusable = smart money – Quality materials hold up through the party AND pack away for next year. Stop buying flimsy decorations that rip before cake time.
Saves you $50+ vs. party store prices – Get the complete coordinated look without the markup. Guests think you hired a decorator; you paid a fraction of the cost.

2. Festive Paper Circle Garland

Best for: Last-minute party planners and paper craft lovers
Crafting Time: 30 minutes
Skill Level: So easy, you could do it while binge-watching your favorite show
This classic never goes out of style because it works. Period. Colorful paper circles strung together create a festive vibe that screams “PARTY TIME!”
What You’ll Need:
- Cardstock in rainbow colors
- Circle punch (2-3 inch) or a cup to trace circles
- Needle and thread (or a sewing machine for speed)
- Scissors
How to Make It:
1. Punch or cut out 50-70 circles in your rainbow color order (red, orange, yellow, green, blue, purple – repeat!)
2. Thread your needle with about 10 feet of strong thread
3. Poke the needle through the center of each circle, sliding them along the thread
4. Space your circles about 1 inch apart as you go
5. Create multiple strands for a fuller look, or make one epic long garland
6. Tie loops at each end for easy hanging
7. Drape across walls, over doorways, or along your party table
Pro Tip: Mix in metallic gold or silver circles every few punches for an extra fancy touch that catches the light beautifully!
3. Felt Heart Garland

Best for: Birthday parties with a sweet, heartfelt vibe
Crafting Time: 1 hour
Skill Level: Beginner (if you can cut and glue, you’ve got this!)
Nothing says “celebration of someone special” quite like a garland made of hearts. This felt version is sturdy, reusable, and absolutely adorable.
What You’ll Need:
- Felt sheets in rainbow colors (2 sheets per color)
- Heart template (3 inches wide)
- Baker’s twine or ribbon
- Hot glue gun
- Scissors
How to Make It:
1. Download and print a heart template or freehand draw one on cardboard
2. Trace and cut out 20-25 hearts from your rainbow felt (about 3-4 hearts per color)
3. Lay out your twine or ribbon along your workspace
4. Arrange hearts in rainbow order along the twine, spacing them about 4 inches apart
5. Apply a line of hot glue along the top center of each heart
6. Press the twine into the glue, holding for 10 seconds until secure
7. Let it dry completely before hanging – patience, party planner!
Pro Tip: Cut a few hearts slightly smaller and layer them on top of larger hearts for a dimensional, extra-crafty look!
4. Mini Rainbow Garland for Kids’ Craft Stations
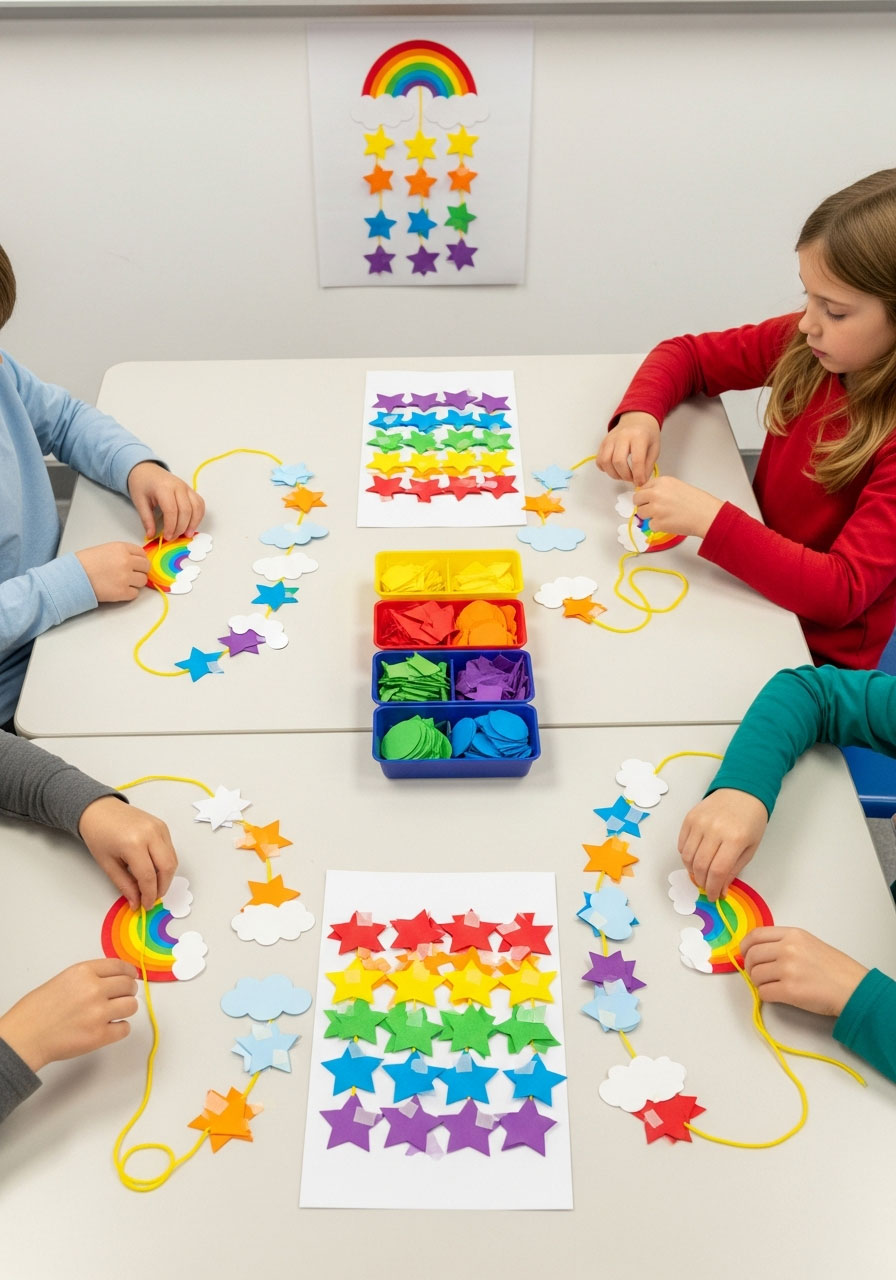
Best for: Interactive party activities where kids make party decor
Crafting Time: 20 minutes (per child)
Skill Level: Kid-friendly!
Turn your little guests into party decorators with this scaled-down garland project. It’s the perfect activity station that keeps kids engaged AND beautifies your space.
What You’ll Need:
- Pre-cut rainbow paper shapes (stars, circles, or clouds)
- Yarn (18 inches per child)
- Tape or glue sticks
- Markers for personalization
How to Make It:
1. Set up a crafting station with all supplies organized by color
2. Give each child a piece of yarn with tape on both ends (easier for little hands)
3. Let them choose 8-10 paper shapes in their favorite rainbow order
4. Have them tape or glue shapes to their yarn, spacing however they like
5. Encourage them to decorate shapes with markers – names, doodles, whatever!
6. Once complete, help them tie their garlands together for one giant collaborative piece
7. Hang the finished product in a place of honor and watch the kids beam with pride
Pro Tip: Photograph each child with their garland section before combining them – it makes for perfect thank-you card material!
5. Pom Pom Garland

Best for: Texture lovers and cozy, playful party vibes
Crafting Time: 45 minutes
Skill Level: Beginner (but you’ll need patience!)
Fluffy, soft, and irresistibly tactile – pom pom garlands add a dimension that flat paper just can’t match. This one’s a crowd favorite for nursery decor too!
What You’ll Need:
- Yarn in rainbow colors (1 skein of each)
- Pom pom maker (or cardboard circles)
- Darning needle
- String or fishing line for hanging
How to Make It:
1. Make 20-30 pom poms in rainbow colors using your pom pom maker (follow the tool’s instructions)
2. Trim each pom pom so it’s nice and round – this step matters more than you think!
3. Cut a long piece of string (as long as you want your garland plus 2 feet)
4. Thread your darning needle with the string
5. Push the needle through the center of each pom pom, sliding them along in rainbow order
6. Space pom poms 2-3 inches apart for a full look
7. Knot both ends and hang your wonderfully fluffy creation
Pro Tip: Mix different sizes of pom poms for visual interest – alternate large, medium, small in a pattern for a designer look!
6. Confetti Burst Garland

Best for: Modern, minimalist party aesthetics
Crafting Time: 30 minutes
Skill Level: Easy peasy
This garland looks like confetti was frozen mid-celebration. It’s sleek, contemporary, and gives you that “I hired a party stylist” vibe without the price tag.
What You’ll Need:
- Colorful paper or lightweight cardstock
- Hole punch (standard size)
- Clear thread or fishing line
- Needle
How to Make It:
1. Punch out 100-150 confetti circles in rainbow colors (put on a podcast – this is therapeutic!)
2. Cut several strands of clear thread, each 4-5 feet long
3. Thread your needle and double-knot one end
4. String 20-25 confetti pieces per strand, spacing them randomly
5. Vary the spacing – closer together at some points, farther apart at others for organic flow
6. Create 5-7 strands and hang them at different heights for a cascading effect
7. Watch the light catch your confetti pieces and sparkle throughout the party
Pro Tip: Hang these in front of a window or near string lights – the translucent effect when backlit is absolutely magical!
7. Crochet Heart Garland

Best for: Crafters who crochet and want an heirloom-quality decoration
Crafting Time: 3-4 hours (spread across a few evenings)
Skill Level: Intermediate (basic crochet knowledge required)
If you’ve got crochet skills, this garland is your time to shine. It’s handmade gorgeousness that you’ll use for years at every celebration.
What You’ll Need:
- DK weight yarn in rainbow colors
- 4mm crochet hook
- Yarn needle for weaving in ends
- Ribbon or twine for stringing
How to Make It:
1. Find a simple crochet heart pattern online (search “easy crochet heart pattern”)
2. Crochet 15-20 hearts, making 2-3 in each rainbow color
3. As you finish each heart, leave a 6-inch tail instead of cutting it short
4. Weave in all the ends except those 6-inch tails
5. Use those tails to tie each heart onto your ribbon, spacing them 5 inches apart
6. Trim the excess tail after securing each knot
7. Display your labor of love and accept all the compliments gracefully
Pro Tip: Starch your hearts lightly with fabric stiffener so they hold their shape perfectly and look extra professional!
8. Sugar Plum Honeycomb Ball Garland

Best for: Elegant parties that need dimensional decor
Crafting Time: 20 minutes
Skill Level: Beginner (mostly assembly!)
These tissue paper honeycomb balls in rainbow colors create instant party atmosphere. They’re lightweight, dramatic, and pack flat for storage.
What You’ll Need:
- Rainbow honeycomb balls (6-8 inch size, available at party stores)
- String or ribbon
- Small adhesive hooks for hanging
How to Make It:
1. Open each honeycomb ball carefully – they’re delicate before assembly!
2. Secure the magnetic or adhesive closures to form complete spheres
3. Tie a 12-inch piece of string through the loop at the top of each ball
4. Create your garland by tying all the strings to one long main ribbon
5. Space balls 10-12 inches apart in rainbow order
6. Hang across your party space using adhesive hooks on the ceiling or walls
7. Step back and admire the 3D rainbow wonderland you’ve created
Pro Tip: Mix metallic gold or silver honeycomb balls between rainbow colors for an upscale, celebratory look!
9. DIY Felt Ball Garland

Best for: Nursery-to-party crossover decor (adorable for ALL ages)
Crafting Time: 1 hour
Skill Level: Beginner
Felt balls are having a major moment, and for good reason – they’re cute, colorful, and impossibly easy to string into gorgeous garlands.
What You’ll Need:
- Felt balls in rainbow colors, 1-inch size (buy pre-made or make your own)
- Embroidery needle
- Strong thread or embroidery floss
- Scissors
How to Make It:
1. Cut a piece of thread about 6 feet long (or your desired garland length plus 2 feet)
2. Thread your embroidery needle – double up the thread for extra strength
3. Tie a large knot at one end to stop the balls from sliding off
4. Push the needle through the center of each felt ball in rainbow order
5. Slide balls close together for a full look, or space 1 inch apart for airier style
6. Continue until your garland is complete (you’ll need 30-40 balls for a 6-foot garland)
7. Tie off the end and hang using small nails or adhesive hooks
Pro Tip: Alternate rainbow balls with white or wooden beads for a Scandinavian-chic look that works year-round!
10. Watercolor Doily Garland

Best for: Vintage-inspired or garden party themes
Crafting Time: 40 minutes
Skill Level: Easy (with a fun artistic element!)
Transform plain white doilies into rainbow works of art with this watercolor technique. It’s crafting meets painting – the best of both worlds.
What You’ll Need:
- White paper doilies (6-inch size works great)
- Liquid watercolors or food coloring diluted in water
- Spray bottles or paintbrushes
- Baker’s twine
- Mini clothespins
- Newspaper to protect surfaces
How to Make It:
1. Lay out newspaper and arrange your doilies flat
2. Create your rainbow colors in spray bottles or small containers
3. Spray or paint each doily with one color – let the watercolor spread naturally for an organic look
4. Make 3-4 doilies in each rainbow color (18-24 total)
5. Let them dry completely (this might take a few hours)
6. Once dry, string baker’s twine along your party space
7. Use mini clothespins to attach doilies in rainbow order along the twine
Pro Tip: Overlap the doilies slightly when clipping them for a fuller, more romantic cascading effect!
11. DIY Felt Macaron Garland

Best for: French-themed parties or sophisticated birthday celebrations
Crafting Time: 1.5 hours
Skill Level: Intermediate
Macarons are almost too pretty to eat, and these felt versions are almost too cute to be real. This garland is quirky, charming, and totally unique.
What You’ll Need:
- Felt sheets in rainbow colors
- Circle template (2 inches)
- Fiberfill or cotton balls for stuffing
- Hot glue gun
- Baker’s twine or ribbon
How to Make It:
1. Cut pairs of circles from each felt color (you’ll need 2 circles per macaron)
2. For each macaron, glue a small “ruffle” of felt around the edge of one circle to mimic the macaron’s signature feet
3. Place a small amount of fiberfill in the center of one circle
4. Glue the second circle on top, creating a puffy sandwich
5. Let each macaron dry completely
6. Hot glue the back of each macaron to your ribbon, spacing them 4 inches apart in rainbow order
7. Hang and prepare for everyone to ask, “Wait, are those macarons?!”
Pro Tip: Add a tiny dab of white fabric paint on each macaron for that authentic shiny glaze look!
12. Rainbow Paper Fan Garland

Best for: Parties needing bold backdrop decor
Crafting Time: 45 minutes
Skill Level: Beginner
Paper fans create instant drama and dimension. When arranged in rainbow order, they become a showstopping backdrop for photos, cake tables, or gift displays.
What You’ll Need:
- Colorful cardstock (12×12 inch sheets)
- Ruler and bone folder (or butter knife)
- Hot glue gun
- String or ribbon for hanging
How to Make It:
1. For each fan, accordion-fold a sheet of cardstock (fold every 1/2 inch for best results)
2. Fold the accordion in half to find the center
3. Apply hot glue along one edge and press the two halves together at the center
4. Fan out the paper into a semicircle and glue the outer edges together to secure
5. Create 2-3 fans in each rainbow color (12-18 fans total)
6. Glue a loop of string to the back of each fan for hanging
7. Arrange fans along a ribbon or directly on the wall in rainbow order, varying sizes for visual interest
Pro Tip: Make fans in three different sizes (small, medium, large) and cluster them together for a more dynamic, professional-looking installation!
13. Quick and Easy Fabric Bunting

Best for: Outdoor birthday parties and casual celebrations
Crafting Time: 30 minutes
Skill Level: Beginner (no sewing required!)
Fabric bunting brings that festival-party vibe instantly. This no-sew version means you can create it the morning of your party without stress.
What You’ll Need:
- Rainbow fabric scraps or fat quarters
- Pinking shears (or regular scissors)
- Ribbon or bias tape (at least 10 feet long)
- Fabric glue or hot glue gun
How to Make It:
1. Cut fabric into triangles (about 6 inches wide at the top, 8 inches tall)
2. Cut 3-4 triangles from each rainbow color
3. Lay your ribbon flat on your workspace
4. Arrange triangles in rainbow order along the ribbon, overlapping the top edge by 1 inch
5. Fold each triangle’s top edge over the ribbon and glue down on the back side
6. Space triangles about 2 inches apart along the entire ribbon
7. Let glue dry for 15 minutes, then hang your bunting proudly
Pro Tip: Use pinking shears for a zigzag edge that won’t fray and adds a charming handmade touch!
14. Tissue Paper Flower Party Lights Garland

Best for: Evening parties and magical ambiance
Crafting Time: 1.5 hours
Skill Level: Intermediate
Combine string lights with tissue paper flowers for a garland that’s both decoration AND lighting. This one’s a showstopper for birthday dinners and evening celebrations.
What You’ll Need:
- Battery-operated string lights (LED for safety!)
- Tissue paper in rainbow colors
- Floral wire or pipe cleaners
- Scissors
- Hot glue (optional)
How to Make It:
1. Create tissue paper flowers: stack 5-6 sheets of tissue paper and accordion-fold them
2. Tie the center with floral wire, then fan out each layer
3. Separate the tissue layers carefully, pulling toward the center to create a puffy flower
4. Make 2-3 flowers in each rainbow color to match the number of lights on your strand
5. Cut a small X in the center back of each flower
6. Push each LED light through the X so the flower sits around the bulb
7. Secure with a tiny dab of hot glue if needed (make sure it’s LED/cool lights only!)
8. Hang your illuminated rainbow masterpiece and bask in the glow
Pro Tip: Test your lights before attaching flowers to make sure all bulbs work – nothing worse than discovering a dead bulb after you’ve assembled everything!
15. Balloon Garland Arch

Best for: Show-stopping entrances and photo backdrops
Crafting Time: 1-2 hours
Skill Level: Intermediate (but worth every minute!)
Balloon garlands are the reigning champion of party decor right now. This DIY version gives you that professional event planner look without the professional price tag.
What You’ll Need:
- Balloons in rainbow colors (at least 50-60 total, mix of 5-inch, 11-inch, and 16-inch)
- Balloon pump (save your lungs!)
- Fishing line or balloon decorating strip
- Clear command hooks for hanging
- Glue dots for securing
How to Make It:
1. Blow up balloons in various sizes – this variety creates the organic, full look
2. Thread fishing line through your space or use balloon decorating strip as your base
3. Start with your largest balloons, tying them in clusters of 2-3 in each rainbow color
4. Attach clusters to your line by wrapping the balloon knots around it
5. Fill in gaps with smaller balloons, working in rainbow order
6. Use glue dots to attach small balloons in empty spaces for a lush, full appearance
7. Step back frequently to check your rainbow gradient and balance
8. Secure ends with command hooks and watch jaws drop
Pro Tip: Add metallic balloons or white balloons between rainbow sections to create separation and make each color pop even more!
16. Classic Paper Chain Garland
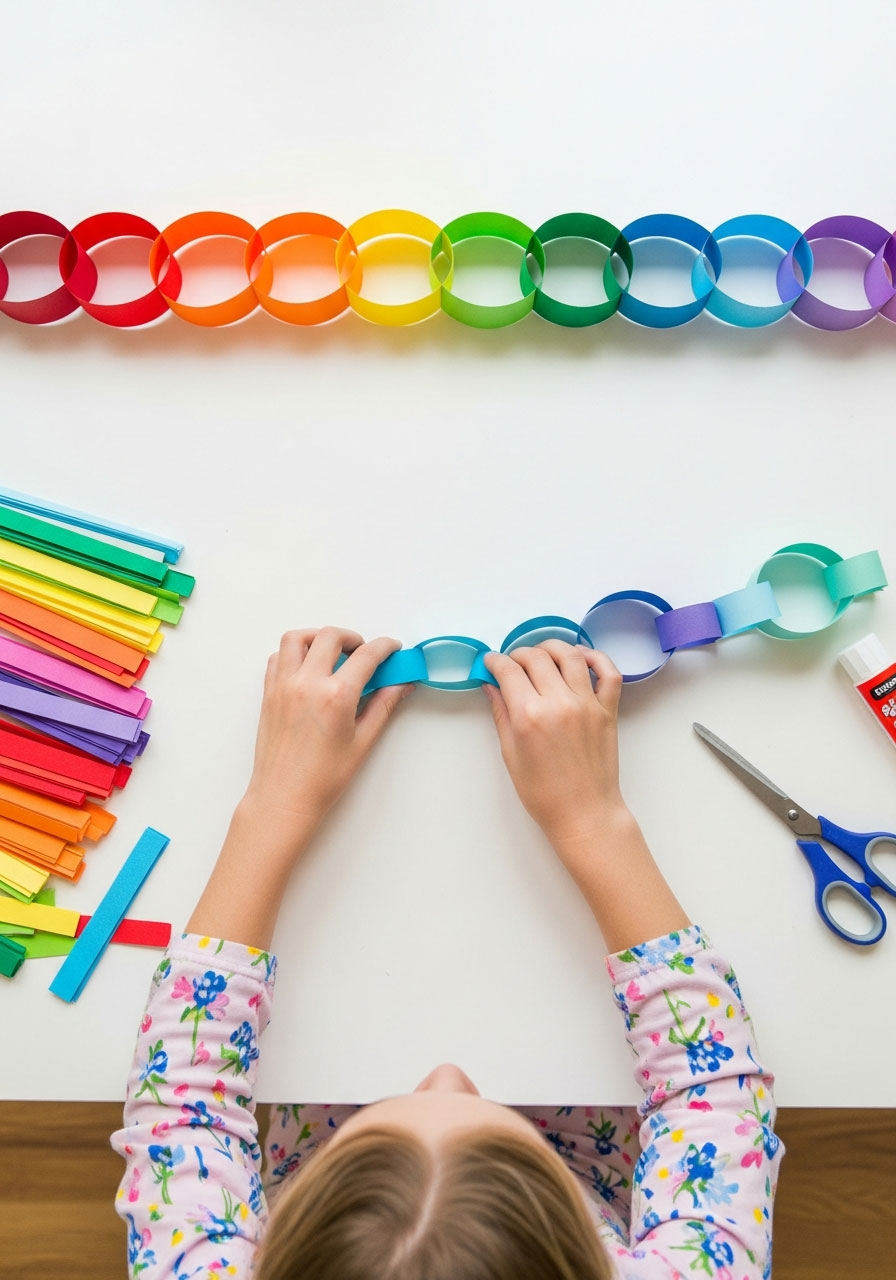
Best for: Nostalgic party vibes and kid-friendly crafting
Crafting Time: 30 minutes
Skill Level: Easy (perfect for kids to help!)
Never underestimate the power of a classic! Paper chains are retro-cool, and when made with beautiful colors and patterns, they’re legitimately stunning.
What You’ll Need:
- Colorful paper strips (1 inch wide, 6 inches long)
- Glue stick or tape
- Scissors
- Optional: patterned scrapbook paper for extra flair
How to Make It:
1. Cut your paper into strips – you’ll need about 100-150 strips for a decent-length garland
2. Organize strips by rainbow color in separate piles for easy assembly
3. Take your first strip, form a circle, and glue or tape the ends together
4. Thread the next strip through the first circle before gluing it closed
5. Continue linking chains in rainbow order (red, orange, yellow, green, blue, purple – repeat!)
6. Keep going until your garland reaches your desired length
7. Hang it with pride and marvel at how something so simple can look so perfect
Pro Tip: Enlist party guests or birthday kids to help make chains before the party – it’s a great pre-party activity that gets everyone excited!
17. Colorful Geometric Paper Garland

Best for: Modern, design-forward party aesthetics
Crafting Time: 45 minutes
Skill Level: Intermediate
Move over basic circles – geometric shapes are here to party! This garland brings an art gallery vibe to your celebration with its clean lines and bold colors.
What You’ll Need:
- Cardstock in rainbow colors
- Geometric templates (hexagons, triangles, diamonds)
- Paper punch or scissors
- String or thin ribbon
- Glue stick
How to Make It:
1. Print or draw geometric templates on cardstock (mix 2-3 different shapes for interest)
2. Cut out 30-40 shapes total in rainbow colors
3. For each shape, fold a small tab at the top (about 1/4 inch)
4. Apply glue to the tab and press it over your string
5. Alternate shapes and colors as you go, spacing them 2-3 inches apart
6. Keep your pattern random or create a specific sequence – your choice!
7. Hang across windows, doorways, or above the party table for that geometric rainbow magic
Pro Tip: Use metallic or holographic cardstock for a few shapes to add unexpected sparkle throughout your garland!
18. Pom Pom Tassel Garland

Best for: Boho-chic parties and trendy celebrations
Crafting Time: 1 hour
Skill Level: Beginner to Intermediate
Combine two party decor darlings – pom poms and tassels – into one fabulous garland. This texture-rich decoration adds major style points to any space.
What You’ll Need:
- Yarn in rainbow colors
- Cardboard (for making tassels)
- Pom pom maker or cardboard circles
- Darning needle
- Strong string for hanging
How to Make It:
1. Make 10-12 tassels: wrap yarn around a 4-inch piece of cardboard 30 times, tie at top, cut at bottom, wrap and tie a small section below the top to create the tassel neck
2. Make 10-12 pom poms using your pom pom maker in coordinating rainbow colors
3. Cut a long piece of string (as long as you want your garland plus extra)
4. Thread your darning needle with the string
5. Alternate between tassels and pom poms as you string them along
6. Space each element about 3-4 inches apart
7. Tie off both ends and hang your textured rainbow creation
Pro Tip: Add wooden beads between the tassels and pom poms for extra visual interest and a natural element that grounds all that color!
19. Rainbow Ribbon Streamers

Best for: Quick, elegant decor with maximum movement
Crafting Time: 15 minutes (yes, really!)
Skill Level: Beginner (the easiest one yet!)
When you need something gorgeous RIGHT NOW, ribbon streamers are your best friend. They flutter beautifully and create dreamy atmosphere with minimal effort.
What You’ll Need:
- Satin or grosgrain ribbon in rainbow colors (1/2 to 1 inch wide)
- Wooden dowel, branch, or curtain rod
- Scissors
- Optional: hot glue or tape
How to Make It:
1. Cut ribbons in varying lengths (anywhere from 3 to 6 feet long)
2. Cut 4-5 ribbons in each rainbow color
3. Fold each ribbon in half to find the center
4. Loop the center over your dowel or branch
5. Pull the ribbon ends through the loop and tighten (it’s called a lark’s head knot!)
6. Arrange ribbons in rainbow order along your dowel
7. Hang the dowel from the ceiling, over a doorway, or behind the birthday chair
8. Watch the ribbons dance with every breeze and movement
Pro Tip: Curl the ribbon ends with scissors (like you would curl wrapping paper ribbon) for extra fancy, spiraled ends that catch the light!
20. Painted Wooden Bead Garland

Best for: Scandinavian-style or modern minimalist parties
Crafting Time: 1 hour (plus drying time)
Skill Level: Beginner
This garland brings a sophisticated, design-forward vibe while still celebrating rainbow fun. It’s perfect for hosts who want color without going full-on party explosion.
What You’ll Need:
- Natural wooden beads (1-inch size, at least 40 beads)
- Acrylic paint in rainbow colors
- Small paintbrush
- Strong cord or leather string
- Newspaper or cardboard for painting surface
How to Make It:
1. Lay out newspaper and arrange your wooden beads
2. Paint beads in rainbow colors – about 6-7 beads per color
3. Let one side dry completely (about 20 minutes), then flip and paint the other half
4. While beads dry, cut your cord to desired length plus 2 feet
5. Once beads are completely dry (test with your finger!), thread them onto the cord
6. Arrange in rainbow order, pushing beads close together or spacing them out – both looks work!
7. Tie knots at both ends to secure beads in place
8. Hang your sophisticated rainbow creation and accept compliments on your “elevated” party style
Pro Tip: Leave some beads natural wood and alternate them with painted beads for a more subtle, Scandinavian-inspired look that’s still rainbow-fabulous!
Your Rainbow Garland Game Plan
There you have it – 20 stunning ways to bring rainbow magic to your birthday celebration! Whether you’ve got 15 minutes or an entire crafting weekend, there’s a perfect garland project here waiting for you.
Quick Party Planning Tips:
- Choose based on your timeline: Under 30 minutes? Go for ribbon streamers or paper chains. Have a few hours? Try balloon garlands or felt projects.
- Match your venue: Outdoor party? Fabric bunting is your friend. Elegant indoor dinner? Painted wooden beads or watercolor doilies will shine.
- Get help: Many of these projects are perfect for crafting parties – invite friends over, pour some wine, and make your decorations together!
The best part? Once you’ve made these garlands, you can store them and reuse them for birthdays, holidays, and celebrations all year long. That’s what we call a party planning win!
Now grab your supplies, pick your favorite project (or three!), and get ready to create a birthday party that’ll have everyone asking, “Where did you find that amazing decorator?!” (We won’t tell them it was you – your secret’s safe with us!)
Happy crafting, party superstar!
More Birthday Party Ideas to Keep the Fun Rolling:
40+ Magical Harry Potter Birthday Games That’ll Cast a Spell on Your Party
25 Best Mermaid Birthday Party Ideas That’ll Make a Splash
Some Bunny Is One: The Ultimate 1st Birthday Party Theme
DIY Woodland Fairy Crowns: Make Magical Party Crowns Kids Love
24 Construction Birthday Party Ideas That’ll Have Kids Ready to Build Some Fun
15 Epic Super Mario Birthday Party DIY Crafts
The Ultimate Alice in Wonderland First Birthday Party Ideas.
30+ Sparkling Fun Unicorn Birthday Party Ideas That’ll Make Your Party Absolutely Magical
DIY Birthday Backdrop: Tablecloth Trick Under $5! (Easy Tutorial)
How to Make a DIY Birthday Candle Garland That’ll Light Up Your Party
20+ Donut Birthday Party Ideas (Games, Decor & Recipes!)
As an Amazon Associate, we may earn a commission from qualifying purchases at no additional cost to you.
