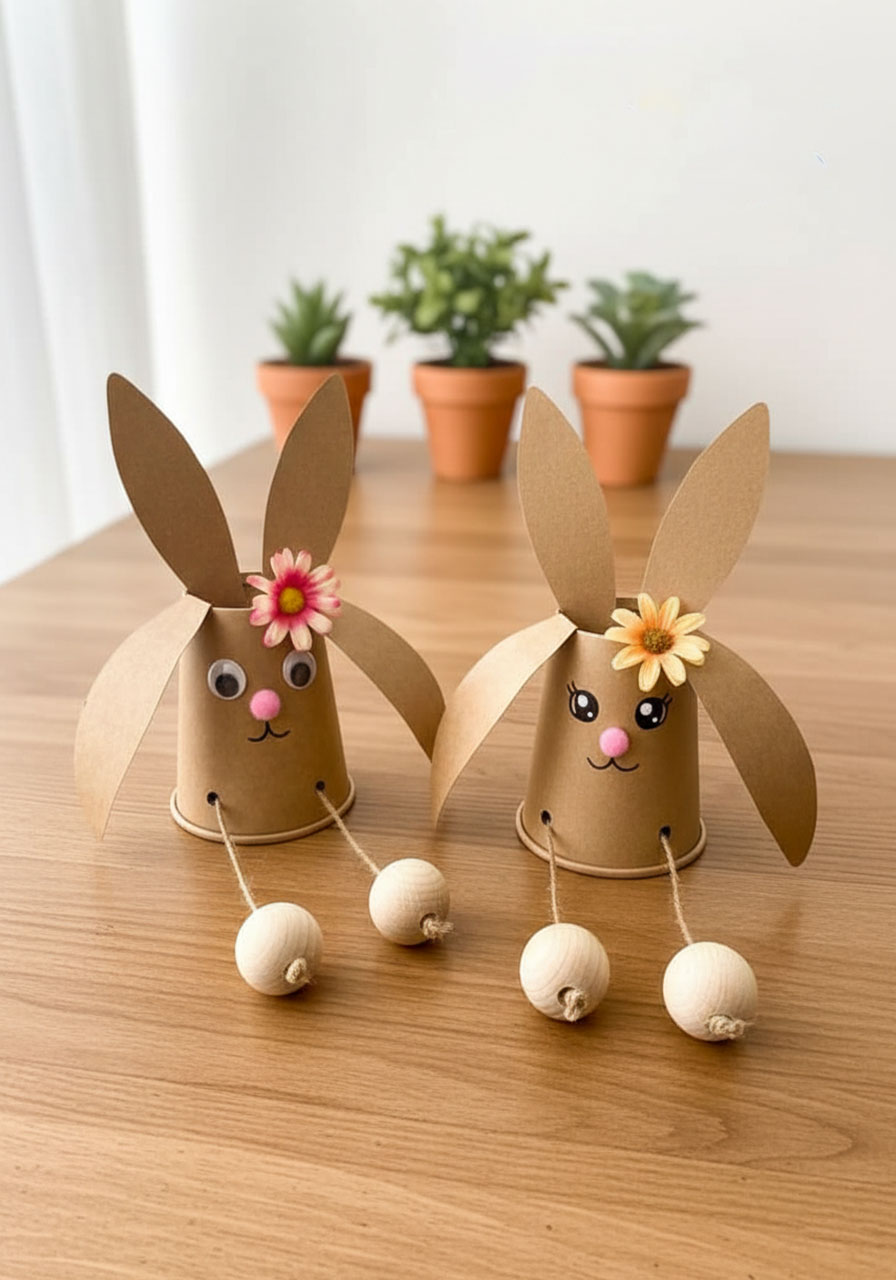
Get ready to hop into the cutest Easter craft activity your little ones have ever seen! This paper cup bunny is so adorable, it might just become your go-to spring craft for years to come. We’re talking googly-eyed cuteness with dangly feet that actually swing back and forth. Trust me, the kids are going to lose their minds over these little guys.
The best part? You probably already have most of the supplies lying around in your craft drawer. This is the perfect last-minute Easter classroom project, rainy afternoon activity, or spring break boredom-buster that’ll keep little hands busy and creative minds happy.
Why You’ll Love This Paper Cup Bunny Craft
Perfect for: Preschool through early elementary, Easter parties, spring classroom activities, rainy day crafts
Time to Complete: 15-20 minutes per bunny
Mess Level: Low! (Always a win in our book)
Adorableness Factor: Off the charts


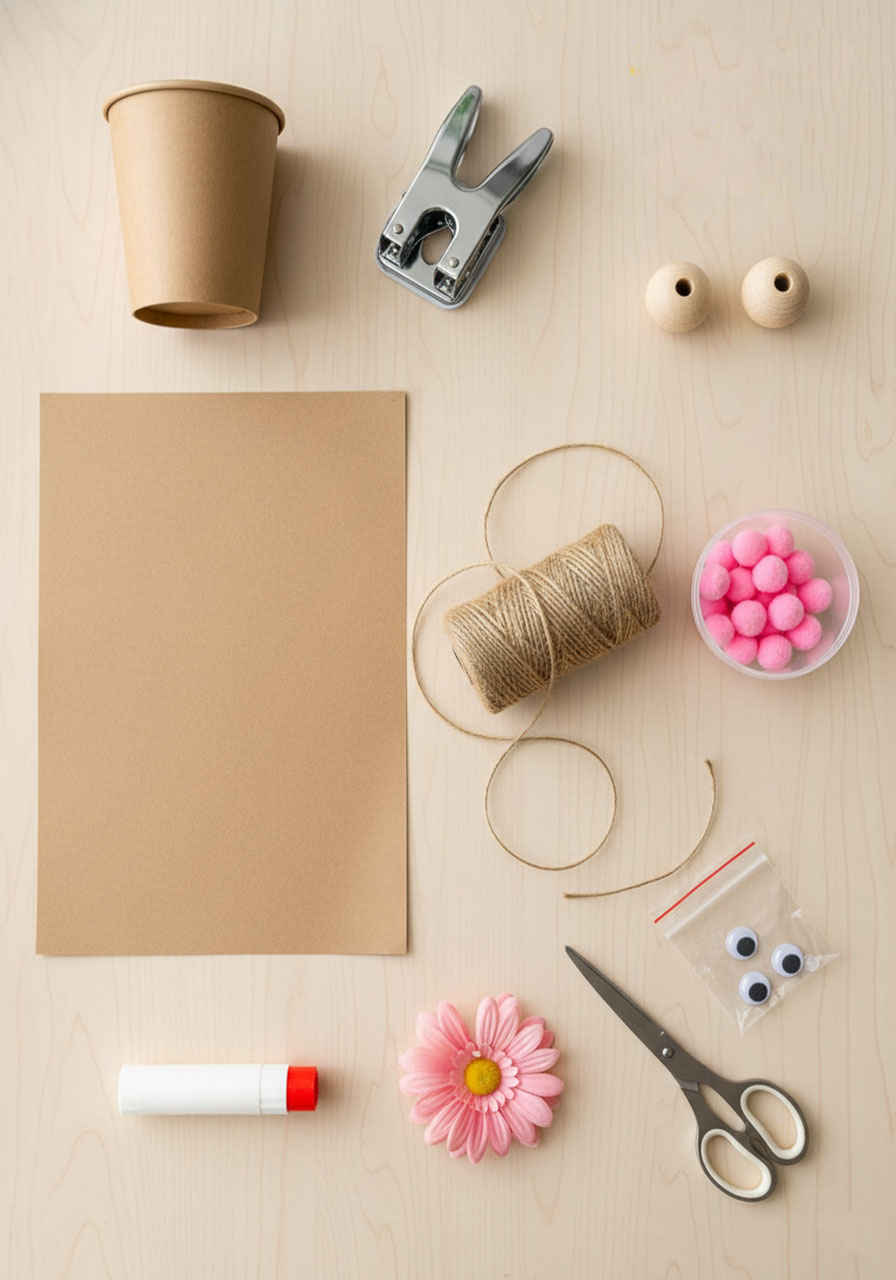
What You’ll Need
Round up these simple supplies and you’re ready to create bunny magic:
Brown paper cups (one per bunny – or grab a whole stack because kids always want to make more!)
Brown craft paper or cardstock (for those floppy ears)
Twine or string (about 25 cm per bunny)
Two large wooden beads (these become the cutest swinging feet)
Googly eyes (because everything’s better with googly eyes)
Pink pom-pom (for that boopable nose)
Small decorative flower (optional, but it adds serious spring charm)
Hole puncher
Scissors
Glue stick
Black marker (for drawing details)
Pro Tip: Can’t find wooden beads? No problem! Pom-poms, large buttons, or even small plastic Easter eggs work great as bunny feet. Get creative with what you have!

Easter Story 3D Egg Craft Template Printable | Resurrection Craft for Kids
🐴 Palm Sunday – Kids clearly understand Jesus entering Jerusalem as they color the donkey – turning a complex Bible moment into something simple and memorable.
🍞 Last Supper – The bread and wine panel helps you naturally introduce Jesus’ sacrifice and connect it to real-life church practices like communion.
✝️ The Cross – The crucifixion scene gives you a gentle, age-appropriate way to explain Jesus’ love and why His sacrifice matters.
⛰️ Empty Tomb – This panel captures kids’ attention with the biggest turning point – helping them grasp that Jesus defeated death.
🙏 Resurrection – Seeing Jesus alive again reinforces the full Easter message, giving kids a clear, lasting understanding of why we celebrate.
How to Make Your Paper Cup Bunny (Step-by-Step)
Okay, let’s turn that plain paper cup into the most adorable bunny that ever hopped! Follow these super simple steps:
1. Set up your craft station.
Lay out all your supplies so little hands can reach everything they need. This is half the fun – kids love seeing all the materials laid out like a real craft workshop!
2. Flip that cup!
Turn your brown paper cup upside down so the bottom faces up. This closed end becomes your bunny’s head, and the open end (now at the bottom) is where we’ll add those adorable dangly legs.
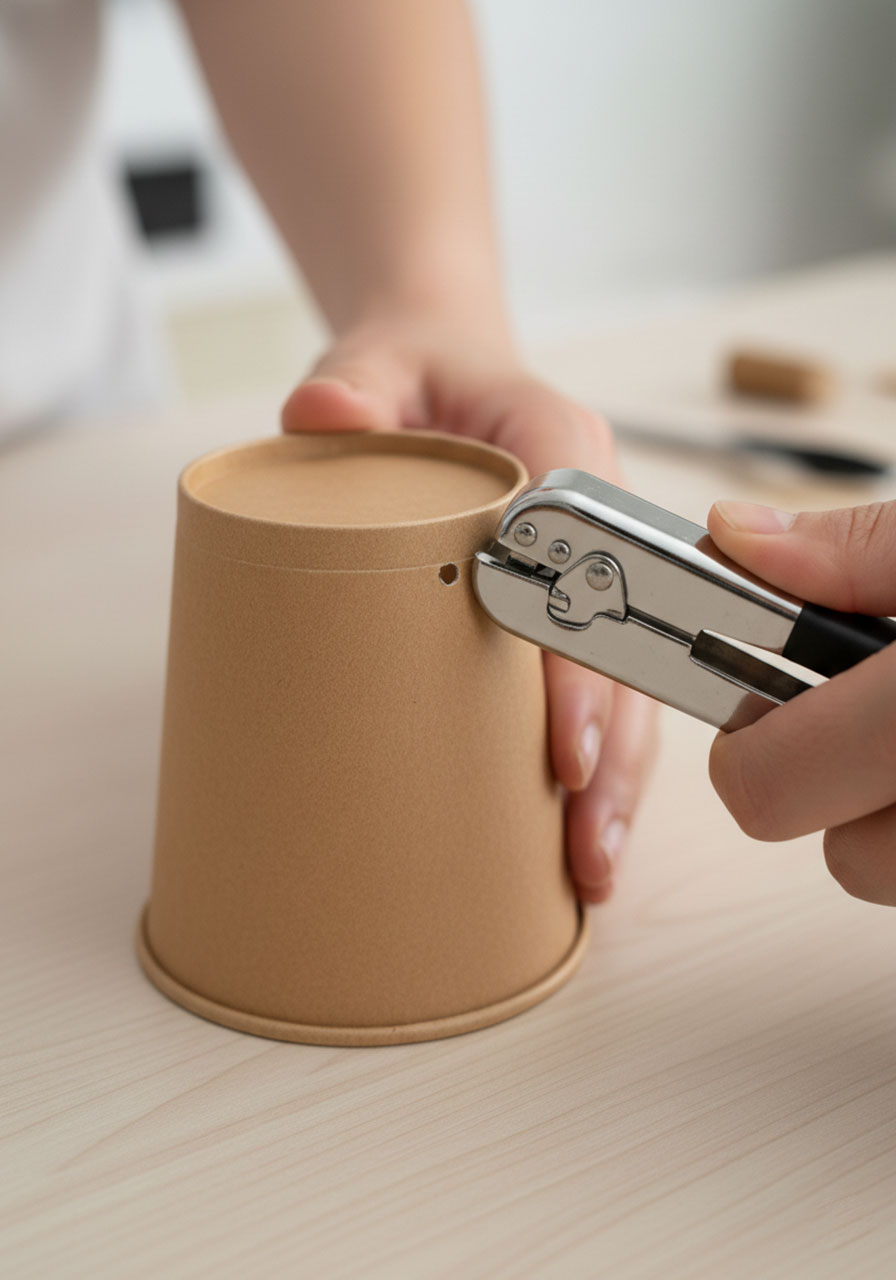
3. Punch the leg holes.
Use your hole puncher to make two holes in the bottom rim of the cup, about 4 cm apart. These holes are where the bunny’s legs will thread through. (Teacher tip: Pre-punch these for younger kids to save time!)
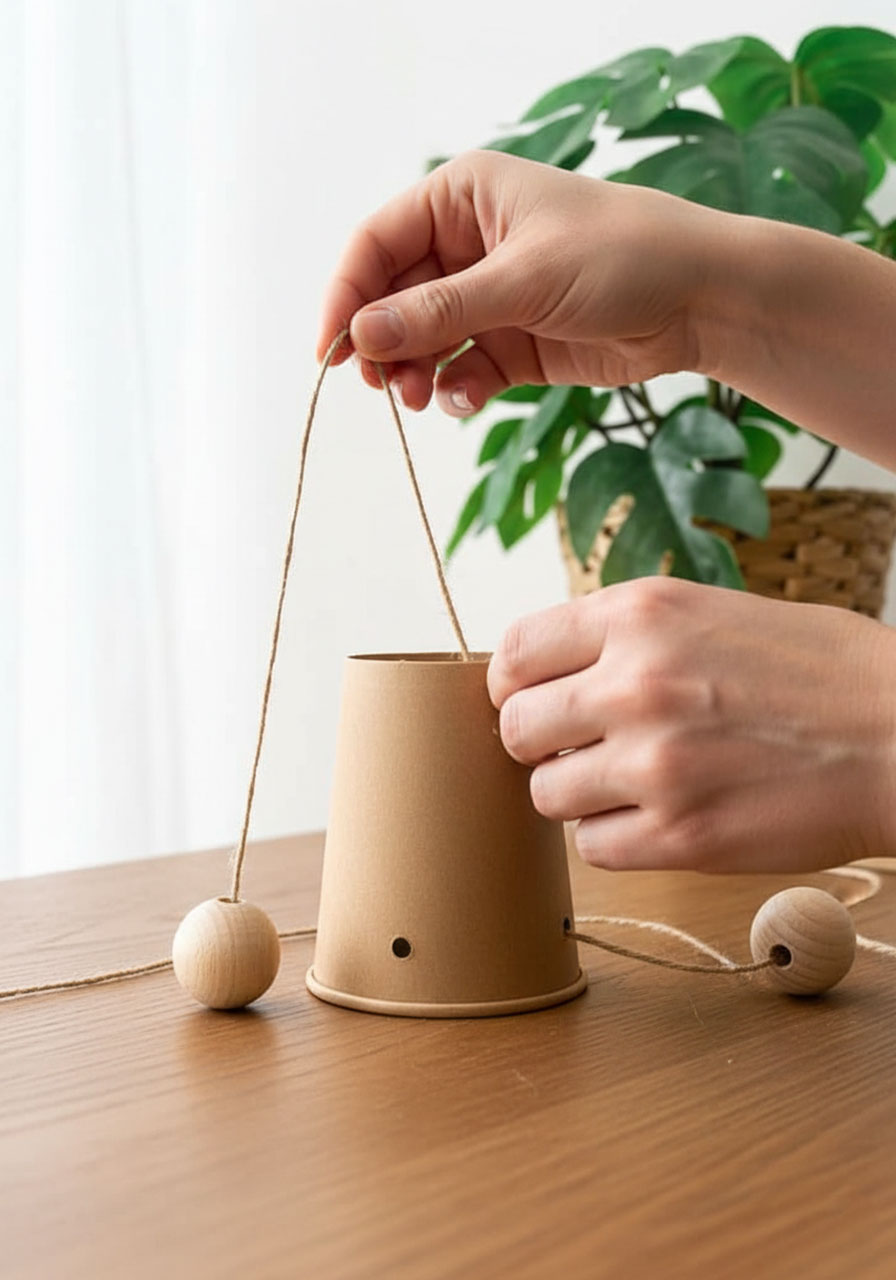
4. Create the swinging legs.
Cut a piece of twine about 25 cm long. Tie a secure knot at one end and thread on your first wooden bead – this knot stops it from slipping off. Now thread your twine through both holes in the cup (going in one hole and out the other), then add the second bead to the other end and tie it off. Give it a little shake and watch those bunny feet swing!
5. Cut and attach the ears.
Cut two long, oval bunny ears from your brown paper. Make them about as tall as the cup itself – long, floppy ears are what make bunnies so cute! Use your glue stick to attach them to the top of the cup. Let the kids bend them slightly for extra personality.

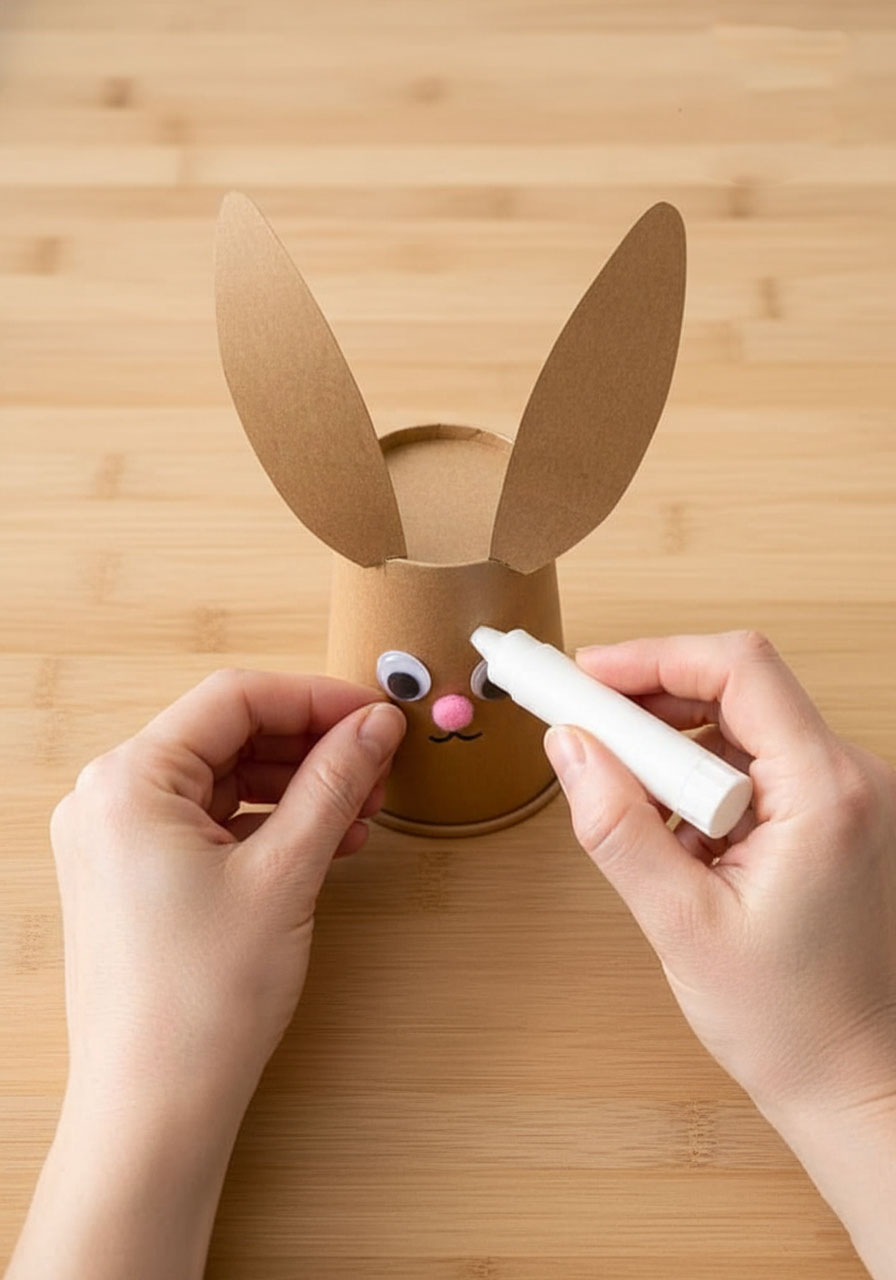
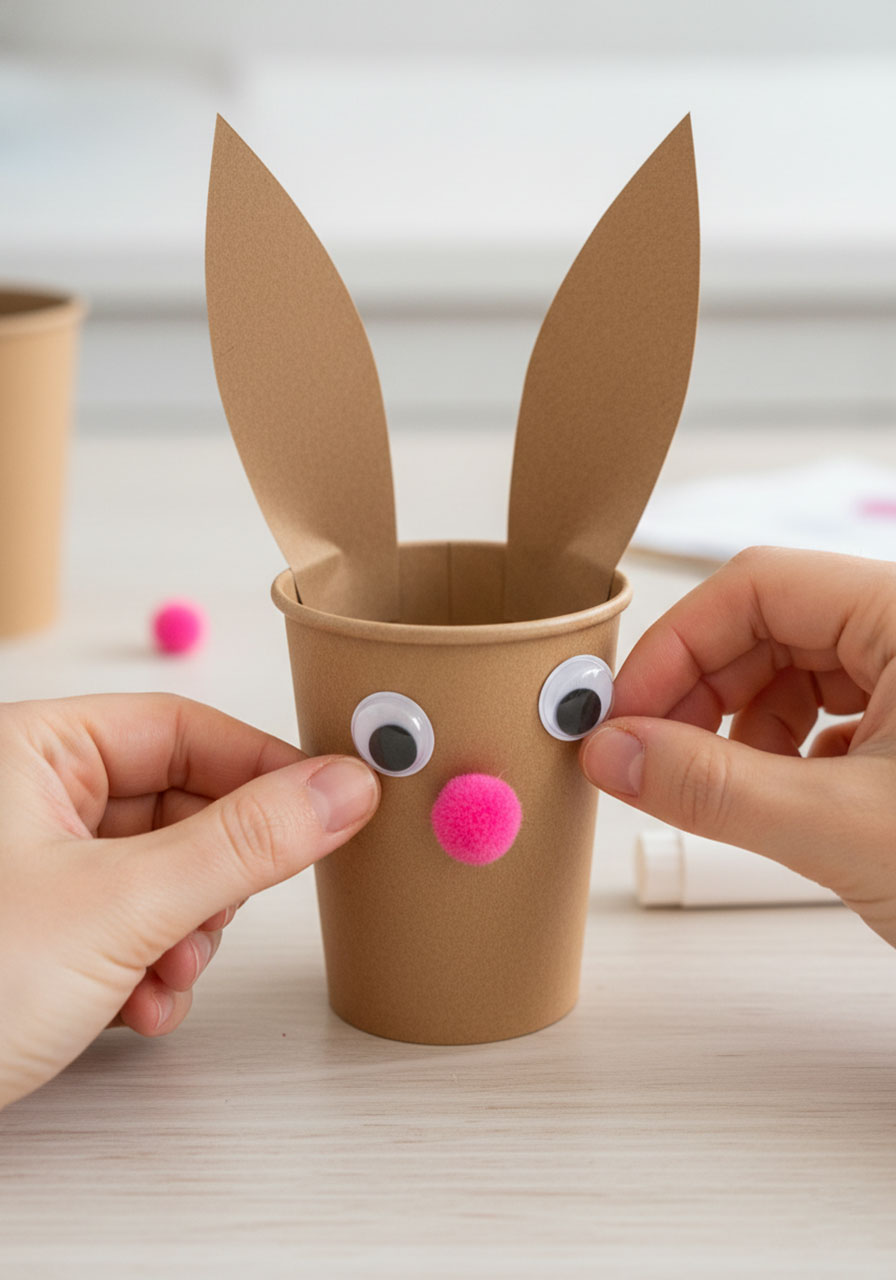
6. Add the face.
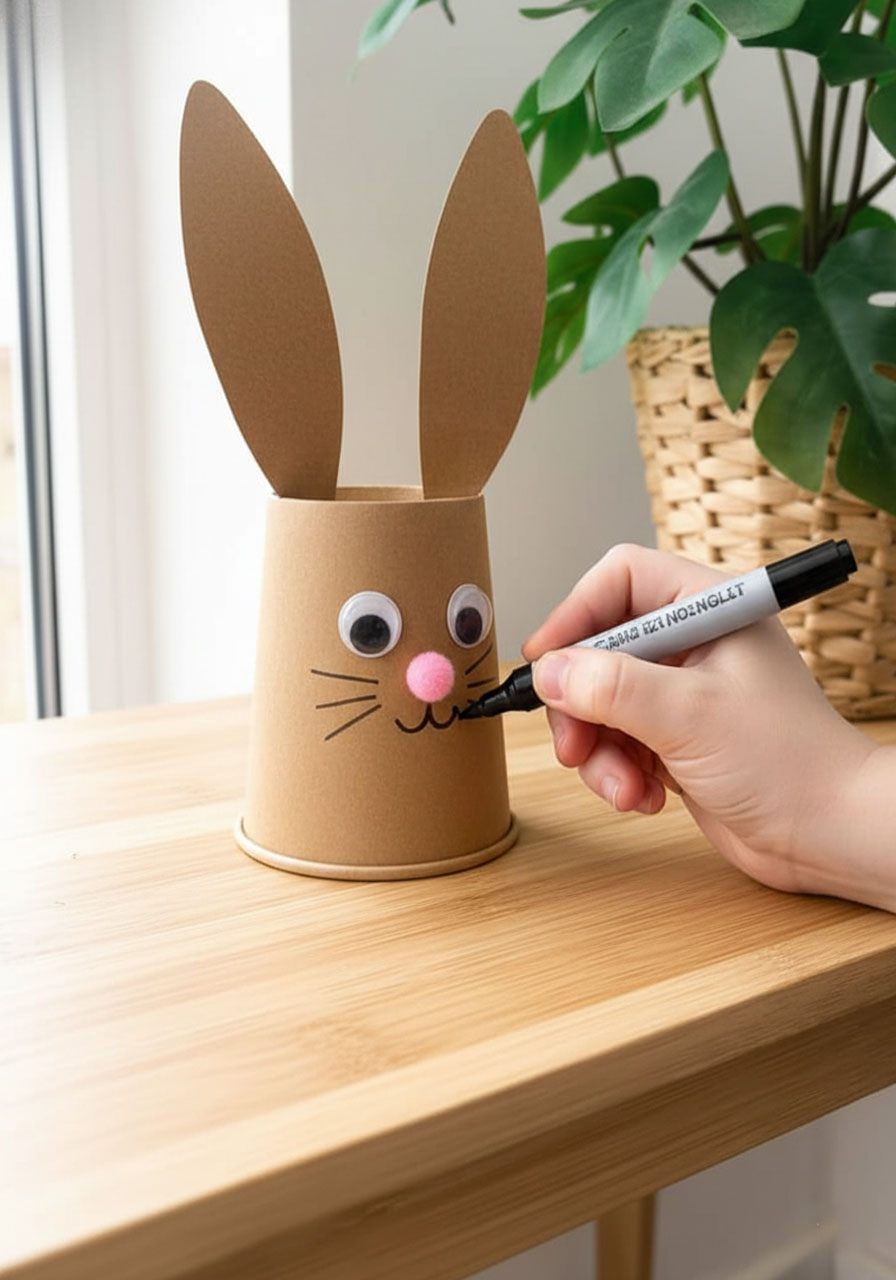
Stick on two googly eyes (positioning is everything – let kids experiment to see how the eye placement changes the bunny’s expression!). Then glue that pink pom-pom right in the center for an irresistible nose. Use your black marker to draw a simple smile and maybe a few whiskers if you’re feeling fancy.
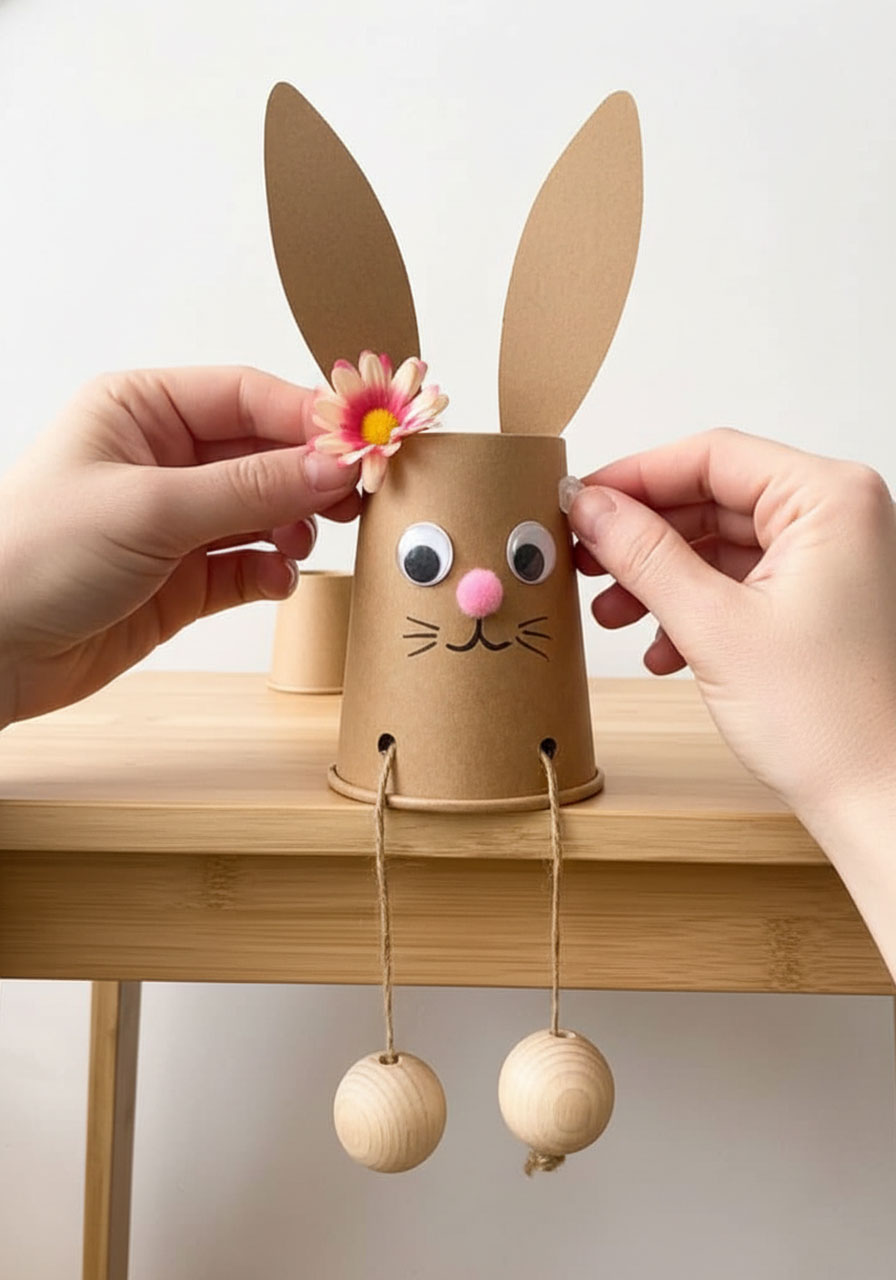
7. Top it off with spring flair.
This is where you can really personalize your bunny! We added a small decorative flower behind one ear for a springtime touch, but kids can add whatever makes their bunny special. Different colored pom-poms, tiny bows, or even glitter accents all work beautifully.
Fun Variations to Try
Once you’ve mastered the basic bunny, here are some creative twists that’ll keep the fun going:
Rainbow Bunny Family: Use cups in different colors (pink, blue, yellow) to create a whole bunny family. Each child can make their bunny unique!

Cotton Ball Tail: Glue a fluffy cotton ball to the back of the cup for an extra-soft bunny tail.
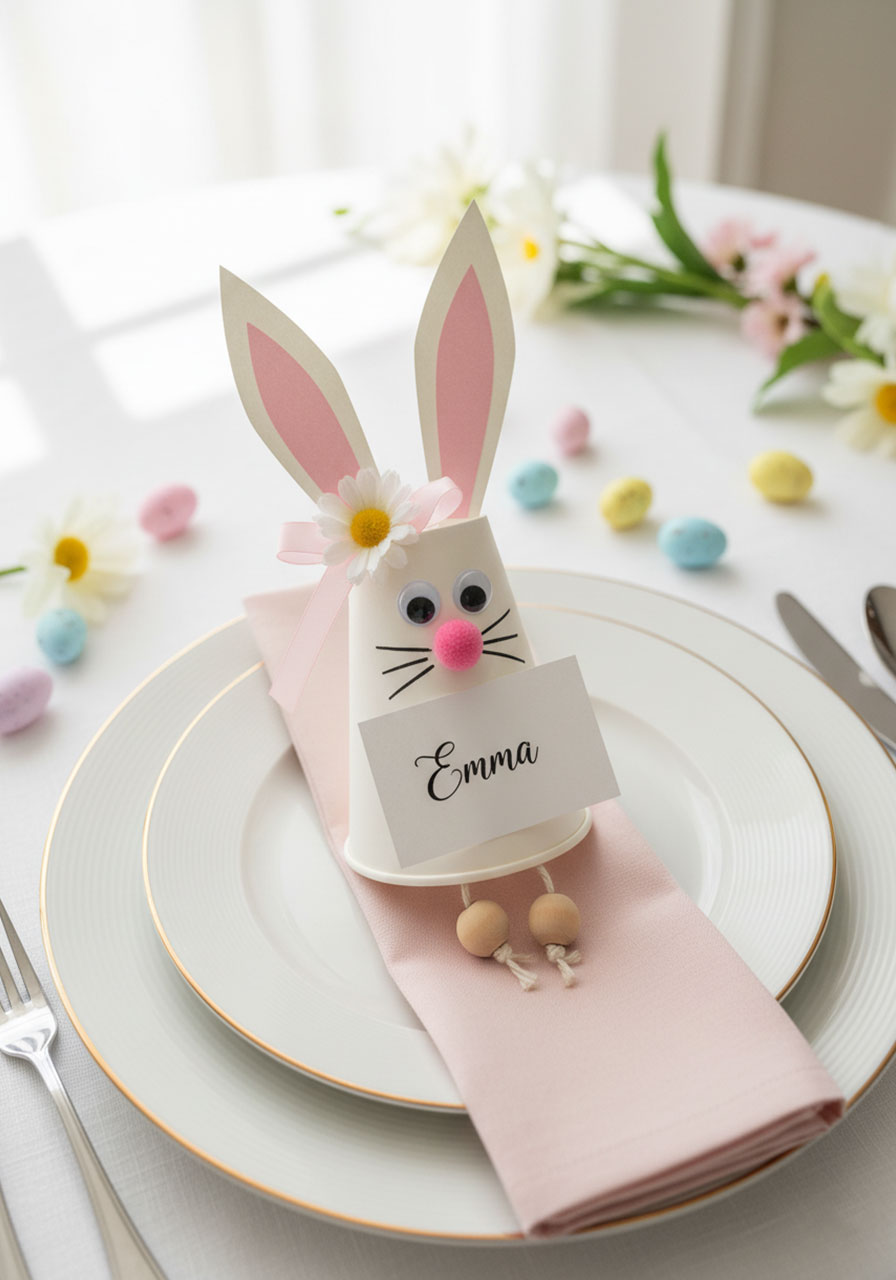
Bunny Name Tags: Write names on the bunny’s tummy with markers – perfect for Easter place cards at your dinner table!
Seasonal Switch-Up: Change the flower for different seasons. Fall leaves, winter snowflakes, or summer daisies keep this craft fresh all year round.
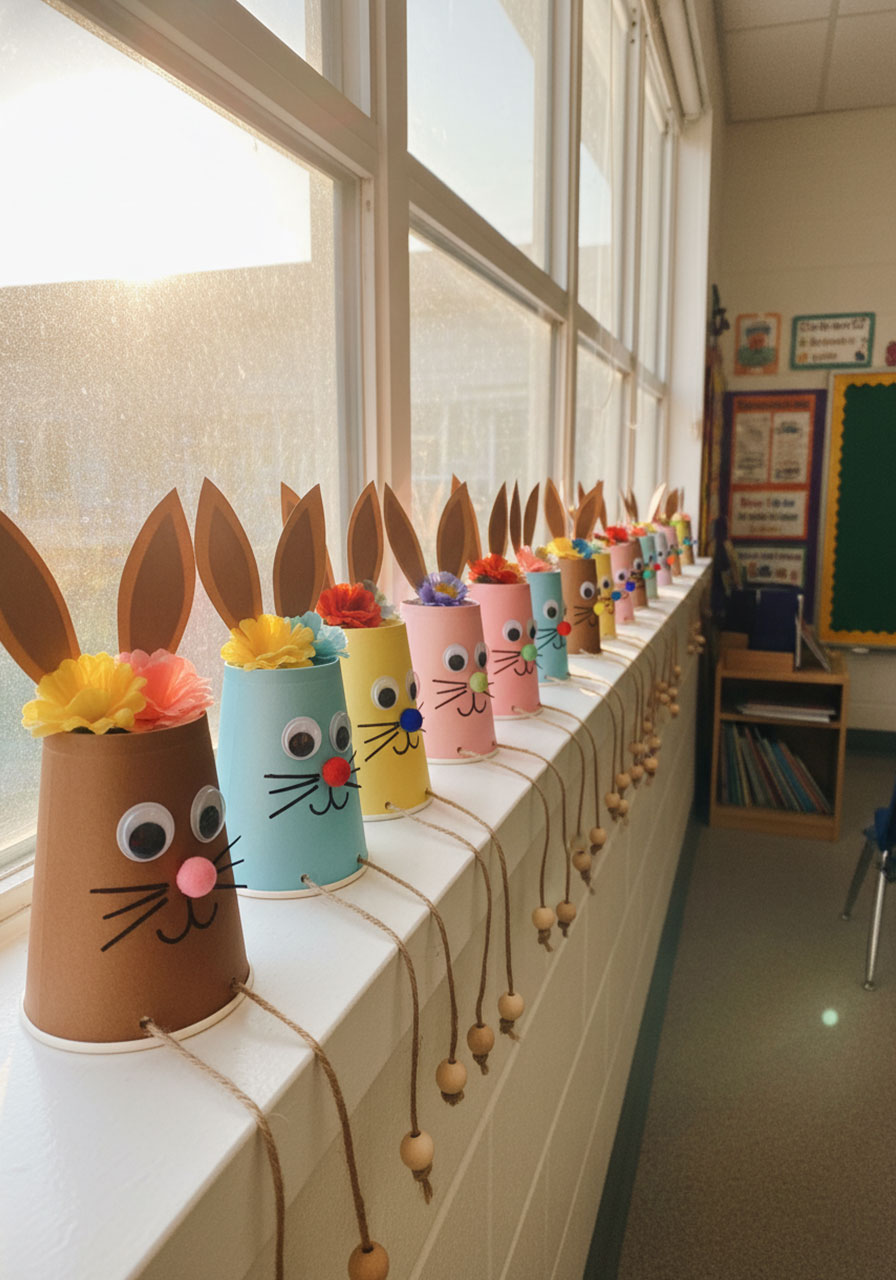
Classroom Hero Tip: Pre-cut the ears and pre-punch the holes before class starts. This way, even your youngest students can complete this craft successfully in one sitting. Nothing beats seeing an entire class of personalized bunnies lined up on the windowsill!
Why Kids (and Adults!) Love This Craft
There’s something magical about watching a simple paper cup transform into a cute character. The swinging bead feet add a playful, interactive element that makes kids want to pick up their bunny and play with it long after craft time is over.
Plus, this craft hits that sweet spot of being simple enough for preschoolers but engaging enough that older elementary kids still enjoy personalizing their bunnies. It’s a rare win-win in the world of kids’ crafts!
More Ways to Use Your Paper Cup Bunnies
Don’t just make these cuties and call it a day! Here are some fun ways to extend the activity:
Create an Easter bunny parade by lining them up along a shelf or mantle
Use them as party favors filled with small candies or treats
String several together to make an adorable Easter garland
Set up a “bunny hop” race where kids gently toss beanbags at their bunnies
Make them into place card holders for your Easter brunch table
Parent Win: This craft doubles as a sneaky fine motor skills workout! Threading the beads, gluing small pieces, and positioning the eyes all help develop hand-eye coordination and dexterity. Learning through play at its finest!
Ready, Set, Hop to It!
With just a handful of basic craft supplies and about 20 minutes, you’ve got yourself the perfect spring activity that delivers maximum cuteness with minimum fuss. Whether you’re a parent looking for a weekend project or a teacher planning your Easter classroom party, these paper cup bunnies are guaranteed to be a hit.
So grab those paper cups, round up the kids, and get ready to create some seriously adorable Easter magic. Your bunny army awaits!
More Easter Party Ideas to Keep the Fun Rolling:
How to Make String Easter Eggs That Actually Work
100 Best DIY Easter Centerpieces That’ll Make Your Table the Talk of the Town
27 Extra Cute Easter Crafts for Adults That’ll Make You the Coolest Host (or Teacher!)
How to Make Foam Cup Bunnies in Just 5 Minutes (Your Kids Will Go Wild!)
20+ Easter Tot School Activities That’ll Make Learning Egg-stra Fun
15 Epic Easter Party Ideas That’ll Have Everyone Hopping with Joy
8 Indoor Easter Egg Hunt Ideas That’ll Have Kids Begging for More
Easter Egg Rescue: The Fine Motor Activity That’ll Keep Kids Busy for Hours