
You’re going to want to bookmark this one right now.
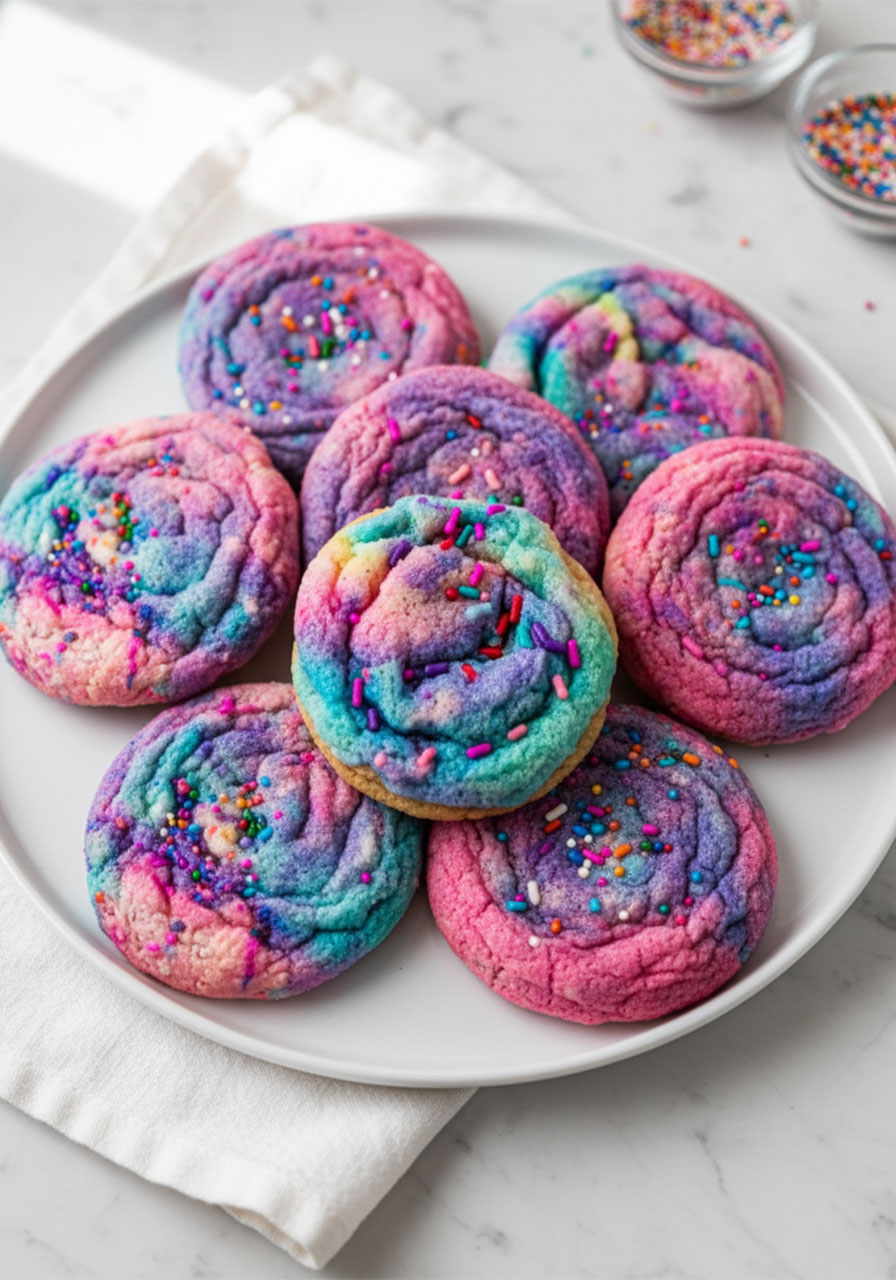
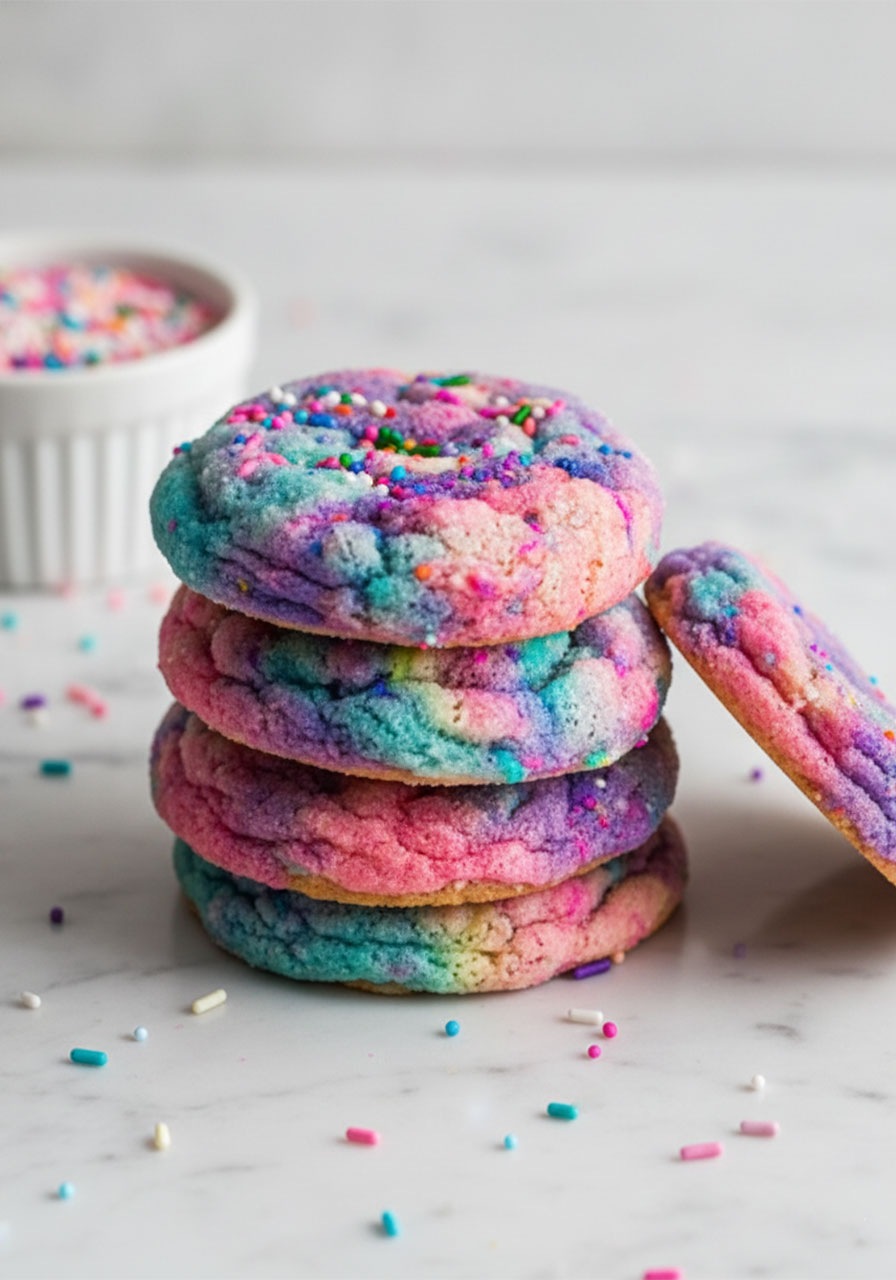
These unicorn cookies are the kind of treat that makes kids absolutely lose their minds – in the best possible way. We’re talking swirly pink, blue, and violet dough packed with sprinkles, rolled into big pillowy balls, and baked until the edges are just golden. Every single cookie looks like it came straight out of a fairytale.
And here’s the best part? You don’t need any fancy decorating skills. No piping bags. No fondant. No stress. Just a simple sugar cookie dough, a few squirts of gel food coloring, and about 40 minutes from start to finish.
Whether you’re planning a unicorn birthday party, a classroom celebration, or just a rainy-day baking project with the kids, these cookies are 100% guaranteed to be a hit.
Let’s make some magic. 🦄
Why Parents and Teachers LOVE This Recipe
As someone who’s brought these to more than one school party, I can tell you firsthand – the moment you set these out on a table, everyone stops and stares. The colors are just that eye-catching.
But beyond the “wow” factor, here’s what actually makes this recipe a keeper:
Simple pantry ingredients. Everything you need is probably already in your kitchen.
Kid-friendly process. Little hands can help with the swirling and rolling – it’s genuinely fun for them.
No cutter, no fuss. Just scoop, roll, and bake. Easy as it gets.
Thick, chewy texture. These aren’t thin and crispy. They’re soft, buttery, and absolutely delicious.
Make-ahead friendly. You can prep the dough up to 3 days ahead. More on that below!

What Makes These Cookies So Chewy and Thick?
Great question – and it’s not just luck. The texture of these unicorn cookies comes down to a few specific ingredients working together.
Cream of tartar is the secret weapon here. It’s a mild acid that reacts with the baking soda to help the cookies rise without spreading too much. The result? A thick, domed cookie with that signature soft-in-the-middle bite.
Room temperature butter creams better with sugar, which means more air gets incorporated into the dough. That’s what gives you that light, tender crumb instead of a dense, flat cookie.
And the generous amount of flour (3½ cups!) keeps these cookies sturdy and thick. Don’t be tempted to reduce it.
💜 First-timer tip: If your cookies are spreading too flat in the oven, pop the portioned dough balls in the fridge for 30 minutes before baking. Game-changer.
Ingredients You’ll Need
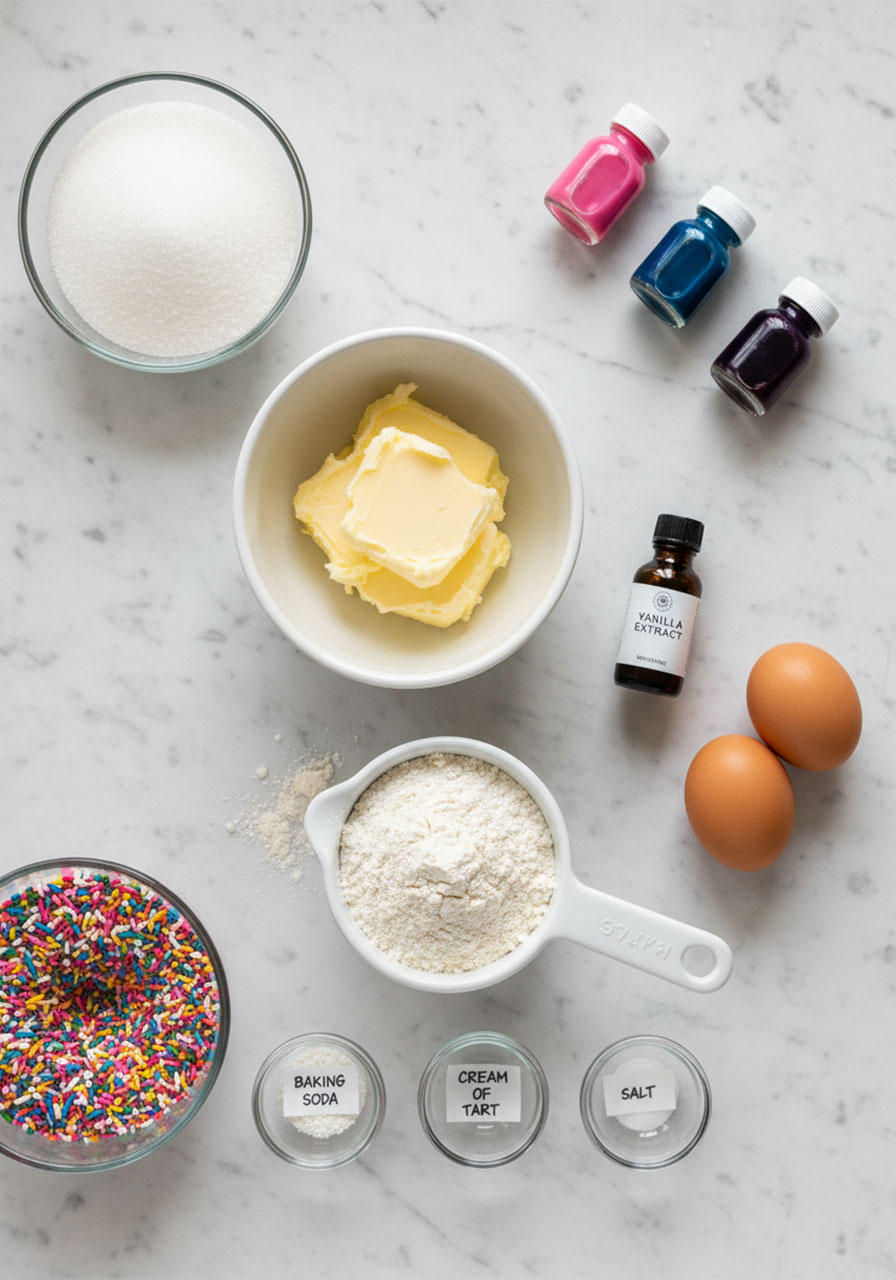
Here’s your full shopping list. Nothing exotic – just the good stuff.
1 cup (226g) unsalted butter, at room temperature
1½ cups (285g) granulated sugar (plus extra for rolling)
2 large eggs, at room temperature
1 teaspoon pure vanilla extract
3½ cups (420g) all-purpose flour
½ teaspoon baking soda
½ teaspoon cream of tartar
¼ teaspoon salt
½ cup rainbow sprinkles
Gel food coloring in Pink, Royal Blue, and Violet
Pro Tip: Always use gel food coloring, not liquid. Gel gives you those rich, vibrant unicorn colors without adding extra moisture to the dough. A little goes a long way – start with a small amount and build up!
How to Make Unicorn Cookies – Step by Step
Ready? Here’s everything you need to know, in order, so nothing gets missed.
Step 1: Preheat the Oven
Set your oven to 350°F (175°C) and line a large baking sheet with parchment paper or a silicone baking mat.
Don’t skip the parchment! It prevents sticking and makes cleanup a breeze.
Step 2: Cream the Butter and Sugar
In a large mixing bowl, beat the room temperature butter and granulated sugar together on medium speed for about 2–3 minutes, until the mixture is light and fluffy.
Then add both eggs and the vanilla extract, and mix until fully combined. The batter should look smooth and creamy.
Step 3: Add the Dry Ingredients
In a separate bowl, whisk together the flour, baking soda, cream of tartar, and salt.
Gradually add the dry mixture into the butter mixture, mixing on medium-low speed just until a dough forms. Don’t overmix here – once the flour disappears, you’re done.
Step 4: Fold in the Sprinkles
Gently fold in the ½ cup of rainbow sprinkles using a spatula or wooden spoon. You want them evenly distributed without breaking them up too much.
This is a great step for kids to help with!
Step 5: Divide and Color the Dough
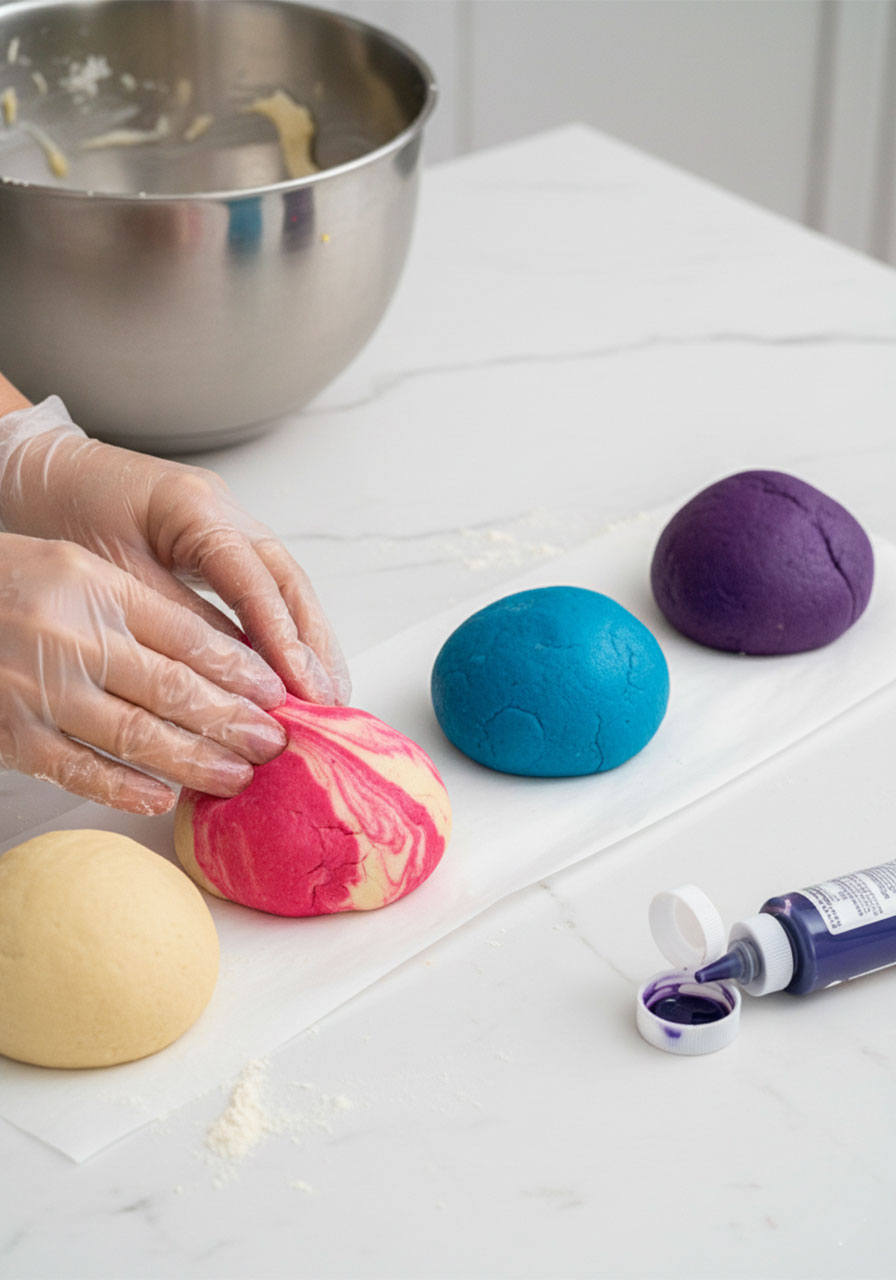
This is where the magic happens. Split your dough into four roughly equal portions.
Leave one portion uncolored (plain white)
Color the second portion pink
Color the third portion royal blue
Color the fourth portion violet
To color each portion, add a small amount of gel coloring and knead it in with your hands or a spatula until the color is even throughout. Use gloves if you don’t want colorful hands!
Step 6: Create the Swirl Effect
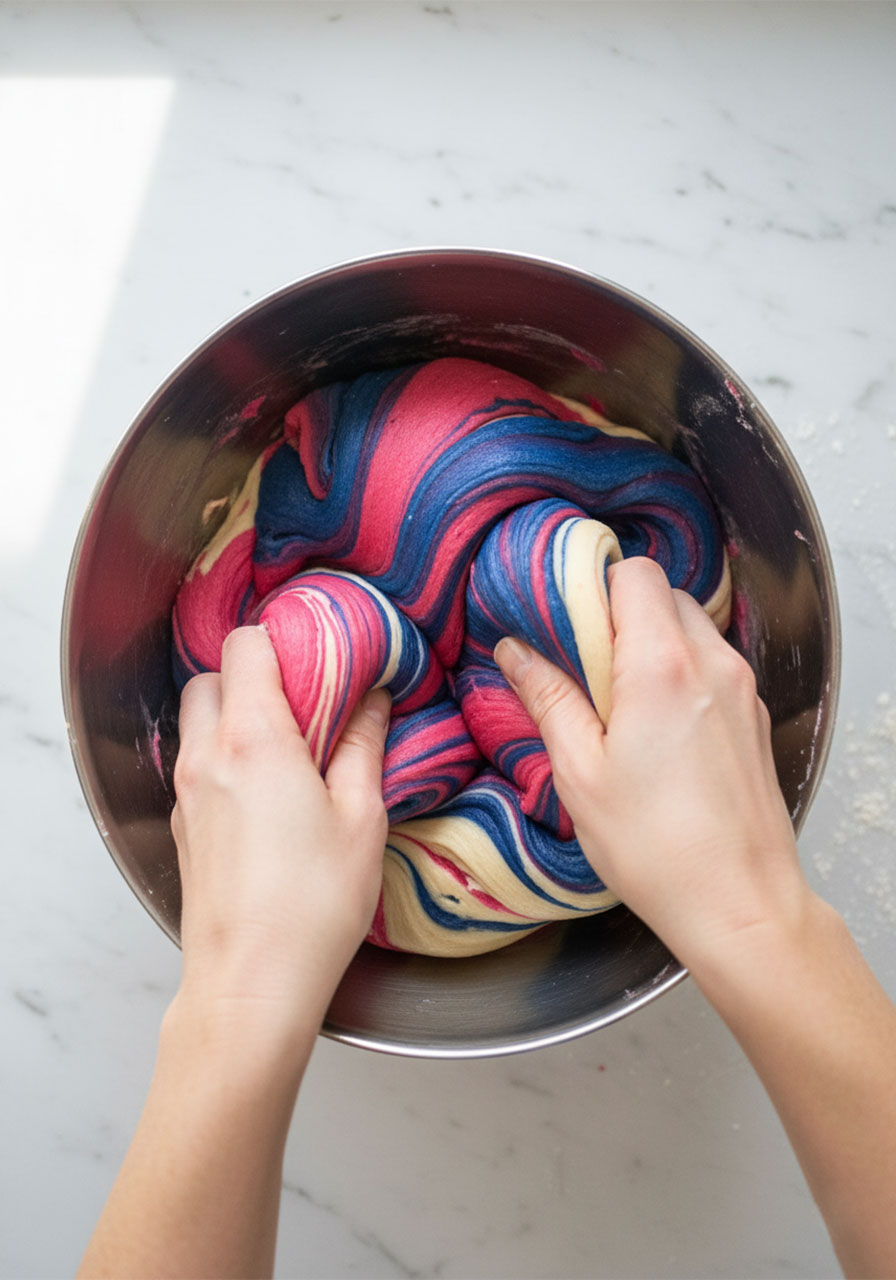
Place all four colored dough portions into one large bowl. Using a spoon or your hands, gently swirl the colors together – think 3 or 4 folds, not a full mix.
The goal is a marbled, tie-dye effect. Stop early! Over-swirling turns everything into muddy purple. You want distinct streaks of each color peeking through every cookie.
🎨 The swirling step is the most important for that wow-worthy look. Less is more. Embrace the imperfect swirls – they make every cookie totally unique!
Step 7: Scoop and Roll
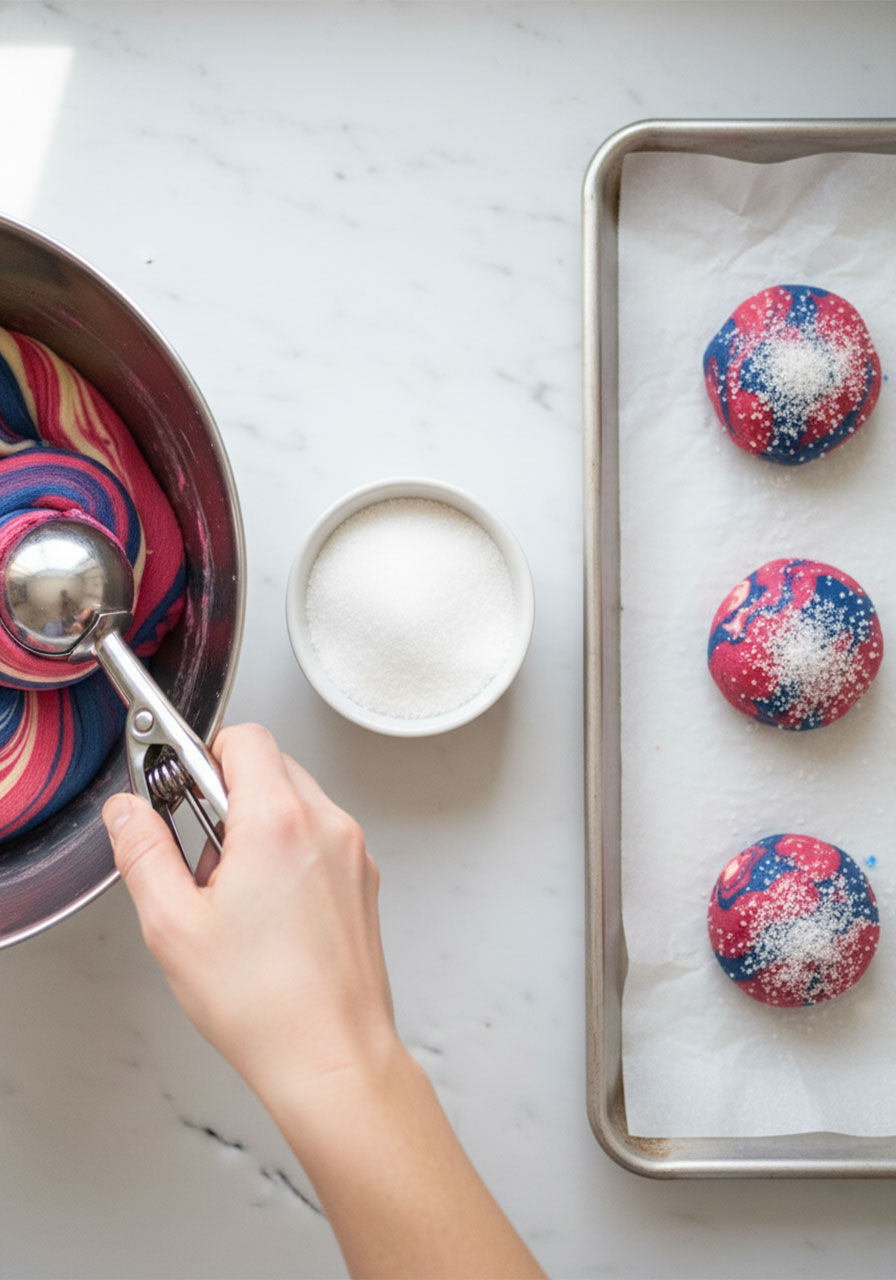
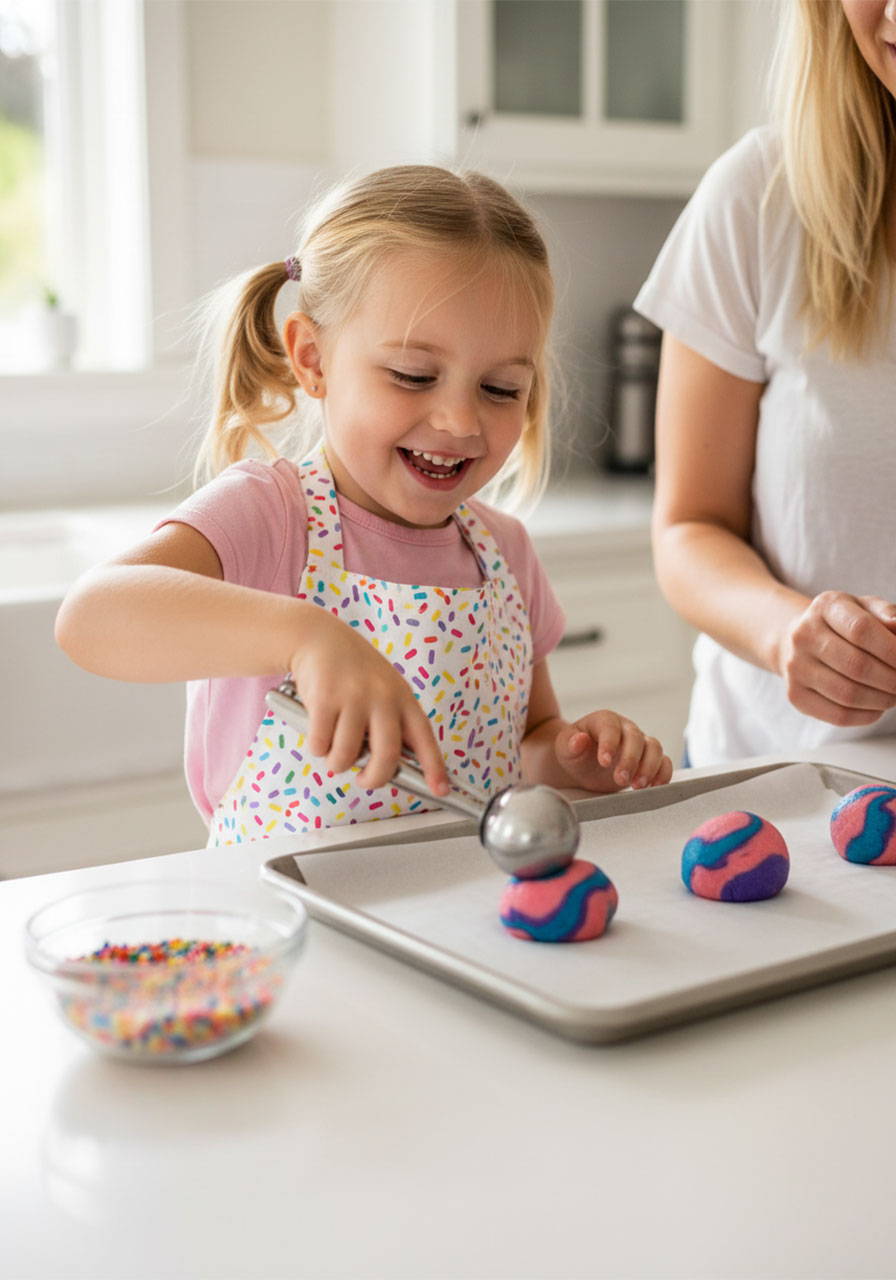
Use a medium cookie scoop (about 1.5 tablespoons) to portion the dough into balls. Roll each ball in a little granulated sugar or extra sprinkles before placing on the prepared baking sheet.
Space the cookies about 2 inches apart – they spread a little as they bake.
Step 8: Bake
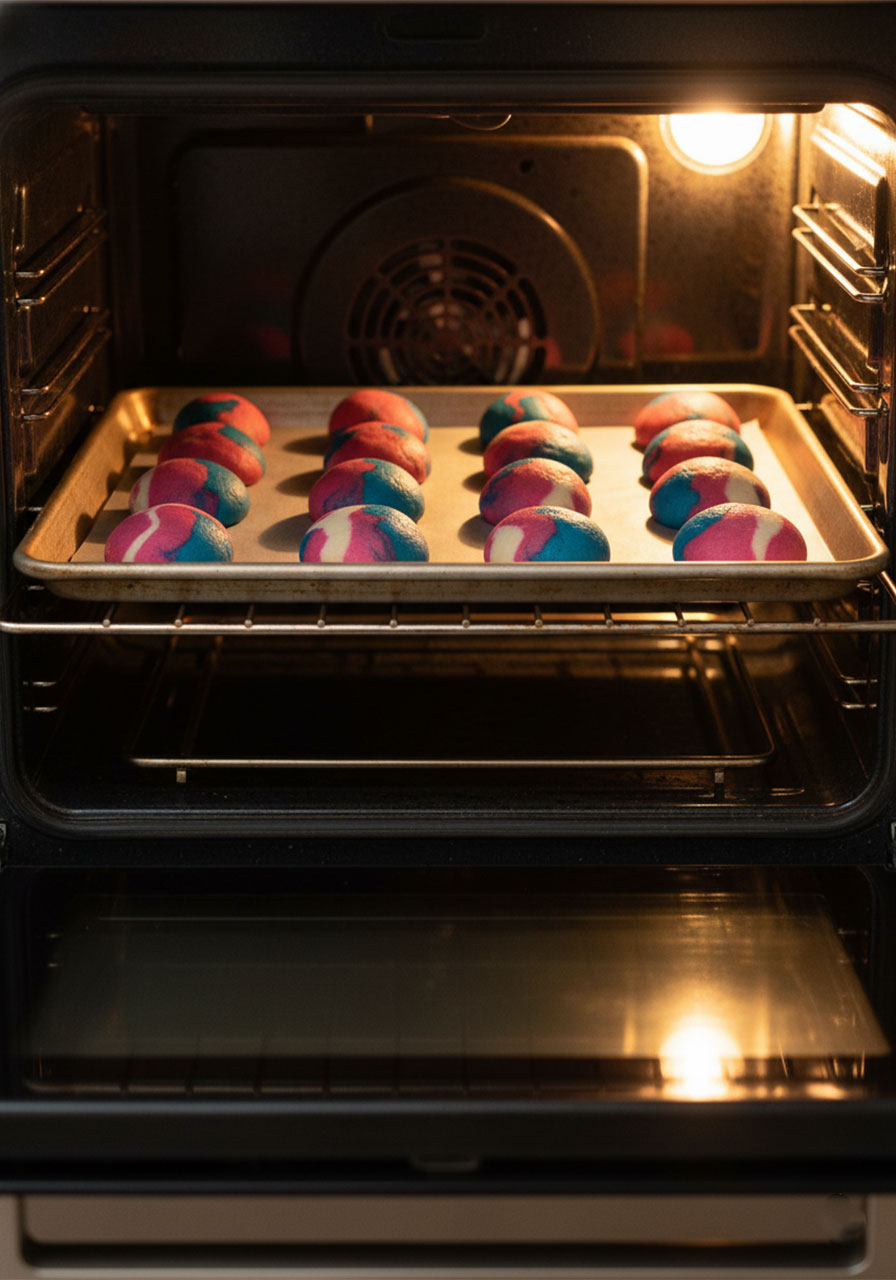
Bake for 10–12 minutes, until the edges look just set and lightly golden. The centers will still look slightly underdone – that’s perfect. They’ll firm up as they cool.
Let the cookies cool on the baking sheet for 5 minutes before transferring to a wire rack. Trust us – they’re fragile right out of the oven!
How to Get the Most Vibrant Colors
The most common question I get about these cookies is: “Why don’t mine look as colorful as the photos?”
Here’s the honest answer – it usually comes down to three things:
1. Liquid food coloring vs. gel. Liquid coloring is too diluted. Gel colors are concentrated and give you those punchy, vivid pinks and purples you see in the photos.
2. Not enough coloring. Don’t be shy! Add color in small amounts, mix, and keep going until you reach a color that looks almost “too bright” – it will fade slightly during baking.
3. Over-swirling. This is the biggest culprit. If you swirl too much, the colors blend into each other and lose their individuality. Stop when you still see clear streaks of each color.
Fun Ways to Customize These Cookies
Once you’ve nailed the base recipe, the fun really begins. Here are some easy ways to switch things up!
Change the Color Palette
The pink-blue-violet combo is classic unicorn, but you can absolutely go in a different direction:
Mermaid cookies: Use teal, seafoam green, and deep blue
Galaxy cookies: Try midnight blue, black, and silver with star-shaped sprinkles
Rainbow cookies: Go all out with red, orange, yellow, green, blue, and purple
Holiday version: Red and green for Christmas, pink and red for Valentine’s Day
Switch Up the Sprinkles
The type of sprinkles you use makes a big difference in the final look. Try:
Edible glitter for extra sparkle ✨
Star or heart-shaped sprinkles for a themed party
Pastel nonpareils for a softer, dreamy look
Chocolate sprinkles for a more grown-up twist
Add a Drizzle
Once the cookies are fully cooled, drizzle them with white chocolate or a simple powdered sugar glaze tinted with matching gel colors. It takes them from adorable to absolutely stunning.
Make-Ahead and Storage Tips
Great news for busy parents and teachers: these cookies are super make-ahead friendly.
Make the Dough Ahead
You can prepare and color the dough up to 3 days in advance. Wrap it tightly in plastic wrap and refrigerate. When you’re ready to bake, let it sit at room temperature for about 15 minutes to soften slightly, then scoop and bake as directed.
You can also freeze the raw dough balls (before rolling in sugar) for up to 1 month. Bake straight from frozen – just add 2–3 extra minutes to the bake time.
Storing Baked Cookies
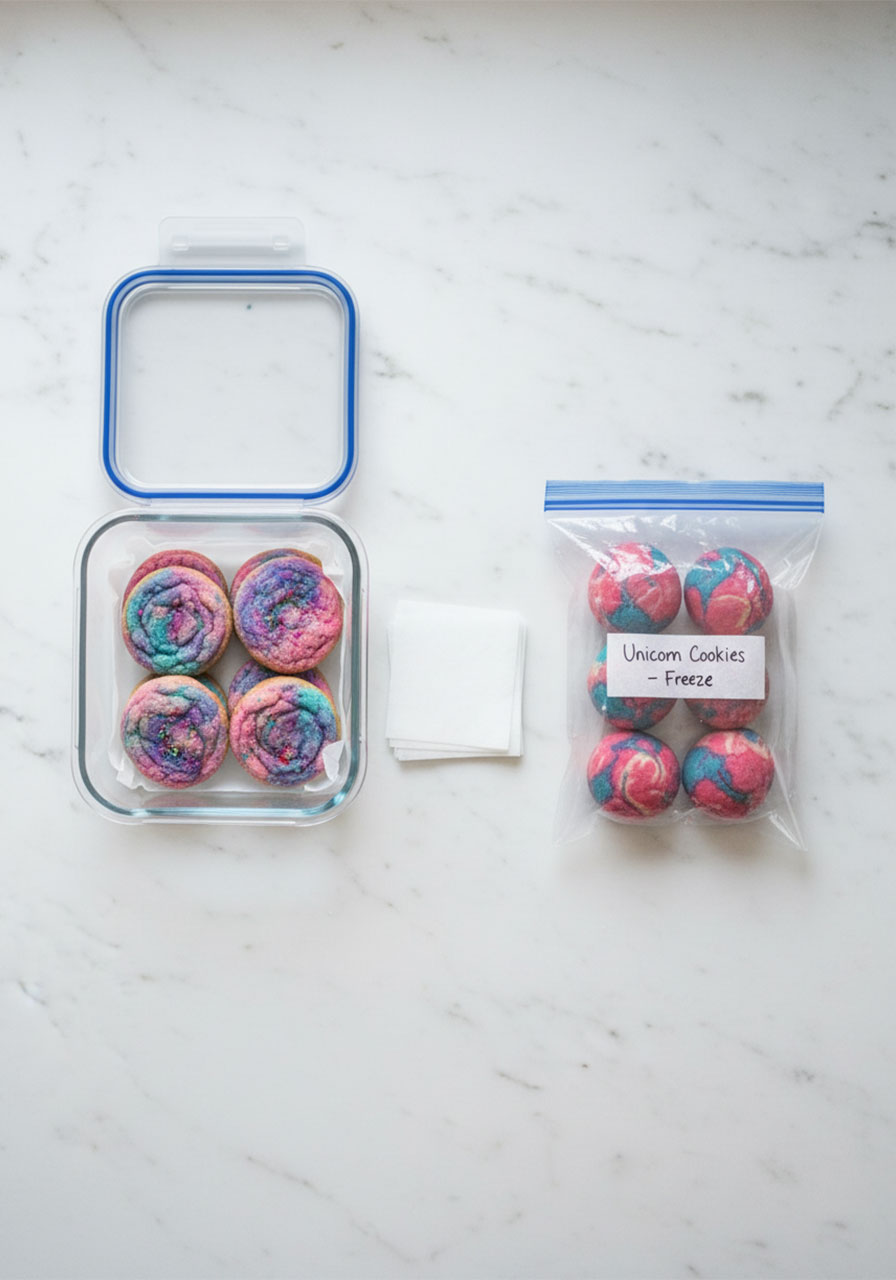
Once baked and fully cooled, store unicorn cookies in an airtight container at room temperature for up to 1 week. Layer them with parchment paper to protect the sprinkles.
To freeze baked cookies, arrange them in a single layer on a baking sheet until frozen solid, then transfer to a freezer bag. They’ll keep for up to 3 months. Thaw at room temperature for 20–30 minutes before serving.
Party Prep Tip: Bake these 1–2 days before the party and store in an airtight container. They actually taste even better the next day as the flavors settle!
Perfect Occasions for Unicorn Cookies
These cookies aren’t just for unicorn-themed parties (though they are absolutely perfect for those). Here’s a quick list of every occasion where they’ll be a guaranteed showstopper:
🎂 Kids’ birthday parties – the obvious MVP
🏫 Classroom celebrations – end-of-year parties, 100th day of school, Valentine’s Day
🎉 Baby showers – pastel colors fit perfectly
🌈 Pride celebrations – swap in rainbow colors
☁️ Rainy day baking project – kids LOVE helping with the swirling step
🎁 Gift giving – package them in a clear bag with a ribbon for a beautiful handmade gift

Frequently Asked Questions
Can I use margarine instead of butter?
Technically yes, but we’d strongly recommend sticking with real unsalted butter. Margarine has a higher water content which can make the cookies spread more and the texture won’t be quite as rich and chewy.
What if my cookies spread too much during baking?
This usually means the butter was too warm (melted, not just softened). Chill your portioned dough balls in the fridge for 30 minutes before baking. That almost always fixes the problem.
Can I make these gluten-free?
Yes! Substitute the all-purpose flour with a 1:1 gluten-free flour blend. Just double-check that your sprinkles and baking soda are also certified gluten-free.
My colors look muddy – what went wrong?
You over-swirled! The colors were mixed too much. Next time, do just 3–4 gentle folds when combining the colored doughs. Imperfect swirls are actually better swirls here.
Can kids help make these?
Absolutely – that’s one of the best things about this recipe! Kids can help add sprinkles to the dough, fold the colors together, and roll the dough balls in sugar. Just handle the oven parts yourself.
How far in advance can I make these for a party?
Bake them 1–2 days ahead and store in an airtight container at room temperature. They stay fresh and delicious. If you want to get even further ahead, freeze the unbaked dough balls and bake the day of.
With these unicorn cookies in your baking arsenal, you are fully equipped to be the most legendary party host – or the most beloved teacher in the school. They look like you spent hours on them. They taste like pure happiness. And they’re honestly one of the easiest cookie recipes you’ll ever make.
Because the best parties (and the best classrooms) are the ones filled with color, laughter, and really, really good cookies. 🌈
Made these? Drop a comment below and tell us what color combo you used – we love seeing your unicorn creations!
Easy Unicorn Cookies (The Most Magical Birthday Party Treat for Kids!)
Ingredients
- 1 cup (226g) unsalted butter, room temperature
- 1½ cups (285g) granulated sugar (+ extra for rolling)
- 2 large eggs, room temperature
- 1 tsp pure vanilla extract
- 3½ cups (420g) all-purpose flour
- ½ tsp baking soda
- ½ tsp cream of tartar
- ¼ tsp salt
- ½ cup rainbow sprinkles
- Gel food coloring: Pink, Royal Blue, Violet
Instructions
- Preheat oven to 350°F (175°C). Line a baking sheet with parchment paper.
- Beat butter and sugar on medium speed until light and fluffy, about 2–3 minutes. Add eggs and vanilla; mix until combined.
- In a separate bowl, whisk flour, baking soda, cream of tartar, and salt. Add to the butter mixture on medium-low speed until a dough forms.
- Fold in the sprinkles with a spatula.
- Divide dough into 4 portions. Leave one plain; color the others pink, blue, and violet with gel food coloring.
- Combine all doughs in one bowl and swirl gently – just 3–4 folds. Stop before the colors blend completely!
- Scoop into balls and roll in granulated sugar. Place 2 inches apart on the baking sheet.
- Bake 10–12 minutes until edges are just set. Cool on the pan for 5 minutes, then transfer to a wire rack.
Notes
- Butter must be softened, not melted – this is key for thick, chewy cookies.
- Use gel food coloring only for best color results.
- If cookies spread too much, chill dough balls 30 minutes before baking.
- Don’t over-swirl the colors – a few folds is all you need for that beautiful marbled look.
Nutritions (per cookie, approx.)
| Calories | 150 | Fat | 7g |
| Carbs | 23g | Protein | 2g |
| Sugar | 10g | Cholesterol | 30mg |
More Easy Party Food Ideas to Keep the Fun Rolling:
Taco Ranch Bites (Easy Party Finger Food for a Crowd!)
No-Bake Oreo Cheesecake Cups (Easy Dessert for Parties!)
Strawberry Brownie Kabobs (Fun Party Dessert Skewers Kids Will Go Crazy For!)
Crispy Chicken Bacon Ranch Wrap (The Ultimate Easy Party Food & Lunch Idea!)
Easy Pinwheel Sandwiches (Make-Ahead Party Finger Food!)
Sheet Pan Burger Sliders on Hawaiian Rolls (Easy Crowd Meal!)
