
You don’t need to spend a fortune to make your Fourth of July table look absolutely festive and fun.
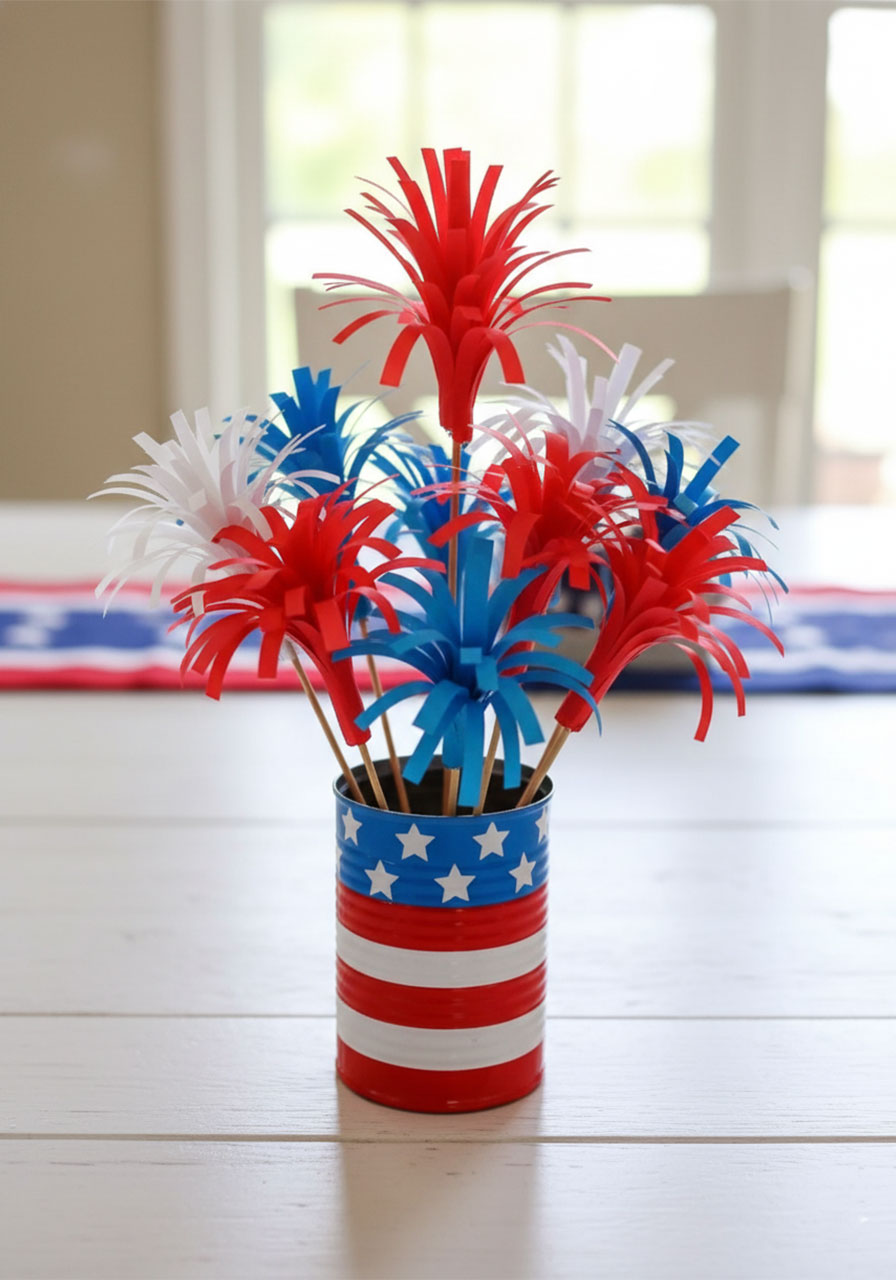
This tin can fireworks centerpiece is one of those crafts that looks like you put in way more effort than you actually did – and that’s exactly the kind of project we love around here.
It’s made from recycled cans, a few sheets of colored paper, and some basic supplies you probably already have at home. Whether you’re decorating for a backyard cookout, a neighborhood block party, or a quiet patriotic celebration at home, this little centerpiece is going to make your table pop – literally.
Plus, it’s a perfect activity to do with kids. They get to cut, color, and create, and you end up with something genuinely beautiful to display. A total win.
Let’s make it!
Why You’ll Love This Craft
Before we dive into the how-to, here’s why this project deserves a spot on your Fourth of July to-do list:
It’s budget-friendly. The main “vase” is a tin can you were going to recycle anyway. The paper and stickers cost almost nothing.
It’s quick. You can knock this out in under an hour – even with kids helping.
It’s reusable. Display it year after year. Just store it carefully and it’ll look great every summer.
It’s a great kids’ activity. The paper-cutting and decorating steps are perfect for little hands to get involved.
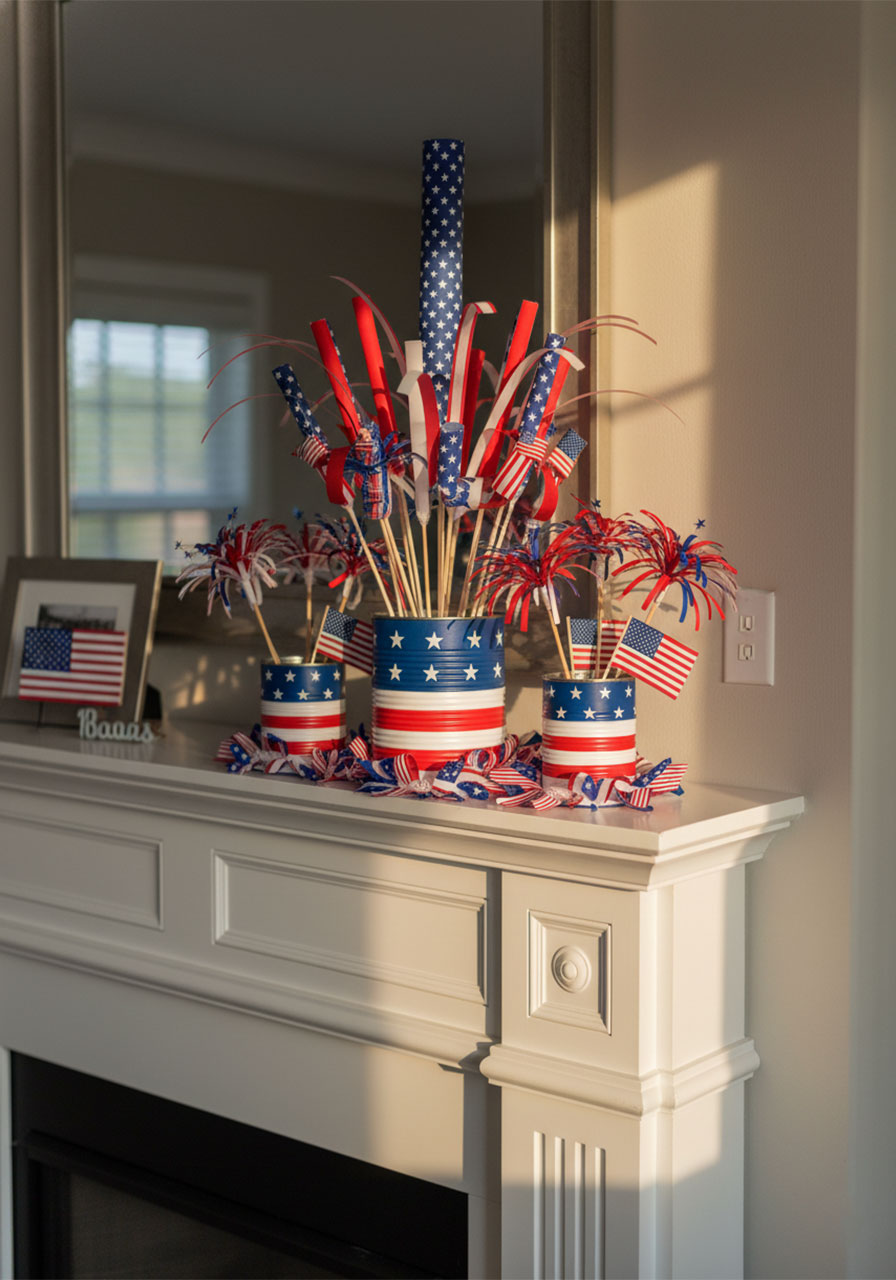
It’s stunning on a table. The burst of red, white, and blue paper fireworks above the flag-painted can is genuinely eye-catching.


What You’ll Need
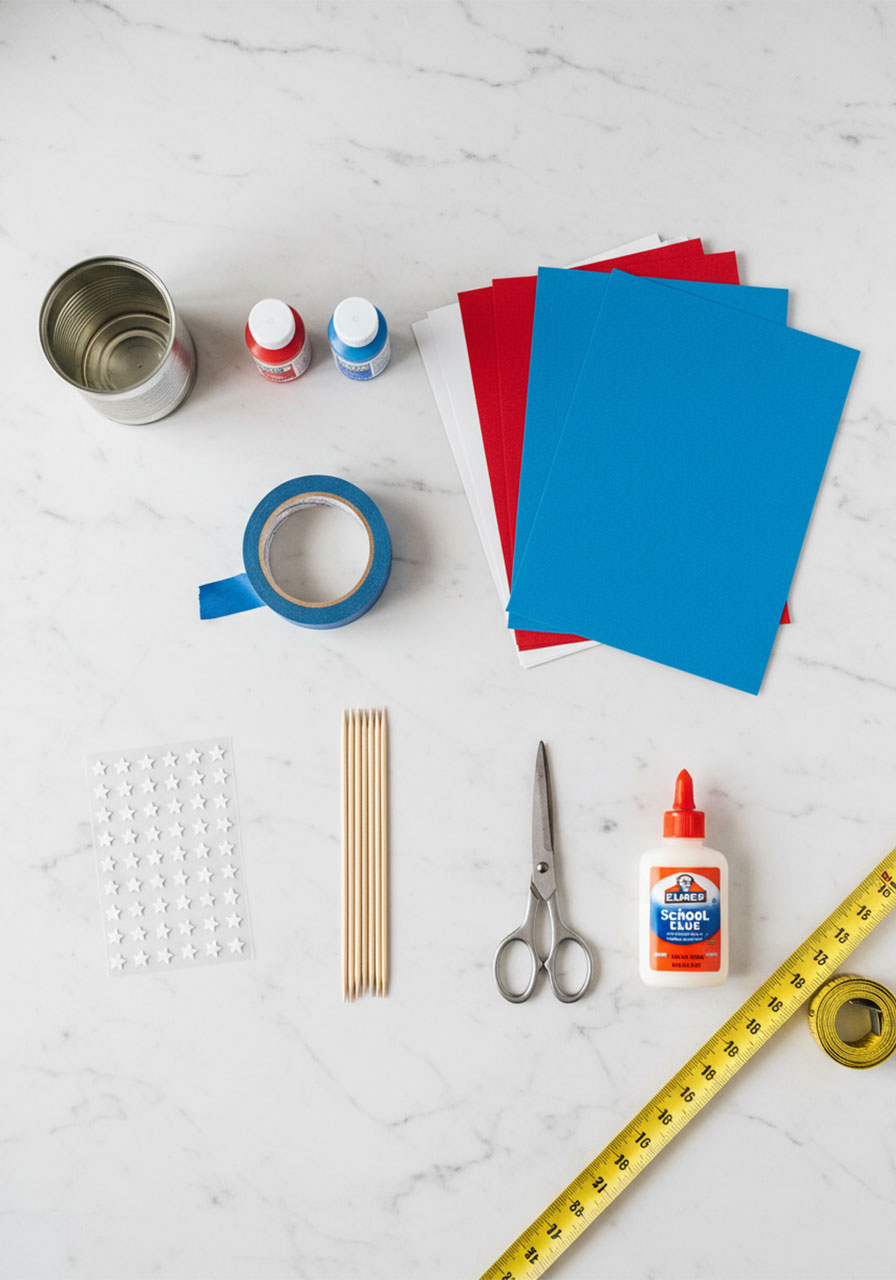
SUPPLIES
1–3 clean, empty tin cans (soup cans or similar sizes work great – you can cluster multiple cans for an even bigger display!)
Red, white, and blue acrylic paint
Painter’s tape (for clean, crisp stripes)
White star stickers or a star stamp
Red, white, and blue cardstock or construction paper
Wooden dowels, skewers, or straws
Scissors
Tape or glue
Optional: foam or crumpled paper to fill the inside of the can and hold the sticks upright
Pro Tip: Use cans of different sizes for a more dynamic, layered centerpiece. A tall can in the center flanked by two smaller ones looks especially gorgeous on a table!
How to Make the Tin Can Fireworks Centerpiece
STEP-BY-STEP INSTRUCTIONS
Step 1: Prep Your Tin Can
Peel off the label from your tin can completely. Give it a quick rinse and dry it thoroughly.
Run your hands around the rim to make sure there are no sharp edges. If you find any, use a can opener with a safety edge or just sand it down a little. Safety first – especially when kids are involved!
Step 2: Tape Off Your Stripes
This is the secret to getting those clean, crisp American flag stripes that look so polished.
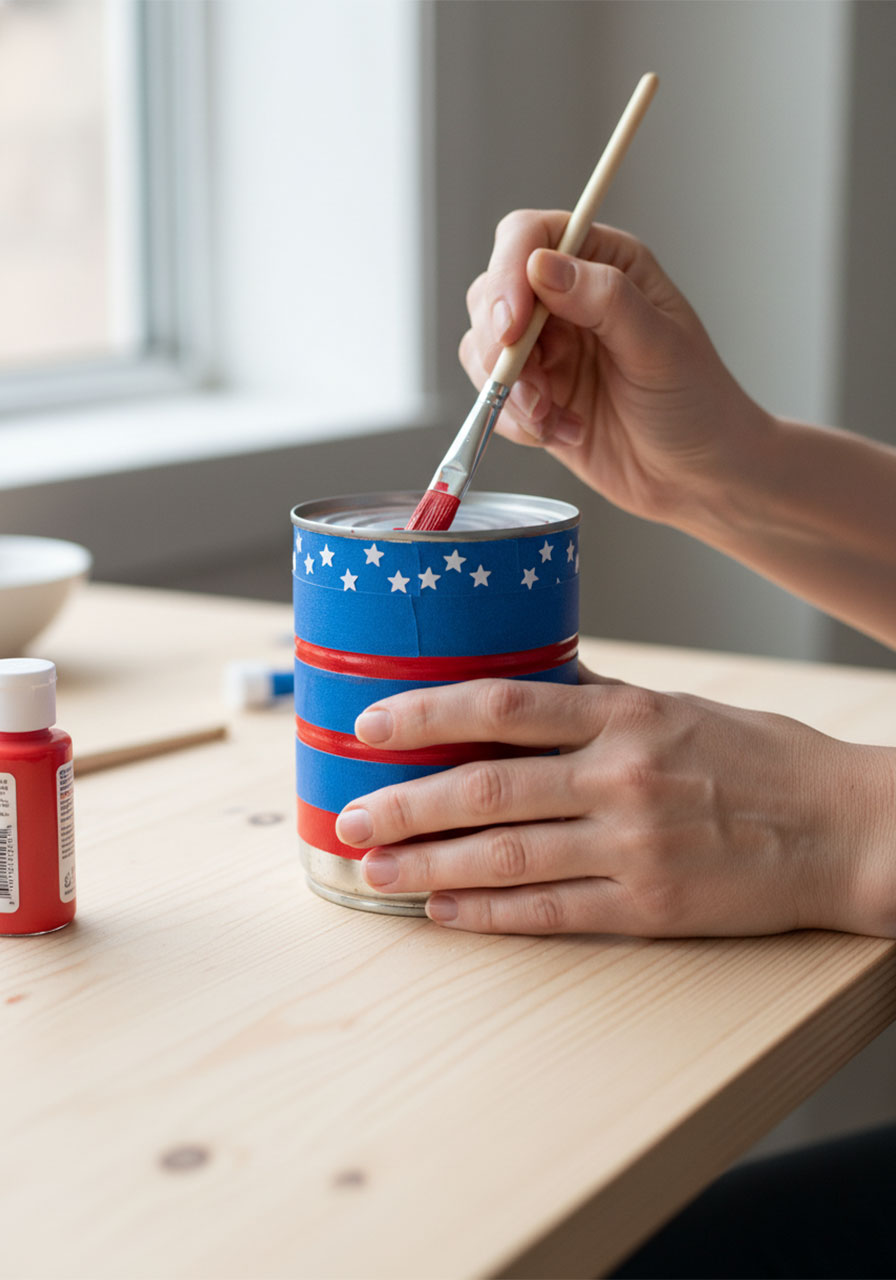
Wrap strips of painter’s tape horizontally around the can, spacing them evenly. These taped sections will become your white stripes, so make sure the spacing looks balanced before you paint.
Paint the exposed sections of the can red. Let it dry completely.
Once it’s dry, carefully peel off the painter’s tape to reveal the white stripes underneath. The result? A beautifully clean striped look that would make Betsy Ross proud.
Step 3: Add the Blue Star Section
Paint the top portion of the can blue – about a quarter of the way down from the rim.
Let it dry, then add white star stickers (or stamp white stars on) to give it that classic flag canton look.
Step back and admire – your tin can is already adorable. But we’re just getting started!
Step 4: Make the Paper Fireworks
This is where the magic happens. These little paper fireworks are easier to make than they look, and the result is so satisfying.
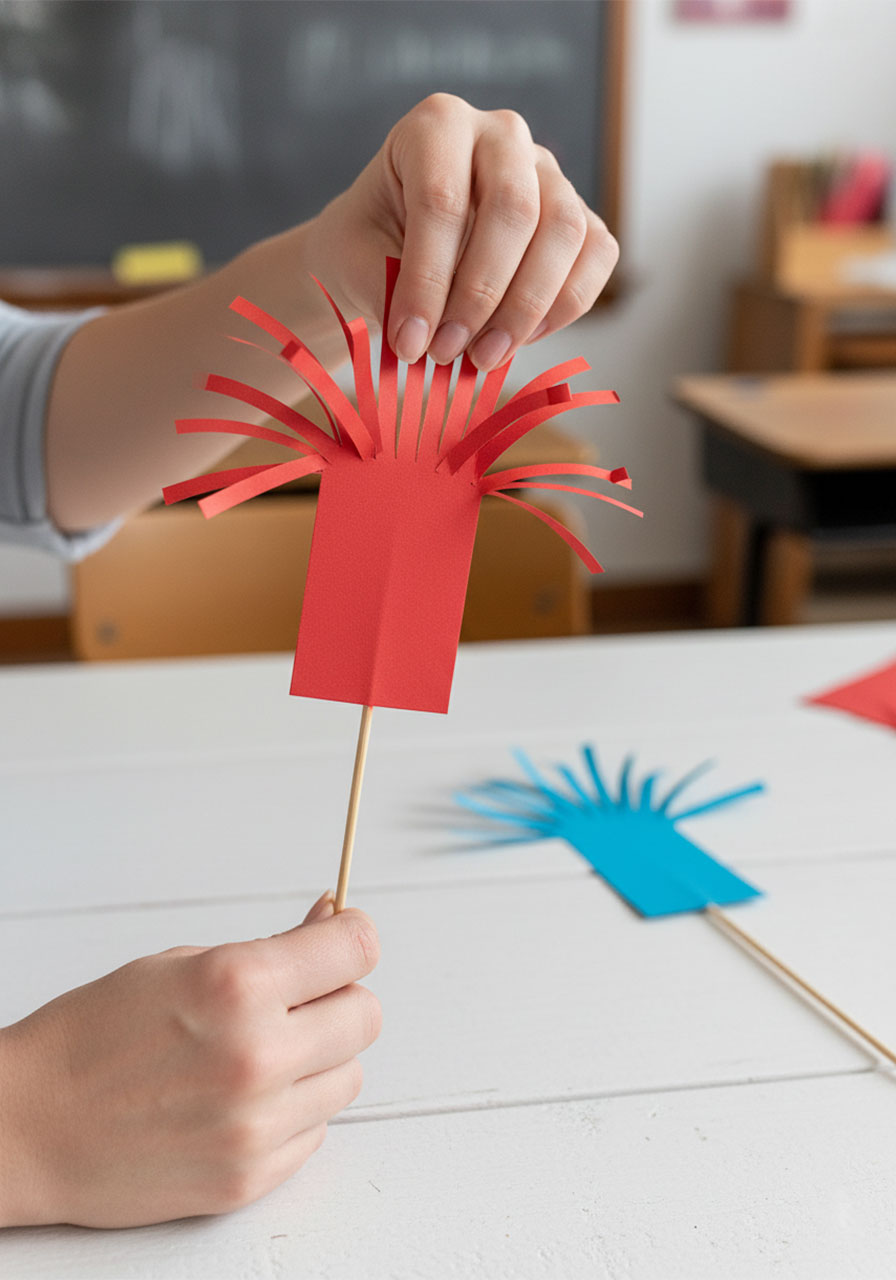
1. Cut a rectangle of colored paper – about 4 inches tall and 8–10 inches wide. Red, white, and blue each make gorgeous fireworks!
2. Fold up the bottom of the rectangle about half an inch. This will be the part that wraps around your stick.
3. Cut fringe strips from the top of the paper down toward the folded base. Cut as many strips as you can – the more strips, the fuller and more dramatic your firework will look. Leave about half an inch uncut at the bottom fold.
4. Curl the strips by wrapping each one tightly around a pencil, then releasing. This gives that beautiful firework burst shape.
5. Roll and glue the paper around the top of your wooden dowel or skewer. The folded base wraps snugly around the stick. Tape or glue it in place to secure it.
6. Bend and fluff the strips outward and downward to mimic the arc of real fireworks bursting in the sky.
Repeat this with as many sticks as you’d like – aim for at least 6–8 for a full, lush arrangement. Mix your colors so you get a beautiful red, white, and blue burst!
Pro Tip: Vary the length of your sticks so the fireworks burst at different heights. It makes the whole centerpiece look much more dynamic and professional – like a real fireworks show frozen in time!
Step 5: Assemble Your Centerpiece
Fill your painted tin can with foam, crumpled paper, or even floral foam to anchor the sticks in place.
Start inserting your paper firework sticks into the can, arranging them so the bursts fan out and overlap beautifully. Taller ones in the center, shorter ones around the edges works really well.
Adjust and fluff the paper strips until you’re happy with the shape. Step back, take a look, and tweak as needed.
That’s it – your patriotic masterpiece is complete!

Display Ideas & Variations
Once you’ve made one, you’re going to want to make a whole collection. Here are a few fun ways to take this craft even further:
Make a trio. Three cans of varying heights clustered together on a table runner make a stunning centerpiece display.
Add glitter. Brush a little Mod Podge on the paper strips and dust with red, blue, or silver glitter before rolling them. Extra sparkle, extra festive.
Use metallic paper. Gold or silver paper mixed in with the red, white, and blue gives a really elegant, elevated look.
Skip the paint. Wrap your can in patriotic washi tape or scrapbook paper for a quicker version that still looks great.
Make it a mantel display. Line up five or six cans of different heights along your fireplace mantel for a dramatic patriotic statement.
A Little Patriotic Heart Behind This Craft
There’s something quietly meaningful about taking something as simple as a tin can – something we’d usually toss in the recycling – and turning it into something beautiful.
It’s a small reminder that creativity doesn’t require expensive supplies or special talent. It just requires a willing spirit and a little time.
Whether you make this with your kids, your grandkids, or as a solo creative afternoon with your favorite playlist on, this craft is a beautiful way to celebrate the season with your hands and your heart.
Put it on your table, set it on your porch, or give one as a little patriotic gift to a neighbor. However you use it, it’s going to bring a smile to everyone who sees it.
Happy crafting – and happy Fourth of July! 🎆
Quick Reference
Best for: Adults and kids, 4th of July, Memorial Day, Flag Day, patriotic parties
Time to Make: 45–60 minutes
Difficulty: Easy
Cost: Under $5 (most supplies you likely already have!)
More 4th of July Ideas to Keep the Fun Rolling:
The Easiest 4th of July Firework Craft for Kids (Using Toilet Paper Rolls!)
Straw Stamped Paper Plate 4th of July Craft (Easy & So Festive!)
5 Easy Steps to Make the Cutest Fourth of July Windsocks for Kids
Egg Carton Memorial Day Poppy Wreath (A Meaningful Craft Kids Will Love)
Easy Patriotic Paper Plate Hat Craft for Fourth of July
Cotton Ball Stamped Star: The Easiest 4th of July Craft for Kids (That Actually Looks Amazing)
