
You’ve got the food covered. The yard looks festive. The fireworks don’t start for hours.
And now you’ve got a group of restless little ones tugging at your sleeve, asking what they can do next.
Here’s the answer: star suncatchers.
This simple, gorgeous 4th of July craft takes about 25 minutes, uses supplies you probably already have at home, and creates something so beautiful you’ll want to hang it in your own window long after the holiday is over.
It’s patriotic. It’s peaceful. It’s the kind of hands-on activity that turns a busy holiday afternoon into a quiet, creative memory.
Let’s make something beautiful together.

Why You’ll Love This Star Suncatcher Craft
This isn’t just a “keep the kids busy” activity – though it absolutely will do that.
This is one of those rare crafts that feels special without requiring a trip to the craft store, a complicated setup, or hours of prep. Most of what you need is probably already sitting in your craft drawer right now.
And when that finished star catches the afternoon light in your window – glowing red, white, and blue like a little piece of stained glass – you’ll feel genuinely proud of what you made.
Here’s why this craft deserves a spot in your 4th of July plans:
Zero stress setup. Gather your supplies in five minutes. That’s it.
Great for all ages. Toddlers, school-age kids, tweens, and crafty adults can all participate at their own level.
Doubles as DIY decor. These aren’t just crafts – they’re genuinely beautiful decorations for your windows.
Builds fine motor skills. Cutting, tearing, and pressing tissue paper are all fantastic for developing little hands.
Endlessly adaptable. Swap out the colors and you’ve got a craft for any season, any holiday, any occasion all year long.
It’s a win from every angle.

What You’ll Need
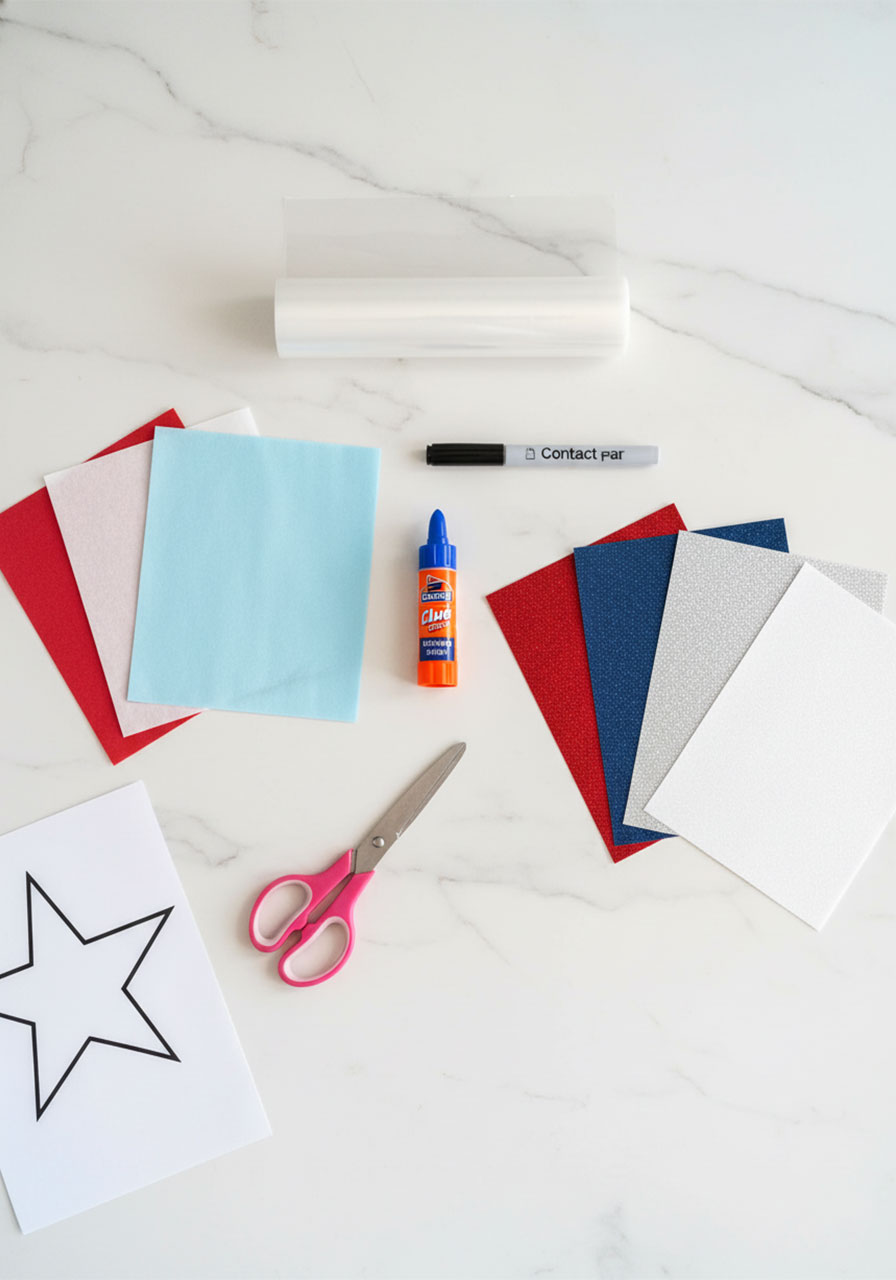
Simple supplies. Nothing fancy. Here’s your list:
Star template – Print ours out or freehand a star if you don’t have a printer handy.
Cardstock – Glitter cardstock gives you the most gorgeous sparkly border (highly recommended!), but any cardstock works. Avoid regular construction paper if you can – it tears too easily and won’t hold its shape well.
Scissors – Use safety scissors for young kids. Regular scissors for older kids and adults.
Marker or pencil – For tracing the star onto your cardstock.
Glue stick – A basic glue stick is all you need. No hot glue, no mess.
Tissue paper – Red, white, and blue for a patriotic look. This is where all the color magic happens!
Clear contact paper – The secret ingredient that holds everything together. Can’t find it? Press-n-Seal wrap works perfectly as a substitute.
That’s the whole list. Most people already have everything they need.
Can I Use Construction Paper Instead of Cardstock?
You can – but I’d recommend cardstock if you have it.
Cardstock is sturdier and won’t tear as easily, which means your star frame will hold its shape beautifully. Construction paper is flimsier and can get soft once glue is applied.
That said, if construction paper is all you have on hand, go ahead and use it. Just handle it gently and let it dry completely before hanging.
How to Make a Patriotic Star Suncatcher (Step by Step)
Follow these steps in order and you’ll have a stunning finished star in about 20 to 25 minutes.
Step 1: Print and Cut Out Your Star Template
Download and print the star template. Carefully cut it out, keeping the outline intact.
This is your tracing guide, so precise edges matter here. No printer? No problem – just freehand a star shape on a piece of paper. It doesn’t have to be perfect. Imperfect stars have their own charm!

Step 2: Trace and Cut Your Cardstock Star
Lay the template on top of your cardstock and trace around it with a marker or pencil.
Then carefully cut the star out. What you want is a star-shaped frame – the outline of a star, with the center removed. Think of it like a star-shaped picture frame.
Take your time with the inner edges so the frame stays clean and even.
Step 3: Cut and Position Your Contact Paper
Cut a piece of clear contact paper that’s a few inches larger than your star on every side. You want plenty of extra around the edges.
Peel off the backing and lay the contact paper flat on your table, sticky side facing up. Smooth out any bubbles or wrinkles before you continue.
Step 4: Slide the Star Frame Under the Contact Paper
Position your cardstock star frame underneath the contact paper so the open center of the star lines up beneath the sticky surface.
The star frame acts as your guide. You’ll fill in that open center area with tissue paper in the next step.
Step 5: Cut Your Tissue Paper Into Small Squares
Cut your red, white, and blue tissue paper into roughly 1-inch squares.
You don’t have to be precise – a little variation in size actually makes the finished suncatcher look more beautiful and organic, just like real stained glass.
Tip for younger kids: Let them tear the tissue paper instead of cutting it. Torn pieces have a wonderfully textured, artsy look and skips the scissors entirely.
Step 6: Press Tissue Paper Squares Onto the Contact Paper
This is the most fun part!
Place tissue paper squares onto the sticky contact paper, filling in the open star shape completely. Let the pieces overlap – actually encourage it!
Overlapping layers create depth and give you that gorgeous jewel-tone, stained-glass effect. The more you layer, the more vibrant the colors will look when the light shines through.
Fill the entire star opening with color before moving to the next step.
Step 7: Glue the Star Frame in Place
Once your tissue paper design is complete, apply a thin, even layer of glue stick to one side of your cardstock star frame.
Carefully press the star frame down on top of the tissue paper so the glittery border frames your colorful design. Press firmly and hold for a moment to secure it.
Step 8: Trim the Excess Contact Paper
Use scissors to carefully trim away any contact paper peeking out around the outer edges of the star.
Follow the star shape closely for the cleanest, most finished look.
Step 9: Let It Dry and Hang It Up!
Give the glue a few minutes to fully dry.
Then take your finished star to the sunniest window in your home and hang it up. Watch what happens when the light hits it. That warm, glowing, stained-glass effect is absolutely stunning – and worth every minute of effort.
Pro Tips for the Most Beautiful Suncatchers
These little details make a big difference in the final result.
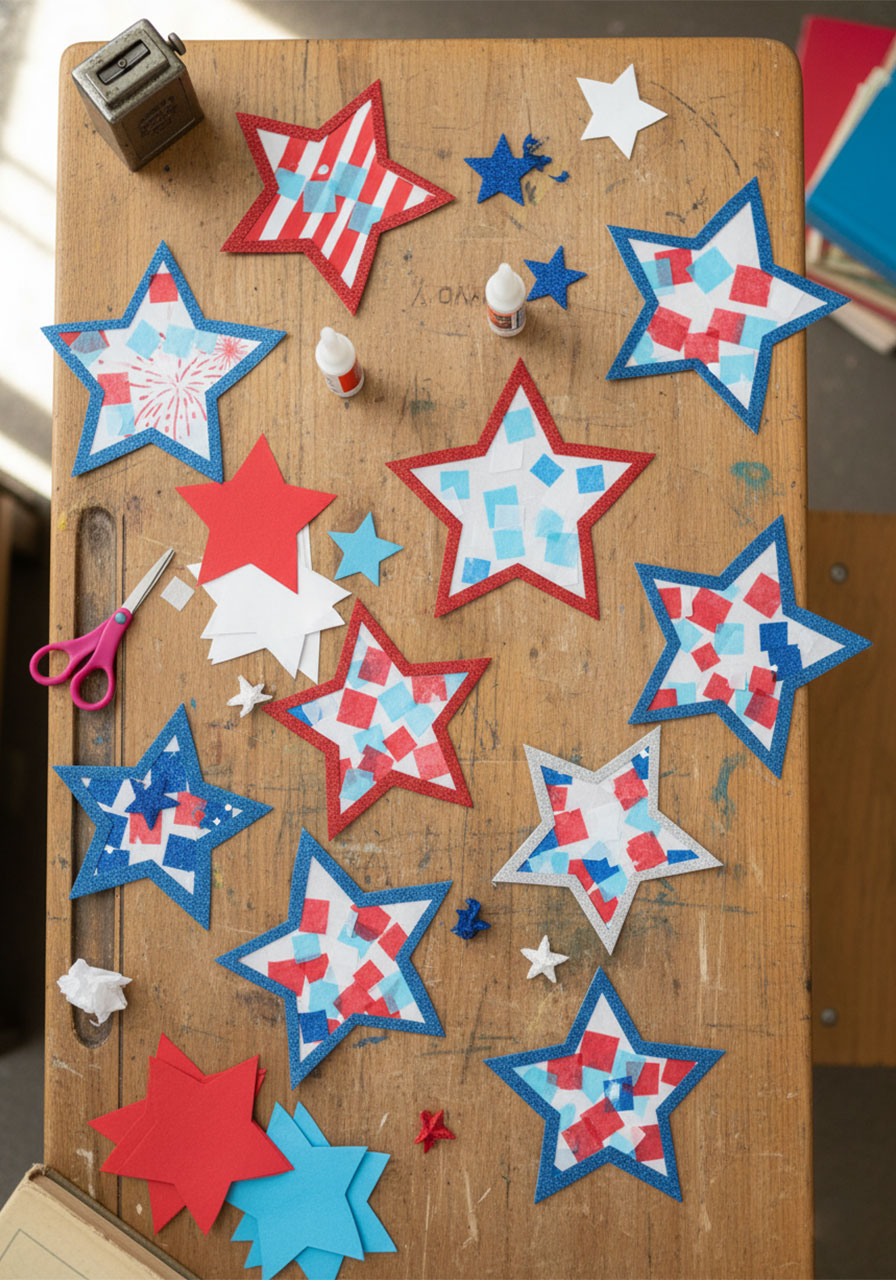
Use glitter cardstock for the star frame.
That sparkly border catches the light and makes the whole thing look extra polished and special. If you use plain cardstock, jazz it up with glitter glue or decorative stickers along the edges. A little sparkle goes a long way.
Layer the tissue paper generously.
Don’t be shy. The more tissue paper you layer, the richer and more vibrant the colors become when the light shines through. Thin, sparse coverage looks washed out. Full, layered coverage? Absolutely stunning.
Choose your sunniest window.
South-facing windows work best. The stronger the light, the more those colors will glow and pop. Hang your star where it gets the most direct sunlight for maximum impact.
Make a garland.
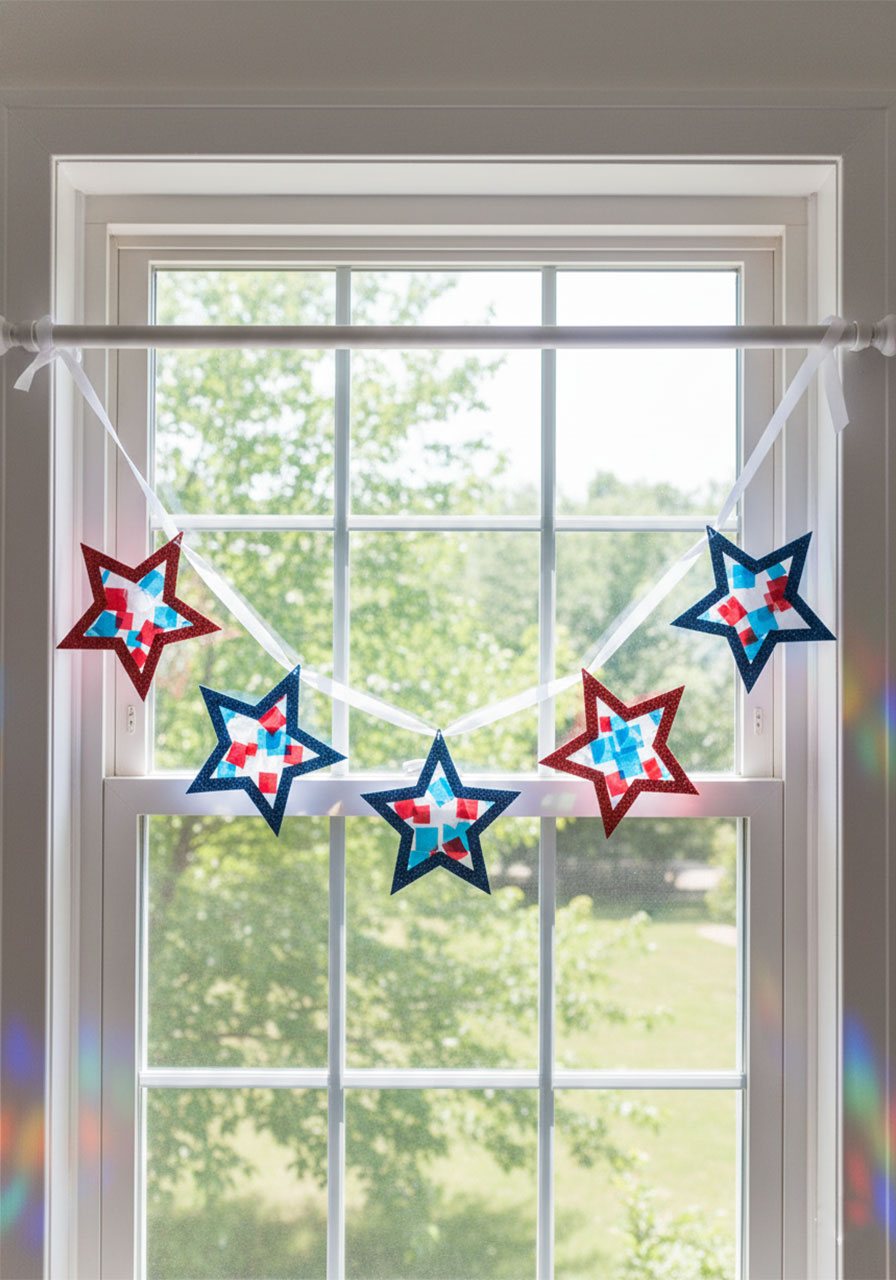
Punch a hole in the top point of each star, thread a piece of red, white, or blue ribbon through, and string multiple stars together. A garland of glowing stars across a window is one of the most beautiful – and effortless – patriotic decorations you’ll ever make.
Use a hole punch and pretty ribbon.
This gives each star a finished, intentional look rather than just taping them to the glass. A simple satin ribbon tied at the top makes the whole thing look like it came from a boutique.
Make them a day ahead.
These store flat and hold up great. Make a batch one or two days before your party and hang them the morning of for fresh, gorgeous window decorations that look like you spent way more effort than you did.
Turn It Into a Party Activity
If you’re hosting a 4th of July party with kids, this craft makes the most wonderful party station.
Set up a table – indoors or outside in the shade – with all the supplies pre-laid out.
Bowls of red, white, and blue tissue paper squares. Pre-cut contact paper pieces. Stacks of glitter cardstock in patriotic colors. Scissors, glue sticks, and star templates ready to go.
Let the kids walk up, grab their supplies, and get creative. Once they understand the basic method, they can truly run with it on their own.
Older kids naturally step in to help younger ones with the scissors. Adults wander over, get curious, and end up making their own. Before long, you’ve got a whole table of people quietly creating something together – which, if you ask me, is one of the best things a party can offer.
When everyone’s finished, hold them all up to the window at the same time. The colors will take your breath away.
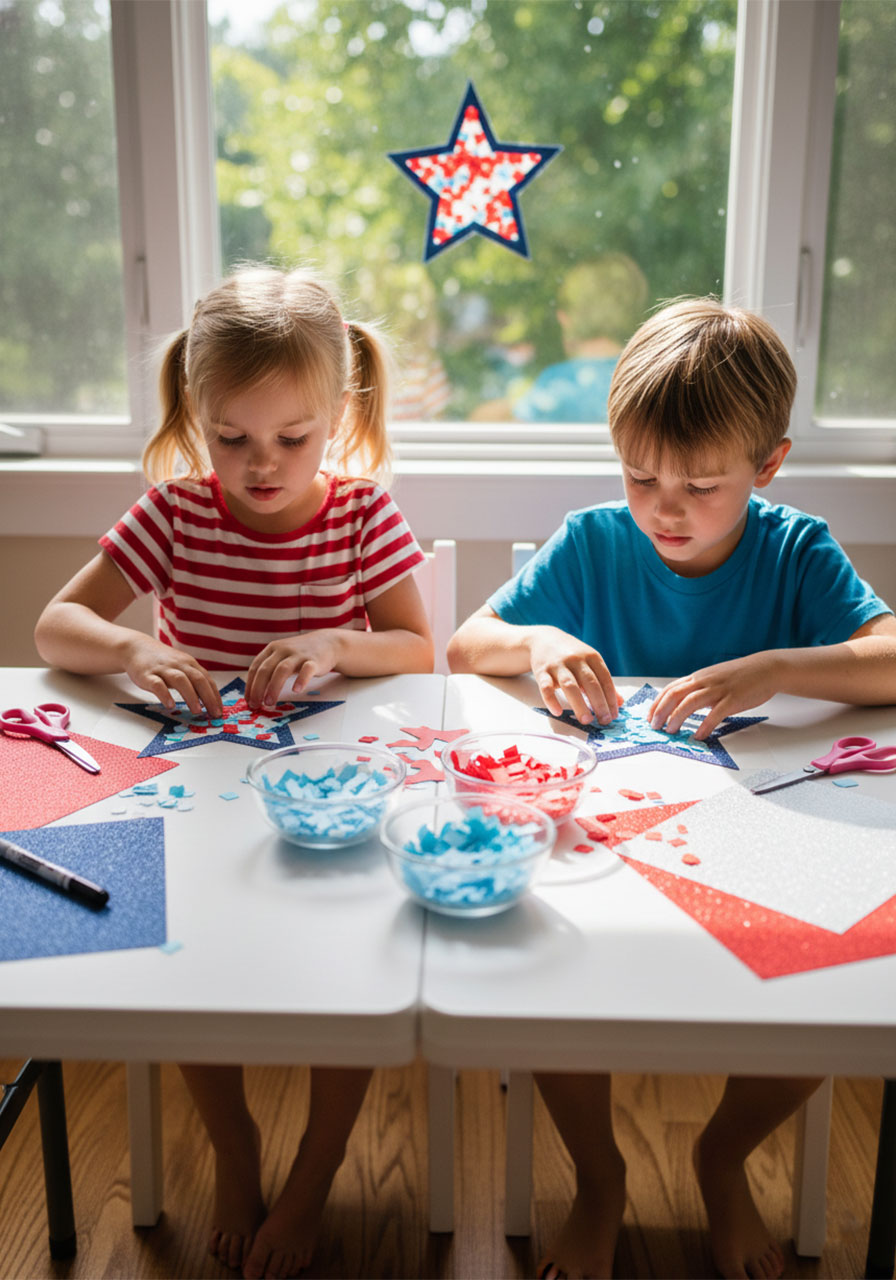
A Quiet Moment of Meaning in the Middle of the Celebration
The 4th of July is a lot of wonderful things – food, fireworks, family, and the beautiful gift of freedom.
But in the middle of all that noise and excitement, this craft is a quiet invitation to slow down for twenty minutes.
To sit beside your kids. To press little squares of color onto paper together. To make something beautiful with your hands on a day that is genuinely worth celebrating.
There’s something deeply meaningful about creating something tangible to mark a meaningful day. That star hanging in your window isn’t just a decoration. It’s a small, glowing reminder of who you were with, what you made together, and how beautiful ordinary afternoons can be.
As the old saying goes – it’s the little things that become the big memories.
Adapt This Craft for Every Holiday and Season
Once you’ve tried the suncatcher technique, you’ll want to use it all year long.
The star shape is perfect for 4th of July and Memorial Day. But the method works beautifully for any shape and any color palette. Here are some ideas to spark your creativity:
Heart shapes with red and pink tissue paper for Valentine’s Day.
Cross shapes with purple and gold for Easter – a deeply beautiful way to bring your faith into your spring decor and celebrate the season with intention and meaning.
Butterfly shapes with bright rainbow colors for a spring birthday party or garden celebration.
Leaf shapes in orange, red, and yellow for a gorgeous fall window display.
Snowflake shapes in white, silver, and icy blue for a peaceful, wintry Christmas decoration.
Angel shapes in white and gold for Christmas – a beautiful reminder of the deeper reason for the season.
Sun shapes in yellow, orange, and gold for summer birthday parties or end-of-school celebrations.
One simple technique. Endless possibilities. Every holiday becomes more beautiful when you make something by hand.

Frequently Asked Questions
Can I use construction paper instead of cardstock?
You can, but cardstock is a much better choice. It’s sturdier, won’t tear as easily, and holds its shape once the glue dries.
Construction paper can get floppy near the edges, especially once moisture from the glue sets in. Use cardstock whenever possible – it makes a big difference in the final result.
What if I can’t find contact paper?
Press-n-Seal wrap is a perfect substitute and works just as well. You can find it in the food storage aisle at any grocery store.
In a real pinch, you can also layer wide strips of clear packing tape over a piece of wax paper – just make sure it’s large enough to cover the full star opening.
How long does this craft take?
About 20 to 25 minutes from start to finish, including a few minutes for the glue to dry.
It’s genuinely quick, which is part of what makes it so perfect for a party setting where kids have limited patience for waiting around.
Is this safe for toddlers?
Absolutely! Toddlers can skip the scissors entirely and just tear the tissue paper by hand.
Pressing the pieces onto the sticky contact paper is actually a wonderful sensory and fine motor activity for little ones. Just supervise closely around scissors for your youngest crafters.
Can adults enjoy this craft too?
One hundred percent yes. There’s something quietly satisfying about this craft no matter how old you are.
The repetitive, meditative quality of pressing tissue paper squares – choosing colors, layering, watching the design build up – is genuinely relaxing. Several adults I know have made their own after doing them “for the kids.” No shame in it at all!
How do I hang the finished suncatcher?
The easiest method is clear tape directly on the window glass.
For a prettier look, punch a hole in the top point of the star and thread ribbon or yarn through to create a loop. Tape the ribbon to the window frame, use a suction cup hook, or tie it to a curtain rod. String multiple stars together along a single ribbon for a stunning garland effect.
How long will the suncatcher last?
With reasonable care, these hold up beautifully for weeks. Keep them away from direct rain and high humidity if possible.
The tissue paper colors stay vibrant as long as the contact paper seal stays intact – so handle gently and they’ll look great for the whole holiday season.
Can I make these ahead of time?
Yes! Make them one or two days in advance, store them flat, and hang them up the morning of your celebration.
They look just as fresh and beautiful as the day you made them – and it means one less thing to think about on the day itself.
You’re Ready to Make Something Beautiful
That’s everything you need.
Gather your supplies, print out the template, and set aside 25 minutes this 4th of July for one of the most satisfying crafts you’ll make all summer.
Whether you’re making these with your kids, setting up a party craft station, or carving out a few quiet minutes for yourself – you’re going to love the finished result.
Hang them in your sunniest window. Watch the light pour through the red, white, and blue. And enjoy the simple, glowing beauty of something made with your own hands on a day worth celebrating.
Happy 4th of July. May your day be full of light, laughter, good food, and beautiful moments worth remembering.
Prep Time: 5 minutes | Craft Time: 20 minutes | Total Time: 25 minutes | Makes: 1 suncatcher
More 4th of July Ideas to Keep the Fun Rolling:
How to Make a Tin Can Fireworks Centerpiece (Easy Patriotic Craft for 4th of July)
The Easiest 4th of July Firework Craft for Kids (Using Toilet Paper Rolls!)
Straw Stamped Paper Plate 4th of July Craft (Easy & So Festive!)
5 Easy Steps to Make the Cutest Fourth of July Windsocks for Kids
Egg Carton Memorial Day Poppy Wreath (A Meaningful Craft Kids Will Love)
