Perfect for Mother’s Day · Kid-Friendly Craft · No Special Tools Required
Store-bought cards are lovely – but a handmade card? That’s the one that ends up saved in a drawer for years. This DIY Heart Waterfall Card is one of those rare crafts that looks impressive, feels deeply personal, and is genuinely fun to make together with kids.
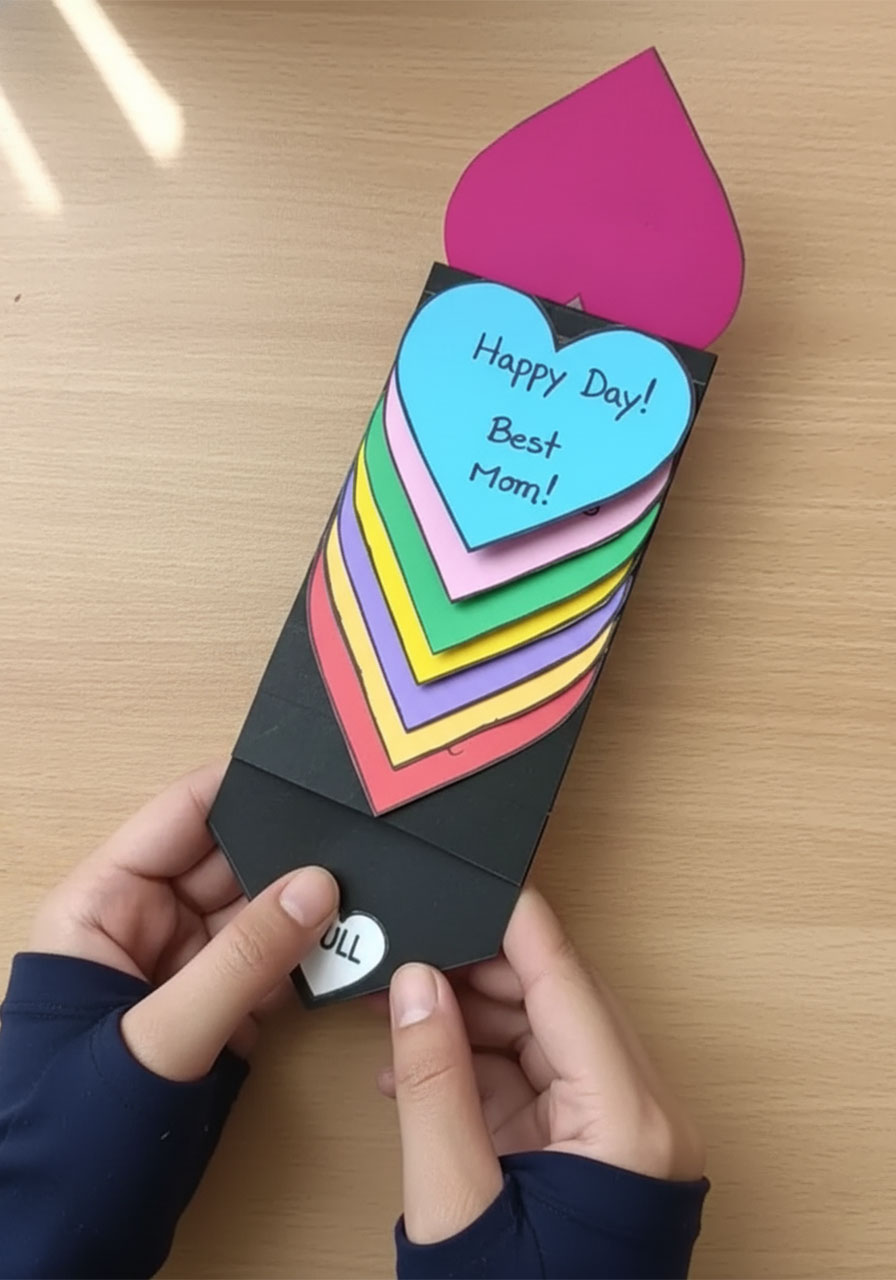
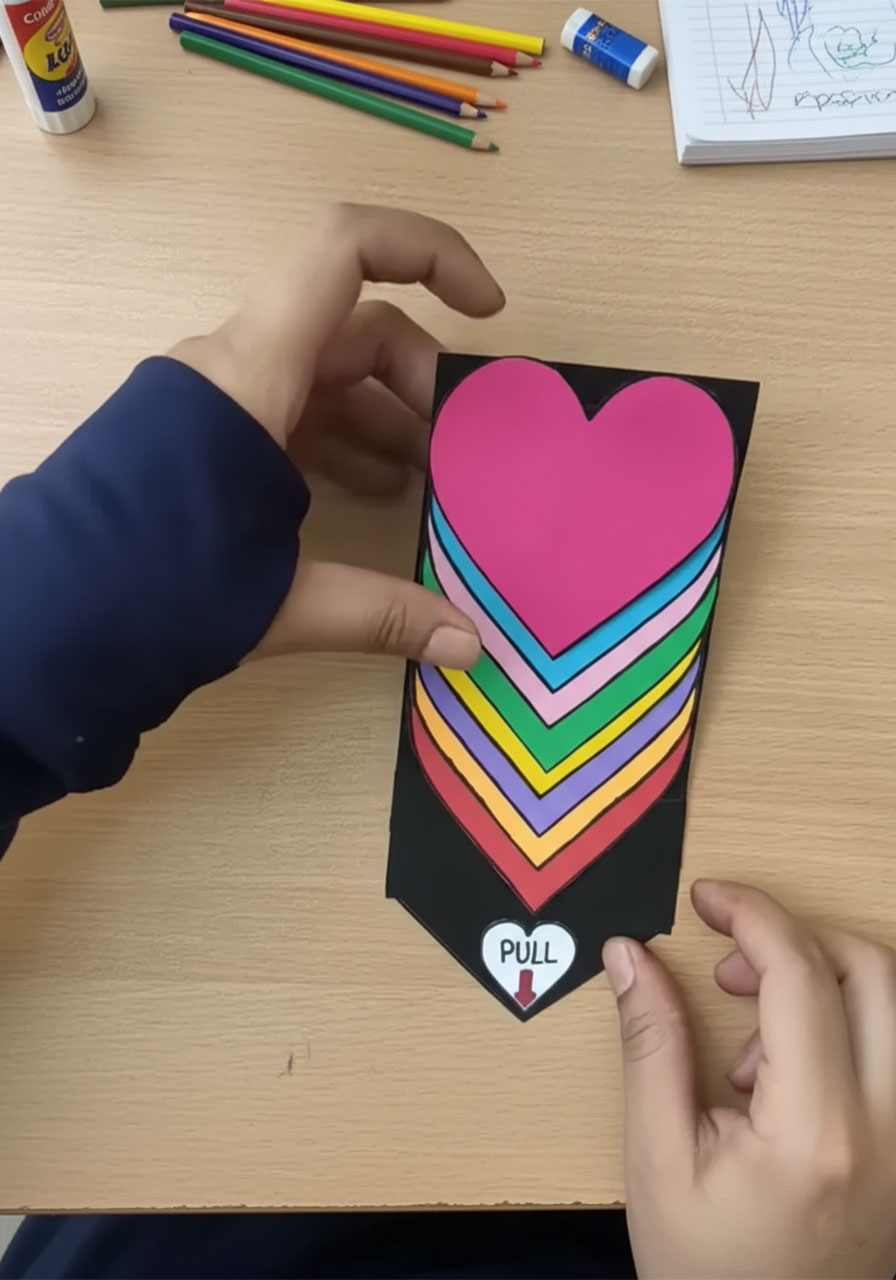
Here’s what makes it extra special: when Mom pulls the little tab at the bottom, a cascade of colorful hearts fans out one by one – each one hiding a sweet handwritten message inside. It’s interactive, it’s beautiful, and it’s the kind of gift that makes people say “Wait – you made this?!”
Whether you’re a parent doing this with your child at home, or a teacher organizing a Mother’s Day craft session, this step-by-step guide will walk you through everything from start to finish. No special tools, no fancy supplies – just some colored paper, glue, and a little love.

What Age Is This Craft Best For?
Best for: Ages 7 and up (with adult help for younger kids)
Time to Make: About 45–60 minutes
Difficulty: Easy to Moderate
Younger children (ages 4–6) can absolutely join in on the fun parts – picking colors, coloring the hearts, and writing their messages. The folding, measuring, and gluing steps are best handled by an older child or adult.


🎨 What You’ll Need
Colored cardstock or construction paper – 8 different colors, each cut to 8cm x 8cm squares (you’ll use one square per heart)
Black cardstock – one strip at 8cm x 30cm (the main base), and one small strip at 14cm x 1.5cm
White paper – one 8cm x 8cm square for your heart template
Black marker – for outlining the hearts and writing messages
Pencil – for tracing
Ruler
Scissors
Glue stick
A small “PULL” label – a tiny folded piece of white paper with “PULL” written on it works perfectly
💡 Teacher Tip: For a classroom setting, pre-cut the black base strips and heart squares ahead of time. This saves a significant chunk of time and lets kids focus on the creative parts – choosing colors, decorating, and writing their messages.

🛠️ Step-by-Step Instructions
STEP 1: Make Your Heart Template
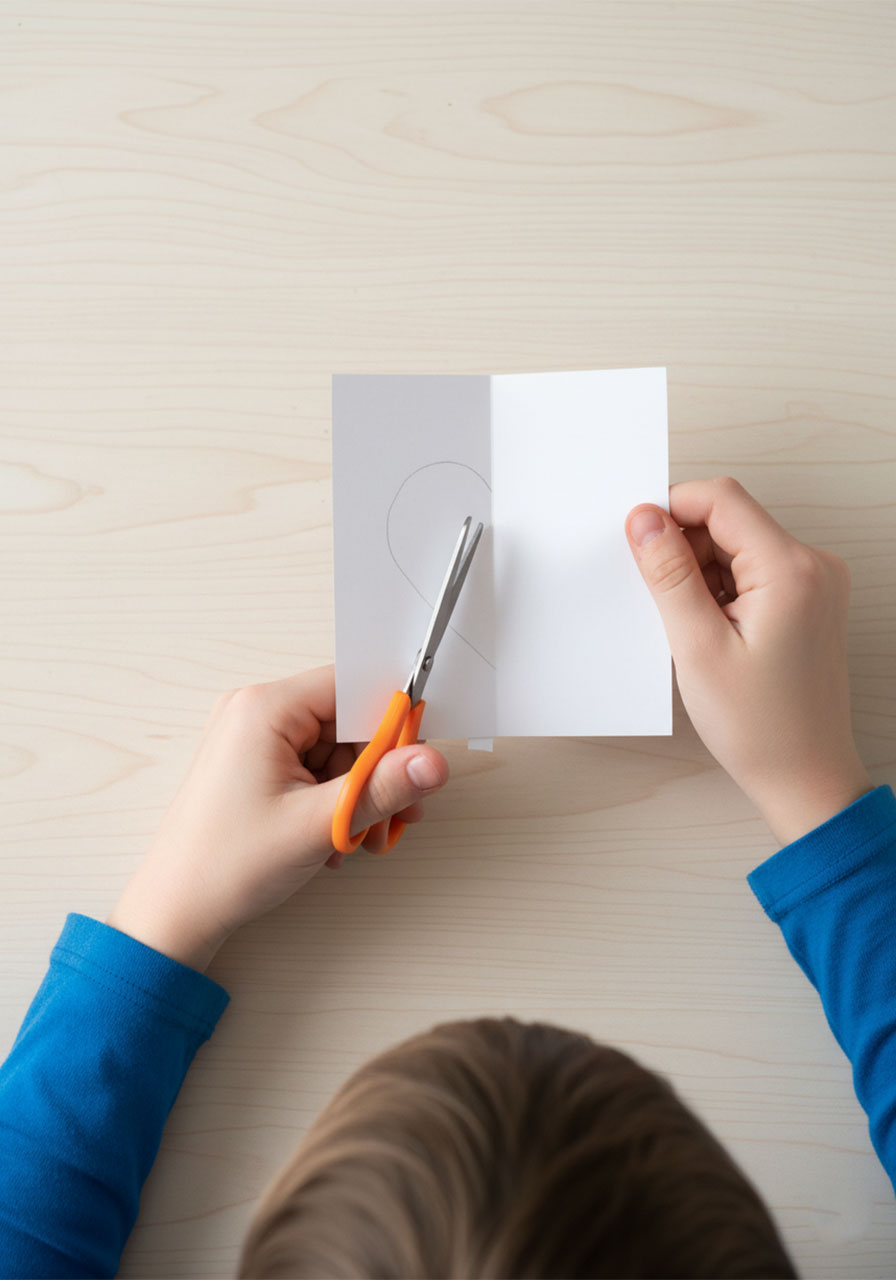
Start by folding your white 8cm x 8cm square of paper exactly in half. Along the folded edge, draw half a heart shape – just one side, from the top bump down to the pointed bottom. Cut along your drawn line, then unfold the paper to reveal a perfect, symmetrical heart.
This becomes your reusable template for tracing all the other hearts. Take a moment to make sure it looks good – the rounder and more even, the better the final card will look!
STEP 2: Cut Out Your 8 Colorful Hearts
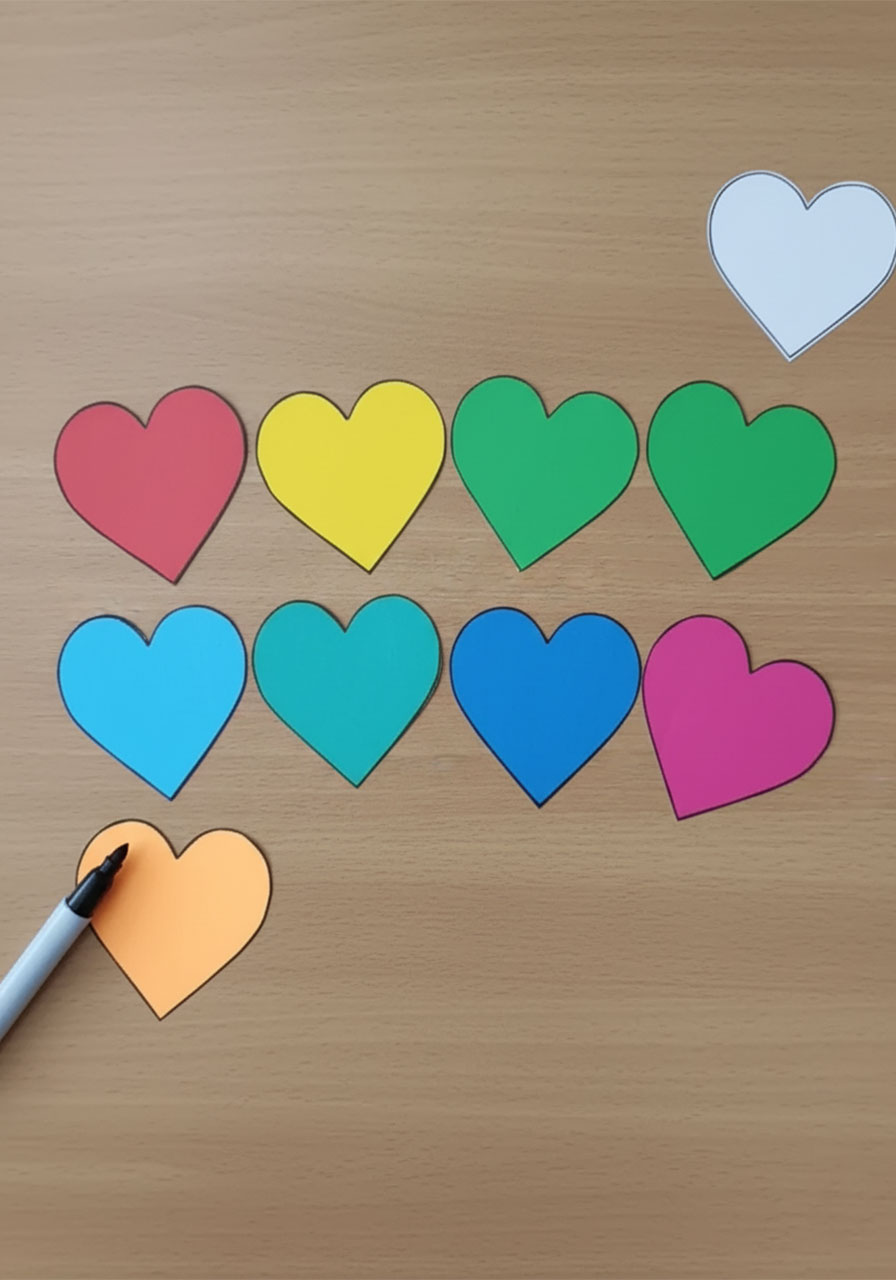
Place your white heart template onto each of your 8 colored squares and trace around it with a pencil. Then cut each one out carefully.
Once all 8 hearts are cut, use your black marker to outline the edge of each heart. This small detail makes a huge difference – the black outline gives each heart definition and makes the rainbow stack look really bold and polished when the card is open.
💡 Pro Tip: Arrange your hearts from largest to smallest (or keep them the same size but pick colors that look beautiful fanned out together). A rainbow gradient – red, orange, yellow, green, blue, purple, pink – always looks stunning. Let your child choose the color order!
STEP 3: Prepare the Black Base Strip
Cut your black cardstock to 8cm x 30cm. This long strip is the “engine” of the whole card – it’s what the hearts attach to, and it’s what slides when Mom pulls the tab.
Lay the strip out flat in front of you, horizontally. At one end of the strip (this will be the top of the card), place one of your hearts on top. Lightly trace the outline of the bottom half of the heart onto the black strip with a pencil. This shows you roughly how much space each heart will take up, and helps you position everything correctly in the next step.
STEP 4: Score the Fold Lines
Using your ruler, mark lines every 1cm across the black strip – you’ll need about 8 marks total (one for each heart). These lines will become the small folded tabs that hold each heart in place.
Once marked, use the edge of your ruler or a bone folder to score along each line, then fold each one to create a crisp, flat tab. Fold them all in the same direction (toward the back of the strip). These accordion-style folds are what give the card its “waterfall” movement when the tab is pulled.


STEP 5: Glue the Hearts onto the Tabs
This is where the magic comes together! Apply a small amount of glue to the top surface of each 1cm tab. Then press your hearts onto the tabs one by one, working from the bottom of the strip upward.
Each heart should slightly overlap the one below it – just like a waterfall of petals or a fan of cards. Press each one down firmly and let the glue set for a moment before moving to the next.
When you’re done, you should have a gorgeous stack of rainbow hearts cascading down your black strip. Flip it over to the front – it should look like a layered, colorful fan of hearts. Beautiful, right?
💡 Pro Tip: Work from the bottom heart up to the top. This way, each new heart naturally covers the top edge of the previous one, creating a clean, layered look.


STEP 6: Add the Sliding Support Strip
Cut your second black strip to 14cm x 1.5cm. This narrow strip acts as a “sleeve” that holds the waterfall mechanism in place while still letting the main strip slide freely.
Lay it horizontally across the middle section of your heart stack – roughly over the center hearts. Fold the ends of this small strip around to the back of the main strip and glue them down securely.
Test the sliding motion by gently pulling the bottom of the main strip downward. The hearts should fan out one by one as you pull! If anything feels sticky, adjust the support strip slightly until the movement is smooth.


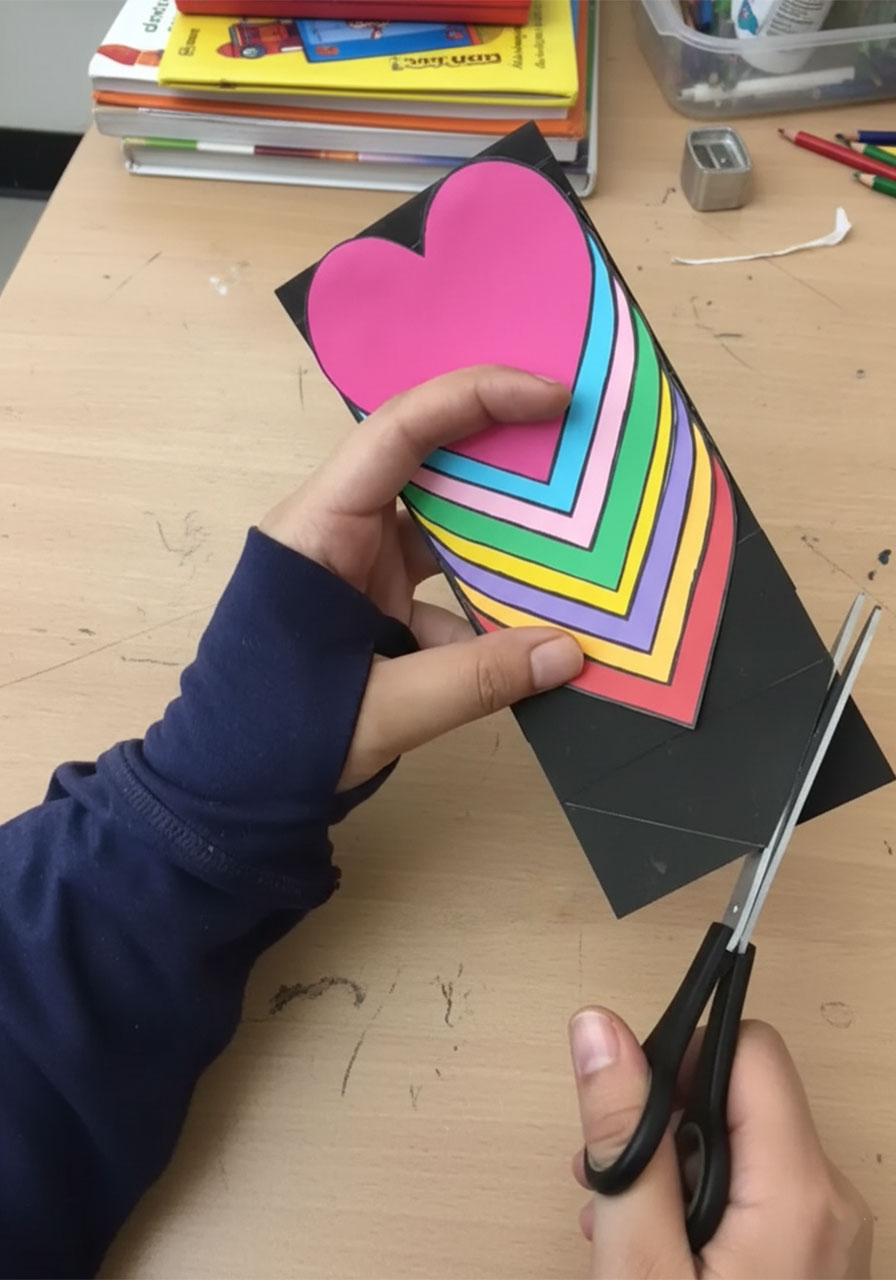
STEP 7: Trim the Bottom and Add the Pull Tab
At the very bottom of the sliding strip (the part that sticks out below the card), cut the tip into a neat point – like an arrow. This gives it a finished, intentional look.
Now make your “PULL” label: cut a small white heart or oval shape, write “PULL” on it with a black marker (a small downward arrow is a nice touch too!), and glue it to the very tip of the pointed tab. This signals to Mom exactly how to open her surprise.
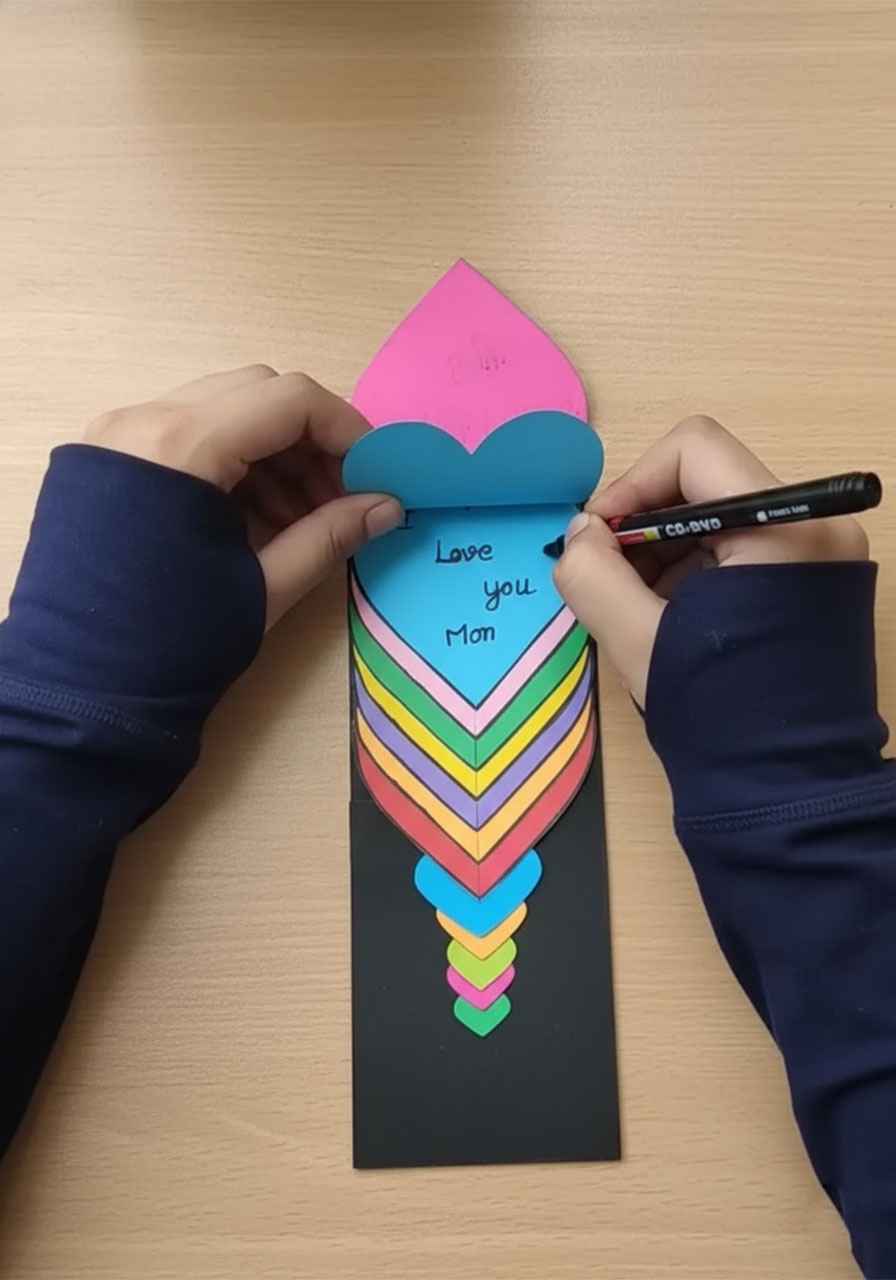
STEP 8: Write Your Messages – The Best Part!
This is what turns a beautiful craft into a truly unforgettable gift. Gently lift each heart up from the top and write a sweet message on the back side of the heart beneath it – the part that’s hidden when the card is closed.
Each heart gets its own message, revealed one at a time as Mom fans out the card. Here are some ideas to get you started:
Message Ideas for Each Heart:
- “Happy Mother’s Day!”
- “I love you, Mom.”
- “You are the sweetest mom.”
- “Thank you for everything.”
- “You are my whole world.”
- “You make every day brighter.”
- “My heart is full because of you.”
- “You are my favorite person.”
For younger children who aren’t writing yet, try a mix of simple words (“LOVE,” “HUGS,” “MOM”) and little drawings – a star, a flower, a smiley face. Every heart becomes its own tiny surprise.
💡 Teacher Tip: In a classroom, give each child a simple worksheet with 8 message prompts to fill in before the craft session. This way, kids come prepared with what they want to write, and you avoid the “I don’t know what to say!” freeze during craft time.
💖 Why This Card Is So Special
What sets this card apart from everything else on the craft table is the experience of opening it. The moment Mom pulls that little tab, the hearts fan out one by one in a slow, satisfying cascade – and each new heart reveals another message written just for her. It’s not just a card. It’s a moment.
There’s something deeply meaningful about a child sitting down, thinking carefully about what they love about their mom, and putting those words on paper. This craft gives that process a beautiful, tactile form.
And honestly? Even if the hearts aren’t perfectly even or the writing is a little wobbly – that’s what makes it priceless. No store-bought card in the world can compete with that.

✨ Fun Variations to Try
For Grandma: Use soft, pastel shades of pink, lavender, and cream for a more delicate look.
For a Teacher Gift: Swap the hearts for stars, and use school colors for the paper. Change the messages to things the student loves about their teacher.
Birthday Version: Use a bright, festive color palette and swap messages for birthday wishes or favorite memories.
Classroom Display: Make a giant version on a bulletin board – one big heart per student, each one with a message about what makes their mom amazing. An instant, beautiful display!

This craft proves that the most memorable gifts don’t come from a store – they come from the heart. (Eight of them, in this case! 😄) Grab your paper, round up your little makers, and get crafting. Mom is going to absolutely love it.
Happy crafting – and Happy Mother’s Day! 🌸
More Mother’s Day Ideas to Keep the Fun Rolling:
30+ Mother’s Day Crafts for Kids of All Ages
How to Make a Mother’s Day Flower Pot Craft
Easy Coffee Filter Flowers – The Prettiest Mother’s Day Craft for Kids and Classrooms
Mother’s Day Flower Pot Craft: The Cutest Preschool Gift Mom Will Actually Keep
The Cutest DIY Mother’s Day Gift Ever: A Kid’s Handprint Flower Mug
How to Make a Shrinky Dinks Flower Handprint Keychain for Mother’s Day
Salt Dough Flower Magnets: The Cutest Mother’s Day Gift Kids Can Actually Make
5 Heartwarming Mother’s Day Craft Ideas Grandma Will Absolutely Treasure