
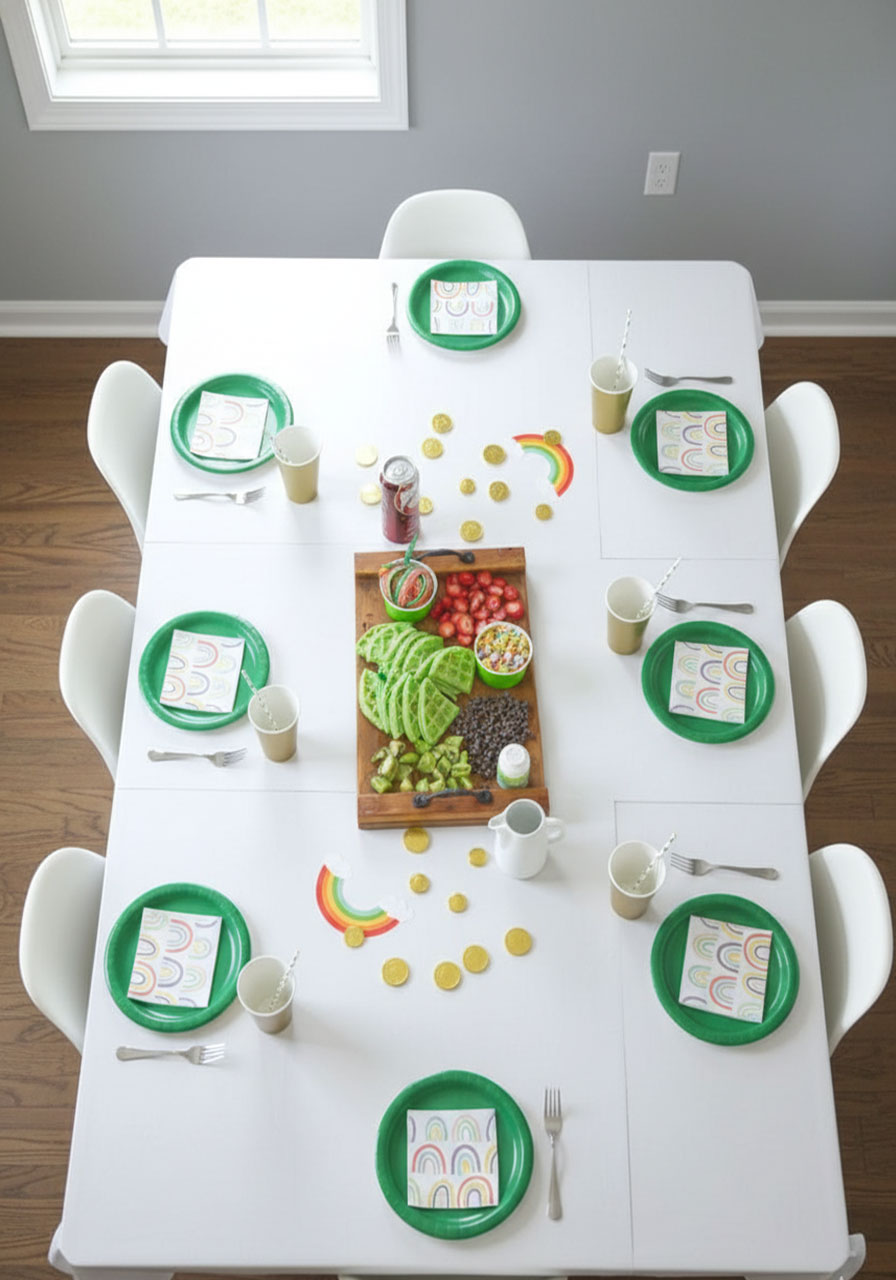
Want to make St. Patrick’s Day morning absolutely magical without spending hours in the kitchen? Get ready to become the hero of breakfast time with this fun and festive setup that’ll have your kids squealing with excitement before they even take their first bite!
The secret? A waffle charcuterie board that does all the heavy lifting while you sit back and watch the magic happen. We’re talking green waffles, rainbow toppings, and a self-serve setup that turns breakfast into an unforgettable experience. Let’s dive in!
Why This Breakfast Setup is Pure Gold
Here’s what makes this St. Patrick’s Day breakfast an absolute winner: it’s interactive, low-stress for you, and designed to let kids build their own creations. You prep once, set it up beautifully, and then watch as your little ones become breakfast artists. No complicated recipes, no fancy cooking skills required – just smart planning and festive flair.
Best for: Parents, teachers, families with kids ages 3-12
Prep Time: 20-30 minutes
Total Time: 45 minutes (including setup)

Setting a Fun and Festive Table (The Easy Way!)

Keep It Simple, Make It Special
When setting up a kids’ table for St. Patrick’s Day, your mantra should be: simple supplies, maximum impact. Here’s your foolproof game plan:
What You’ll Need for Table Settings:
Solid-color paper plates (green works perfectly!)
Rainbow-themed napkins
Gold or green paper cups
Shamrock straws (reuse these year after year!)
Paper rainbow decorations for accents
Gold chocolate coins scattered across the table
Forks and any serving utensils
Pro Tip: Hit up your local party store the week after St. Patrick’s Day and stock up on decorations for next year at clearance prices. You’ll thank yourself when March rolls around again!

How to Set It Up:
1. Start with your base. Lay out a white tablecloth or just use your regular table – it makes those pops of green and gold really stand out.
2. Create each place setting. Put one plate at each spot with a folded napkin on top. Add a cup and fork to keep things classic and simple.
3. Add the festive touches. Scatter gold coins between place settings, add those paper rainbows as table scatter, and stick shamrock straws in the cups.
4. Position your centerpiece. Clear the middle of the table – this is where your show-stopping waffle charcuterie board will live!
The Star of the Show: Your Waffle Charcuterie Board

This is where the magic happens. A waffle charcuterie board turns ordinary breakfast into a create-your-own-adventure that keeps kids entertained and excited.
What You’ll Need:
For the Waffles:
8-10 waffles (homemade or frozen – no judgment here!)
Green food coloring (for that St. Patrick’s Day wow factor)
A large wooden cutting board or serving platter
For the Toppings:
Fresh strawberries, sliced
Kiwi, peeled and sliced or diced
Chocolate chips
Whipped cream
Maple syrup in a small pitcher
Lucky Charms cereal
Rainbow sour belts or rainbow candies
Colorful sprinkles
Any other favorite toppings your kids love!
For Serving:
Small bowls or treat cups for each topping
Spoons for scooping
Shamrock cupcake toppers or picks (optional but adorable!)

How to Make Those Gorgeous Green Waffles

Don’t worry – you don’t need to be a professional chef to nail this. Here’s your step-by-step:
If Using Homemade Waffles:
1. Mix up your favorite waffle batter according to the recipe. (We love a simple buttermilk waffle recipe, but use whatever your family enjoys!)
2. Add the green. Stir in green food coloring a few drops at a time until you get that vibrant shamrock green. Start with 4-5 drops and add more if needed – you want them bright and festive!
3. Cook according to your waffle maker’s instructions. Let them cool slightly before arranging on your board.
If Using Frozen Waffles:
1. Toast your waffles until they’re golden and crispy.
2. While they’re still warm, lightly brush each waffle with a tiny bit of melted butter mixed with green food coloring. This gives them that festive tint without changing the flavor!
Pro Tip: Make the waffles the night before and store them in an airtight container. Just reheat them in the toaster the morning of your breakfast – one less thing to stress about!
Assembling Your Show-Stopping Charcuterie Board

This is the fun part, and honestly? There’s no wrong way to do it. But here’s a layout that looks amazing every single time:
Step-by-Step Assembly:
1. Start with your waffles. Fan them out across your wooden board, overlapping slightly. This creates visual interest and makes everything look abundant.
2. Create zones for your toppings. Think of your board in sections: one area for fruit, another for sweets, another for Lucky Charms and sprinkles.
3. Arrange the fruit first. Pile sliced strawberries in one section, then add your kiwi chunks or slices nearby. The contrast of red and green is perfect for St. Patrick’s Day!
4. Add your chocolate chips. Pour them into a dedicated spot on the board – they look like a pot of gold when piled together!
5. Fill your small bowls with Lucky Charms, rainbow candies, and sprinkles. Nestle these bowls right on the board between the other ingredients.
6. Set out the whipped cream in a small bowl with a spoon, and place your maple syrup in a pour-friendly pitcher nearby.
7. Add those final touches. Stick shamrock picks into a few spots on the board, tuck in some rainbow candy decorations, and step back to admire your masterpiece!
Fun Variation: If you’re hosting this for a classroom, set up mini individual boards! Give each child a small plate with one waffle and little cups of toppings. They’ll love having their own personal setup.
Let the Breakfast Party Begin!
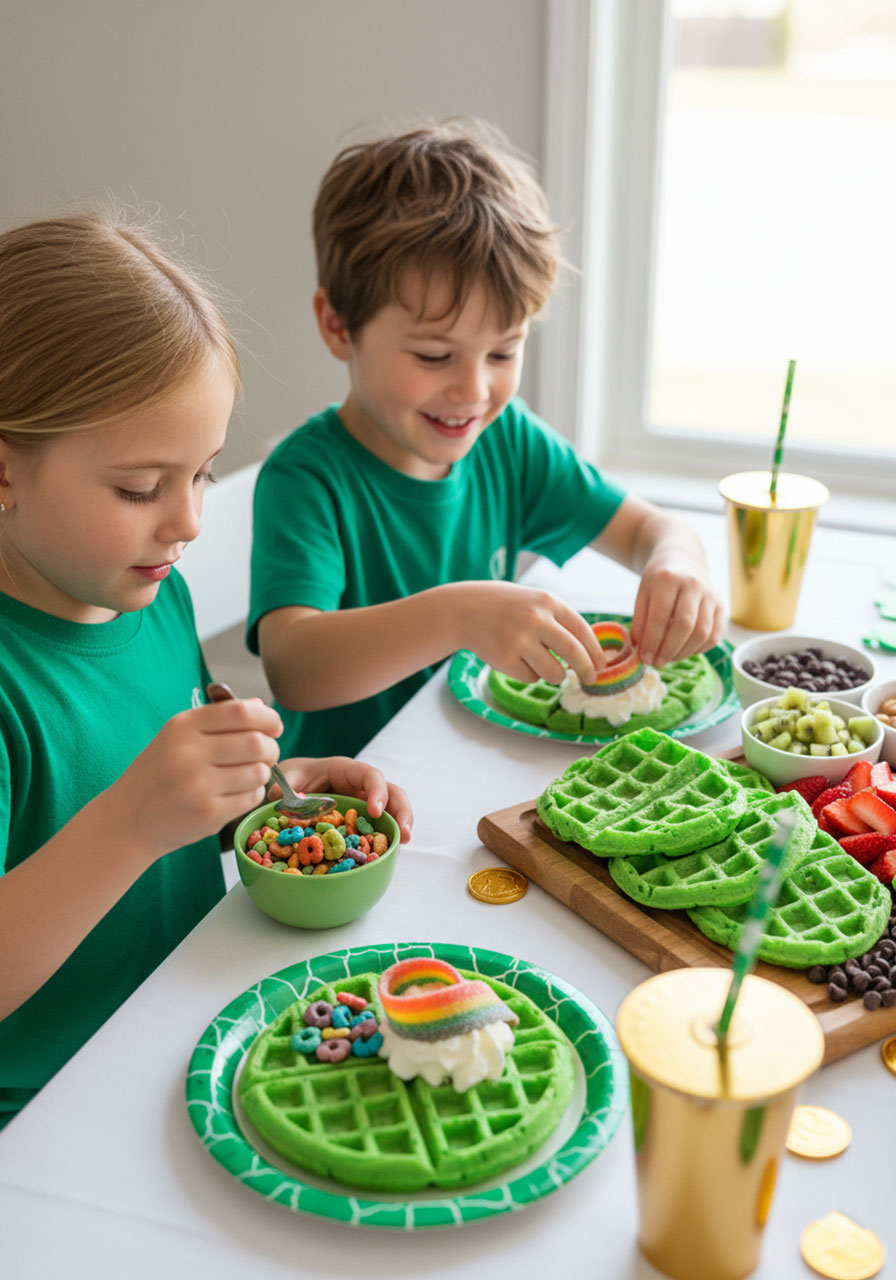
Once everything’s set up, gather your kids around the table and let them go wild building their perfect St. Patrick’s Day waffle creation. Here’s what you’ll see: pure joy as they pile on toppings, strategic decision-making about whether chocolate chips or Lucky Charms go on first, and proud faces when they show off their colorful masterpieces.
What Kids Love Most:
Building their own breakfast gives them control and makes them feel like little chefs
The rainbow candies and colorful toppings are Instagram-worthy (yes, even for kids!)
Eating something green feels special and silly in the best way
The variety means picky eaters can customize to their heart’s content
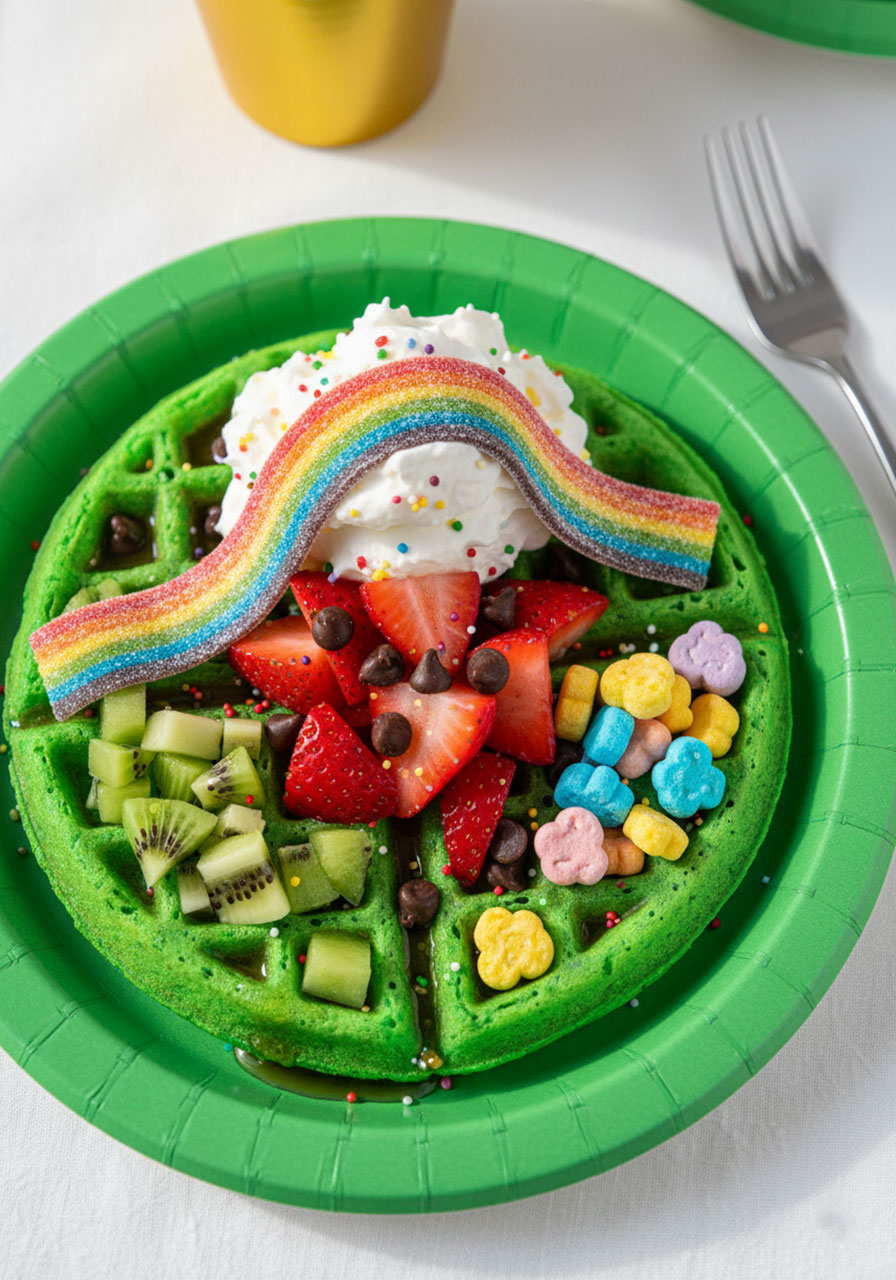
Extra Tips to Make This Breakfast Unforgettable
For Parents:
Prep all your toppings the night before and store them in the fridge. Morning setup becomes a 10-minute job!
Use paper goods for zero cleanup stress. You’ve got enough going on!
Take a quick photo before everyone digs in – you’ll want to remember this setup for next year.
For Teachers:
Assign parent volunteers to bring specific toppings to make this a collaborative classroom celebration
Set up a “topping station” where kids line up cafeteria-style to build their waffles
Use this as a fun reward breakfast or end-of-week celebration
Make It Educational:
Have kids count their toppings before eating (math practice!)
Talk about the colors of the rainbow as you identify toppings
Discuss St. Patrick’s Day traditions from Ireland while you eat together

Why This Breakfast Setup Works Every Single Time
Let’s be real: you want something that looks amazing, tastes delicious, and doesn’t require a culinary degree. This St. Patrick’s Day breakfast delivers on all three. The waffle charcuterie board is forgiving, flexible, and festive. Kids get excited about food they helped create, and you get to enjoy watching them have fun without sweating over a hot stove all morning.
Plus, this same concept works for other holidays too – think red and pink for Valentine’s Day, pastels for Easter, or red and green for Christmas. Once you master this setup, you’ve got a blueprint for memorable breakfast celebrations all year long!
Your St. Patrick’s Day Breakfast Checklist
Ready to make this happen? Here’s your quick shopping list:
Grocery Store:
- Waffle ingredients or frozen waffles
- Green food coloring
- Strawberries
- Kiwi
- Whipped cream
- Maple syrup
- Chocolate chips
- Lucky Charms cereal
- Rainbow candies
Party Store:
- Green paper plates
- Rainbow napkins
- Gold or green cups
- Shamrock straws
- Paper rainbow decorations
- Gold chocolate coins
- Shamrock picks or cupcake toppers (optional)
With these ideas in your back pocket, you’re ready to host a St. Patrick’s Day breakfast that’ll have your kids talking about it until next March. The best part? You’ll look like a party planning genius while keeping your stress levels at zero. Because the best celebrations are the ones filled with laughter, colorful toppings, and waffles piled high with joy!
More St. Patrick’s Day Party Ideas to Keep the Fun Rolling:
18 Easy and Fun St. Patrick’s Day Activities for Toddlers (No Prep Required!)
15 Easy St. Patrick’s Day Crafts for Kids That Are Actually Fun
Easy Shamrock Suncatcher Craft – A Magical St. Patrick’s Day Activity for Kids
How to Make a DIY St. Patrick’s Day Garland in 7 Easy Steps
Rainbow Pot of Gold Craft: The Ultimate 3D St. Patrick’s Day Project Kids Will Love
Leprechaun Hat Blowers: The Most Fun St. Patrick’s Day Craft Your Kids Will Actually Want to Make
Marshmallow Shamrock Stamping: The Easiest (and Sweetest!) St. Patrick’s Day Craft
Fork-Painted Leprechaun Craft: The Easiest St. Patrick’s Day Project Your Kids Will Actually Love
