Stuck inside on a rainy Saturday with kids who are already bouncing off the walls? This one’s about to become your new best friend.
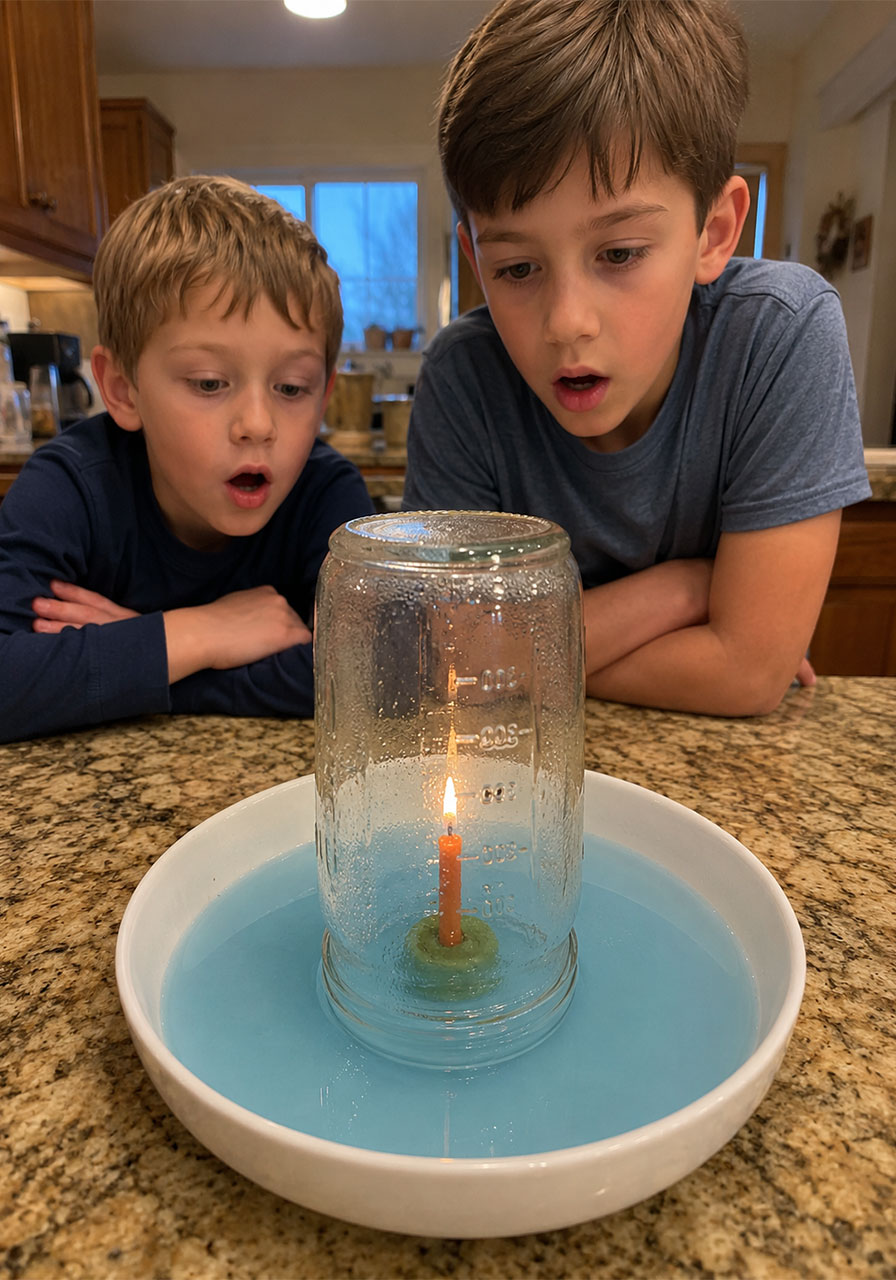
The burning candle in water experiment looks like straight-up magic. A lit candle. A splash of water. A glass turned upside down. And then – water climbs up into the glass like it’s being pulled by an invisible string.
My son was six the first time he saw it happen. He grabbed my arm, eyes wide, and whispered, “Mom. How is it doing that?” That reaction right there is why this is one of the best science experiments for kids you can pull off with stuff already sitting in your kitchen.
It takes about 10 minutes. It needs almost no supplies. And it teaches a real, honest-to-goodness science concept (air pressure) in a way that actually sticks. Whether you’re a parent looking for a screen-free rainy day activity or a teacher planning a hands-on STEM lesson, this experiment checks every box.
Grab the hypothesis worksheet at the bottom of this post so your kids can record their predictions and observations like real scientists.
Quick Facts
Best for: Kids ages 4 and up (with adult supervision), classrooms, homeschool science journals, rainy day boredom-busters
Time to Complete: 10 minutes
Group Size: 1 to a whole classroom – easy to scale up
Mess Level: Low (a little water on the counter, that’s it)
Adult Supervision: Required – this uses an open flame


Safety First
Before you dive in, one important note: this experiment uses a real, lit candle. An adult should always handle the lighter or matches and stay close by for the whole activity.
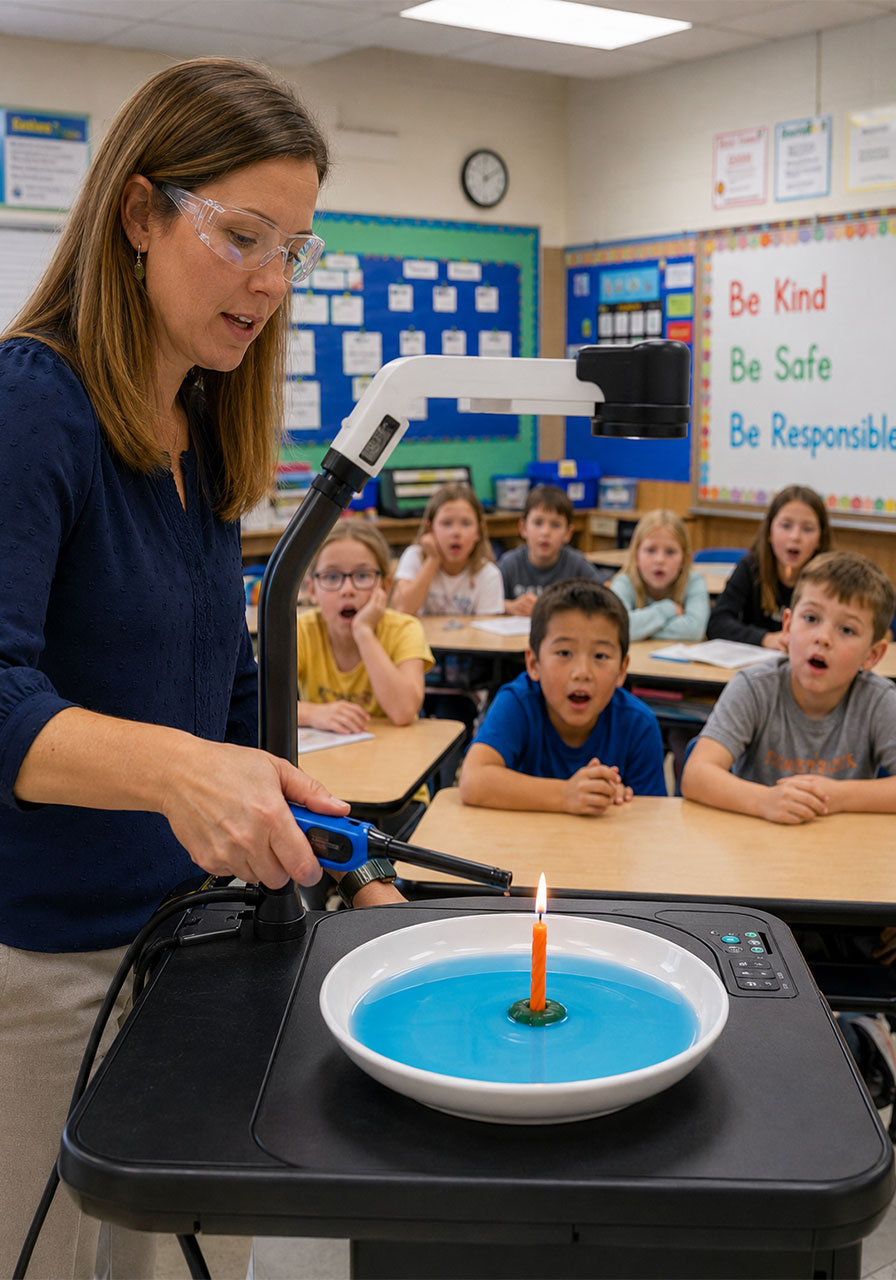
If you’re doing this with a classroom or a group of younger kids, it works great as a demonstration where the adult handles the flame and the kids handle the observing, predicting, and note-taking.
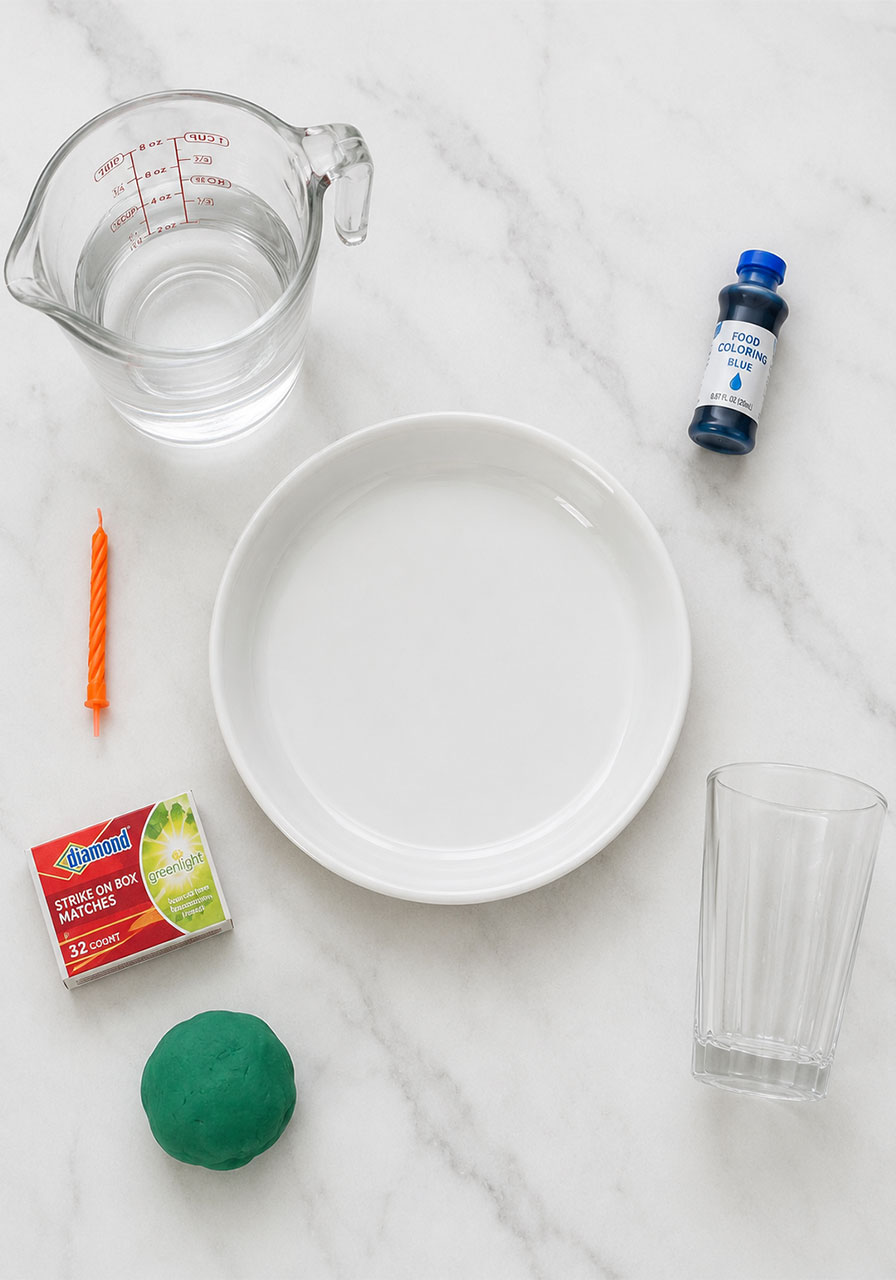
What You’ll Need
A plate with a raised rim, or a shallow bowl
Water
A small candle
A lighter or matches
A drinking glass or mason jar (needs to fully cover the candle)
Optional: food coloring
Optional: playdough (to help the candle stand upright)
Rising water experiment worksheet (grab it below)
How to Play – Step by Step
Here’s exactly how to set it up so there’s zero guesswork.
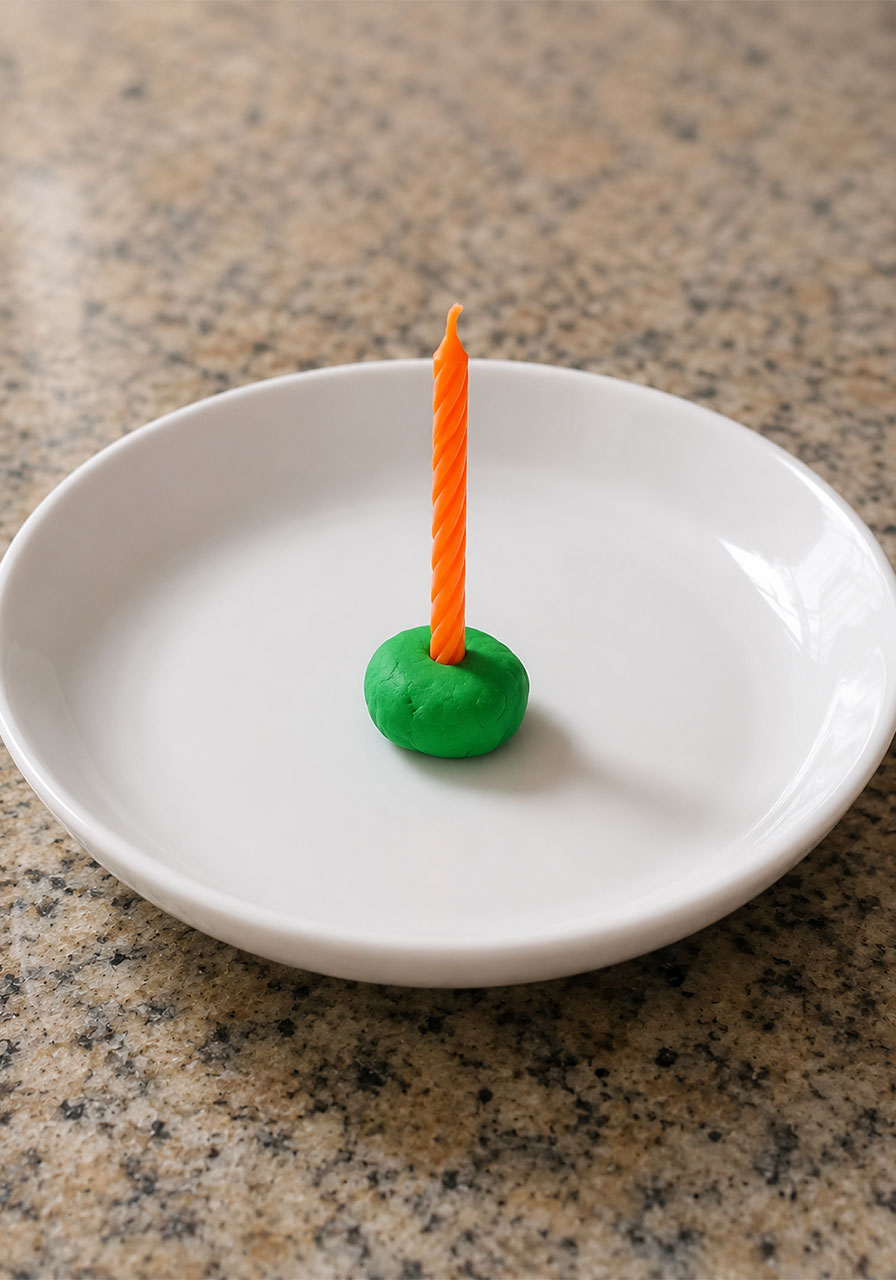
1. Set up your candle.
Place the candle in the middle of your plate or bowl. If it won’t stand on its own, press a small ball of playdough onto the bottom to keep it upright.
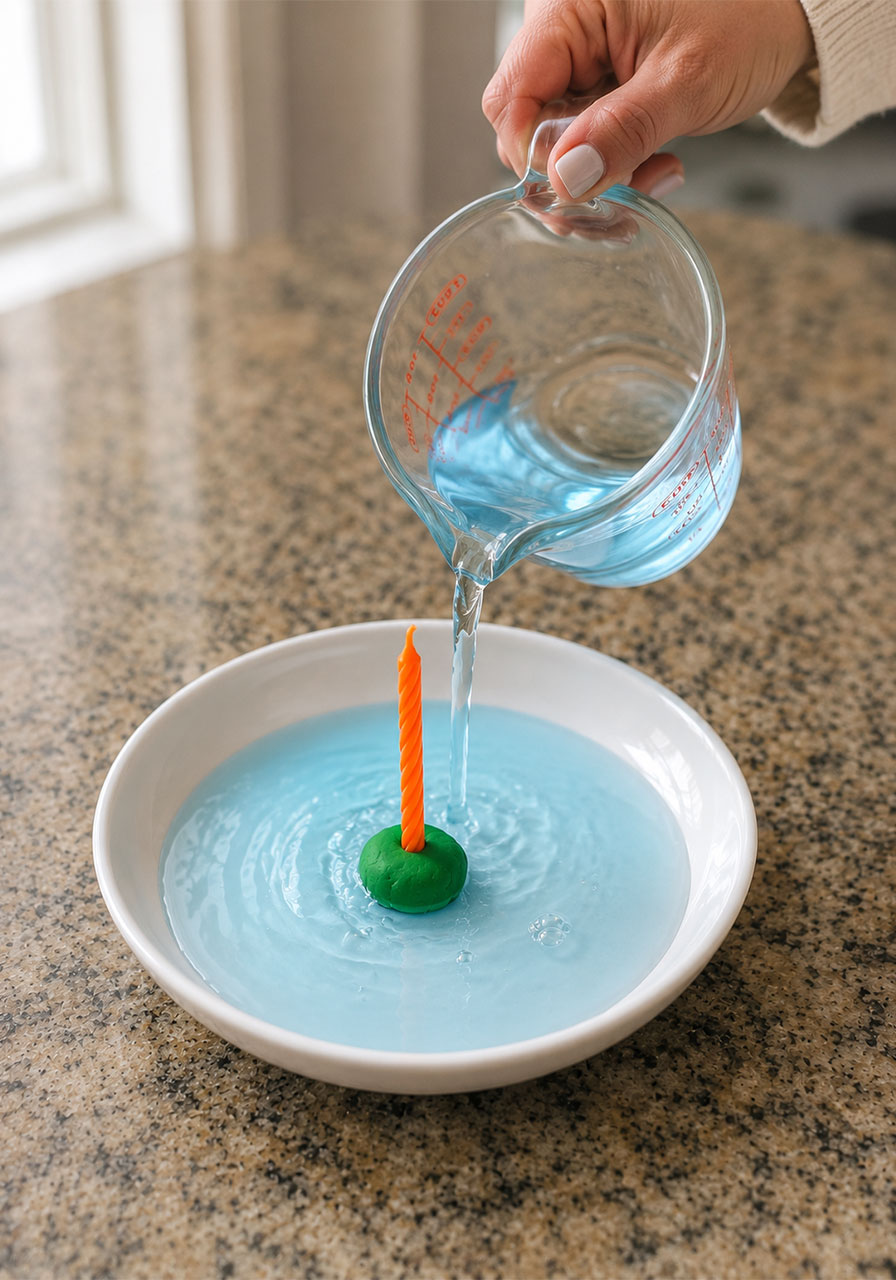
2. Color your water (optional but recommended).
Mix a few drops of food coloring into your water in a separate cup. This makes the rising water so much easier to see – and way more exciting for kids to watch.
3. Pour the water into the plate.
Add about 1 cm of water, just enough to cover the base of the candle.
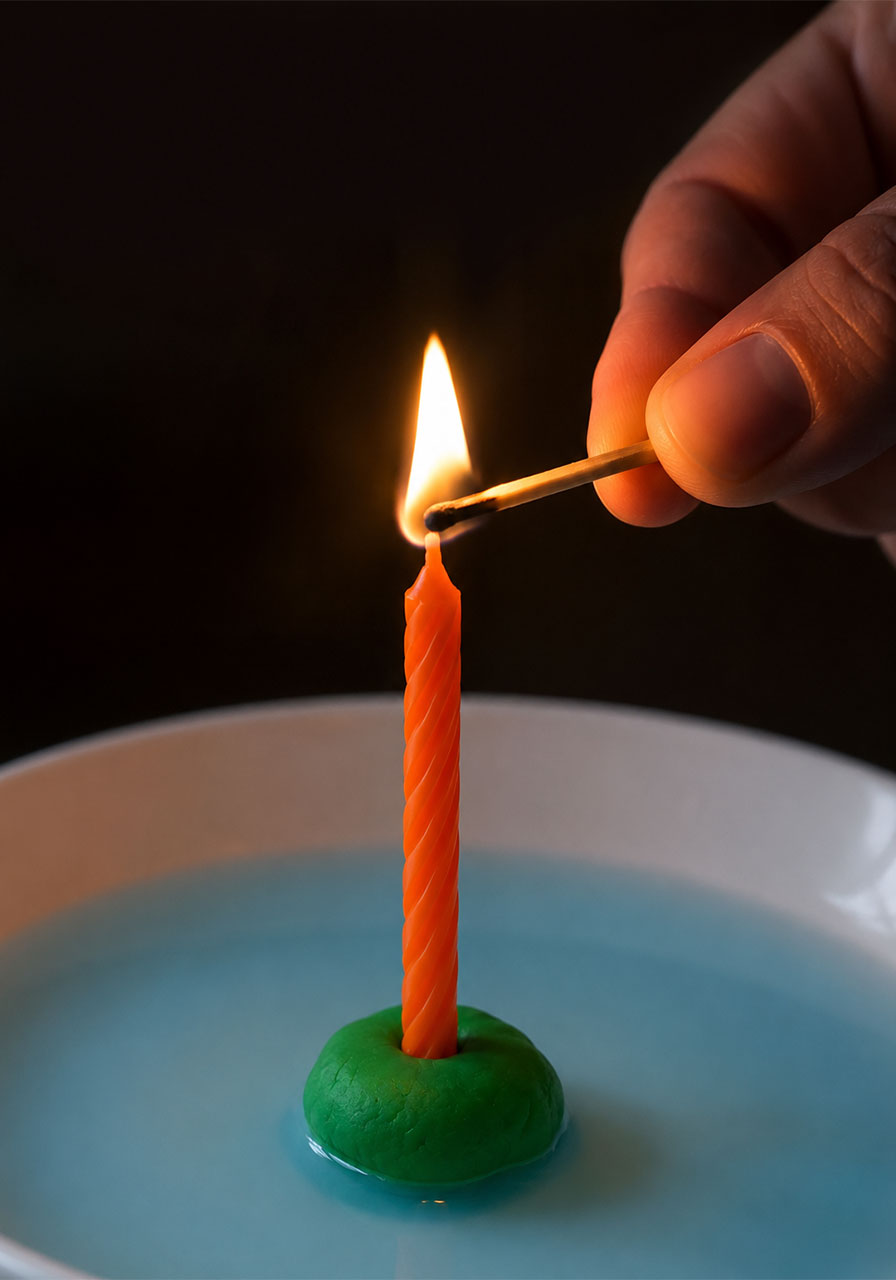
4. Light the candle.
If you’re using the worksheet, this is the moment to pause. Have your child draw or write their prediction: what do they think is going to happen when you place the glass over the flame?
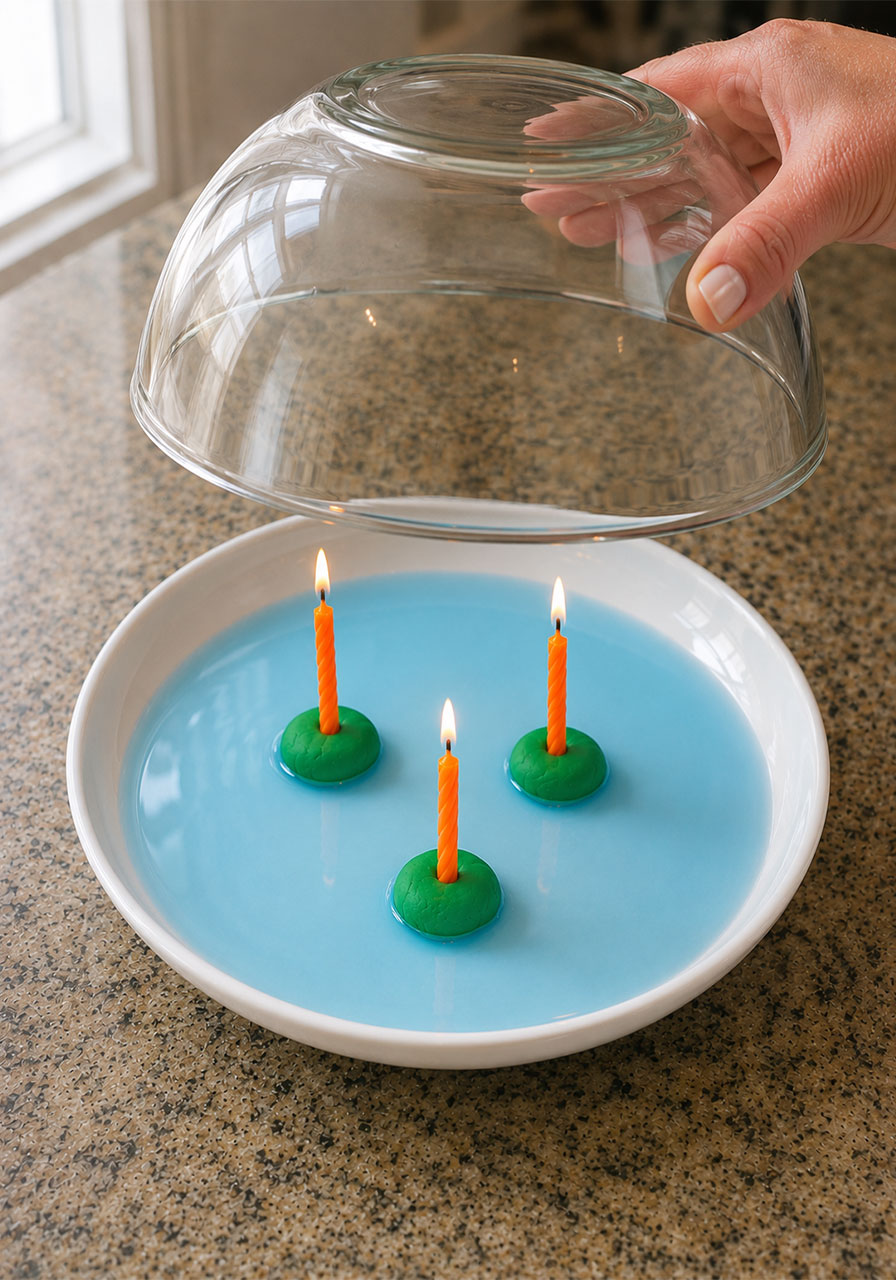
5. Cover the candle with the glass.
Turn your drinking glass or mason jar upside down and place it directly over the lit candle, making sure the rim sits in the water.
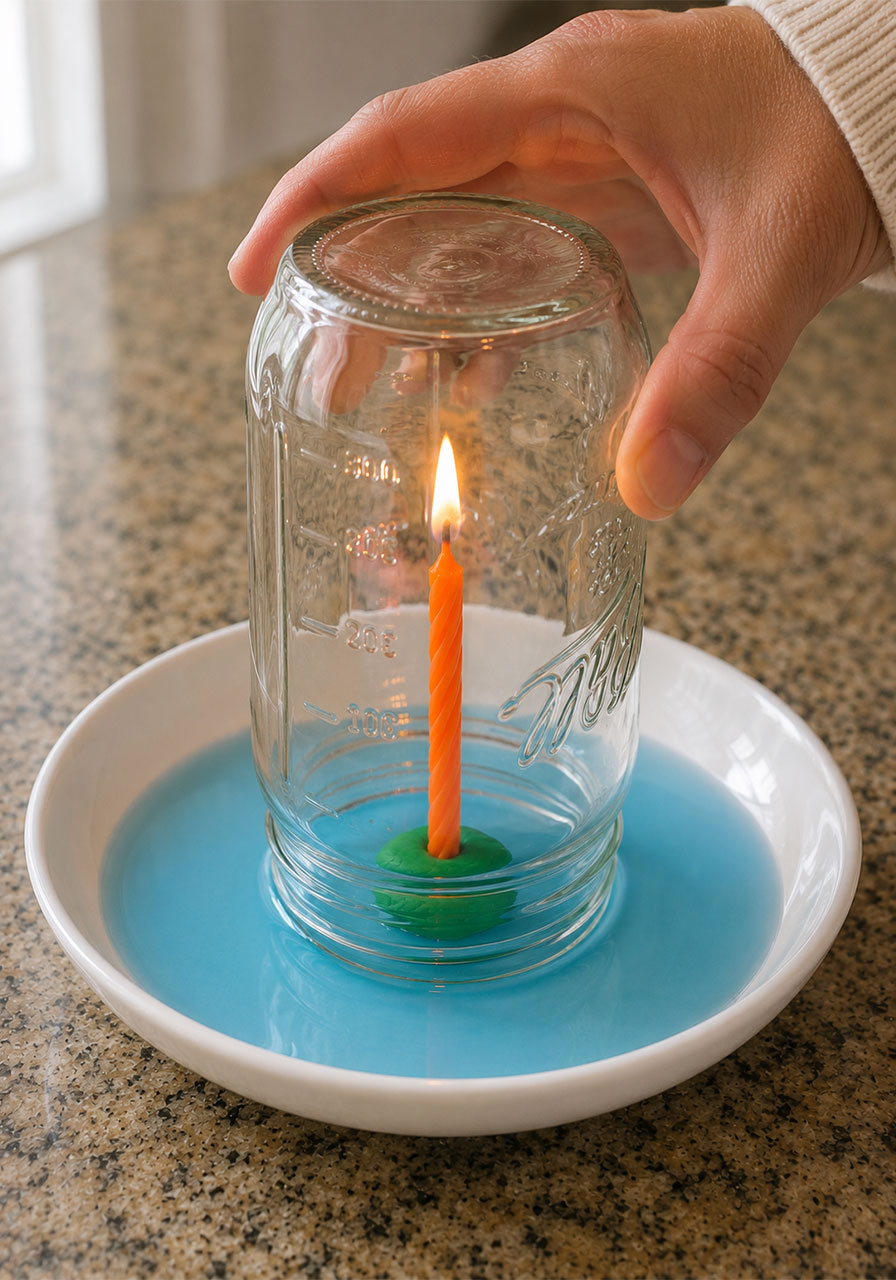
6. Watch closely.
Keep your eyes on the flame – and then keep watching after it goes out. This is where the “trick” happens.
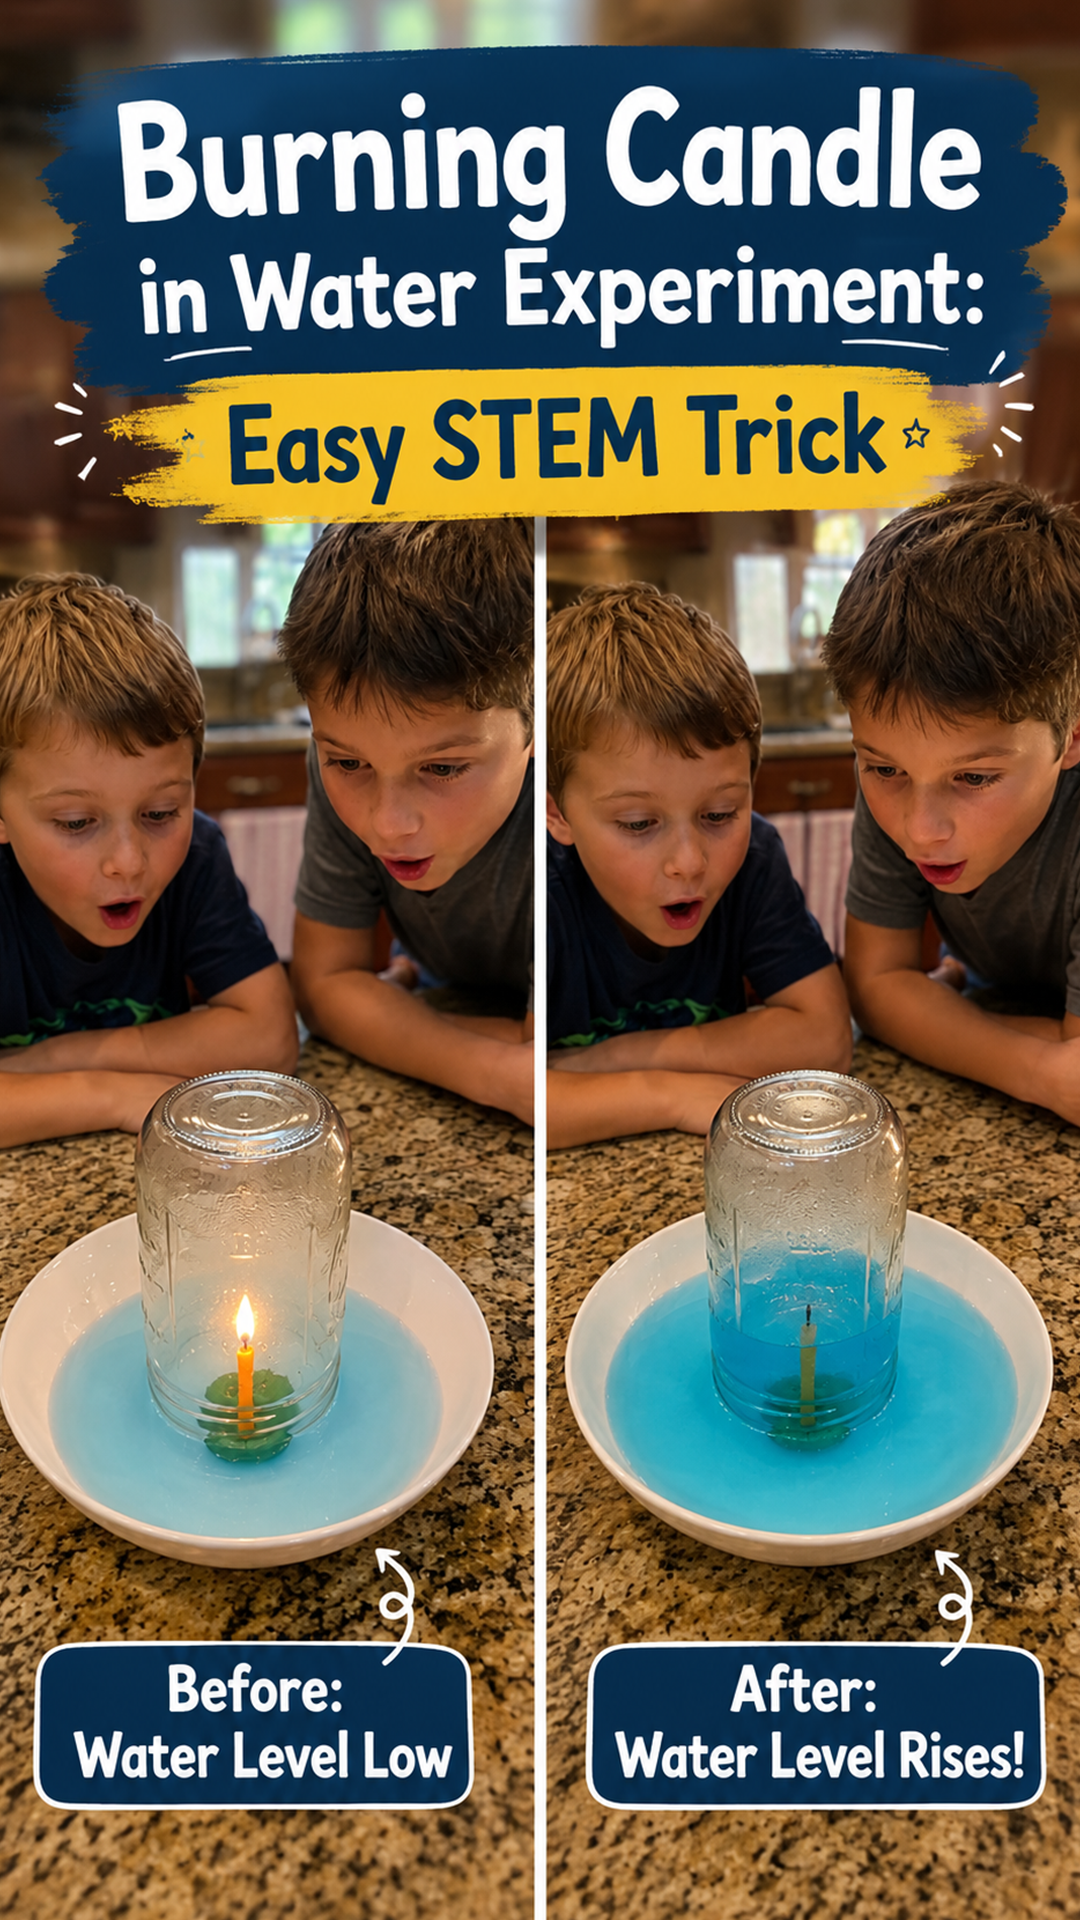
What You’ll See Happen
At first, nothing dramatic. The candle keeps burning, and if you look closely, you might spot tiny bubbles escaping from under the rim of the glass.
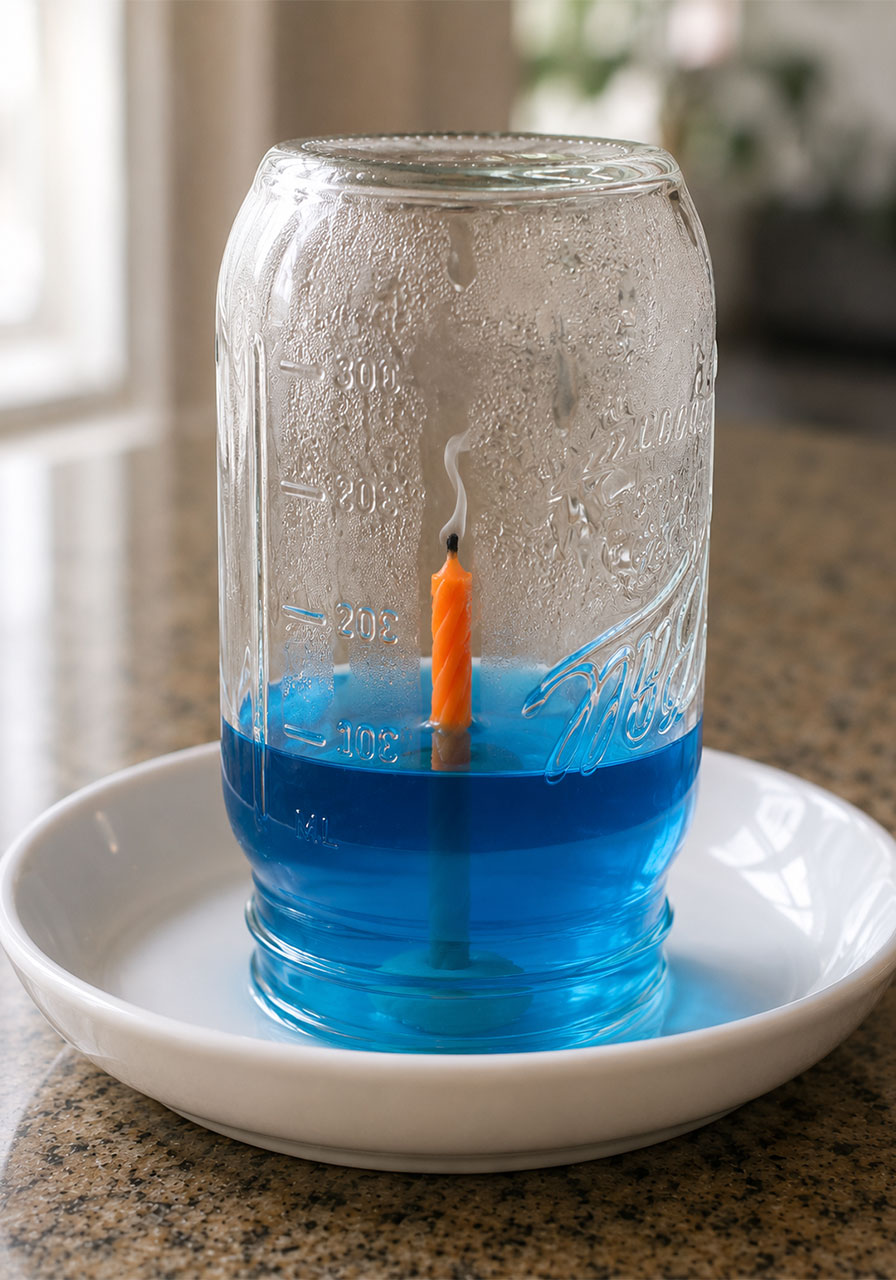
Then the flame starts to shrink. It flickers. And it goes out.
That’s the moment kids lose their minds – the water inside the plate suddenly rises up into the glass, right before their eyes. No hands. No trick. Just science.
My kids loved it so much the first time that we relit the candle and did it again. And again. Until the candle wouldn’t light anymore. Fair warning: you may be doing this more than once.
The Science Behind It: Why Does the Water Rise?
Here’s the simple explanation you can share with your kids (or your students) right after the “wow” moment.
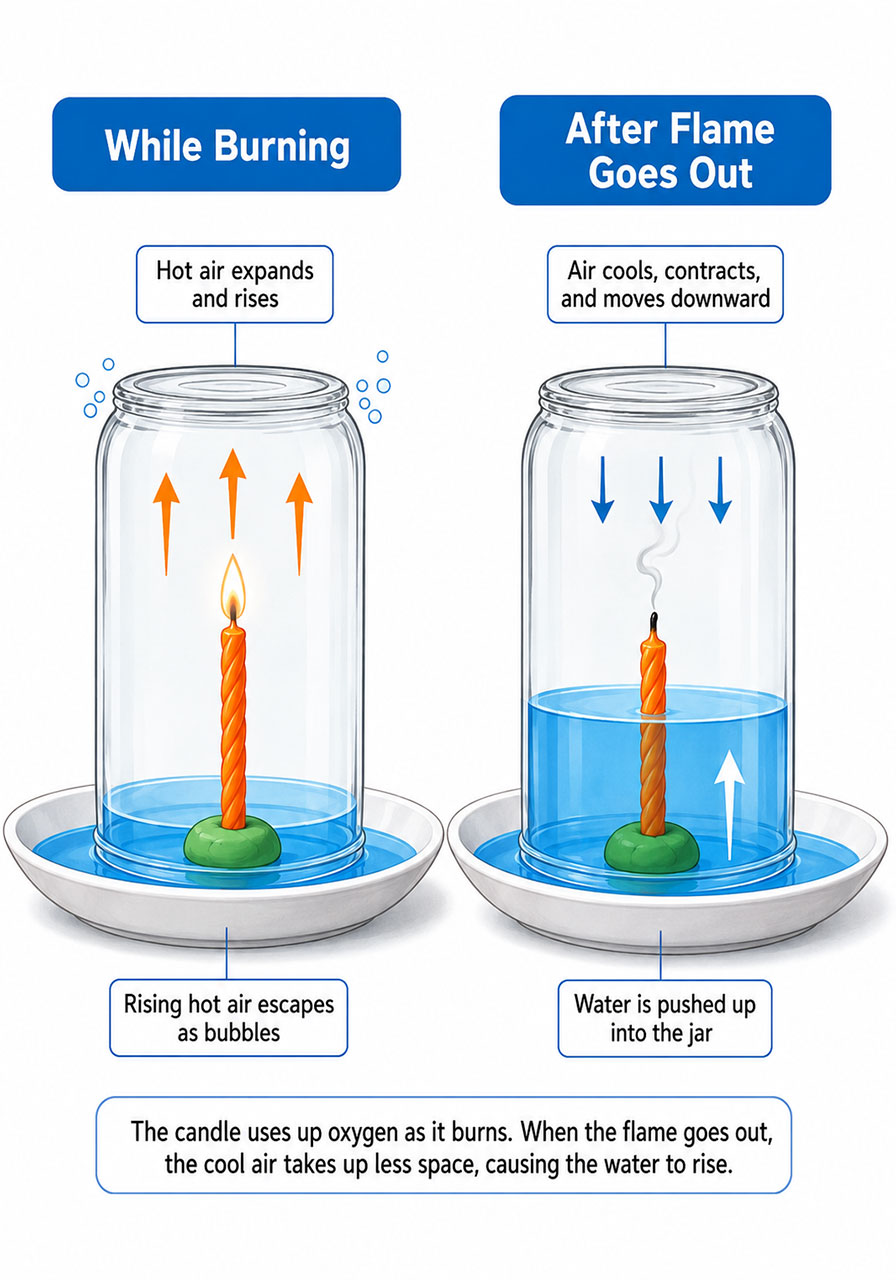
While the candle is burning, the flame heats up the air trapped inside the glass. Hot air expands, which pushes the air pressure inside the glass higher than the pressure outside. Some of that pressurized air actually escapes as tiny bubbles from under the rim – that’s what you may have spotted earlier.
Once the candle runs out of oxygen and the flame goes out, everything changes fast. The air inside the glass cools down quickly. Cool air contracts, taking up less space. That drops the air pressure inside the glass below the air pressure outside.
Since the outside air pressure is now higher, it pushes down on the water in the dish. That pressure difference forces the water up into the glass, and it keeps rising until the pressure inside and outside finally evens out.
So no, it’s not magic. It’s air pressure doing exactly what air pressure does. But watching a kid connect “hot air expands, cool air contracts” to something they saw happen right in front of them? That’s the good stuff.
Troubleshooting: Candle Won’t Relight?
If your kids want to run it back and the candle keeps snuffing out right away, don’t worry – nothing’s broken. The air trapped inside the glass is still low on oxygen from the last round.
Simply blow into the glass or wave it around in the air for a few seconds to refresh the oxygen supply, then try again.
Pro Tip
Use a clear glass instead of a mason jar for your very first run-through. It makes it much easier for little scientists to watch the bubbles form and the flame shrink without any distortion from thick jar glass.
Fun Variations & STEM Extensions to Try
Once your kids have seen the basic version work, they’re going to want to test everything. Lean into it – this is where real scientific thinking kicks in. Try turning each of these into its own mini hypothesis using the worksheet.
Water temperature: Try hot water versus cold water. Does temperature change how high the water rises?
Candle size: Swap in a larger or smaller candle. Does more flame mean more water rise?
Multiple candles: Try two or three candles under one glass instead of one. What changes?
Different liquids: Swap the water for vinegar or milk. Does the type of liquid affect the result?
Starting water level: Try more or less water in the plate before you begin. Does the starting level matter?
Glass size: Compare a large glass to a small one. Which one shows a bigger rise?
Glass shape: Try a glass with a narrower neck and see what your kids notice.
Looking for a no-flame way to explore the same air pressure concept? The hot and cold balloon experiment teaches the exact same principle using just a balloon and a bowl of water – perfect for younger kids or a classroom where an open flame isn’t an option.
Frequently Asked Questions
What age is this experiment good for?
With adult supervision handling the flame, kids as young as 4 can enjoy watching and predicting. Kids around 6 and up can usually handle more of the setup themselves, always with an adult nearby.
Is this safe to do in a classroom?
Yes, as long as an adult manages the open flame at all times. Many teachers run this as a front-of-class demonstration while students record predictions and observations at their desks.
How long does the whole activity take?
About 10 minutes for one round – though most kids will want to repeat it a few times, so plan for 20 to 30 minutes if you’re doing several variations.
What’s actually causing the water to rise?
Air pressure. As the air inside the glass heats up and then cools down after the flame goes out, the pressure difference between the inside and outside of the glass pushes the water upward.
Final Thoughts
This is the kind of experiment that earns its spot on repeat rotation. It’s fast, it’s cheap, it’s genuinely impressive to watch, and it teaches a real science concept your kids will actually remember.
Next time it’s raining and you need twenty minutes of “wow, how does that work,” you know exactly where to turn.
If you try the worksheet with your kids or students, we’d love to hear how their hypothesis-writing goes.