
Looking for a STEM activity that’s ridiculously simple to set up but keeps kids engaged for way longer than you’d expect? This one’s a winner. All it takes is a dowel rod, a handful of craft sticks, and a few small weights, and suddenly your kitchen table turns into a full-blown physics lab.
This challenge teaches kids about balance and center of gravity in a way that actually clicks. No worksheets, no lecture, just hands-on trial and error until that “aha!” moment hits. And trust us, when the craft stick finally balances perfectly, the excitement on their face is priceless.
Whether you’re a teacher planning a classroom science station or a parent hunting for a screen-free afternoon activity, this one checks every box. It’s inexpensive, it’s fast to set up, and it works for a wide range of ages.
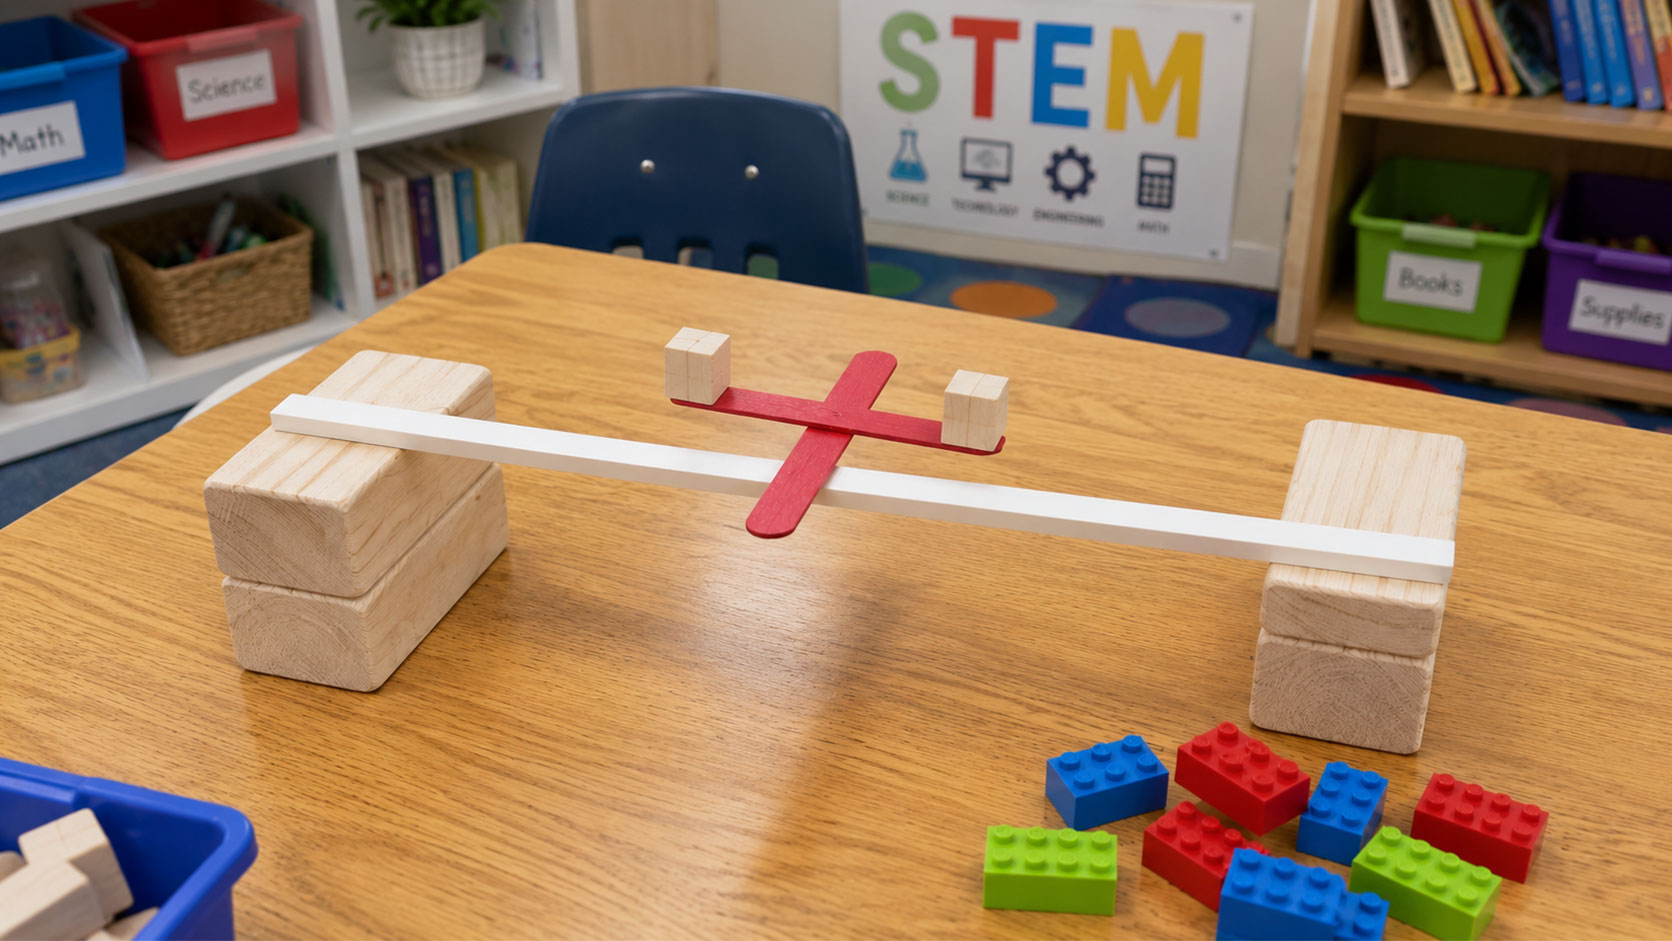
Why This Activity Works So Well
Balance might seem like a simple concept, but there’s real physics happening here. When kids experiment with where to place weights on a craft stick, they’re discovering firsthand that objects balance when the force on both sides of a pivot point is equal.
This is also a sneaky way to introduce algebra concepts. When you add the same weight to both sides of a stick and it still balances, you’re demonstrating that if you do the same thing to both sides of an equation, the equation stays balanced. Kids won’t realize they’re doing math. They’ll just think they’re playing.
Beyond the science, this activity builds fine motor skills and patience. Getting objects to balance just right takes a steady hand and a little persistence, which makes the payoff even sweeter when it finally works.
Best for: Ages 5 and up, with older kids able to work more independently. Great for homeschool science lessons, classroom STEM stations, rainy day activities, or summer learning at home.

What You’ll Need
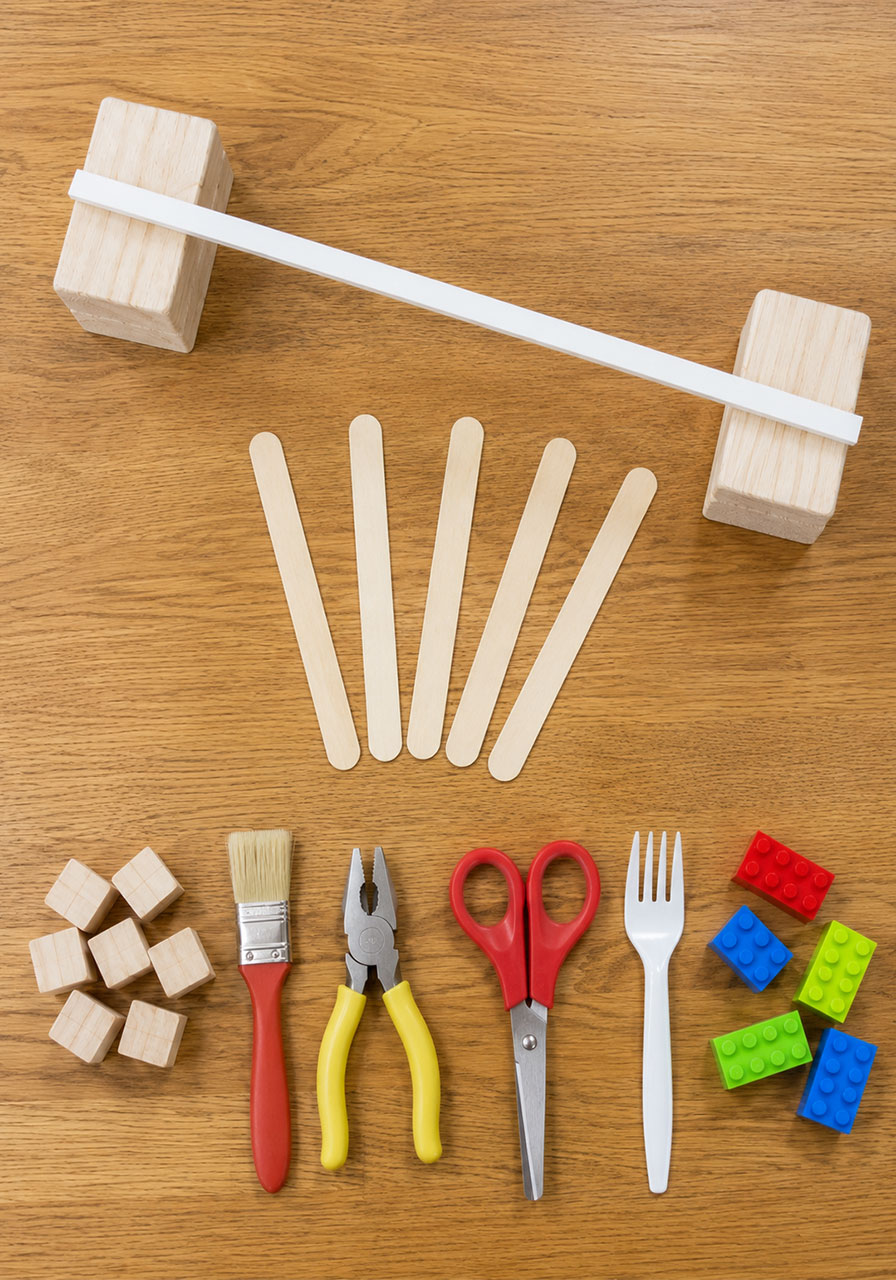
The core setup is simple, and you likely already have most of these items around the house.
- A rectangular dowel rod with flat sides (found at craft stores like Hobby Lobby, or hardware stores like Lowe’s or Home Depot, usually in the wood dowel section)
- Two stacks of wooden building blocks, or two stacks of books, to act as the base
- Wooden craft sticks (popsicle sticks work great, and painting them different colors makes the activity even more fun)
- Small weighted objects like wooden cubes or LEGO bricks
- A few household objects with irregular shapes, such as a paintbrush, pliers, scissors, or a plastic fork
A flat-sided dowel is important here. Round dowels tend to roll, which makes this activity nearly impossible. Look for one that’s rectangular or has at least one flat edge.
Step 1: Set Up Your Balance Beam
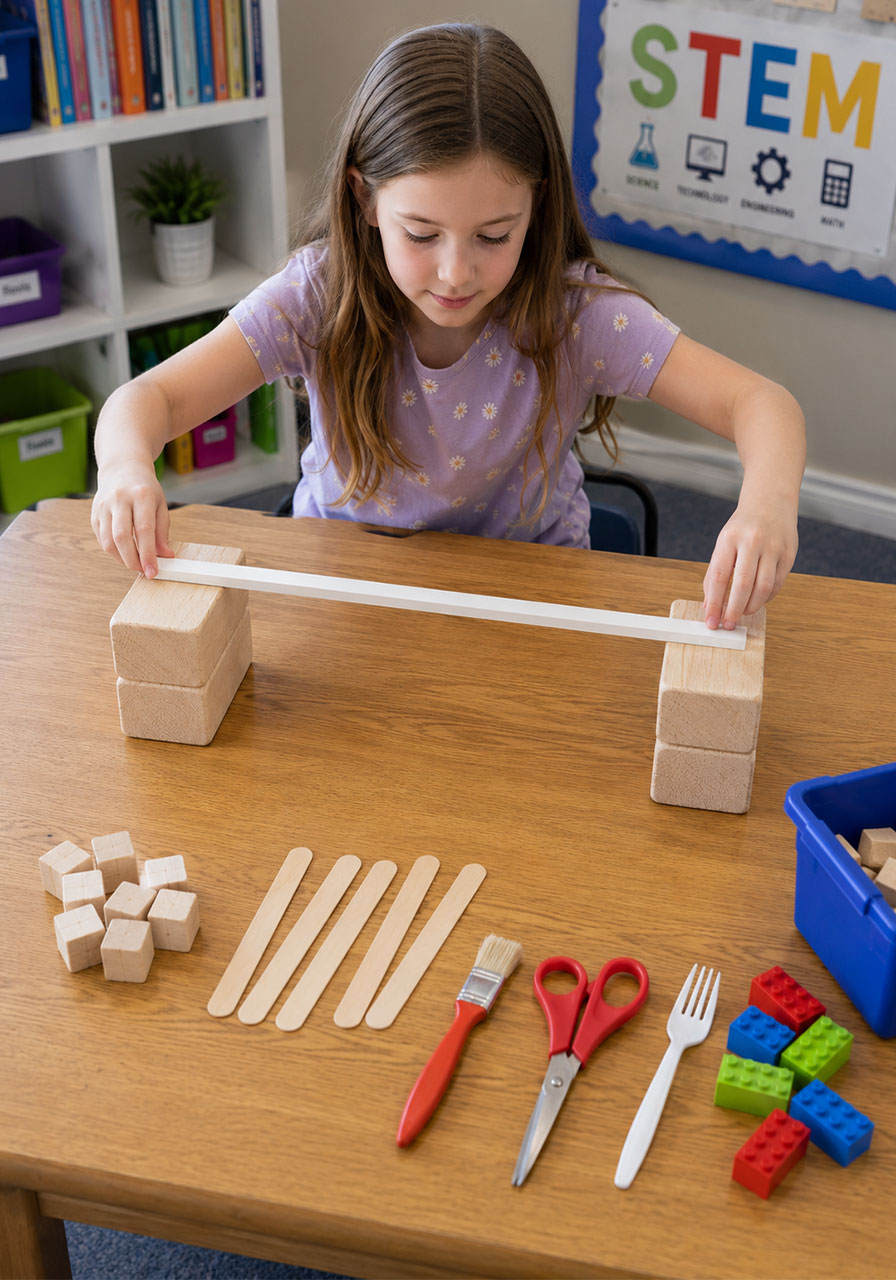
Start by stacking your wooden blocks or books into two even piles, spaced a foot or so apart. Lay the dowel rod across the top of both stacks so it forms a bridge. This dowel is going to act as your fulcrum, which is just a fancy word for the pivot point that everything will balance on.
Make sure the setup is on a flat, stable surface like a table or the floor. A little bit of a wobble in the base can throw off your results, so take a second to double check that both stacks are level before moving on.
Step 2: Find the Balance Point of Everyday Objects
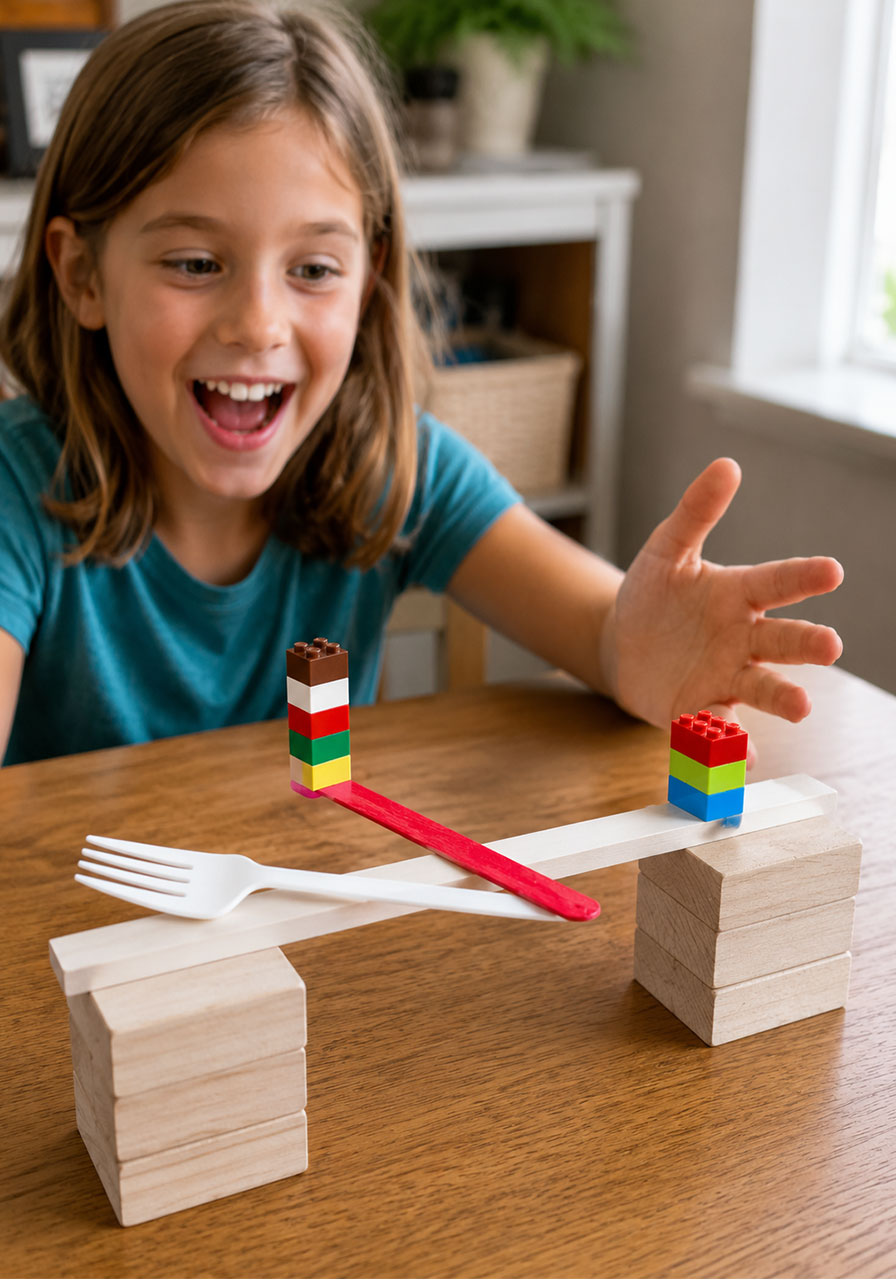
Before jumping into the craft sticks, let kids experiment with finding the balance point of ordinary objects. Grab a paintbrush, a pair of pliers, scissors, or a plastic fork, and challenge kids to lay each one across the dowel until it balances without tipping.
This step matters more than it seems. It teaches kids that the balance point of an object depends on where its mass is concentrated, not just where the middle of the object happens to be. A pair of scissors, for example, will balance much closer to the blades than to the handles, since that’s where more of the weight sits.
Let kids guess where they think the balance point will land before testing it. Half the fun is being surprised when they’re wrong.
Step 3: Balance a Plain Craft Stick
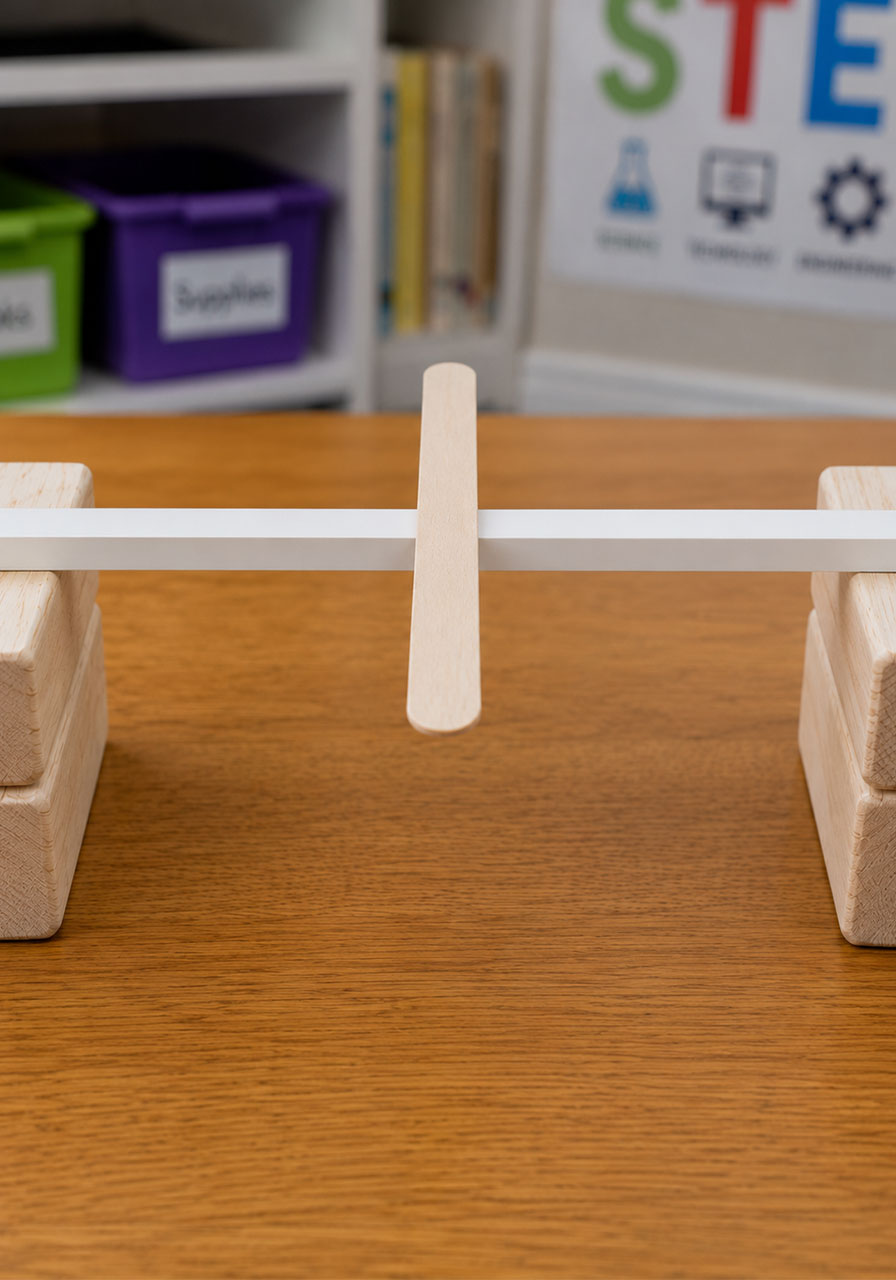
Once kids get the hang of finding balance points, move on to a plain craft stick with nothing attached to it. Since the weight is spread evenly across the whole stick, it should balance right in the middle of the dowel.
This is a great moment to ask kids why they think it balances in the center. Guide them toward the idea that both sides of the stick weigh the same, so neither side pulls harder than the other.
Step 4: Add Equal Weight to Both Sides
Now it’s time to add a wooden cube or a LEGO brick to each end of the craft stick. If the weights are equal, the stick should still balance right at the center of the dowel.
This is the algebra connection we mentioned earlier. Adding the same amount of weight to both sides keeps everything in balance, the same way adding the same number to both sides of a math equation keeps it equal.
For younger kids, this step might take a few tries to get the placement just right. That’s okay. The wobbling and adjusting is exactly where the learning happens.
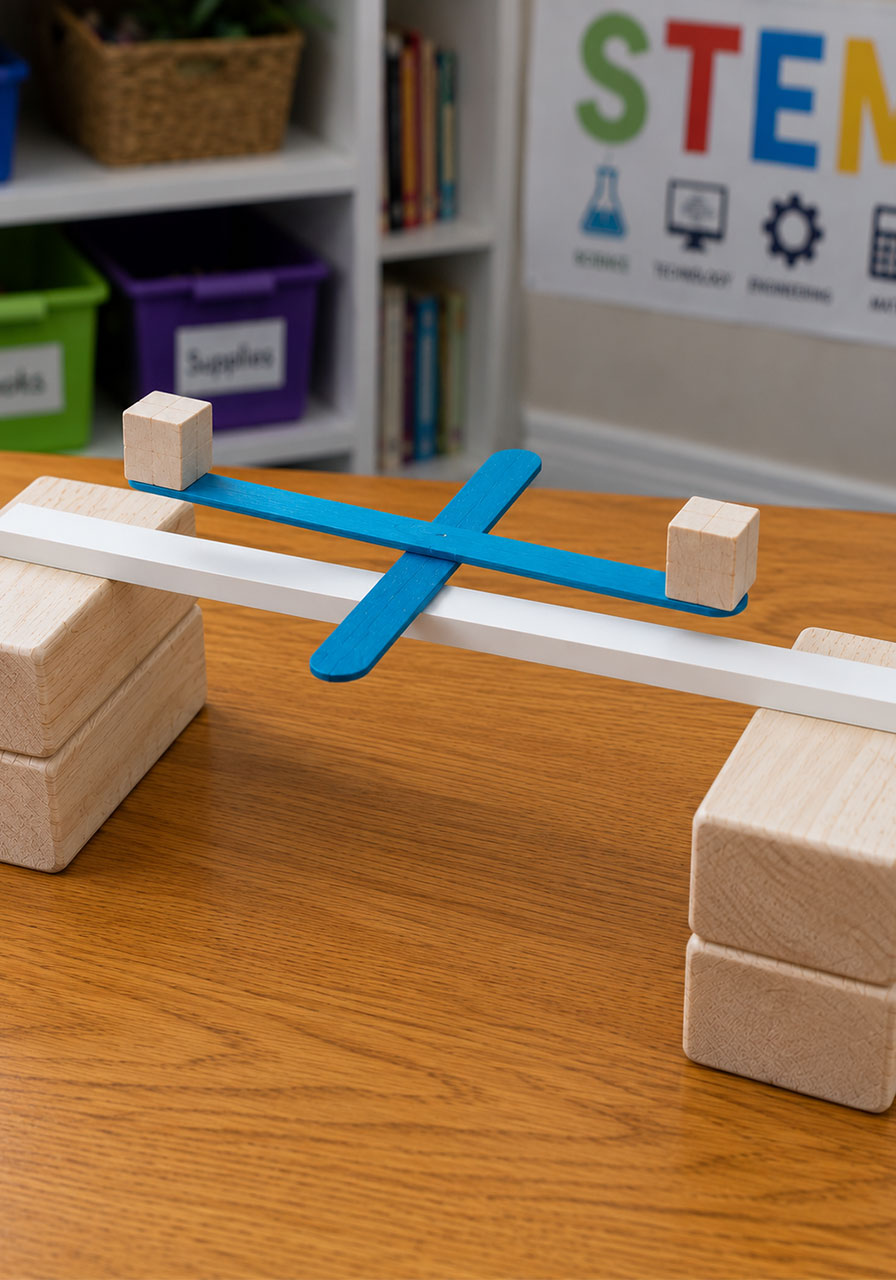
Step 5: Add Different Amounts of Weight and Adjust the Fulcrum
Here’s where things get really interesting. Add two wooden cubes to one side of the stick and just one cube to the other side. The stick will no longer balance in the center, but don’t worry, it can still balance. Kids just need to slide the stick along the dowel to find a new balance point.
Since one side is heavier, the balance point will need to move closer to the heavier side. The bigger the weight difference, the further the fulcrum has to shift.
Try a few different combinations. What happens with three cubes on one side and one on the other? What about four against two? Let kids predict where they think the balance point will land each time before testing it out.
Step 6: Try LEGO Bricks for an Extra Challenge
LEGO bricks add a fun twist because they stack together, which makes it easy to build taller towers of weight. Try stacking three 2×4 LEGO bricks on one side, and see if six smaller 2×2 bricks on the other side will balance it out.
You might notice they don’t balance perfectly evenly, since the smaller bricks have more plastic and surface area between them. That’s a great real-world lesson in how even objects that seem mathematically equal can behave a little differently in practice.
For an extra fun challenge, see how many small bricks it takes to balance one large stack. Some setups can balance eight bricks against just one on the opposite side, which always gets a big reaction from kids.
Pro Tip for Teachers and Parents
If you’re working with younger children, especially under age 8, consider gluing the cubes onto the craft sticks ahead of time. This removes some of the trial and error, but it also prevents the frustration of pieces sliding off mid-experiment.
For a classroom setting, prep several craft sticks in advance with weights already attached in different spots. Hand them out and let each student or small group experiment with finding the balance point on their own stick. This keeps things moving quickly and lets every child get hands-on time with the activity.
Age Guide
Ages 5-7: Best with adult supervision and pre-glued weights for less frustration.
Ages 8-10: Can handle the full activity independently, including experimenting with different weight combinations.
Ages 11+: Ready to take it further by measuring exact distances from the fulcrum and calculating the math behind why each setup balances.
Why Kids Love It
There’s something deeply satisfying about watching an object teeter, wobble, and then finally settle into perfect balance. Kids get instant visual feedback on whether their guess was right, which keeps them coming back to try again.
It also turns failure into part of the fun. If the stick tips over, that’s not a mistake, that’s data. Kids naturally want to adjust and try again, which builds resilience without them even realizing it.
This is the kind of STEM activity that sneaks real learning into pure, hands-on play. And with supplies you likely already have at home, it costs next to nothing to set up.
Frequently Asked Questions
Do I need a special dowel rod for this activity?
A flat-sided or rectangular dowel works best since round dowels tend to roll. Craft stores and hardware stores both carry them in the wood dowel section.
What can I use instead of wooden blocks for the base?
Stacks of books work just as well. Anything sturdy and evenly stacked will do the job.
Is this activity messy?
Not at all. There’s no glue, paint, or cutting required unless you choose to color the craft sticks for extra visual appeal, which is optional.
How long does this activity take?
Plan for about 20 to 30 minutes, though kids who get hooked on experimenting may want to keep going much longer.
Final Thoughts
This balancing craft stick challenge proves that some of the best STEM activities don’t need a big budget or a complicated setup. With just a few simple supplies, kids get a genuine, hands-on introduction to physics concepts like balance and center of gravity, all while having a blast.
Set it up once, and don’t be surprised if it becomes a repeat request. There’s always one more combination of weights to try.
