
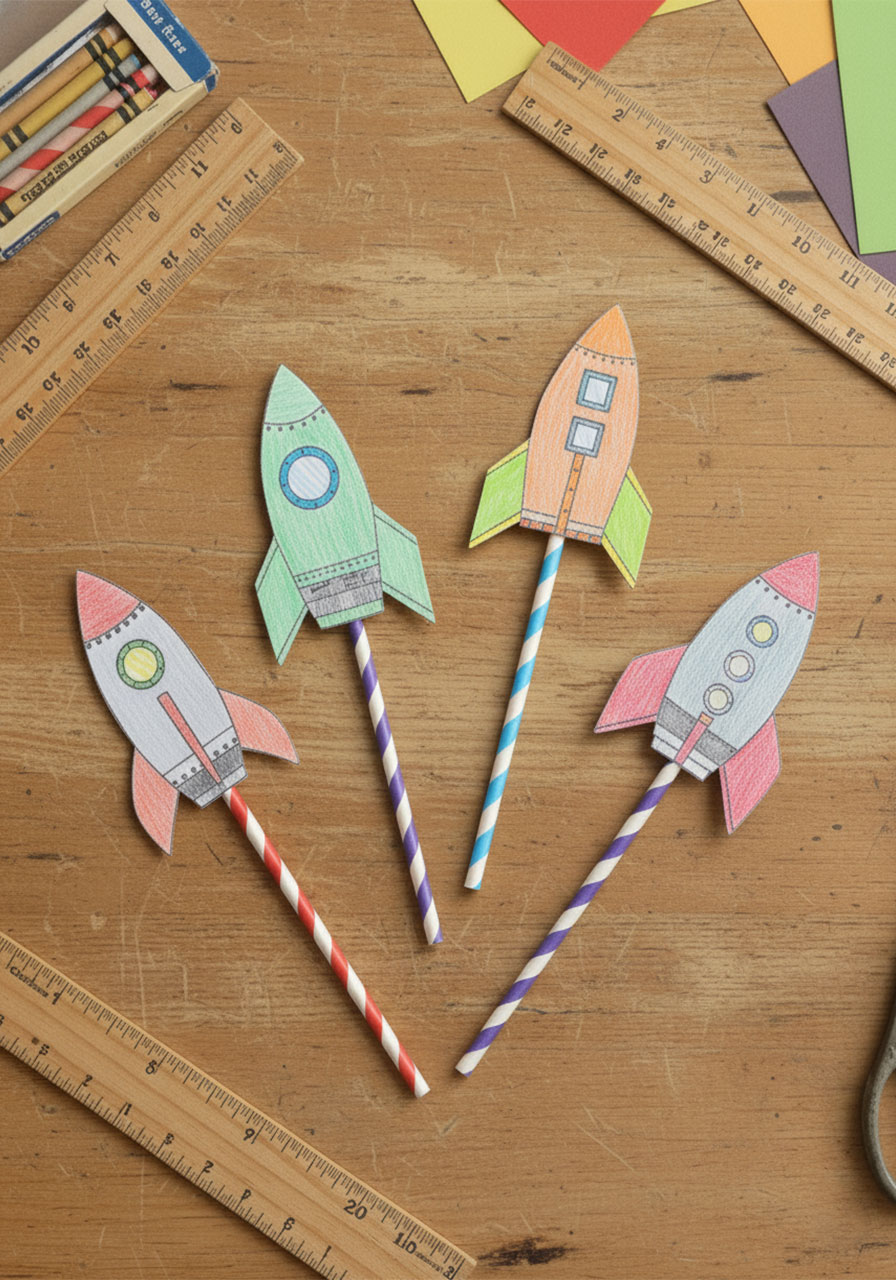
Looking for a hands-on activity that’s part craft, part science experiment, and 100% fun? These straw rockets are about to become your new go-to. Kids color them, cut them out, and then – with just one big puff of air – launch them across the room. It’s the kind of simple activity that somehow keeps kids busy for way longer than you’d expect.
The best part? You only need a handful of basic supplies, and the printable template does most of the heavy lifting for you. Whether you’re a parent looking for a rainy day rescue or a teacher planning a STEM lesson, this one’s a guaranteed hit.
Why Kids (and Teachers!) Love This Activity
This isn’t just a cute craft – it’s sneaky science. Kids are actually exploring real physics concepts like air pressure, thrust, and how launch angles affect distance. But don’t worry, you don’t need to frame it that way. To them, it just feels like launching rockets across the living room, which is pretty much the coolest thing ever.
This activity works beautifully for ages 3 and up. Younger kids love the coloring and the puffing. Older kids (think 4th and 5th grade) can turn it into a full-on flight experiment – testing angles, adding fins, and competing to see whose rocket flies the farthest.
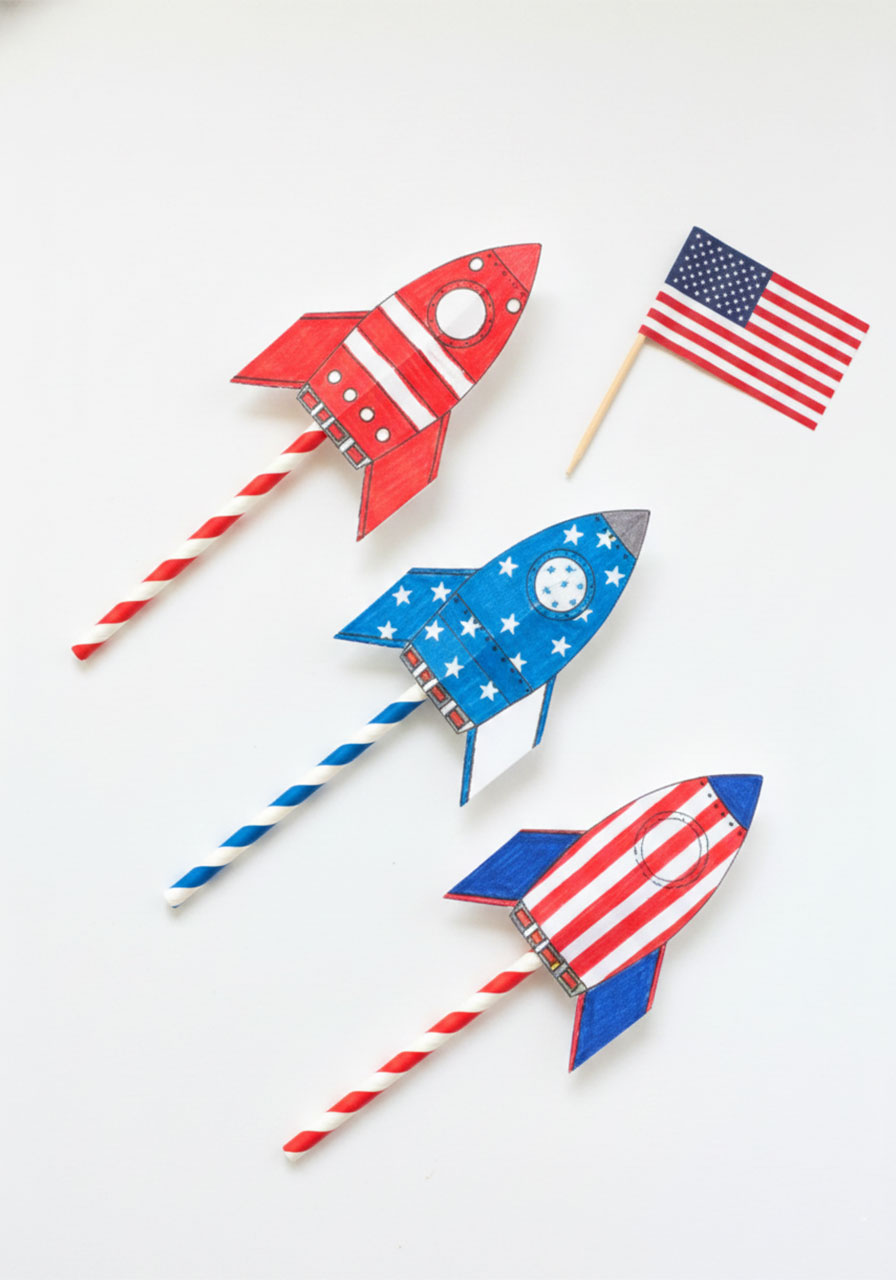
It’s also a perfect fit for a unit on space, physics, things that fly, or patriotic themes. (Color your rockets red, white, and blue for a festive twist!) If you want a great picture book to pair with this activity, check out The Darkest Dark by Chris Hadfield – it’s a reader favorite to read alongside this project.

What You’ll Need
Straws (standard size)
Plastic pipettes or a wider straw for the rocket body (more on this below)
Tape or glue dots
Markers, crayons, or colored pencils
Scissors
Rocket Printable Template
Don’t have plastic pipettes at home? No problem! A wider straw works just as well. The key is that your “rocket straw” needs to be slightly wider in diameter than your “launching straw” so it can slide and launch off easily. Keep reading – we explain exactly how to set it up.
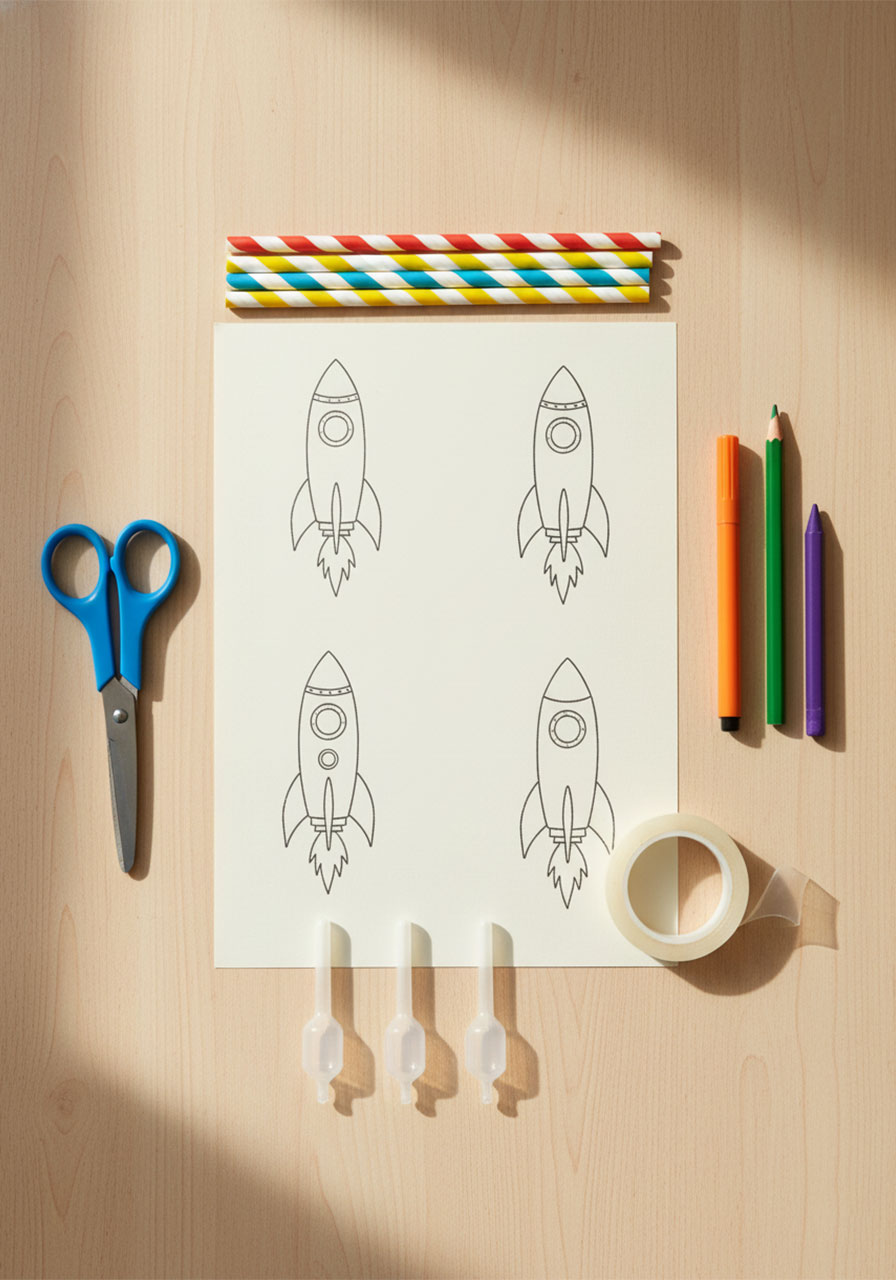
How to Make Straw Rockets: Step-by-Step
Step 1: Print and Color Your Rockets
Download and print out the rocket template. Then hand the kids their markers, crayons, or colored pencils and let them go wild. There are no rules here – neon green with pink fins? Absolutely. A galaxy-inspired color scheme? Go for it. This is their rocket, so let their creativity take over.
Once they’re done coloring, carefully cut out each rocket along the outline.

Step 2: Attach the Launch Tube to the Back of the Rocket
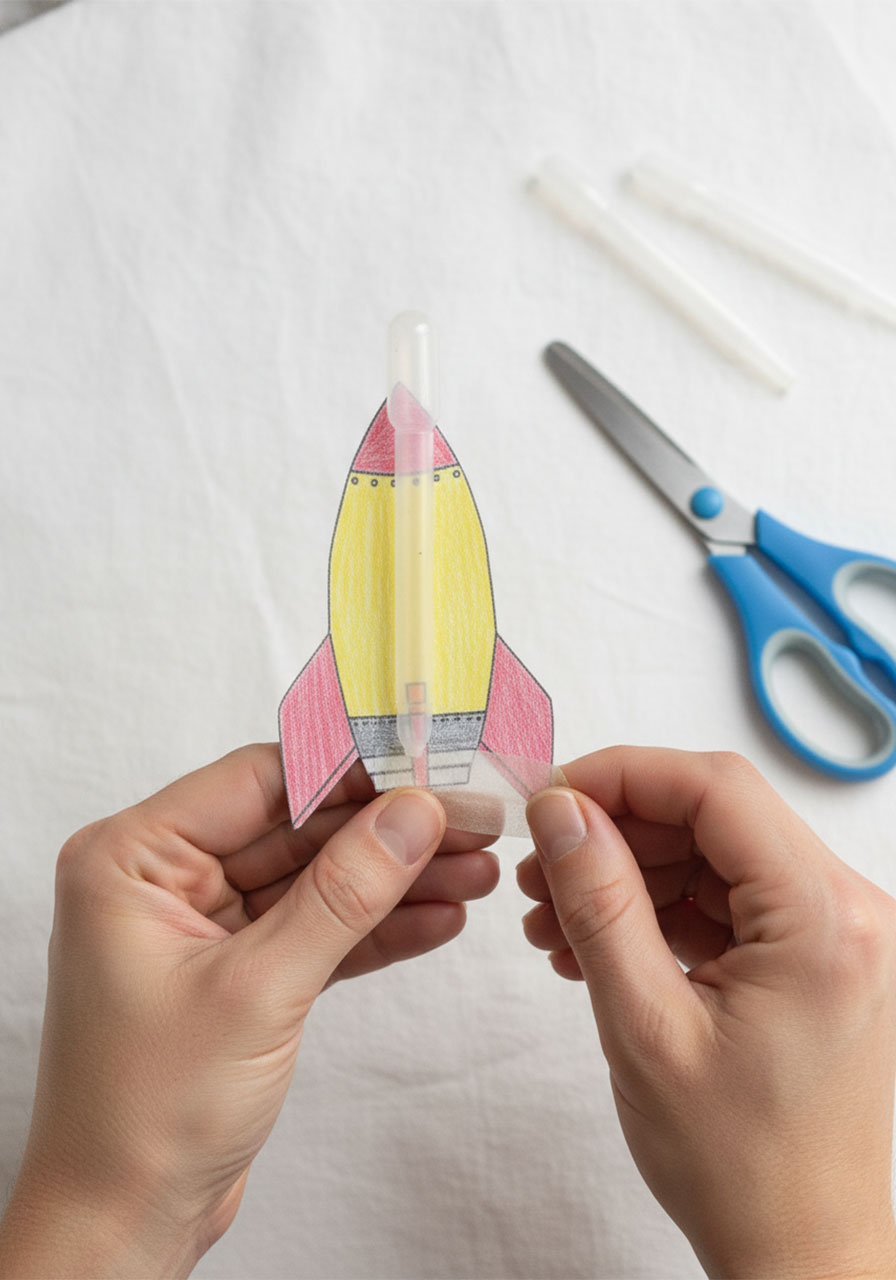
This is the step that makes the magic happen. You need to attach a small tube to the back of each rocket – this is what the straw slides into so you can blow the rocket into the air.
Option A (Recommended): Use a plastic pipette. Cut off the bottom bulb of the pipette so you’re left with just the narrow tube. Tape or glue this tube vertically along the back center of your rocket. Make sure it’s secure!
Option B: Use a wider straw. Cut a piece of the wider straw to roughly match the height of your rocket. Seal one end completely with tape – this end is the “top” of the tube (where the air will push against). Attach the straw tube to the back of your rocket using tape or glue dots, with the sealed end at the top.
Pro Tip: Glue dots make this step super easy and mess-free for younger kids. Double-sided tape works great too!
Step 3: Load Your Rocket onto the Launch Straw
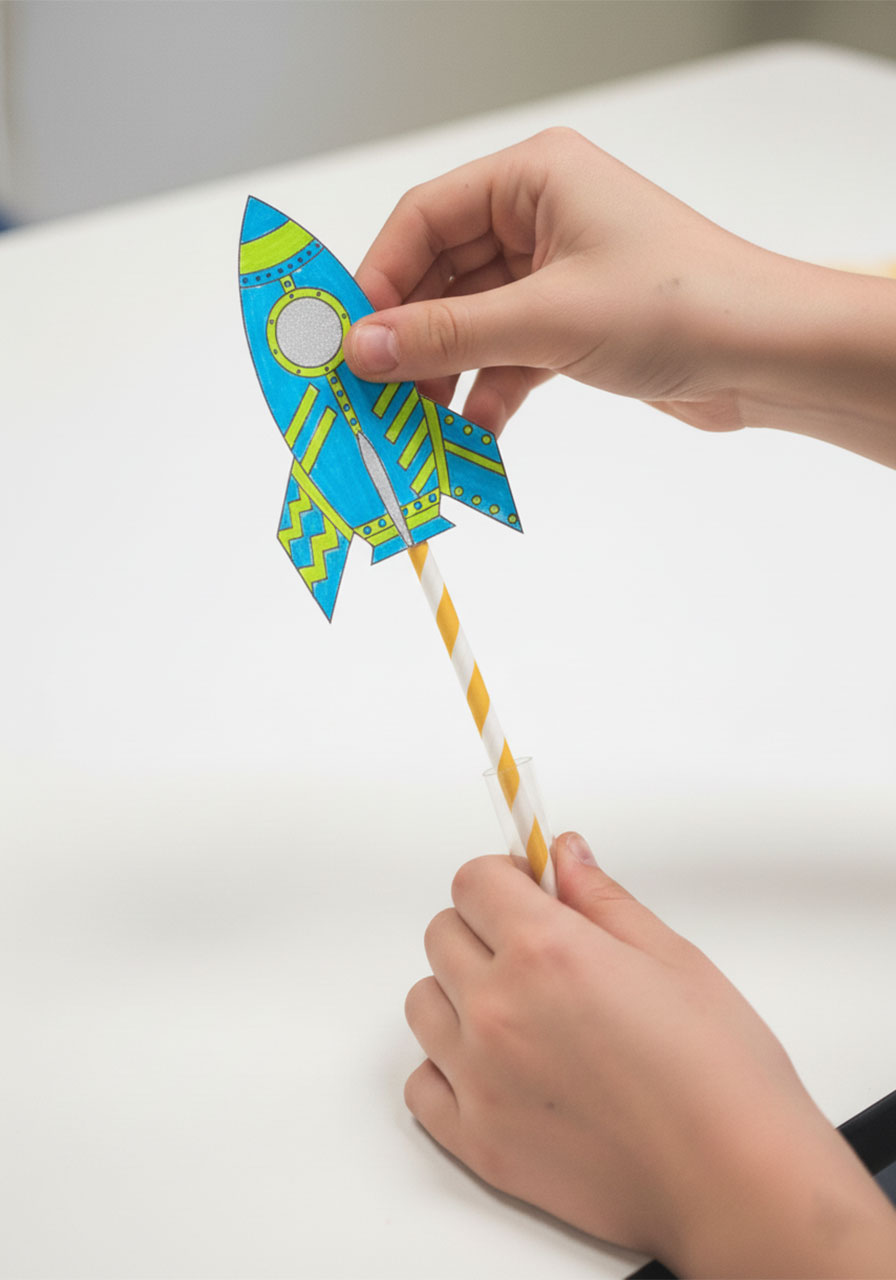
Slide your regular straw into the open end of the tube on the back of your rocket. The rocket should sit loosely on the straw – snug enough to stay on, but free enough to launch off easily when you blow.
Hold the bottom of the straw, point it at a slight upward angle, and get ready for liftoff.
Step 4: Launch!
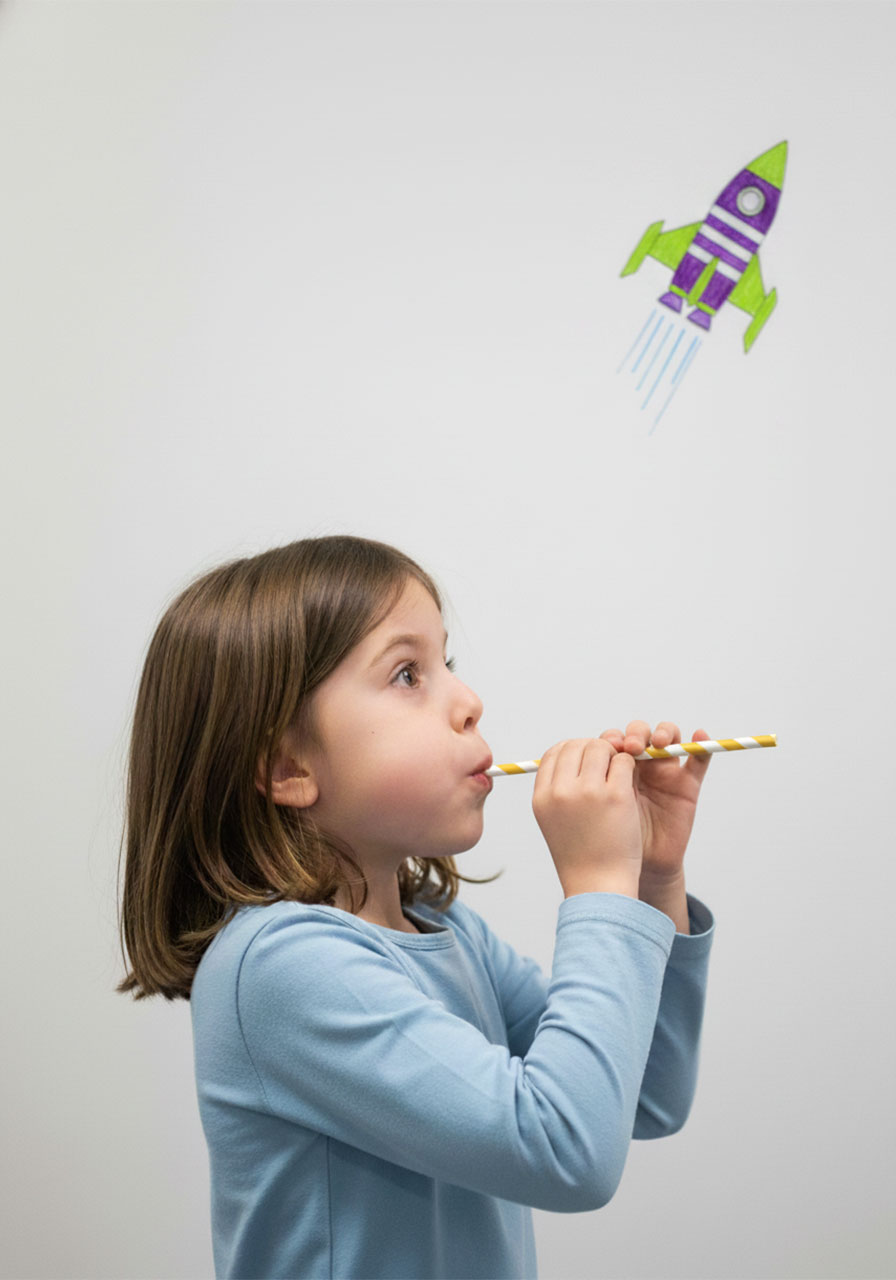
Take a deep breath, place your lips on the bottom of the straw, and give it one strong puff of air. Watch your rocket shoot off into the air! The bigger the puff, the farther it goes.
Try launching at different angles – straight up, at 45 degrees, nearly horizontal – and see what happens. This is where the real science kicks in!
Tips for the Best Results
Make sure the sealed end is airtight. If air is leaking out of the top of your launch tube, the rocket won’t go anywhere. Press the tape down firmly and double-check the seal before launching.
Use cardstock if you can. Printing the template on regular paper works fine, but cardstock gives the rockets a little more stiffness and helps them hold their shape better during flight – especially important if you’re doing this in a classroom and rockets are getting lots of use.
Reinforce the tube attachment with extra tape. After a few launches, the tube can start to peel away from the rocket. A little extra tape on the sides keeps everything held together through many more launches.
For younger kids: Pre-cut the rockets and pre-attach the tubes before the activity. This way, they can focus on the fun parts – coloring and launching!
Turn It Into a Science Experiment
Once the rockets are built, don’t stop at just launching them. This is where the activity goes from fun to really fun – and sneaks in some genuine STEM learning along the way.
Experiment 1: Test different launch angles. Have kids launch their rockets at different angles (flat, 45 degrees, straight up) and use a tape measure to record how far each one travels. Which angle sends the rocket the farthest? Have them write down their predictions first – then test and see!
Experiment 2: Design your own rocket. Challenge older kids to skip the printable and design their own rocket from scratch on plain paper. Do homemade rockets fly differently than the printed template ones? What shapes seem to work better?
Experiment 3: Add fins. Cut small triangles of paper and tape them onto the rocket as extra fins. Does adding more fins change how the rocket flies? Does it go higher, farther, or more straight?
Experiment 4: Hold a flight competition. This one’s simple and wildly popular in classrooms. Give each kid (or pair) three launches. Mark where each rocket lands. Whoever’s rocket lands the farthest wins. Cue the cheering.

Great Occasions to Use This Activity
This project is incredibly versatile. Here are some of the best times to pull it out:
Rainy day at home – It takes about 20 minutes to make and then keeps kids busy for much longer.
Classroom STEM lessons – Perfect for physics, space, or engineering units in grades K–5.

Space-themed birthday parties – Set up a rocket-making station and let kids decorate and launch their own!
Summer camp or after-school programs – Easy to prep in bulk and always a crowd-pleaser.
4th of July or patriotic themes – Color your rockets red, white, and blue for a festive twist.
Frequently Asked Questions
What age is this activity good for?
Honestly, a wide range! Kids as young as 3 can participate with a little help from a grown-up – they’ll mostly need help with the cutting and tube attachment. The coloring and launching are easy enough for toddlers. For older kids (up to 5th grade and beyond), the science experiment extension keeps things challenging and engaging.
Can I do this activity without the printable template?
Absolutely! You can draw your own rocket shape on paper or cardstock, cut it out, and attach the launch tube the same way. It’s a great creative challenge for older kids who want to engineer their own design from scratch.
Do I have to use plastic pipettes?
Nope! A wider straw with one end taped shut works just as well. Just make sure there’s a clear size difference between the launch tube and the launching straw so the rocket can slide off easily.
How do I keep the rocket from falling off the straw before launch?
Make sure the tube is snug on the straw – it should slide freely but not be loose enough to fall off on its own. If it’s too loose, try tightening the tube slightly with a small piece of tape around the end.
Can I laminate the rockets to make them last longer?
Yes! If you’re doing this in a classroom or want to use the rockets over and over, laminating the template before cutting is a fantastic idea. The laminated rockets are sturdier, more colorful, and hold up much better to repeated launches.
Did your kids love this activity? Share your straw rocket photos with us – we’d love to see those colorful rockets in action!
More Summer Craft & Activity Ideas to Keep the Fun Rolling:
Easy Pinwheel Craft Kids Love – Step-by-Step Guide
Adorable Ocean Friends Craft Sticks Kids Will Beg to Make All Summer
How to Make Paper Plate Frisbees Kids Will Actually Want to Throw
Summer Crafts for Kids That Are Easy, Fun, and Mess-Approved
15 Best Fun-Filled Kids Summer Activities to Try Now
How to Make Paper Umbrellas: A Super Fun Craft for Kids (With or Without the Raindrop Extras!)
