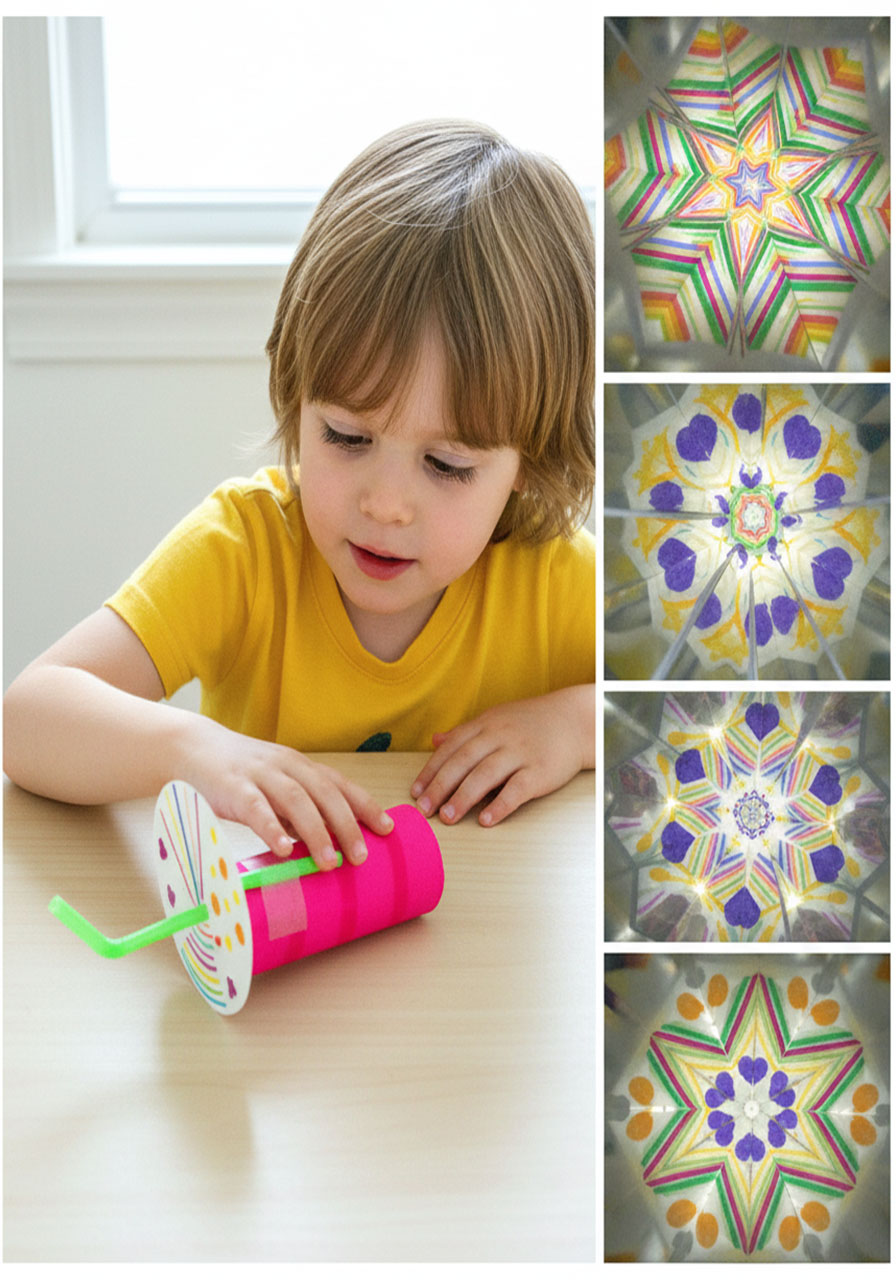
Get ready to turn a boring toilet paper roll into a mesmerizing optical illusion machine! This homemade kaleidoscope project is the perfect blend of art, science, and pure “whoa, that’s so cool!” moments. Your kids will be absolutely captivated by the symmetrical patterns they create – and they’ll actually learn about light and reflections without even realizing it.
I tried this with a group of first and second graders, and let me tell you, the room went silent the moment they looked through their kaleidoscopes. That never happens with 7-year-olds. Trust me, this craft is a guaranteed winner.
Best for: Kids ages 5-12, rainy day activities, classroom STEM projects, curious minds who love hands-on experiments
Time to Make: 30-45 minutes (plus drying time if you paint)
Learning Goals: Explore light, reflections, symmetry, and basic optics while having a blast!
What You’ll Need:
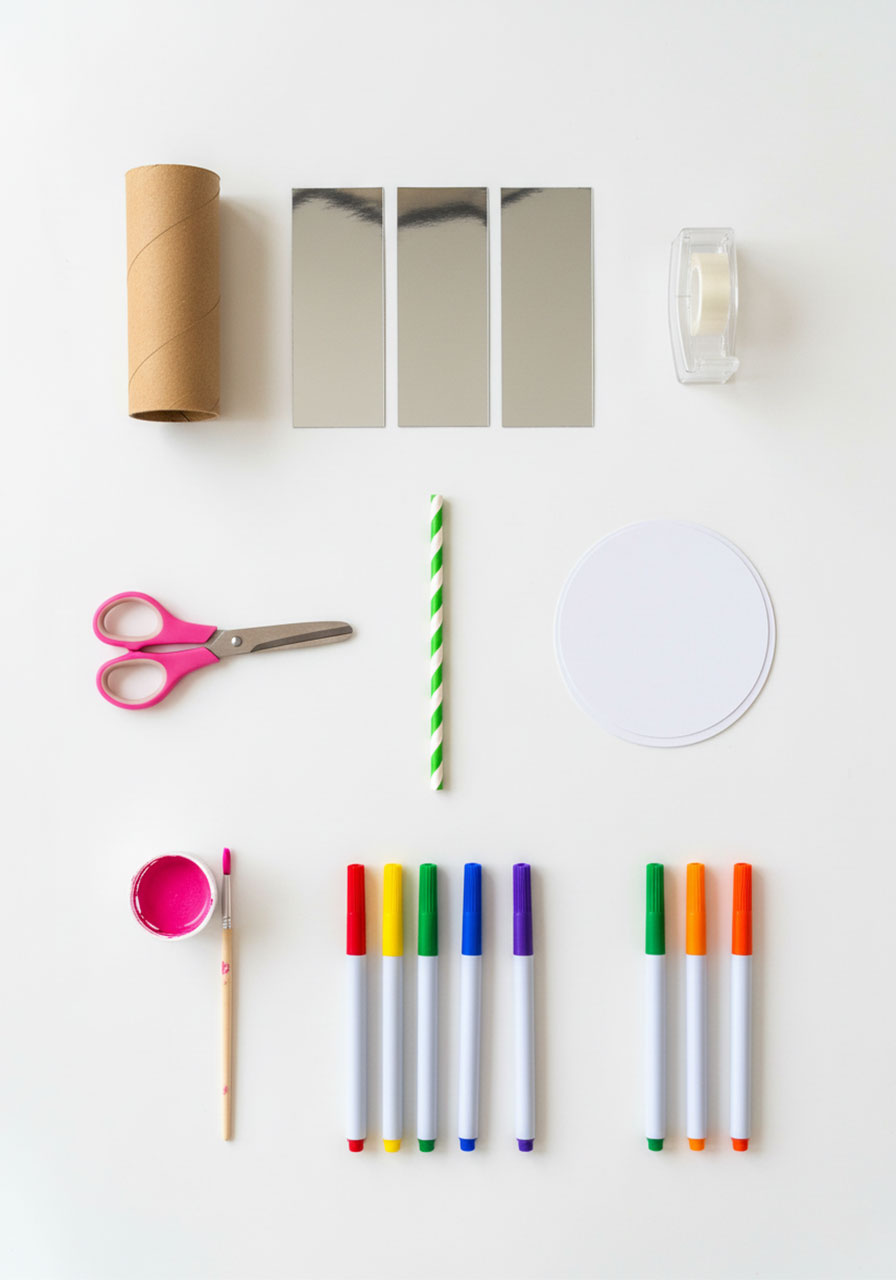
Empty toilet paper roll (or paper towel roll cut in half)
Mylar sheets or reflective mirror sheets
Scissors or paper cutter
Clear tape
White cardstock
1 bendy straw
Markers, stickers, crayons, or colored pencils for decorating
Optional: Tempera paint to jazz up your tube
Optional: Sharp pencil for poking holes
Pro Tip: Before you start cutting your precious mylar sheets, practice measuring and folding with regular cardstock first. You don’t want to waste that shiny goodness on a sizing mishap!


How to Make Your Kaleidoscope:
Step 1: Paint Your Tube (Optional but Fun!)
Want your kaleidoscope to look as cool on the outside as it does on the inside? Grab some tempera paint and go wild decorating your cardboard tube. Set it aside to dry completely while you work on the next steps.
Step 2: Cut Your Mylar into Three Equal Strips
Here’s where precision matters. You need three identical strips of mylar that will fit snugly inside your toilet paper tube without falling out.
For standard Cottonelle toilet paper tubes, cut your mylar strips to 9.7 cm x 3.5 cm. (Different brands might use slightly different tube sizes, so adjust if needed.)
Step 3: Tape Your Strips Together
Lay your three mylar strips side by side on a flat surface with the shiniest side facing down. Leave a tiny gap between each strip – just enough for the tape to bridge them. Use clear tape to connect all three strips along the gaps.

Step 4: Fold It into a Triangular Prism
Now for the fun part! Carefully fold your taped mylar strips into a triangular prism shape (think: a long, skinny triangle). The reflective sides should be facing inward. Tape along the final edge to hold your prism together.

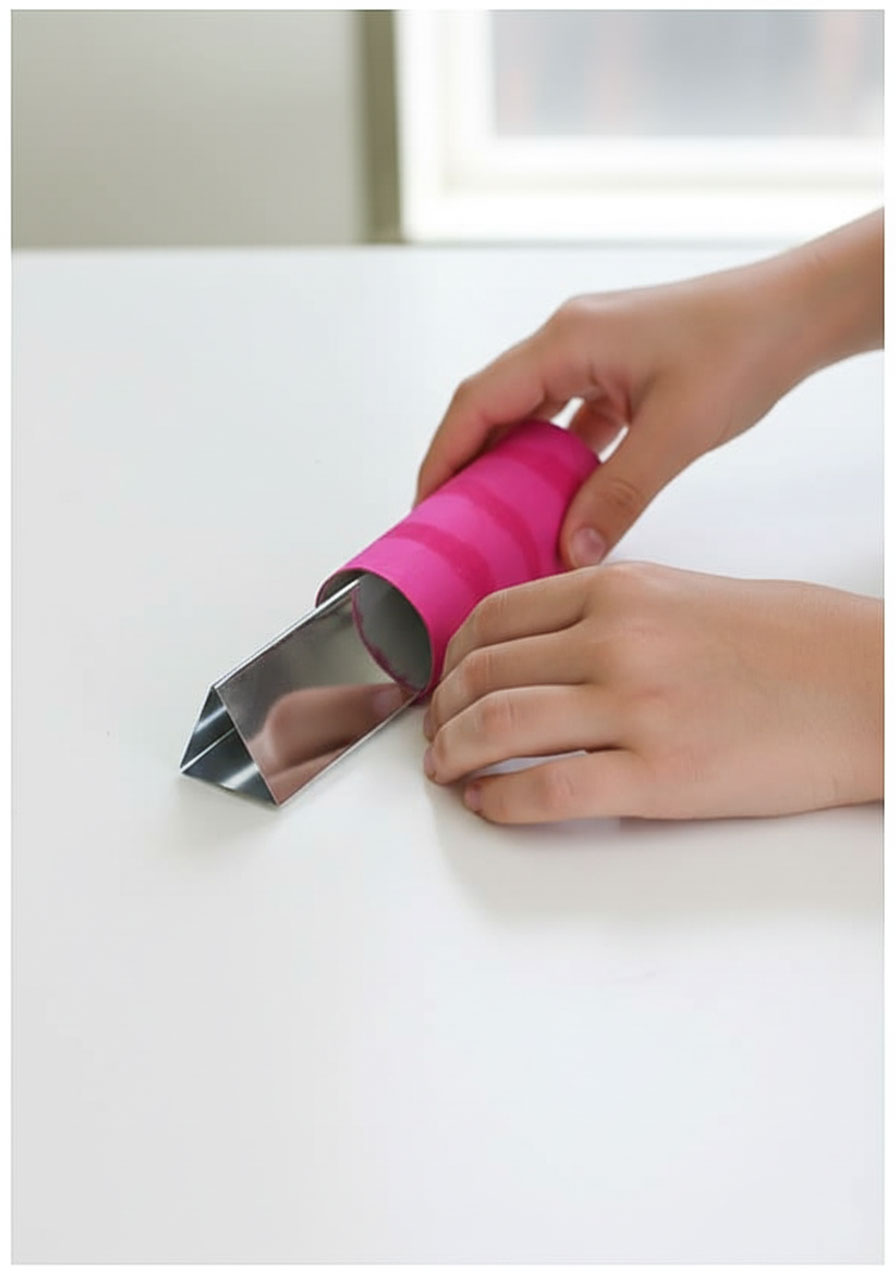
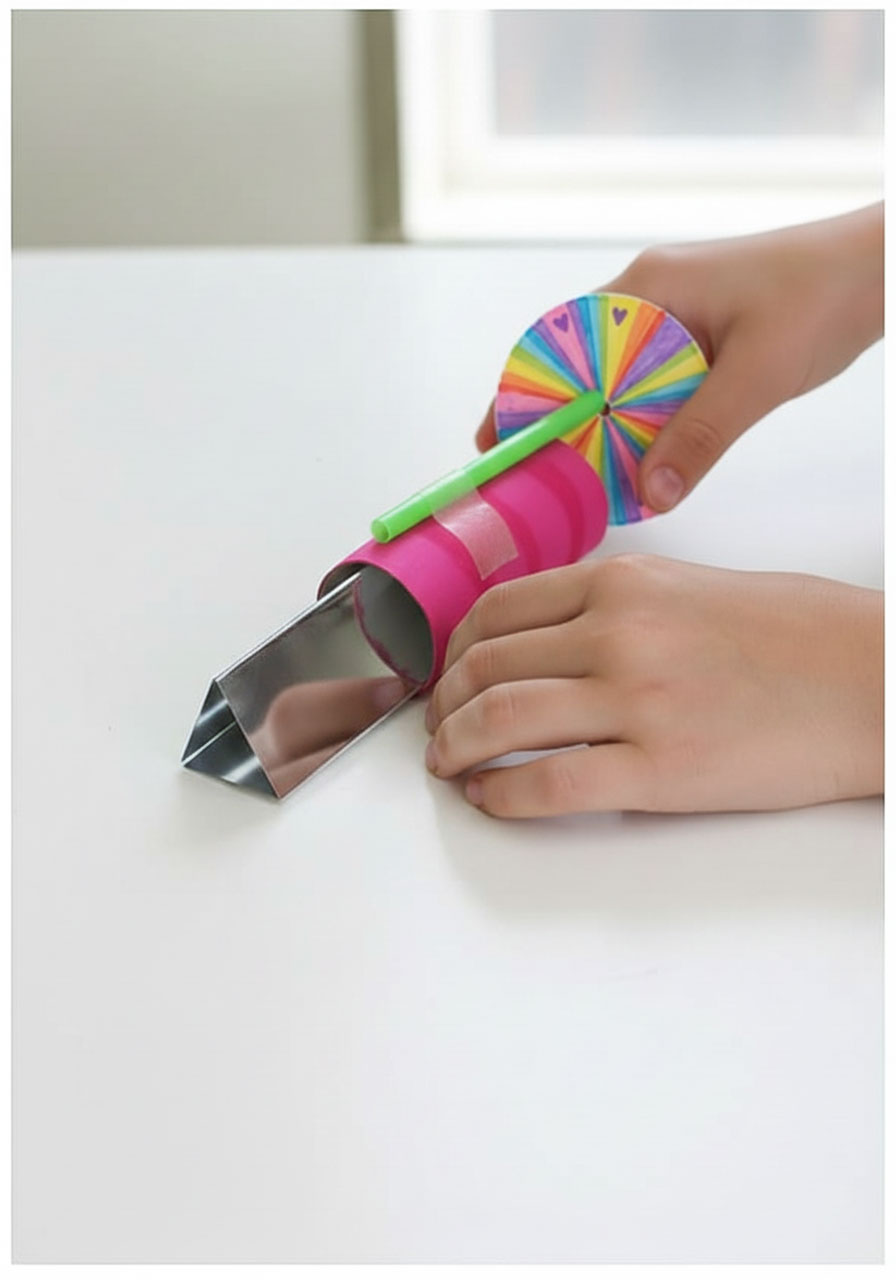
Step 5: Insert the Prism into Your Tube
Slide your shiny triangular prism into your cardboard tube. It should fit snugly and stay in place on its own. If it’s too loose, add a bit more tape. If it’s too tight, trim your mylar slightly.
Can’t get it to fit? No worries! Your kaleidoscope will still work perfectly if you skip the tube and just tape the straw directly onto the prism.
Step 6: Add Your Bendy Straw
Cut off just the bendy end of a flexible straw (about 2-3 inches). Tape it along the top edge of your cardboard tube with the flexible part hanging over the edge. This is what you’ll use to spin your designs!
Step 7: Create Your Spinning Design Circles
Cut out 3 circles from white cardstock, each measuring about 3.75 inches in diameter. (You can print out a circle template or trace a cup – whatever works!)
Use a sharp pencil to poke a hole right in the center of each circle. The hole needs to be big enough to fit over the bendy part of your straw.
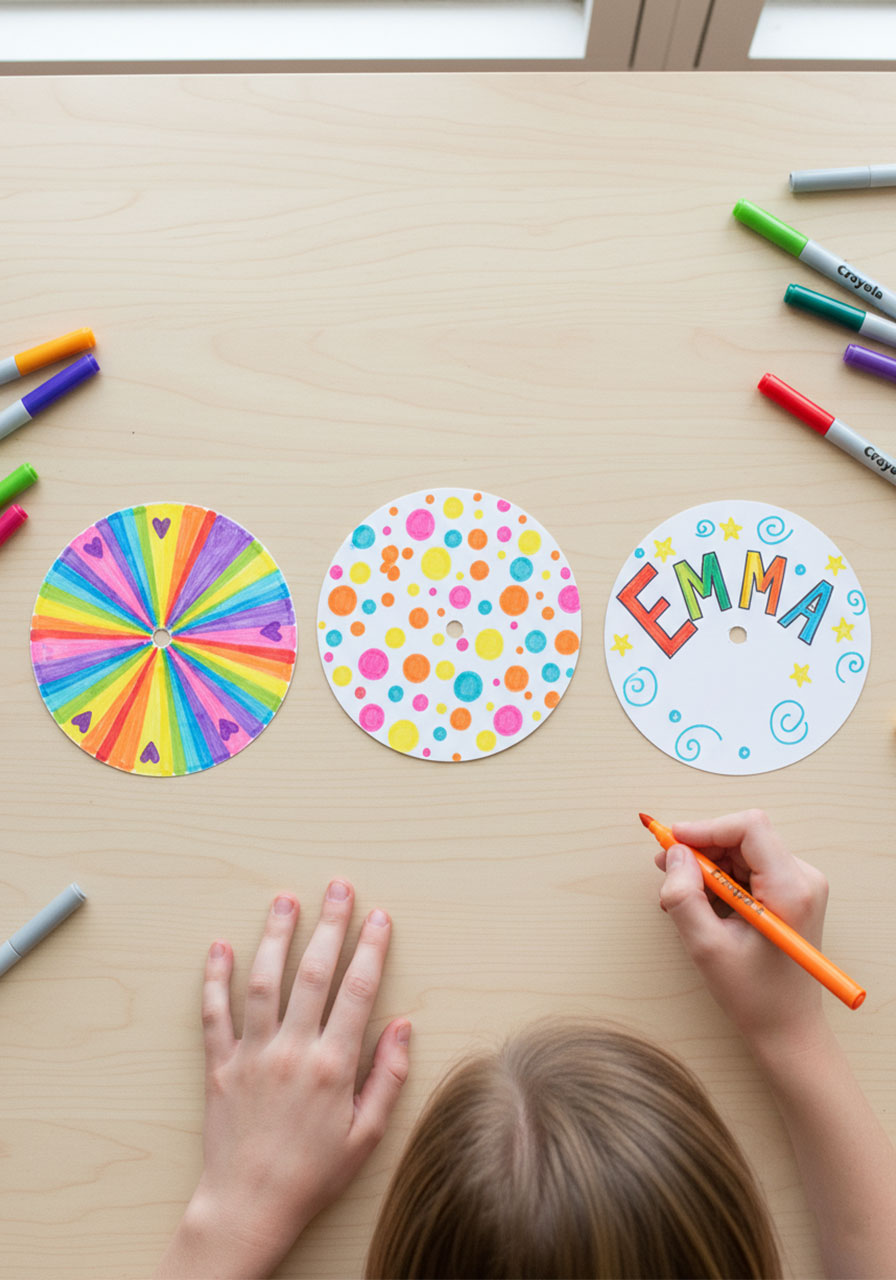
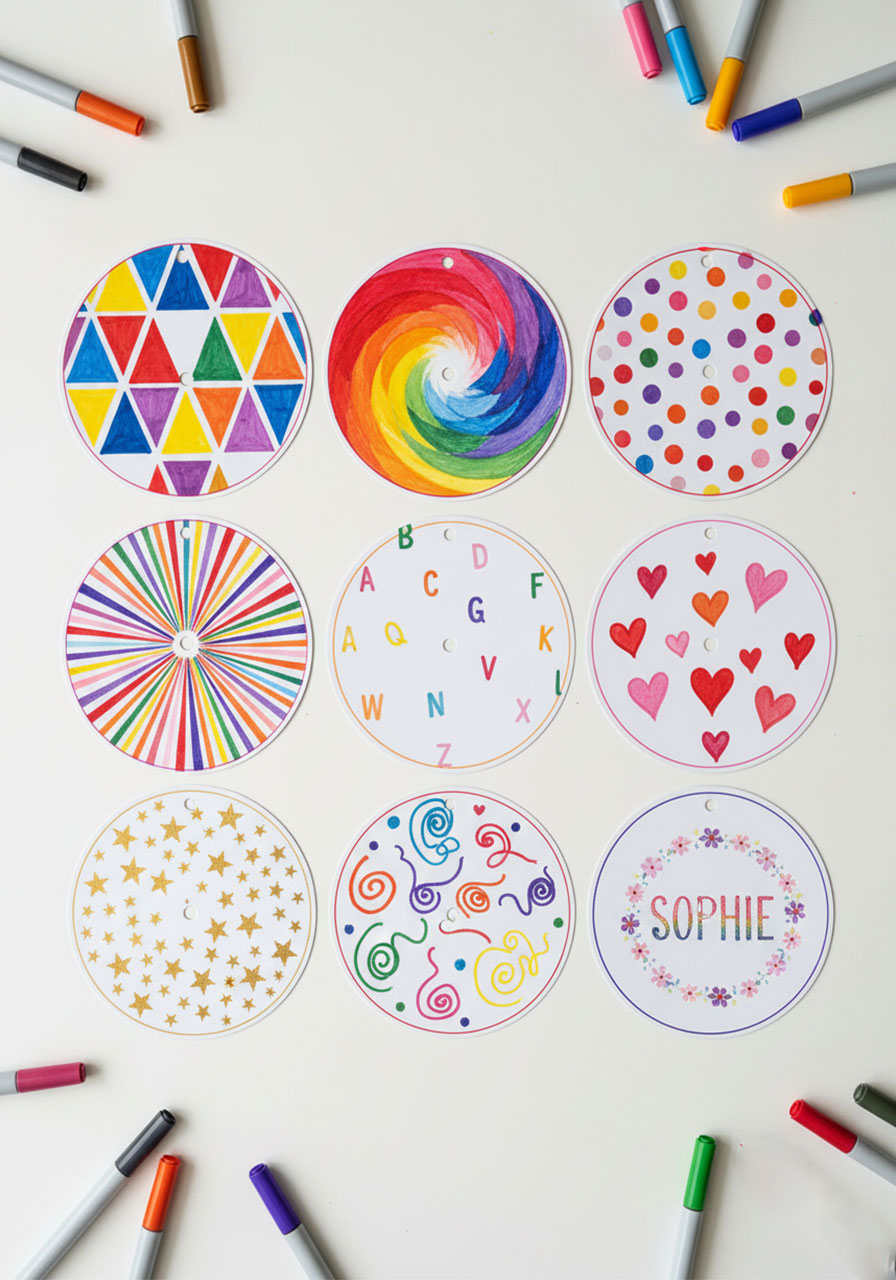
Step 8: Unleash Your Inner Artist
This is where the magic happens! Decorate each circle with different designs using markers, stickers, or crayons. Try these ideas:
Polka dots in rainbow colors (my personal favorite – they create insane starburst patterns!)
Stripes and zigzags for geometric awesomeness
Hearts, stars, and doodles for whimsical vibes
Your name written in a circle (it’ll look like alien code through the kaleidoscope)
Step 9: Attach Your Circle and Peek Inside!
Slide one of your decorated circles onto the straw with the design facing toward the kaleidoscope. The hole should fit over the flexible part so it spins easily.
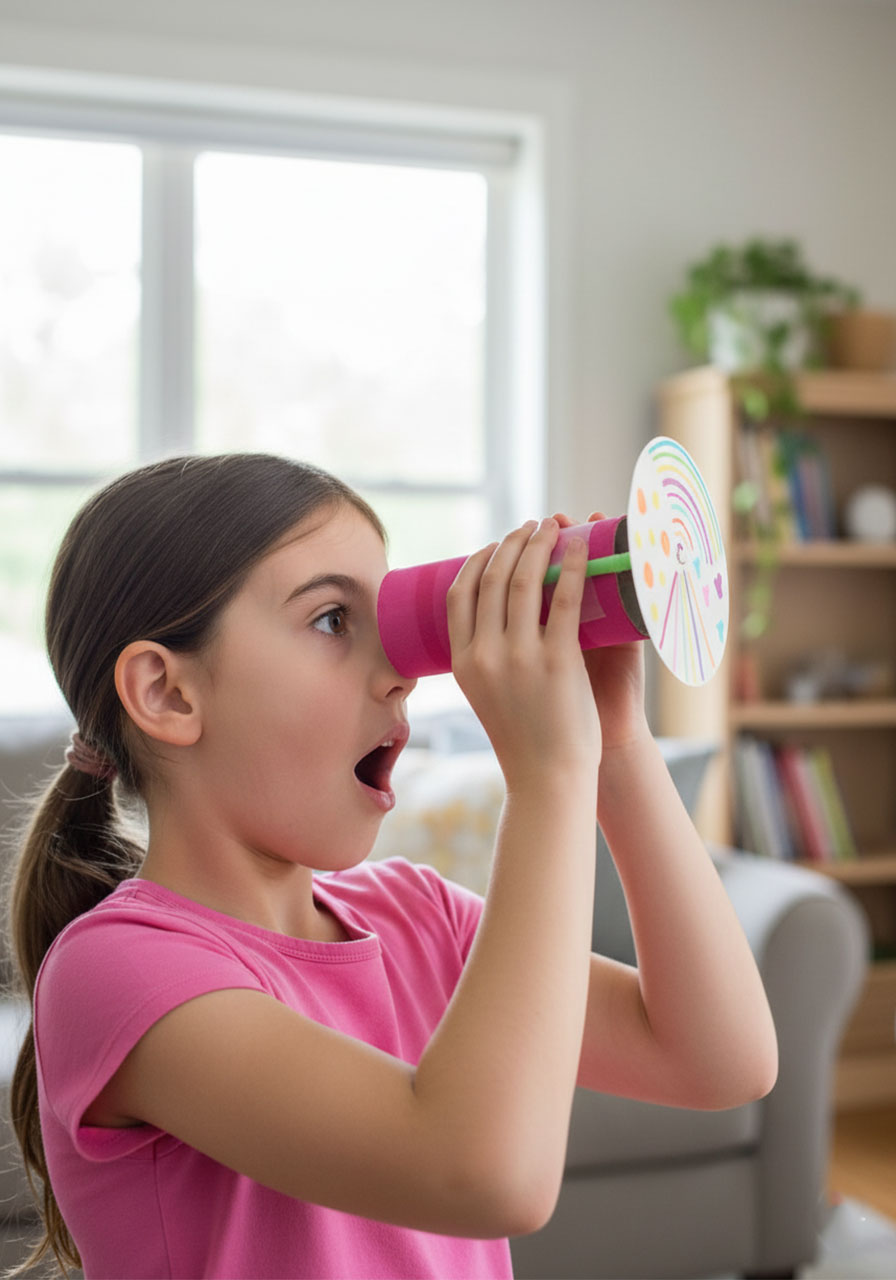
Now hold the kaleidoscope up to your eye, point it toward a light source, and slowly spin the straw. Prepare to have your mind blown.
Why This Works (The Cool Science Part):
The three mirrors inside your kaleidoscope reflect light back and forth, creating multiple copies of whatever design you’re looking at. Because they’re arranged in a triangle, you get those mesmerizing symmetrical patterns. The more you spin, the more the patterns shift and change. It’s like having a portable art show powered by physics!
Bonus Learning Moment: Try making circles with different designs and see which ones create the coolest patterns. Symmetrical designs? Random doodles? Letters? There’s no wrong answer – just endless eye candy.
Pro Tips to Level Up Your Kaleidoscope:
Make a whole set of design circles and store them in a ziplock bag. You can swap them out whenever you want a fresh view!
Try adding glitter or sequins to your circles for extra sparkle (just tape them down well)
Look at different objects through your kaleidoscope – fabric, leaves, even your friend’s shirt. Everything transforms!
Host a kaleidoscope design competition and see who can create the most mind-bending pattern
This DIY kaleidoscope isn’t just a craft – it’s a hands-on science experiment disguised as pure fun. Your kids will be so busy marveling at their reflections, they won’t even realize they’re learning about optics, symmetry, and light. And the best part? You made it from stuff you probably already have lying around the house.
So grab that empty toilet paper roll before it hits the recycling bin, and get ready to see the world through a whole new lens. Your mini scientists are going to love this one!
More Kid’s Party Ideas to Keep the Fun Rolling:
Paper Airplane Birthday Party Ideas That’ll Have Your Guests Soaring
Cornstarch & Dish Soap Bubble Dough: Easy DIY Sensory Fun!
25+ Hands-On Human Body STEM Activities Kids Will Love
The Soap and Pepper Experiment: A Mind-Blowing Way to Get Your Kids to Actually Use Soap
How to Make Stunning DIY Glue Suncatchers (So Easy, Kids Can Do It!)
16 Fun Games for Toddlers (Because You Need to Keep Them Busy)