
Spring is here, and you know what that means – it’s time to unleash your inner art teacher and let those tiny hands get gloriously messy!
If you’re ready to swap screen time for creative time and turn your kitchen table into an art studio, you’ve come to the right place.
We’re talking about process art – the kind of art where the magic happens in the doing, not the finished product.
No Pinterest-perfect crafts required. Just pure, joyful, mess-making creativity that’ll have your kids actually learning while they play.
Ready to dive into some seriously fun spring art projects? Let’s get those smocks on and those imaginations fired up!
What Exactly Is Process Art? (And Why Your Kids Need It)
Here’s the deal: process art is all about the journey, not the destination.
It’s the complete opposite of those cookie-cutter crafts where every bunny looks identical and you’re frantically cutting out templates at midnight.
With process art, there’s no “right” way to do it. Your child explores materials, experiments with colors, discovers textures, and creates whatever their imagination dreams up.
The result? Maybe it looks like abstract chaos to you, but to them, it’s a masterpiece – and more importantly, they learned something in the process.
What Process Art Is NOT: Those adorable toilet-paper-roll butterflies you see all over Pinterest. Those perfectly-stamped apple prints. Anything where the end product matters more than the experience. Those are crafts, and while they’re cute, they’re not what we’re after here.

Why Spring Is the Perfect Time for Process Art
Spring practically screams creativity! The flowers are blooming, the weather’s warming up, and everyone’s got that fresh-start energy. Plus, if you’re doing this outside, cleanup is a breeze – just hose down the patio and call it a day.
13 Spring Process Art Ideas Your Little Ones Will Love
Alright, let’s get to the good stuff! Here are our favorite spring-themed process art projects that are simple to set up and guaranteed to keep those little hands busy.
1. Glittery St. Patrick’s Day Process Painting

Get ready for some seriously sparkly fun! This one’s perfect for celebrating St. Patrick’s Day or just embracing all those gorgeous green hues of spring.
Best for: Toddlers and preschoolers (ages 2-5)
Time to Create: 20-30 minutes
Mess Level: High (but totally worth it!)
What You’ll Need:
Washable paint in blue, green, yellow, and white
Gold and silver glitter
Large paper or canvas
Paintbrushes or sponges
Smocks or old t-shirts
How to Create:
1. Set up your workspace with plenty of newspaper or a plastic tablecloth – this one gets sparkly!
2. Squeeze paint directly onto the paper in whatever colors your child chooses. No planning required!
3. Let your child spread the paint using brushes, fingers, sponges, or whatever tool they prefer.
4. Sprinkle glitter over the wet paint and watch their eyes light up as it sticks.
5. Add more layers if desired – swirls, dots, lines, whatever feels right!
6. Let it dry completely before displaying their shimmery masterpiece.
Pro Tip: Do this project outside or on a large tray to contain the glitter chaos. Trust me, future-you will be grateful!
2. Worm Painting (Yes, Really!)
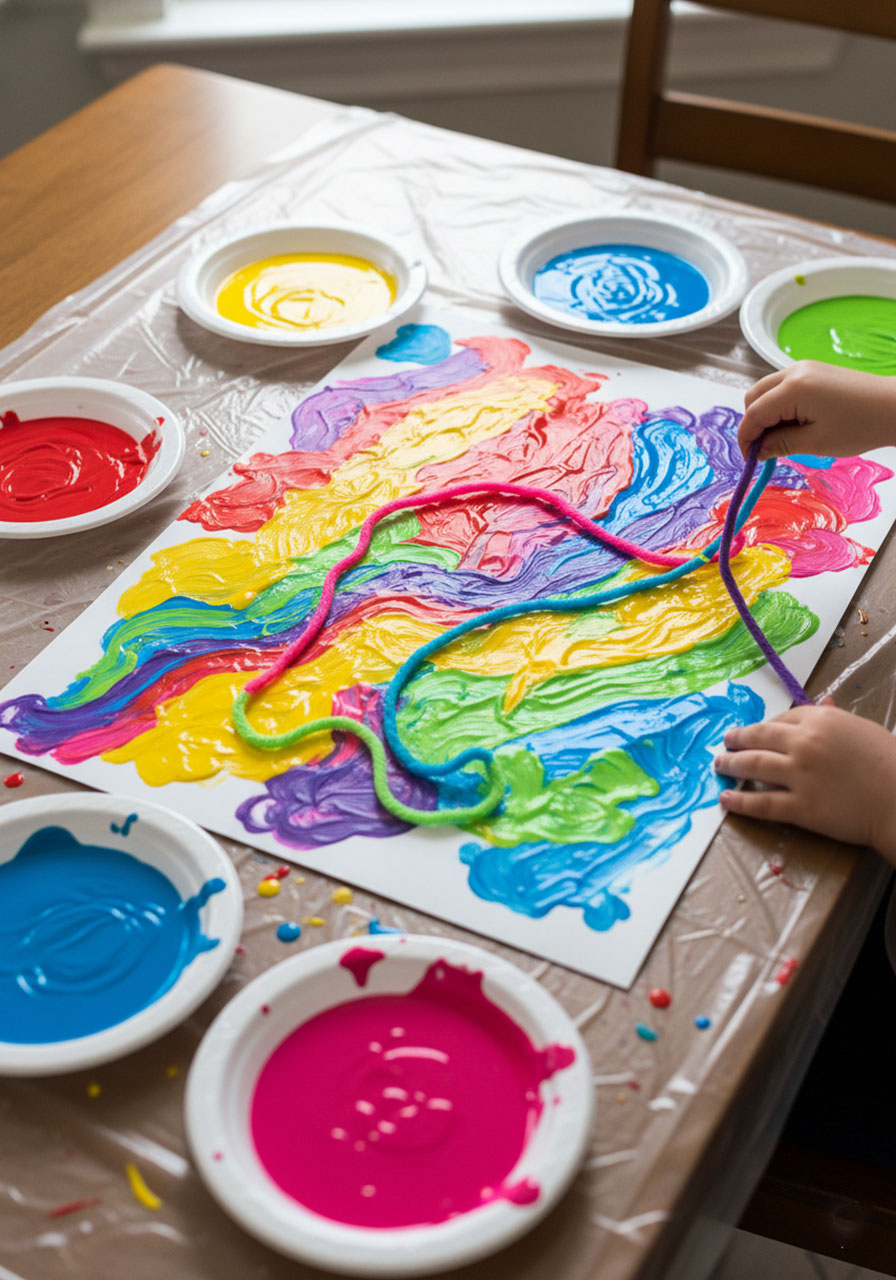
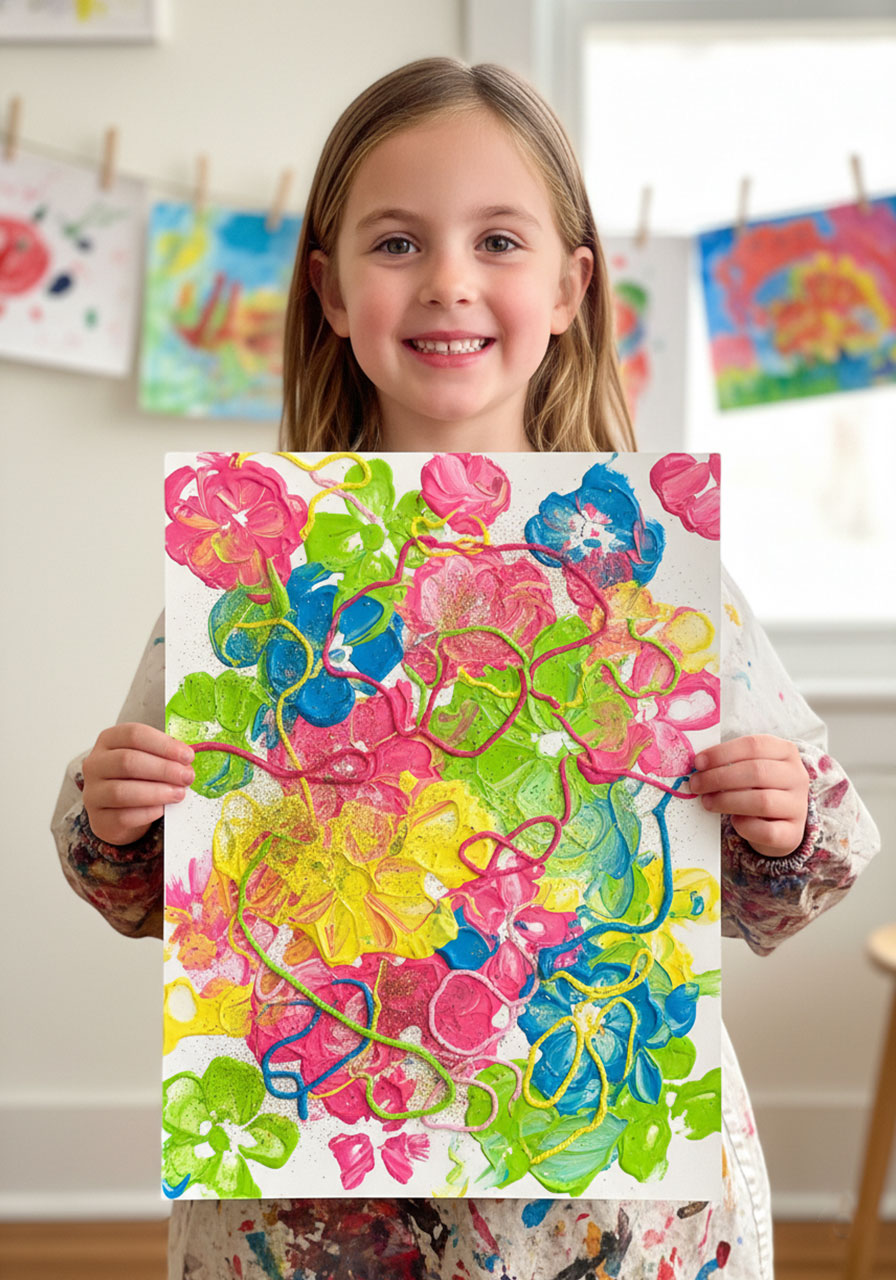
This one’s a crowd-pleaser because it’s equal parts silly and stunning. Kids drag yarn “worms” through paint to create wild, unpredictable patterns.
Best for: Ages 2-6
Time to Create: 15-20 minutes
Mess Level: Medium
What You’ll Need:
Thick yarn or string cut into 12-18 inch pieces
Washable paint in spring colors
White paper
Shallow dishes or plates for paint
How to Create:
1. Pour paint into shallow dishes – one color per dish works great.
2. Dip the yarn “worm” into the paint until it’s well-saturated.
3. Drag, wiggle, and swirl the yarn across the paper to make squiggly designs.
4. Try different movements – fast zigzags, slow spirals, or wild whips across the page.
5. Switch colors and repeat until your child’s satisfied with their wormy creation.
Fun Variation: Use multiple yarn pieces at once and let your child hold several “worms” to create layered patterns!
3. Flower Printing with Real Flowers

Nature meets art in this gorgeous activity! Your kids will love exploring how different flowers create different prints.
Best for: Ages 3-7
Time to Create: 20-30 minutes
Mess Level: Low to Medium
What You’ll Need:
Fresh flowers (daisies, carnations, and flowers with distinct petal shapes work best)
Washable paint or ink pads
White or colored paper
Small dishes for paint (if using paint)
How to Create:
1. Go on a flower hunt! Let your child pick flowers from your garden or yard.
2. Dip the flower face into paint or press it onto an ink pad.
3. Stamp it onto the paper and see what pattern it makes.
4. Experiment with different flowers, colors, and arrangements to create a spring garden on paper.
5. Try printing with different parts – petals, stems, even leaves.
Pro Tip: This is the perfect activity to pair with a nature walk. Collect flowers on your walk, then come home to create!
4. Cork Fireworks Painting

These bursts of color look just like fireworks exploding across the page – perfect for celebrating spring!
Best for: Ages 2-5
Time to Create: 15-25 minutes
Mess Level: Medium
What You’ll Need:
Wine corks (or bottle corks)
Washable paint in bright spring colors
Paper
Shallow dishes for paint
How to Create:
1. Pour paint into dishes – one color per dish.
2. Dip the flat end of the cork into the paint.
3. Press and twist the cork onto the paper to create a burst pattern.
4. Layer different colors on top of each other for an explosion effect.
5. Fill the entire page with colorful “fireworks”!
Fun Variation: Add some splatters by flicking paint from a brush for extra pizzazz!
5. Yarn Painting Adventure
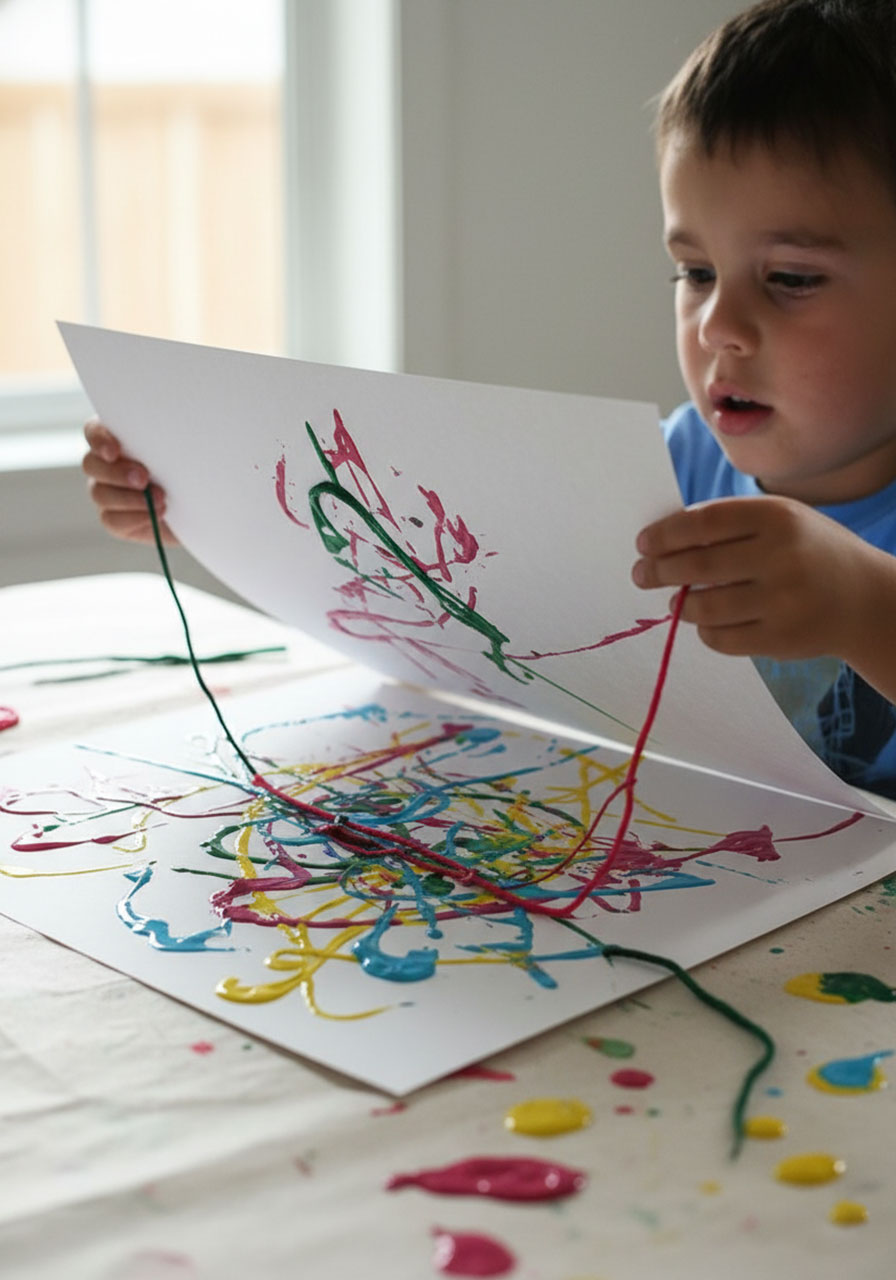
Similar to worm painting but with a twist – this time, kids drag multiple pieces of yarn to create wild, abstract designs.
Best for: Ages 3-6
Time to Create: 20-30 minutes
Mess Level: High (but so fun!)
What You’ll Need:
Multiple colors of thick yarn
Washable paint in various colors
Large paper
Shallow containers for paint
How to Create:
1. Cut yarn into 12-20 inch pieces – you’ll need several.
2. Dip each piece into a different color of paint until saturated.
3. Lay the painted yarn on the paper in swirls, lines, or random patterns.
4. Place another piece of paper on top and press down.
5. Pull the yarn out while pressing – when you lift the top paper, you’ll reveal a symmetrical surprise!
6. Or skip the pressing and just drag yarn across a single sheet for wild abstract art.
Pro Tip: Let your child choose whether they want the surprise reveal or the dragging method – both are equally awesome!
6. Solar Printing Magic

This one’s pure magic. Kids arrange objects on special paper, leave it in the sun, and watch as nature creates art!
Best for: Ages 4-10
Time to Create: 5-10 minutes of setup, then sun does the work!
Mess Level: None (yes, really!)
What You’ll Need:
Sun-sensitive paper (available at craft stores or online)
Spring objects: flowers, leaves, butterfly cutouts, feathers, shells
A sunny day
A tray or board to carry items
How to Create:
1. Gather your spring treasures – flowers, leaves, interesting shapes.
2. Arrange them on the sun-sensitive paper in whatever design your child creates.
3. Place the paper in direct sunlight for the time specified (usually 1-5 minutes).
4. Remove the objects and watch the magic – the covered areas stay light while exposed areas darken!
5. Rinse the paper in water to “fix” the image permanently.
Pro Tip: This is perfect for teaching kids about sun exposure and UV rays in a hands-on way!
7. Feather Painting Frenzy
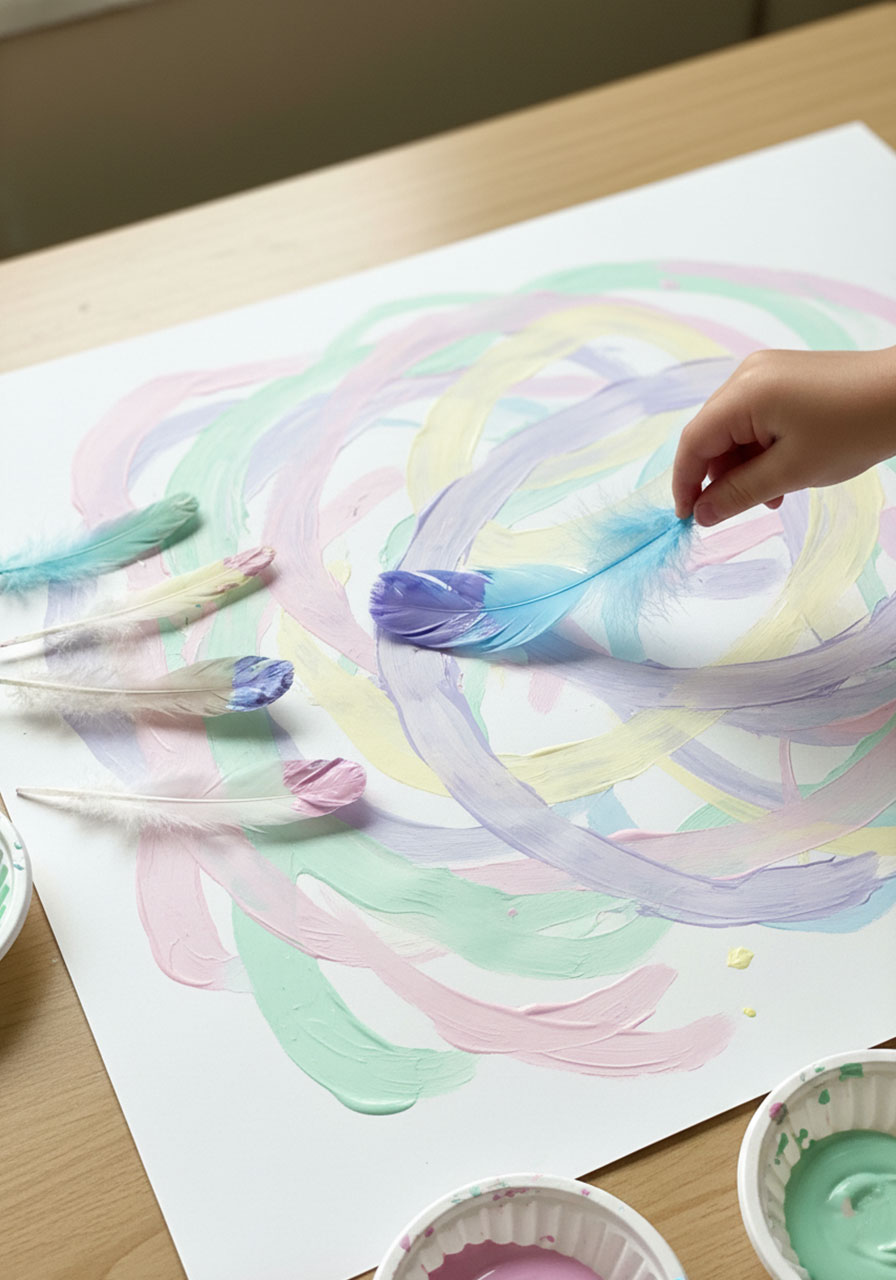
Feathers create the most gorgeous textures and patterns – plus, they’re a total sensory experience!
Best for: Ages 2-6
Time to Create: 15-25 minutes
Mess Level: Medium
What You’ll Need:
Feathers (craft feathers work great, or find some outside!)
Washable paint in spring colors
Paper
Small containers for paint
How to Create:
1. Give your child several feathers in different sizes.
2. Dip the feathers in paint – experiment with how much paint to use.
3. Brush, sweep, tickle, and swirl the feathers across the paper.
4. Try different techniques – light strokes for wispy effects, heavy pressure for bold marks.
5. Layer colors and watch how they blend and interact.
Fun Variation: Try using the feathers on dark paper with light-colored paint for a dramatic contrast!
8. Butterfly Wing Symmetry Art
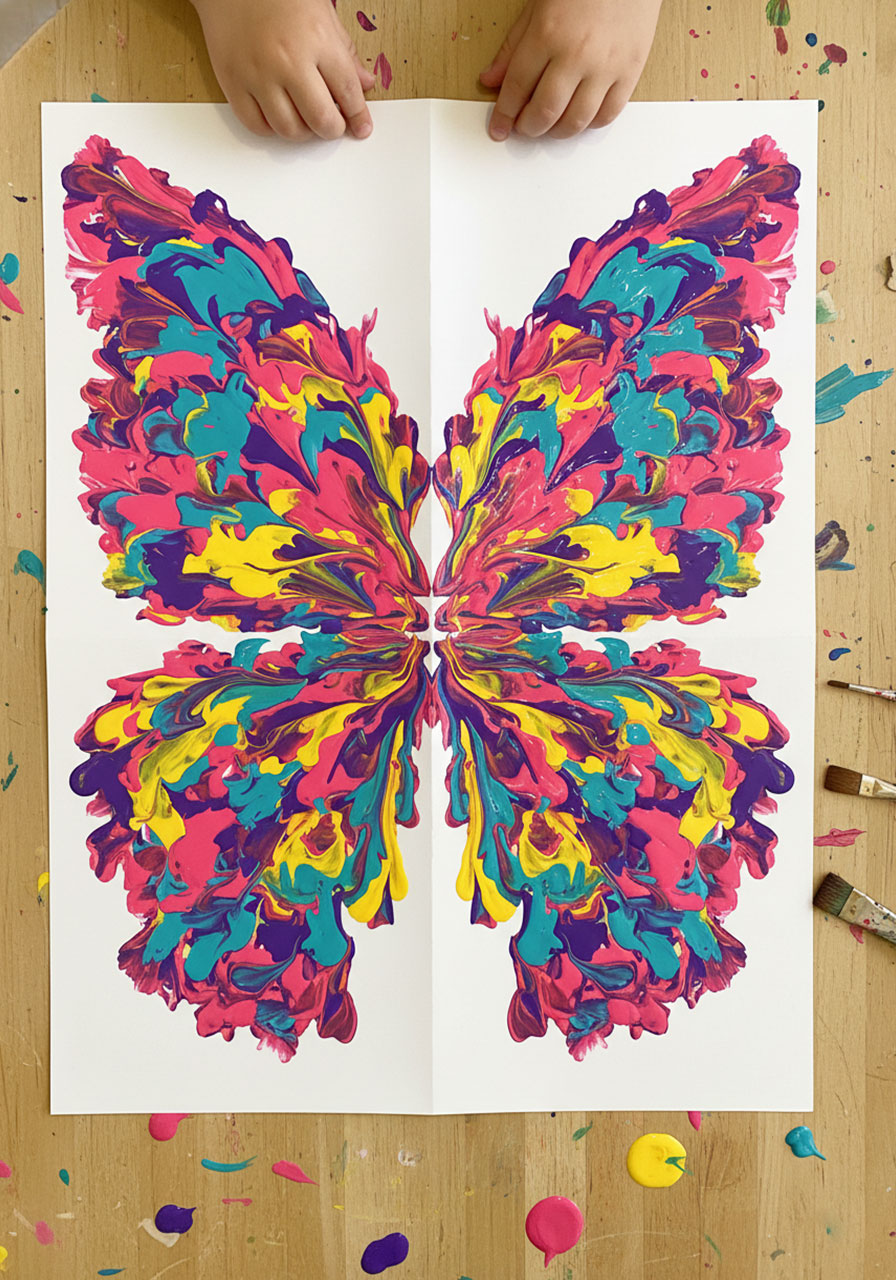
This project sneaks in a mini science lesson about symmetry while creating gorgeous butterfly-inspired art.
Best for: Ages 3-7
Time to Create: 20-30 minutes
Mess Level: Medium
What You’ll Need:
White or colored paper
Washable paint
Paintbrushes or droppers
Optional: Butterfly outline template
How to Create:
1. Fold the paper in half to create a crease down the middle.
2. Open it back up so your child can see both “wings.”
3. Apply paint to ONE side only – dots, lines, swirls, whatever they want!
4. Fold the paper in half again while the paint is still wet.
5. Press and rub gently to transfer the paint.
6. Open it up to reveal the symmetrical “butterfly wings”!
7. Optional: Add a body and antennae once dry.
Pro Tip: Use this as a teachable moment about how real butterflies have symmetrical wings – art and science in one!
9. Nature Egg Suncatcher Art

Perfect for Easter or just celebrating spring, this project lets kids create colorful displays that catch the light beautifully.
Best for: Ages 4-8
Time to Create: 30-45 minutes (plus drying time)
Mess Level: Low
What You’ll Need:
Contact paper or clear adhesive paper
Tissue paper in spring colors
Natural items: flower petals, small leaves, etc.
Scissors
String for hanging (optional)
How to Create:
1. Cut contact paper into egg shapes – you’ll need two identical pieces per suncatcher.
2. Peel the backing off one piece and place it sticky-side-up.
3. Let your child arrange torn tissue paper pieces and natural items on the sticky surface.
4. Press the second piece of contact paper on top to seal everything inside.
5. Trim the edges if needed to make them even.
6. Hang in a sunny window and watch the colors glow!
Pro Tip: This is a fantastic quiet activity for when you need 20 minutes of peace!
10. Citrus Printing Party
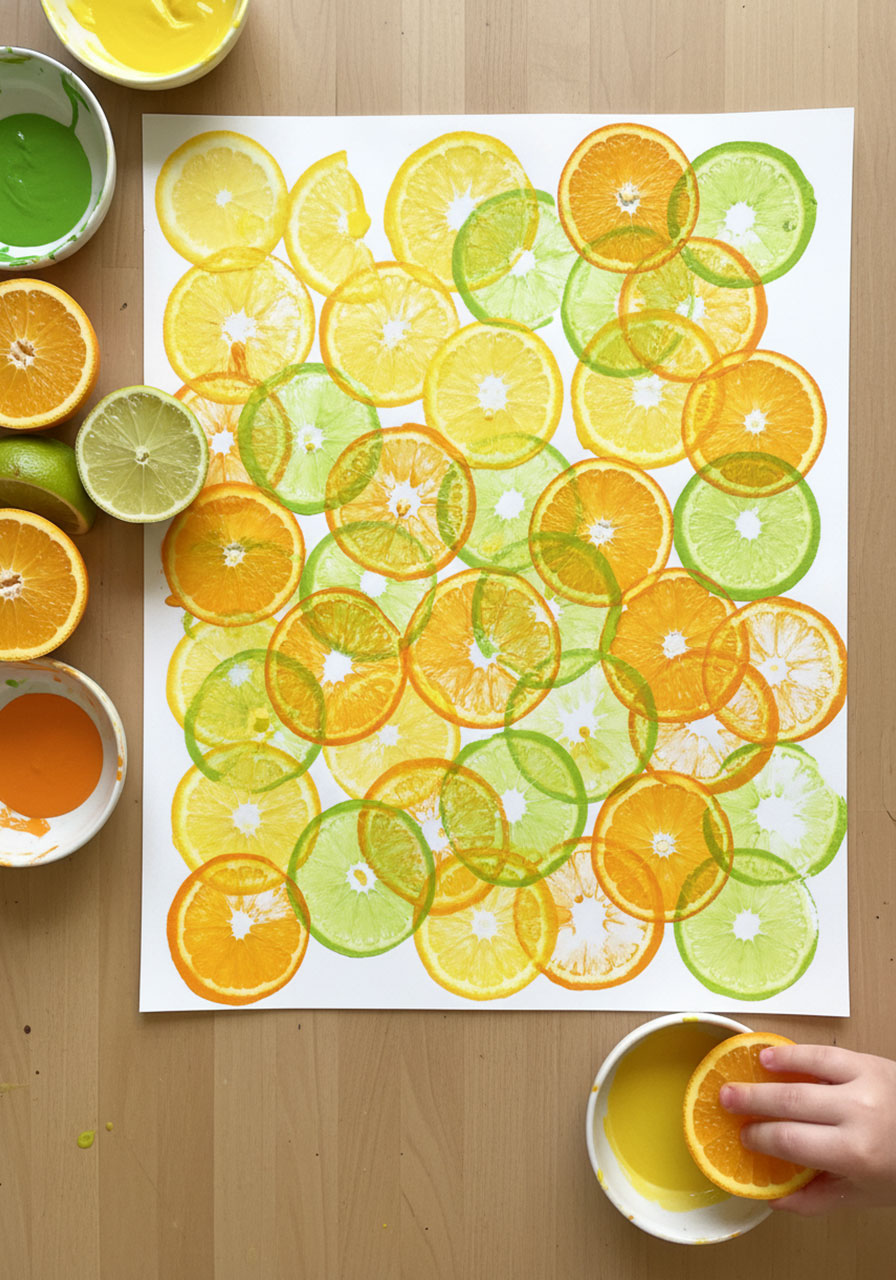
Turn ordinary lemons and oranges into extraordinary art stamps! Plus, the smell is amazing.
Best for: Ages 2-6
Time to Create: 15-25 minutes
Mess Level: Medium
What You’ll Need:
Citrus fruits (lemons, limes, oranges) cut in half
Washable paint or ink pads
Paper
Shallow dishes for paint
How to Create:
1. Cut your citrus fruits in half – let your child see the cool patterns inside!
2. Dip the cut side into paint or press onto an ink pad.
3. Stamp onto the paper to reveal the beautiful natural pattern.
4. Try different citrus fruits and notice how the patterns differ.
5. Create patterns, overlap prints, or just cover the whole page with colorful citrus designs.
Fun Variation: Try cutting the fruit into different shapes (wedges create different patterns than halves)!
11. Easter Egg Rolling Painting

This one’s basically controlled chaos – and kids absolutely love it! Perfect for using up those plastic Easter eggs.
Best for: Ages 2-6
Time to Create: 15-20 minutes
Mess Level: Medium to High
What You’ll Need:
Plastic Easter eggs or small balls
Washable paint
A box lid or shallow box
Paper that fits in the box
Spoons for scooping
How to Create:
1. Place paper in the bottom of the box.
2. Put small dollops of paint onto the paper – 2-3 colors work great.
3. Place the plastic egg or ball in the box.
4. Let your child tilt, shake, and roll the box to make the egg roll through the paint.
5. Watch as wild tracks and swirls appear across the paper!
6. Add more paint or more eggs for additional layers.
Pro Tip: This is excellent for working those gross motor skills while creating art – bonus learning!
12. Broccoli Tree Stamping
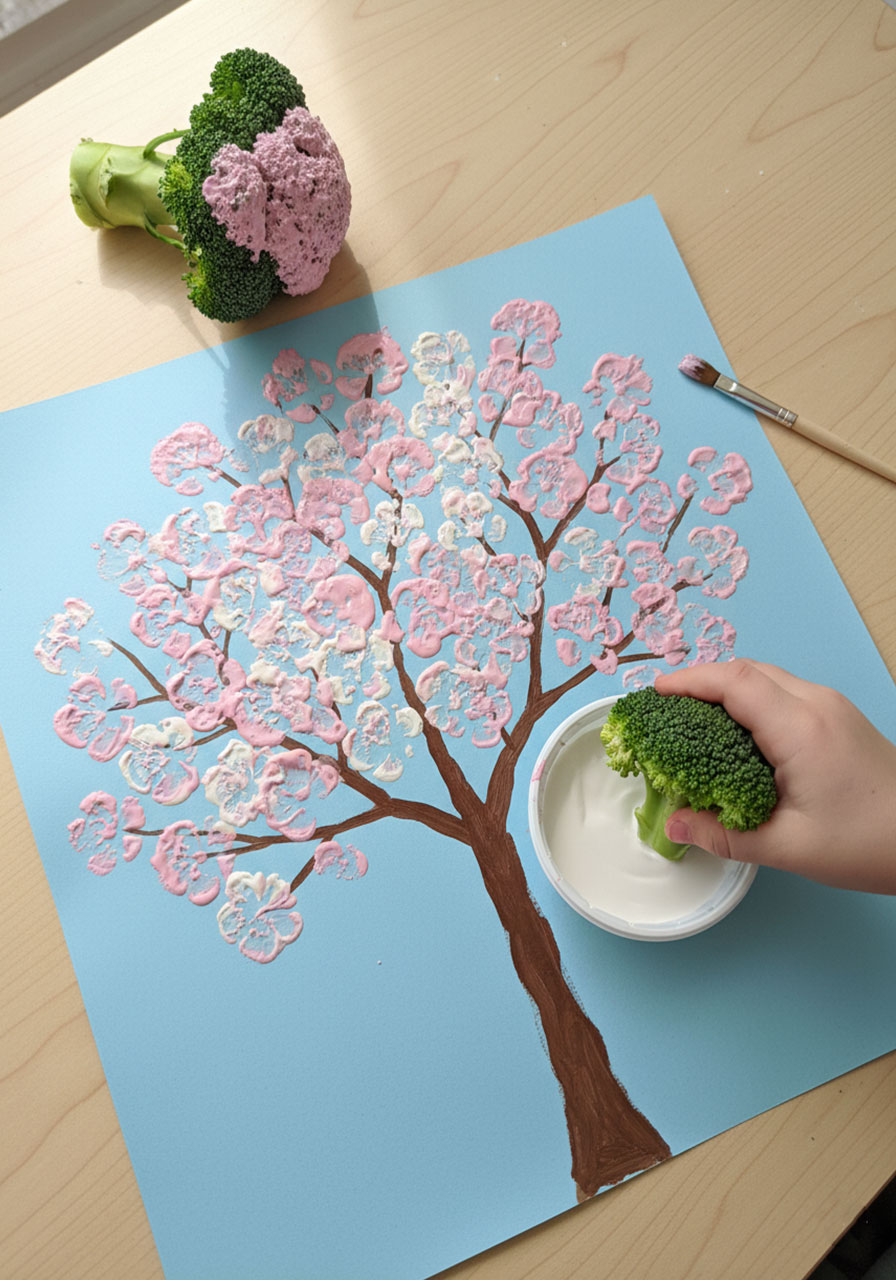
Who knew broccoli could create such gorgeous spring trees? This veggie-stamping technique is a total game-changer.
Best for: Ages 2-6
Time to Create: 15-25 minutes
Mess Level: Medium
What You’ll Need:
Fresh broccoli crowns
Washable paint (pink, white, green for blossoms; brown for tree trunks)
Paper (light blue background is perfect!)
Paintbrush
Shallow dishes for paint
How to Create:
1. Paint a simple brown tree trunk and branches on your paper using a brush – or let your child do this part!
2. Dip the broccoli crown into pink or white paint (these are your blossoms).
3. Stamp the broccoli onto the branches to create a beautiful flowering tree.
4. Add as many blossoms as you want – the more, the better!
5. Try different colors for different spring tree effects.
Fun Variation: Use green paint and stamp broccoli all over to create a grassy meadow effect!
13. Crumpled Paper Texture Art

This one’s inspired by children’s book illustrations, and it creates the most interesting textures and layers.
Best for: Ages 3-8
Time to Create: 30-45 minutes
Mess Level: Medium
What You’ll Need:
White tissue paper or thin paper
Liquid watercolors or diluted paint
Glue stick
Heavier paper or cardboard for base
Spray bottle with water (optional)
How to Create:
1. Crumple the tissue paper into a tight ball, then unfold it – the wrinkles are what create the texture!
2. Paint or color the crumpled paper with watercolors or diluted paint.
3. Let it dry completely.
4. Tear or cut the painted paper into shapes – clouds, flowers, animals, whatever your child imagines.
5. Glue the textured pieces onto a background to create a layered composition.
6. Add more layers for depth and interest.
Pro Tip: This technique is used in so many beautiful children’s books – show your child some examples for inspiration!
Quick Tips for Successful Process Art Sessions
Want to make your art time as stress-free as possible? Here’s how we set ourselves up for success:
Set Up for Success:
Cover your work surface with newspaper, a plastic tablecloth, or take it outside. Put kids in smocks or clothes you don’t care about. Have wet wipes nearby for quick cleanups.
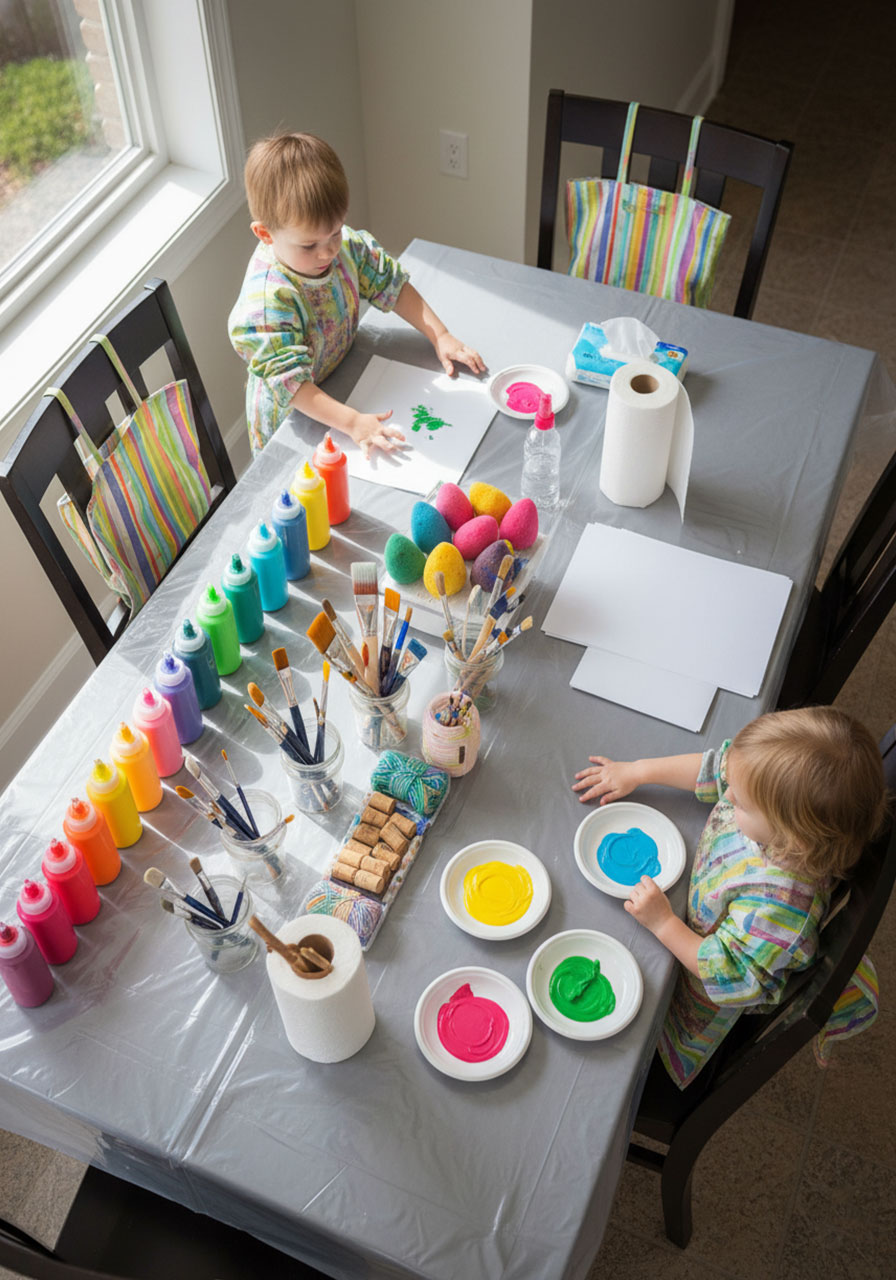
Less Is More: Don’t overwhelm kids with too many choices. Start with 2-3 colors and one or two tools. You can always add more as they explore.
Let Go of the Outcome: Repeat this mantra: “It’s about the process, not the product.” Your child’s scribbles and splatters are exactly what they should be doing.
Ask Open-Ended Questions: Instead of “What is it?” try “Tell me about what you made” or “What was your favorite part?” This keeps the focus on their experience, not your interpretation.
Display Their Work: Even if it looks like abstract chaos to you, hang it up! Kids beam with pride when they see their creations displayed.
Our Favorite Spring Process Art Supplies
Want to stock up on quality supplies that won’t break the bank? Here are our go-to recommendations:
Washable Paint: Look for non-toxic, easy-cleanup options. Crayola and Colorations both make great washable paints.
Natural Art Tools: Honeysticks makes amazing beeswax crayons that are perfect for little hands. Veggie Baby offers plant-based art supplies that are safe even for the youngest artists.
Paper: Buy in bulk! Large rolls of butcher paper or newsprint are way more economical than individual sheets.
Smocks: Invest in a few good quality smocks with sleeves. Your laundry routine will thank you.
Ready to Get Creating?
Spring is bursting with creative possibilities, and these process art projects are your ticket to hours of mess-making, imagination-building fun.
Remember, the goal isn’t a perfect product you can frame – it’s watching your child explore, experiment, and express themselves through art.
So grab those supplies, embrace the mess, and watch your little artist bloom this spring!
Whether you try one project or all thirteen, you’re giving your child something way more valuable than a craft: you’re giving them the freedom to create, explore, and discover their own artistic voice.
Now it’s your turn! Which project are you most excited to try first? Drop a comment below and let us know – we love hearing which activities become instant favorites in your home!
More Kid’s Party Ideas to Keep the Fun Rolling:
13 Safari Fine Motor Activities That’ll Make Your Kids Go Wild!
Pass the Ice Cream: The Ultimate Sharing Game for Preschoolers
How to Make a Stunning Leaf Butterfly Craft – Easy Nature Art for Kids
10 Epic DIY Cardboard Carnival Games That’ll Make You the Hero of Any Party
Build a Name STEM Activity: The Perfect First-Week Icebreaker That Combines Literacy and Creativity
Unwrap the Alphabet: A Sneaky-Smart Fine Motor Game for Little Learners
LEGO Bridge Building Challenge: The Ultimate STEM Party Game for Kids!
Post-It Math Party: Turn Addition Practice Into an Active Game Your Kids Will Actually Beg to Play
