
Ready to blow your kids’ minds with the simplest science experiment ever? This rainbow experiment is pure magic – and it only takes three supplies you already have in your house. We’re talking paper towels, washable markers, and water. That’s it!
Whether you’re a parent looking for a rainy-day activity or a teacher planning a crowd-pleasing science lesson, this grow-a-rainbow experiment is your new secret weapon. Kids get to watch colors literally travel up a paper towel and meet in the middle to create a stunning rainbow bridge. It’s the kind of activity that has kids glued to the table, asking “How is that happening?!”
The Quick Facts
Best For: Kids ages 3-10, classrooms, rainy days, science fairs, keeping siblings entertained
Time to Set Up: 2 minutes (seriously)
Time to Watch the Magic: 10-15 minutes
Mess Factor: Low (but keep those markers washable!)
Adult Supervision: Minimal – just help the littlest ones with cutting

What You’ll Need

Grab these simple supplies and you’re good to go:
Paper towels – The more absorbent, the better (we love Bounty for this one)
Washable markers – This is KEY. Regular markers won’t work, and permanent markers are a hard no
Water – Plain tap water is perfect
2 small glasses or cups – Anything that can hold water
Scissors (optional) – Only if you need to trim your paper towel
Pro Tip: Check that your markers say “washable” on the package. Not all Crayola markers are washable, and you need the water-based kind for this experiment to work its magic!
How to Grow Your Rainbow (Step-by-Step)
Step 1: Prep Your Paper Towel
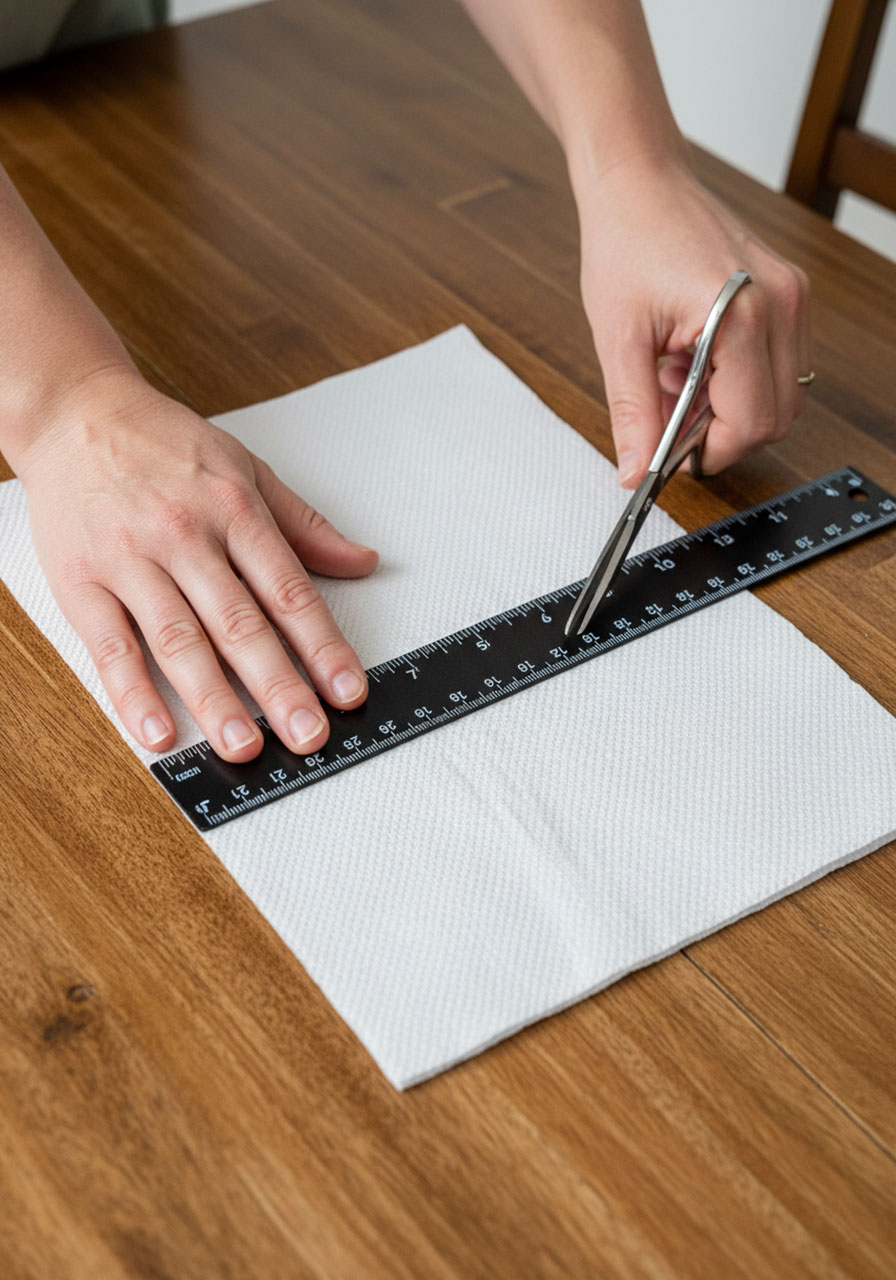
Fold one sheet of paper towel in half so you have two layers stacked together. Now trim it down to about 7.5 inches long.
Why this matters: The shorter your paper towel, the faster your rainbow will connect. Any longer than 8 inches and the colors might not make it all the way to the middle. Trust us on this one!
Step 2: Color Your Ends
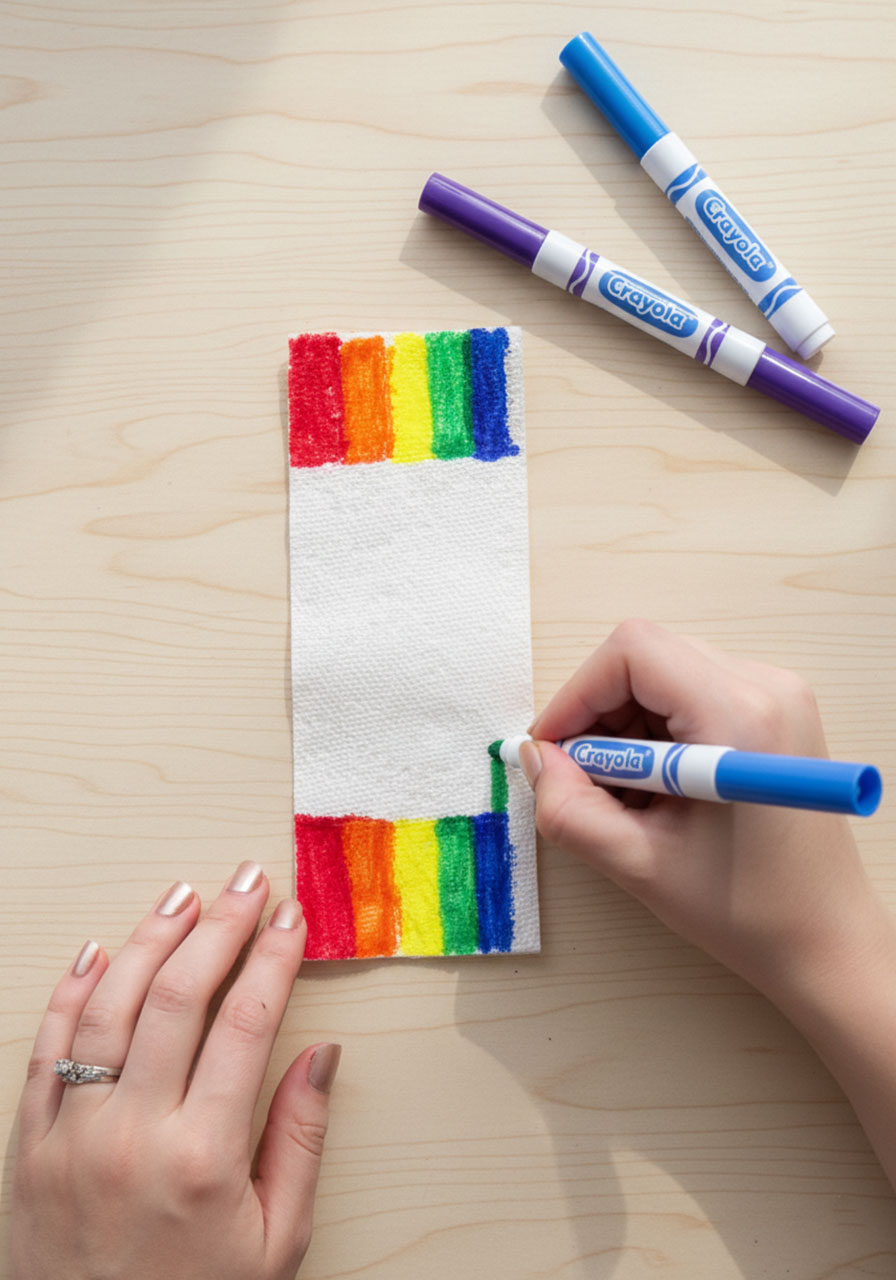
Here’s where the fun starts. Draw thick rectangles of rainbow colors on each end of your paper towel. Go in rainbow order if you want the full effect: red, orange, yellow, green, blue, purple.
The secret: You need to really saturate those ends with color. We’re talking thick, bold stripes – not wimpy little lines. The more marker you add, the more vibrant your rainbow will be as the colors travel upward.
Step 3: Set Up Your Cups
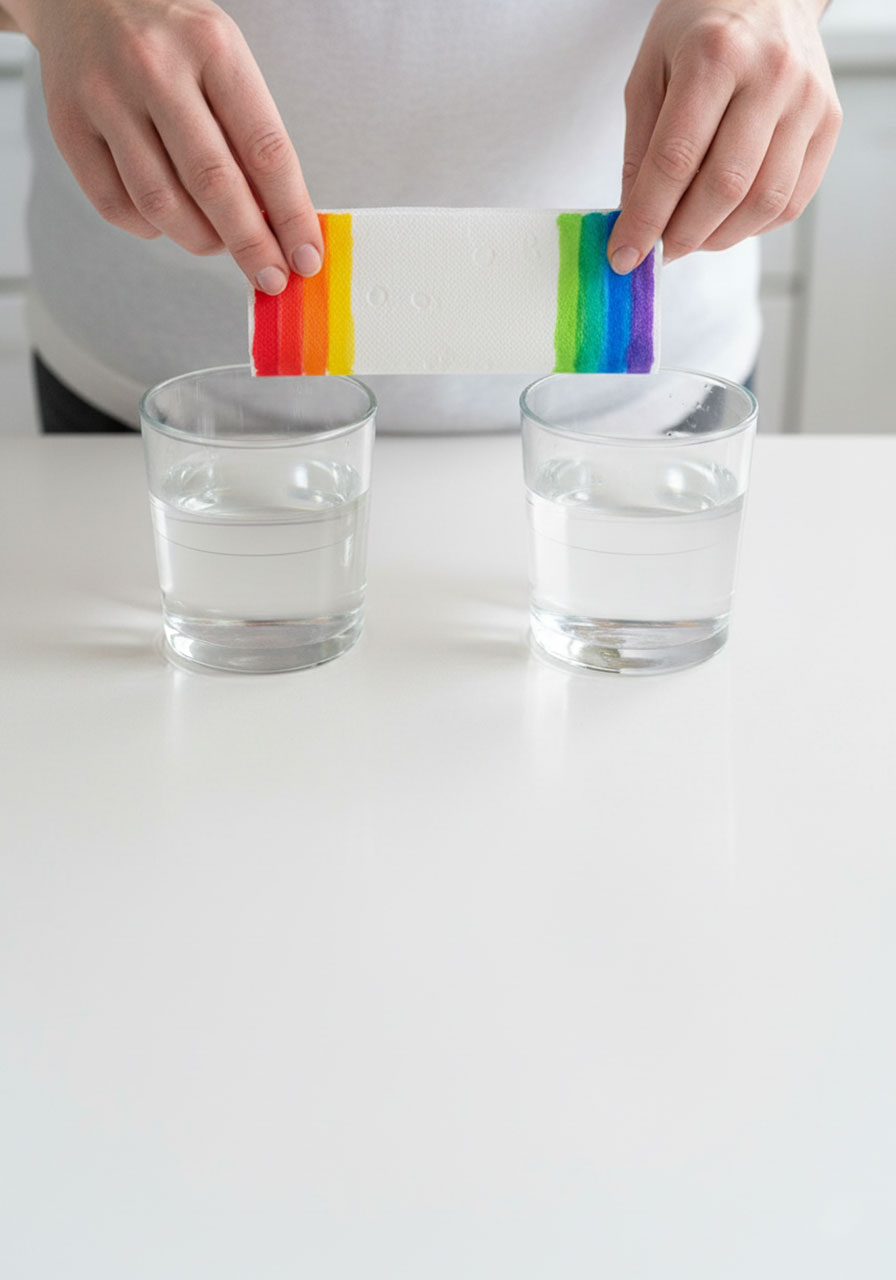
Fill two glasses about 3/4 full with water. Don’t fill them to the brim – you need some space at the top.
Critical step: When you place your paper towel in, you only want the very bottom edge touching the water. If the colored part goes too deep into the water, the dye will just dissolve into the cup instead of traveling up the paper towel. Keep those colored rectangles just above the water line!
Step 4: Watch the Magic Happen
Place one end of your paper towel into each glass. The colored ends should dip into the water (but not the marker itself – just the paper towel below it).
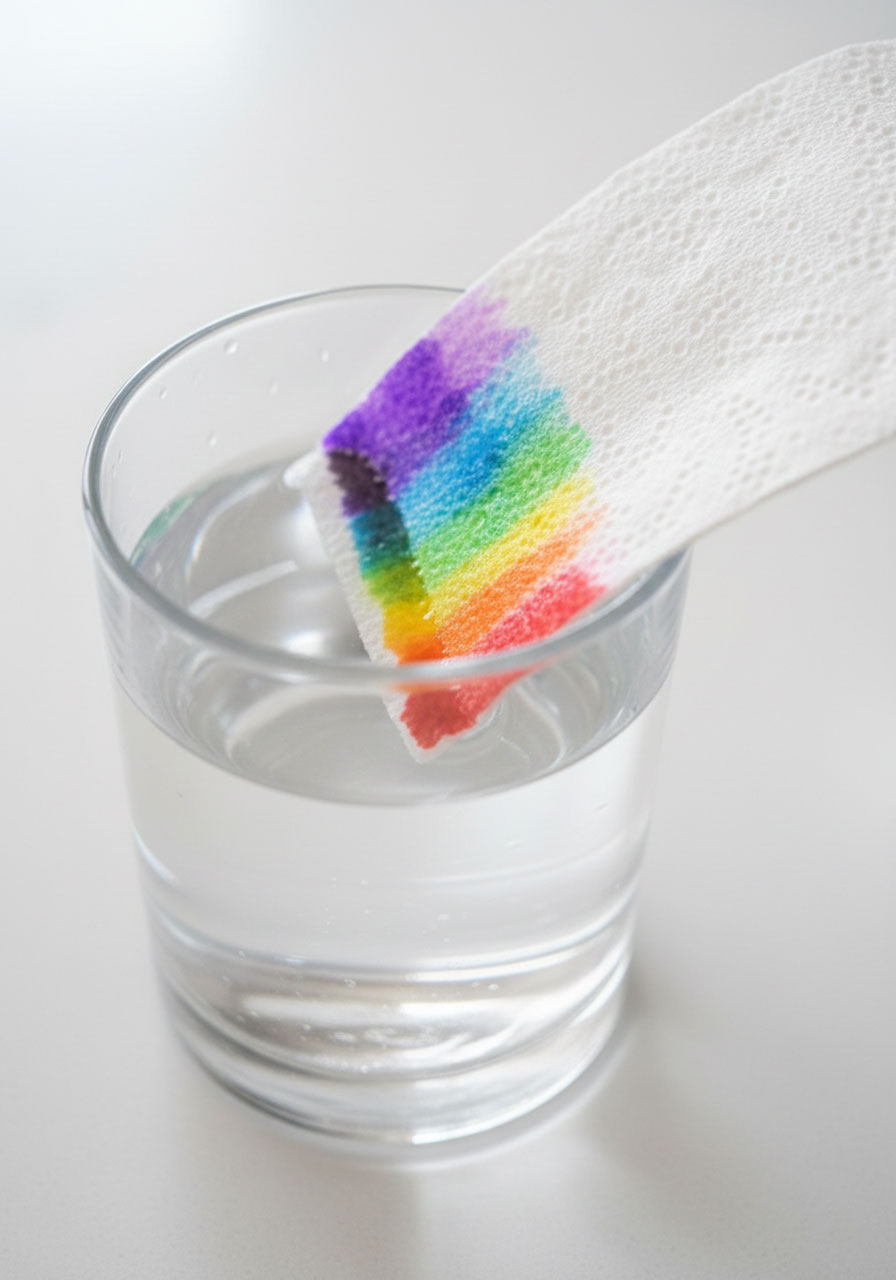
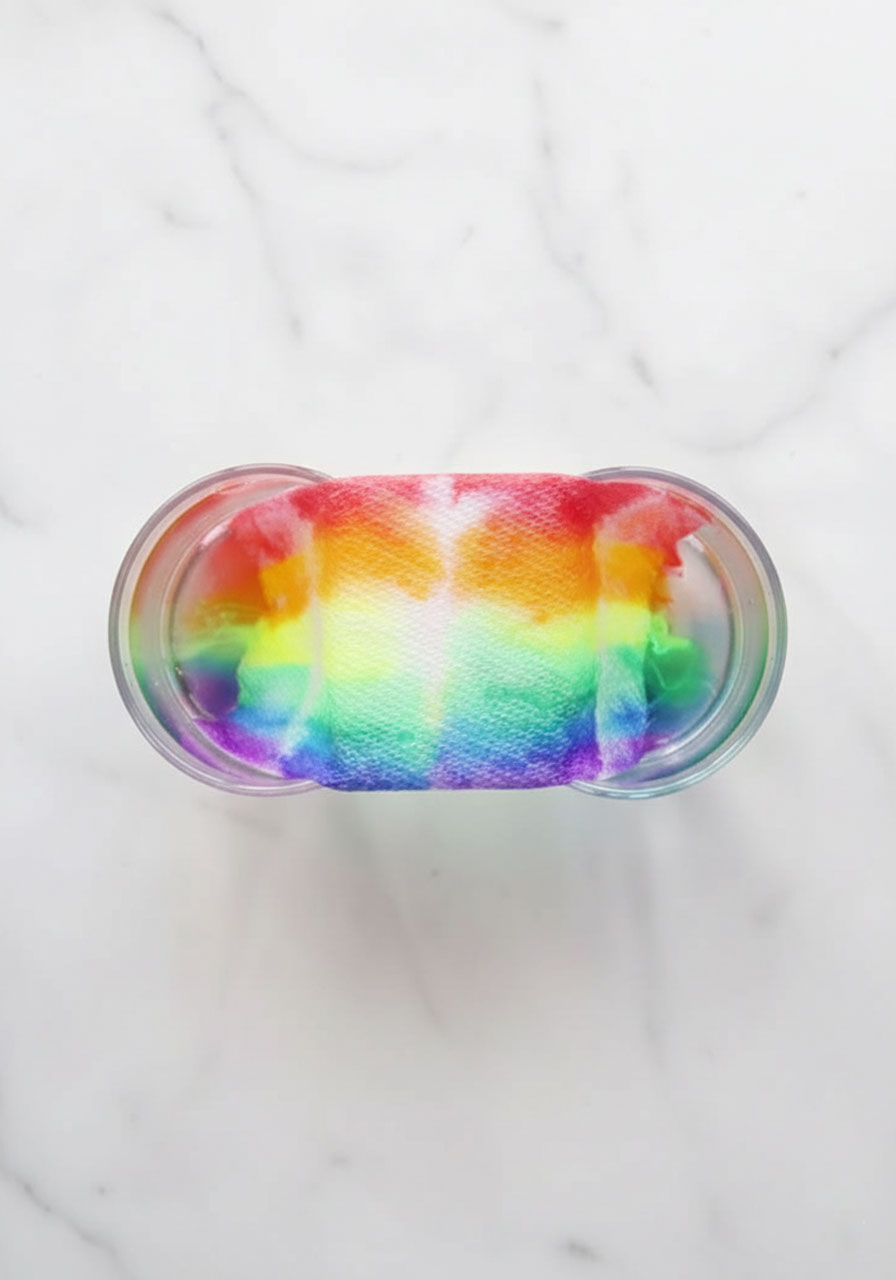
Now step back and watch. Within seconds, you’ll see the water start climbing up the paper towel, pulling the colorful dye along with it. The colors will slowly creep toward the center, getting closer and closer until – BAM! – they meet in the middle and create a gorgeous rainbow arc.

Step 5: Be Patient (But Not Too Patient!)
Let your paper towel sit for 10-15 minutes. You’ll see the colors gradually travel upward and blend together in the center. It’s mesmerizing to watch, and kids will be hooked from start to finish.
Timing tip: If nothing’s happening after a few minutes, your paper towel might not be absorbent enough, or your markers might not be washable. Double-check your supplies!

The Science Behind the Magic (AKA Why This Works)
Here’s the cool part: this experiment is all about chromatography and capillary action.
Capillary action is what makes the water defy gravity and climb up the paper towel. The water molecules are attracted to the paper towel fibers, so they pull themselves upward, carrying the washable marker dye along for the ride.
Chromatography is the fancy science word for separating mixtures. When the water moves through the paper towel, it picks up the marker dye and spreads it out. Since washable markers are water-based, they dissolve and travel with the water. That’s why you see those beautiful streaks of color moving up the page!
Want to take it further? Try this experiment with permanent markers (spoiler: it won’t work because they’re alcohol-based, not water-based). Or try it with just water and no markers – you’ll still see the water climb, proving that capillary action is the real hero here.
Pro Tips for Maximum Rainbow Success
Use the right paper towels. Cheap, thin paper towels won’t absorb as well. Go for a quality brand like Bounty for best results.
Load up on marker. Don’t be shy with those colors! The more dye you add to the ends, the more dramatic your rainbow will be.
Keep it short. A shorter paper towel means faster results and a better connection in the middle. If your rainbow isn’t meeting, trim down your paper towel and try again.
Don’t submerge the color. This is the most common mistake! Only the plain paper towel should touch the water – keep those colored rectangles just above the waterline.
Fold for double the impact. Using two layers of paper towel (folded in half) helps the colors travel better and creates a more vibrant effect.
Fun Variations to Try
Once you’ve nailed the classic rainbow, mix things up with these awesome variations:
Try different color combos. Instead of a rainbow, create an ombre effect with shades of blue, or go wild with neon colors.
Pre-color for parties. Hosting a birthday party or classroom event? Pre-color all your paper towels ahead of time, and let kids just dip them in water. It’s a perfect low-prep activity that still feels magical!
Test permanent markers vs. washable. Set up two experiments side by side to show kids why marker type matters. The washable one will create a rainbow, while the permanent marker one stays put. Science in action!
Try different liquids. For older kids, experiment with rubbing alcohol instead of water. You’ll see that permanent markers disperse in alcohol but not in water – mind blown!
Create rainbow art. Once your paper towel has dried, you can draw a rainbow arch outline with a black marker over the dried colors to create a frame-worthy piece of art.
Why Kids (and Teachers) Love This Experiment
It’s foolproof. As long as you have absorbent paper towels and washable markers, this experiment works every single time. No complicated steps, no special equipment, no room for error.
It’s fast. You get results in 10-15 minutes, which is perfect for short attention spans or tight class schedules.
It’s visual. Kids can actually see the science happening in real time. Watching those colors travel up the paper towel is utterly captivating.
It sparks questions. This experiment naturally leads to curiosity. “Why does the water go up?” “Why do the colors move?” “What happens if we use a longer paper towel?” You’re opening the door to scientific thinking without even trying.
It’s budget-friendly. No need to order specialty supplies or break the bank. You’ve got everything you need in your house right now.

Troubleshooting: When Your Rainbow Won’t Grow
Colors aren’t moving? Check your markers – they must be washable. Also make sure you’ve added enough color to the ends.
Rainbow isn’t connecting in the middle? Your paper towel is probably too long. Trim it down to 7 inches or less and try again.
Colors bleeding into the water? You’ve dipped the paper towel too deep. Pull it out slightly so only the plain part (not the colored rectangles) is submerged.
Experiment happening too slowly? Use a more absorbent paper towel brand, or try unfolding your paper towel to a single layer for faster action.
More Ways to Extend the Fun
Once your kids have mastered the grow-a-rainbow experiment, keep the momentum going with these related activities:
Create a rainbow slime. Mix up batches of slime in rainbow colors and let kids build their own rainbow sculpture.
Make rainbow playdough. This super-soft homemade playdough is easy to make and lasts for months!
Set up a rainbow rice sensory bin. Dye rice in rainbow colors for a tactile, colorful play experience that kids can’t get enough of.
Explore more chromatography. Try coffee filter chromatography with markers and water to create butterfly wings or flowers.
The Bottom Line
This grow-a-rainbow experiment is one of those rare activities that checks every box: simple, stunning, educational, and fun. You’ll love how easy it is to set up, and your kids will love watching the science magic unfold before their eyes.
Whether you’re filling a rainy afternoon, planning a classroom science day, or just want to see your child’s face light up with wonder, this experiment delivers every single time. So grab those paper towels and washable markers, and get ready to grow your own rainbow!
More Kid’s Party Ideas to Keep the Fun Rolling:
How to Make a Stunning Leaf Butterfly Craft – Easy Nature Art for Kids
10 Epic DIY Cardboard Carnival Games That’ll Make You the Hero of Any Party
Build a Name STEM Activity: The Perfect First-Week Icebreaker That Combines Literacy and Creativity
Unwrap the Alphabet: A Sneaky-Smart Fine Motor Game for Little Learners
LEGO Bridge Building Challenge: The Ultimate STEM Party Game for Kids!
Post-It Math Party: Turn Addition Practice Into an Active Game Your Kids Will Actually Beg to Play
Paper Plate Roller Coaster Challenge: The Ultimate Physics Party for Elementary Kids
Teddy Bear Bridge STEM Challenge: The Ultimate Team-Building Activity for Little Engineers
How to Make a Walking Paper Horse: The Coolest STEM Project That Actually MOVES!
