
Mother’s Day is coming up fast – and if you want to give Mom something that makes her actually gasp when she opens it, you’re in the right place. This DIY Flower Pop-Up Card is a stunning 3D bouquet that blooms right in her hands the moment she opens it. And the best part? It looks like something you ordered from a boutique, but costs almost nothing to make.
Whether you’re a parent making this with your kids, or a teacher looking for a meaningful classroom craft, this project is the one. No fancy machines needed – just paper, a few markers, scissors, and a little bit of love.
Here’s everything you need to know, step by step.

What You’ll Need
Gather these supplies before you start so you’re not hunting for scissors mid-craft (we’ve all been there!):
Square paper – 14×14 cm each, in pink, yellow, and/or white (you’ll need 7 sheets for the pop-up flowers)
Thick cardstock – for the outer card base
Brush pen markers – light and dark shades of pink, plus yellow
Yellow oil pastels or chalk pastels
Scissors
Ruler and pencil
Glue stick or double-sided tape runner
Green cardstock – for leaves (optional but highly recommended)
Small strip of paper – for the center message label


Step-by-Step Instructions
1. Cut Your Base Flower Shape
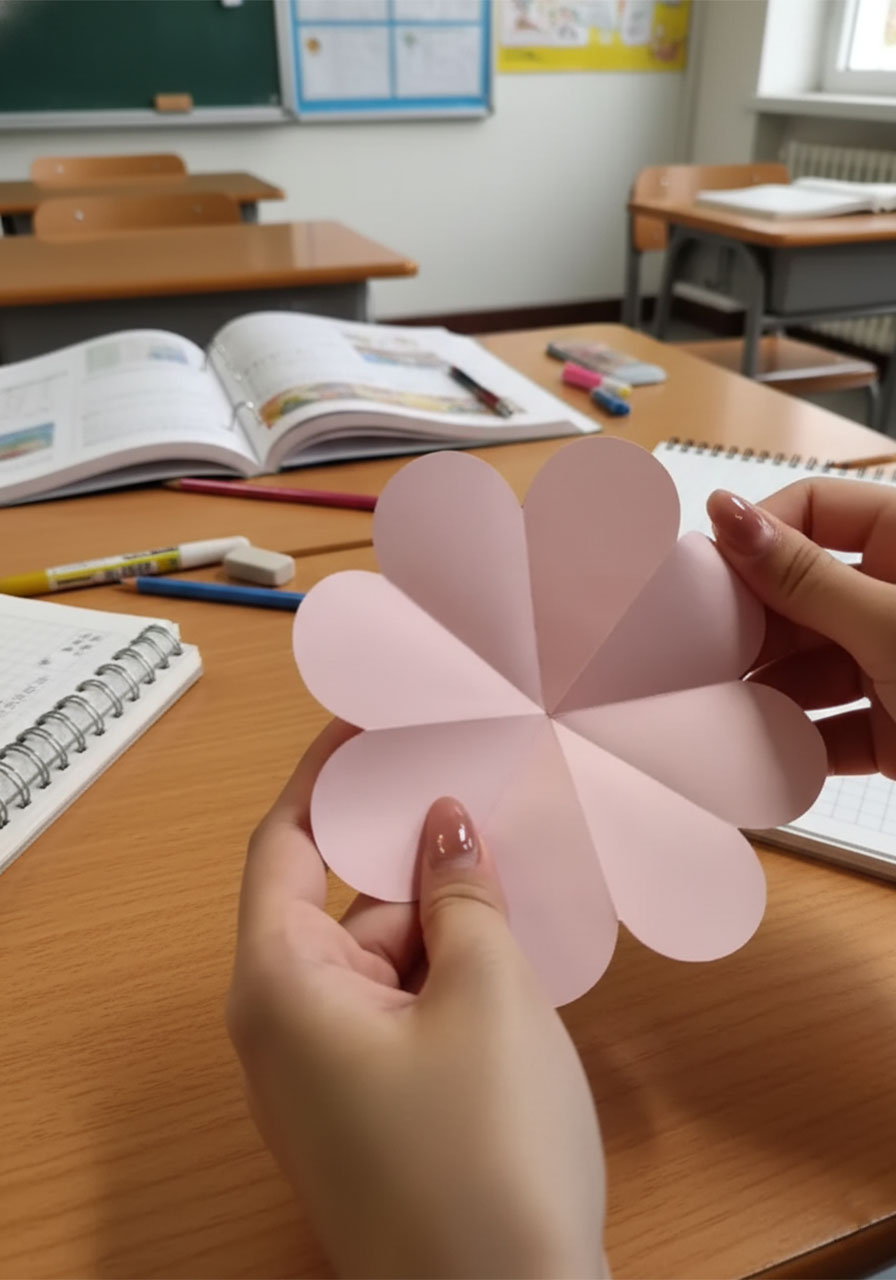
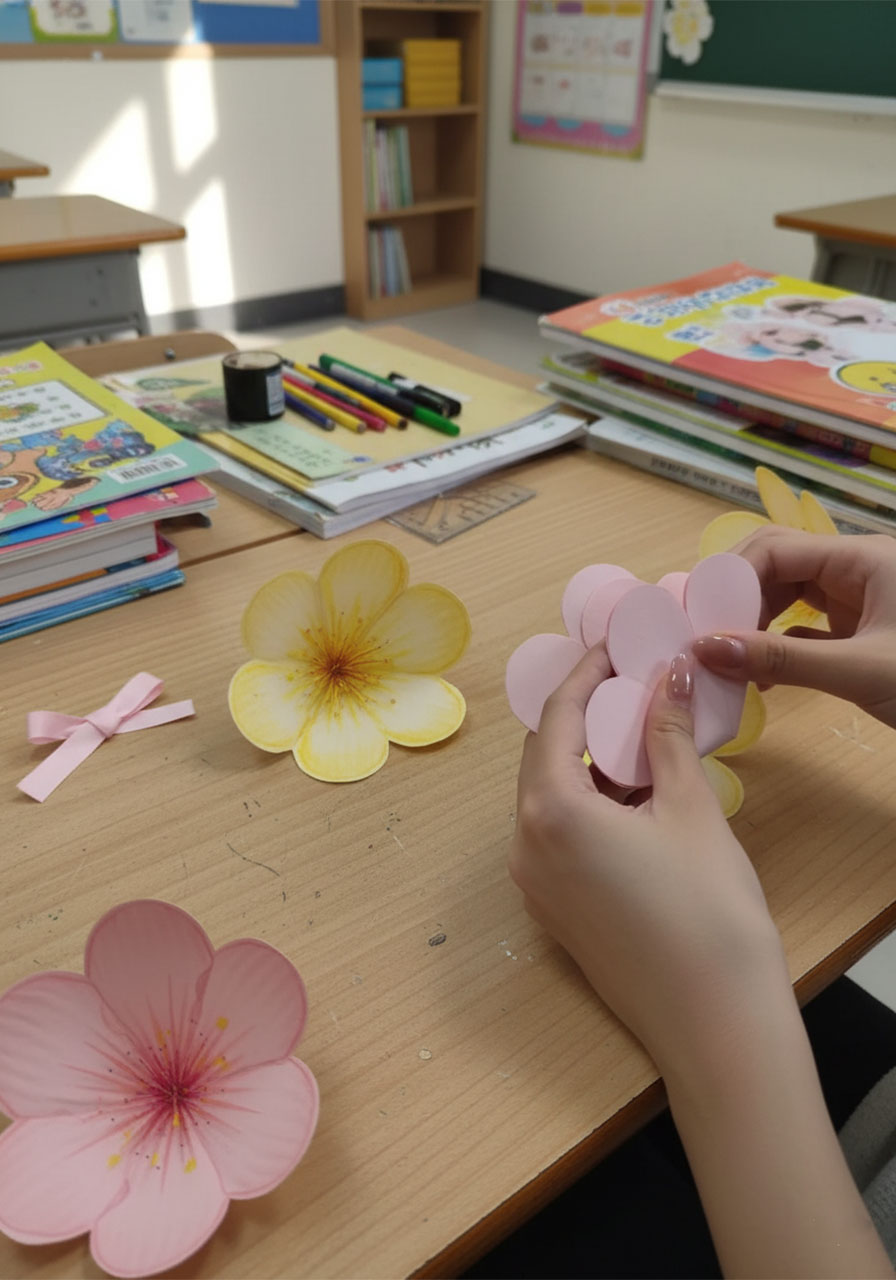
Start with one 14×14 cm square of paper. Fold it in half diagonally to form a triangle, then fold it diagonally again to make a smaller triangle. Next, fold each of the two side flaps inward toward the center crease.
Now here’s the fun part: grab a circular object – a roll of tape or a small cup works perfectly – and trace a gentle curve across the rounded top of your folded triangle. Cut along that curve. When you open it up, you’ll have a beautiful 8-petal flower shape!
✏️ Pro Tip: If the curve looks a little wobbly, don’t stress – once the petals are colored and shaped, any slight imperfections completely disappear. Imperfect petals actually look more natural and handmade-gorgeous.
Repeat this process 7 times total – these will become your 7 pop-up flowers.
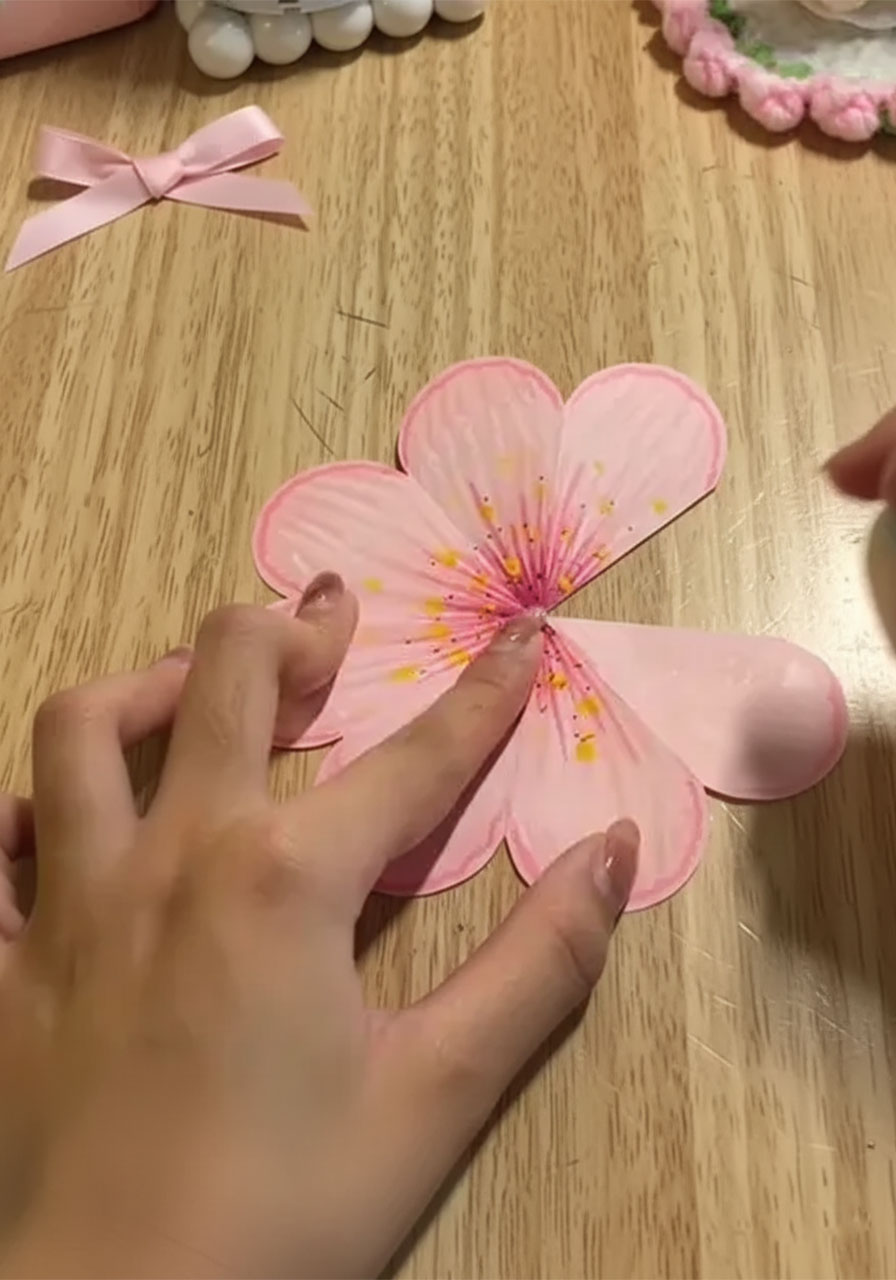
2. Paint the Petals to Life
This is where your flowers go from “cute” to wow. Working from the center of the flower outward, use a light pink marker to draw thin radiating lines (like spikes or veins) across each petal. These lines mimic the look of real flower petals – the detail that makes people ask, “Wait, is that real paper?!”
Then layer a deeper, darker pink right at the center of the flower, blending it outward slightly. Add a little more dark color around the very edges of the petals for dimension.
Finally, dab a few dots of yellow oil pastel in the center – these are your pollen, and they add that gorgeous pop of warmth that makes the whole flower glow.
✏️ Pro Tip: Work with a light hand on the first pass, then build up color gradually. You can always go darker, but you can’t easily go lighter on paper!


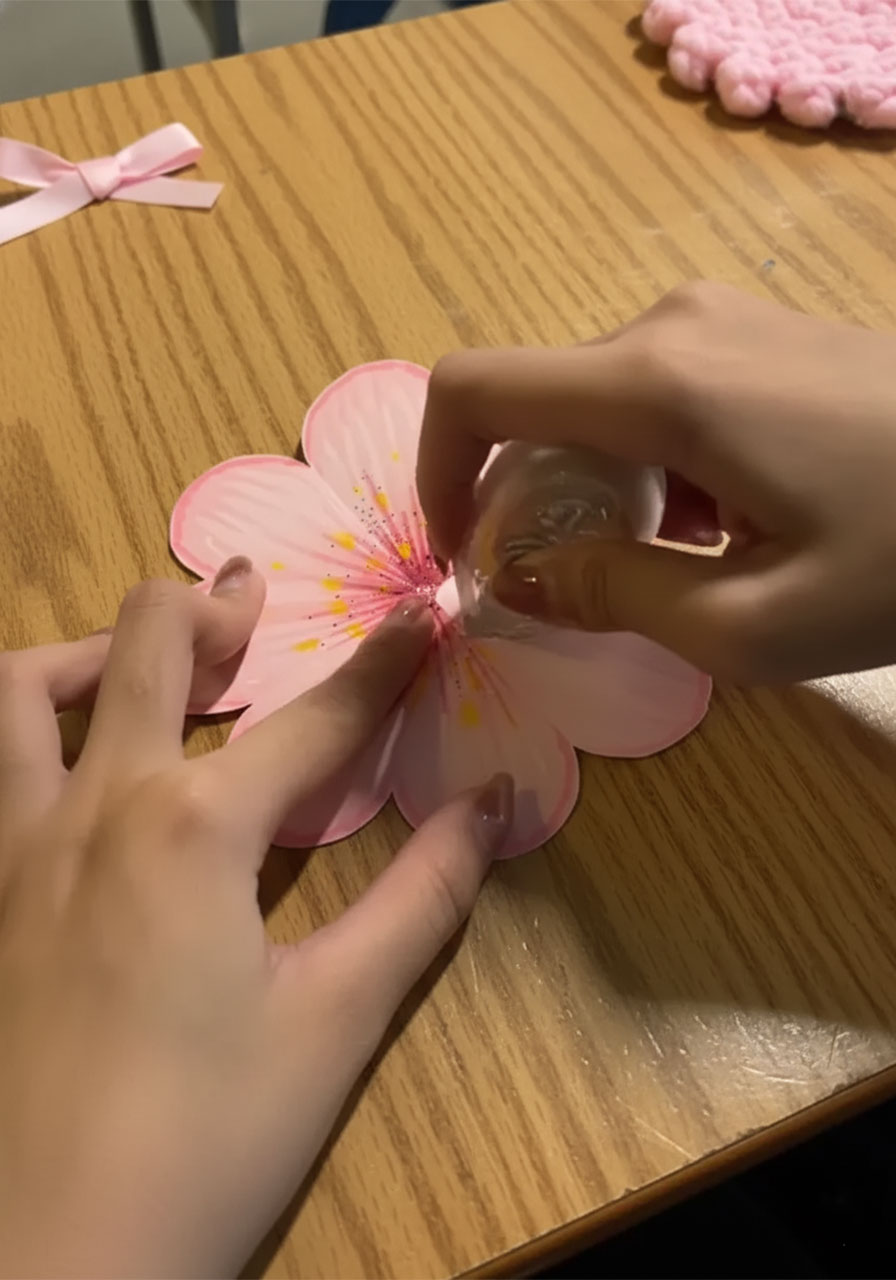
3. Shape the Flower into 3D
Here’s where the magic happens. Once your flower is colored, cut out exactly one petal completely. You’ll now have a 7-petal flower with a gap.
Apply a small amount of glue to the petal immediately next to the gap. Overlap the petal on the other side of the gap onto the glued petal, pressing gently to hold. This pulls the flower up into a gentle cone shape – suddenly your flat paper becomes a dimensional, cupped flower!
📌 Important: The overlap doesn’t need to be huge – just enough to create a gentle curve. Think of it like a shallow bowl, not a closed cone.
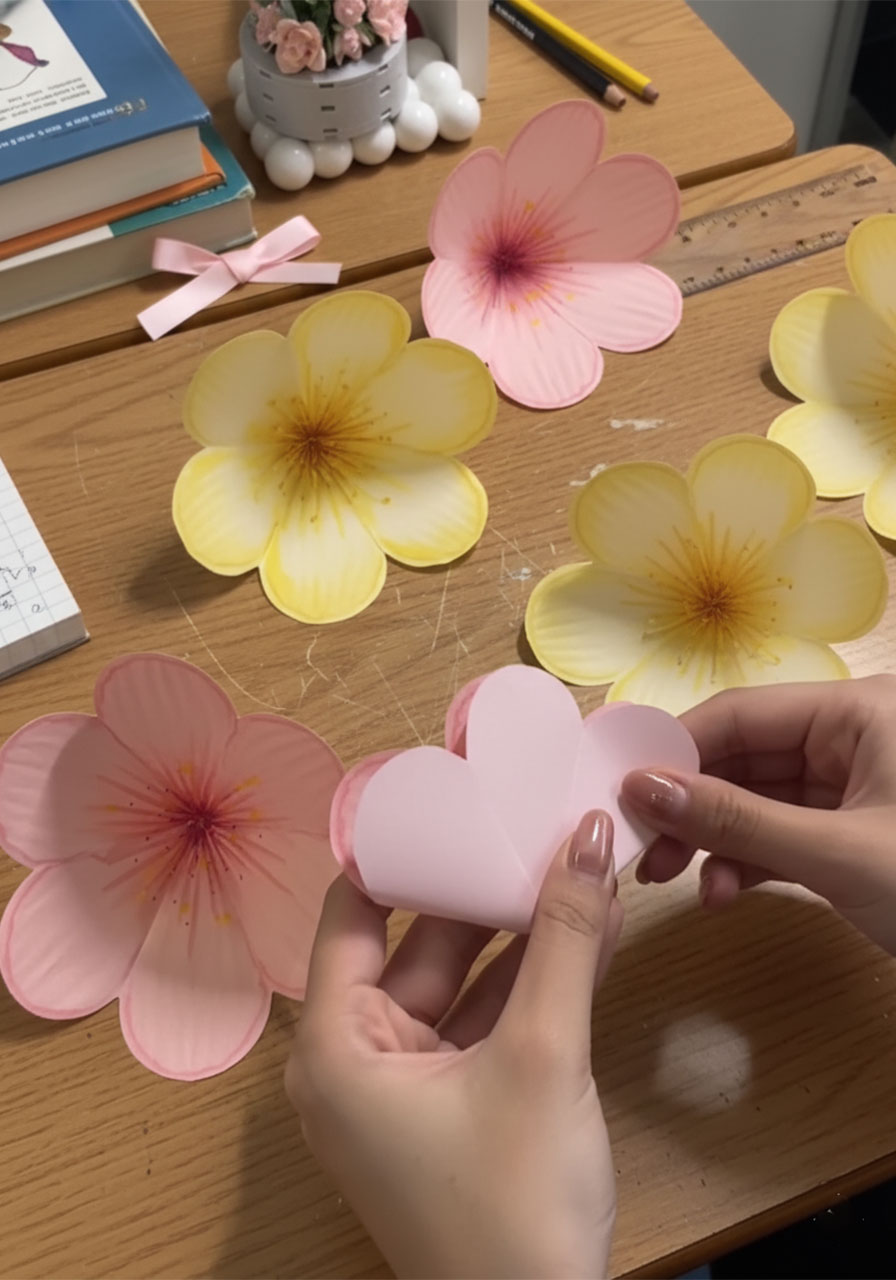
Repeat for all 7 flowers. Set them aside to dry while you work on the card base.

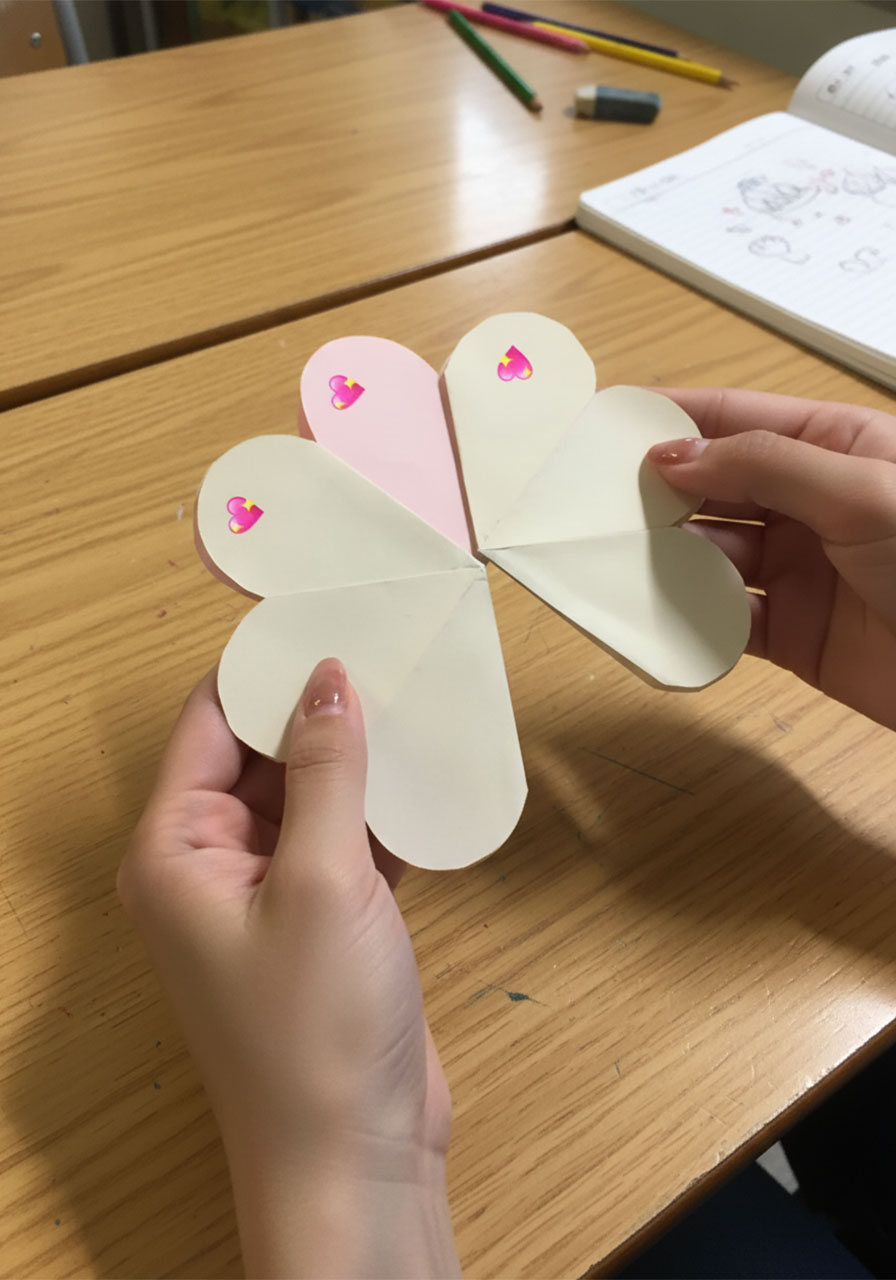
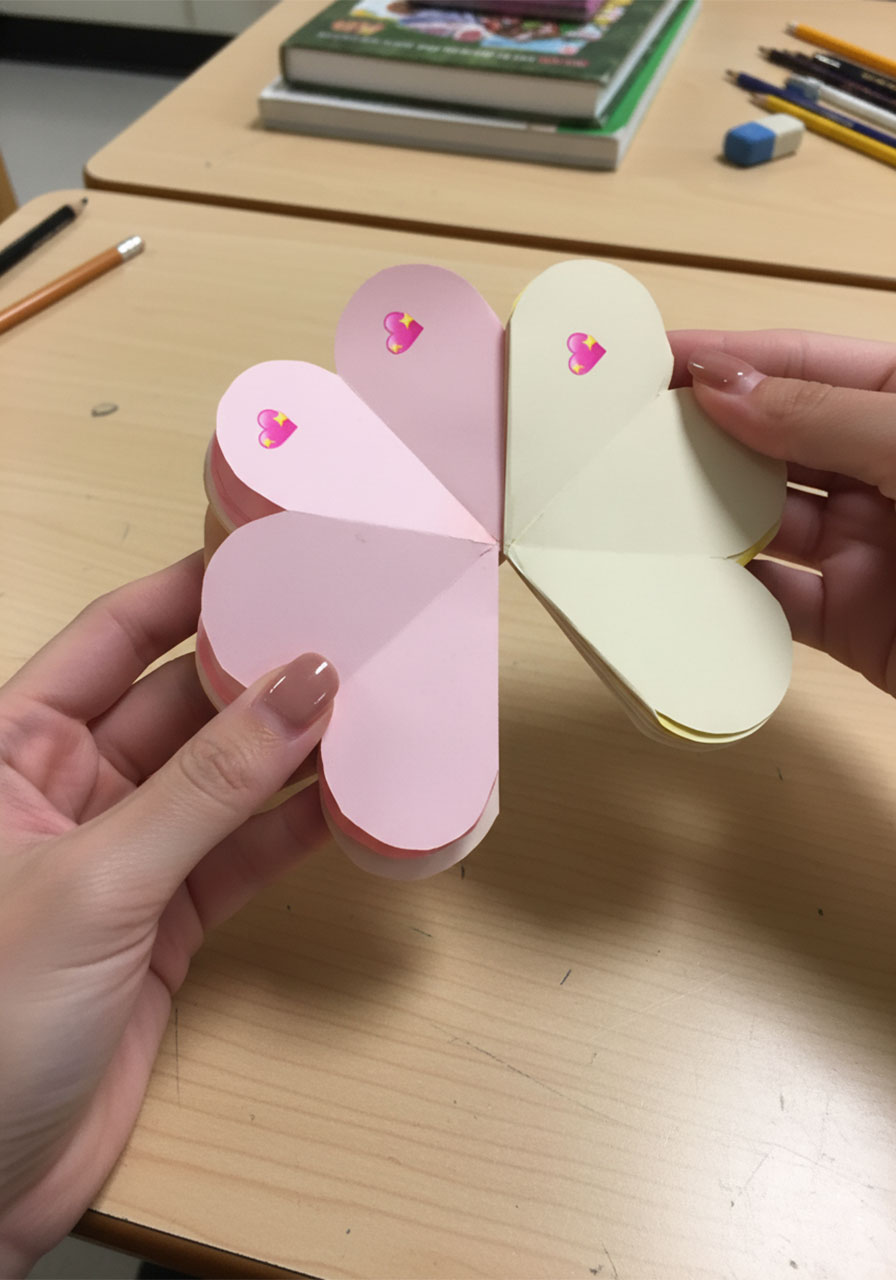
4. Assemble the Pop-Up Mechanism
This is the step that transforms seven individual flowers into one showstopping pop-up. Here’s how to think about it:
1. Fold each flower in half along the center, so it becomes a half-moon shape. This is the position it will sit in when the card is closed.
2. Working with your first two flowers, apply glue to the back of one folded petal on flower #1. Press flower #2 on top of it, offsetting it slightly so the petals fan out when opened.
3. Continue stacking and gluing all 7 flowers in this same alternating pattern. Each flower should be rotated slightly from the last, so when the stack opens, the petals radiate outward in a full 360° bloom.
4. Once your stack is assembled and dry, apply glue to the flat bottom of the stack (the folded edge).
✏️ Pro Tip: Do a dry run first! Stack your folded flowers without glue, hold them closed, then let them open to see how they fan. Once you’re happy with the arrangement, then start gluing. This saves a lot of frustration!
5. Build the Card Base
Take your thick cardstock and fold it cleanly in half. Run a ruler or bone folder along the crease for a crisp edge – this keeps the card lying flat when closed and opening smoothly every time.
If you want to decorate the outside (highly recommended!), you can brush a coat of diluted pink or rose-gold paint across the front cover for a gorgeous shimmery effect, similar to what you see in the finished card example. Let it dry completely before moving on.
Now, open the card flat. Apply glue firmly to the bottom folded edge of your flower stack and press it down into the center of the card. Hold for 30 seconds. Close the card gently and let everything set for at least 5 minutes before testing the pop-up action.
📌 Important: Make sure the flower stack is centered and that no petals extend beyond the card edges when it’s closed – otherwise the card won’t close properly.

6. Add the Finishing Touches
Now for the details that take this from “great” to “she’s going to cry (happy tears)”:
Leaves: Cut small leaf shapes from green cardstock – a simple oval with a pointed tip works beautifully. Score a line down the center and fold slightly for dimension. Tuck a few around the base of your pop-up flower cluster inside the card, and add some around the bouquet on the front cover too.
Front cover flowers: Make 3–5 smaller versions of your 5-petal flower (using the same folding technique but with a smaller square of paper) and glue them across the front of the card. These give Mom a beautiful “preview” before she even opens it.
Center message label: Cut a small circle or strip of paper. Write “Happy Mother’s Day!” in your neatest handwriting (or your child’s sweetest handwriting – even better). Fold a tiny strip of paper into a small “riser” and glue it to the center of the pop-up bouquet, then attach your label on top so it floats above the flowers.
Outside text: Add a small label reading “to the best Mama” (or whatever feels right for your family) to the front cover using sticker letters, a label maker, or hand lettering.


Why This Card Is Worth Every Minute
Here’s the truth: Mom has probably received plenty of store-bought cards over the years. But the moment she opens this one and the flowers bloom right in front of her eyes? That’s a memory she’ll hold onto.
This is also a wonderful project to make with kids. Younger children can help color the petals and add the pollen dots. Older kids can handle the folding and assembly. And when Mom or Grandma sees that little set of hands contributed to every petal – there’s nothing better than that.

Best of all, this card lasts forever. Unlike a real bouquet that wilts by the end of the week, this one can sit on her shelf or desk for years as a reminder that someone took the time to make something just for her.
💐 Made one of these beauties? We’d love to see it! Share your creation and tell us – what’s your favorite thing about your mom? Drop it in the comments below. Because the best parties, and the best memories, are always made with love.
More Mother’s Day Ideas to Keep the Fun Rolling:
30+ Mother’s Day Crafts for Kids of All Ages
12 Hilarious Mother’s Day Games the Whole Family Will Love
How to Make a DIY Mini Paper Rose Bouquet (The Cutest Mother’s Day Gift That Lasts Forever!)
How to Make a DIY Heart Waterfall Card: The Sweetest Handmade Gift for Mom
How to Make a Mother’s Day Flower Pot Craft
Easy Coffee Filter Flowers – The Prettiest Mother’s Day Craft for Kids and Classrooms
Mother’s Day Flower Pot Craft: The Cutest Preschool Gift Mom Will Actually Keep
The Cutest DIY Mother’s Day Gift Ever: A Kid’s Handprint Flower Mug