⏱ Project Time: ~1 hour active + 24–48 hrs drying 👐 Ages: 2 and up (with adult help) 💰 Cost: ~$20–$30 for two stones
Here’s the truth about grandmas: they don’t want another candle. They don’t need another mug. What they really want is proof that those tiny little hands – the ones that still reach up for theirs – existed at exactly this size, at exactly this moment in time.
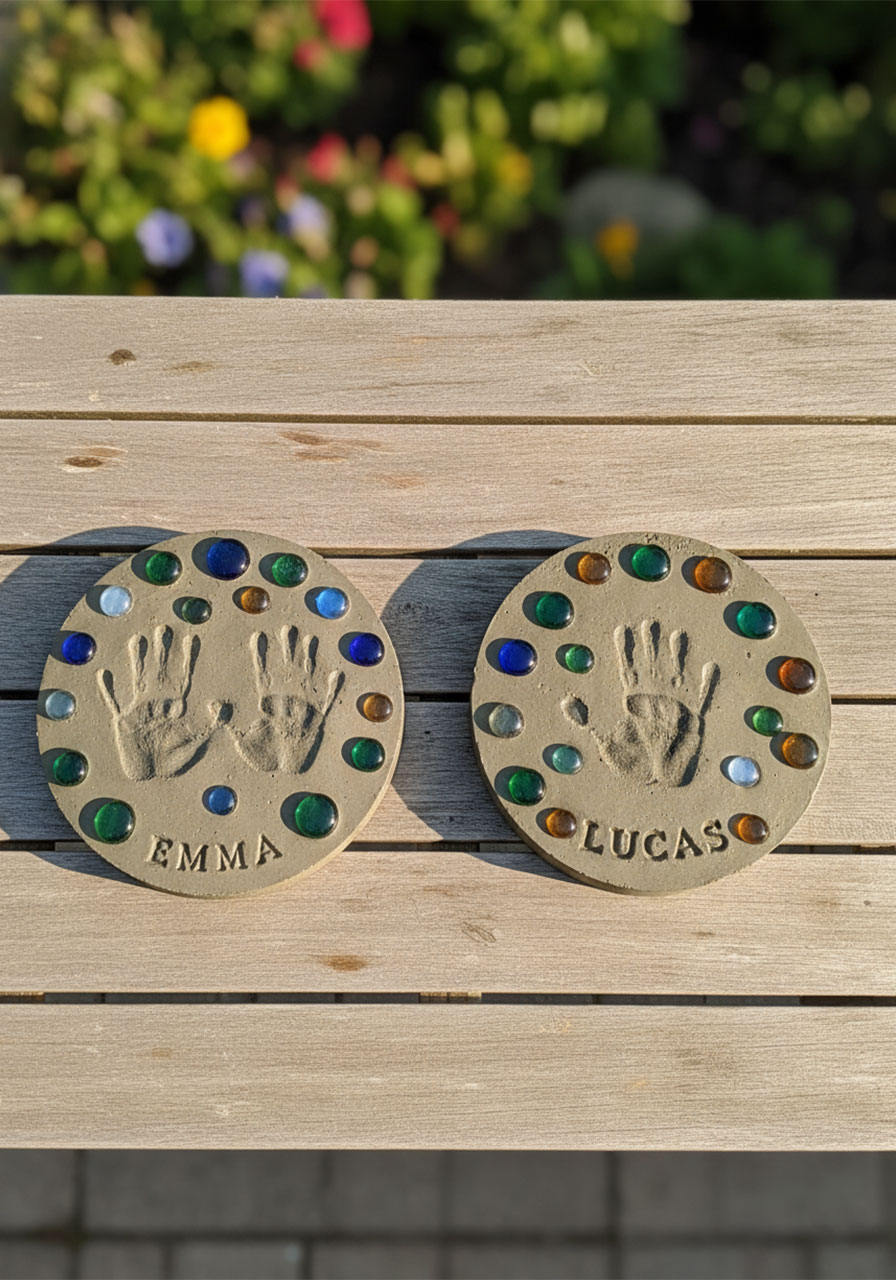
That’s exactly what these DIY Handprint Stepping Stones deliver. Press your kids’ hands into concrete, add their names, tuck in a few colorful gems, and you’ve just created a garden keepsake that will make Grandma tear up every single time she looks at it – which, if you place it on her porch, is multiple times a day. You’re welcome, Grandma.
The best part? Kids love making these. There’s concrete involved. They get to smash their hands into wet cement and call it a gift. It’s basically their dream activity wrapped up in a bow.
Here’s how to pull it off without a single stressful moment.

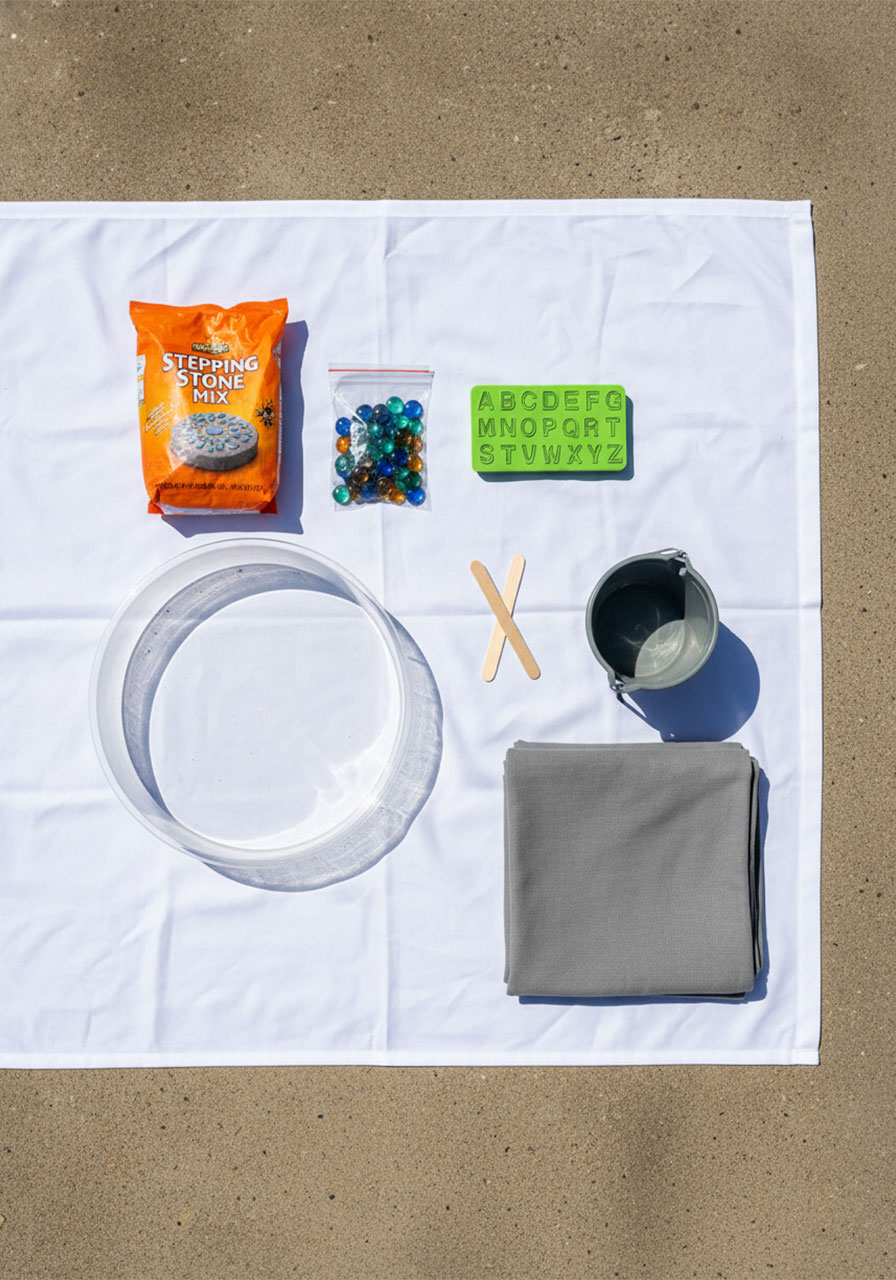
What You’ll Need
For each stepping stone:
Stepping stone concrete mix – Look for it at craft stores (Michaels often carries it), hardware stores, or online. One bag typically makes 1–2 stones.
Round mold – A large disposable plastic tray (the kind you’d use for a party platter) works perfectly. Old pie tins or pizza pans are great too. Aim for something 10–14 inches wide.
Letter stamps – Foam or rubber alphabet stamp sets work beautifully for pressing names into wet concrete. You’ll find these at any craft store.
Decorative glass gems or flat marbles – The colorful ones! Available at dollar stores, craft stores, or the floral section of most big-box stores.
Popsicle sticks or a small trowel – For smoothing the surface.
A mixing bucket – An old bucket or large bowl you don’t mind getting dirty.
Drop cloth or old tarp – Trust us on this one. Concrete splatters.
A bucket of clean water + paper towels – For washing little hands immediately after the handprint step.
Pro tip before you start: If you’re making stones for two grandmas (one for each side of the family), double everything and make them at the same time. The kids only have to do the handprint step once, and you’ll have both stones ready to go.


Step-by-Step Instructions
Step 1: Set Up Your Workspace
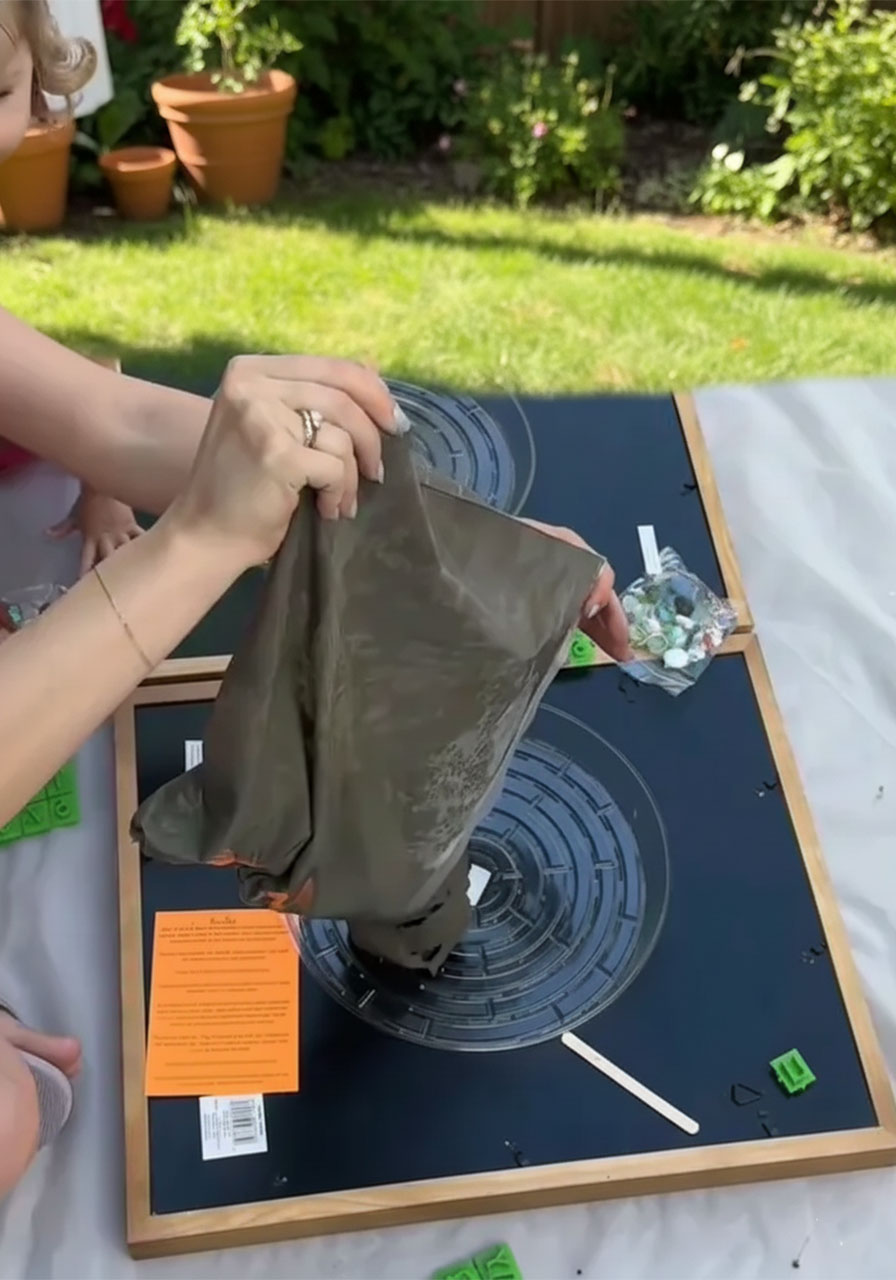
Take everything outside. Seriously – concrete mix is dusty, wet concrete is splattery, and your floor will not thank you. Lay your drop cloth flat on the ground or on a table, set your molds on top, and get everything within arm’s reach before you mix a single thing.
This is also the moment to call the kids over and hype them up. Tell them they’re making something so special that Grandma is going to put it in her garden forever. Watch their eyes go wide.
Step 2: Mix and Pour the Concrete
Follow the instructions on your specific concrete mix bag – they vary slightly by brand. You’re aiming for a consistency that looks and feels like thick peanut butter. Too watery and it won’t hold the handprints; too thick and it’ll be hard to smooth.
Pour the mixed concrete into your mold, filling it to about 1.5–2 inches deep. Use a popsicle stick or trowel to smooth the top surface. Then give the mold a few gentle shakes and taps on the table to help any air bubbles rise and pop. A smoother surface = cleaner handprints.
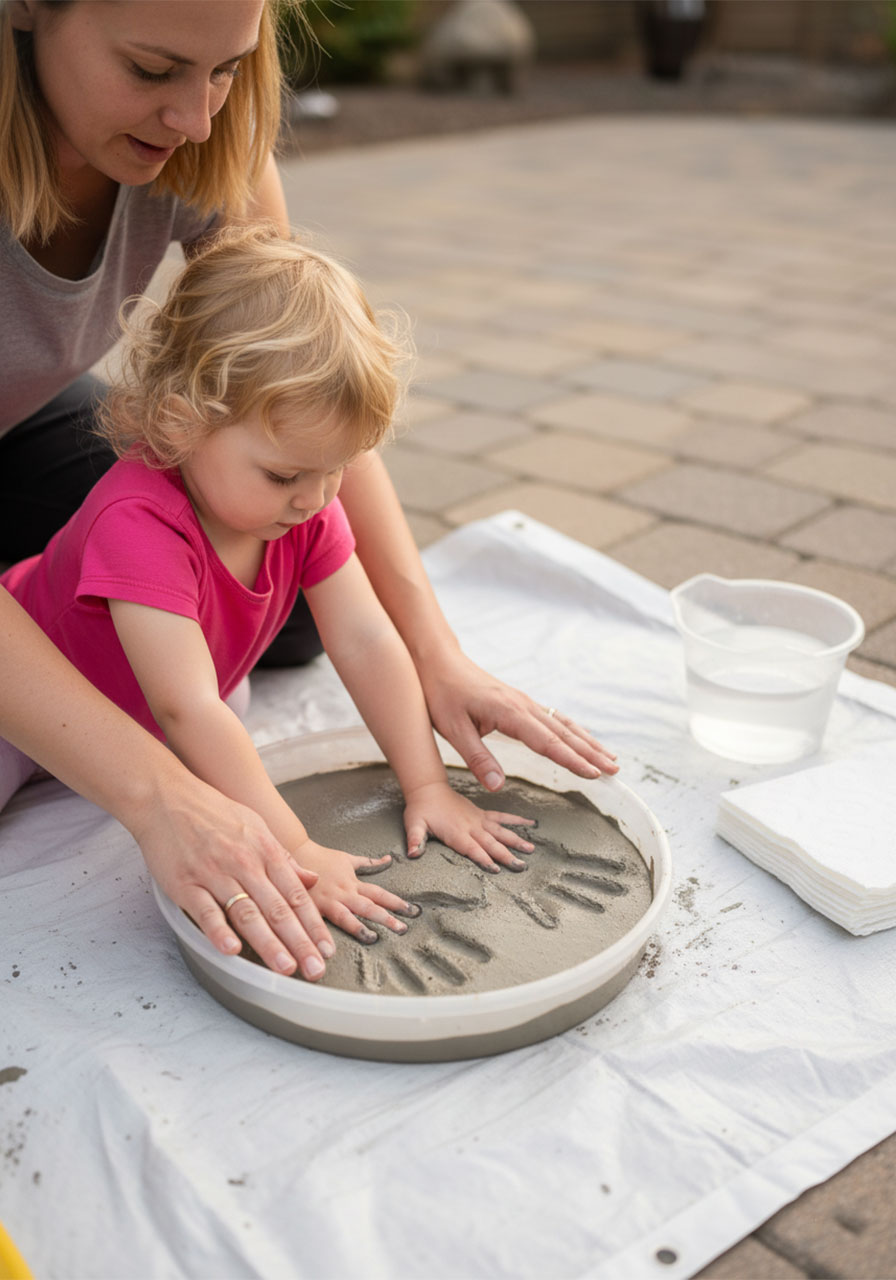
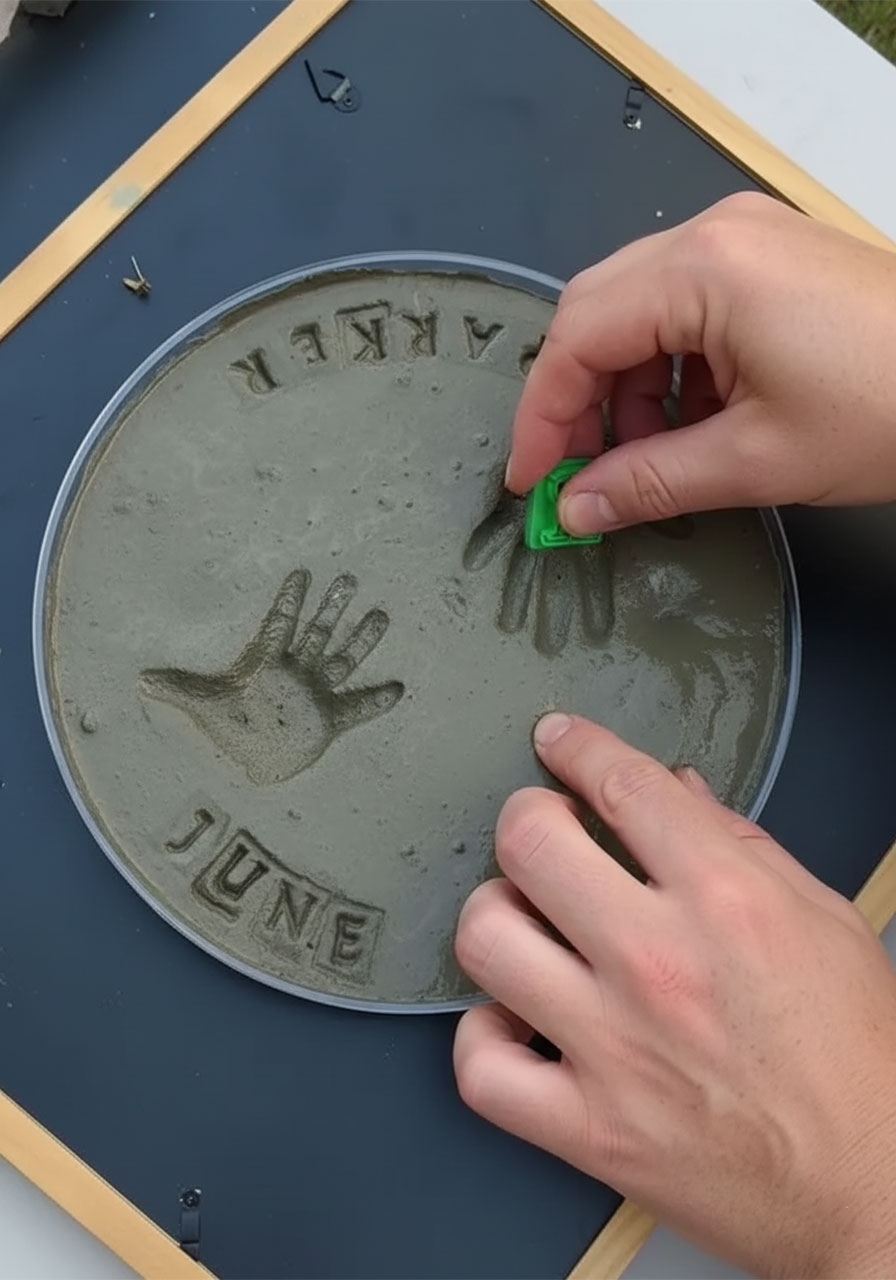
Step 3: The Main Event – The Handprints
Here’s where timing matters: wait 5–10 minutes after pouring before doing the handprints. The concrete should be firm enough to hold a clean impression but still soft enough to press into easily. If your finger barely leaves a mark, it’s ready.
Help your child spread their fingers wide and press their hand firmly and straight down into the center of the stone – no wiggling or sliding, or the print will blur. Hold it there for 5–10 seconds, then lift straight up.
Have your water bucket and towel ready to go the instant their hand comes out. Wet concrete can irritate skin, so you want to wash it off immediately. Don’t skip this step.
⭐ Pro Tip: If a print doesn’t look quite right, you can gently smooth it over with a damp finger and try again – as long as the concrete is still wet. You’ve got a small window, so work quickly but calmly.
Step 4: Stamp the Names
Now, while the concrete is still soft, use your letter stamps to press the child’s name into the stone. Press each letter firmly and straight down – just like the handprint. Work from left to right and space the letters evenly.
Names on the front of the stone look beautiful, and if you want to add the year, stamp it on the back or edge. Future-you (and future Grandma) will be so glad you did – there is something incredibly moving about seeing Parker, 2025 on a garden stone when Parker is suddenly in middle school.
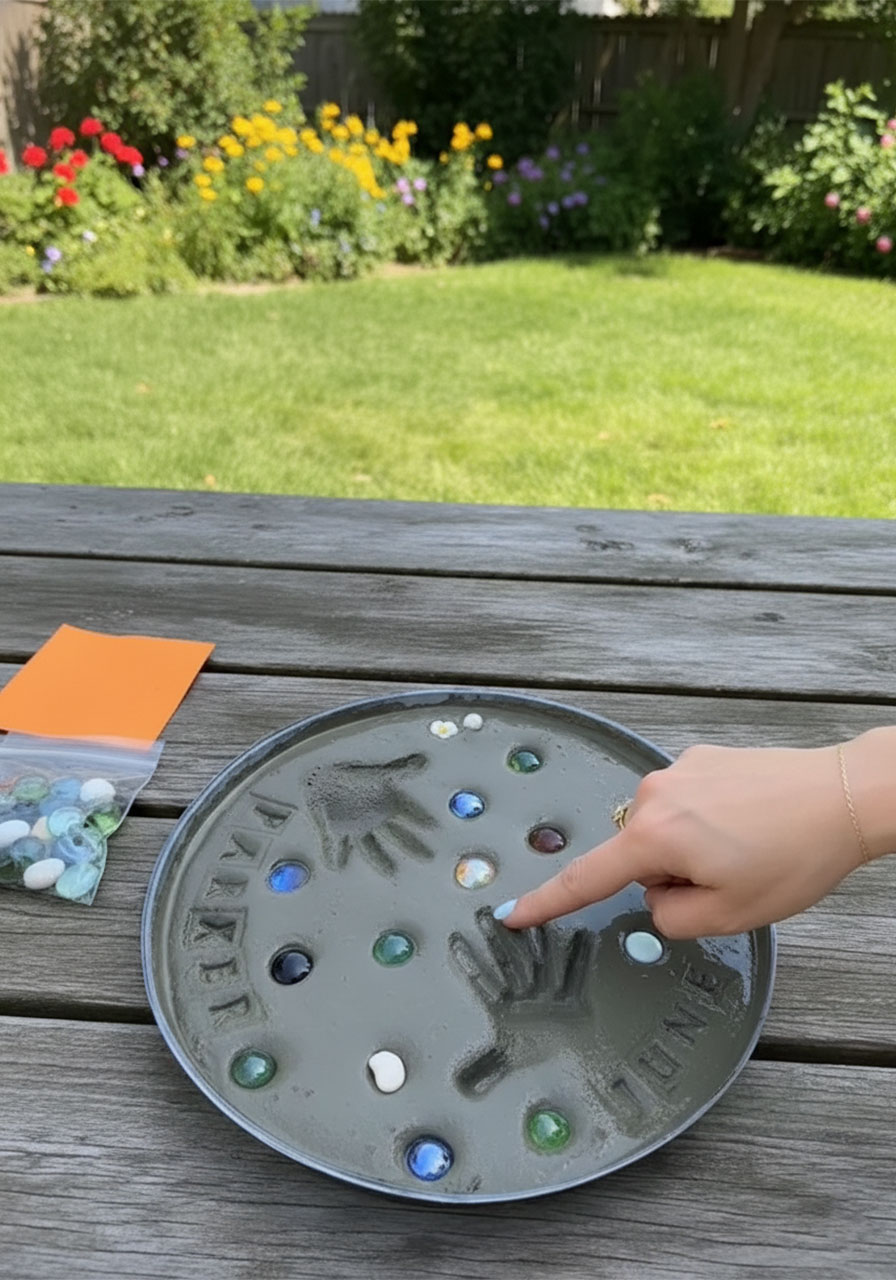
Step 5: Decorate with Glass Gems
This is the kids’ favorite part (after the hand-smashing). Let them pick their colorful glass gems and press them into the concrete around the handprints. They can fill in the outer edges, create a little border, or just scatter them wherever feels right.
Make sure they press each gem in firmly – you want at least half of each gem buried in the concrete so it doesn’t pop out once everything dries. A gentle but solid push does the trick.
⭐ Pro Tip: Let the child “design” this part with minimal interference. Their chaotic, joyful gem placement is part of the charm – and honestly, it looks more personal than anything perfectly arranged.
Step 6: Let It Cure (The Hardest Part)
Set the molds somewhere flat and completely undisturbed for at least 24–48 hours. Check your specific concrete mix for its recommended cure time – some need up to 72 hours for full hardness.
Keep them out of direct rain while they’re drying. Once they’re fully hardened, pop the stones out of their molds and they’re ready to gift!
⭐ Fun Variation: If your kids are very young (under 3), do a footprint instead of a handprint – little baby feet pressed into concrete are absolutely irresistible.
Presentation Tips (Because the Unwrapping Matters Too)
A stepping stone is already a stunning gift on its own, but here are a few ways to make the moment even more memorable:
Wrap it in burlap or a gift bag with tissue paper – the weight and shape make it feel like something special before it’s even opened.
Add a handwritten note from the kids. Even a scribble from a two-year-old with their name written by you is a treasure.
Tell Grandma which hand it is – left or right, and how old the child was. Write it on a little card to tuck alongside.
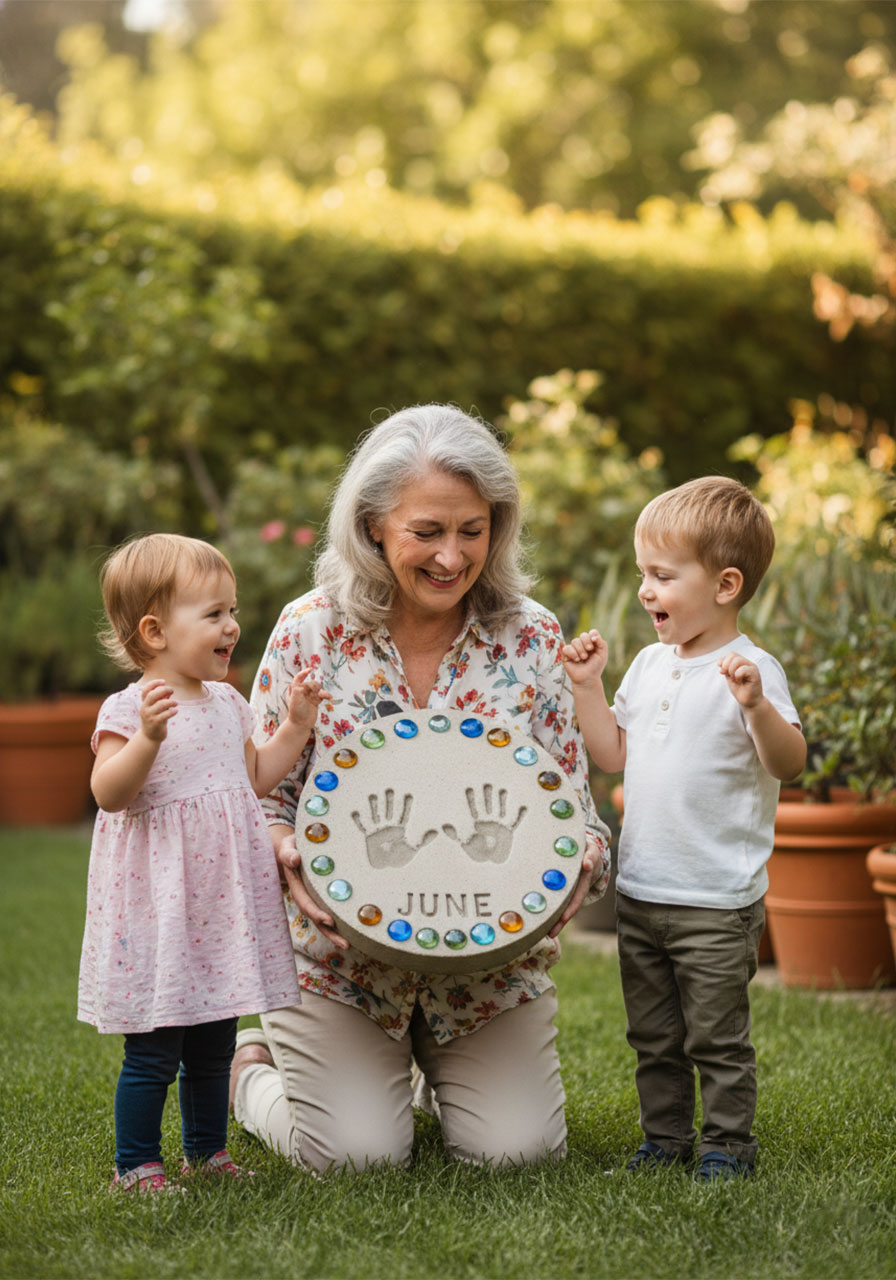
Why This Gift Works Every Single Time
Grandmas have lived long enough to know that things – candles, chocolates, spa sets – come and go. But a stone in her garden with her grandchildren’s handprints pressed into it? That’s permanent. That’s the kind of gift she shows to every single person who visits.
Every time she steps outside, she sees it. Every time she passes it, she remembers exactly how small those hands were, and how the kids had concrete on their arms up to the elbow, and how everyone was laughing. You can’t buy that at a store.
This Mother’s Day, give Grandma something she’ll keep forever. Those little handprints have a way of freezing time in the most beautiful way possible – and the best part is, making them together is half the gift.
Happy crafting, and Happy Mother’s Day! 🌸
More Mother’s Day Ideas to Keep the Fun Rolling:
30+ Mother’s Day Crafts for Kids of All Ages
Bloom Her Away: How to Make a DIY Mother’s Day Flower Pop-Up Card
12 Hilarious Mother’s Day Games the Whole Family Will Love
How to Make a DIY Mini Paper Rose Bouquet (The Cutest Mother’s Day Gift That Lasts Forever!)
How to Make a DIY Heart Waterfall Card: The Sweetest Handmade Gift for Mom
How to Make a Mother’s Day Flower Pot Craft
Easy Coffee Filter Flowers – The Prettiest Mother’s Day Craft for Kids and Classrooms
Mother’s Day Flower Pot Craft: The Cutest Preschool Gift Mom Will Actually Keep