
If you need a crowd-pleasing dessert that takes almost zero effort – and gets devoured every single time – this is it.
These No-Bake Oreo Cheesecake Cups are creamy, rich, and absolutely loaded with Oreos. They take about 20 minutes to put together, require only 5 ingredients, and you never have to turn on the oven. Yes, really.
Whether you’re hosting a birthday party, a classroom celebration, a holiday gathering, or just surviving a busy weeknight, this dessert has your back.
Kids go absolutely wild for them. Parents love how fast they are to make. Teachers have been known to bring these to school parties and never hear the end of it – in the best way possible.
Let’s get into it.
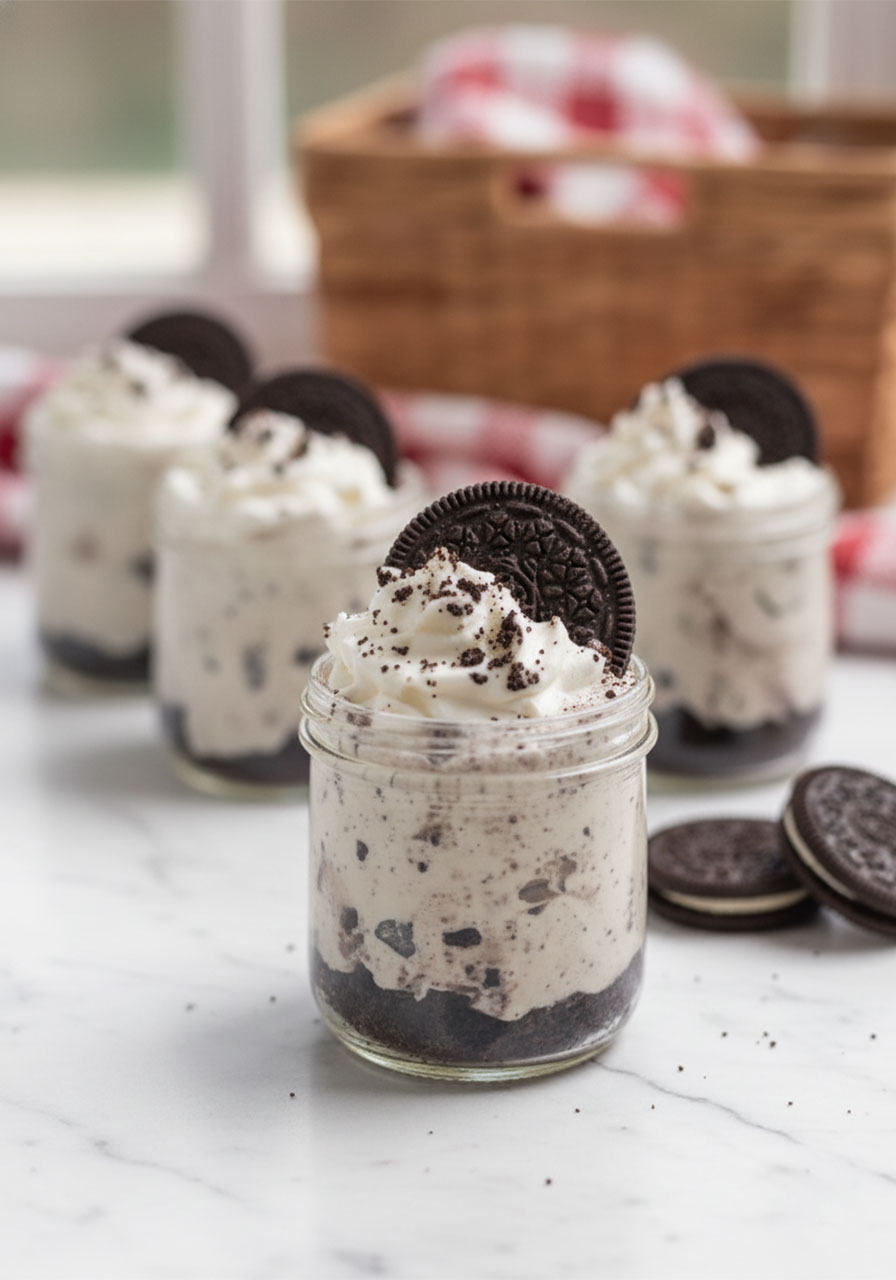
Why These Oreo Cheesecake Cups Are a Party MVP
You don’t need a reason to make these. But just in case you need some convincing to bring them to your next gathering, here’s why they work so well.
They’re pre-portioned and ready to serve. No slicing, no scooping, no mess. Just grab a spoon and dig in. That’s huge when you’re managing a table full of kids or a buffet line of hungry guests.
There’s zero baking involved. No oven. No timing. No stress. Just mix, chill, and serve. That makes these ideal for warm-weather parties, school events, and any time your schedule is already packed.
You only need 5 ingredients. Most of them are probably already in your kitchen. If not, one quick trip down the dairy aisle and you’re set.
Kids and adults both love them equally. That’s rarer than you’d think. These disappear fast no matter who’s at the table.
They’re easy to customize. Swap the Oreo flavor, add a fun extract, change up the toppings – these cups are super flexible depending on the occasion or the crowd.
Once you make these, they’ll become your go-to dessert for basically every event on your calendar.

What You’ll Need
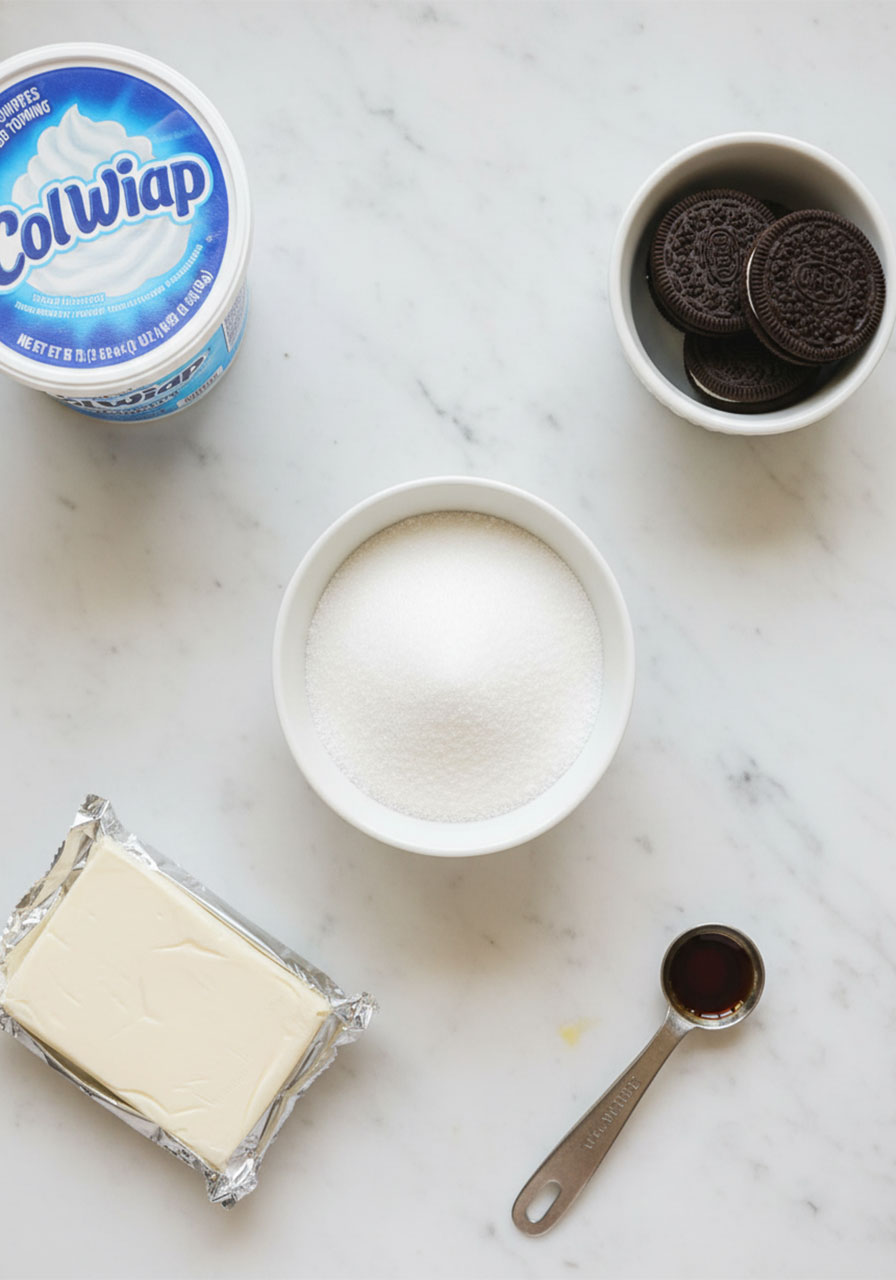
Just 5 simple ingredients stand between you and the best no-bake dessert of the summer.
1 block (8 oz) full-fat cream cheese, softened – Softened means room temperature! Cold cream cheese will leave lumps in your filling. Full-fat gives the creamiest, richest result. Reduced-fat works in a pinch, but skip the fat-free version entirely.
2/3 cup powdered sugar – This sweetens the filling and also helps it firm up a bit. Don’t substitute granulated sugar here.
1 tsp vanilla extract – Just a small splash makes the whole filling taste more layered and flavorful.
1 container (8 oz) Cool Whip or whipped topping – This is what makes the filling light and fluffy. You can use homemade whipped cream (made from heavy cream) if you prefer the real deal – but for a quick party dessert, Cool Whip is honestly perfect.
24–26 Oreo cookies, plus extra for topping – Classic chocolate Oreos are the crowd favorite here. But this recipe works with any flavor you love. More on that below!
The Best Oreo Flavors to Try
Here’s where things get fun. The classic Double Stuf Oreo is always a winner. But don’t be afraid to mix it up!
Golden Oreos give the filling a vanilla-on-vanilla vibe that tastes like birthday cake. Mint Oreos turn these into a mint cookies-and-cream dream (add 1/2 tsp peppermint extract to really amp it up). Peanut Butter Oreos add a salty-sweet twist that adults especially love.
There are also several gluten-free Oreo options available now, which makes this recipe incredibly easy to adapt for guests with dietary restrictions – no separate dessert needed!
Whatever flavor you choose, the method stays exactly the same. That’s the beauty of this recipe.
How to Make No-Bake Oreo Cheesecake Cups
This recipe comes together in three simple stages: crush the Oreos, make the filling, assemble the cups. That’s it.
Step 1: Crush Your Oreos
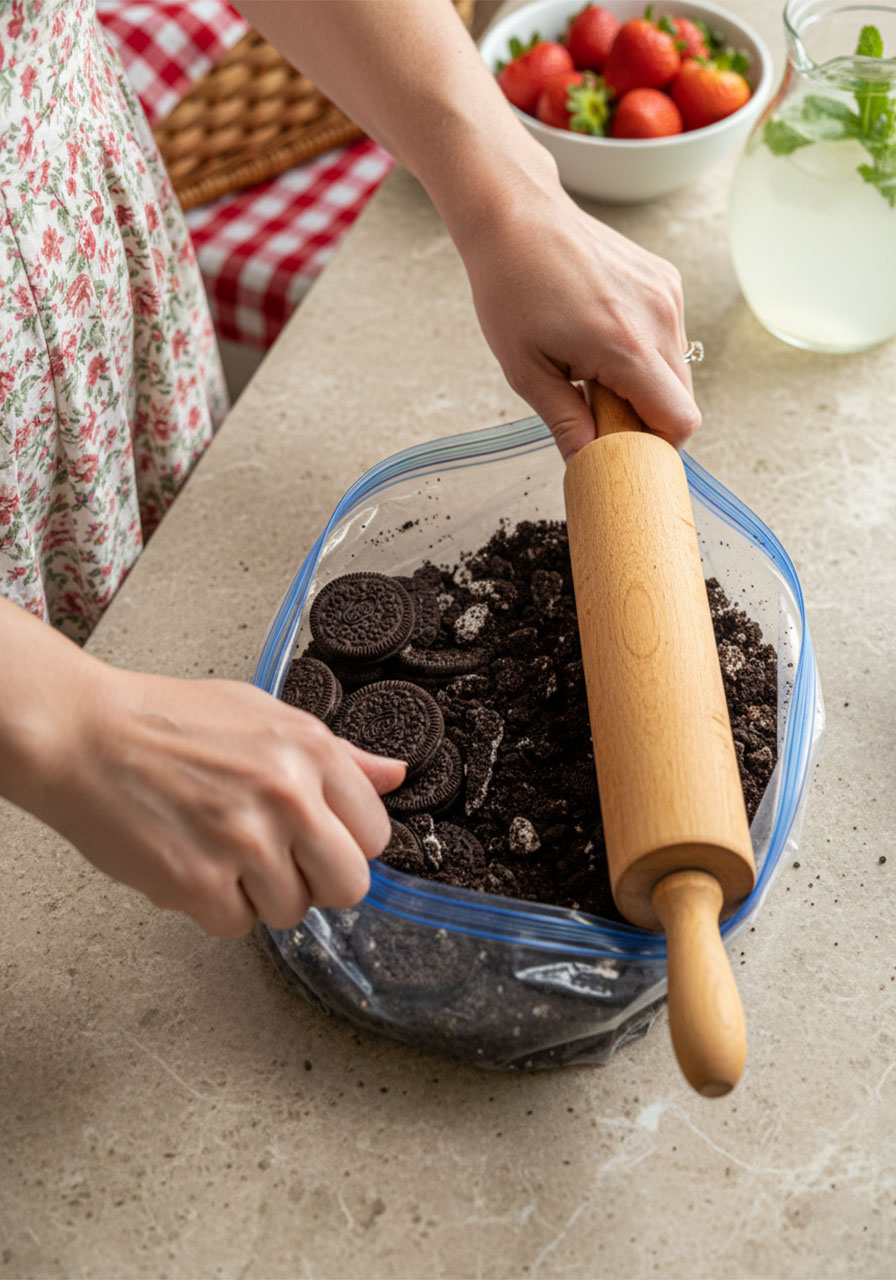
Place all your Oreos into a large zip-lock bag and seal it shut. Then use a rolling pin or the back of a sturdy wooden spoon to crush them.
You don’t want a fine powder here. Aim for a mix of small chunks and bigger pieces – it gives the filling a better texture and makes every bite more interesting.
No food processor needed. Fewer dishes, more fun.
Step 2: Layer the Bottoms
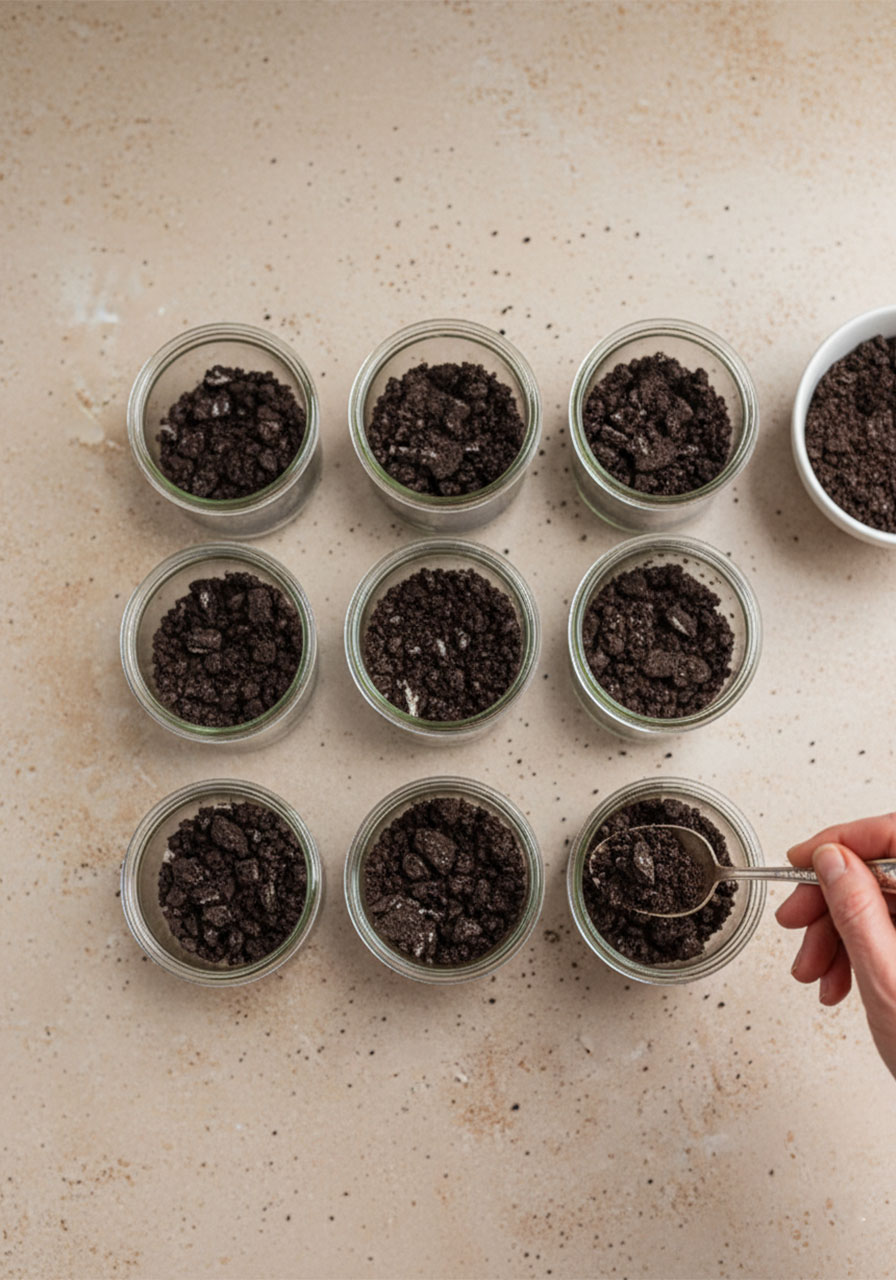
Grab 6 small dessert cups or glass jars (at least 3/4 cup to 1 cup in size). Spoon about 1 1/2 to 2 tablespoons of crushed Oreos into the bottom of each one.
Press them down gently. This becomes your cookie base – kind of like a mini cheesecake crust, but way easier.
Set the cups aside and keep the remaining crushed Oreos for the filling.
Step 3: Make the Cheesecake Filling
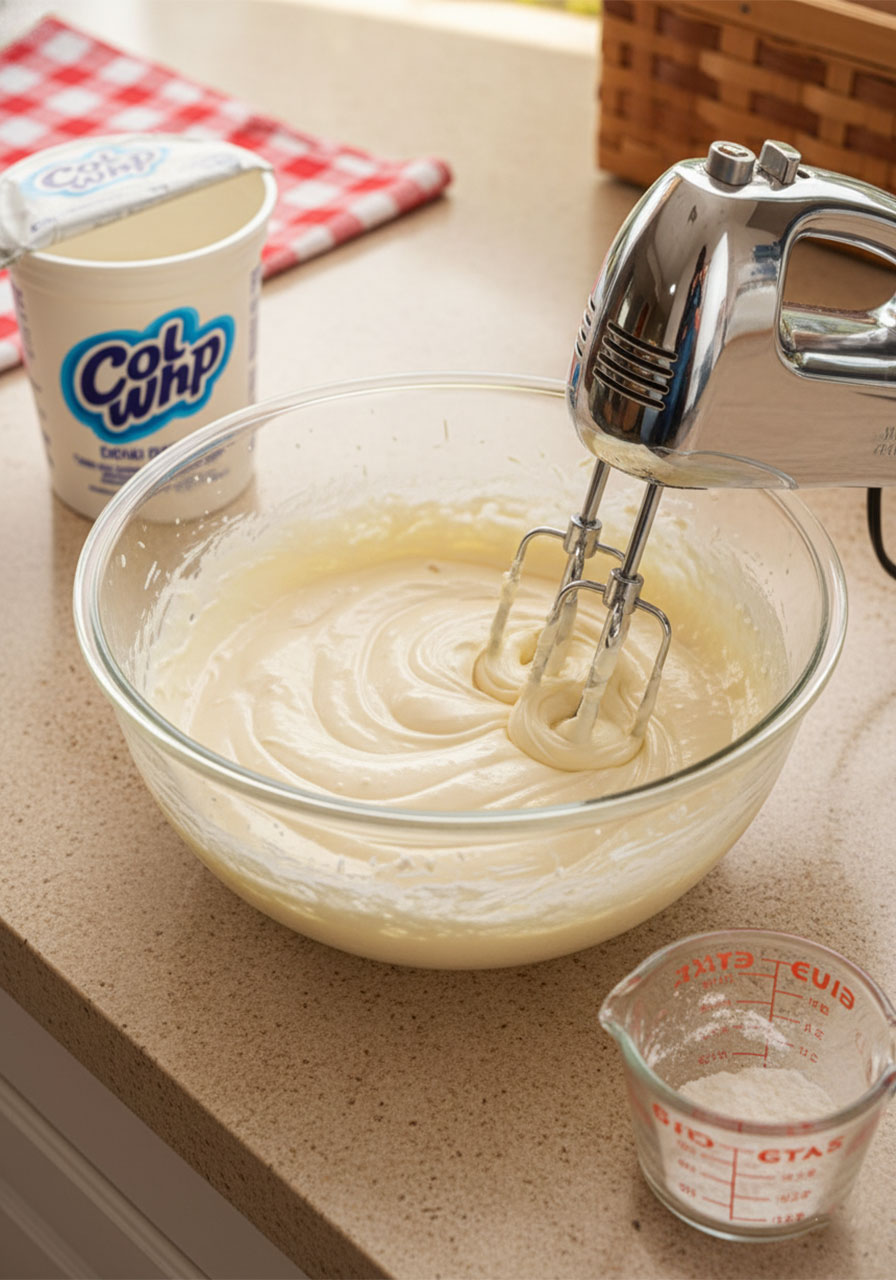
In a large bowl, combine the softened cream cheese and powdered sugar. Using a hand mixer or stand mixer, beat them together on low speed at first (seriously – start slow or you’ll be wearing a cloud of powdered sugar), then increase to medium until the mixture is totally smooth and creamy.
Add the vanilla extract and beat it in.
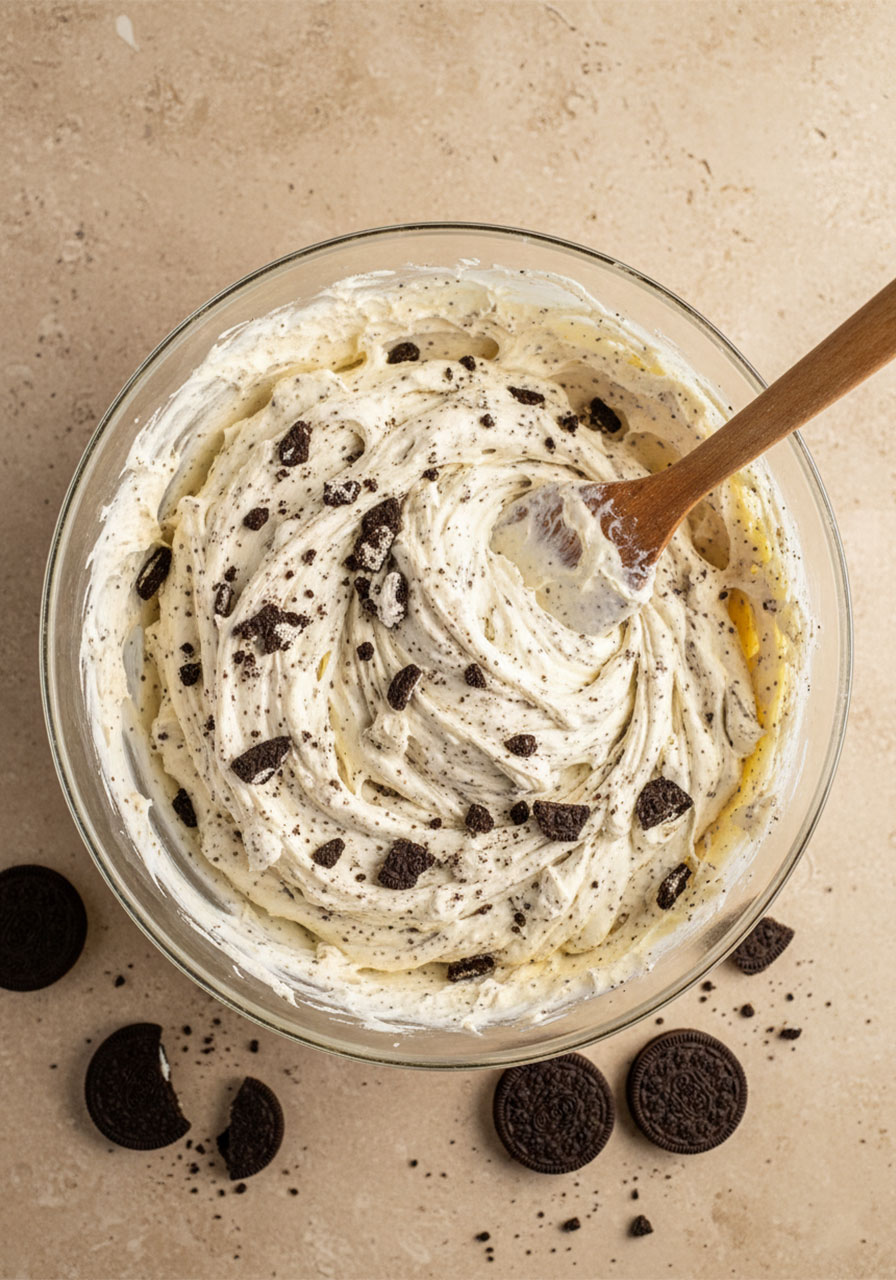
Next, gently fold in the Cool Whip using a spatula or wooden spoon. Use slow, sweeping motions to keep the mixture light and fluffy. Don’t stir aggressively – you want to preserve that airy texture.
Finally, fold in the remaining crushed Oreos. At this point, the filling will look absolutely irresistible. Try not to eat it all straight from the bowl (no judgment if you do).
Step 4: Fill and Chill
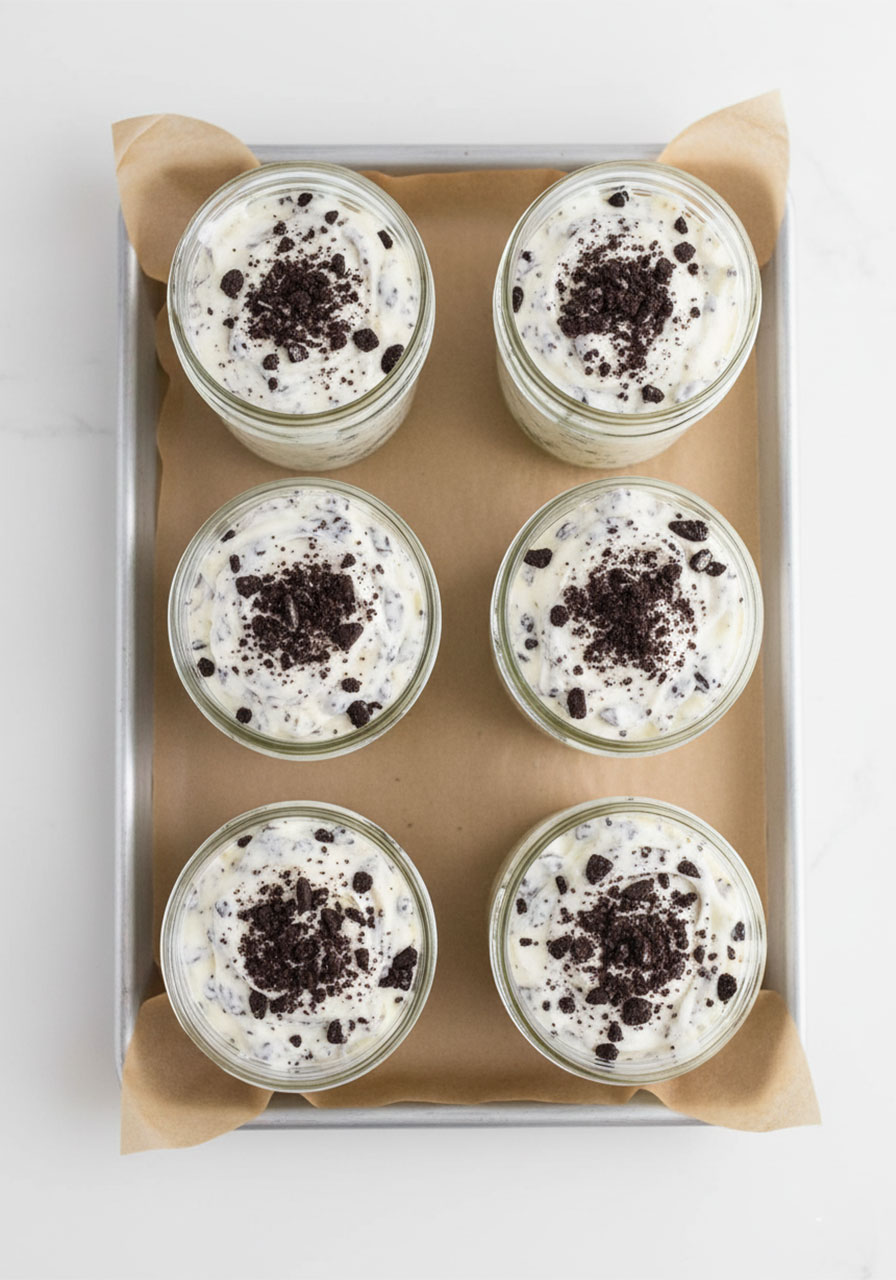
Spoon the cheesecake filling evenly into your 6 cups, on top of the Oreo base. Gently press the filling down to fill in any gaps around the cookie crumbs at the bottom.
Refrigerate for at least 1 hour before serving. This gives the filling time to set up and firm slightly, making every bite perfect.
Step 5: Top and Serve
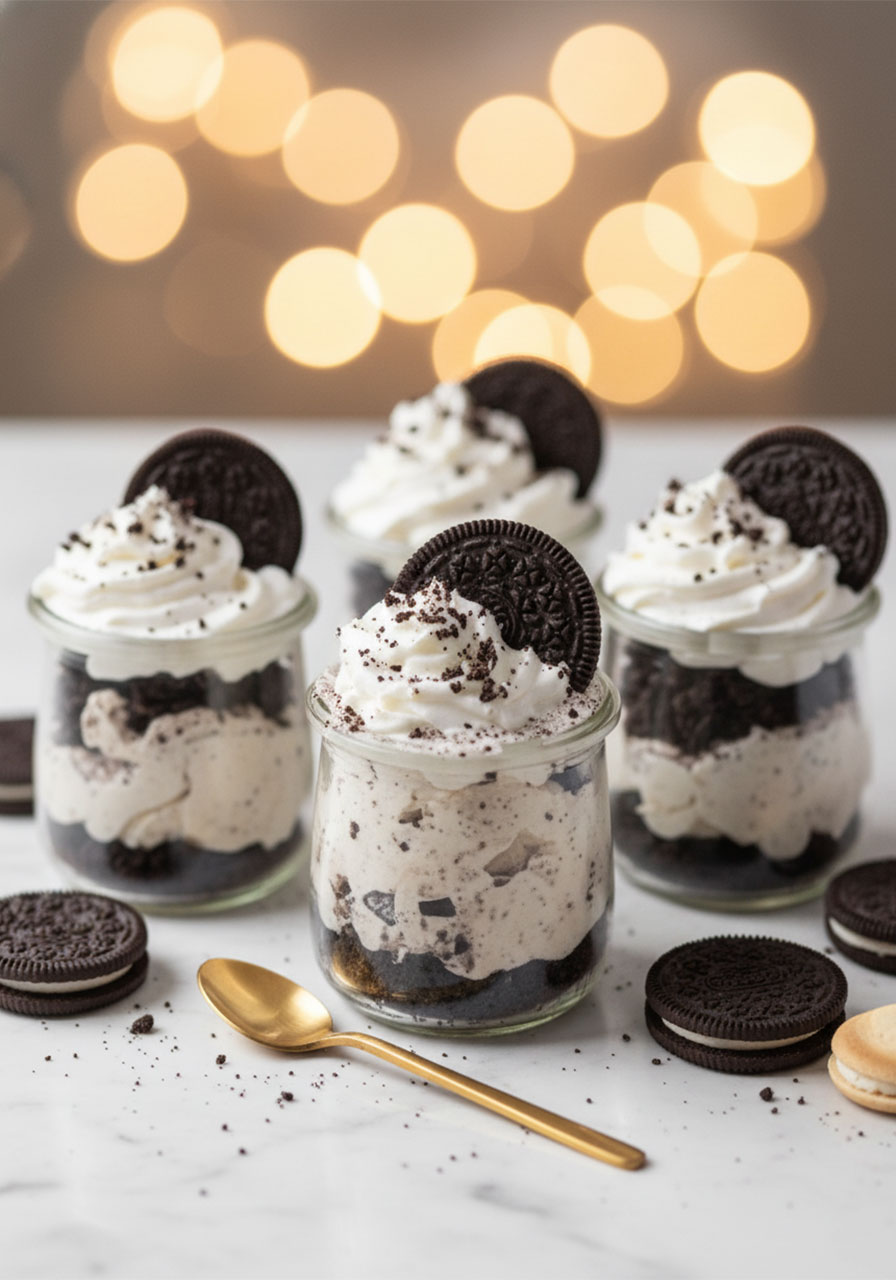
Right before serving, add a big swirl of whipped cream on top. Then scatter some extra crushed Oreos over the whipped cream, and finish with a whole Oreo (or a half) stuck into the top at a dramatic angle. It’s the detail that makes everyone say “wow” before they even take a bite.
Pro Tips for Perfect Cheesecake Cups Every Time
Soften your cream cheese fully. This is the most important step people skip. Cold cream cheese = lumpy filling. Leave it on the counter for at least 30–60 minutes before you start. If you’re short on time, unwrap it and microwave it in 10-second bursts until it gives easily when pressed.
Don’t skip the chill time. One hour minimum. The filling firms up in the fridge and the flavors meld together beautifully. If you can make these the night before a party, even better.
Keep some bigger Oreo chunks in your filling. It’s tempting to crush everything to a fine crumb, but the chunky pieces in the filling are where all the textural magic happens.
Add toppings right before serving. If you add whipped cream hours early, it can start to weep or deflate. Top each cup just before putting them on the table.
Make the base optional. If you’re short on Oreos or making a larger batch, you can skip the bottom cookie layer entirely. Just use 6–8 fewer cookies and go straight to filling. Still delicious.
Fun Variations to Try
Once you’ve nailed the classic version, these variations are worth exploring for different parties and occasions.
Mint Oreo Cheesecake Cups – Use mint-flavored Oreos and add 1/2 teaspoon of peppermint extract to the filling. Perfect for Christmas parties or St. Patrick’s Day events.
Birthday Cake Oreo Cups – Swap in Birthday Cake Oreos and top with rainbow sprinkles. This version is a guaranteed hit at kids’ birthday parties.
Peanut Butter Oreo Cups – Use Peanut Butter Oreos in both the base and filling. Drizzle the finished cups with a little peanut butter warmed in the microwave for extra impact.
Parfait-Style Cups – Want to make them even more impressive? Layer crushed Oreos, then cheesecake filling, then more Oreos, then more filling – parfait style. Looks beautiful in clear glasses.
One Big Dish Version – Making these for a really large group? Pour everything into an 8×8 inch pan or a bread loaf pan. Layer Oreos, then filling, then repeat. Scoop and serve like a casserole. It’s not quite as pretty, but it’s just as delicious.
Make It Gluten-Free
Good news: this recipe is almost entirely naturally gluten-free already. The only swap you need to make is using gluten-free Oreos, which are now widely available in most major grocery stores.
Everything else – cream cheese, powdered sugar, vanilla, Cool Whip – is already gluten-free. Easy as that.
This makes these cups a fantastic option for classroom parties or mixed gatherings where you want one dessert that works for everyone.
How to Store Oreo Cheesecake Cups
These cups keep well in the refrigerator for up to 5 days. Wrap each cup tightly with plastic wrap, or store them in an airtight container. If your cups have lids, even better – just snap them on.
One thing to note: the Oreos will soften slightly over time as they absorb moisture from the filling. By day 2 or 3, they’ll be tender rather than crunchy. Some people actually prefer it that way!
You can also freeze these cups for longer storage. Wrap them twice – first in plastic wrap, then in foil – to prevent freezer burn. Thaw overnight in the refrigerator before serving.
Do not add whipped cream or cookie toppings before freezing. Add those fresh right before you serve.
Serving Ideas for Parties
These cups are born for a party table. Here are a few ways to make them shine even more.
Set up a mini dessert station with the cups already topped and arranged on a tray. Add a few whole Oreos scattered around for decoration – it looks effortlessly put together.
For a classroom setting, use small 4-oz plastic cups with lids for easy individual servings. Kids can grab one, pop the lid off, and eat without any serving utensils needed. Zero mess.
For a more elegant presentation at adult gatherings, use short wide-mouth glass jars and pipe the whipped cream topping using a star tip. It looks like something from a fancy restaurant, but it took you 20 minutes to make.
Planning a potluck or bake sale? Make a big batch in 3-oz plastic cups, cover them with lids or wrap, and stack them in a cooler. They travel beautifully and don’t need to be refrigerated for short periods.
Frequently Asked Questions
Can I use homemade whipped cream instead of Cool Whip?
Absolutely! Whip 1 cup of heavy cream to stiff peaks and fold it in exactly the same way. The texture will be slightly lighter, and the flavor will be a little richer. Both versions are delicious – it just depends on how much time you have.
What size cups should I use?
You want cups that hold at least 3/4 cup to 1 cup of filling. Small mason jars, glass yogurt jars, ramekins, or even short wide-mouth glasses all work great. If using plastic cups, look for 8–10 oz portion cups.
Can I make these the night before?
Yes, and honestly you should! They taste even better after chilling overnight. Just wait to add the whipped cream and cookie toppings until right before serving.
Can I double the recipe?
Easily. Just double every ingredient and use 12 cups instead of 6. The method stays exactly the same.
My filling turned out lumpy. What happened?
Almost certainly the cream cheese wasn’t fully softened before mixing. Next time, leave it out at room temperature for at least an hour. If it’s lumpy right now, try beating it on medium speed for another full minute – sometimes the warmth of the mixer can still smooth things out.
The Bottom Line
There are a lot of desserts out there. But very few of them check every box at once: quick, easy, no baking, crowd-pleasing, kid-approved, adult-adored, and completely customizable.
These No-Bake Oreo Cheesecake Cups do all of that – and they look gorgeous on a party table to boot.
Make them once and you’ll understand why they always disappear first. With this recipe in your back pocket, you’re officially ready to be the most legendary dessert-bringer at every gathering this year.
Go grab those Oreos. Your guests are waiting.
No-Bake Oreo Cheesecake Cups
Ingredients
- 1 block (8 oz) full-fat cream cheese, softened to room temperature
- 2/3 cup powdered sugar
- 1 tsp vanilla extract
- 1 container (8 oz) Cool Whip or whipped topping, thawed
- 24–26 Oreo cookies (plus extra for topping, if desired)
- Whipped cream, for serving
Instructions
- Place Oreos in a large zip-lock bag, seal it shut, and crush them using a rolling pin or sturdy wooden spoon. Aim for chunky crumbles rather than a fine powder. Reserve a small handful for topping.
- Spoon 1 1/2 to 2 tablespoons of crushed Oreos into the bottom of each of 6 dessert cups (at least 3/4 cup to 1 cup capacity). Press down gently. Set cups aside.
- In a large mixing bowl, beat the softened cream cheese and powdered sugar together with a hand mixer or stand mixer on low speed to start, then increase to medium, until smooth and creamy with no lumps. Start on low to avoid a powdered sugar explosion!
- Add vanilla extract and beat until fully incorporated.
- Gently fold in the Cool Whip with a spatula using slow sweeping motions until fully combined and fluffy. Do not over-mix.
- Fold in the remaining crushed Oreos.
- Spoon the cheesecake filling evenly into the 6 prepared cups, pressing gently to fill any gaps around the Oreo base.
- Refrigerate for at least 1 hour (or overnight) until set.
- Just before serving, top each cup with a swirl of whipped cream, a sprinkle of crushed Oreos, and a whole or half Oreo cookie for garnish.
Notes
- Cream cheese must be fully softened or the filling will be lumpy. Leave it out at room temperature for at least 30–60 minutes before starting.
- Any Oreo flavor works in this recipe. Try Golden Oreos, Mint Oreos, Peanut Butter Oreos, or Birthday Cake Oreos.
- To make gluten-free: substitute gluten-free Oreos. All other ingredients are naturally gluten-free.
- To make with homemade whipped cream: whip 1 cup heavy cream to stiff peaks and fold in as directed.
- For mint variation: use Mint Oreos and add 1/2 tsp peppermint extract to the filling.
- Storage: Cover tightly and refrigerate for up to 5 days. Oreos will soften over time. Add whipped cream topping just before serving.
- Freezer-friendly: Wrap cups twice (plastic wrap + foil) and freeze. Thaw overnight in the fridge. Add toppings fresh before serving.
More Easy Party Food Ideas to Keep the Fun Rolling:
Taco Ranch Bites (Easy Party Finger Food for a Crowd!)
Strawberry Brownie Kabobs (Fun Party Dessert Skewers Kids Will Go Crazy For!)
Crispy Chicken Bacon Ranch Wrap (The Ultimate Easy Party Food & Lunch Idea!)
Easy Unicorn Cookies (The Most Magical Birthday Party Treat for Kids!)
Easy Pinwheel Sandwiches (Make-Ahead Party Finger Food!)
Sheet Pan Burger Sliders on Hawaiian Rolls (Easy Crowd Meal!)
