
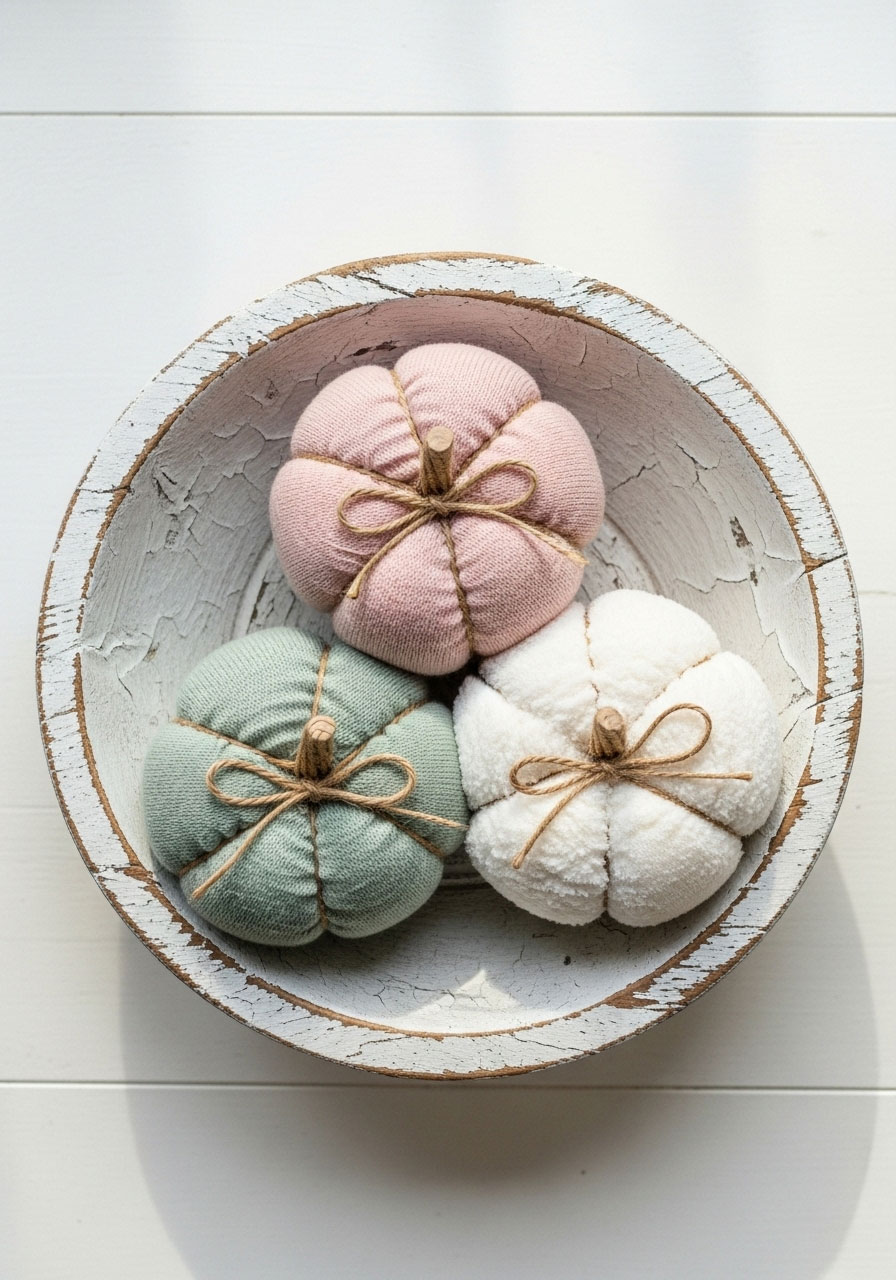
Get ready to transform boring fuzzy socks into the most adorable fall decorations you’ve ever seen – and you won’t even need to thread a needle!
Why You’ll Love This Craft
If you’re drawn to all things soft, fuzzy, and ridiculously cute, this tutorial is about to become your new favorite fall project. These fluffy sock pumpkins require minimal supplies, take less than 15 minutes to make, and use just a tiny dab of hot glue. Trust me – once you make one, you’ll want to make a whole pumpkin patch!
Best for: Fall decorating, Thanksgiving place settings, quick weekend projects
Time to Complete: 10-15 minutes per pumpkin
Skill Level: Total beginner-friendly

What You’ll Need
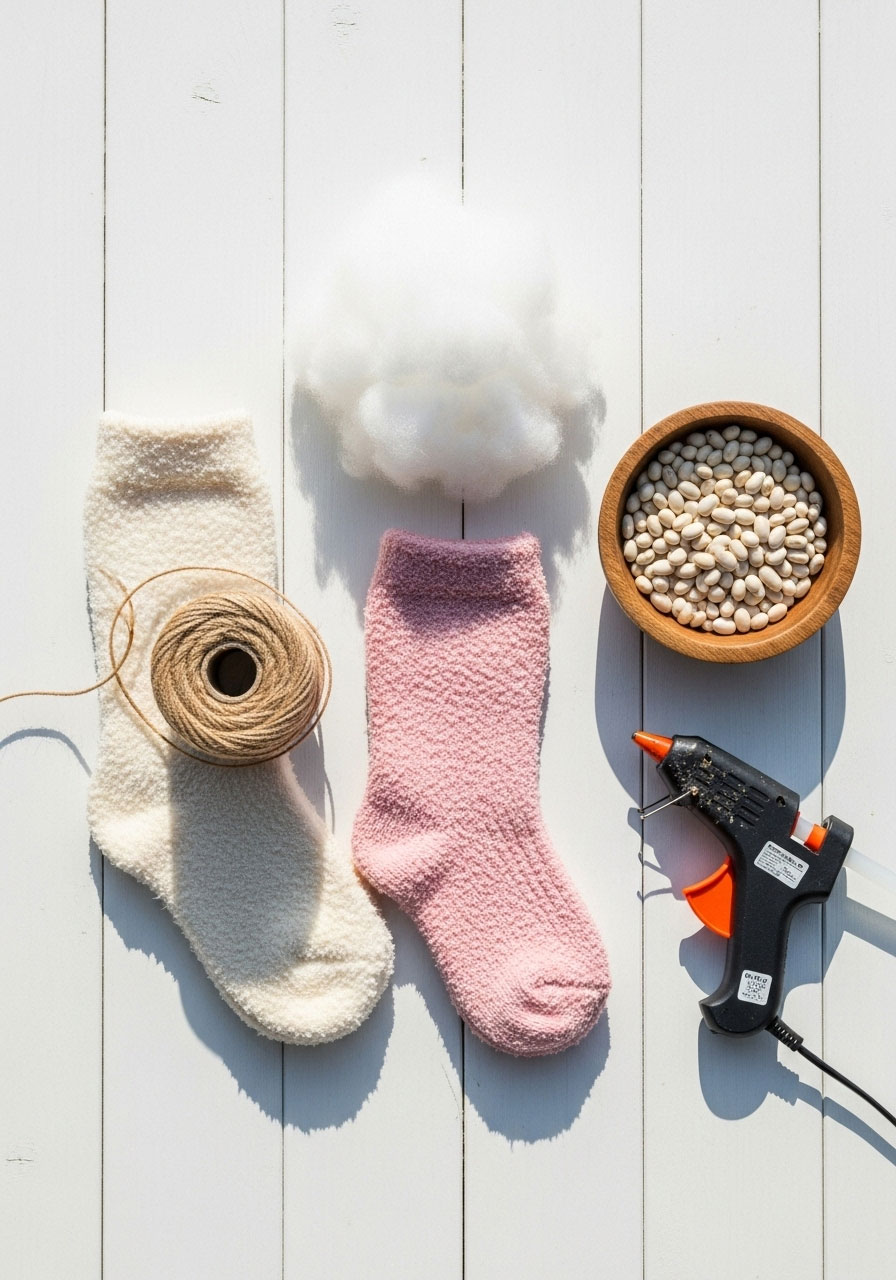
Here’s your super simple supply list:
- Fuzzy socks (short socks work best – we’ll be cutting them)
- Polyester fiberfill (for that cloud-like stuffing)
- Small dried beans, rice, or popcorn kernels (about 1/4 cup per pumpkin for stability)
- Hot glue gun (you’ll barely use it, promise!)
- Jute twine (for that rustic stem and pumpkin segments)
Optional add-ons to make yours extra special:
- Alphabet stamps and black fabric ink for cute tags
- Felt leaves for a leafy stem
- Coffee-stained drop cloth for vintage-style tags
Pro Tip: I’ve made tons of projects with dried beans and rice, and I’ve never had issues with critters. Just store your finished pumpkins in a sealed plastic bin. But if you’re worried, grab some non-edible stuffing beads instead!

Fall Autumn Outdoor Scavenger Hunt Printable for Kids & Adults
🎁Buy Now and get instant access to your download!
✉After your purchase, you can download your files directly from the website or find them in the email receipt we send you.
📧Should you encounter any issues, please contact us at [email protected] and we'll assist you within 24-48 hours.
How to Make Your Fuzzy Sock Pumpkins (Step-by-Step)
Ready to get fluffy? Let’s dive in! I’m walking you through each step so your pumpkins turn out picture-perfect.
Step 1: Cut Your Sock
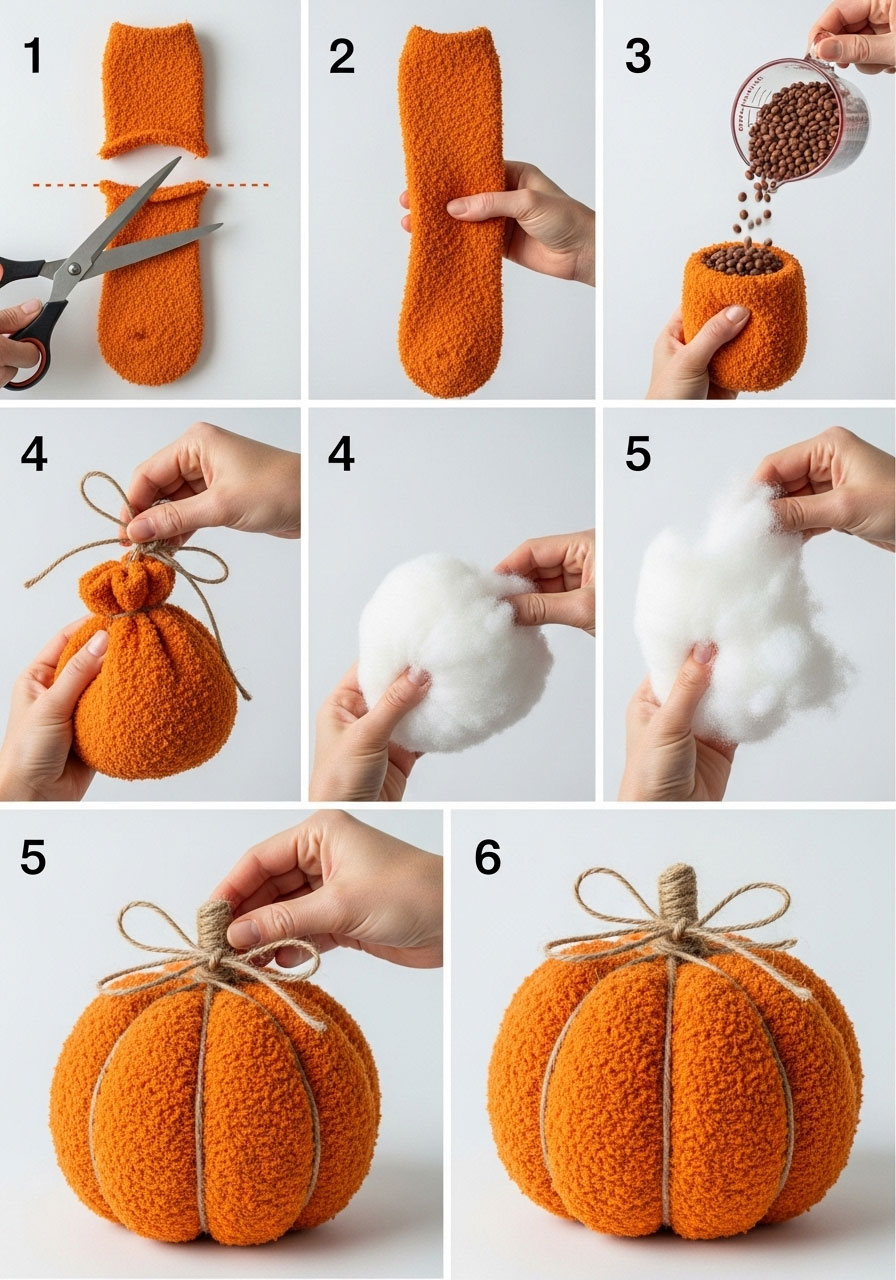
Lay your fuzzy sock flat on your work surface and cut straight across at the heel. You’ll discard the shorter heel piece (or save it if you used tall socks – you can make a bonus mini pumpkin!).
Step 2: Add Your Bean Base
Pour about 1/4 cup of dried beans into the bottom of your sock tube. This creates a stable base so your pumpkin can stand up without flopping over. Think of it as your pumpkin’s foundation!
Step 3: Stuff It Like You Mean It
Here’s where the magic happens! Firmly stuff your sock with polyester fiberfill. And I mean firmly. You’ll add way more than you think you need – just keep stuffing and pressing down until you have an even, plump fill. Your pumpkin should feel solid, not squishy.
Why this matters: A firmly stuffed pumpkin will hold its shape beautifully and make those gorgeous segments in the next steps.
Step 4: Tie Off the Top
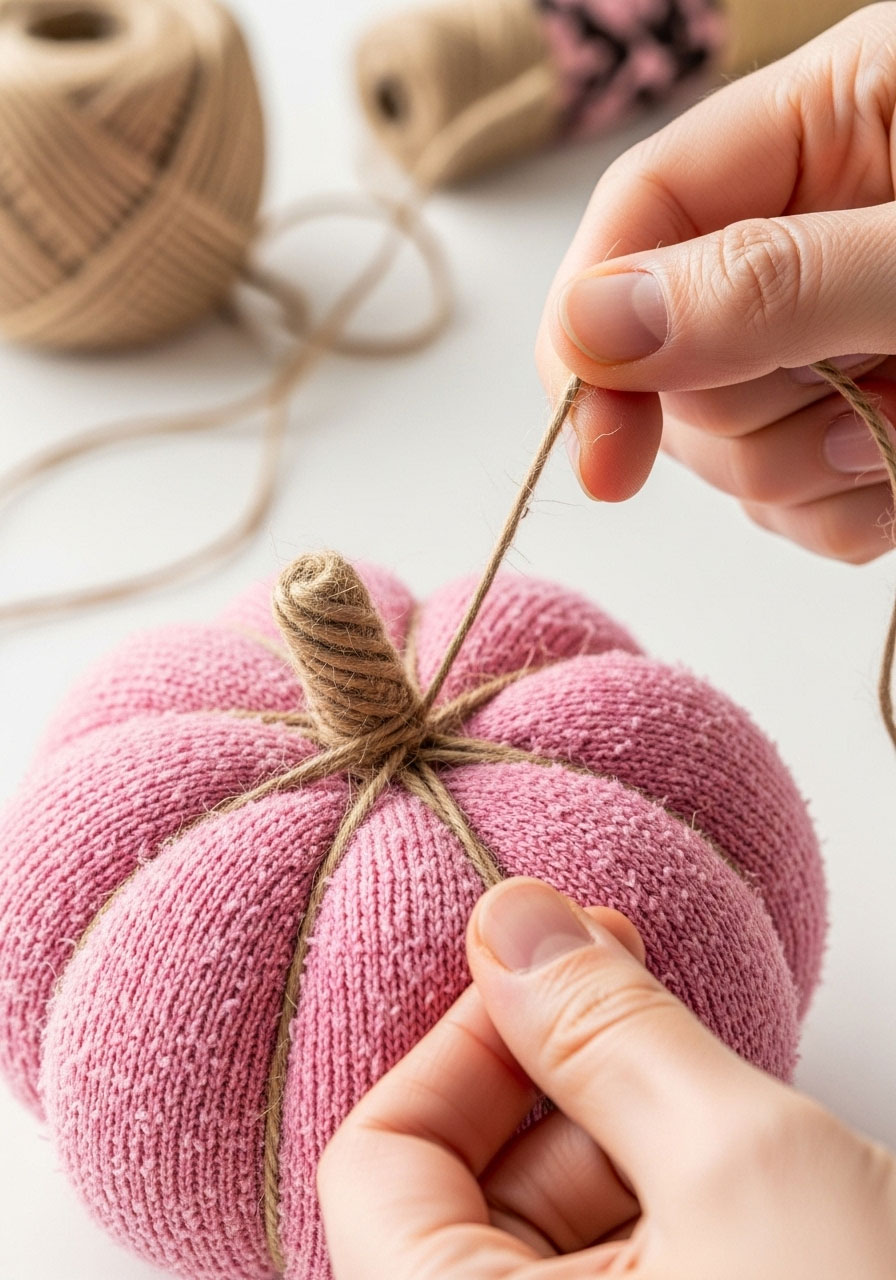
Use jute twine to tightly tie your pumpkin at the top. Double knot that bad boy for security!
IMPORTANT: Do NOT cut the jute yet! Keep your roll or ball of jute intact – we’ll need a long strand for the next steps, and there’s no way to know exactly how much you’ll need.

Step 5: Create Those Instagram-Worthy Segments
Now for the fun part! Wrap the jute from the top of your pumpkin down and around the bottom, then bring it back up to the stem. Wrap it around the stem area, then repeat this process until you have 6-8 beautiful pumpkin segments.
The secret trick: As you bring the jute back up to the top, pull on it slightly so your pumpkin segments look nicely indented. This is what gives your pumpkin that authentic, just-picked-from-the-patch look!
Still don’t cut that jute – we’re not done yet!

Step 6: Build Your Stem
Time to create that adorable rustic stem! Wrap the jute tightly around the very top of your pumpkin, going around and around to build height. Pull that jute tight so everything stays secure.
Once your stem is as tall as you want it (I usually go for about 1-2 inches), cut the top of the sock fabric away. Use just a little dab of hot glue to secure the jute around the top, creating a seamless, finished stem.
And you’re done! Seriously, that’s it. You just made the cutest fluffy pumpkin ever.
Tips for Turning Out the Cutest Sock Pumpkins
Want to make sure your pumpkins look professionally crafted? Follow these insider tips:
- Stuff firmly: A well-stuffed pumpkin holds its shape and looks full and plump – don’t be shy with that fiberfill!
- Pull snugly: When wrapping jute around your pumpkin to create segments, pull it tight and always wrap it around the base of the stem before moving to the next segment
- Tighten that stem: Pull your jute really tight when making the stem, or it might unravel or look loose. You may need to overlap the jute to completely cover the sock
- Less glue is more: You only need a tiny bit of glue on the very top of the stem to secure everything in a neat circle

Rescue The Runaway Turkeys – Easy Thanksgiving Scavenger Hunt Printable for Kids
🎁Buy Now and get instant access to your download!
✉After your purchase, you can download your files directly from the website or find them in the email receipt we send you.
📧Should you encounter any issues, please contact us at [email protected] and we'll assist you within 24-48 hours.
Make It Extra Special

Want to take your sock pumpkins to the next level? Here’s a charming idea: stamp your guests’ names on small tags (use cardstock or coffee-stained fabric for that vintage vibe) and hot glue them to the base of each pumpkin stem.
Party host genius move: Use these personalized pumpkins as Thanksgiving place settings! Your guests will have an adorable handmade gift to take home, and you’ll look like the most creative host ever.
Why This Craft Is a Total Win
Once you make your first sock pumpkin, you’ll get the hang of it fast – and the rest will go even quicker and easier! These fuzzy beauties work in traditional fall colors (think burnt orange, deep burgundy, and warm brown) or go totally unexpected with pastels, jewel tones, or even black and white for a modern look.
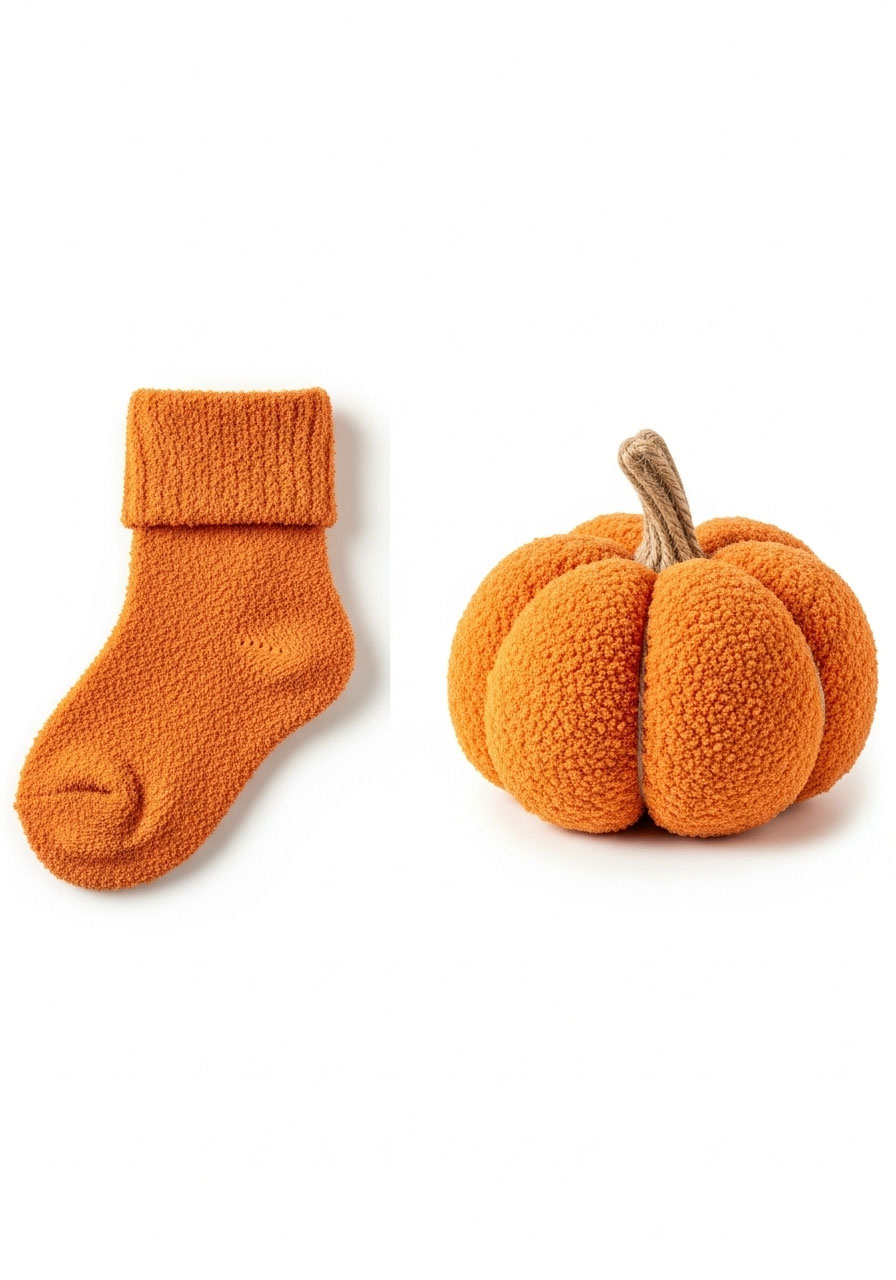
With these DIY pumpkins in your decorating arsenal, you’re ready to make your home feel cozy, festive, and Instagram-worthy all fall long. Because the best seasonal decor is the kind you made yourself with a whole lot of fluff and a little bit of love!
Ready to get fluffy? Grab those socks and let’s make some pumpkin magic happen!
More Fall Party Ideas to Keep the Fun Rolling:
50 Easy Pumpkin Decorating Ideas Your Kids Will Love (No Carving Required!)
35+ Epic Pumpkin Games for Kids’ Parties That’ll Make This Fall Unforgettable
DIY Outdoor Pumpkins That Look Insanely Real (And Cost Almost Nothing!)
How to Make No-Knit Yarn Pumpkins (So Easy, Your Guests Will Want the Tutorial!)
How to Host an Epic Pumpkin Carving Party
How to Make a Fall Leaf Garland
