Father’s Day is right around the corner, and if you’re looking for a gift that’s personal, creative, and genuinely fun to make – you’ve landed in exactly the right place.
This DIY pop-up superhero card is one of those projects that looks seriously impressive but is actually totally doable, even with little ones helping. When Dad pulls that little tab and a whole squad of superheroes springs to life? Trust me – his face will be everything.
Whether you’re making this as a parent crafting alongside your kids, or a teacher setting up a Father’s Day craft activity for the classroom – this step-by-step guide has you completely covered.
Let’s dive in!

Why This Card Is So Stinkin’ Special
Before we get our hands glue-y, let’s talk about why this particular card is worth the effort.
Most store-bought cards end up in a drawer and forgotten by July. This card? Dad is going to keep it on his desk.
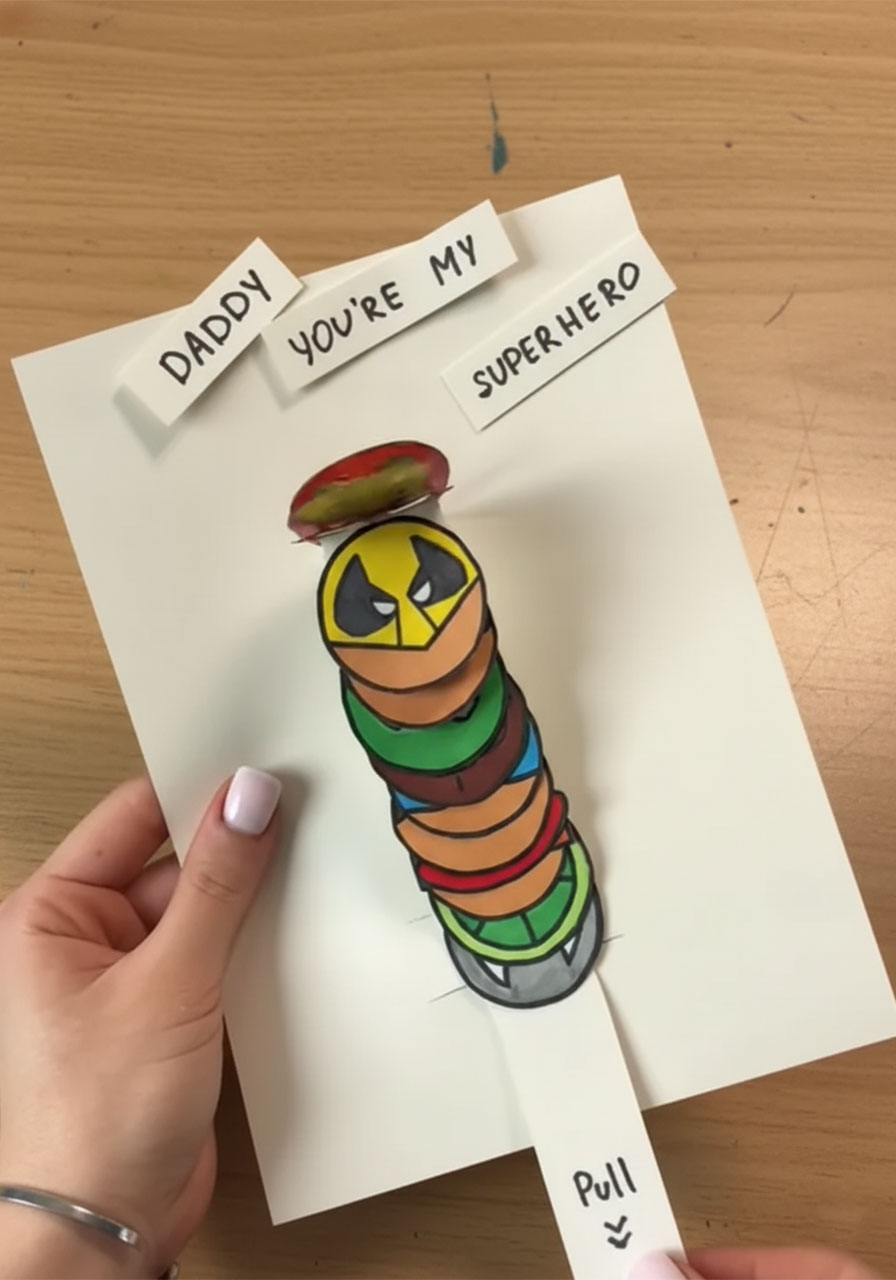
The secret is the pull-tab mechanism. When Dad tugs the little strip at the bottom, a tower of his favorite superheroes pops right up through the card. Deadpool, Iron Man, Captain America, Batman, Hulk – you can pack in as many heroes as you like. It’s like a tiny paper surprise party just for him.
And the best part? The whole thing is made from materials you almost certainly already have at home. No trip to the craft store required.


What You’ll Need
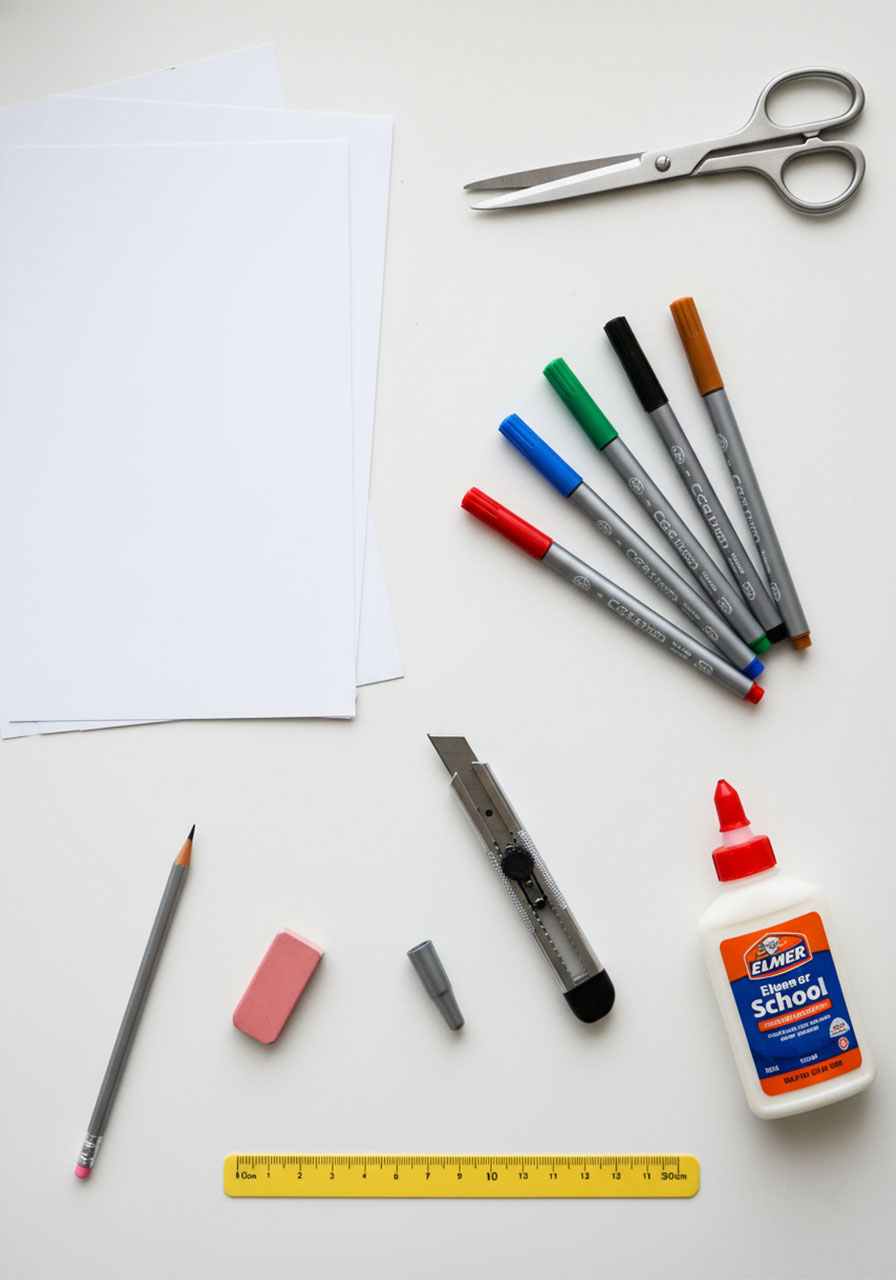
Materials List:
White cardstock or heavy paper – You’ll need two pieces: one for the card itself and one for the pop-up mechanism strip.
Colorful markers – The more colors, the better! Bold, vibrant shades make the superheroes pop.
Pencil and eraser – For sketching your hero designs before committing to marker.
Scissors – Sharp enough to cut cleanly through cardstock.
A craft knife (like an X-Acto knife) – Essential for cutting the two small slits in the card base. Adult supervision required!
Liquid school glue or a glue stick – Either works great here.
A ruler – For measuring even fold marks on your paper strip.
💡 No cardstock? Regular printer paper can work in a pinch, but cardstock gives the accordion folds much more satisfying structure. If you can, grab a pack – it’s a game-changer for this project!
Step-by-Step Instructions
We’ve broken this into three phases so it’s easy to follow, even if you’re crafting with a wiggly five-year-old by your side.
Phase 1: Draw and Color Your Superheroes
This is the most fun part – bringing your hero squad to life!
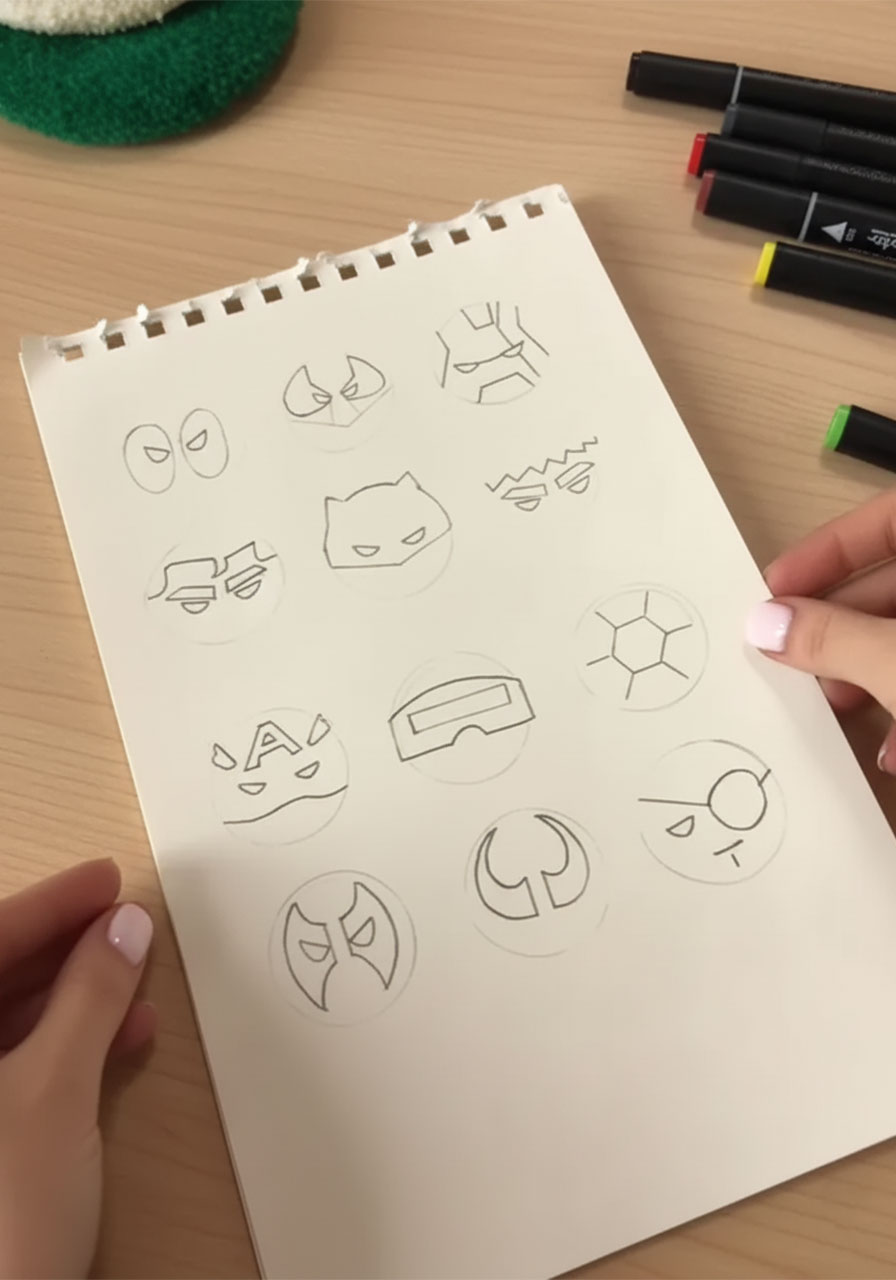
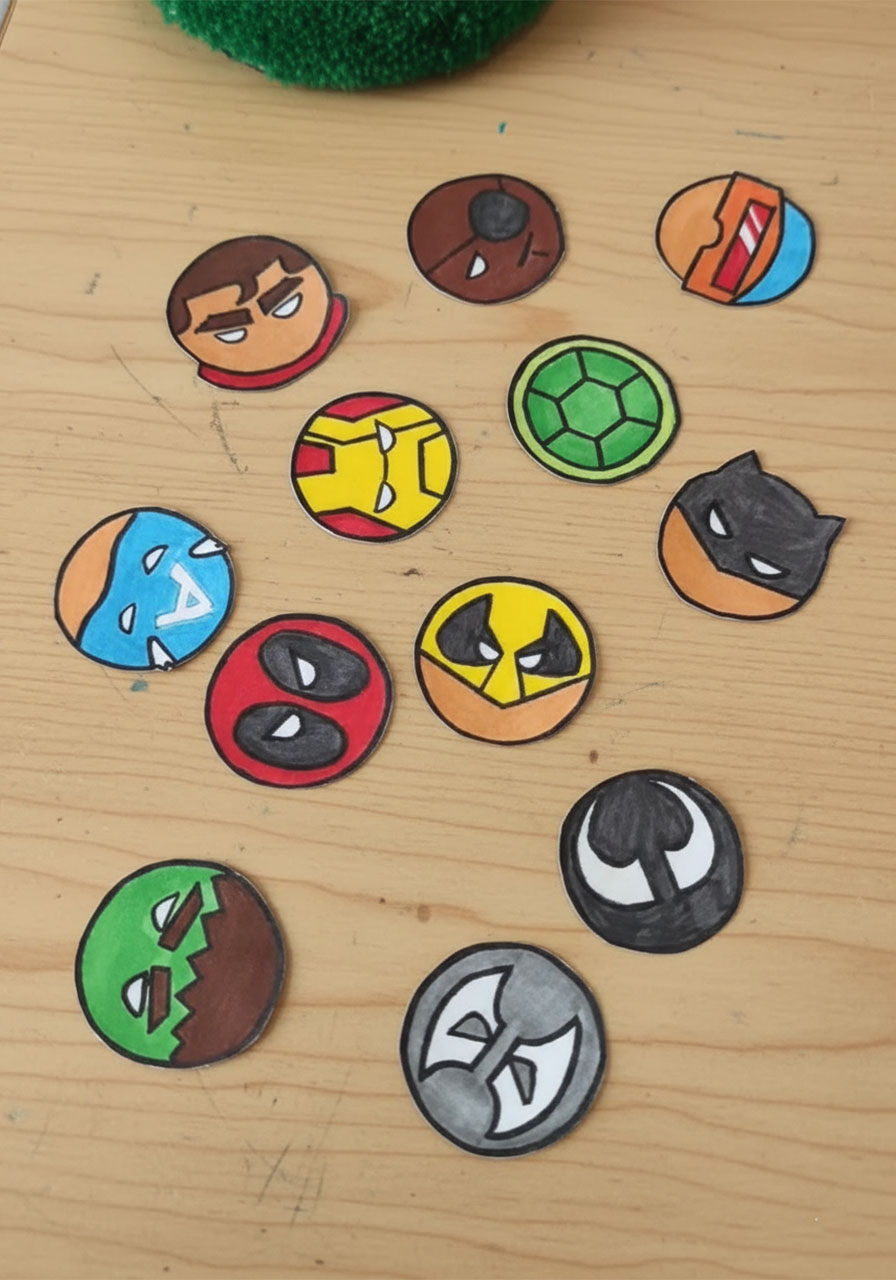
1. Draw your superheroes in simple circle shapes.
Think of each hero as a little round icon. Iconic features work best: Deadpool’s mask, Iron Man’s faceplate, Batman’s cowl, Captain America’s shield design, the Hulk’s angry green face. Keep them bold and simple – you don’t need to be a professional artist for this to look awesome.
2. Color them in with bright, vibrant markers.
The bolder the better! These little guys need to stand out when they pop up from the card. Go wild with the color.

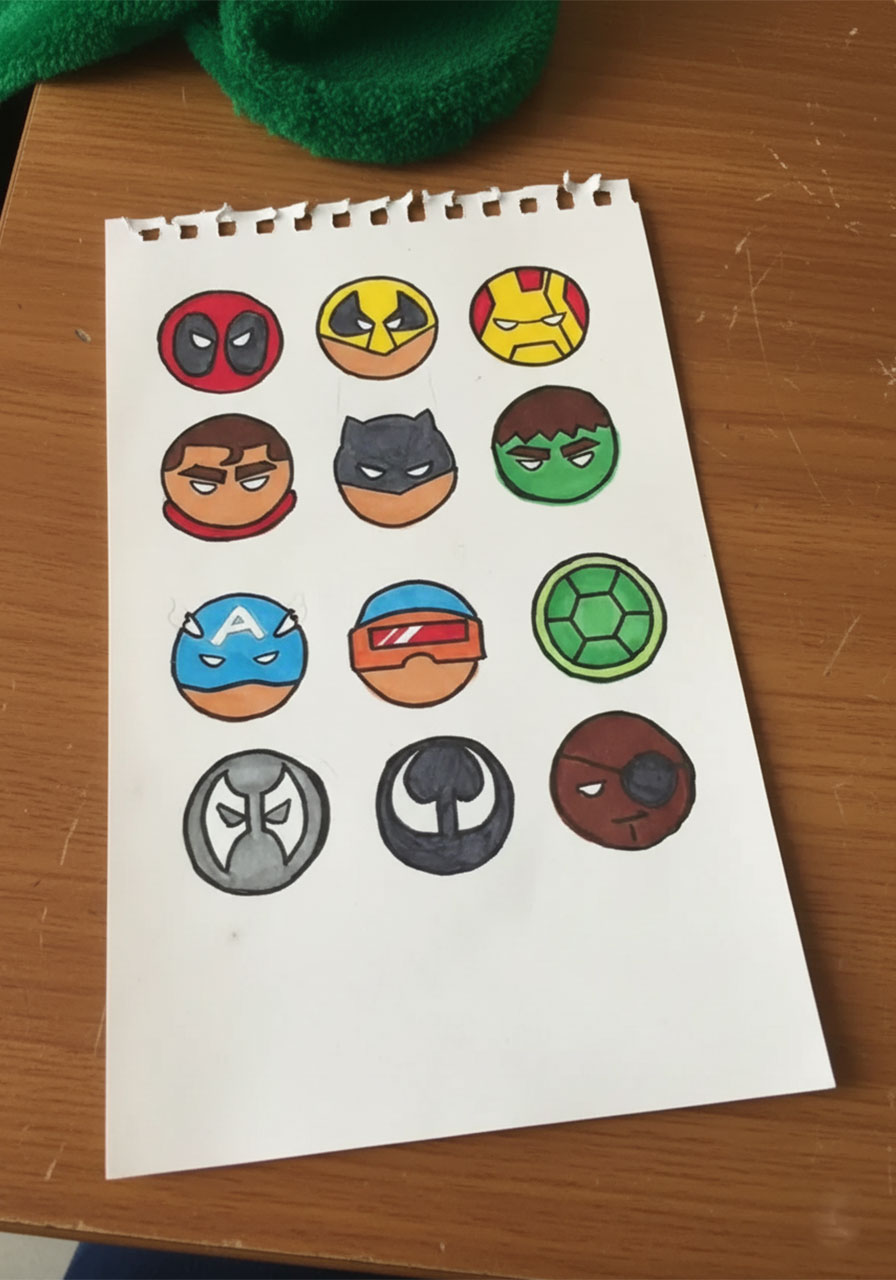
3. Cut each circle out carefully.
Try to keep the edges clean and smooth. These circles are going to be the stars of the show!
🎨 Pro Tip: Sketch all your heroes in pencil first before going over them in marker. That way, if Batman’s ears look a little lopsided, you can fix it before it’s permanent. Kids especially love having the “redo” option!
Aim for around 10–12 hero circles if you want a really tall, impressive tower. You can always do fewer if you’re short on time – even 6 or 7 heroes looks fantastic.
Phase 2: Build the Pop-Up Mechanism
Here’s where the magic happens. This accordion-fold strip is what makes the whole card work – and it’s simpler than it looks!
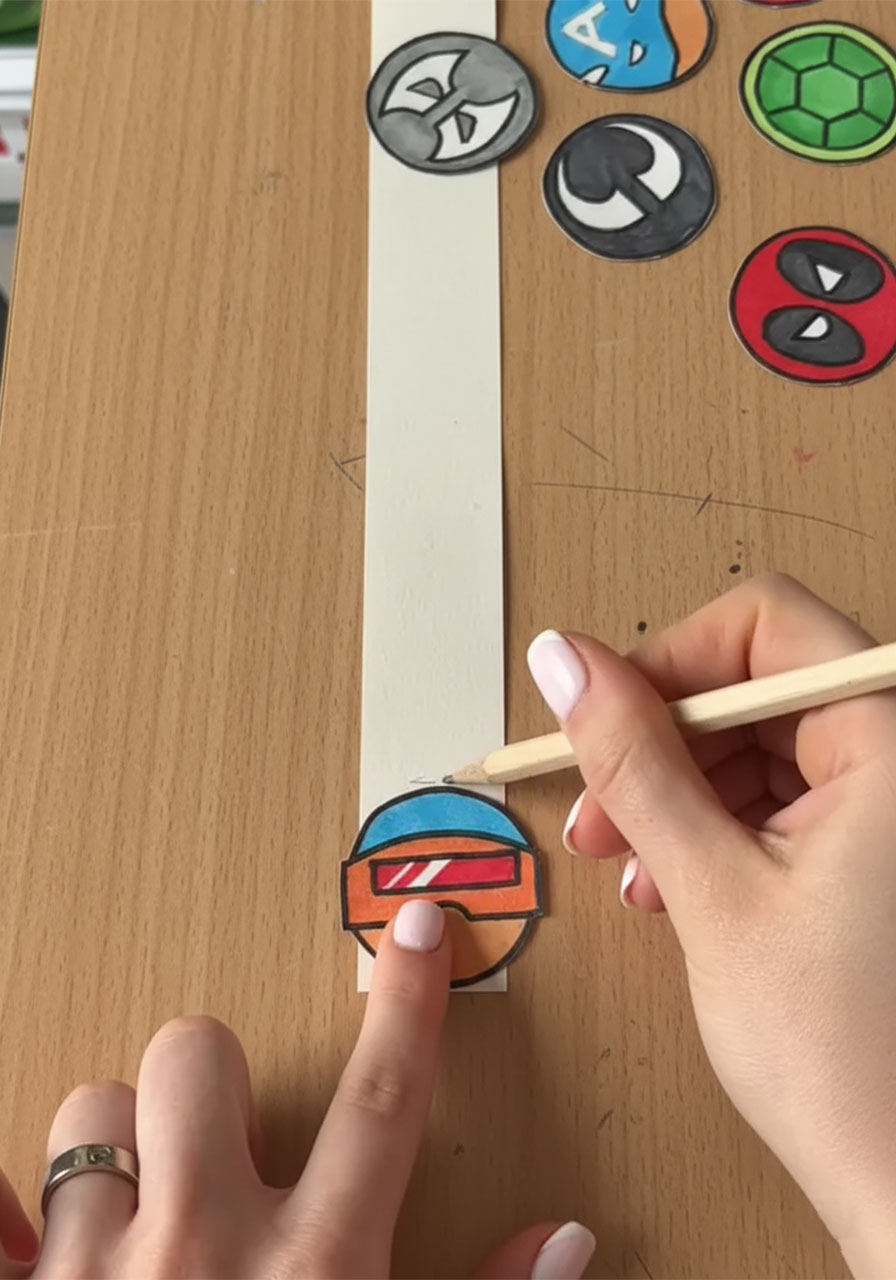
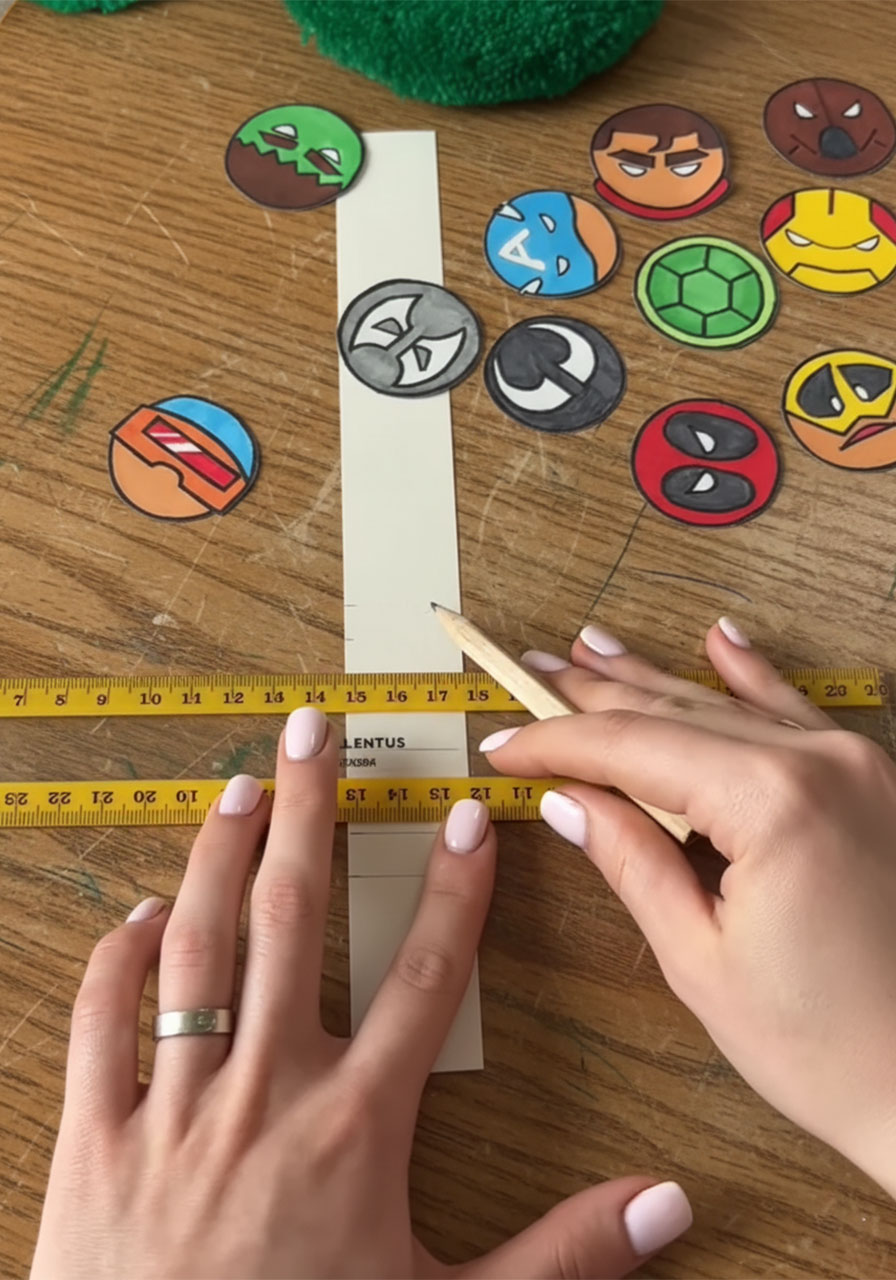
1. Cut a long, rectangular strip from your cardstock. It should be about 1.5–2 inches wide and as long as you can make it (the longer it is, the more heroes you can fit!).
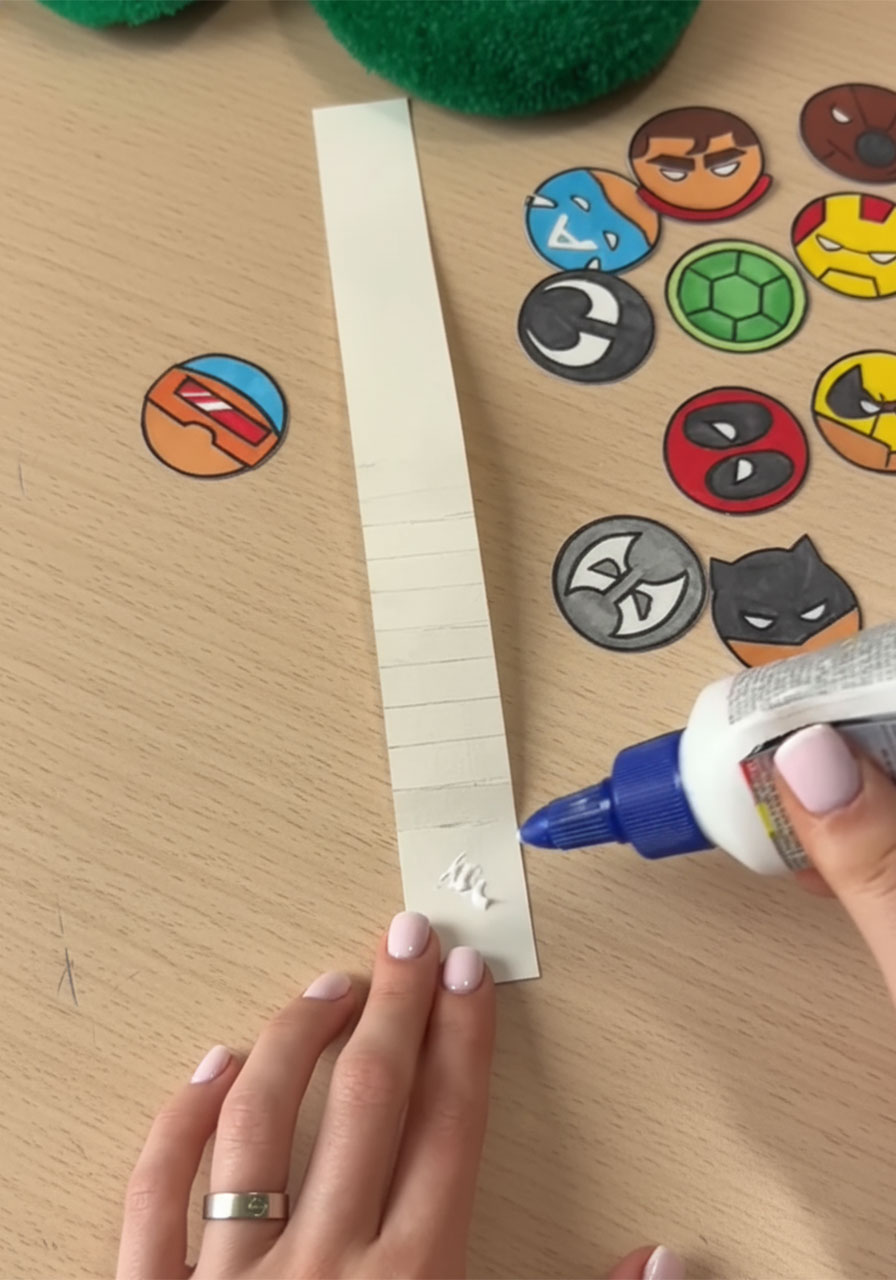
2. Using your ruler and pencil, make small marks every 3 millimeters (about ⅛ inch) along the entire length of the strip. Take your time here – even spacing makes for a cleaner, more satisfying accordion fold.
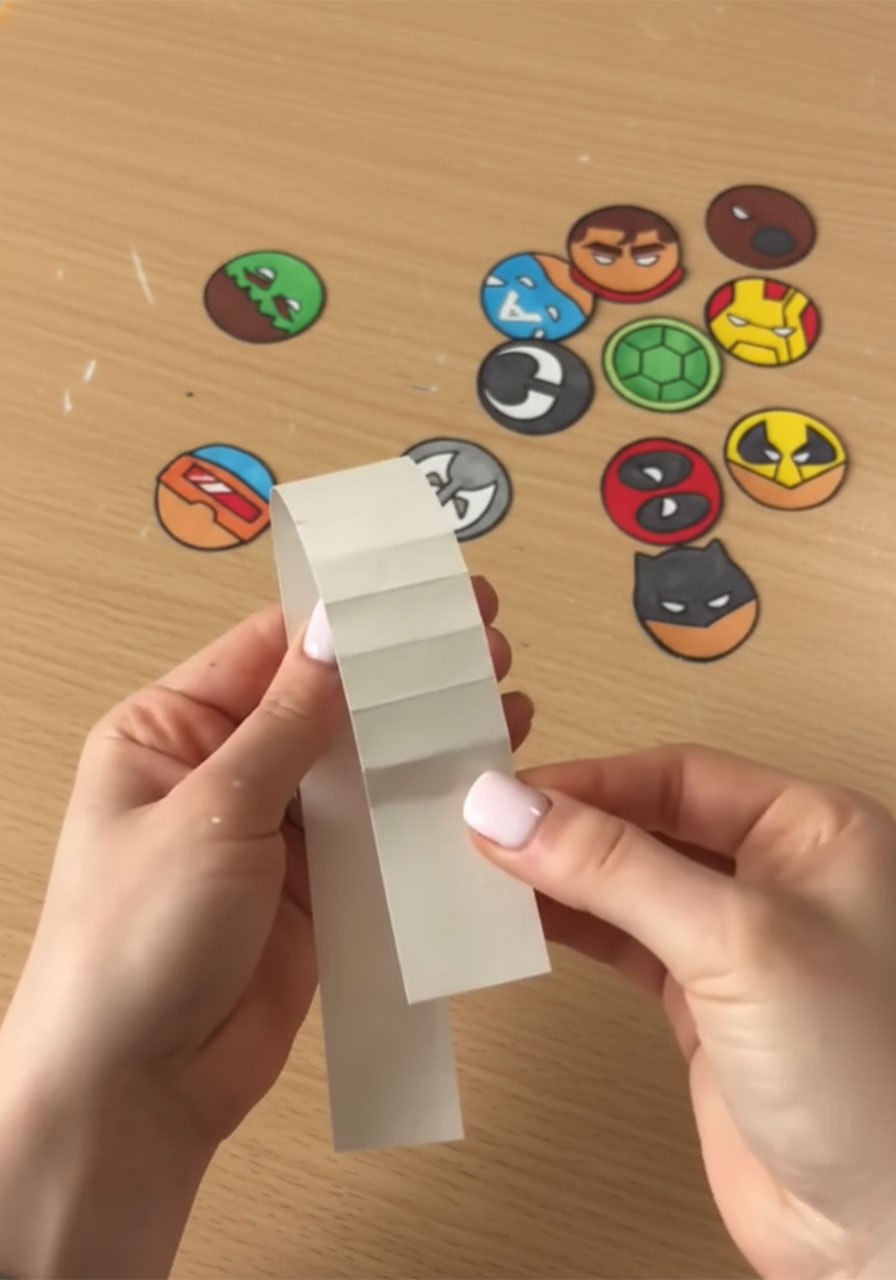
3. Score gently along each mark. Run the edge of your scissors or the back of a butter knife along the ruler at each mark. You’re not cutting through – just creating a faint crease line that makes folding easy and crisp.
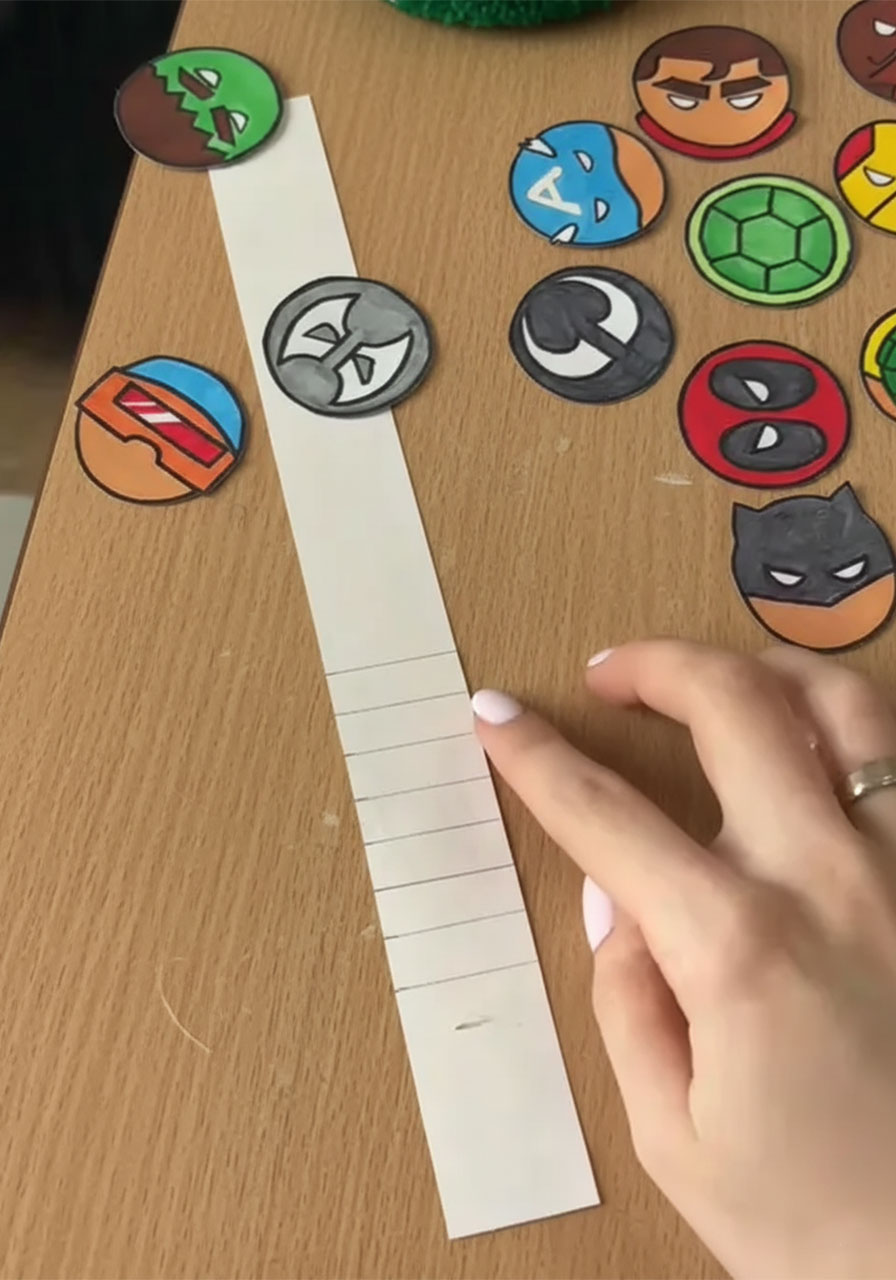
4. Fold the strip accordion-style along all your scored lines – forward, backward, forward, backward, all the way down. You’ll end up with a fan-like, pleated strip. This is your pop-up engine!
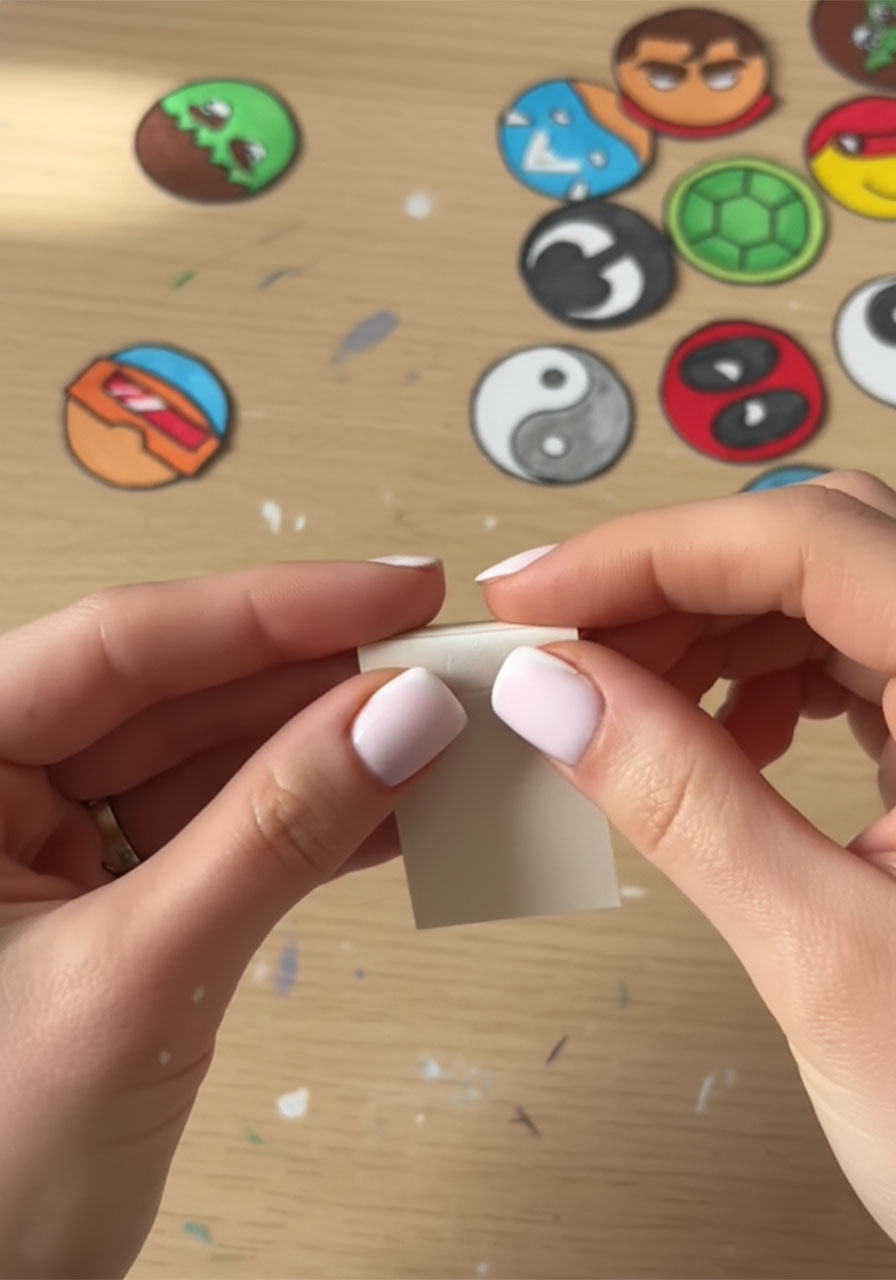
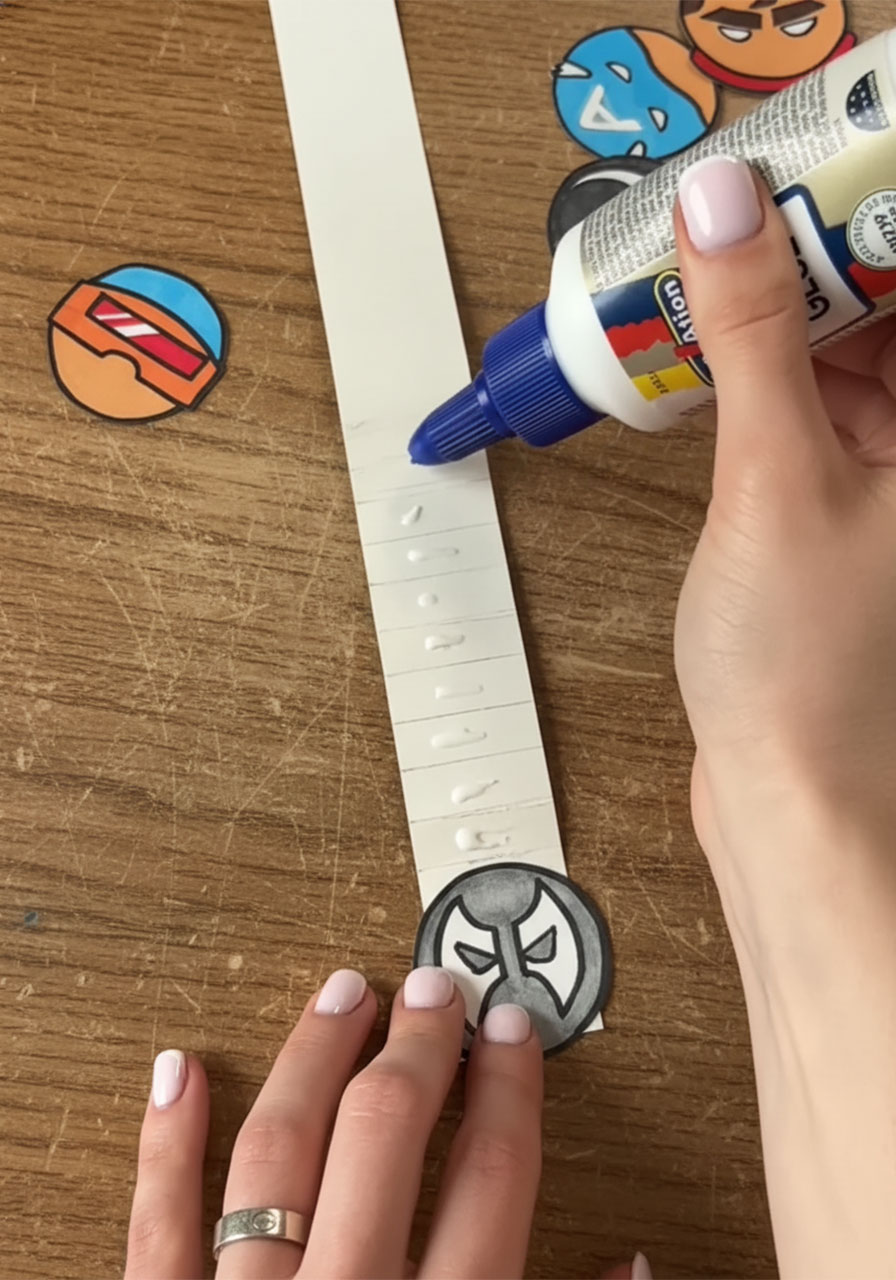
5. Apply a small bead of glue along each fold on one side of the strip. Work in sections so the glue doesn’t dry before you can attach the heroes.
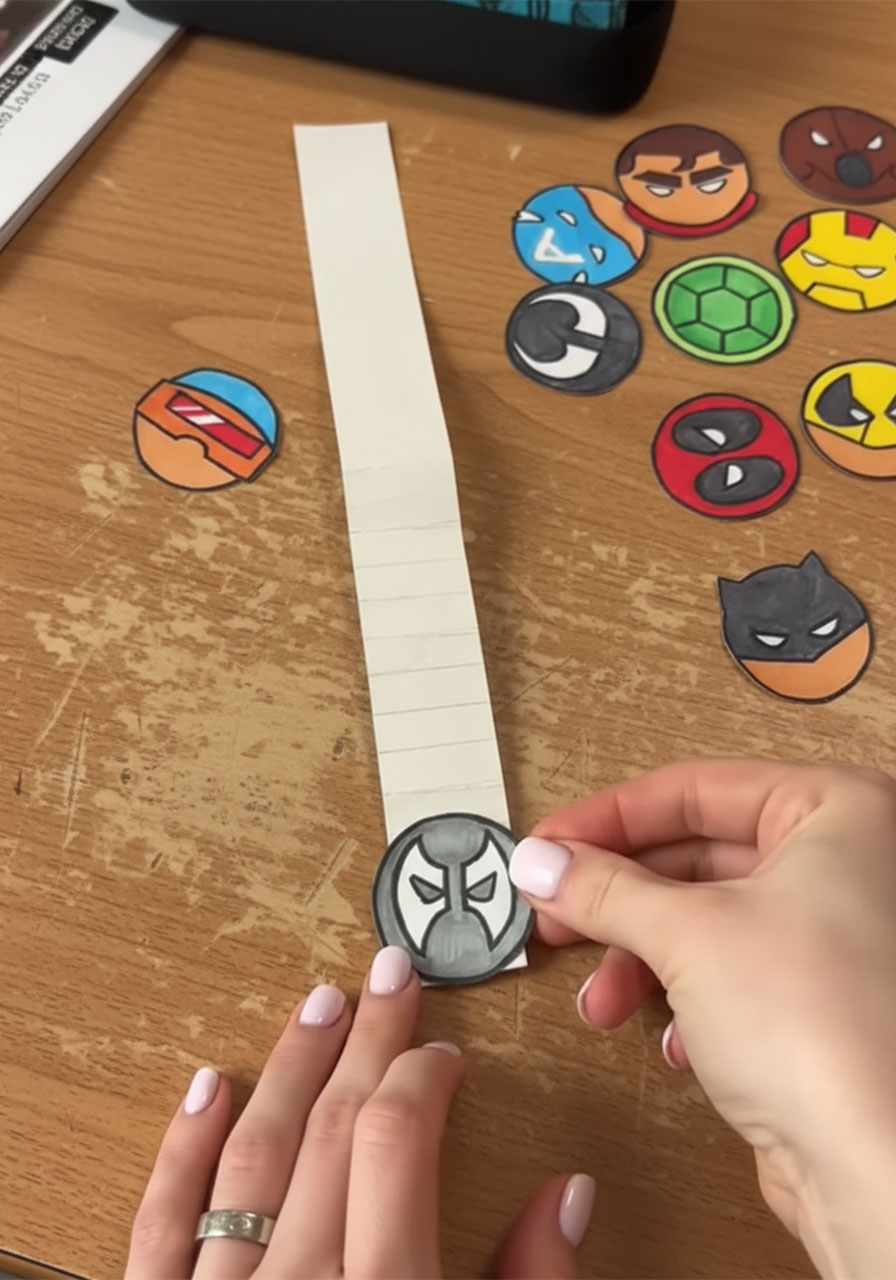
6. Press one superhero circle onto each glued fold. Center them carefully and hold each one in place for a few seconds. The circles should slightly overlap each other as you build up the stack – that’s what creates the layered tower effect!
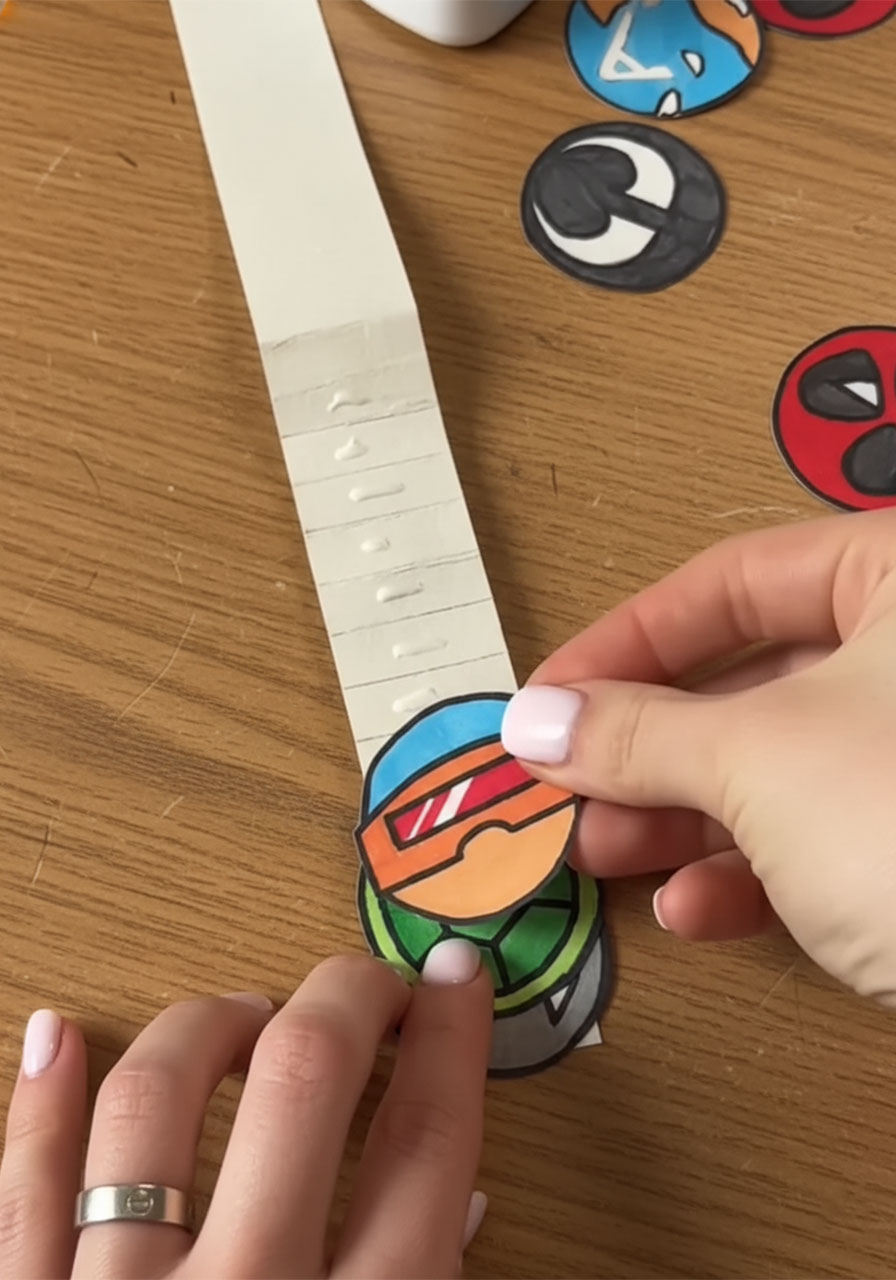
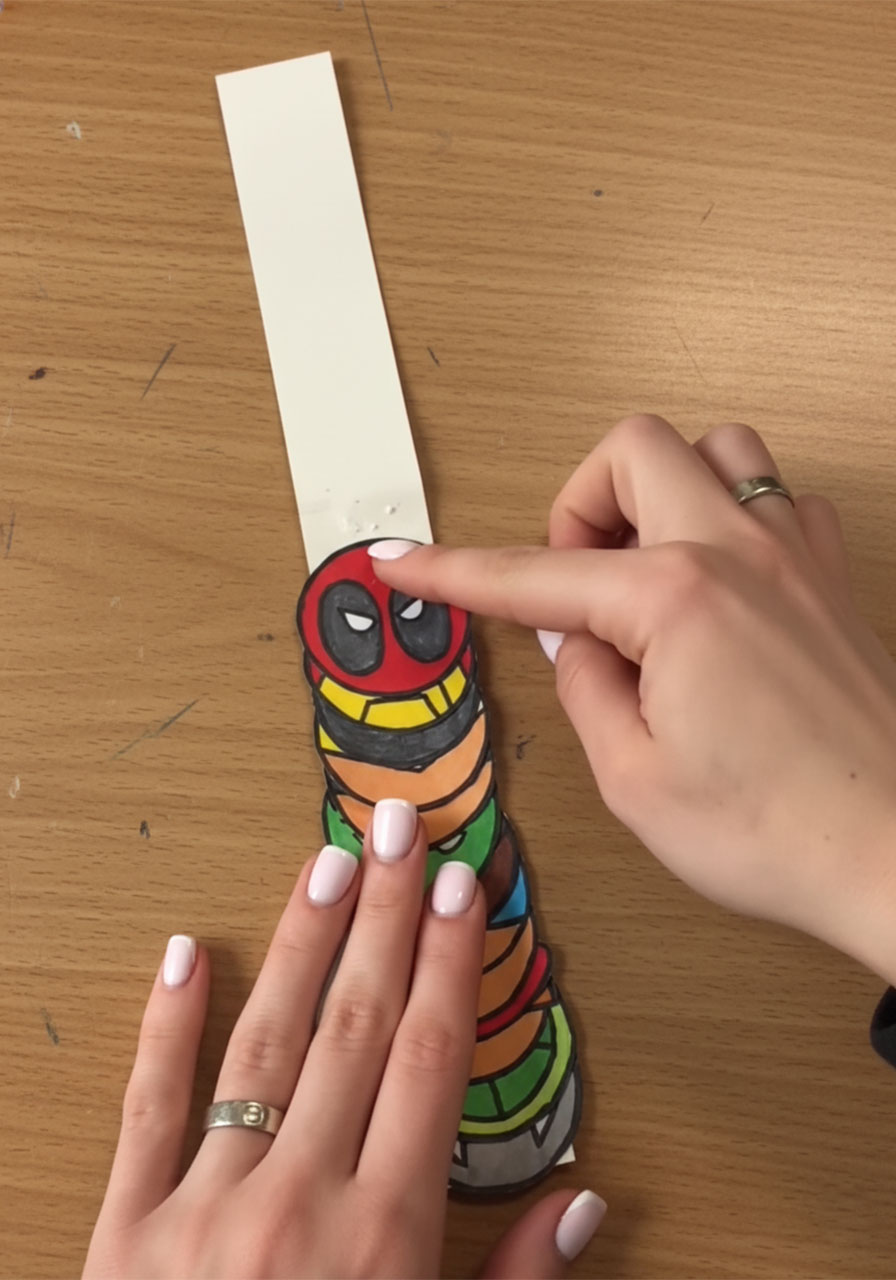
7. Continue until every fold has a hero attached. Let the whole assembly dry for a few minutes before moving on.
🦸 Pro Tip: Start gluing heroes from the bottom of the strip upward. Put your most eye-catching hero (Deadpool is always a crowd-pleaser!) at the very top – that’s the one Dad will see first when the card pops open.
Phase 3: Assemble the Final Card
Almost there! Now we put the whole thing together into a finished card.
1. Fold a piece of cardstock in half to create your card base.
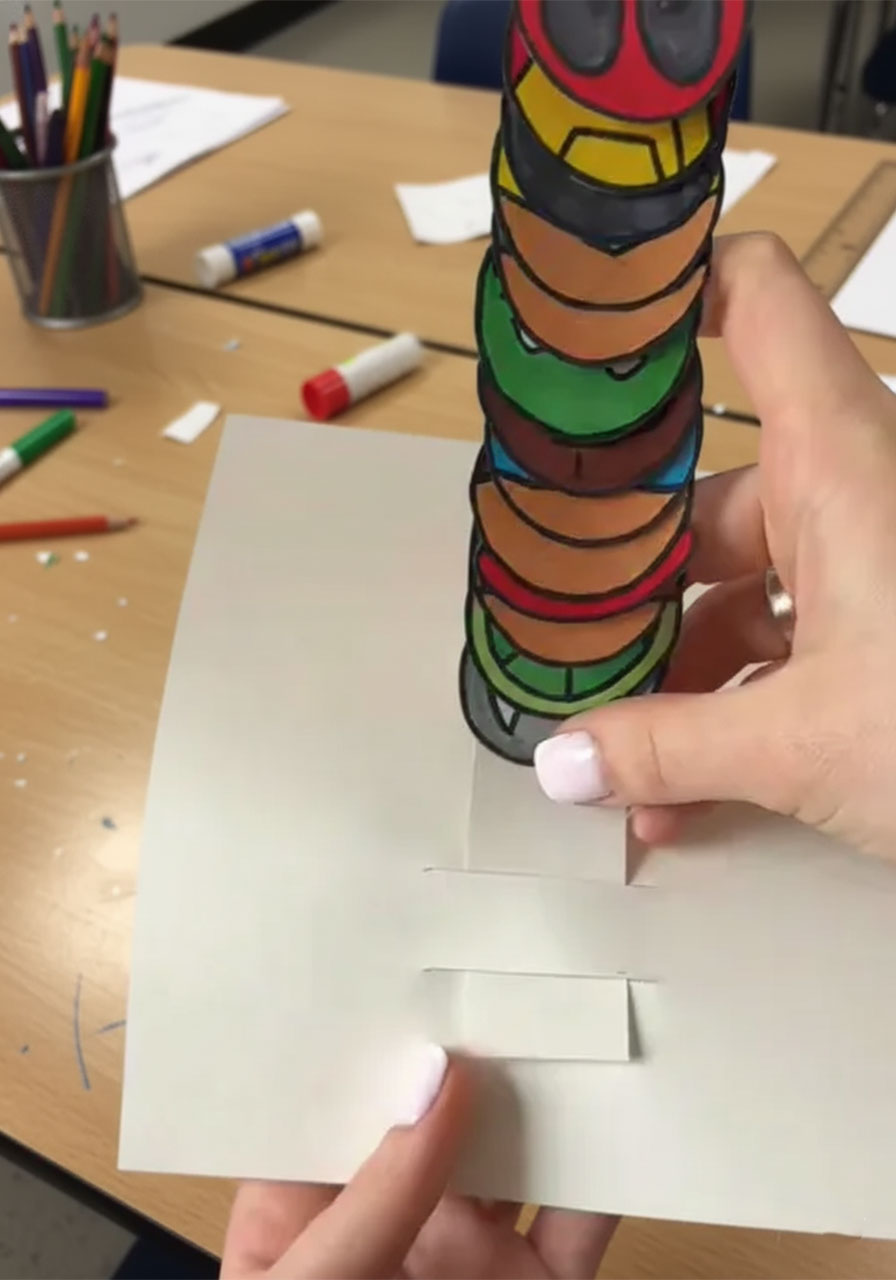
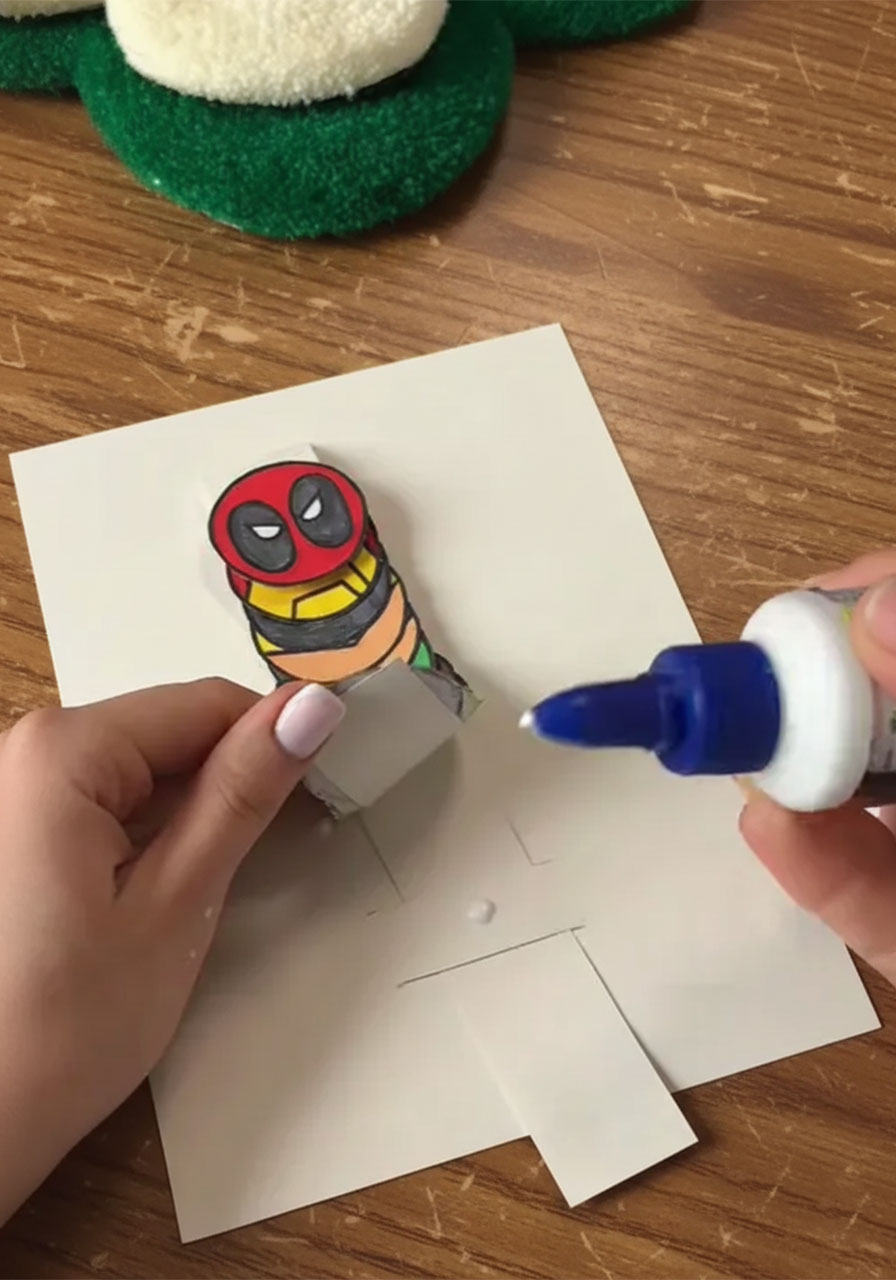
2. Near the bottom of the card front, carefully use your craft knife to cut two small parallel slits. The slits should be slightly narrower than the width of your accordion strip. This is where you’ll thread the mechanism through. Adults: this is your moment!
3. Thread the bottom end of the accordion strip down through the top slit and back up through the bottom slit. The strip should now pass through the front of the card, with the hero tower sitting on top and a length of strip hanging below the card.
4. Secure the mechanism inside the card. Add a small dot of glue where the strip meets the inside of the card to hold everything in position and prevent it from slipping.
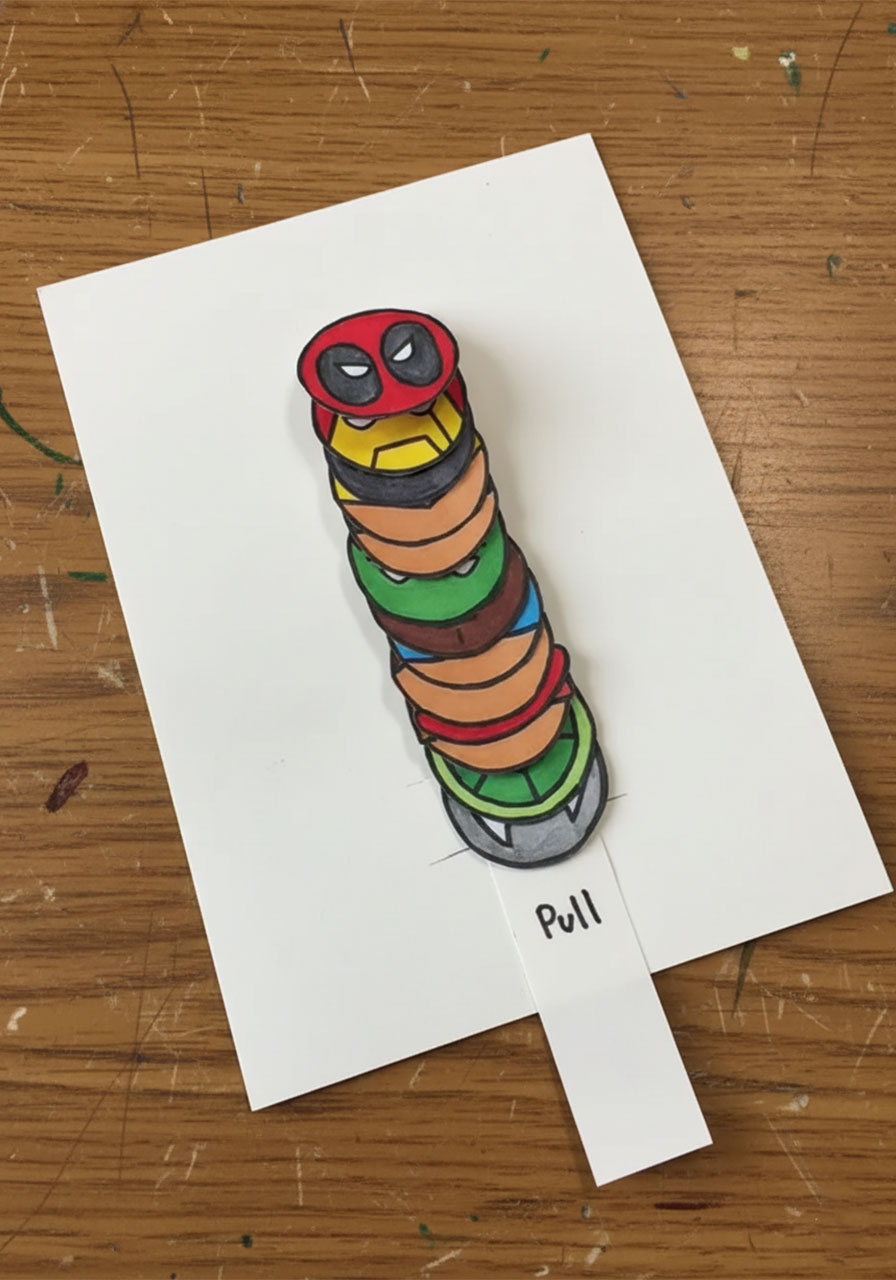
5. Make the pull tab. Cut a small rectangular piece of paper and glue it to the bottom end of the strip (the part hanging below the front of the card). Write “Pull” on it with your marker and add a little arrow pointing downward. That’s Dad’s cue!
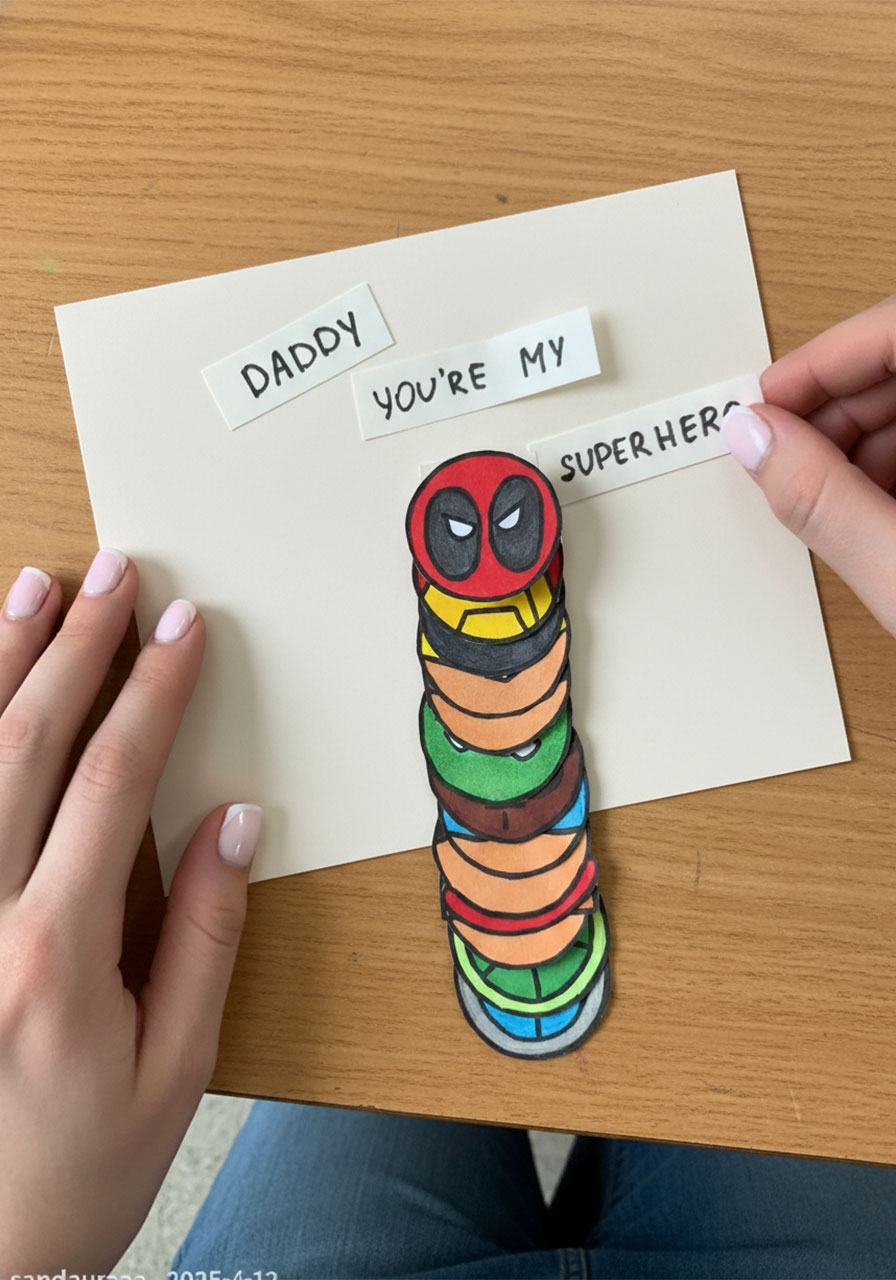
6. Add your message. Write or cut out your words across the top of the card – something like “Daddy, You’re My Superhero!” or “The World’s Greatest Hero” works perfectly. You can hand-letter it, cut individual paper strip labels, or print and glue.
⚡ How it works: When Dad pulls the tab downward, the accordion strip compresses – and all the heroes spring upward and reveal themselves through the card. It’s genuinely delightful every single time!
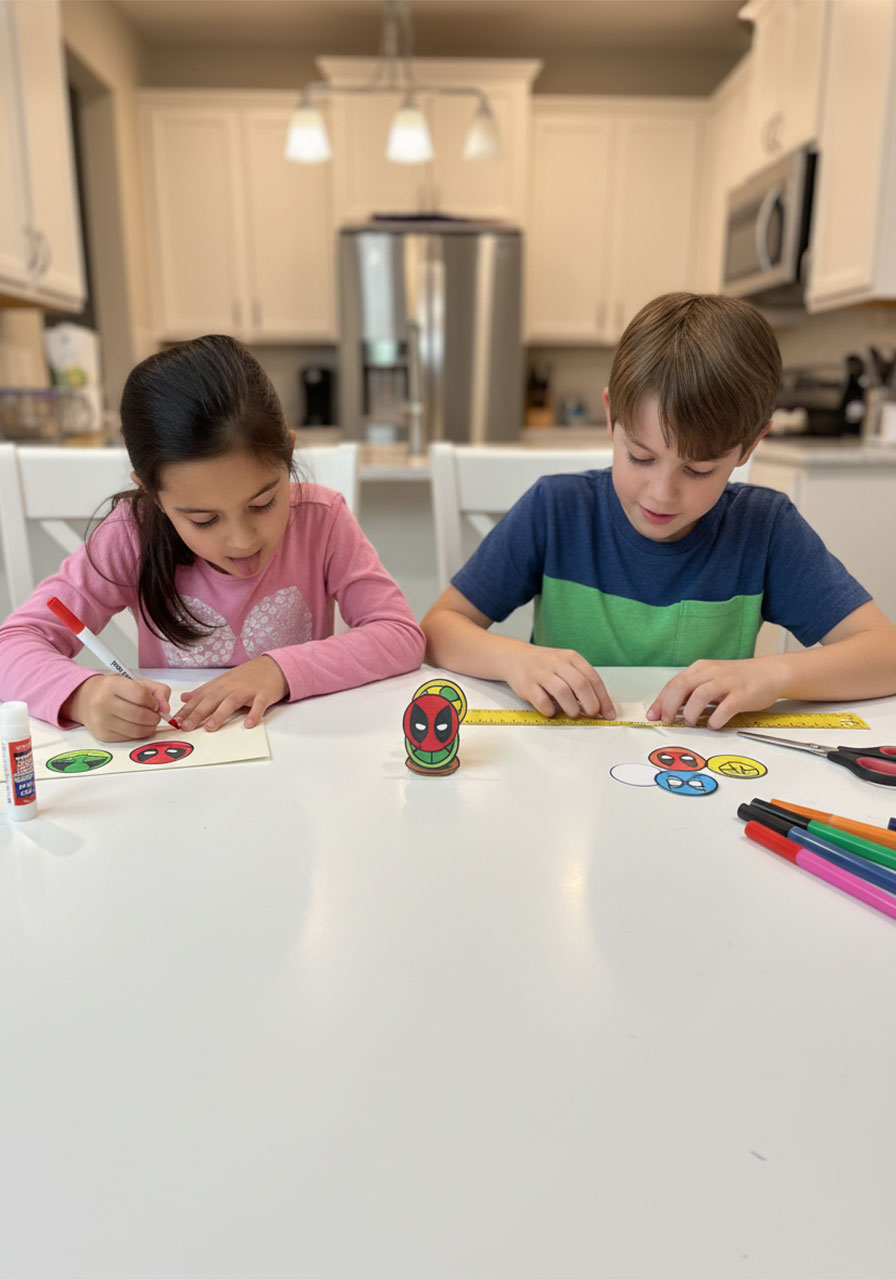
Tips for Making This with Kids
This project works brilliantly as a team effort. Here’s how to divide up the tasks by age so everyone feels involved:
Ages 3–5: Coloring the heroes and helping stick them onto the glued strip. They’ll love the “assembly line” feeling of snapping heroes into place!
Ages 6–9: Drawing the hero circles (with a pencil sketch first!), cutting out the circles with kid scissors, and writing the card message.
Ages 10+: Measuring and scoring the accordion strip, threading the mechanism, and taking ownership of the whole design.
Adults: Handling the craft knife step for the card slits – full stop.
🧑🏫 For Teachers: This makes an amazing Father’s Day classroom craft! Prep the accordion strips in advance (pre-scored and pre-folded saves a ton of time). Let each student decorate and glue their own heroes during class. You can even set up a “hero drawing station” with reference images to inspire the kids.
Fun Variations to Try
Once you’ve nailed the basic version, there are so many ways to customize this card and make it uniquely yours.
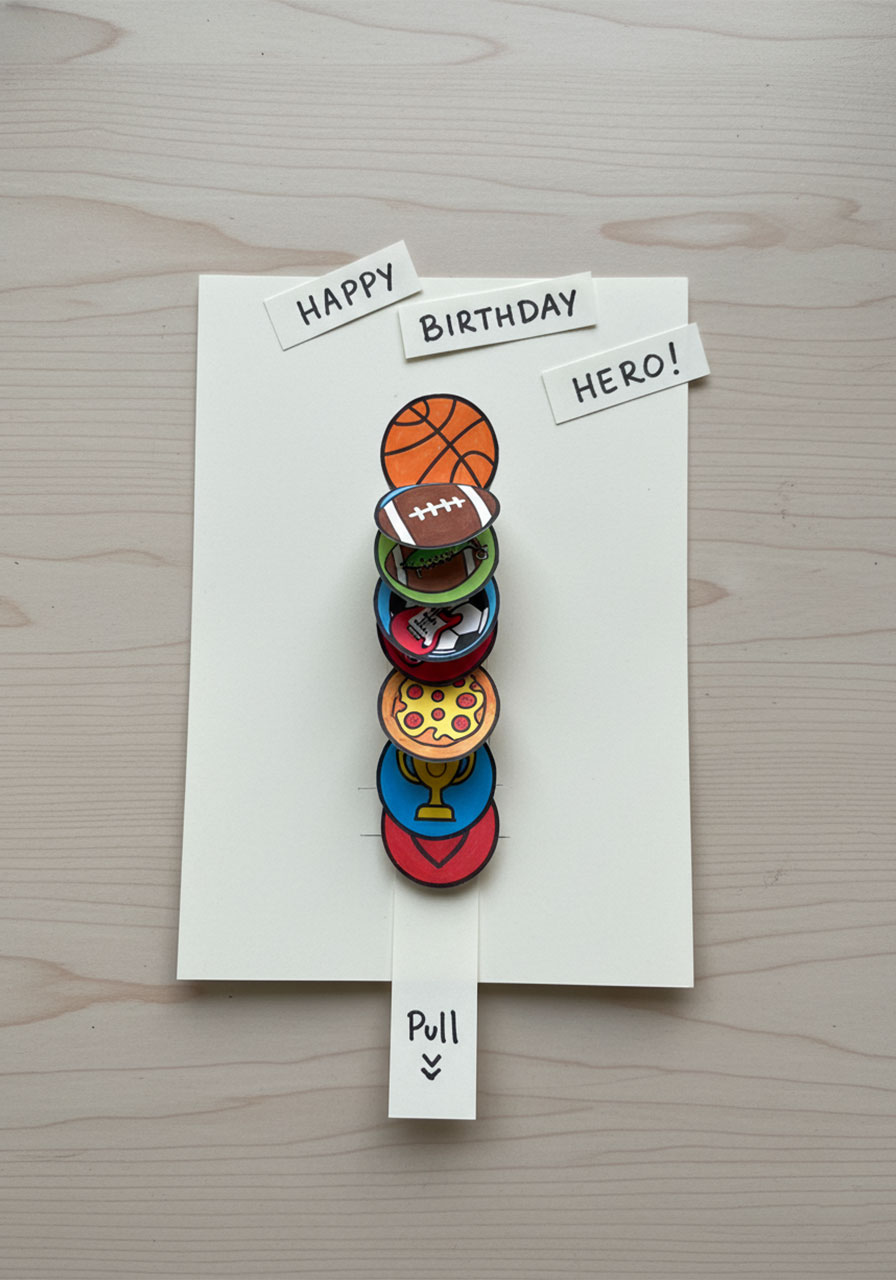
Make it personal. Instead of superheroes, draw things Dad actually loves – his favorite sports teams, his hobbies, his pets. A stack of little golf ball icons or tiny fishing lures would be hilarious and adorable.
Go big. Use a larger card base and a wider accordion strip to fit even more heroes. A tower of 15+ heroes is genuinely jaw-dropping.
Add glitter or stickers. A little shimmer on Iron Man’s armor or a star sticker on Captain America’s shield takes these little circles to the next level.
Make a matching envelope. Fold and decorate a custom envelope from a second sheet of cardstock. Draw a simple hero emblem on the front for extra wow factor when Dad receives it.
Turn it into a birthday card. Swap the Father’s Day message for “Happy Birthday, Hero!” and you’ve got a card that works for grandpas, uncles, brothers, or any superhero fan in your life.
You’re Ready to Save the Day!
And there you have it – your complete guide to making a DIY pop-up superhero card that Dad (or Grandpa, or your favorite teacher’s dad) is going to absolutely treasure.
The whole project takes about 45–60 minutes start to finish, it costs next to nothing, and the payoff when that hero tower springs up? Completely priceless.
The best gifts aren’t always the most expensive ones. They’re the ones that say: I thought about you. I made this for you. You’re my superhero.
So grab your cardstock, round up the kids, and get crafting. Father’s Day is about to get a whole lot more fun. 🦸♂️
More Father’s Day Ideas to Keep the Fun Rolling:
DIY Handprint Keychains: The Sweetest Little Father’s Day Gift Kids Can Actually Make
10 Reasons to Make This Colorful Father’s Day Popsicle Stick Wall Hanging With Your Kids
A “Corny” Father’s Day: How to Make a Pop-Up “Pop-Corn” Card for Dad
How to Make a DIY #1 Dad Award Ribbon for Father’s Day (Kids Will Love This!)
Make Dad Feel Like Royalty: The “Dad, You Are My King!” DIY Pull-String Father’s Day Card
The Cutest 5-Minute Father’s Day Gift Wrap Trick (That Looks Like You Tried Super Hard)
Grand Slam Pop-Up: The 3D Baseball Father’s Day Card Your Kids Can Actually Make