
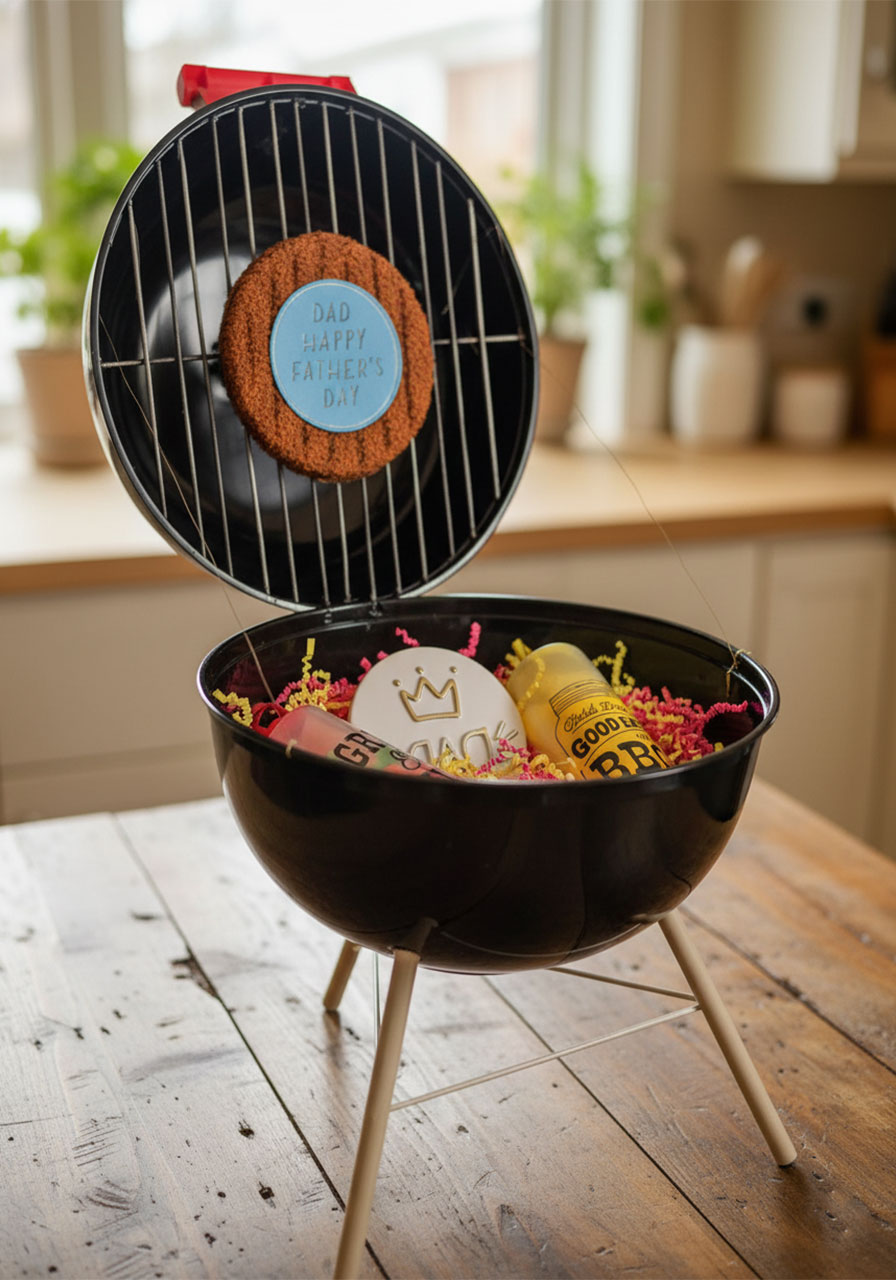
If your dad lives in an apron and claims his grilling skills are “basically a superpower,” this is the Father’s Day gift idea he didn’t know he needed – and you didn’t know you could pull off.
This DIY mini grill gift basket is made almost entirely from Dollar Tree supplies. It looks incredibly impressive when it’s done, and the whole build takes less than an afternoon. No fancy tools. No special skills. Just a little patience, some glue, and this step-by-step guide walking you through every single detail.
Seriously – when Dad lifts that lid and sees the grill grate, the DIY burger, and the little condiment bottles waiting inside? He’s going to love it.
🎯 Who This Is Perfect For: Dads, grandpas, stepdads, or any backyard BBQ champion who takes their grilling very seriously. This also makes a wonderful classroom craft project for students to bring home as a Father’s Day surprise!
What Makes This DIY Grill Gift Basket So Special
Gift baskets are great. But a gift basket that looks like a mini kettle grill? That’s a whole different level of thoughtfulness.
The finished grill has a real hinged lid that opens and closes. It has three wooden legs. It has an actual grill grate inside the lid. And nestled in the bowl, you’ll find a DIY “burger” sitting on the grate, mini condiment bottles, colorful paper shred, and a heartfelt Father’s Day message front and center.
It’s the kind of gift that makes people stop and say, “Wait – you made this?!”
And yes. Yes, you did.

Supplies You’ll Need
🛒 Shopping List (Mostly Dollar Tree!)
2 large matching black plastic bowls – These form the two halves of your grill. Make sure they’re the same size and shape so the lid fits perfectly.
Wooden skewers – You’ll use these for two purposes: the grill grate inside the lid, and as support cross-pieces for the legs.
3 wooden dowels (medium thickness, cut to equal lengths) – These become the three legs of your grill.
Black permanent marker or black spray paint – For coloring the skewers so they look like a real metal grill grate.
E6000 glue or a strong craft adhesive – This is the backbone of the whole build. Don’t skimp here – regular craft glue won’t hold.
Zip ties – These create the hinge so the lid opens and closes.
A toy shovel or scoop with a red handle – You’ll only use the handle piece. It becomes the grill’s lid handle and gives it that classic kettle grill look.
Floral foam round – The base for your DIY burger patty.
Brown fabric or felt – Wrapped around the foam to look like a burger.
Paper shred – The colorful filler that goes in the bottom of the grill bowl.
Mini condiment squeeze bottles – Fill with red and yellow candies to mimic ketchup and mustard.
Small gift items or candy – Whatever you want to hide inside the basket!
A Father’s Day card or tag – To place on top of the burger.
Thin floral wire – Used at the very end to keep the lid from flopping back when opened.
A needle or thin skewer – For poking small holes in the bowls.
⏱️ Heads up on timing: E6000 glue needs several hours to fully cure. Plan to do this project over two sessions – one to build and glue, one to assemble and fill. It’s worth the wait!

Step-by-Step Instructions
Step 1: Color Your Skewers Black
Grab your wooden skewers and color them completely black using a permanent marker or black spray paint. You’ll need enough skewers to create a grid pattern across the inside of one bowl – this becomes the grill grate.
Lay them flat and let them dry fully before you move on.
💡 Pro Tip: Spray paint gives a more even, metallic-looking finish than a marker. If you have a can on hand, it takes just 10 minutes and looks super authentic.
Step 2: Build the Grill Grate (Lid Bowl)
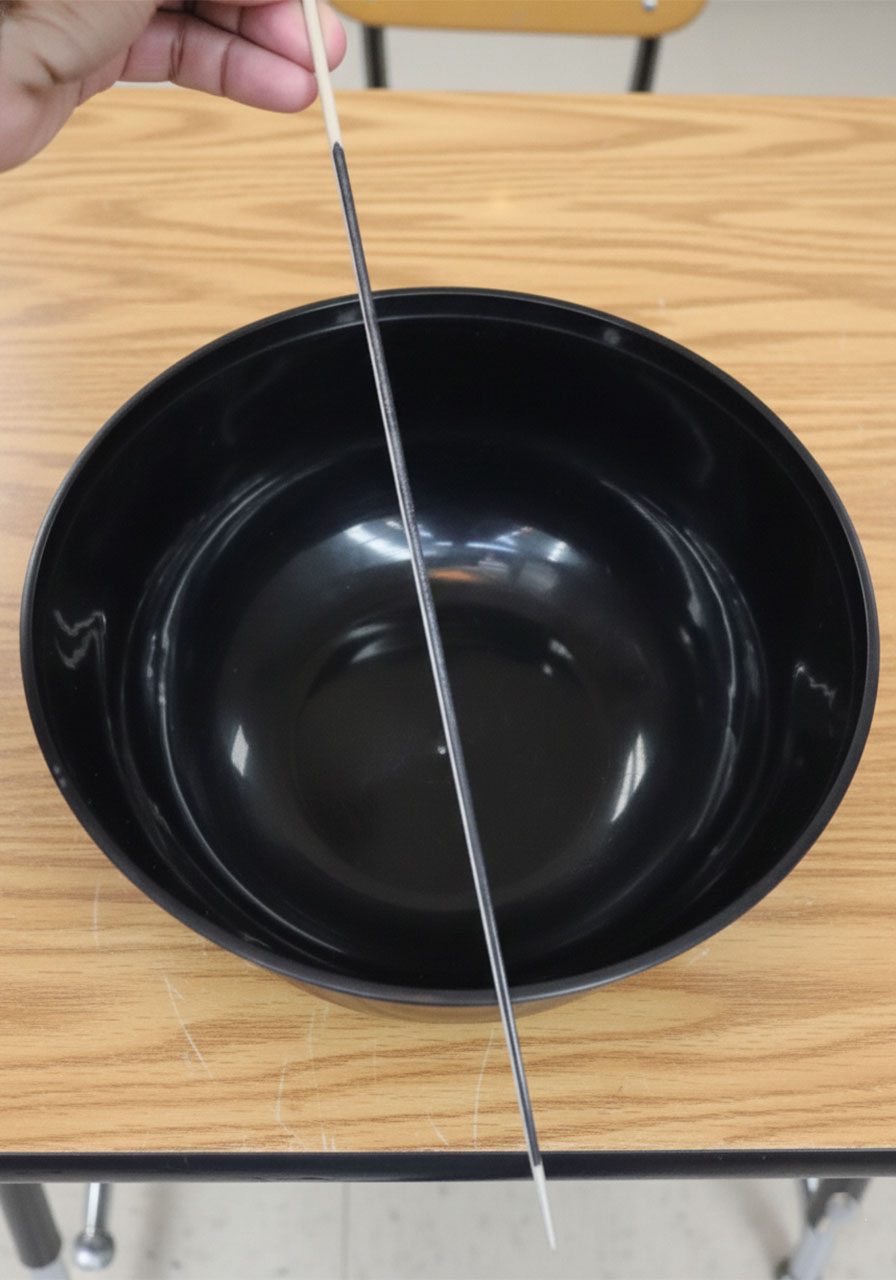
Take one of your two black bowls – this will be the top half (the lid) of your grill. Flip it upside down so the inside is facing up.
Now lay your black skewers across the inside of the bowl in a parallel pattern, evenly spaced. Glue each one down with E6000. Then lay a second set of skewers perpendicular to the first set to create a real grid pattern, just like a grill grate.
Press firmly and let this dry for at least a few hours before handling.
💡 Pro Tip: Work from one side to the other and use small pieces of tape to hold the skewers in place while the glue dries. Once it sets, that grate isn’t going anywhere.

Step 3: Attach the Legs (Bottom Bowl)
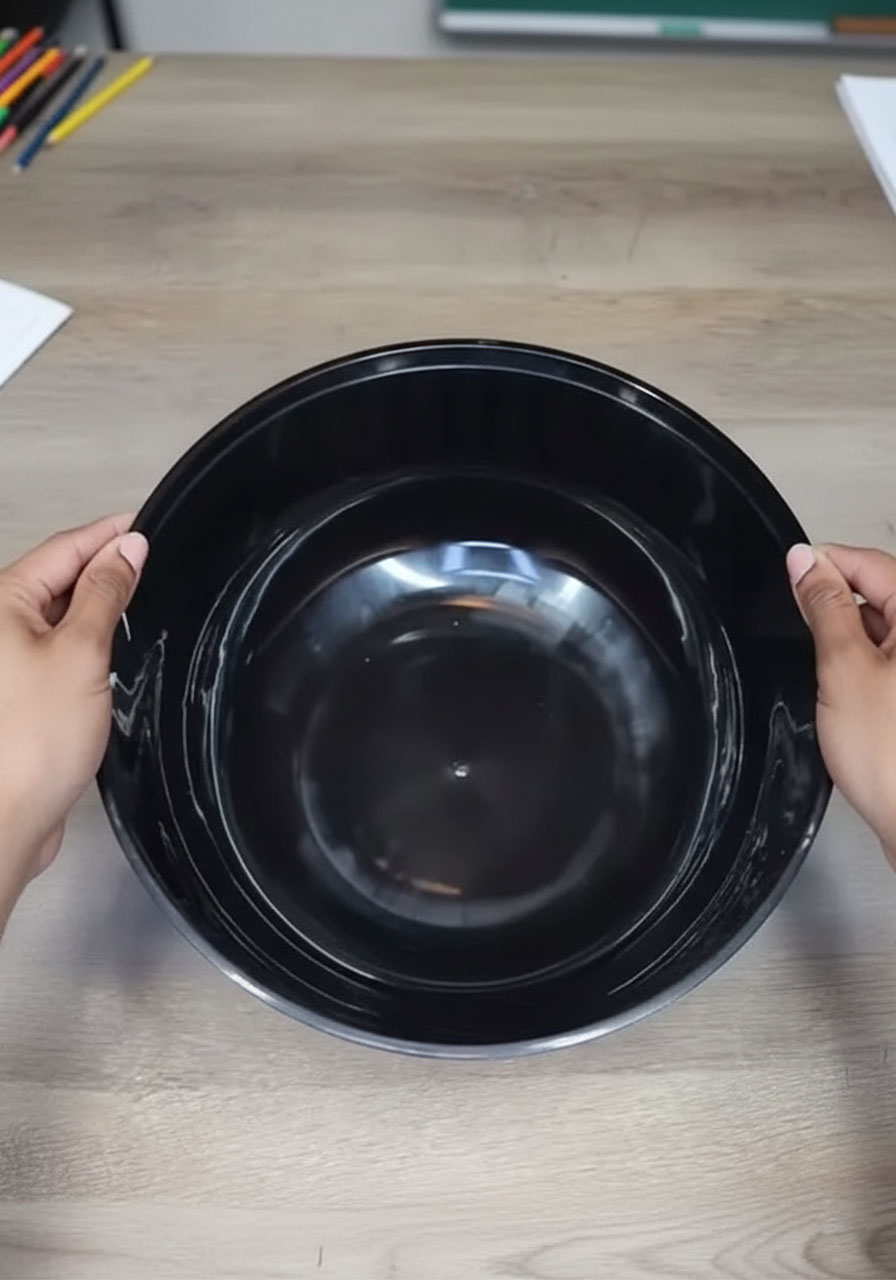
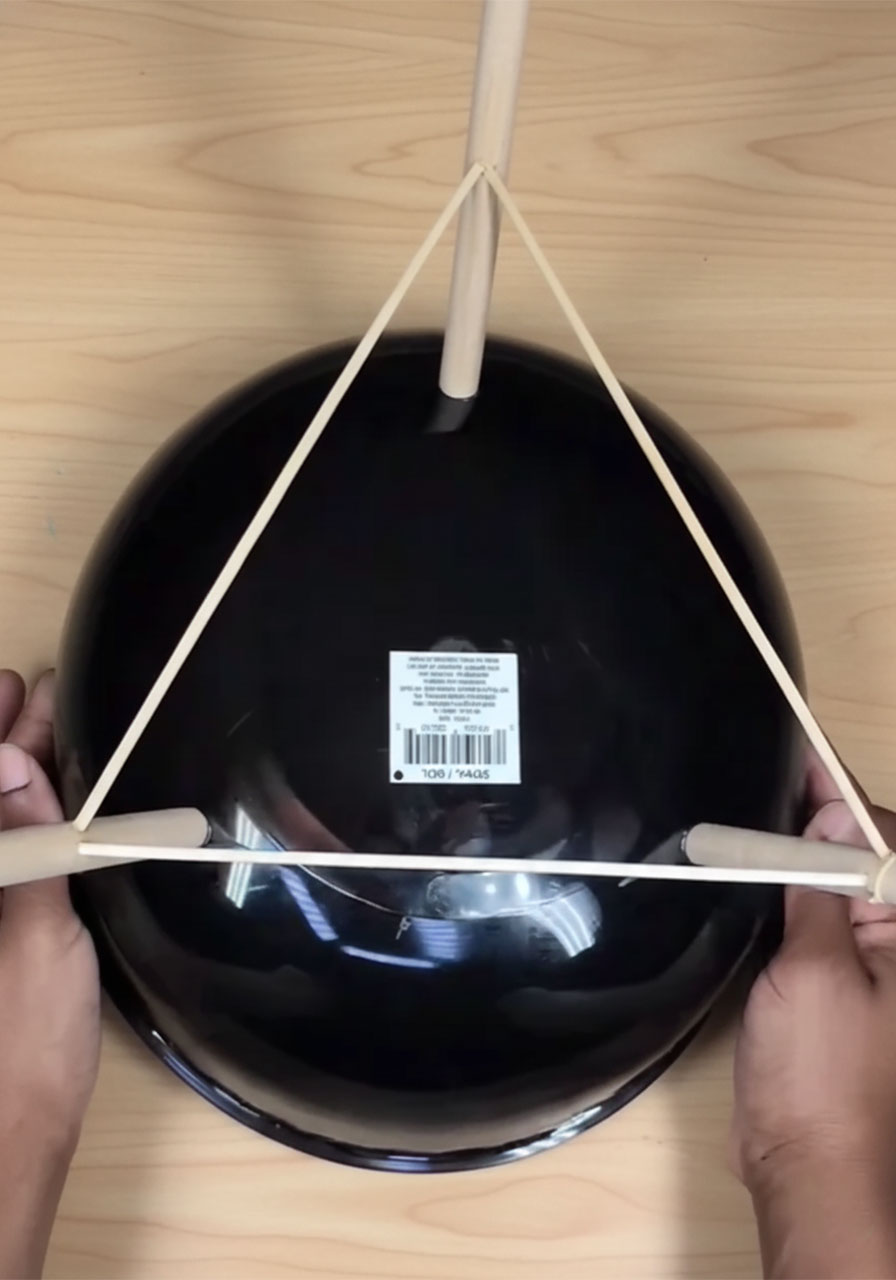
Take your second bowl – this will be the bottom half that holds all the gifts. Flip it upside down so the bottom is facing up.
Take your three wooden dowels (pre-cut to equal lengths – about 3 to 4 inches works great) and glue them to the bottom of the bowl in a tripod formation using E6000. Space them evenly around the bowl so the finished grill will sit level and stable.
To add extra stability, glue short skewer pieces horizontally between the three dowels near the base. This cross-support keeps the legs from wobbling once the bowl is filled with gifts.
Let this dry completely – ideally overnight – before you flip it back over.
💡 Pro Tip: After the glue dries, give each leg a gentle wiggle test. If anything feels loose, add another layer of E6000 and let it cure again. A wobbly grill is a wobbly gift!

Step 4: Create the Hinge (Connect the Two Halves)
This is the step that brings the whole grill to life – the lid that actually opens.
Hold the lid bowl (with the grate) up to the bottom bowl (with the legs) so they line up like a clamshell. Mark two spots on the back edge of both bowls – these will be your hinge points.
Using a needle or thin skewer, carefully poke two small holes through the back rim of each bowl at your marked spots.
Thread a zip tie through the hole in the bottom bowl, then through the matching hole in the lid bowl. Pull it snug and trim the excess. Repeat for the second hole.
Test it! The lid should lift up and swing back cleanly, just like a real grill opening.
⚠️ Go slowly here. The plastic bowls can crack if you force the needle. Use a gentle back-and-forth motion to work through the material.


Step 5: Add the Red Handle
Remember that toy shovel? Time to put it to work.
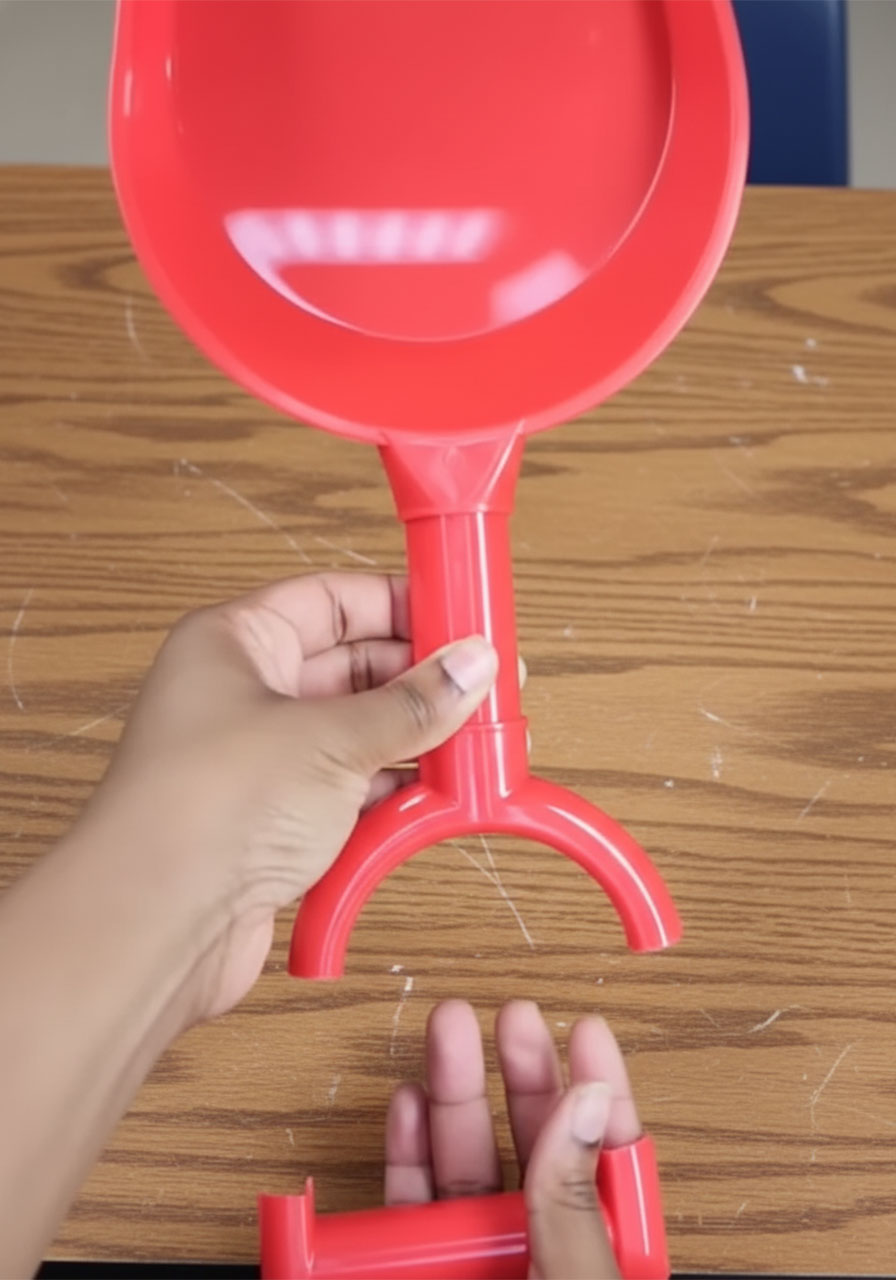
Take the shovel apart and separate just the red handle piece from the rest. Glue it to the front edge of the lid bowl using E6000. This is the detail that makes the whole thing look like a real kettle grill.
Center it carefully, press firmly, and let it cure. Once it’s set, your grill has its signature look – and Dad will have something to grab when he opens his gift.


Step 6: Make the DIY Burger
This is everyone’s favorite part to make – and the first thing people notice when the lid opens.
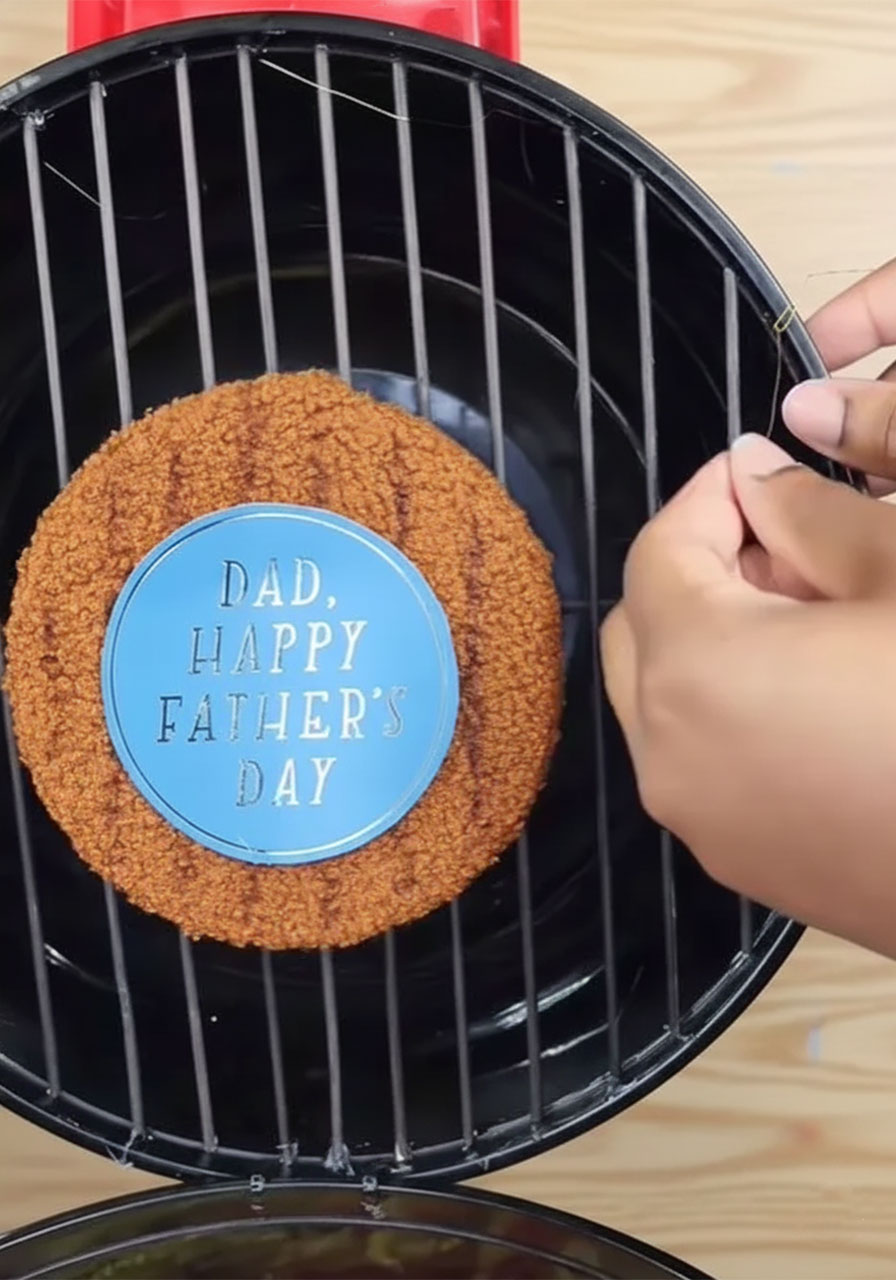
Take your round floral foam and wrap it snugly in brown fabric or brown felt. Tuck and glue the edges underneath so it looks neat and rounded, like a burger patty.
Use a black marker to draw a few diagonal lines across the top of the fabric – these are your “grill marks.” Make them bold and slightly curved for a realistic look.
Then place your Father’s Day card or a small round label right in the center of the burger. Something like “Dad, Happy Father’s Day” looks incredible against the brown texture.
💡 Pro Tip: Use a light-colored tag or label for the message so it really pops against the brown fabric background. A blue or white card looks especially sharp.

Step 7: Fill the Grill Bowl
Now it’s time to load up that bottom bowl with goodies!
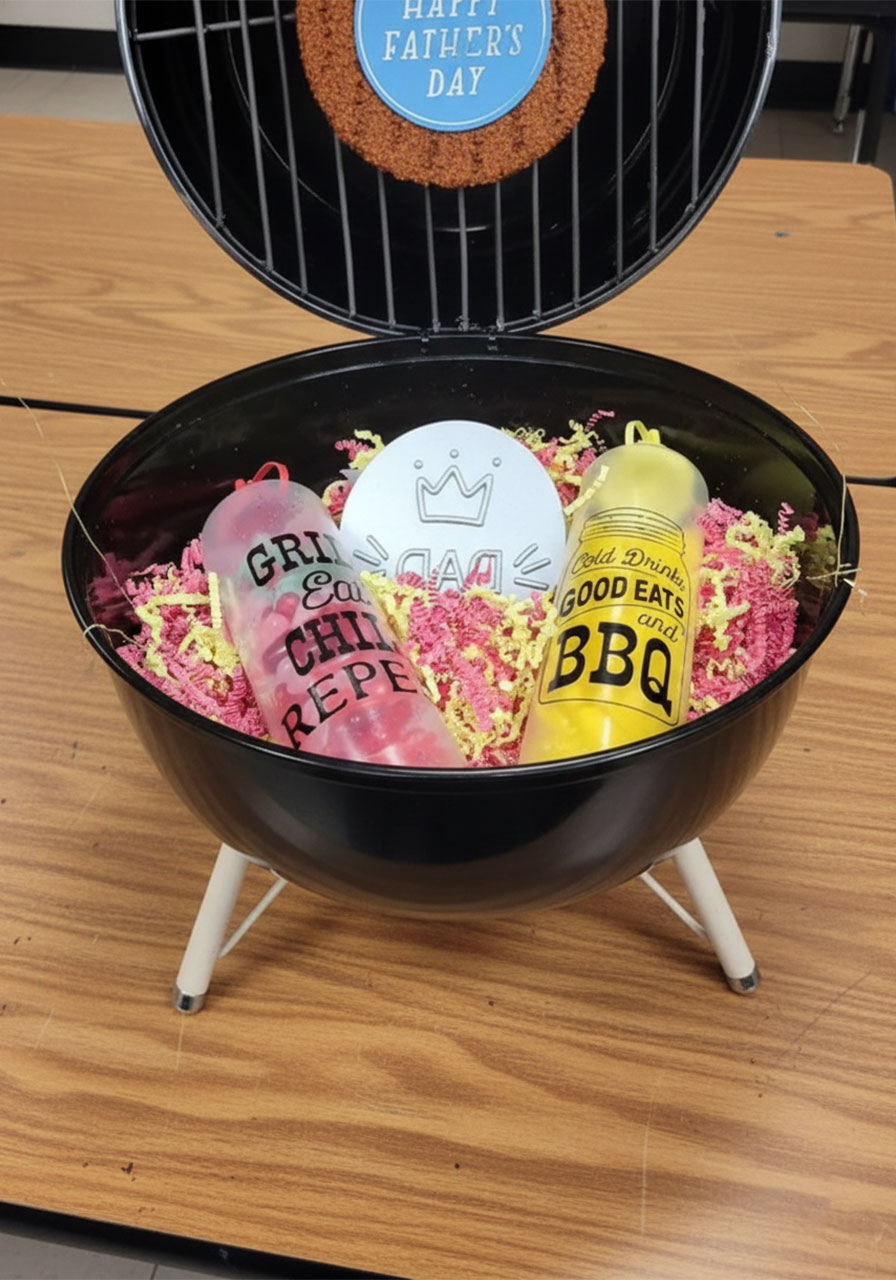
Start by laying down a generous bed of colorful paper shred. Mix colors – pink, yellow, and red look amazing together and give it that festive, gift-basket feel.
Then nestle in your mini condiment squeeze bottles filled with candy. A red bottle for “ketchup” and a yellow one for “mustard” is the classic combination.
Add any other small gifts – a “World’s Best Dad” coaster or token, small snacks, a gift card, BBQ seasoning packets, or anything else that fits your dad’s personality.
Tuck everything in snugly so nothing shifts around when the grill is moved.
Step 8: Attach the Burger to the Grate
Your DIY burger goes on top of the grill grate – on the inside of the lid, so it’s the first thing Dad sees when he lifts it open.
Set the burger in the center of the grate. You can secure it lightly with a small piece of floral wire threaded through the grate and around the edge of the foam. Twist the wire on the back side of the lid so it stays hidden.
This keeps the burger looking perfectly centered and “grilling” in place.
Step 9: Add the Lid Support Wire
This is the small finishing detail that makes a huge difference in presentation.
Poke two tiny holes on the side edges of the grill – one on the lid bowl and one on the bottom bowl, each near the front corner.
Thread a short piece of thin floral wire through both holes and twist it to secure. This wire acts as a lid stop – when Dad opens the grill, the lid will stay open at the perfect angle to show off the burger and the message inside, without flopping all the way back.
Think of it as the finishing move that makes the whole reveal moment absolutely perfect.

The Finished Product 🔥
Step back and take a look at what you just made.
A black kettle grill – complete with three wooden legs, a real hinged lid, a grill grate, a red handle, a DIY burger with grill marks, a personalized message, colorful filler, and mini condiment bottles.
Made almost entirely from Dollar Tree supplies.
Dad is going to absolutely lose it when he sees this.
What to Put Inside the Grill Basket
The bowl has more room than you’d think! Here are some ideas for filling it out beyond the candy bottles:
BBQ seasoning rubs or spice packets
A “World’s Best Griller” apron
Small bag of gourmet hot sauce
A “Dad” coaster or keychain
A gift card to his favorite restaurant or hardware store
Mini bottle of his favorite hot sauce
Grilling tongs (if you can find a small pair!)
Handwritten notes from the kids with reasons they love him
Tips for Making This With Kids or in a Classroom
Teachers – this one is a winner for a Father’s Day craft project, especially for older elementary and middle school students.
Here’s how to make it classroom-friendly:
Pre-color the skewers before class so kids don’t need to handle spray paint.
Pre-poke the hinge holes ahead of time so students just thread the zip ties themselves.
Let kids customize their own burger card with a personal message, drawing, or photo.
Have students choose their own paper shred colors and “gift” items to make each one unique.
The burger-wrapping step is a perfect fine motor activity for younger students.
The end result? Every kid walks out the door with something genuinely beautiful for their dad – and they made it themselves. That’s the kind of moment parents don’t forget.
Frequently Asked Questions
Where do I find the black bowls?
Dollar Tree usually carries large black plastic bowls in their party or kitchen section. If you can’t find them there, check the party supply aisle at Walmart or Target. You need two bowls that are the same size – this is important for the lid to close properly.
Can I use hot glue instead of E6000?
You can use hot glue for the lighter elements like paper shred placement or decorations. But for anything structural – legs, grate, handle – stick with E6000. Hot glue can pull loose under weight, and you don’t want the legs popping off mid-presentation!
How long does the whole project take?
Active build time is about 1–2 hours. But because of glue drying time, plan for a full day or overnight. Start it the day before you need it, and you’ll be totally stress-free.
Can I paint the bowls a different color?
Absolutely! Black is the classic kettle grill look, but you could also go with dark green or even red for a fun twist. Just make sure any paint you use adheres well to plastic – look for spray paint labeled “for plastic.”
What age is this project appropriate for?
The full build is best for adults or teens with some craft experience. However, the decorating, filling, and burger-making steps are great for younger kids (ages 6+) with adult supervision for the gluing parts.
Why This DIY Father’s Day Gift Works So Well
You could buy a gift basket. You could grab a card and some candy at the checkout line.
Or you could spend an afternoon making something that will genuinely stop Dad in his tracks.
This project works because it’s personal. It tells Dad that you thought about him specifically – his love of grilling, his place at the backyard cookout, his identity as the family’s grill master. That kind of thoughtfulness is something you can’t buy at the store.
And when he sees that mini grill with the lid cracked open, the burger on the grate, and the little note that says “Happy Father’s Day”? He’s going to remember this one for a long time.
Because the best gifts aren’t just about what’s inside – they’re about showing someone you truly see them.
Happy crafting, and happy Father’s Day! 🔥🍔
More Father’s Day Ideas to Keep the Fun Rolling:
How to Make a DIY Pop-Up Superhero Card for Father’s Day
DIY Handprint Keychains: The Sweetest Little Father’s Day Gift Kids Can Actually Make
10 Reasons to Make This Colorful Father’s Day Popsicle Stick Wall Hanging With Your Kids
A “Corny” Father’s Day: How to Make a Pop-Up “Pop-Corn” Card for Dad
How to Make a DIY #1 Dad Award Ribbon for Father’s Day (Kids Will Love This!)
Make Dad Feel Like Royalty: The “Dad, You Are My King!” DIY Pull-String Father’s Day Card
The Cutest 5-Minute Father’s Day Gift Wrap Trick (That Looks Like You Tried Super Hard)
