
Here’s the truth every kid already knows: Dad doesn’t need a cape to be a superhero. He shows up every single day – fixing things, cracking dad jokes, and going above and beyond without ever asking for a thank you. This Father’s Day, give him a card that says it all.
This DIY Superhero Dress Shirt Card is the project you didn’t know you needed. It looks like a polished dress shirt on the outside – complete with a collar and tie. But the moment Dad opens it? Surprise. He’s been a superhero all along.
It’s interactive, it’s meaningful, and yes – it’s going to make him tear up a little. In the best way possible.
The best part? You don’t need to be a craft expert. If you can fold paper and use scissors, you’ve got this. Keep reading and we’ll walk you through every single step.

Why This Card Is Different From Every Other Father’s Day Card Out There
Store-bought cards are fine. But a handmade card that your child created? That goes in a keepsake box and stays there for years.
This card works on two levels. On the outside, it’s a neat-looking dress shirt – respectable, put-together, very “Dad.” But when he opens those shirt flaps, he finds a superhero suit with a hand-drawn shield and a message written just for him. It’s the physical version of saying: “I see who you really are.”
It’s also a genuinely fun activity to do with kids. They get to practice cutting, folding, and writing – all while thinking about why their dad is their hero. That’s the kind of afternoon memory that sticks around too.
Whether you’re making this with a 5-year-old or a 12-year-old, this project is the right level of doable without feeling boring. Let’s get into it.

What You’ll Need
Gather these supplies before you start – it makes the whole process so much smoother.
White cardstock or heavy paper – for the dress shirt outer layer
Blue cardstock or heavy paper – for the superhero suit interior
Yellow paper – for the shield shape
Red paper – for the tie and shield detailing
Red marker – to draw the “S” (or Dad’s initial!) on the shield
Black marker – for writing the heartfelt message inside
Scissors
Glue – tacky glue or a glue stick both work great here
That’s it. No fancy craft store run required. Chances are you already have most of this at home right now.

How to Make the DIY Superhero Dress Shirt Card – Step by Step
Step 1: Fold the Dress Shirt Outer Layer
Start with your white cardstock laid flat in front of you, landscape style (wider than it is tall).
Fold the left and right edges inward so they meet in the center. These are your two “shirt panels” that will open and close like a real shirt. Press the folds flat so they hold their shape.
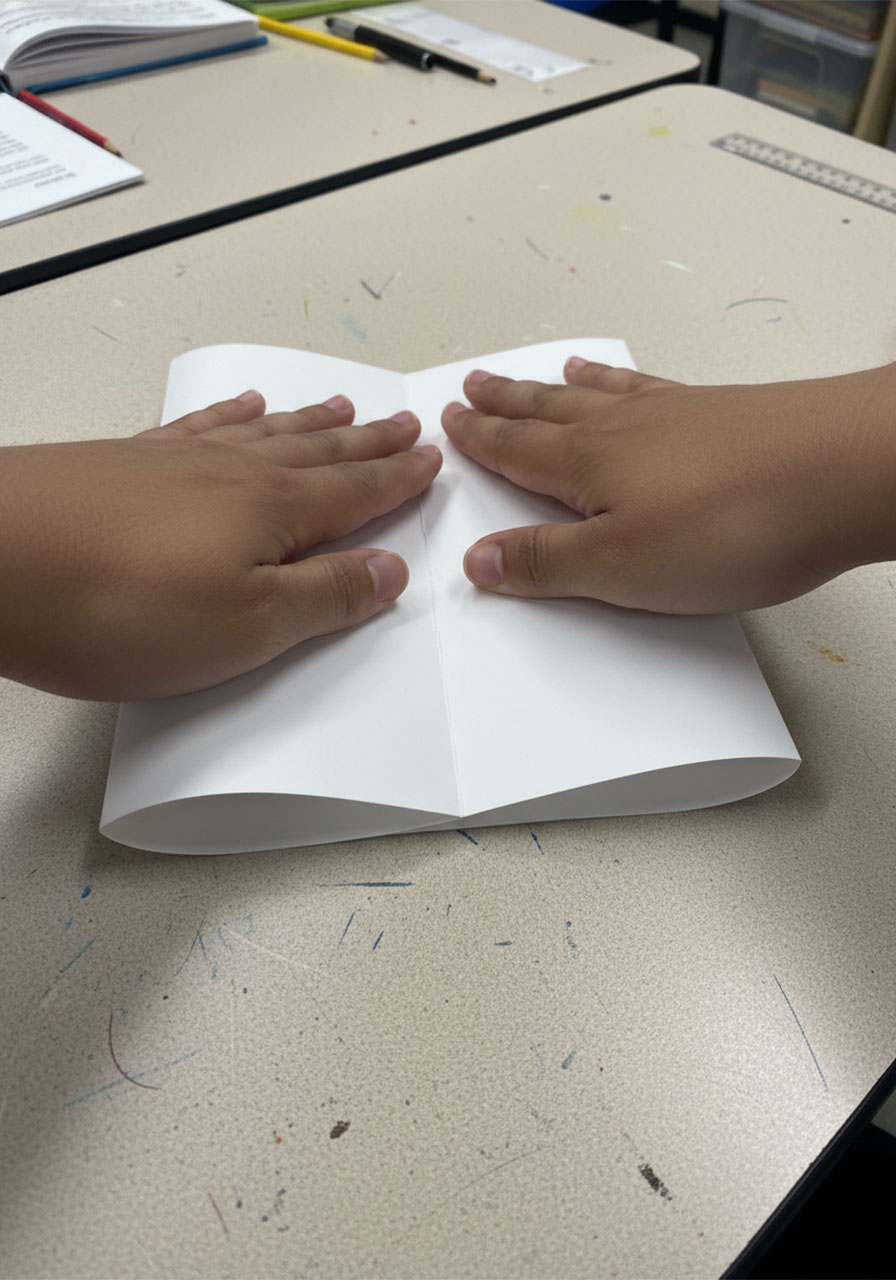
Now for the collar. Take the top corners of each panel and fold them outward at an angle – about 45 degrees. This creates that classic V-neck collar shape. When both sides are done, it should immediately look like a dress shirt. That’s your “secret identity” cover sorted.
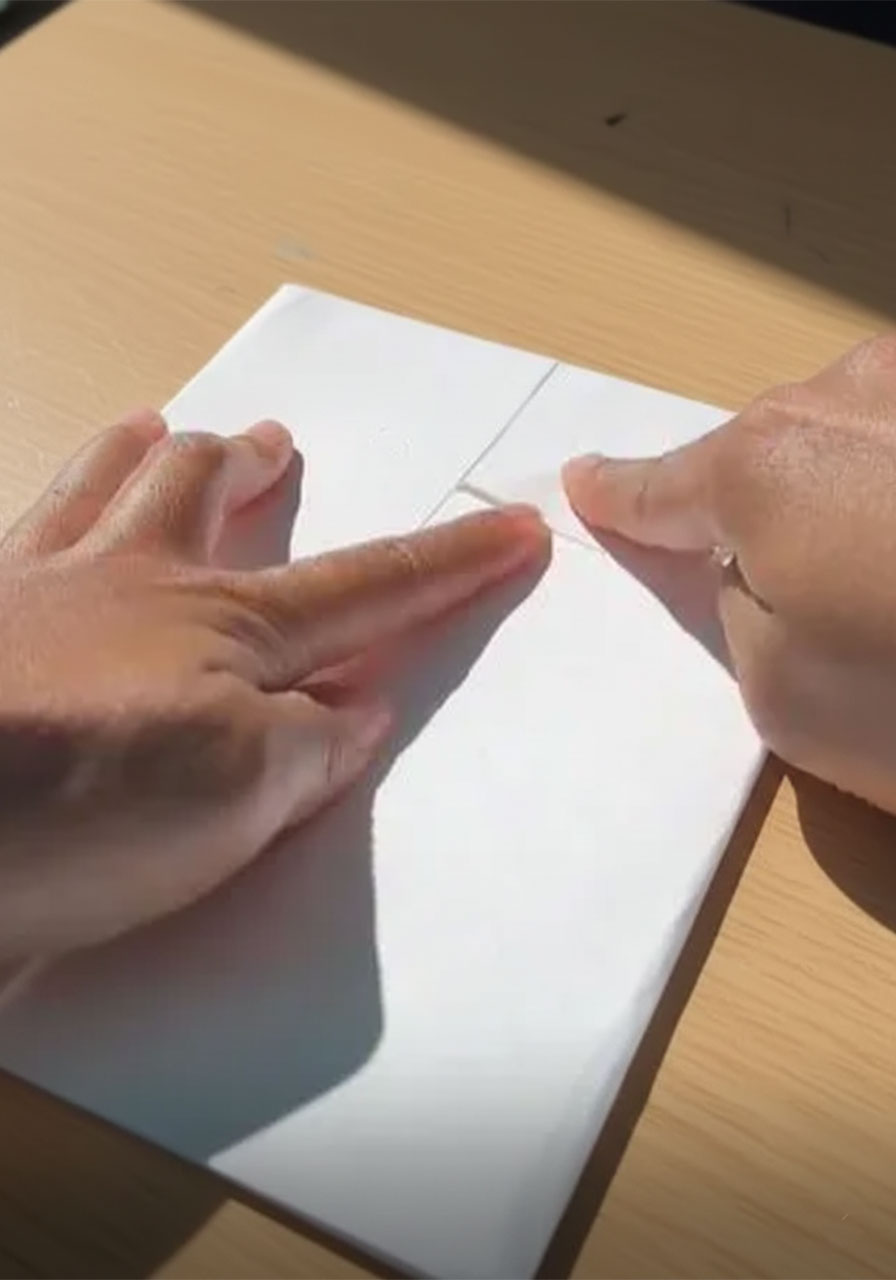

Pro Tip: Use a bone folder or the back of a spoon to get crisp, clean folds. It makes the shirt look noticeably more polished.
Step 2: Build the Superhero Suit Inside
Cut your blue cardstock so it fits snugly inside the white shirt when the panels are open. This blue interior is the hidden superhero suit – the real Dad underneath the everyday exterior.

Glue the blue paper down flat in the center of the white cardstock, making sure it’s centered and secure. Smooth out any bubbles and let it dry completely before moving on.

Step 3: Create the Superhero Shield
This is where it gets fun. Cut a pentagon (shield) shape out of your yellow paper. It doesn’t have to be perfect – superhero shields come in all shapes.
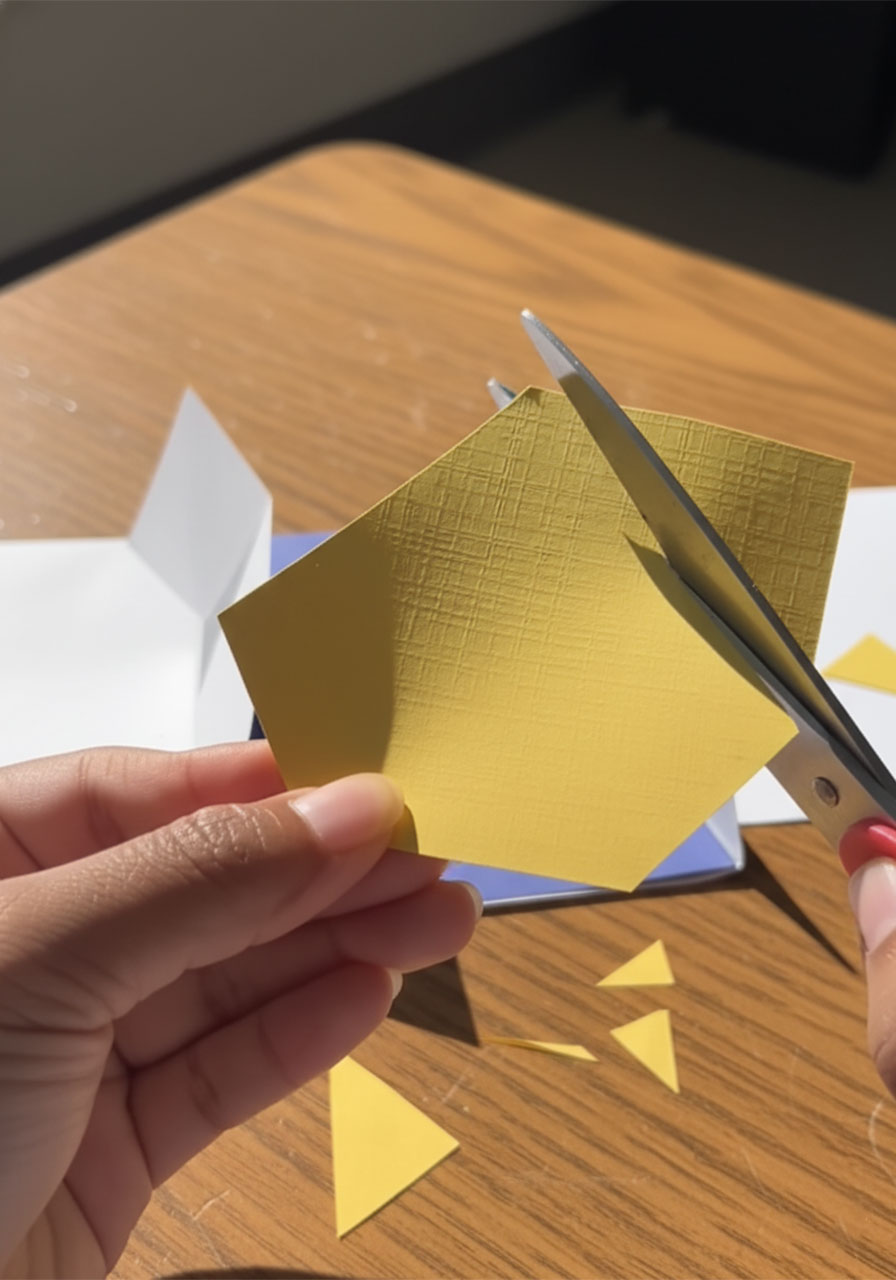
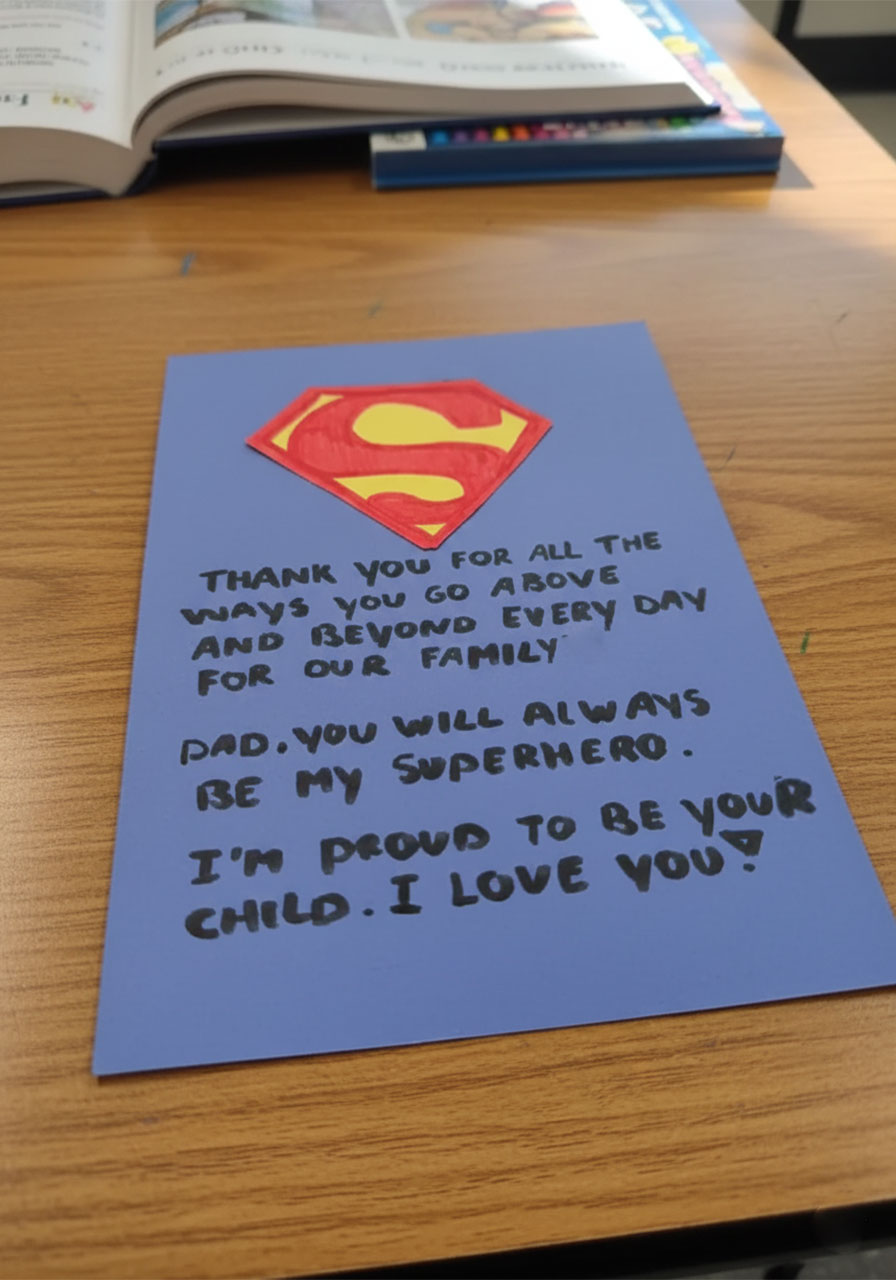
Using your red marker, draw a large letter “S” in the center of the shield. Then fill in the background of the shield with red, leaving just the “S” in yellow. If you want to personalize it, use Dad’s initial instead – “M” for Mike, “J” for James, whatever fits your superhero.

Once the marker is dry, glue the shield onto the top center of the blue suit panel. Center it so it sits right where a superhero emblem should be – front and proud.
Fun Variation: Have your child draw the shield completely freehand without any template. Imperfect and kid-made is 100 times more precious than perfect.
Step 4: Write the Heartfelt Message
This is the part that’s going to get Dad. Using your black marker, write a message on the blue interior – below the shield, or anywhere there’s space.
Need inspiration? Here’s the message from the original card that people absolutely loved:
“Thank you for all the ways you go above and beyond every day for our family! Dad, you will always be my superhero. I’m proud to be your child. I love you!”
Feel free to use that word for word, or make it your own. The more personal, the better. If your child is old enough to write, let them do it in their own handwriting. That’s the version that ends up framed on someone’s desk.
If the little ones are too young to write, have them draw something – a heart, their favorite animal, a stick-figure family portrait. It all counts.
Step 5: Add the Tie to Finish the Shirt
Cut a simple tie shape out of your red paper. A classic necktie silhouette works perfectly – wide at the bottom, narrow at the top.
Glue the top of the tie to the center of the white shirt, right where the collar meets. Let it hang down naturally over the front.
Important: Only glue the very top of the tie – not the whole thing. This keeps the shirt panels able to open freely so the reveal still works. If you glue the whole tie down, you’ll block the superhero suit inside. Just the top is all you need.

The Big Reveal Moment
Once everything is dry and assembled, close the shirt panels over the blue interior so it looks like a normal dress shirt with a collar and tie.
Hand it to Dad.
Watch his face when he opens it.
That moment – when he sees the superhero suit and reads the message – is worth every minute of crafting. Have your phone ready. You’re going to want to capture it.

Ways to Personalize This Card Even More
This project is a fantastic base that you can make completely your own. Here are a few ideas to take it up a notch.
Use his favorite team’s colors. If Dad is a die-hard Packers fan or a Lakers loyalist, swap the red and yellow for his team’s colors. He’ll notice immediately.
Add photos. Print a small photo of the kids and tuck it inside alongside the message. Or glue a tiny family photo right onto the blue interior.
Make it for Grandpa or Uncle, too. This card works beautifully for any father figure in the family. “Super Grandpa” hits just as hard as “Super Dad,” trust us.
Let every sibling sign it. If there are multiple kids in the house, have each one write their own line or draw their own little signature somewhere inside. Dad will read every single one.
Pair it with a small gift. Tuck a gift card, a coupon booklet (“Good for one breakfast in bed,” “Good for control of the remote”), or a handwritten list of reasons he’s their hero right inside the card. The shirt panels make a great pocket.

Why Kids Absolutely Love Making This
Beyond the gift itself, this activity is genuinely great for kids. The folding and cutting builds fine motor skills. The writing prompt – “why is Dad your hero?” – builds emotional intelligence and gratitude. And finishing something they made with their own hands? That’s a serious confidence boost for any age.
It’s also a rare chance for kids to slow down and really think about the people they love. In a world of screens and noise, an afternoon of crafting and reflecting is more valuable than it might seem.
Plus, they get to see Dad’s face when he opens it. That reaction is something kids remember forever.

Quick Tips Before You Start
Do a dry run with regular printer paper before using your good cardstock. Once you fold the shirt once, the second time is way easier.
Let all glue dry completely between steps – rushing leads to wonky results.
If a young child is helping, pre-cut the tie and shield shapes for them so they can focus on the fun parts: decorating and writing.
Cardstock works much better than regular paper for this project. It holds the folds crisply and feels substantial when Dad holds it.
Make it the morning or afternoon before Father’s Day so the glue has time to fully set overnight.
A Card He’ll Keep Forever
Here’s what makes this project special: it’s not just a card. It’s a keepsake. Ten years from now, Dad is going to find this in a drawer or a box and remember exactly who made it and exactly how he felt when he opened it.
That’s the whole point, isn’t it? Father’s Day isn’t about the perfect gift or the fanciest dinner. It’s about showing the people we love that we see them – really see them – and that we’re grateful they show up.
This little paper card does all of that. And it cost you an afternoon and a few sheets of colored paper.
Go make something he’ll never throw away.
More Father’s Day Ideas to Keep the Fun Rolling:
“Best Dad in the Universe”: The Cutest DIY Father’s Day Card Kids Can Make in an Afternoon
Hands Down the Best! 4 Easy DIY Handprint Crafts for Father’s Day
“High-Five for Dad!” – The Cutest Father’s Day Handprint Card Kids Can Make
8 Heartfelt DIY Gifts for the New Dad That He’ll Actually Love (And Keep Forever)
The Cutest Handprint Father’s Day Grill Card (Template Inside!)
DIY “I Love You This Much” Handprint Card – The Sweetest Father’s Day Gift Your Kids Can Make
The Sweetest Father’s Day Gift You Can Make With Your Kids (And It Costs Almost Nothing)
