
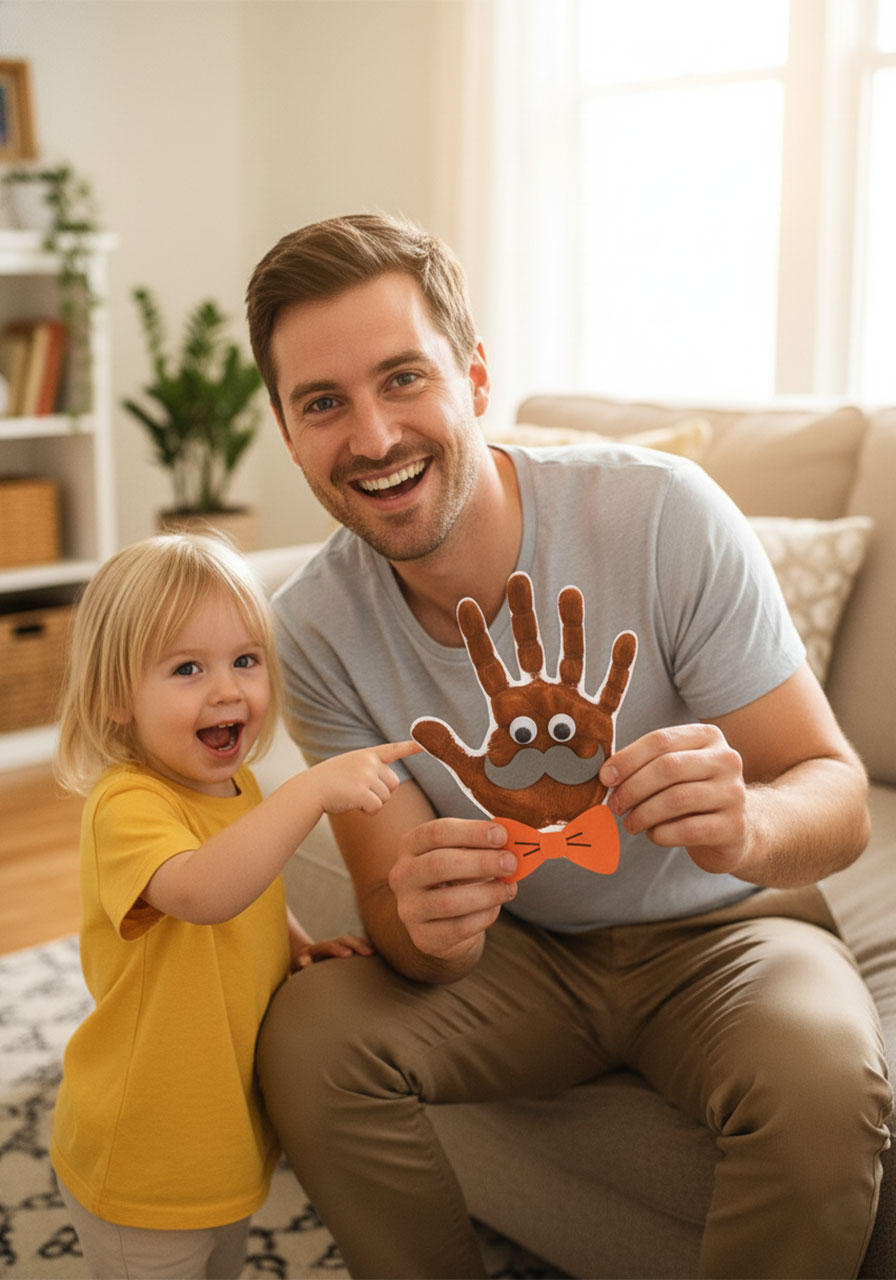
Looking for a Father’s Day gift that’s guaranteed to make Dad’s heart melt? This handprint card craft is it. It’s simple, it’s adorable, and it transforms your kid’s little hand into the most charming mustachioed gentleman you’ve ever seen.
The best part? Dad gets a card he’ll actually want to keep – not just stick on the fridge for a week and quietly recycle. These handprint cards open up so you can write a heartfelt message inside, making them both a craft and a keepsake.
Whether you’re a parent making this at the kitchen table or a teacher organizing a whole class of tiny Picassos, this project is low-stress, high-reward, and seriously fun.
Let’s dive in!

Why Kids (and Parents!) Will Love This Craft
There’s something magical about handprint crafts. They capture a moment in time – tiny fingers that won’t stay tiny forever. This Father’s Day handprint card takes that sweetness and dresses it up with googly eyes, a dapper mustache, and the most charming little bow tie you’ve ever seen.
Kids absolutely love getting their hands traced. There’s almost always a giggle involved, which makes the whole process feel less like a craft project and more like a mini-event.
And for teachers? This is a classroom dream. The steps are simple enough for young kids to follow, the mess is manageable (we’re talking paint and glue, nothing wild), and every single card comes out looking uniquely adorable.
Each handprint card can also be personalized to look like Dad – different skin tones, hair colors, bow tie colors. No two dads are the same, and no two cards have to be either.

What You’ll Need
White and black cardstock – White for the base card, black for the mustache (and darker hair, if needed)
Colored cardstock – For the bow tie (think green, yellow, orange, blue – whatever suits Dad’s vibe!)
Acrylic paint – You’ll need skin tone colors for the face and brown or black shades for the hair
Paintbrushes – One for the face, one for the hair
Googly eyes – The bigger, the better for extra personality
Black Sharpie or marker – For adding detail to the bow tie
Glue – A glue stick or craft glue both work great
Pencil – For tracing the hand
Scissors – Adult supervision recommended for younger kids
Mustache and bow tie template – You can freehand these or use a printable template (more on that below!)
Pro Tip: Grab a variety pack of colored cardstock so kids can mix and match bow tie colors. It makes the craft even more fun and lets each card feel personal.

Step-by-Step Instructions
Step 1: Trace and Cut Out the Handprint
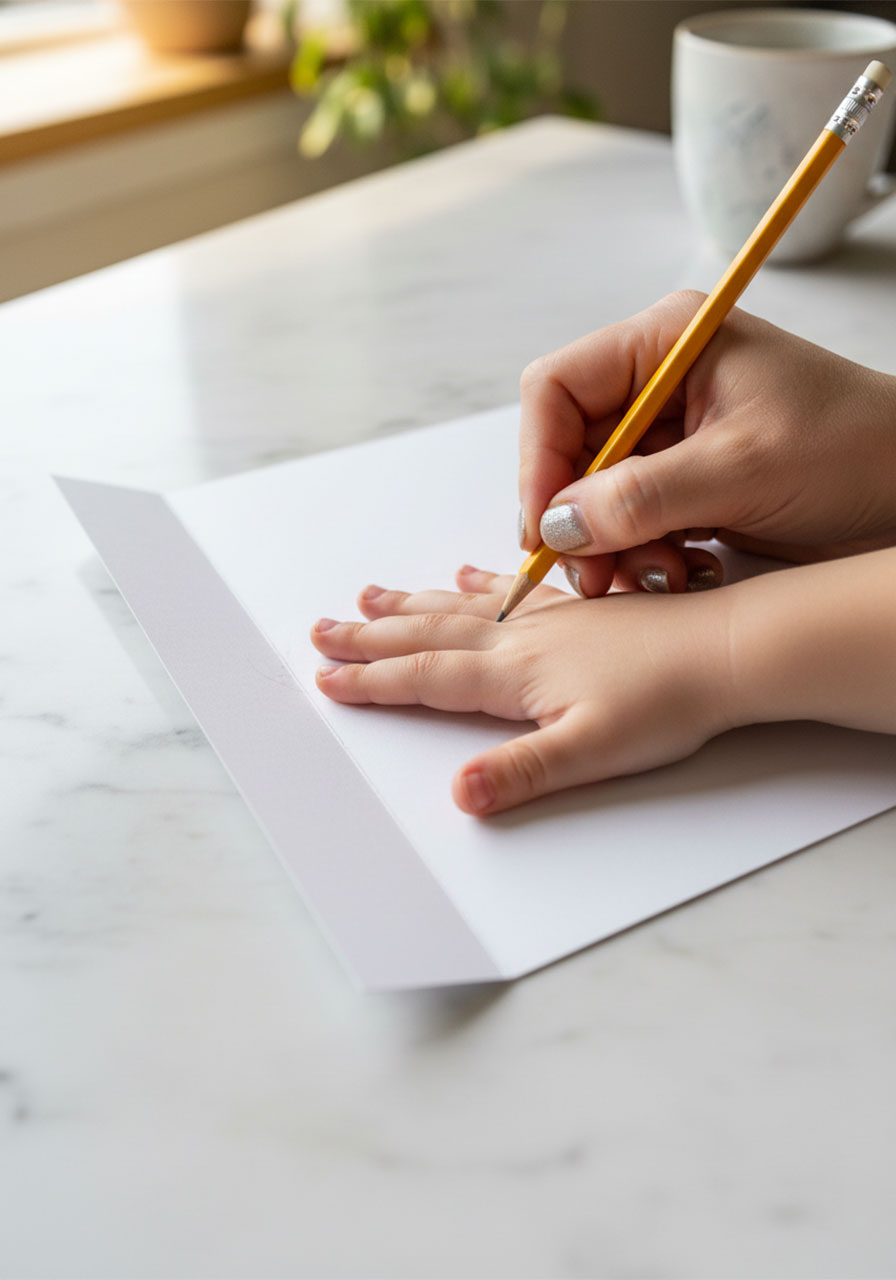
Fold a piece of white cardstock in half lengthwise (like a card). Place the child’s hand on the paper with the pinky finger along the folded edge. This is important – it keeps the card connected when you open it!
Trace all the way around the hand with a pencil, then carefully cut it out. When you unfold it, you’ll have a double-sided handprint card that opens right up. How satisfying is that?
Make sure not to cut along the fold at the pinky side – that’s what holds the card together.
Step 2: Paint the Face
Look at the handprint card with the fingers pointing up. The palm area at the bottom is going to be Dad’s face. Paint this section with a skin tone color and let it dry completely before moving on.
Don’t rush this step – wet paint plus glue equals a sticky mess. Give it at least 10–15 minutes to dry, or speed things up with a hair dryer on a low setting.
Step 3: Paint the Hair
Once the face is dry, it’s time for the hair! The fingers of the handprint become Dad’s hair (and they look surprisingly realistic once painted). Paint them in brown, black, or whatever color best matches Dad’s hair.
This is also a great moment for a little laugh – kids love deciding what color Dad’s hair is, especially if Dad is going a little gray!

Step 4: Cut Out the Mustache and Bow Tie
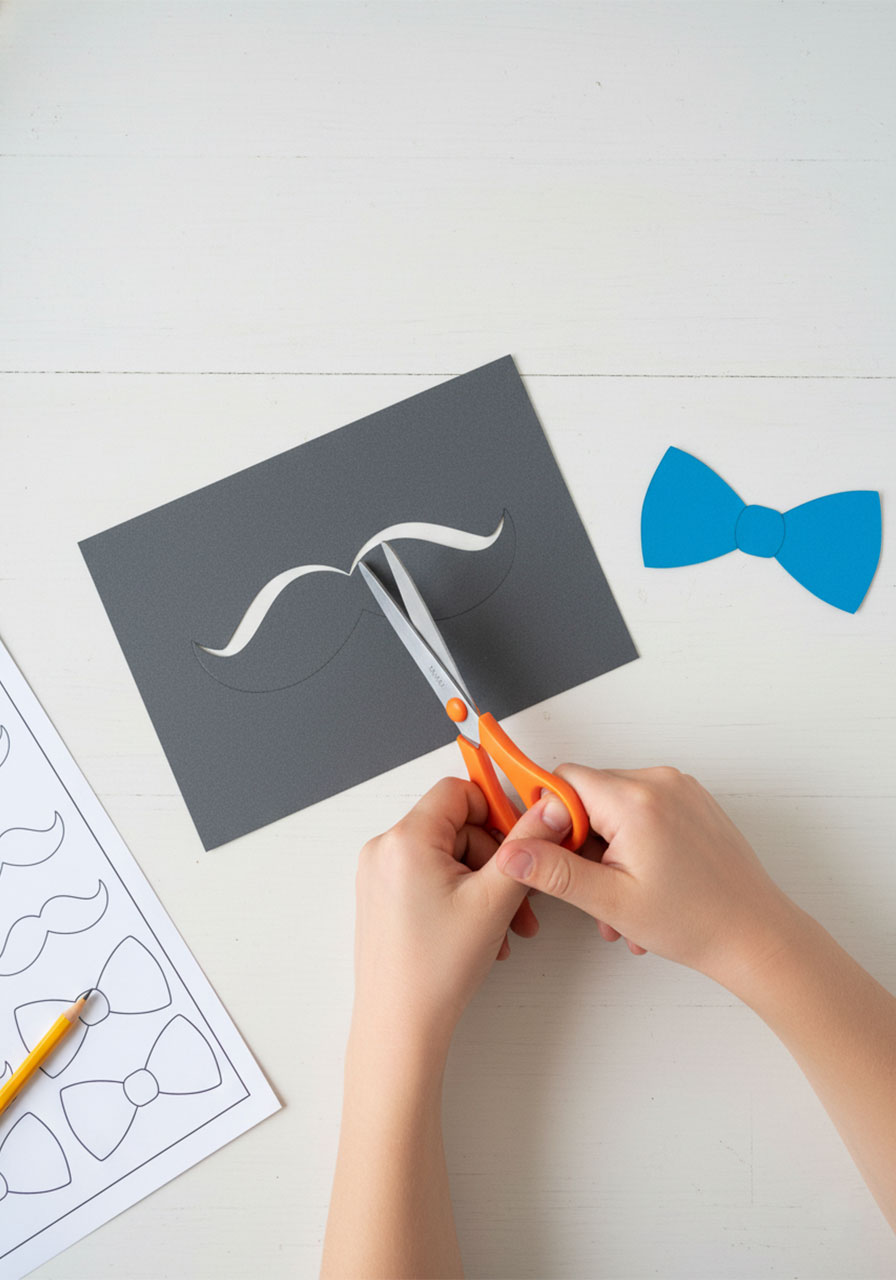
Using your template or freehand drawing, cut out a mustache shape from dark brown or black cardstock. Then cut out a bow tie shape from your chosen colored cardstock.
No template? No problem. A mustache is basically two curved “C” shapes mirrored together, and a bow tie is two triangles pointing toward each other with a small rectangle in the middle. Kids can even help draw and cut these out – great for developing fine motor skills!
If you want a free printable mustache and bow tie template, you can grab one by signing up for the newsletter – it makes this step even faster for classroom settings.
Step 5: Assemble the Face
Now for the fun part – putting it all together! Here’s the order:
1. Glue on the googly eyes in the upper portion of the painted face area.
2. Glue the mustache just below the eyes, centered on the face.
3. Glue the bow tie at the bottom of the face, right below the mustache.
4. Add two small vertical lines in the center of the bow tie with a black Sharpie – this little detail makes the bow tie look polished and realistic.
Step back and admire your work. This little handprint just became the most dapper dad you’ve ever seen.

Step 6: Write Your Message Inside
Open up the card and write a special message for Dad. It could be a heartfelt “Happy Father’s Day, I love you!” or something the child wants to say in their own words.
For classroom projects, you can have kids dictate their message and write it in for younger ones, or let older kids write their own for that extra personal touch.
Fun Variations to Try
One of the best things about this craft is how customizable it is. Here are a few ways to mix it up:
No-Mustache Version: Not every dad has a mustache! Skip it for a clean-shaven look, or add a big smile drawn with a marker instead.
Glasses Dad: Cut small rectangle frames from cardstock and glue them above the mustache for a dad who rocks specs.
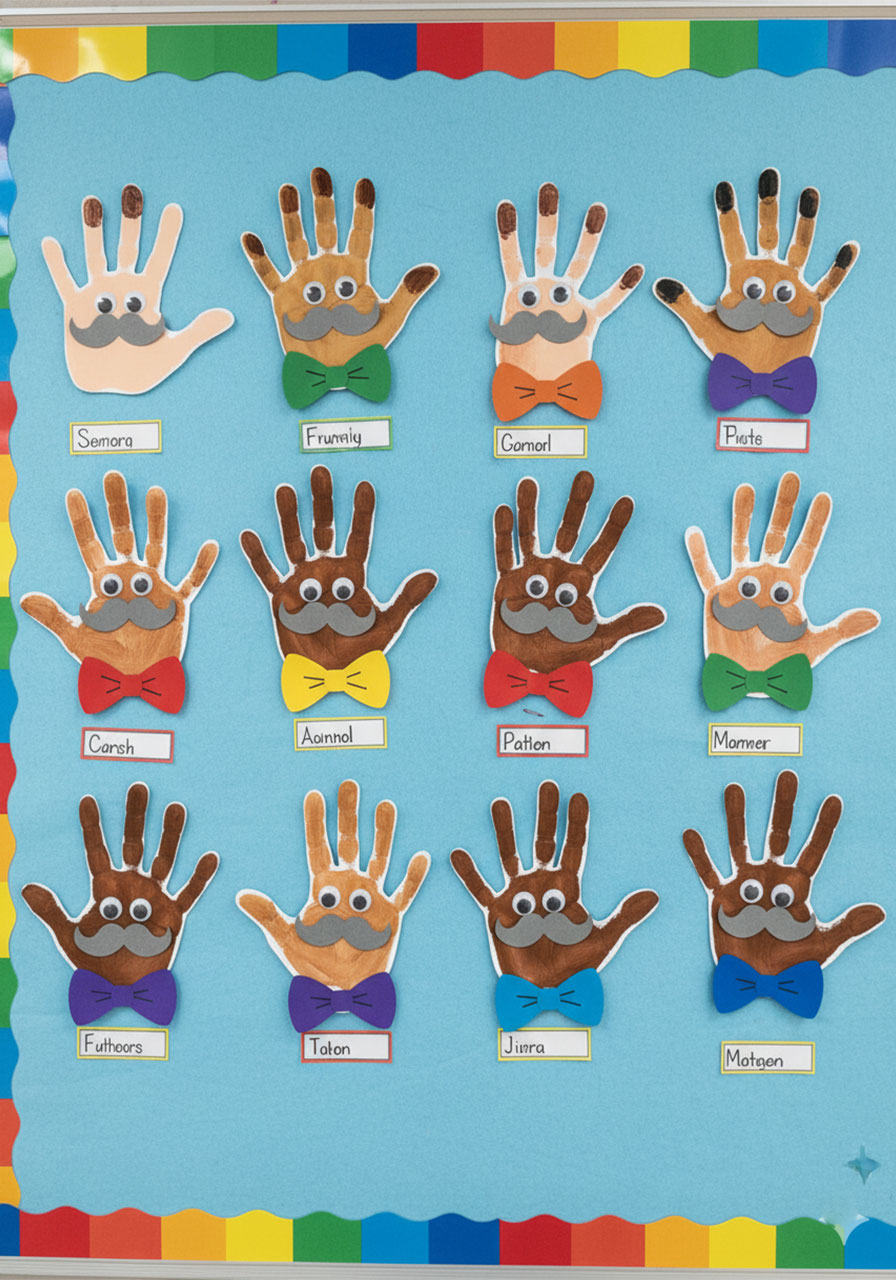
Class Set with Different Bow Tie Colors: If you’re making these in a classroom, give each child a different bow tie color – the finished display wall looks absolutely amazing.
Grandpa Version: Use gray or white paint for the hair and mustache, swap the bow tie for a tie shape instead, and you’ve got the perfect Grandfather’s Day card too.
Write on the Back: Flip the card over and have kids list their favorite things about Dad – “Dad is funny,” “Dad makes the best pancakes,” etc. It turns a cute craft into a treasure Dad will read over and over.
Tips for Making This in a Classroom
If you’re a teacher planning this for a whole class, here are a few things that’ll make your life much easier:
Pre-fold and pre-cut the cardstock ahead of time so kids can jump straight to the tracing step. This saves a lot of time with younger grades.
Set up a painting station with pre-poured paint in small cups. Cover the tables with a plastic tablecloth or newspaper – acrylic paint dries fast but it stains.
Use sponge brushes instead of regular paintbrushes for the face. They cover the area faster and are easier for little hands to control.
Pre-cut the mustache and bow tie shapes for younger kids (Pre-K through 1st grade). For older kids (2nd grade and up), cutting their own adds to the experience.
Do this project two days before Father’s Day so the paint has time to fully dry and the cards are ready to bring home.
Tips for Making This at Home
If you’re a parent doing this with your kid, here’s how to make it go smoothly – and actually enjoy the process:
Let your child pick the bow tie color. This small choice makes them feel ownership over the craft and they’ll be so proud to give it to Dad.
Trace the hand yourself if your child is too young to keep still – then let them do the painting part. Even toddlers can dab paint on with a brush and feel like they made it.
Make a matching card for yourself. Seriously. Use your own hand to make one too, and watch Dad’s face when he opens two cards – one from a tiny hand, one from yours. Instant tears of joy.
Don’t stress about perfection. A slightly lopsided mustache or a bow tie that’s not perfectly centered? That’s character. Dad will love it exactly as it is.
Why This Makes the Perfect Father’s Day Gift
Store-bought cards are fine. But a handmade card from your child – with their actual little handprint on it? That’s the one that goes in the keepsake box.
This craft is special because it’s personal in a way nothing else can be. Dad can look at it ten years from now and remember exactly how small those hands were. That’s not just a card. That’s a memory.
It’s also a gift that fits every budget – which matters when you’re juggling school supplies and life. The materials are affordable, easy to find, and most of them you probably already have at home.
And let’s be honest: when Dad opens that card and sees a tiny mustachioed version of himself made from his kid’s handprint, he’s going to beam with pride. Every. Single. Time.
Frequently Asked Questions
What age is this craft best for?
This craft works great for kids ages 3 and up. Toddlers will need more help with tracing and cutting, but they can absolutely do the painting and gluing. Kids in the 5–10 age range can handle most steps independently with light supervision.
Can I use construction paper instead of cardstock?
You can, but cardstock holds up much better – especially once you add paint and glue. Construction paper tends to warp and tear more easily. If cardstock isn’t available, use the thickest construction paper you can find.
What if I don’t have acrylic paint?
Watercolor paint works in a pinch, though the colors won’t be as vibrant. Tempera paint (the kind commonly used in classrooms) is another great option – it’s washable and easy to work with for younger kids.
How long does this take to make?
From start to finish, plan for about 30–45 minutes, including drying time. If you’re doing it in a classroom, doing the painting one day and assembling the next works really well.
Can we make this for Grandfather’s Day or another occasion?
Absolutely! This craft works for any dad figure – grandfathers, uncles, stepdads, family friends. Just adjust the hair color and add whatever personal touches feel right. It makes a great birthday card too!
More Father’s Day Ideas to Keep the Fun Rolling:
8 Heartfelt DIY Gifts for the New Dad That He’ll Actually Love (And Keep Forever)
The Cutest Handprint Father’s Day Grill Card (Template Inside!)
DIY “I Love You This Much” Handprint Card – The Sweetest Father’s Day Gift Your Kids Can Make
The Sweetest Father’s Day Gift You Can Make With Your Kids (And It Costs Almost Nothing)
Reel Him In: How to Make a DIY Fishing Bobber Gift Basket for Father’s Day
DIY Mini Grill Father’s Day Gift Basket: The Cutest Backyard BBQ Surprise Dad Will Love
