
There’s a moment every parent knows. You look down at your child’s tiny hand in yours and think, I wish I could freeze this forever.
This Father’s Day, you actually can.
This salt dough keepsake is one of those rare crafts that looks like it cost a fortune and took serious skill – but really costs a few dollars and uses ingredients you already have in your pantry. Dad is going to tear up. I’m not even kidding.
Whether you’re making this with your toddler, your preschooler, or even a school-age kiddo, this is the kind of gift that ends up on a desk or bookshelf for years. Long after the “World’s Best Dad” mugs are forgotten, this little heart full of handprints will still be telling its story.
Let’s make it together.
Why This Gift Is So Special (Beyond Just Being Cute)
Salt dough keepsakes have been around for generations – and there’s a reason they never go out of style.
They capture something that no photo quite can: the actual size of your child’s hand at this exact moment in time. When you press that little palm into the dough, you’re creating a physical, three-dimensional record of right now.
Years from now, Dad will hold that heart and remember exactly how small those hands were. How they trusted him completely. How they reached for his without even thinking about it.
That’s not just a craft. That’s a keepsake that holds the whole heart of fatherhood in it.
And if your faith is part of your family’s foundation, this is also a beautiful reminder of the gift of children – little hands made to be loved and guided. There’s something quietly holy about preserving them.

What You’ll Need
Good news: you likely already have most of this at home.
For the dough:
1 cup all-purpose flour
1 cup salt (use regular table salt or kosher salt for a white result – more on this in a minute!)
½ cup warm water
For shaping and baking:
Parchment paper
A rolling pin
A butter knife
A baking sheet
A straw (optional – but read the Pro Tip below!)
For decorating:
White acrylic paint (for the base coat)
Acrylic paint in your color of choice (green is classic and looks gorgeous!)
A fine-tip permanent marker
Mod Podge (this is your secret weapon for a long-lasting, professional finish)
Paintbrushes
A quick note on salt: If you use pink Himalayan salt, your dough will come out pink! That’s totally fine – you’ll paint over it anyway. But if you want to skip the extra base coat step, stick with plain white table salt.

How to Make a Father’s Day Salt Dough Keepsake
Step 1: Mix Your Dough
In a large mixing bowl, combine the flour and salt. Give it a quick stir so they’re evenly mixed.
Now slowly pour in the warm water, stirring as you go. Once it starts to clump together, set down the spoon and get your hands in there.
Knead the dough for a couple of minutes until it’s smooth, soft, and pliable – kind of like Play-Doh. If it feels sticky, add a small pinch of flour. If it’s crumbling and dry, add a tiny splash of water, a little at a time.
This is a great step to let the kids help with! Little ones love squishing and kneading. It also gives you a chance to build the excitement: “We’re making something special for Daddy today!”

Step 2: Roll It Out
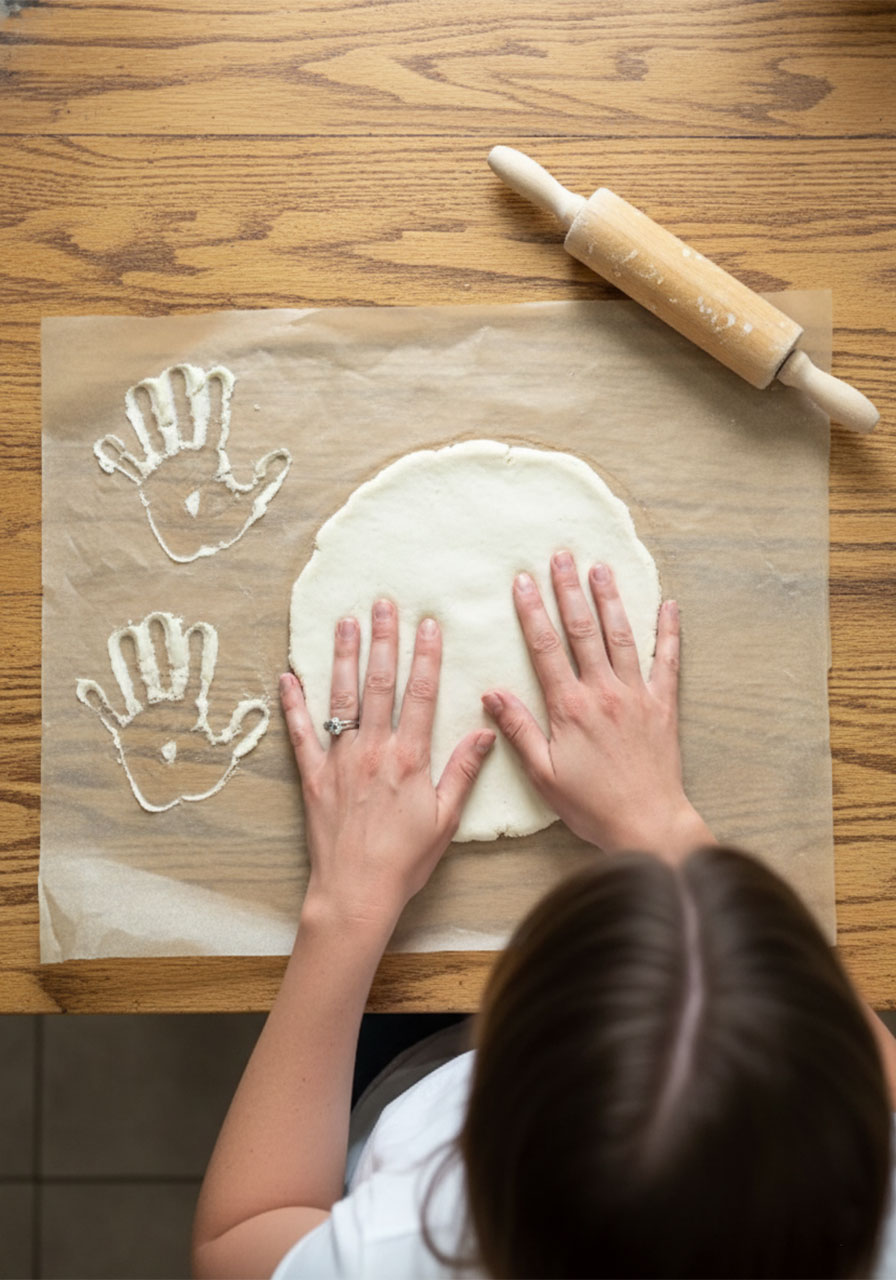
Lay a large sheet of parchment paper on your table or countertop. Place your dough in the center and roll it out to about ½ inch thickness.
Don’t skip the parchment paper. It keeps the dough from sticking, and – this is the genius part – you can slide the whole thing directly onto your baking sheet without having to move the fragile dough.
Make sure it’s even throughout. Thin spots can crack during baking, and thick spots take much longer to dry out.
Step 3: Press the Handprints
This is the moment. Take a breath, because it’s going to be adorable.
Help your child press their hand firmly and flatly into the dough. Press down on each finger gently to make sure all the details are captured.
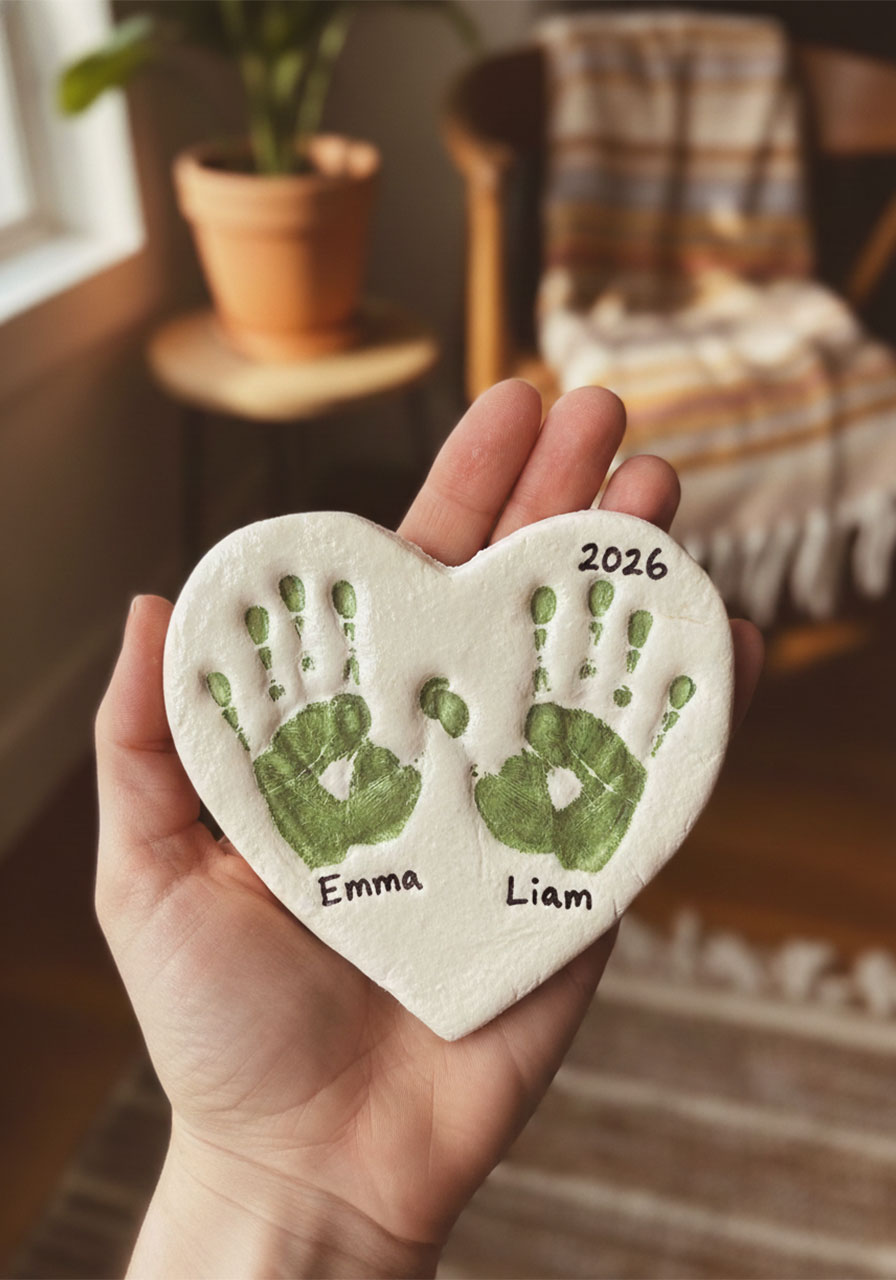
For the heart shape shown in the video, press both hands with the palms overlapping slightly at the bottom, with the fingers fanning outward. The overlapping palms naturally form the bottom point of the heart – it’s the sweetest little trick.
If you have more than one child, have the younger child’s hand go on top. Or you can do one inside the other. There’s no wrong way – it’s your family’s heart to design.
Step 4: Shape the Heart
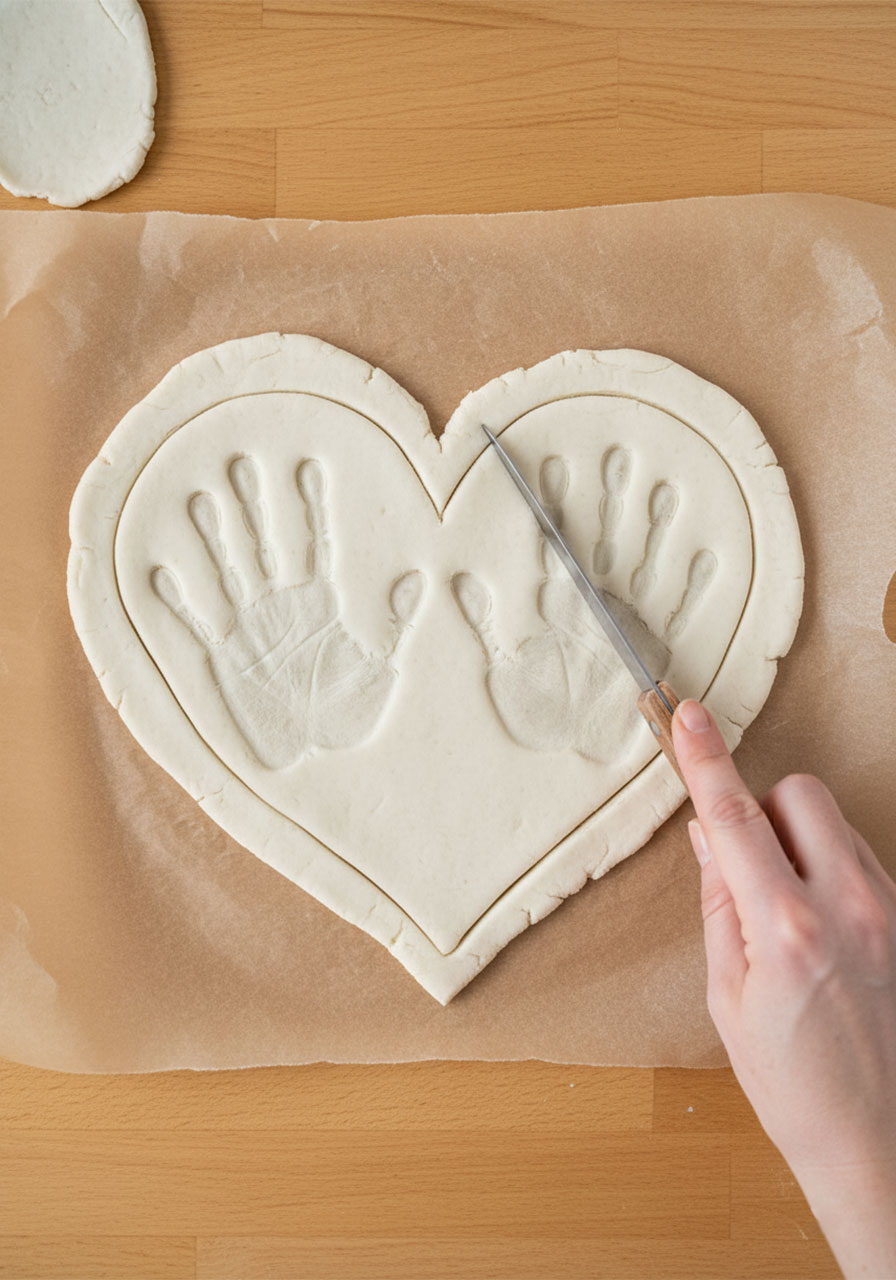
Using your butter knife, draw a heart shape in the dough around the handprints. Don’t press all the way through – just score the outline first, then carefully cut through and peel away the excess dough.
Use a damp fingertip to smooth out any rough edges around the border. You want those edges to look clean and intentional.
Pro Tip: If you want to hang this on a wall or tie a ribbon through it, now is the time! Use a straw to poke a small hole near the top of the heart. Push it through completely and wiggle it to make a clean opening. If you forget to do this before baking, you can try drilling a small hole after – but it’s much easier now.
Step 5: Dry or Bake
You’ve got two options depending on your timeline:
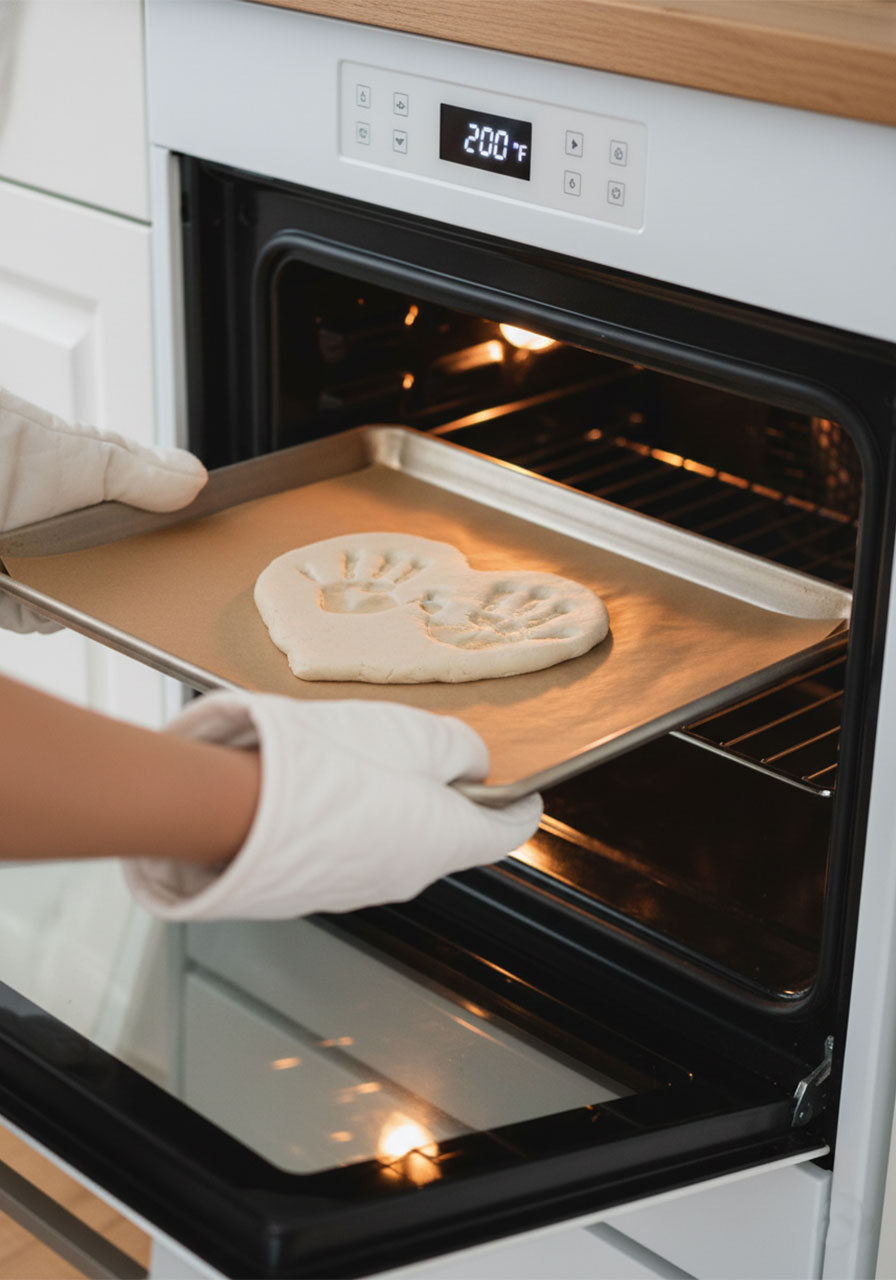
The Bake Method (faster): Slide your parchment paper onto a baking sheet and bake at 200°F for about 2 hours. Check it every 30 minutes. You’re looking for a dough that’s completely dry and hard – not browned or cracked. Every oven is different, so keep an eye on it.
The Air Dry Method (no oven needed): Set it on a wire rack in a dry area and let it air dry for 2 to 4 days. Flip it occasionally so it dries evenly on both sides. This method takes longer, but there’s zero risk of overcooking.
Before you paint, make sure the dough is 100% completely cool and hard all the way through. If there’s any moisture left inside, the paint won’t adhere properly and the keepsake can crack over time.
Step 6: Paint and Personalize
Now for the fun part – making it beautiful.
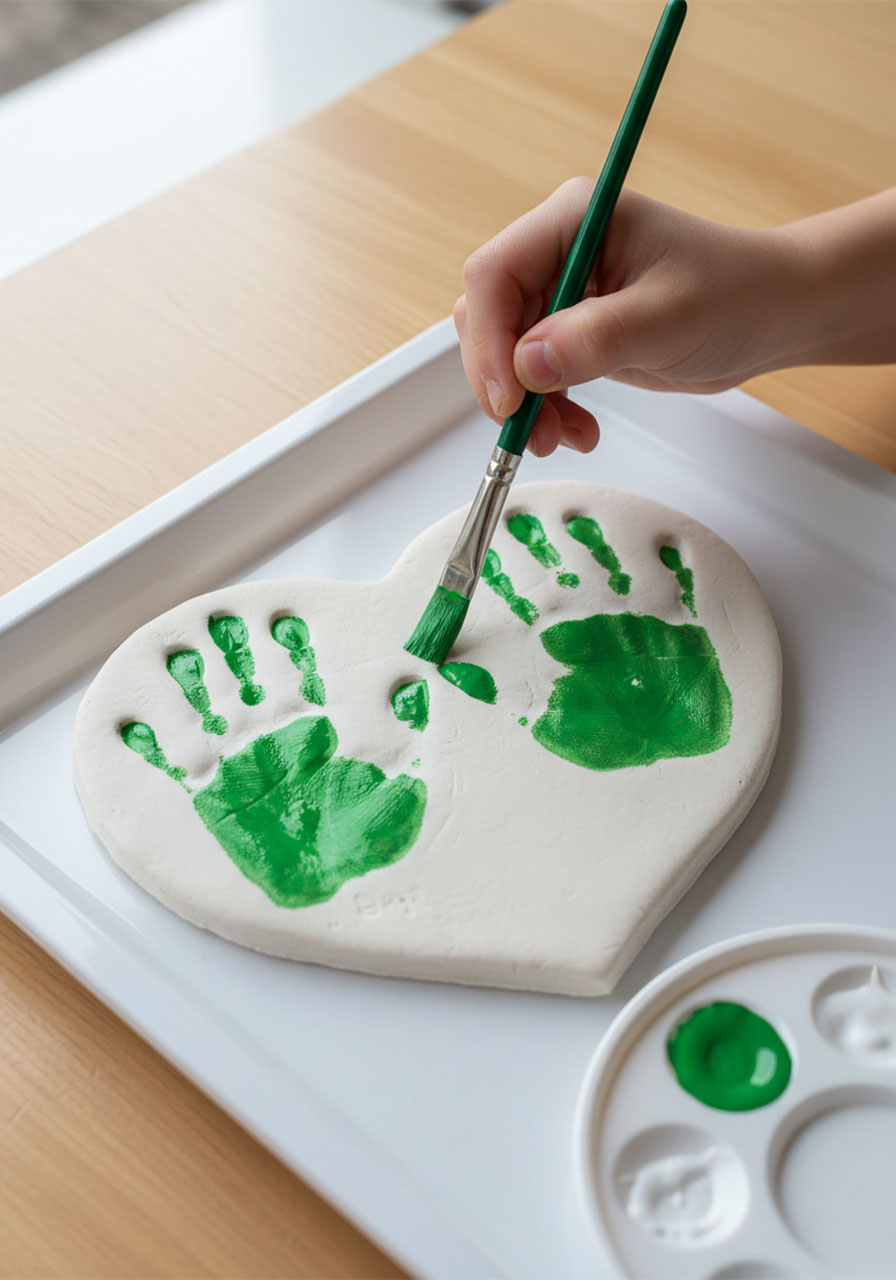
Start with a white base coat. Paint the entire surface of the heart white using acrylic paint. This covers any discoloration from the salt and gives your accent colors a bright, clean base to pop against. Let it dry completely before moving on.
Paint the handprints. Using your chosen accent color, carefully fill in the handprint impressions. Green looks gorgeous (and very “dad energy”), but you could do blue, gold, red – whatever feels like your family. Use a small brush to get into all the little finger details.
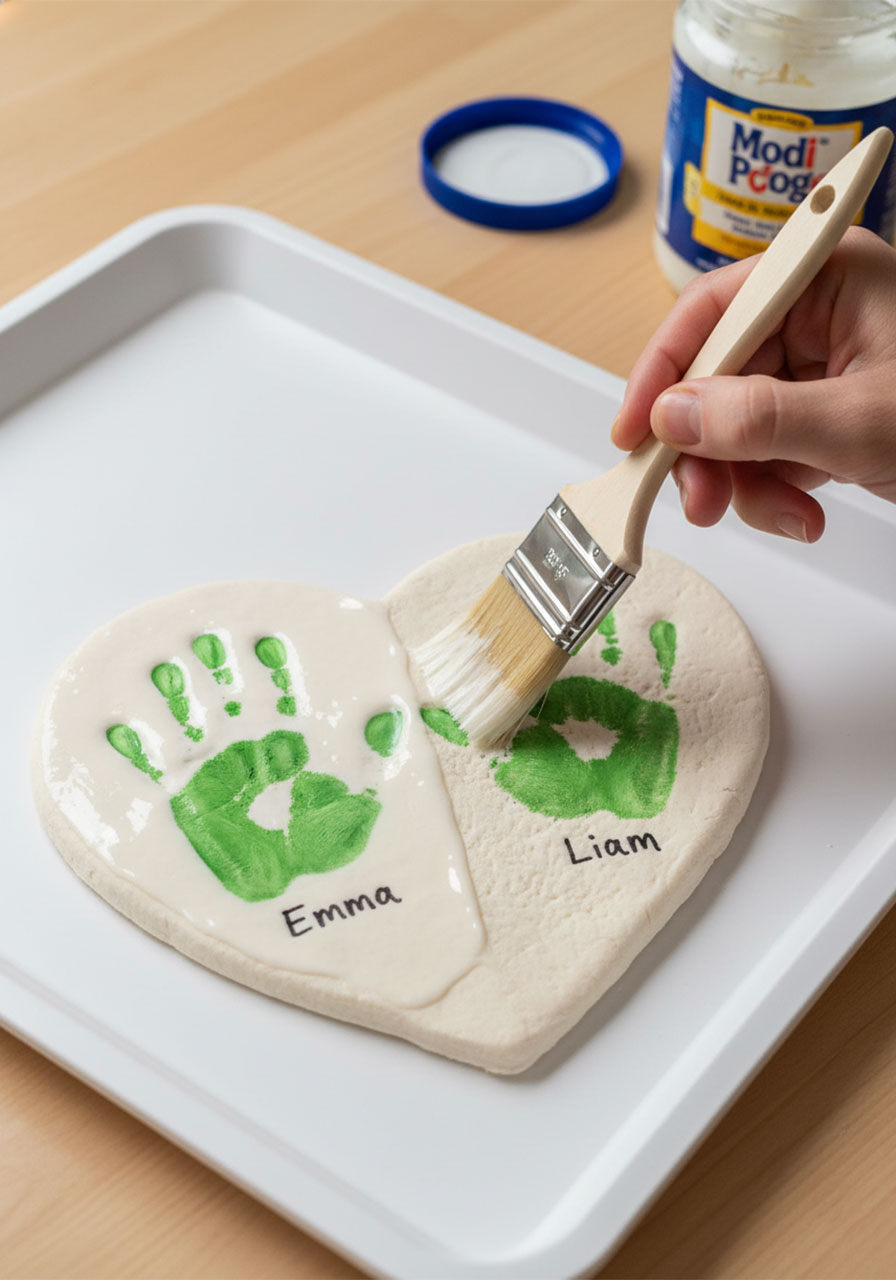
Add the names and year. Once the paint is dry, use a fine-tip permanent marker to write your children’s names beneath their handprints and the year at the top of the heart. Keep the handwriting small and sweet – it adds to the charm.
A little tip from experience: write the names lightly in pencil first so you can position them perfectly before going over with the marker.
Step 7: Seal It for the Long Haul
This step is what takes your keepsake from “cute craft” to “heirloom quality.”
Brush a layer of Mod Podge over the entire painted surface. Mod Podge seals the paint so it won’t chip, and it protects the dough from absorbing moisture over the years (which is what causes cracking and crumbling).
Let it dry to a clear, glossy finish. You can do two coats if you want extra protection – just let the first coat dry completely before adding the second.
That’s it. You just made something that will last for decades.
Tips to Make It Even More Special
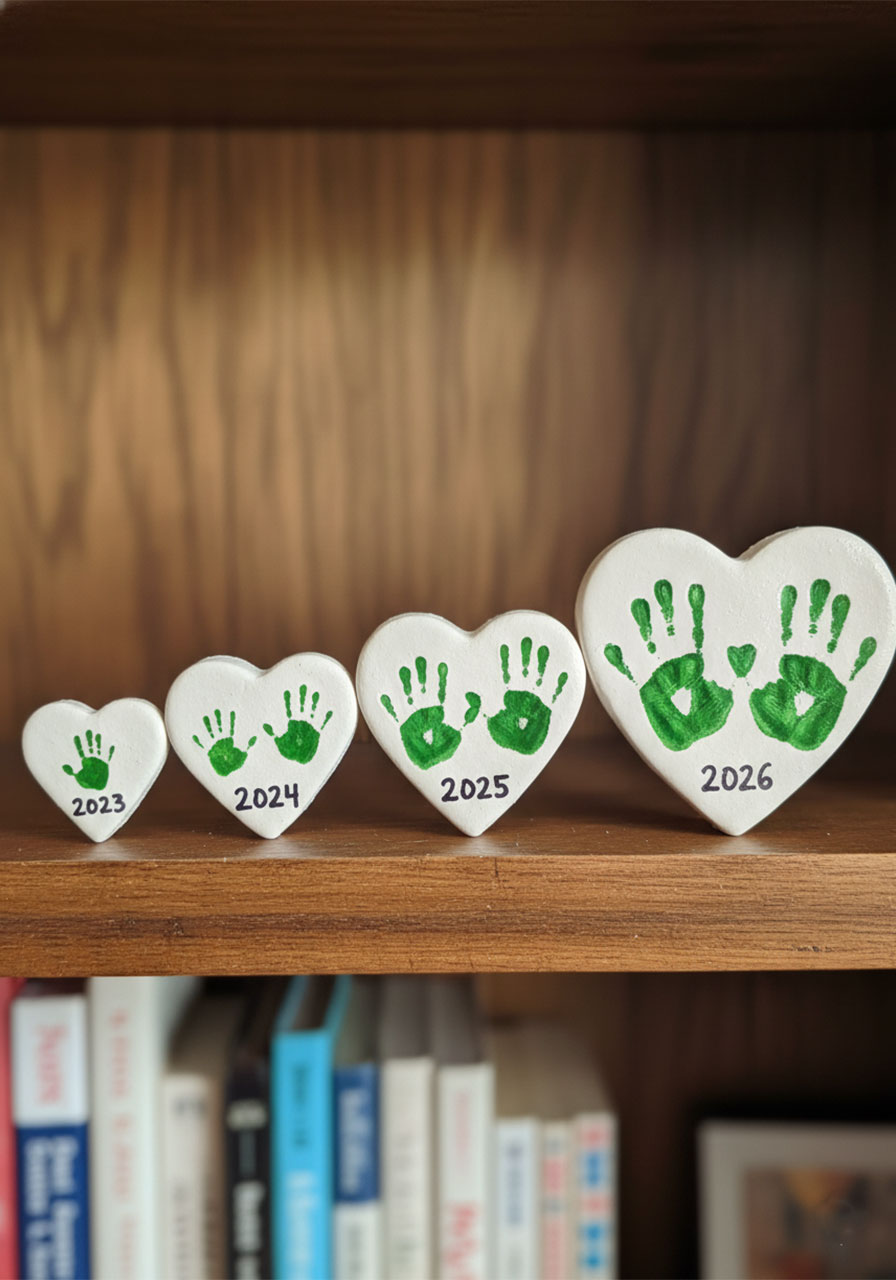
Make one every year. Imagine a collection of hearts, lined up on a shelf, showing how your children’s hands have grown year after year. By the time they leave for college, Dad will have a whole wall of love.
Add a scripture or phrase. Use your permanent marker to write a short Bible verse or meaningful quote along the border. Something like “Children are a gift from the Lord” (Psalm 127:3) is simple, true, and deeply personal.
Try different shapes. The heart is classic, but you could also do a cross shape, a fish, or a simple circle. Whatever shape carries meaning for your family.
Make a matching one for Grandpa. If you’re already mixing the dough, double the batch and make two. Grandpa will treasure it just as much.
Frame it or display it with intention. This heart looks beautiful propped up on a bookshelf, sitting on a desk, hanging on a wall with a ribbon, or nestled in a shadow box alongside a photo from that same year.
A Few Things That Could Go Wrong (And How to Fix Them)
The dough is too sticky. Add flour a tiny pinch at a time until it’s workable. Don’t dump in a lot at once – too much flour makes it dry and crumbly.
The dough is cracking when I roll it. It’s too dry. Wet your hands slightly and keep kneading, or add a tiny drop of water.
The handprints aren’t showing up clearly. Press harder! Kids especially tend to be too gentle. Put your hand over theirs and add some firm pressure. Each finger needs to make good contact with the dough.
It cracked in the oven. This usually happens when the oven is too hot or when there were air bubbles in the dough. Next time, knead more thoroughly and bake low and slow. If it cracks, you can sometimes repair small cracks with a little white glue before painting.
The paint is peeling. The dough wasn’t fully dry before painting. Unfortunately this one’s hard to fix after the fact – but going forward, always let it dry an extra 24 hours just to be safe.
Why Dad Will Actually Love This
Dads get a lot of ties. A lot of mugs. A lot of “World’s Best Dad” things that are sweet but, honestly, a little forgettable.
This is different.
This is the size of your baby’s hand preserved in time. This is the year written right there. This is something no store could ever sell him, because it’s made only from your family.
I once saw a dad open a salt dough keepsake and go completely quiet. Not sad quiet – the kind of quiet that means something hit him somewhere deep. He just held it and looked at it for a long moment. Then he said, “I’m putting this on my desk at work.”
And he did. It sat there for years.
That’s the gift you’re making. And honestly? You’re going to love making it just as much as he loves receiving it.

Frequently Asked Questions
Can I use bread flour or self-rising flour instead of all-purpose?
All-purpose flour works best and gives the smoothest, most predictable result. Bread flour can work in a pinch, but self-rising flour has leavening agents in it that can cause the dough to puff and distort your handprints. Stick with plain all-purpose when you can.
How long will this keepsake last?
With the Mod Podge seal and kept away from moisture and direct sunlight, a salt dough keepsake can last for many, many years – even decades. The key is the seal. Don’t skip it.
My dough turned out pink. Is that okay?
Totally fine! Pink Himalayan salt gives the dough a rosy tint, but once you paint it white, you’d never know. Just make sure your base coat is thorough and fully dry before adding accent colors.
What age is this craft best for?
This works beautifully for kids of all ages – from infants (with parent help for the handprint) to school-age kids. Babies’ handprints are especially precious because the tiny size is so striking. Toddlers can help with the kneading and mixing. Older kids can help with the painting and writing.
Can I make this ahead of time?
Yes! You can make this up to a week or two before Father’s Day if you store it properly. Once it’s fully baked, painted, and sealed, keep it somewhere dry until the big day. Avoid storing it anywhere damp or hot.
Do I have to use Mod Podge?
Mod Podge is the most widely available and reliable sealer for this project, but you can also use a clear acrylic sealer spray. Just make sure whatever you use is non-toxic if little ones will be handling it.
You’ve Got This, Mama
Some of the most meaningful things in life are also the simplest ones. Flour, salt, water, and two small hands pressed into dough with all the love in the world.
You don’t need to be crafty. You don’t need a Pinterest-perfect kitchen. You just need a little bit of time and a whole lot of heart – and you clearly already have both, because you’re here.
Go make something beautiful with your kids today. Dad is going to love it.
And if you try this craft, I’d love to hear how it turned out! Drop a comment below and tell me – what color did your little ones pick for their handprints?
More Father’s Day Ideas to Keep the Fun Rolling:
Reel Him In: How to Make a DIY Fishing Bobber Gift Basket for Father’s Day
DIY Mini Grill Father’s Day Gift Basket: The Cutest Backyard BBQ Surprise Dad Will Love
How to Make a DIY Pop-Up Superhero Card for Father’s Day
DIY Handprint Keychains: The Sweetest Little Father’s Day Gift Kids Can Actually Make
10 Reasons to Make This Colorful Father’s Day Popsicle Stick Wall Hanging With Your Kids
A “Corny” Father’s Day: How to Make a Pop-Up “Pop-Corn” Card for Dad
How to Make a DIY #1 Dad Award Ribbon for Father’s Day (Kids Will Love This!)
