
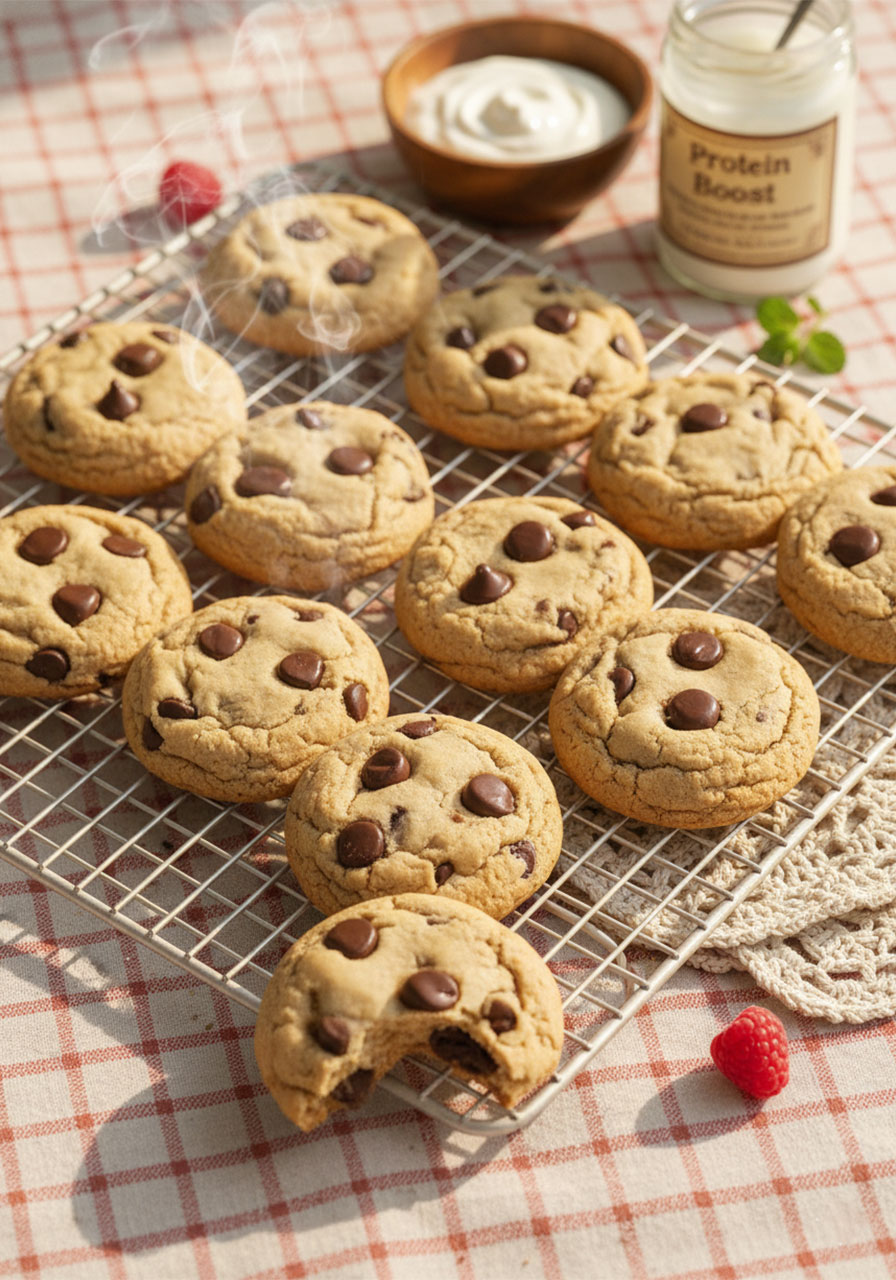
Picture this: it’s after school, the kids are hungry, and you need something fast, filling, and – let’s be real – something they’ll actually eat without making a face.
Enter the protein Greek yogurt cookie.
No, it’s not a gimmick. No, it doesn’t taste like chalk pretending to be dessert. These cookies are soft, chewy, packed with protein, and genuinely delicious – and parents and teachers alike have been going absolutely wild over them.
I first made these on a Sunday afternoon when I had leftover Greek yogurt about to expire and a group of hungry kids about to arrive. Thirty minutes later, I had warm cookies cooling on the rack and zero leftovers. That’s when I knew this recipe was a keeper.
Ready to make cookies that fuel the fun instead of crashing it? Let’s go.
Why These Cookies Are a Game-Changer for Parents and Teachers
If you’ve ever been responsible for feeding a group of energetic kids – whether at home or in a classroom – you know the snack struggle is real.
You want something that won’t send them bouncing off the walls from a sugar spike. You want something quick to make. And honestly? You want something that doesn’t taste terrible, because you’re going to eat some too.
These protein Greek yogurt cookies check every single box.
They’re high in protein. Each cookie delivers around 8–10 grams of protein thanks to the Greek yogurt and protein powder. That means sustained energy – not the dreaded 3 PM crash.
They’re genuinely soft and chewy. Greek yogurt is the secret weapon here. It keeps the cookies moist and tender, so you’re not handing anyone a hockey puck.
They take about 25 minutes start to finish. Yes, including bake time. That’s faster than a drive-through run.
They’re completely customizable. Chocolate chips for the kids who need convincing. Nuts and dried fruit for the grown-ups. You can make them work for everyone in the room.
These aren’t “healthy cookies that pretend to taste good.” These are just… good cookies. With a serious nutritional bonus.


What You’ll Need
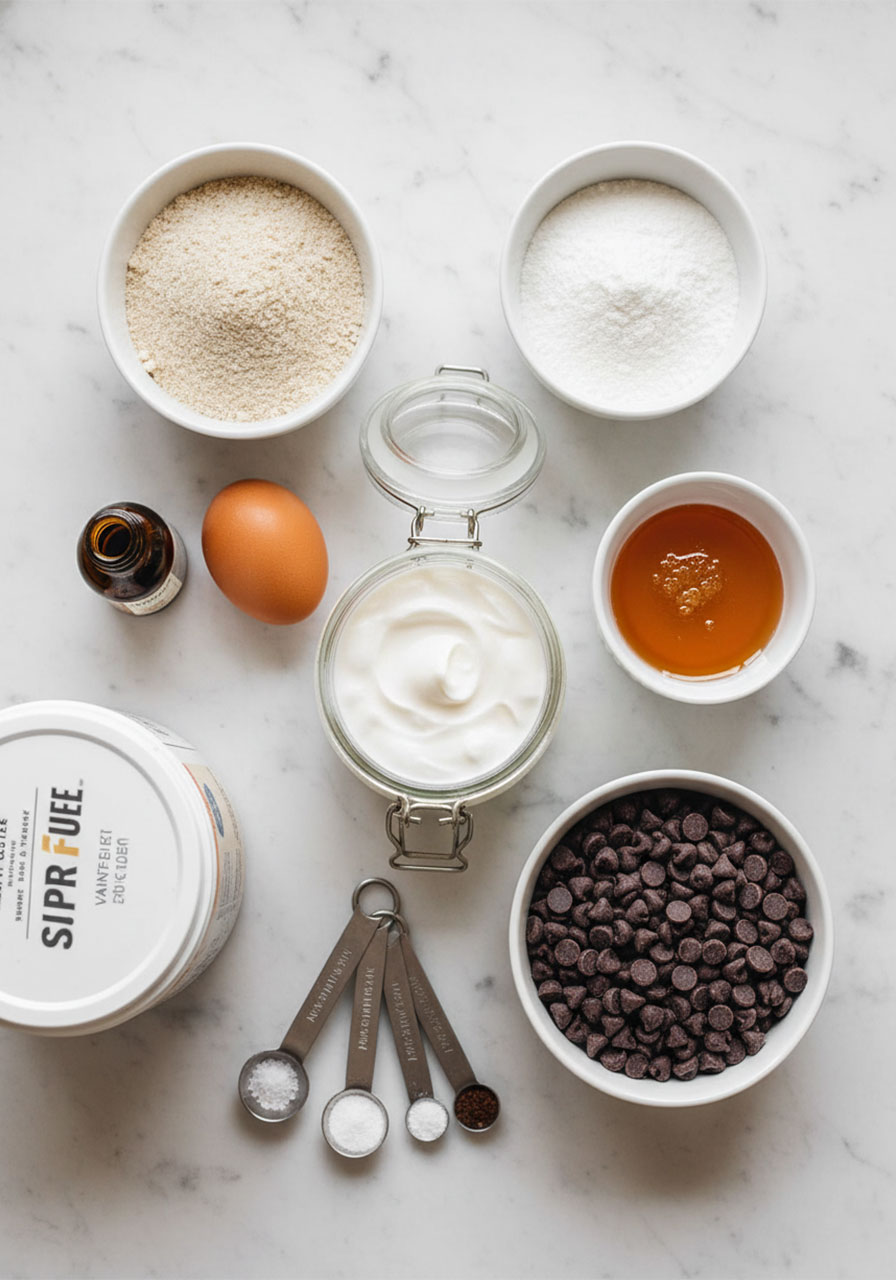
Before you preheat anything, let’s make sure you’re stocked up. Here’s the full ingredient list – nothing fancy, nothing hard to find:
1 cup plain Greek yogurt (full-fat for the richest taste, low-fat works too)
1/2 cup natural sweetener (honey, maple syrup, or coconut sugar – your call)
1 large egg, room temperature
1 teaspoon pure vanilla extract
1 cup oat flour (blend rolled oats in a blender for a quick homemade version)
1/2 cup protein powder (vanilla or neutral whey works best for texture)
1/2 teaspoon baking soda
1/4 teaspoon salt
1/2 cup mix-ins (dark chocolate chips, chopped nuts, dried fruit – whatever the crew loves)
Pro Tip: If you’re baking for a classroom or a group with dietary needs, use a plant-based protein powder and swap honey for maple syrup to make these dairy-light and vegan-friendly. Just add an extra tablespoon of Greek yogurt if the dough feels too dry.
Want to cut the sugar even further? Use a sugar-free protein powder and replace the sweetener with erythritol or monk fruit sweetener. The cookies will still be delicious – I promise.
How to Make Protein Greek Yogurt Cookies (Step by Step)
Alright, here’s where it gets fun. Follow these steps in order and you’ll have warm, golden cookies in under 30 minutes.
Step 1: Preheat and Prep
Preheat your oven to 350°F (175°C).
Line a baking sheet with parchment paper or a silicone baking mat. This is a non-negotiable – it prevents sticking and makes cleanup a total breeze. Especially important when you’re baking with or for kids.
Step 2: Mix the Wet Ingredients
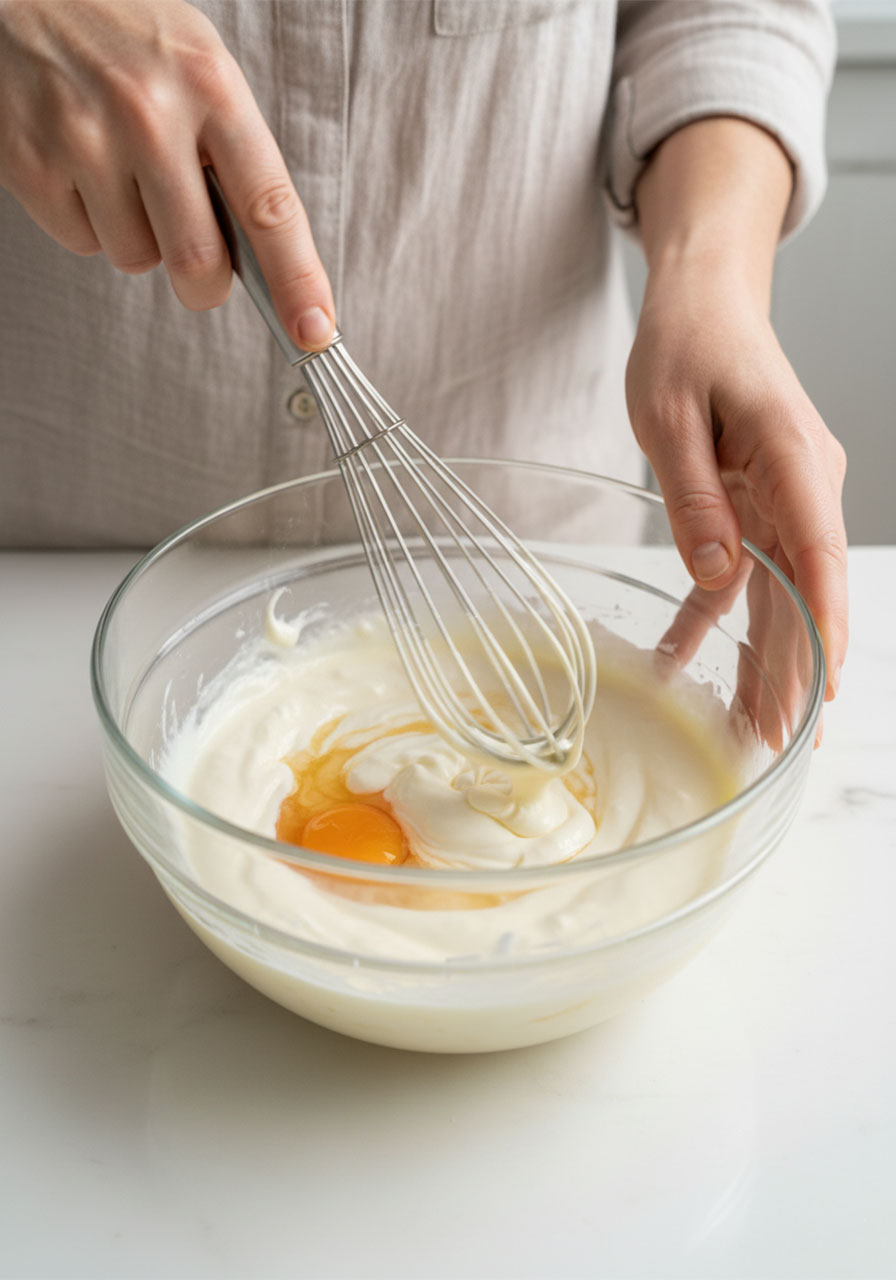
In a large bowl, add your Greek yogurt, sweetener, egg, and vanilla extract.
Whisk it all together until the mixture is smooth and slightly glossy. This only takes about 60 seconds, but don’t skip it – a well-combined wet base makes for a better-textured cookie.
Honest confession: I always taste-test the batter at this stage. No regrets.
Step 3: Combine the Dry Ingredients
In a separate medium bowl, whisk together the oat flour, protein powder, baking soda, and salt.
Mixing the dry ingredients separately first ensures everything is evenly distributed before it hits the wet mixture. This prevents weird clumps of protein powder in the final cookie – and nobody wants a surprise protein pocket.
Step 4: Bring It All Together
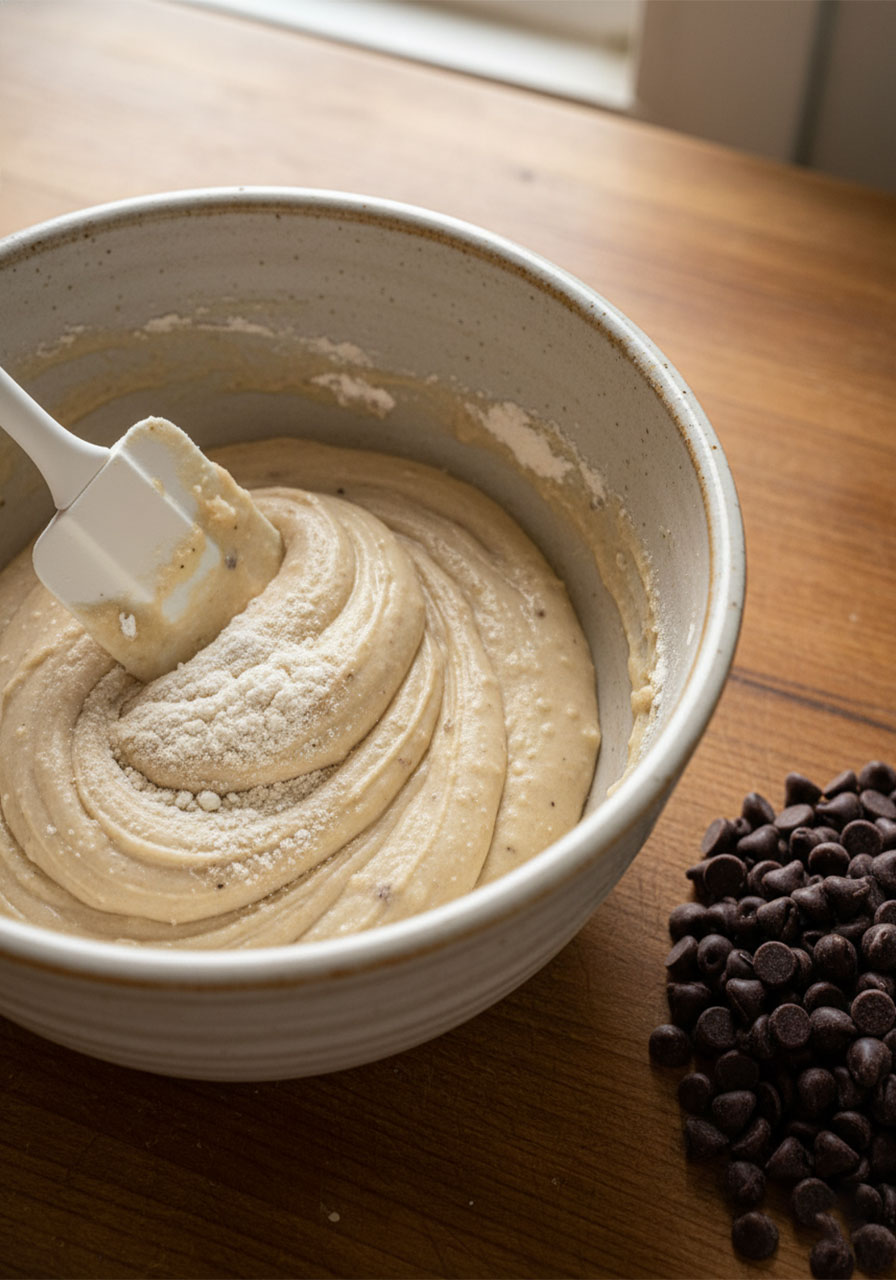
Pour the dry mixture into the wet mixture.
Use a spatula to gently fold everything together. Scrape the sides of the bowl and keep folding until you see no more streaks of flour. This is the key moment: do not overmix. Overmixing activates the gluten in the oat flour and gives you tough cookies instead of tender ones.
Once the dough is uniform, fold in your mix-ins. I’m a dark chocolate chips person every single time – but this is where you make it yours.
Step 5: Scoop and Shape
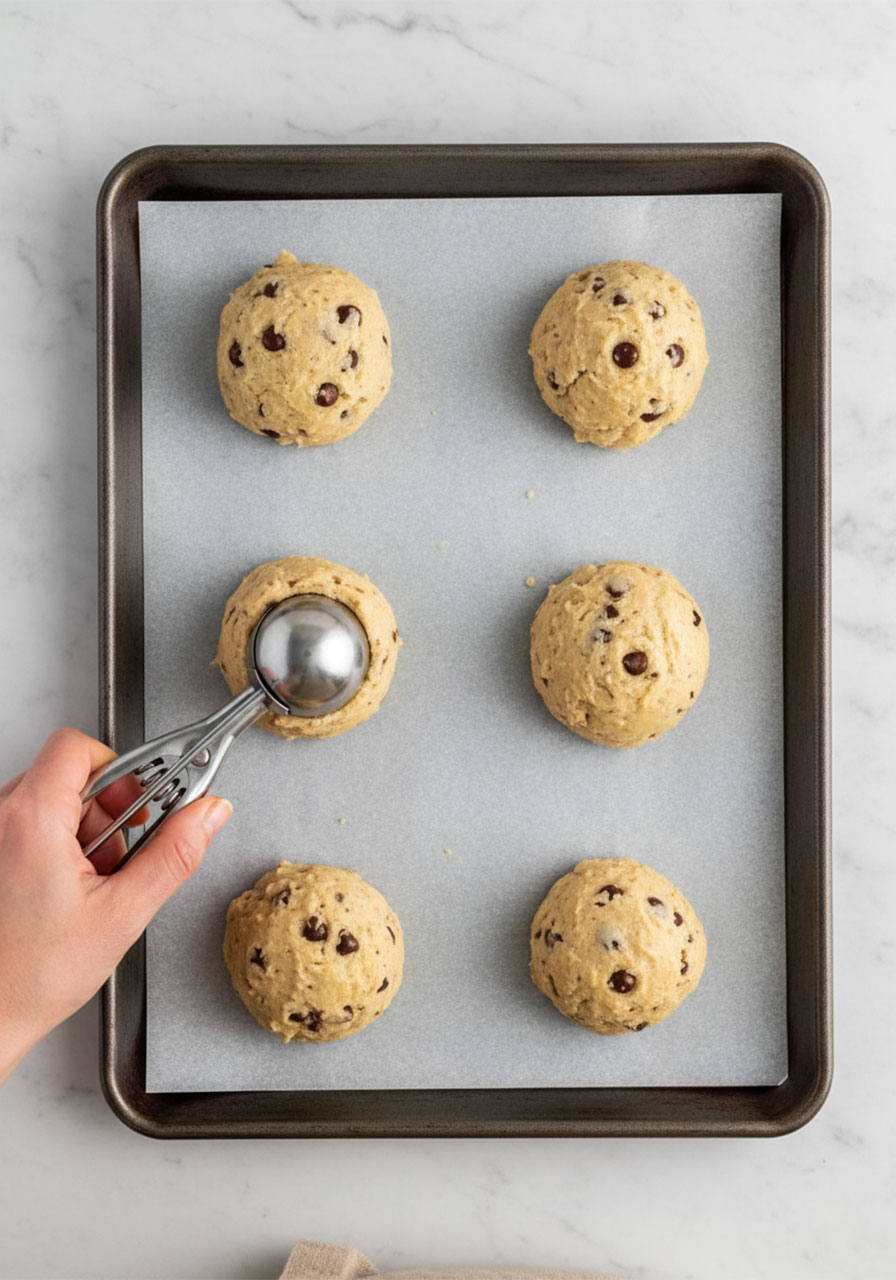
Using a tablespoon or a small cookie scoop, drop rounded mounds of dough onto your lined baking sheet.
Leave about 2 inches of space between each cookie.
Here’s an important detail: these cookies don’t spread much during baking. Give each mound a gentle flatten with your fingers or the back of a spoon. That little pat makes a big difference in the final shape.
Step 6: Bake to Golden Perfection
Slide the tray into your preheated oven and bake for 10–12 minutes.
You’re looking for lightly golden edges and a center that looks just barely set – not wet, but not brown either. The cookies will continue to firm up as they cool, so don’t overbake them chasing a fully set center. Overbaking is the fastest way to dry, disappointing cookies.
Set a timer. Walk away. Come back to the best smell in your kitchen.

Step 7: Cool and Enjoy
Let the cookies rest on the baking sheet for 5 full minutes before moving them.
Then transfer to a wire cooling rack. As they cool, they’ll develop that perfect chewy-soft texture that makes people reach for a second one before they’ve finished their first.
You just made protein cookies from scratch. High five yourself – you’ve earned it. 🙌
Tips and Tricks for the Best Results Every Time
Want to go from good cookies to absolutely incredible cookies? These are the little insider moves that make a real difference.
Chill the Dough for Thicker Cookies
If you have an extra 15 minutes, cover the dough and pop it in the fridge before scooping.
Cold dough spreads less in the oven, giving you a thicker, more compact cookie. If you’re making these for a party or classroom treat, chilling first gives you a more uniform, visually impressive result. Totally optional, but worth it when time allows.
Out of Oat Flour? No Problem
Almond flour works as a 1:1 substitute for oat flour in this recipe.
The texture will be slightly different – a little more dense and rich – but honestly still delicious. It also makes the cookies naturally gluten-free, which is great news if you’re baking for a group with dietary restrictions.
Plant-Based Protein Powder Tips
Plant-based protein powders (pea protein, brown rice, hemp) tend to absorb more moisture than whey.
If your dough looks too thick or crumbly after mixing, just add an extra tablespoon of Greek yogurt and stir again. You want a dough that holds together without being sticky.
Keep Them Soft with the Bread Trick
This is one of those tips that sounds weird until you try it: store your cooled cookies in an airtight container with a single slice of white bread.
The bread releases moisture into the container, keeping your cookies soft for days. I was skeptical the first time I heard this. Now I never store cookies without it.
Make a Double Batch
This recipe makes about 12 cookies – which sounds like a lot until you put them in front of actual humans.
If you’re baking for a family, a classroom, or a playdate, double the batch. The extra cookies freeze beautifully (more on that in the storage section), so nothing goes to waste.
Why Protein Cookies Are Actually Perfect for Kids and Classrooms
Here’s something worth thinking about: the average store-bought cookie or snack bar has almost zero protein and a significant sugar load.
That combination gives kids a quick energy spike followed by a very real energy crash – which any parent or teacher recognizes immediately as “the 2 PM chaos mode.”
Protein slows down sugar absorption and keeps energy levels stable for longer. That means kids stay focused, calm, and genuinely satisfied until the next actual mealtime.
With 8–10 grams of protein per cookie, these are more like a mini-meal than a treat.
And because they use Greek yogurt (which contains probiotics) and oat flour (which contains fiber), you’re also supporting gut health and digestion. That might sound like a bonus, but for parents dealing with picky eaters or kids with sensitive stomachs, it actually matters a lot.
The best part? The kids have no idea any of this is happening. They just think they got cookies.
Nutritional Breakdown (Per Cookie)
Here’s the approximate nutritional snapshot for one cookie using the base recipe:
Calories: ~120
Protein: 8–10g
Fat: 4–6g (varies by mix-ins)
Carbohydrates: 12–15g
Sugar: 5–8g (adjust based on your sweetener choice)
For context: a standard Oreo cookie has about 53 calories, 0.5g of protein, and 5g of sugar – and nobody stops at one Oreo. These Greek yogurt cookies are satisfying enough that one or two genuinely does the trick.
Numbers will shift slightly based on your protein powder brand, your sweetener choice, and what mix-ins you use. But the baseline is strong regardless of how you customize it.
5 Delicious Variations to Keep Things Fun
The base recipe is fantastic on its own. But once you’ve made it once, you’re going to want to start experimenting.
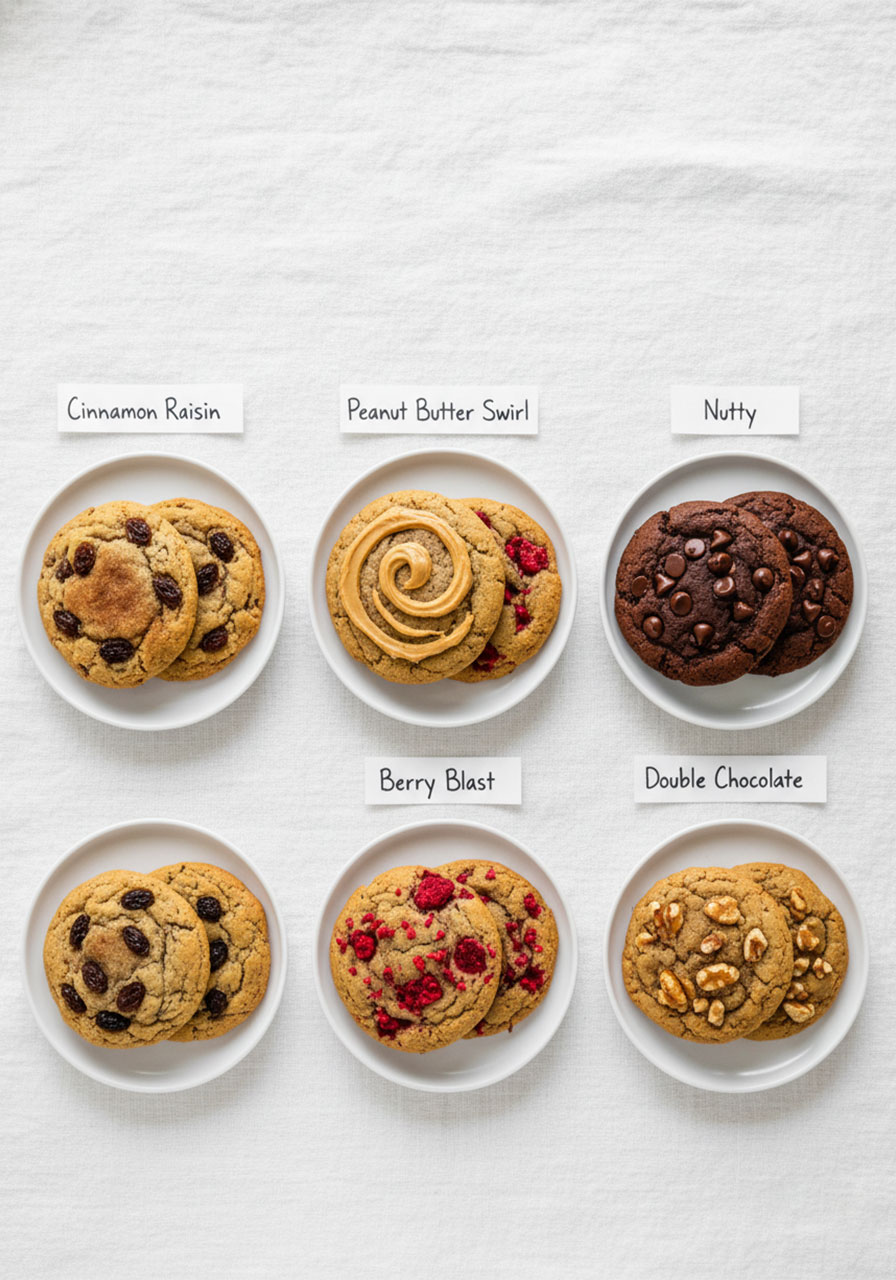
Here are five crowd-tested variations that work brilliantly for kids, families, and classroom settings:
1. Cinnamon Raisin Dream
Swap the chocolate chips for 1/2 cup of raisins and add 1 teaspoon of ground cinnamon to the dry ingredients.
This one feels like a warm hug in cookie form. It’s especially popular with younger kids and anyone who loves a classic, comforting flavor. Great for fall parties or morning classroom snacks.
2. Peanut Butter Swirl
Make the base recipe as written, then drop small teaspoon-sized dollops of peanut butter on top of each cookie before they go in the oven.
Use a toothpick to swirl the peanut butter into the top of the dough. The result is gorgeous-looking and tastes unbelievably good. Heads up: if you’re baking for a classroom, always check for nut allergies first and consider using sunflower seed butter as a safe swap.
3. Berry Blast
Fold in 1/2 cup of fresh blueberries or freeze-dried raspberries in place of the chocolate chips.
The tartness of the berries balances the sweetness of the cookie in the most satisfying way. Freeze-dried berries work especially well because they don’t add extra moisture and hold their shape during baking.
4. Double Chocolate Delight
Use a chocolate protein powder and add 1/2 cup of dark chocolate chips.
This is the version that gets kids (and adults) most excited when they see it on the plate. It looks indulgent, it tastes indulgent, and it still has all the same nutritional benefits. Don’t tell them. Just enjoy the reactions.
5. Nutty Guru
Mix in 1/2 cup of chopped walnuts, pecans, or almonds instead of chips.
This version adds a satisfying crunch and loads of healthy fats, making it even more filling and nutritious. Perfect for older kids, teens, and adults who want something more substantial. Great as an after-school snack that actually holds them over until dinner.
How to Store These Cookies (So They Stay Amazing)
You’ve baked a beautiful batch. Now let’s make sure they stay that way.
Room Temperature Storage
Once your cookies have fully cooled, transfer them to an airtight container.
Store at room temperature and they’ll stay soft and delicious for 3–4 days. Remember the bread trick from earlier – toss a slice of white bread in the container to keep them from drying out. It genuinely works.
Freezer Storage
These cookies are freezer champions.
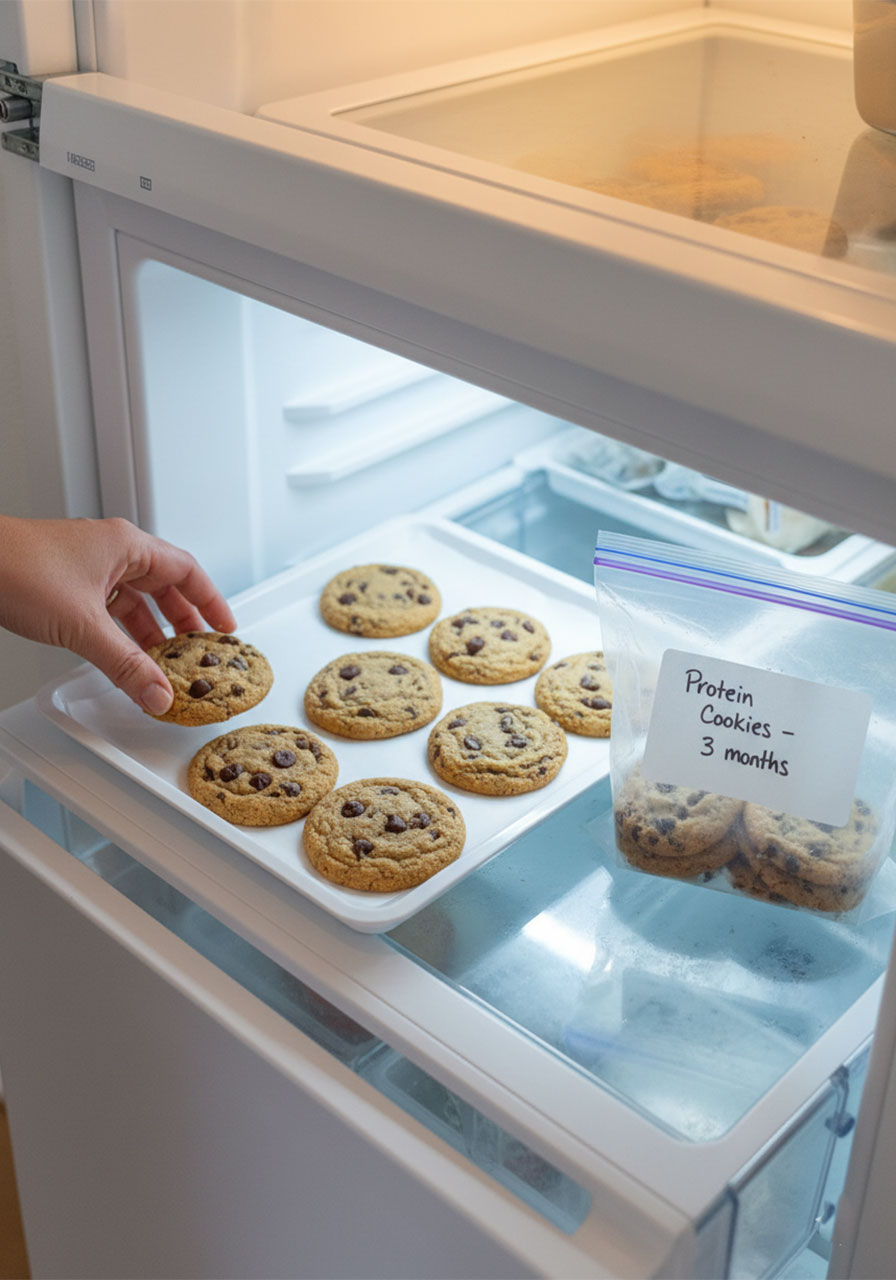
Lay the cooled cookies in a single layer on a baking sheet and freeze for about an hour. Once they’re individually frozen, transfer them to a zip-lock freezer bag. They’ll keep for up to 3 months.
This is a total game-changer for meal prepping, classroom parties, or anytime you want a healthy snack ready to go at a moment’s notice.
Reheating from Frozen
Microwave a frozen cookie for 10–15 seconds.
Or place it in a 300°F oven for about 5 minutes. Either way, you’ll have a warm, soft cookie that tastes like it just came out of the oven. No one will ever know it was frozen.
Serving Ideas That Make These Extra Special
These cookies are great on their own – but here are a few ways to make them feel even more special, especially for a party or a classroom celebration:
Cookie and yogurt parfait: Crumble a cookie over a cup of Greek yogurt with fresh fruit on top. Turns a snack into a full mini-meal.
Warm cookie with a glass of milk: Classic for a reason. The warm-cold combo is unbeatable.
Smoothie bowl topper: Break cookies into chunks and use them as a crunchy, protein-packed topping over smoothie bowls.
Lunchbox treat: Wrap two cookies in a small paper bag with a little note. Instant mood boost for any kid opening their lunchbox.
After-game snack station: Set up a little cookie station after sports practice or a school event. Kids inhale these after physical activity.
The versatility of these cookies is honestly part of what makes them so valuable for busy parents and teachers. They work in so many different contexts.
Frequently Asked Questions
Can I make these without protein powder?
Yes! Simply replace the protein powder with an equal amount of additional oat flour (1/2 cup more).
The cookies will have slightly less protein per serving, but they’ll still be soft, tasty, and far more nutritious than a standard cookie. Great option if you don’t have protein powder on hand.
Can I use flavored Greek yogurt instead of plain?
You can, but plain is highly recommended.
Flavored Greek yogurts contain added sugar and artificial flavors that can throw off the balance of the recipe. Plain yogurt gives you full control over the sweetness and flavor. If you only have flavored on hand, reduce the added sweetener to compensate.
My cookies came out crumbly. What went wrong?
Two possible culprits: too much dry ingredient, or overbaking.
Make sure you’re measuring your oat flour correctly (spoon it into the measuring cup, don’t pack it). And remember – pull the cookies out while the centers look slightly underdone. They firm up significantly as they cool.
Are these safe for kids with gluten sensitivities?
Standard oat flour is generally considered low-gluten, but it is not certified gluten-free.
If you’re baking for a child with celiac disease or a serious gluten sensitivity, use certified gluten-free oat flour or substitute with almond flour instead. Always check that your protein powder is also certified gluten-free if this is a concern.
Can kids help make these?
Absolutely – and they should! This is one of the best beginner baking recipes out there.
Kids can help measure and pour ingredients, whisk the wet mixture, fold in mix-ins, and scoop the dough. The only steps that require adult supervision are the oven-related ones. Baking together is a fantastic activity, and kids who help make the cookies are always more excited to eat them.
The Bottom Line
If you’ve been searching for a snack recipe that’s genuinely nutritious, fast to make, loved by kids, and easy enough to batch-prep for a classroom or family – this is it.
Protein Greek yogurt cookies are the rare kind of recipe that earns its place in your regular rotation. Not because they’re a “healthy substitute” that you force yourself to enjoy. But because they’re actually, legitimately delicious – and they happen to be great for the people eating them.
Make them once this week. Double the batch. Freeze half.
And then wait for the first time someone asks, “Wait, these are healthy?!” – because that moment never gets old.
Happy baking! 🍪
Protein Greek Yogurt Cookie Recipe
Ingredients
- 1 cup plain Greek yogurt (full-fat preferred)
- 1/2 cup natural sweetener (honey, maple syrup, or coconut sugar)
- 1 large egg, room temperature
- 1 tsp pure vanilla extract
- 1 cup oat flour
- 1/2 cup protein powder (vanilla or neutral whey)
- 1/2 tsp baking soda
- 1/4 tsp salt
- 1/2 cup mix-ins of choice
Instructions
- Preheat oven to 350°F (175°C). Line a baking sheet with parchment paper.
- Whisk together Greek yogurt, sweetener, egg, and vanilla until smooth.
- In a separate bowl, whisk oat flour, protein powder, baking soda, and salt.
- Fold dry ingredients into wet until just combined. Do not overmix.
- Fold in your mix-ins.
- Scoop tablespoon-sized portions onto baking sheet. Gently flatten each one.
- Bake 10–12 minutes until edges are golden. Cool on sheet 5 minutes, then transfer to a wire rack.
Notes
Storage
- Room temp: Airtight container, 3–4 days (add a slice of bread to keep soft).
- Freezer: Freeze individually, then bag. Up to 3 months.
- Reheat: Microwave 10–15 seconds or warm in 300°F oven for 5 minutes.
Nutritional Snapshot (Per Cookie)
- Calories: ~120
- Protein: 8–10g
- Fat: 4–6g
- Carbs: 12–15g
- Sugar: 5–8g
