
Let’s be honest – Newton’s Laws sound about as exciting as watching paint dry. Objects at rest? Equal and opposite reactions? Your students are probably already tuning out.
But here’s the good news: Newton’s Laws become absolutely fascinating when you blow marshmallows across the room or watch balloon-powered cars zoom down the hallway. We’re talking about hands-on, laugh-out-loud projects that make these tricky concepts finally make sense.
Here are five foolproof projects that’ll turn your students into Newton’s biggest fans – no PhD required.
First Things First: Let’s Decode Newton’s Laws
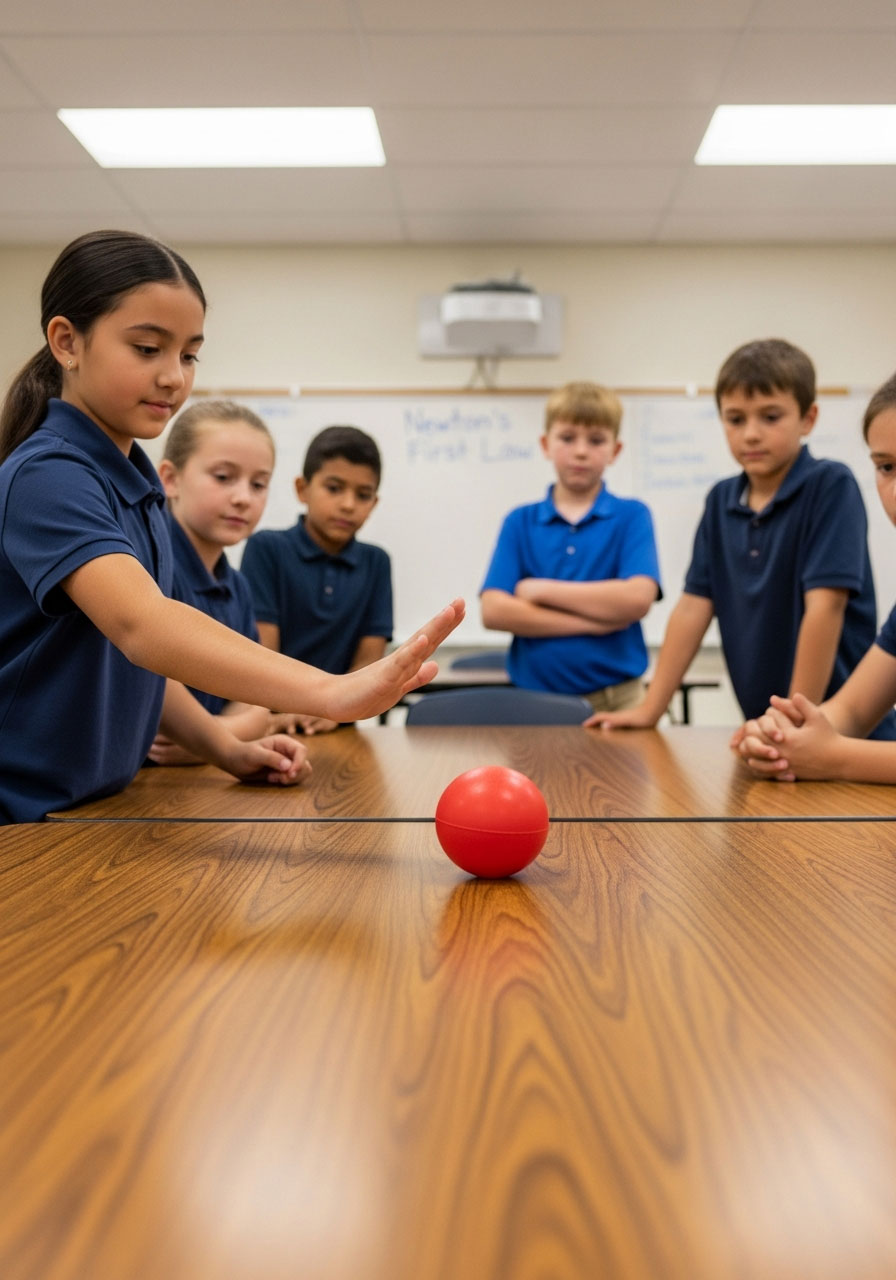
Before we dive into the fun stuff, let’s break down what Newton was actually talking about. (Don’t worry, we’re keeping it simple!)
Newton’s First Law: If something isn’t moving, it’ll stay put forever. If something is moving, it’ll keep going in a straight line forever – unless something stops it or changes its direction.
Think of it this way: A soccer ball sitting on the field won’t suddenly roll away on its own. But once you kick it, it would keep rolling forever if there weren’t things like grass, gravity, and that fence stopping it. That “something” that stops or changes the motion? That’s called an unbalanced force.
Newton’s Second Law: Want something to go far? Use more force. Trying to move something heavy? You’ll need even more force.
The simple version: The harder you throw something (and the lighter it is), the farther and faster it goes.
Newton’s Third Law: For every action, there’s an equal and opposite reaction.
This is the easiest one to understand. When you jump off a diving board, you push down on the board – and the board pushes you up into the air. Two forces, opposite directions, same strength.
Now let’s see these laws in action!

Project #1: Marshmallow Blow Tubes (Newton’s Second Law)
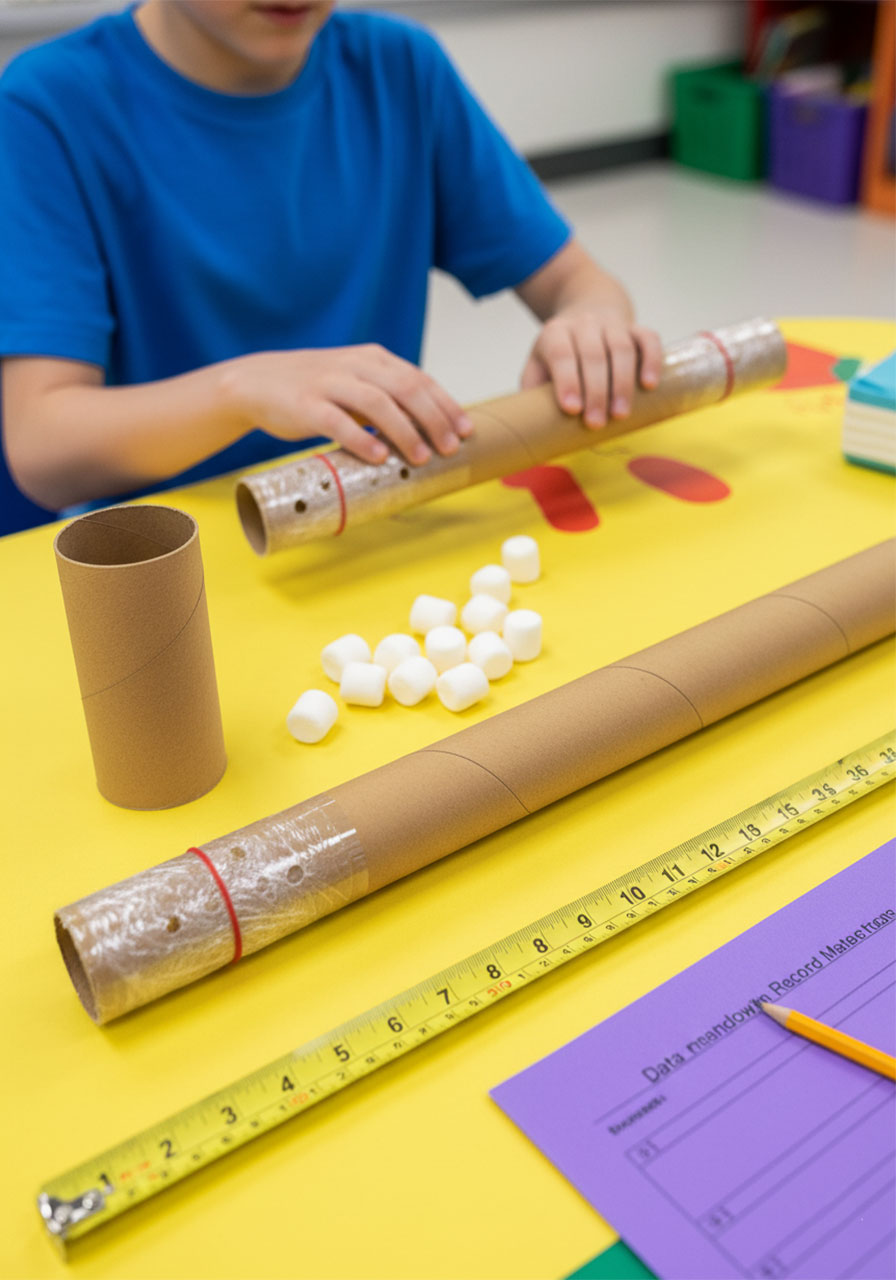
This project is pure gold because kids get to blow marshmallows across the room and learn about force and acceleration. It’s a win-win.
Best for: Grades 3-5, groups of 2-4 students
Time to Complete: 2-3 class periods
What You’ll Prove: The longer a force acts on an object, the farther it travels
What You’ll Need:
- Cardboard tubes in two different lengths (try paper towel tubes and wrapping paper tubes)
- Mini marshmallows or large pom-poms
- Measuring tape or rulers
- Plastic wrap and rubber bands
- Data recording sheets
How It Works:

1. Set Up Your Blow Tubes
Cover one end of each cardboard tube with plastic wrap secured with a rubber band. Poke a small hole in the plastic wrap for students to blow through. (This keeps the tubes hygienic – trust us on this!)
2. Designate Your “Marshmallow Blower”
Pick one student per team to be the official blower. This keeps things consistent and prevents germ-sharing.
3. Start with the Short Tube
Place a marshmallow at the far end of the tube (the end opposite from where you blow). Have your blower take a deep breath and blow hard. Measure how far the marshmallow travels. Repeat five times and calculate the average distance.
4. Move the Marshmallow Closer
Now place the marshmallow at the blowing end of the tube. Blow again, measure, and repeat five times. Calculate this average.
5. Repeat with the Long Tube
Do the entire experiment again using your longer tube. Record all your data.
What Your Students Will Discover:
The marshmallow should travel farthest when it’s blown from the end closest to the blower’s mouth and when using the longer tube. Why? Because the force (air from their lungs) acts on the marshmallow for a longer time as it travels through the tube, giving it more acceleration.
Pro Tip: Results will vary – and that’s perfect! Use this opportunity to introduce the concept of “human factors.” No one can blow with exactly the same force every time. You can also discuss friction inside the tube. This is real science in action!
Fun Variation: Challenge teams to try plastic pipes instead of cardboard tubes to reduce friction. Do the marshmallows travel farther?
Project #2: Egg Cars on Ramps (Newton’s Second Law)
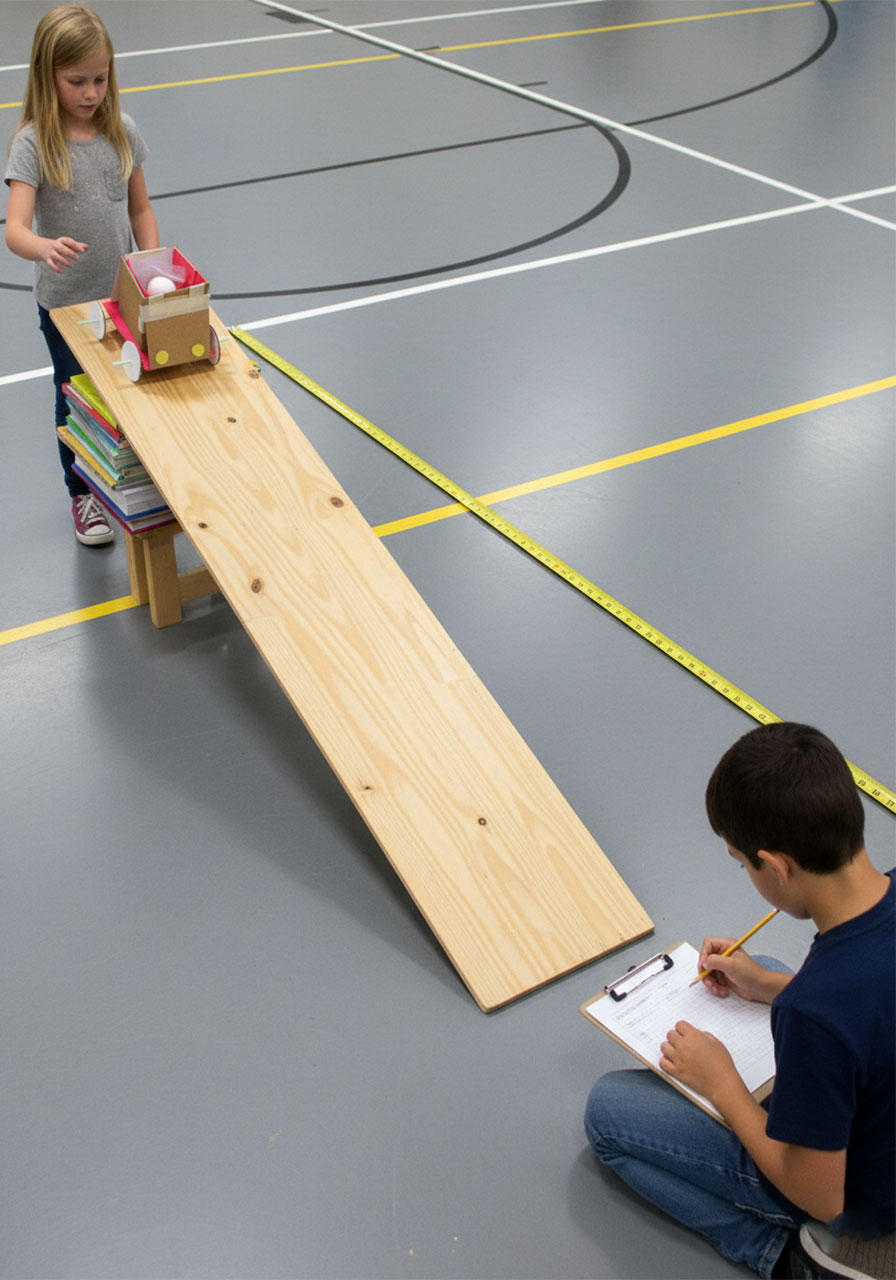
Get ready for your students to lose their minds with excitement. Building cars that carry eggs? It’s like the best parts of engineering and breakfast combined.
Best for: Grades 3-5, groups of 3-4 students
Time to Complete: 3-4 class periods
What You’ll Prove: The steeper the ramp, the more acceleration (and speed)
What You’ll Need:
- Cardboard pieces for car bodies
- Materials for wheels and axles (bottle caps, straws, wooden skewers, craft sticks)
- Raw eggs (one per team – have extras!)
- Long boards or sturdy cardboard for ramps
- Books or blocks to adjust ramp height
- Measuring tape
- Lots of floor space
How It Works:
1. Design and Build the Cars
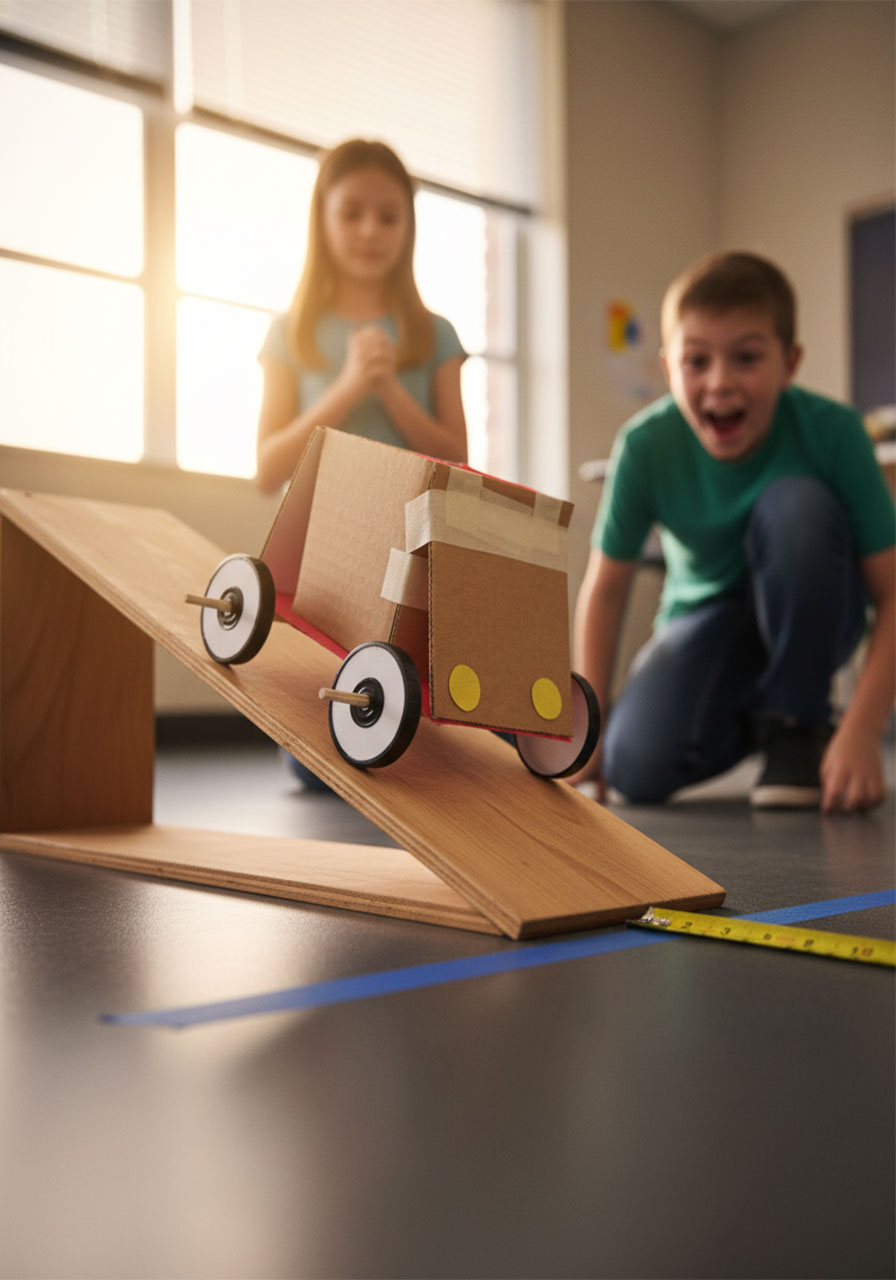
Students create a car with working wheels and a secure spot to hold an egg. The car must be able to roll freely down a ramp. This is where creativity shines – and where you’ll see lots of trial and error!
2. Set Up Your Testing Station
Create a ramp using a board propped up at different angles. Start with a gentle slope.
3. Test Run #1: Gentle Slope
Place the egg in the car and send it down the ramp. Measure how far it travels after leaving the ramp. Did the egg stay in the car?
4. Test Run #2: Steeper Slope
Increase the angle of your ramp. Test again and measure the distance.
5. Test Run #3: Steepest Slope
Crank up that angle one more time and see what happens!
What Your Students Will Discover:
According to Newton’s Second Law, the steeper ramp should make the car go faster and farther because gravity creates more acceleration. But here’s where it gets interesting: some cars might tip over or skid sideways when they hit the floor at high speed. That’s not Newton’s fault – that’s engineering!
Pro Tip: The transition point where the ramp meets the floor is crucial. With steeper ramps, that impact can cause cars to flip or change direction. Have students experiment with different ramp angles to find the sweet spot where their specific car design travels the farthest without crashing.
Real Talk: Not every car will work perfectly, and that’s actually the best part. Students learn that design matters just as much as the physics. Some will need to rebuild their wheels, adjust their axles, or completely redesign their egg holder. That’s real problem-solving!
Project #3: Balloon Cars (Newton’s Third Law)
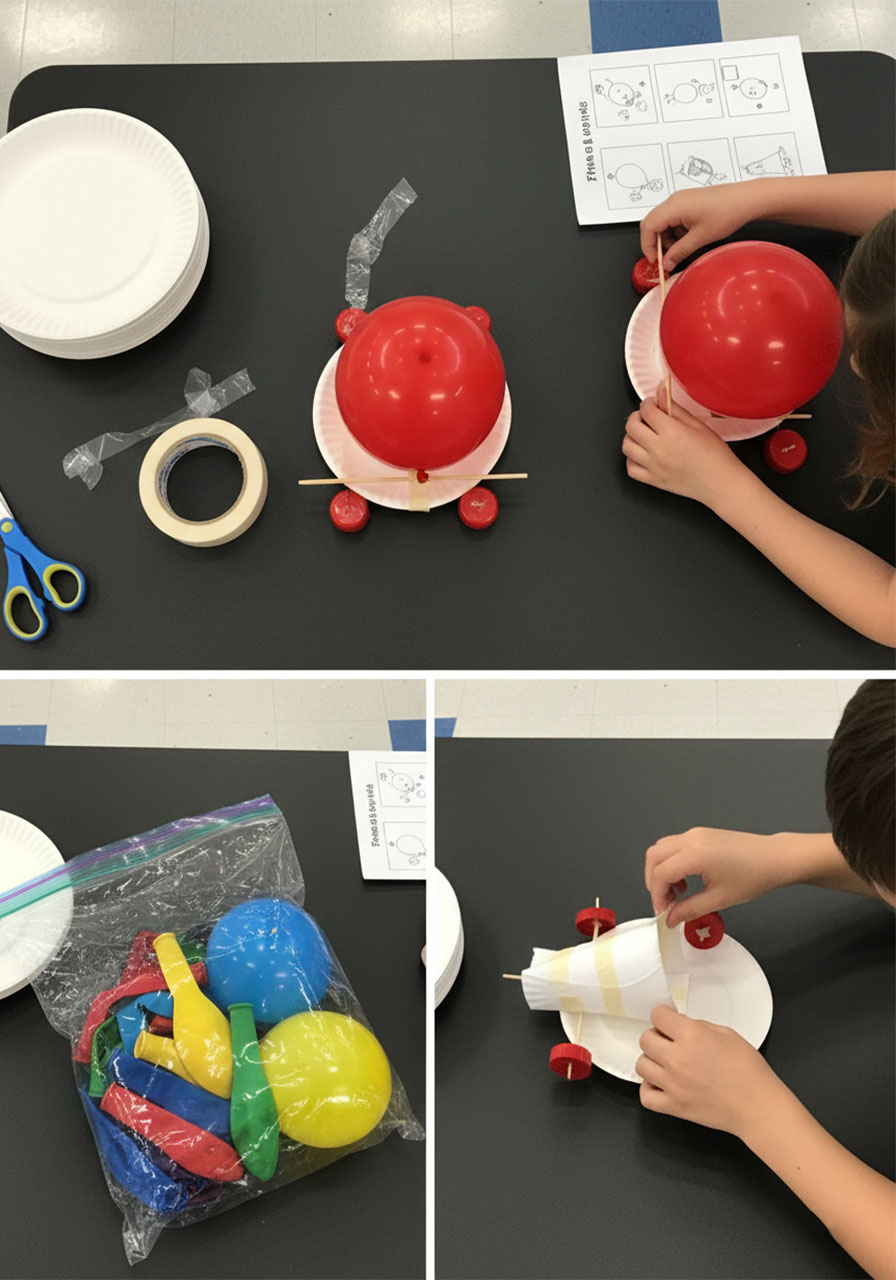
This is the project that makes Newton’s Third Law click. The moment students see the balloon push air backward and the car shoot forward, you’ll hear those magical “Ohhhhh!” moments all around the room.
Best for: Grades 3-5, groups of 2-3 students
Time to Complete: 2-3 class periods
What You’ll Prove: For every action (air rushing out), there’s an equal and opposite reaction (car moving forward)
What You’ll Need:
- Paper plates or lightweight cardboard
- Balloons (bring extras – they pop!)
- Materials for wheels and axles (same as Egg Cars)
- Tape and glue
- Straws (optional, for attaching balloons)
- A long, smooth floor surface for racing
How It Works:

1. Build Your Car Base
Students create a simple car body using a paper plate or cardboard. Attach working wheels that roll smoothly.
2. Attach the Balloon Power
Here’s the tricky part: students need to figure out how to attach a balloon so that when it deflates, the air shoots backward. Some teams tape the balloon directly to the car, others use straws as nozzles. Let them experiment!
3. Inflate and Release
Blow up the balloon (while keeping it attached to the car), hold the opening closed, place the car on the floor, and release! Watch it zoom!
4. Test and Improve
Measure how far each car travels. Then let students modify their designs to make the cars go farther.
What Your Students Will Discover:
When the balloon releases air backward (that’s the action), the car shoots forward (that’s the reaction). The two forces are equal in strength but opposite in direction – that’s Newton’s Third Law in the most satisfying way possible.
Pro Tip: Set up side-by-side racing tracks using tape on the floor. A little friendly competition makes everyone want to improve their designs!
Fun Variation: Challenge students to make their cars travel the straightest line, not just the farthest distance. This introduces the concept of stability and balance.
Project #4: Bottle Cars (Newton’s Third Law)
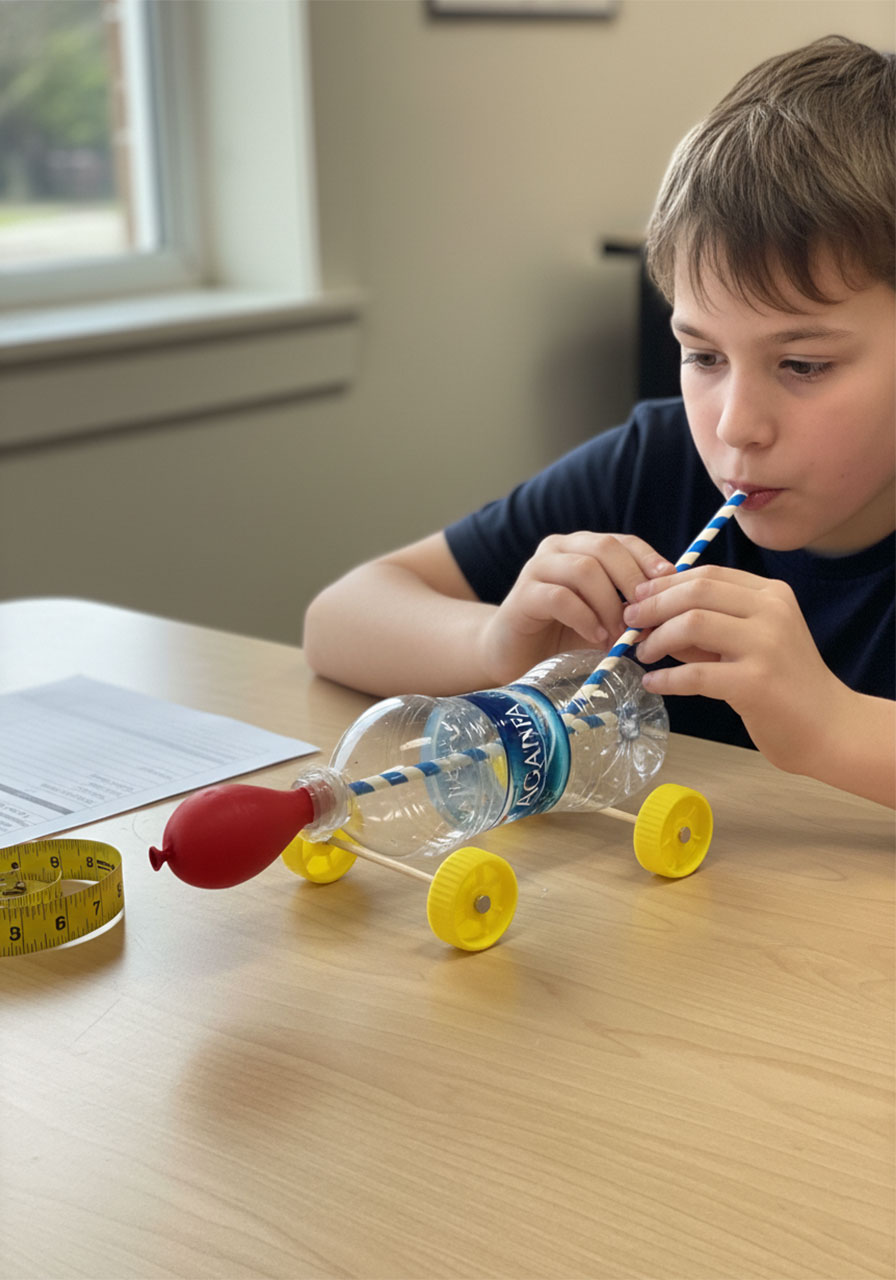
Think Balloon Cars, but leveled up! This version uses an empty water bottle as the car body, creating a different design challenge.
Best for: Grades 4-5, groups of 2-3 students
Time to Complete: 2-3 class periods
What You’ll Prove: Same as Balloon Cars – action and reaction forces
What You’ll Need:
- Empty plastic water bottles
- Balloons
- Flexible straws
- Materials for wheels and axles
- Tape and glue
- Scissors or craft knife (for teacher use only)
How It Works:

1. Prepare the Bottle
Thread a straw through the water bottle from end to end. This will be your balloon nozzle.
2. Attach the Balloon
Stretch the open end of a balloon over one end of the straw. Secure it well with tape – you don’t want air leaks!
3. Add Wheels
Attach working wheels to your bottle car. The bottle shape makes this trickier than the paper plate design.
4. Inflate Through the Straw
Blow up the balloon by blowing into the other end of the straw. Pinch it closed.
5. Race Time!
Set your car down, release your pinch, and watch it fly!
What Your Students Will Discover:
Same beautiful demonstration of Newton’s Third Law, but with a new engineering challenge. The cylindrical bottle body requires different wheel placement and balance strategies.
Pro Tip: This design tends to be faster than paper plate cars because it’s more aerodynamic. Use this as a discussion point about how shape affects speed!
Project #5: DIY Newton’s Cradles (Newton’s Third Law)
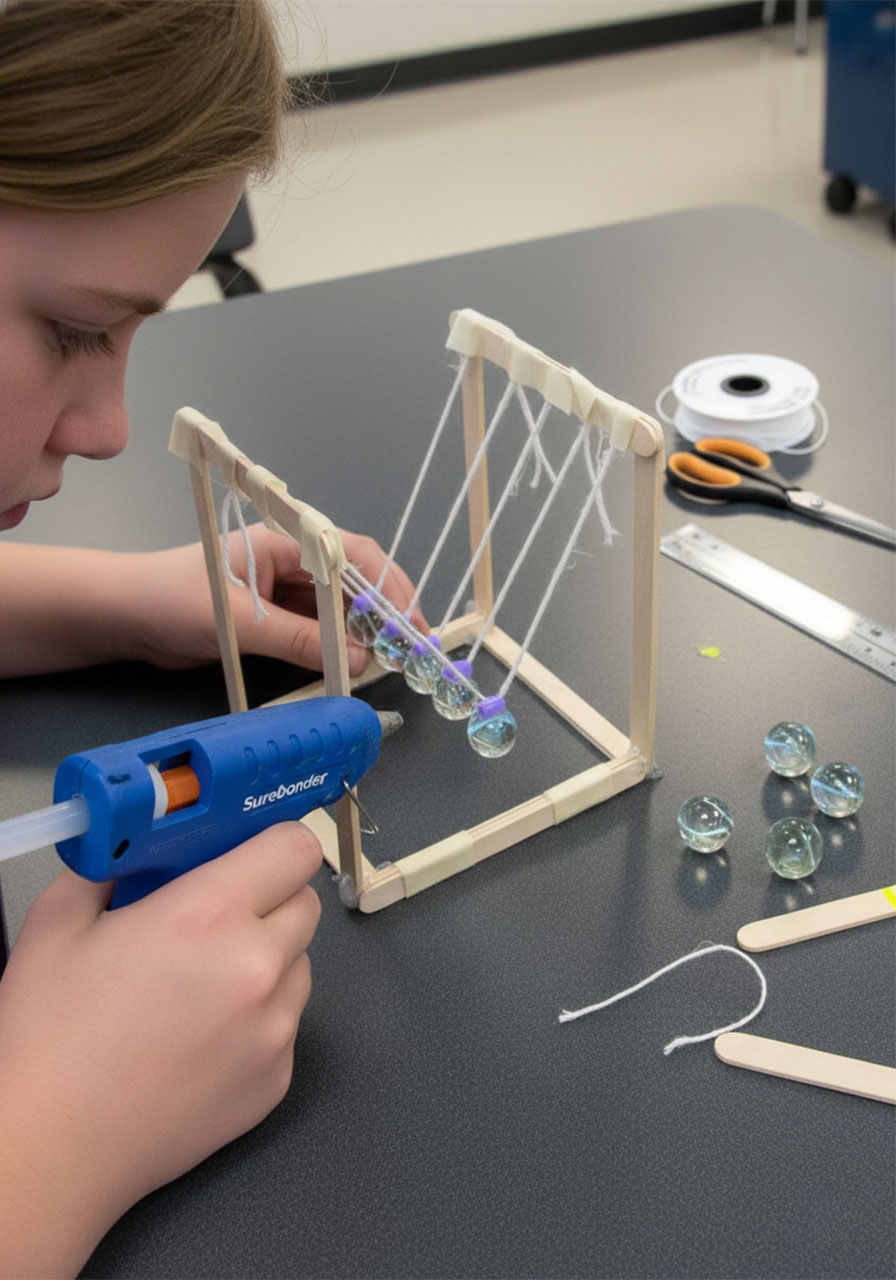
This one’s for your older students who are ready for a precision challenge. Building a working Newton’s Cradle from scratch is no joke – but when those marbles click-clack perfectly, it’s pure magic.
Best for: Grade 5 (requires hot glue and fine motor skills)
Time to Complete: 2-3 class periods
What You’ll Prove: Energy transfer and equal/opposite reactions
What You’ll Need:
- Craft sticks or popsicle sticks
- String or fishing line
- Marbles (all the same size)
- Straws or beads (for guides)
- Hot glue gun and glue sticks
- Ruler
How It Works:
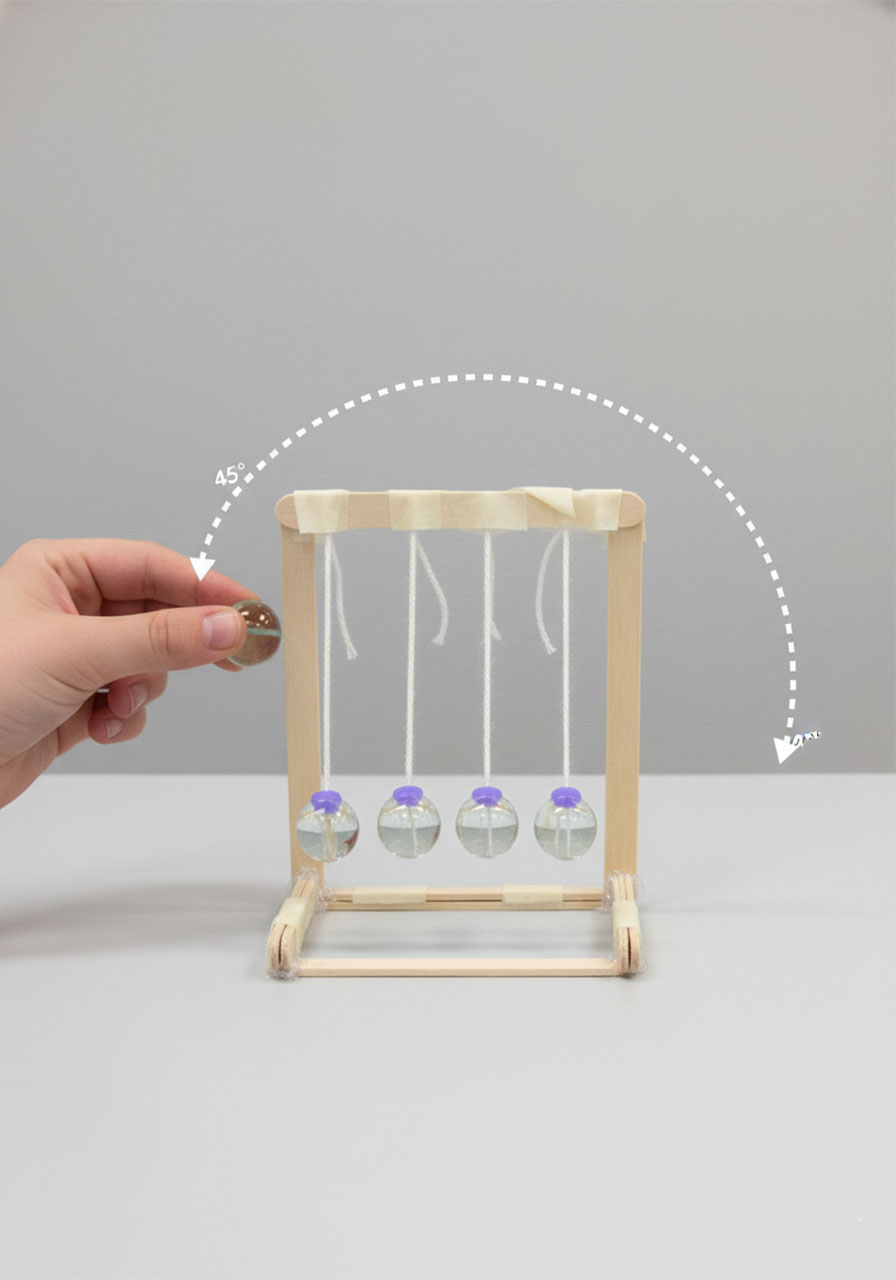
1. Study a Real Newton’s Cradle
Show students a store-bought Newton’s Cradle first. Let them observe how the balls hang and swing.
2. Build the Frame
Use craft sticks to create a rectangular frame that’s tall enough for the marbles to hang and swing freely.
3. Suspend the Marbles
This is the challenging part! Cut equal lengths of string for each marble. The marbles need to hang at exactly the same height and just barely touch each other when at rest. Use straws or beads threaded onto the string as guides to keep the strings parallel.
4. Test and Adjust
Pull back one marble and let it drop. If you’ve built it correctly, one marble should swing out from the opposite side. Pull back two – two should swing out. It’s Newton’s Third Law demonstrated perfectly!
What Your Students Will Discover:
When one marble hits the others, energy transfers through the stationary marbles and launches the last one with equal force. The action (one marble swinging in) creates an equal and opposite reaction (one marble swinging out).
Pro Tip: Getting the marbles to hang at exactly the same height is the biggest challenge. Give students plenty of time to measure, adjust, and remeasure. Precision matters here!
Real Talk: Not every cradle will work perfectly on the first try. Some might need the strings adjusted, others might need better frame stability. That’s engineering! Encourage persistence.
Why These Projects Work (And Why Your Students Will Love Them)
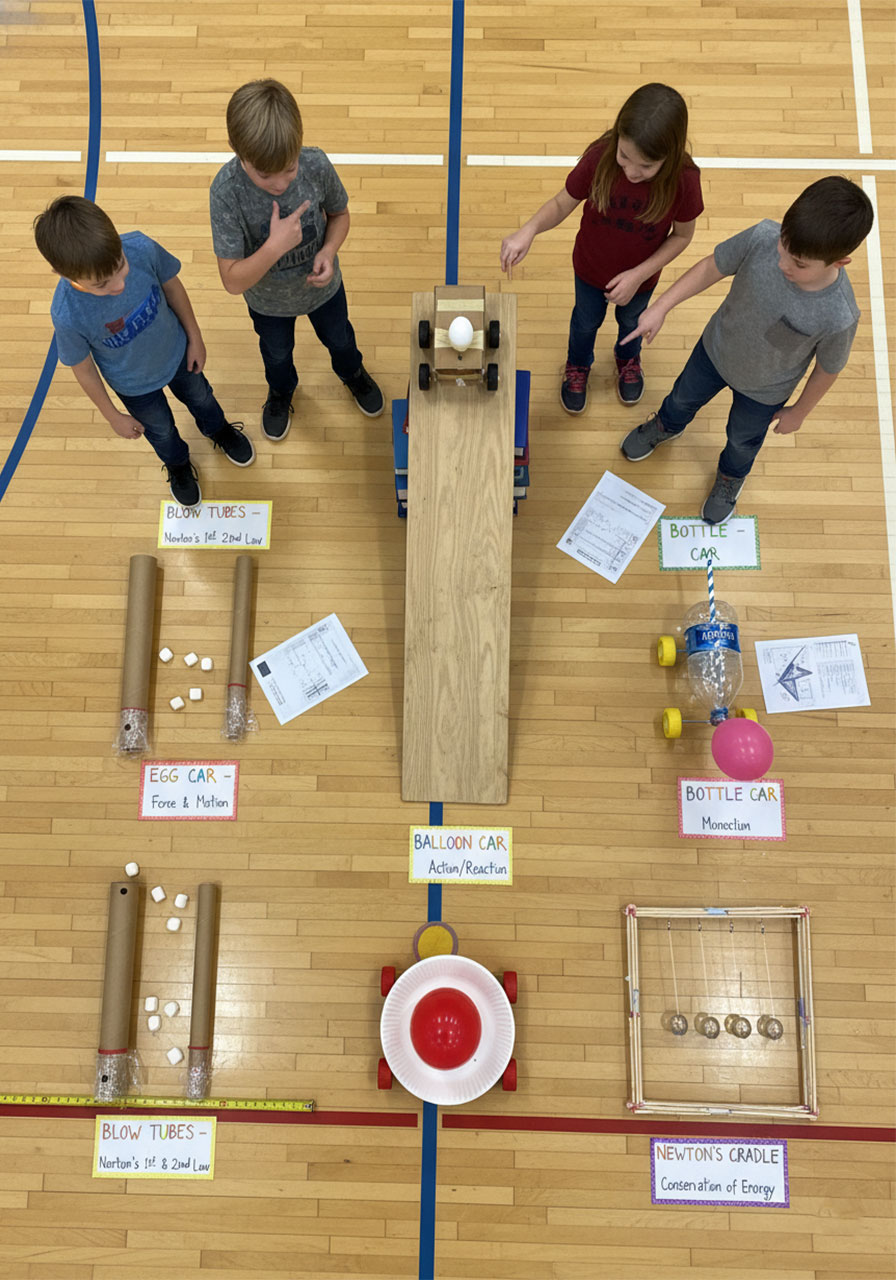
Here’s the secret sauce: these projects don’t just teach Newton’s Laws – they make students experience them. There’s something about blowing marshmallows across the room or watching a balloon car zoom away that makes abstract physics concepts suddenly make sense.
Plus, every single one of these projects includes natural opportunities for students to practice:
- Measuring and calculating averages
- Understanding variables and controls
- Using the scientific method
- Problem-solving when designs don’t work
- Collaborating as a team
You’re not just teaching physics – you’re teaching critical thinking, persistence, and the joy of figuring things out through experimentation.
Your Final Pro Tip: Don’t expect perfect results! The “failures” are often where the best learning happens. When a car tips over or a marshmallow doesn’t go as far as expected, that’s your chance to ask: “Why do you think that happened? How could we fix it?” That’s real science.
So grab those cardboard tubes, round up some balloons, and get ready to make Newton’s Laws the highlight of your students’ year. Because the best way to understand physics? Make it hands-on, make it fun, and let students discover the “why” for themselves.
More Kid’s Party Ideas to Keep the Fun Rolling:
Painting With Cars: The Messiest (and Most Awesome) Art Project Your Kids Will Beg to Do Again
16 Epic Indoor Recess Games Kids Actually Want to Play
Turn a Simple Egg Carton into the Ultimate Nature Color Hunt Adventure
55 Minute to Win It Games for Kids, Teens, & Adults
Transform Old Yogurt Tubs Into Stunning Tissue Paper Lanterns
33+ Epic Outdoor Games That’ll Turn Your Backyard Into the Ultimate Family Fun Zone
Sticker Sorting Activity: The 5-Minute Setup That’ll Keep Your Toddler Busy (and Learning!)
